PRINCIPLES AND PRACTICES,
PROJECT MANAGEMENT
Introduction
The first week of the FabAcademy program focused on introducing students to the course structure, expectations, and tools. We covered the basics of project documentation, version control with Git, and website development for showcasing our work. The main goal was to set up a strong foundation for managing our projects and sharing our progress effectively throughout the course.
Objectives
For Week 1, I was required to complete the following tasks:
- plan and sketch a potential final project
- Download, read, and sign the student agreement, then commit the file to my repository
- Complete a Git tutorial to understand version control basics
- Build a personal website in the class archive
- Include personal information and a description of my final project on the website
Tools and Software Used
During this week, the following tools were used:
- Git
- GitHub / GitLab
- Visual Studio Code
- Web browser
- Command Line / Terminal
- HTML and CSS
Final Project Ideas
This week I worked on defining my final project idea and started to getting used to the documentation process.
1. Pill-Shaped Pill Dispenser
A pill dispenser designed to look like a large capsule. The container opens in the middle and has internal sections to separate doses by day or time. The goal is to make medication storage feel less medical and more friendly.
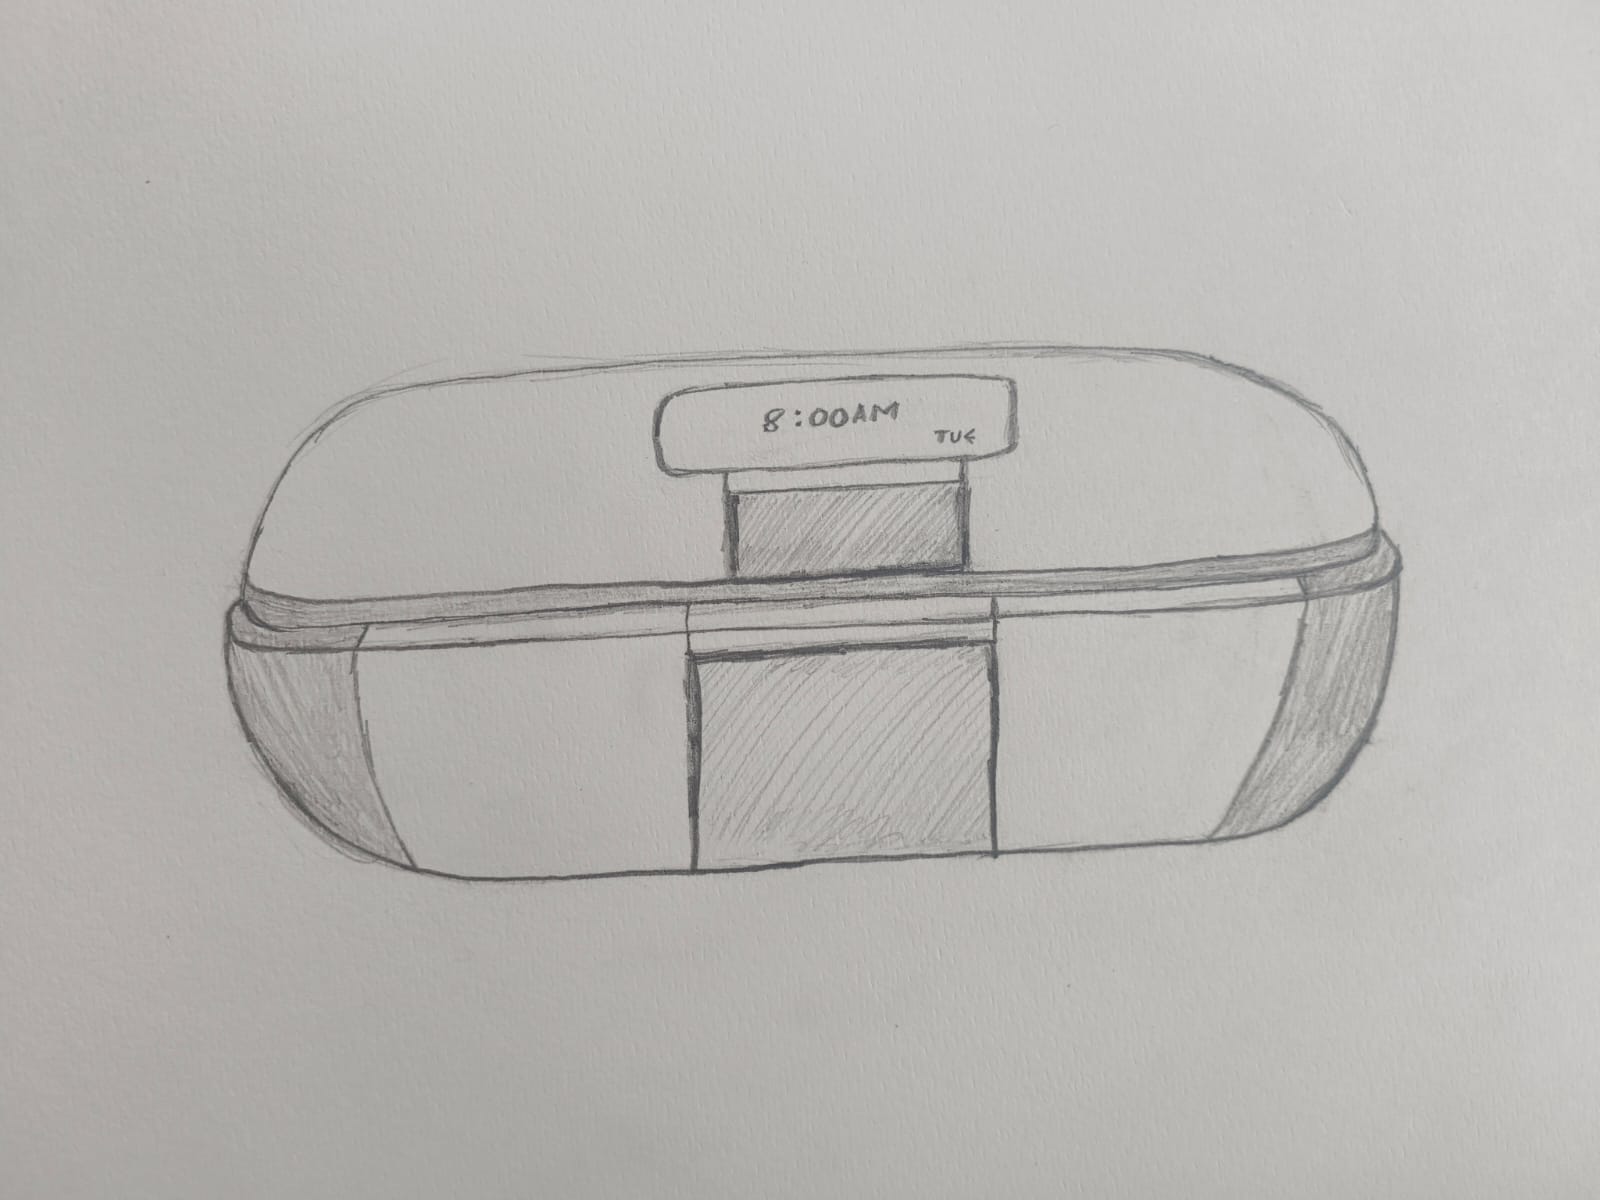
This design treats a pillbox like an everyday object rather than medical equipment — a smooth, pill-shaped container that opens in the bottomand holds separate compartments for days or times. The rounded form, soft colours and simple labels are intended to make medication feel less intimidating and easier to manage, especially for people who find clinical devices off-putting.
2. Convertible Patient Care Bed
A specialized medical bed that mechanically transforms into a seated chair, allowing bedridden patients to change posture safely without leaving the unit. This design reduces the physical strain on caregivers and minimizes the risk of injury during patient transfers.
The bed quietly shifts from flat to seated using linked pivots and smooth linear actuators, so repositioning feels gentle and controlled. Built-in sensors and soft-edge guards help protect skin and reduce sliding, while a simple control panel lets caregivers or patients pause and lock the bed at comfortable angles.
In daily use this design can cut down on heavy lifting, lower the chance of transfer injuries, and give patients more independence. Early prototypes should focus on reliable strength and fail-safe locks, easy-to-clean materials, and an interface that is clear and forgiving for both carers and users.
3. Smart Reminder Display
A physical desktop device featuring an LED screen and navigation buttons that functions as a synchronized to-do list for a bedroom or workspace. It allows users to input tasks and receive visual reminders at specific dates and times, bridging the gap between a digital webpage and a tangible office accessory.
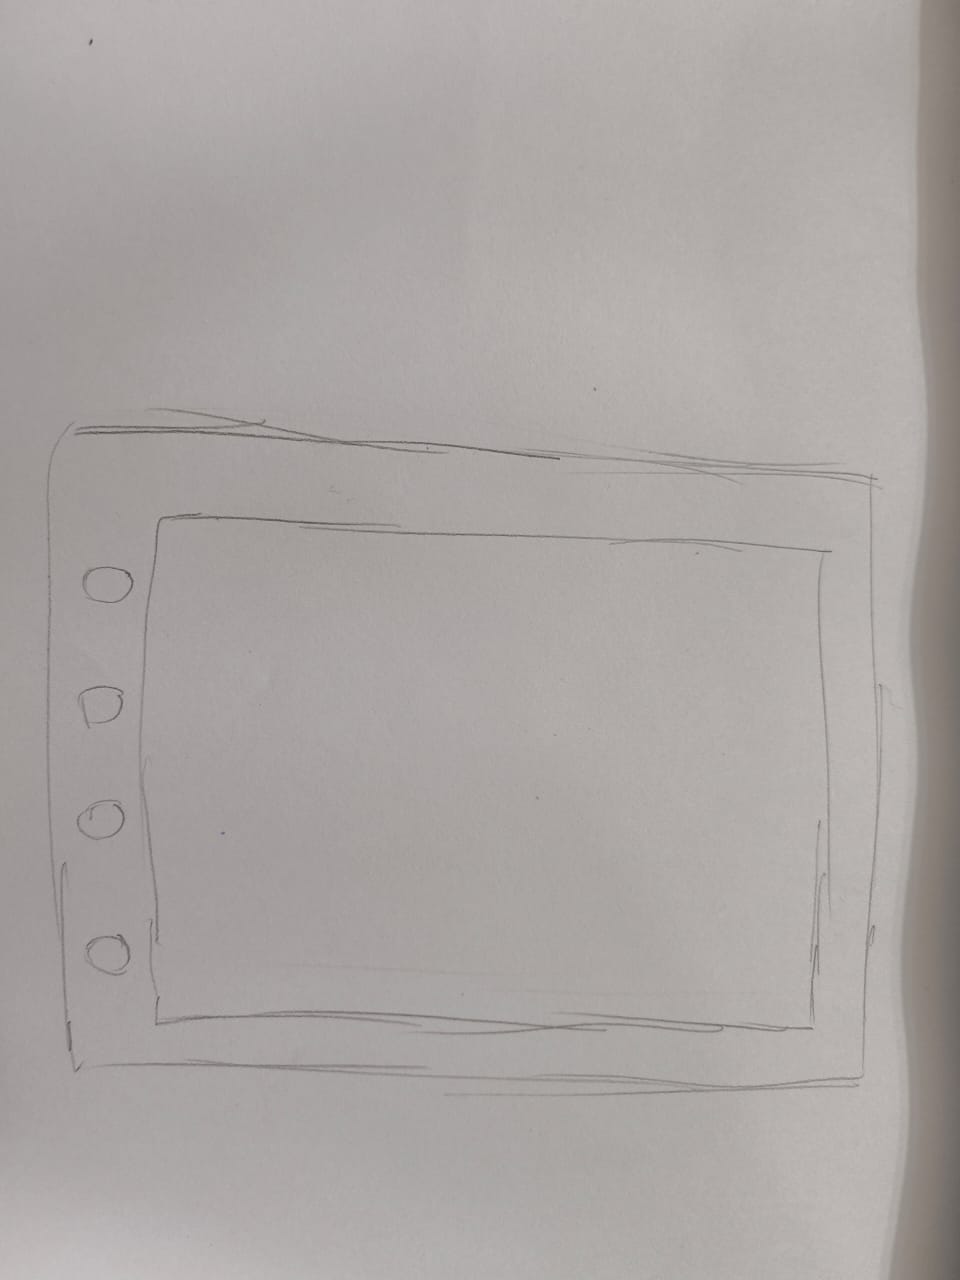
This little device pairs a clear LED panel with simple buttons so reminders feel friendly and easy to glance at. It can sync with a phone or calendar, show upcoming tasks with icons and colours, and uses gentle animations or light changes to get your attention without being disruptive.
In everyday use the display turns fleeting phone notifications into a calm, physical reminder on your desk or bedside — something you can glance at without feeling nagged. For early prototypes, focus on a simple setup, clear readable text, long battery life, and gentle notifications; a soft chime or warm backlight feels better than a loud alarm.
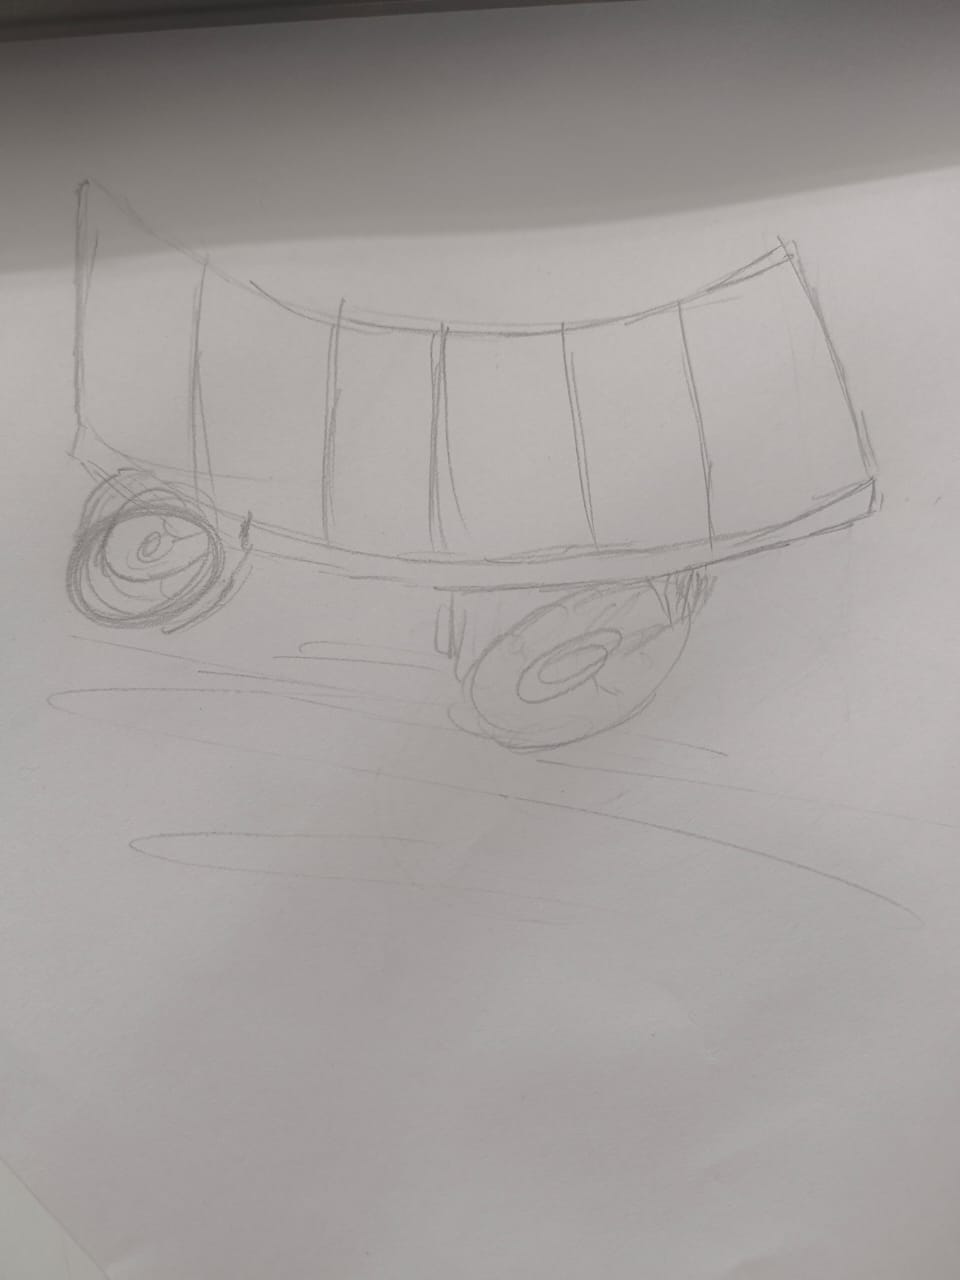
4. Mobile Tabletop Cleaning Robot
A compact robotic arm mounted on a wheeled platform designed to autonomously navigate and clear debris from desks and tabletops. The device uses sensors to detect obstacles and can be programmed to operate on a schedule, ensuring that workspaces remain tidy with minimal human intervention.

This compact cleaner pairs a nimble arm with a small wheeled base to sweep crumbs and little clutter from desks and tabletops. It quietly steers around cups, pens and cables using proximity sensors and a simple mapping routine, collecting debris into an easy-to-empty bin.
The goal is to make tidying effortless. Run it between work sessions or schedule nightly clean-ups. Early prototypes should focus on safe collision handling, a removable dust bin, and a gentle, predictable motion so users trust it around fragile items.
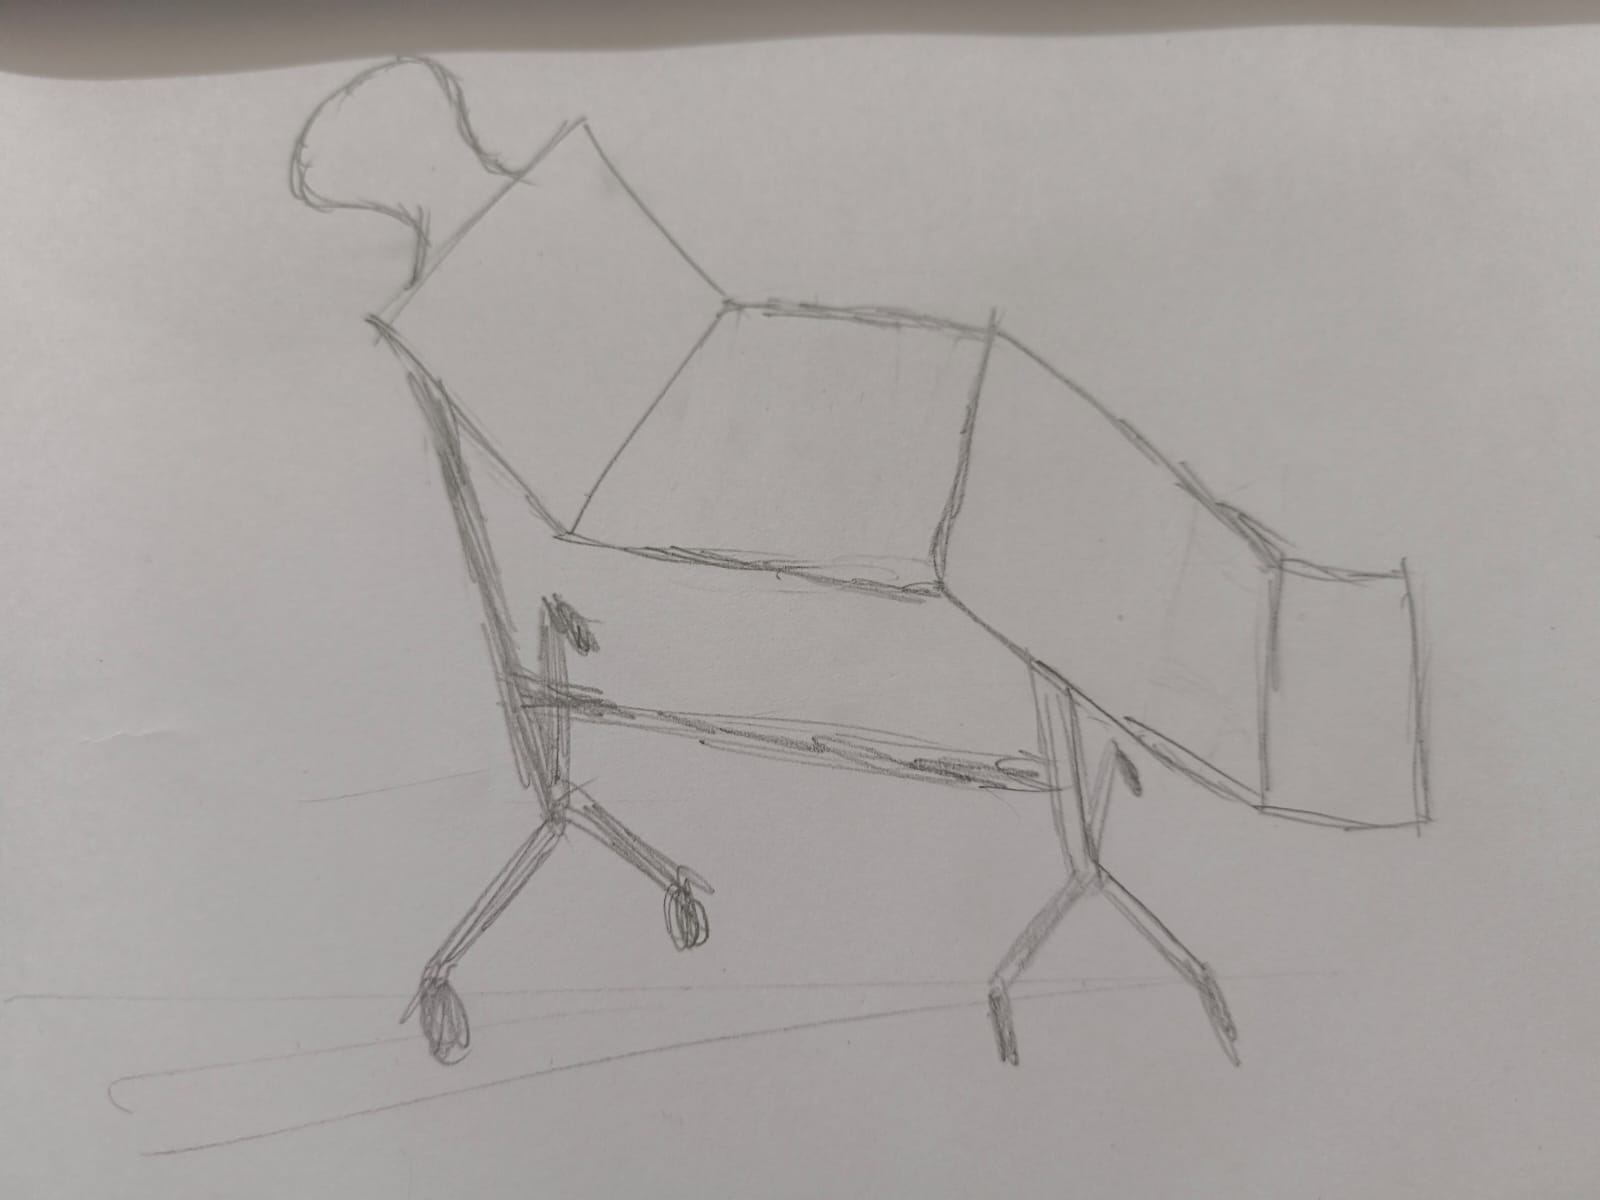
5. Mechanical Tilt Lounge Chair
A leisure-focused reclining chair inspired by rack-and-pinion gear systems, allowing for seamless transition between upright and reclined positions. Using a manual lever or motorized gear, the user can rotate the seating arc to find their perfect relaxation angle for reading, napping, or watching TV.
The chair uses a smooth tilt mechanism inspired by rack-and-pinion motion to shift between upright and reclined positions in a single, satisfying movement. A manual lever or compact motor drives the arc while built-in stops and locks keep the user secure.
Designed for relaxed, everyday use, prototypes should prioritise comfortable cushioning, dependable locking, and accessible maintenance. Testing different seat angles and user feedback will help find the right balance between support and lounging comfort.
Git and VS Code Setup
Git is a version control system used to track changes in files and manage projects, especially in software development.
In simple terms, Git helps you:
- Keep a history of your work
- Save different versions of files
- Collaborate with others without overwriting each other’s work
- Go back to earlier versions if something breaks
Here is your link to download Git.
if you want to know more about Git, click here to read the detailed tutorial I created.
Visual Studio Code (VS Code) is a popular code editor that provides a user-friendly interface for writing and managing code. It has built-in support for Git, making it easier to track changes and collaborate on projects.
Git status: Shows the current state of files in the working directory. Displays the current branch and shows which files are staged, unstaged, or untracked. Shows a short, compact summary of file changes. Includes branch information and upstream tracking details. Outputs the status in a stable, machine-readable format. Git clone: Copies a remote repository to your local machine. This command downloads the entire repository, including all files, branches, and commit history, from a remote source (such as GitHub or GitLab) to your local system. It also automatically sets up a connection to the remote repository named origin, allowing you to push and pull changes easily. Creates a shallow clone with only the latest commit. Clones the repository and checks out the specified branch. Git add: Stages file changes for the next commit. Stages changes from a specific file. Stages all new and modified files in the current directory. Stages all changes, including deleted files. Stages all files matching the specified pattern. Git commit: Saves staged changes to the local repository. Creates a commit with a short descriptive message. Opens the text editor to write a detailed commit message. Stages and commits tracked files in one step. Edits the most recent commit. Git push: Uploads local commits to the remote repository. Pushes commits to the main branch of the remote repository. Pushes commits to the default upstream branch. Sets the upstream branch for future pushes. Forces the push and overwrites remote history (use with caution). Git pull: Downloads and merges changes from the remote repository. Downloads and merges changes from the remote repository. Fetches and merges changes from the remote main branch. Pulls changes from the default upstream branch. Reapplies local commits on top of fetched changes. Downloads changes without merging them.Essential Git Commands
git statusgit status -sgit status -bgit status --porcelaingit clone repository-urlgit clone --depth 1 repository-urlgit clone -b branch-name repository-urlgit add file-namegit add .git add -Agit add *.htmlgit commit -m "message"git commitgit commit -am "message"git commit --amendgit push origin maingit pushgit push -u origin maingit push --forcegit pull origin maingit pull origin maingit pullgit pull --rebasegit fetch
I used this website to learn more about git.
Step 1: Installing Git
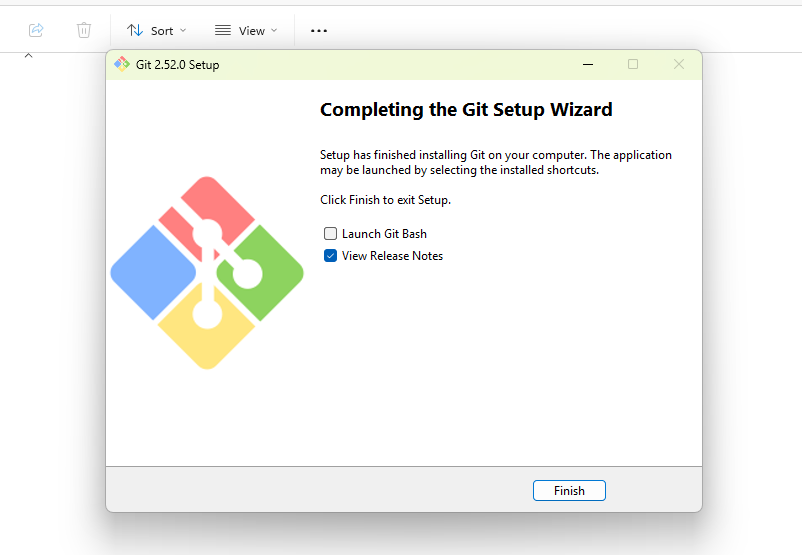
I downloaded and installed Git on my system using the Windows installer. After the setup finished, Git Bash and Git tools were available on my computer, which are needed to connect to the class repository and upload assignments.
You can install Git by downloading it from the official website: https://git-scm.com/downloads.
Step 2: Generating SSH Key
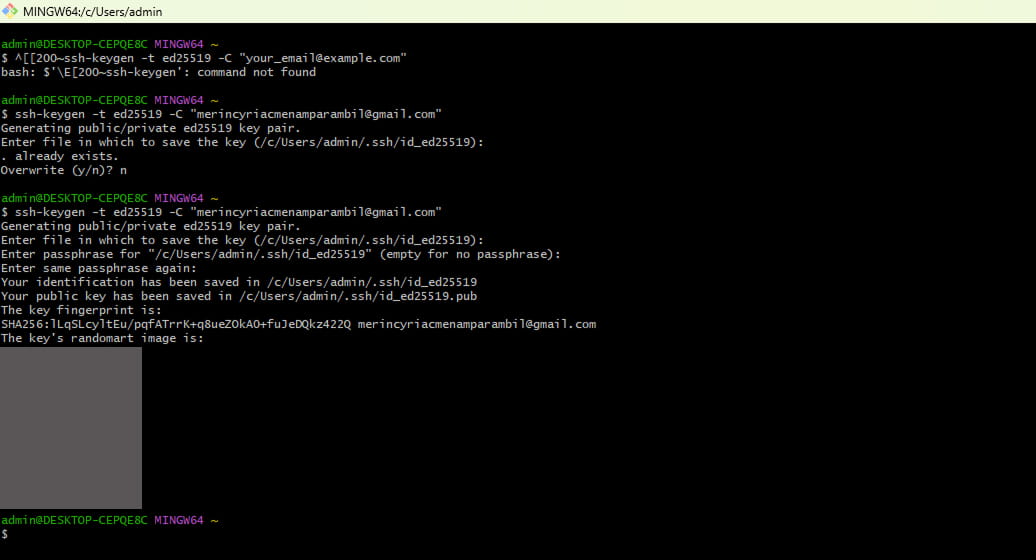
To connect securely to the Git server, I generated an SSH key using Git Bash with the command: ssh-keygen -t ed25519 -C "your_email@example.com". This created a public and private key inside the .ssh folder for secure authentication.
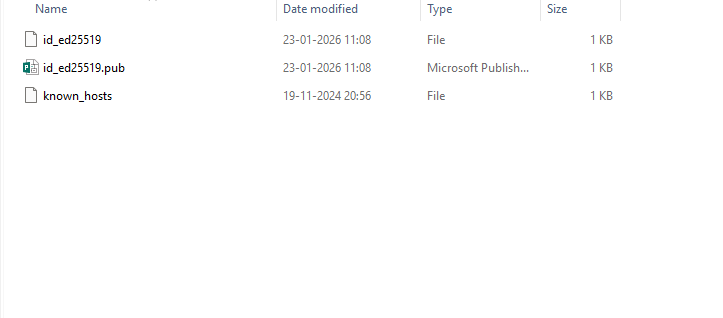
During the key generation process, I was prompted to enter a file name and passphrase. I accepted the default file name and chose to set an optional passphrase for added security. The generated keys were saved in the .ssh directory of my user profile.
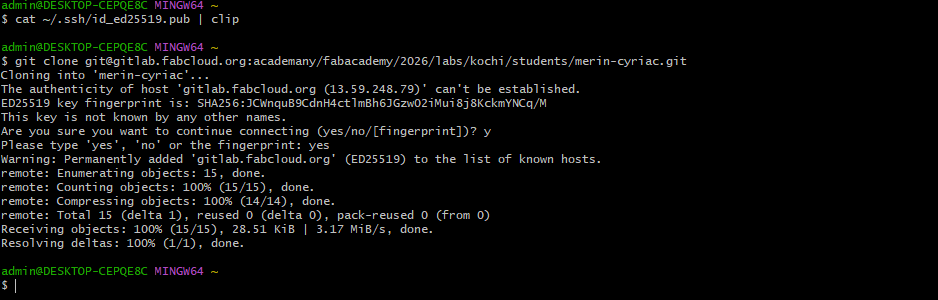
Step 3: Copying SSH Public Key
I displayed the SSH public key in Git Bash using the terminal command cat ~/.ssh/id_ed25519.pub | clip so that I could copy the entire output to my clipboard to register it with the Git server. This step allows my computer to be recognized without asking for a password each time.
Step 4: Registering the SSH Key on the Git Server
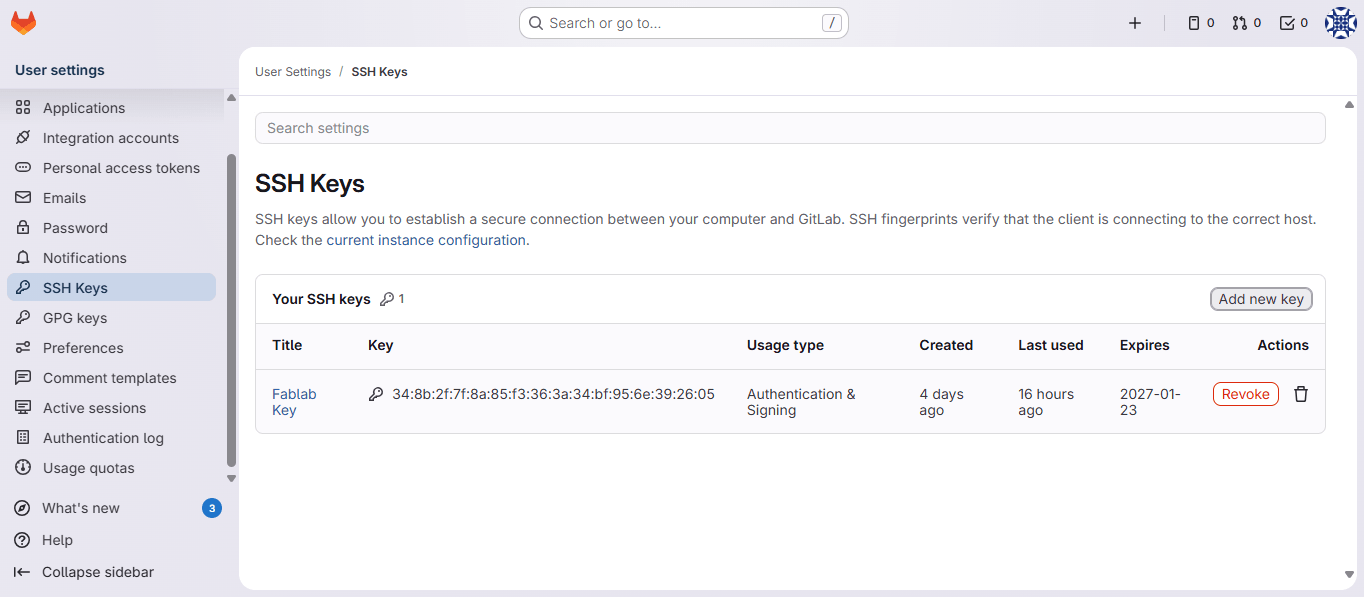
After copying the public key, I logged into my Gitlab.Fabclouds.org account and navigated to the SSH Keys section under Preferences in my profile. I pasted the copied key into the 'Key' field, gave it a descriptive title (e.g., 'Fablab Key'), and saved it. This finalizes the handshake between my local machine and the server.
Step 5: Cloning the Class Repository
After setting up authentication, I cloned the class repository from the FabLab Git server to my local computer using the git clone command.

The repository URL was copied directly from the Clone option in my Git repository interface. This command created a local project folder where I could edit, add, and manage my assignments.
I chose the SSH URL for cloning.
Step 6: Configuring Git Username and Email

I configured my Git username and email address so that my commits would be properly labeled with my identity. This information appears in the commit history when files are uploaded.
Student Agreement
I then downloaded, read, and signed the Student Agreement, and committed the file to my Gitlab repository.
Step 7: Adding, Committing, and Pushing Files
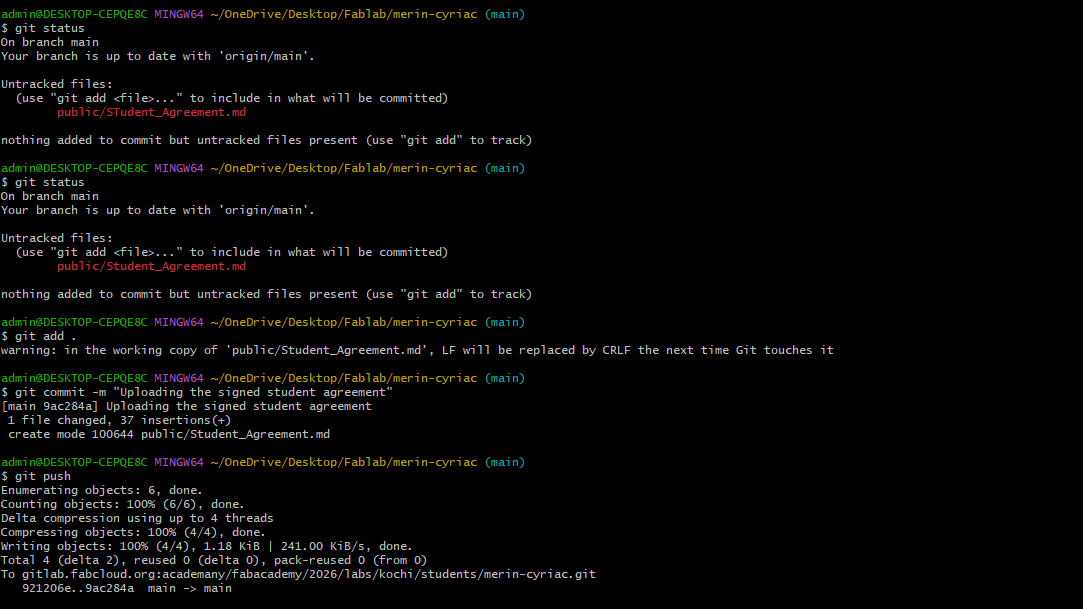
I checked the status of the repository to see untracked files, added the signed student agreement file, committed it with a message, and pushed the changes to the remote repository. This confirmed that my setup was working and that I could submit assignments.
Step 8: Installing Visual Studio Code
I downloaded and installed Visual Studio Code on my computer. After installation, I used it as my main editor for writing and updating my HTML and CSS files.
You can download the application here.
Step 9: Connecting Project to Git
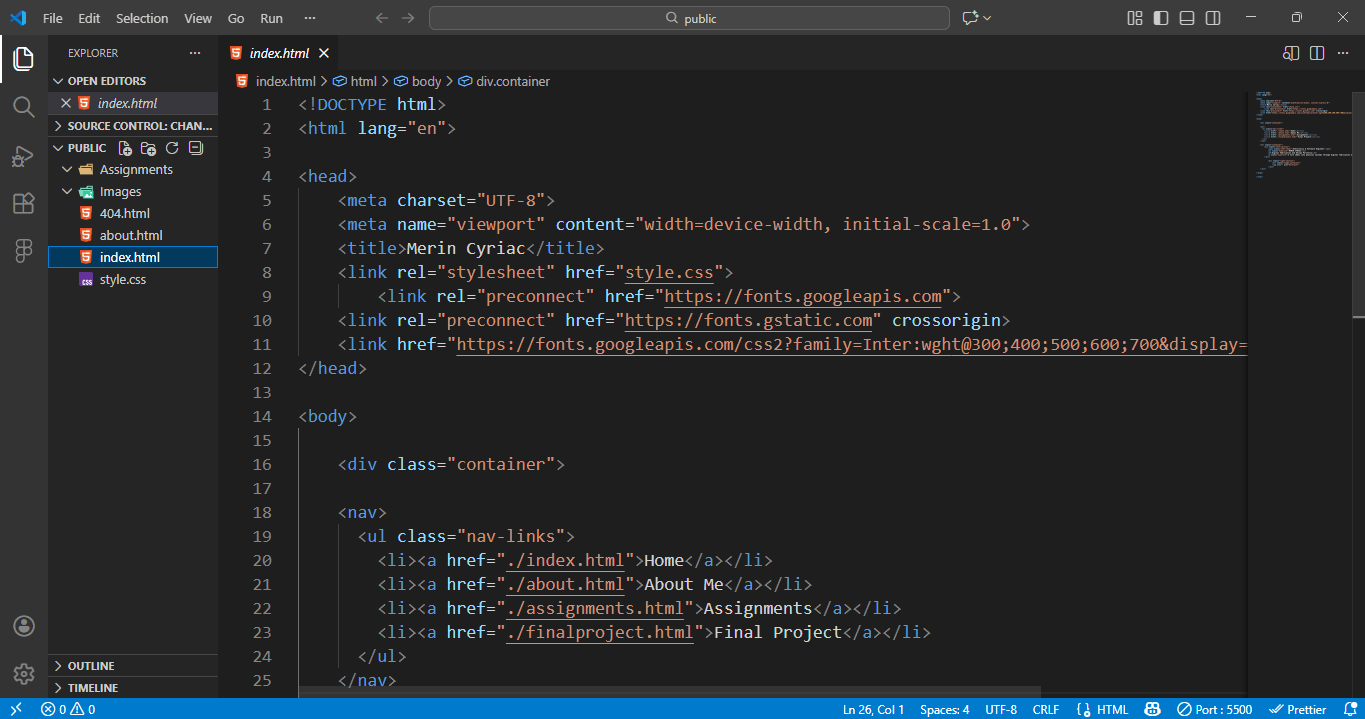
I opened my website folder in VS Code and connected it to my Git repository. I checked file changes using Git tools to make sure my edits were being tracked.
Step 10: Committing and Pushing to Remote Repository
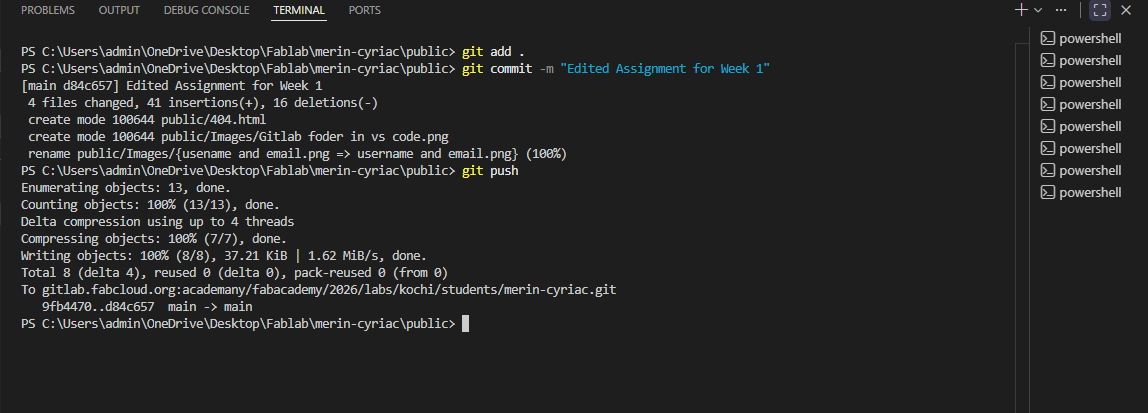
After making changes to my website, I committed the files with a message and pushed them to the remote repository. This updated my online site and confirmed that my setup was working correctly.
I edited my home page picture using NoteGPT. I provided the ai with an image of mine and instructed it to edit. The propmt I used is given below:
                Edit this portrait to match a clean, minimal, futuristic editorial website style.

                Keep the face realistic and natural.
                Remove the outdoor background and replace it with a soft light-gray or white studio background with subtle gradient lighting.
                Lighting should be even, soft, and diffused, with gentle highlights and no harsh shadows.
                Clothing should be simple and modern in neutral tones (white, light gray, or soft beige), no patterns, no bold colors.
                Overall color palette should be cool and muted to match a minimal tech interface.
                Add very subtle depth-of-field blur in the background only.
                No dramatic effects, no sci-fi costume, no neon, no busy textures.
                Final result should look like a professional portrait placed inside a modern UI card on a premium tech portfolio website.
Website Development Process
For my FabAcademy documentation website, I used an AI-assisted design tool, Bolt to generate the initial home page layout and visual style. I selected this approach to quickly explore layout and typography ideas and to establish a strong design direction early in the process.
Prompt for the design:
            Design a futuristic personal portfolio website inspired by high-end minimal editorial layouts.

            Style:

            Clean, white or very light background with strong black/gray typography

            Futuristic but elegant, with thin lines, soft shadows, and subtle glass or chrome accents

            Large hero typography and a large portrait or abstract futuristic visual on the right side

            Overall feeling: tech + design student portfolio, premium and modern

            Layout (Home Page):

            The home page must be exactly one screen height (100vh) with NO vertical scrolling

            Everything must fit within the visible screen

            Left side: big bold greeting text like “Hello” or “Welcome”, with a short subtitle line

            Right side: large portrait-style image or futuristic visual element

            Small stats or labels near the top or side (optional), styled minimally

            Navigation:

            Top horizontal navigation bar, always visible

            Links: Home, About Me, Assignments, Final Project

            A call-to-action style link on the right like “View Work” or “Start” (optional)
After generating the base design, I manually edited the HTML and CSS and used the home page structure as a template for developing the remaining pages of the website.
Technology Stack
- HTML5 for semantic structure
- CSS3 for layout, typography, and responsiveness
- Google Fonts (Inter) for typography
- Static hosting on FabCloud
No front-end frameworks or CMS platforms were used. All pages are built as static HTML files with shared styling.
Design Workflow
- I first used Bolt to prototype the home page layout, focusing on:
- Two-column hero composition
- Large editorial typography
- Minimal color palette and soft UI elements
- I then exported the generated code and:
- Cleaned up unused styles
- Simplified the structure for easier editing
- Adjusted spacing, fonts, and alignment manually
- Once the home page layout was finalized, I reused the same navigation and layout structure to design:
- About Me page
- Assignments listing page
- Final Project page
This ensured visual consistency while allowing each page to present different types of content.
Layout Implementation
Modern CSS techniques were used to implement the layout:
- Flexbox and Grid for responsive two-column and section layouts
- Fixed top navigation for consistent access to all pages
- height: 100vh on the home page to keep it within one screen without scrolling
- Media queries to adjust layout for smaller screen sizes
Resources & References
Official References
These are the authoritative sources for learning the tools and concepts covered this week:
- Git Official Documentation - Complete guide to version control
- GitHub - Collaborative development platform
- HTML Tutorial - Learn web markup
- CSS Tutorial - Learn web styling
Learning Materials
Supplementary resources to deepen your understanding:
- Git workflow visualization and tutorials
- Best practices for documentation
- Portfolio design inspiration
- Markdown syntax guide
- HTML and CSS fundamentals
Practice regularly with small commits and meaningful messages. The more you use Git, the more natural it becomes.
View Learning MaterialsCommunity Resources
Connect with other FabAcademy students and get help from the community:
- FabAcademy Global Network - Connect with labs worldwide
- Discord communities for peer support
- Stack Overflow for technical questions
- GitHub discussions and issues
- Local FabLab events and meetups
Don't hesitate to ask questions and share your progress. The FabAcademy community is here to support your learning.
Join Community