
Week 17
Week 17: Wildcard Week
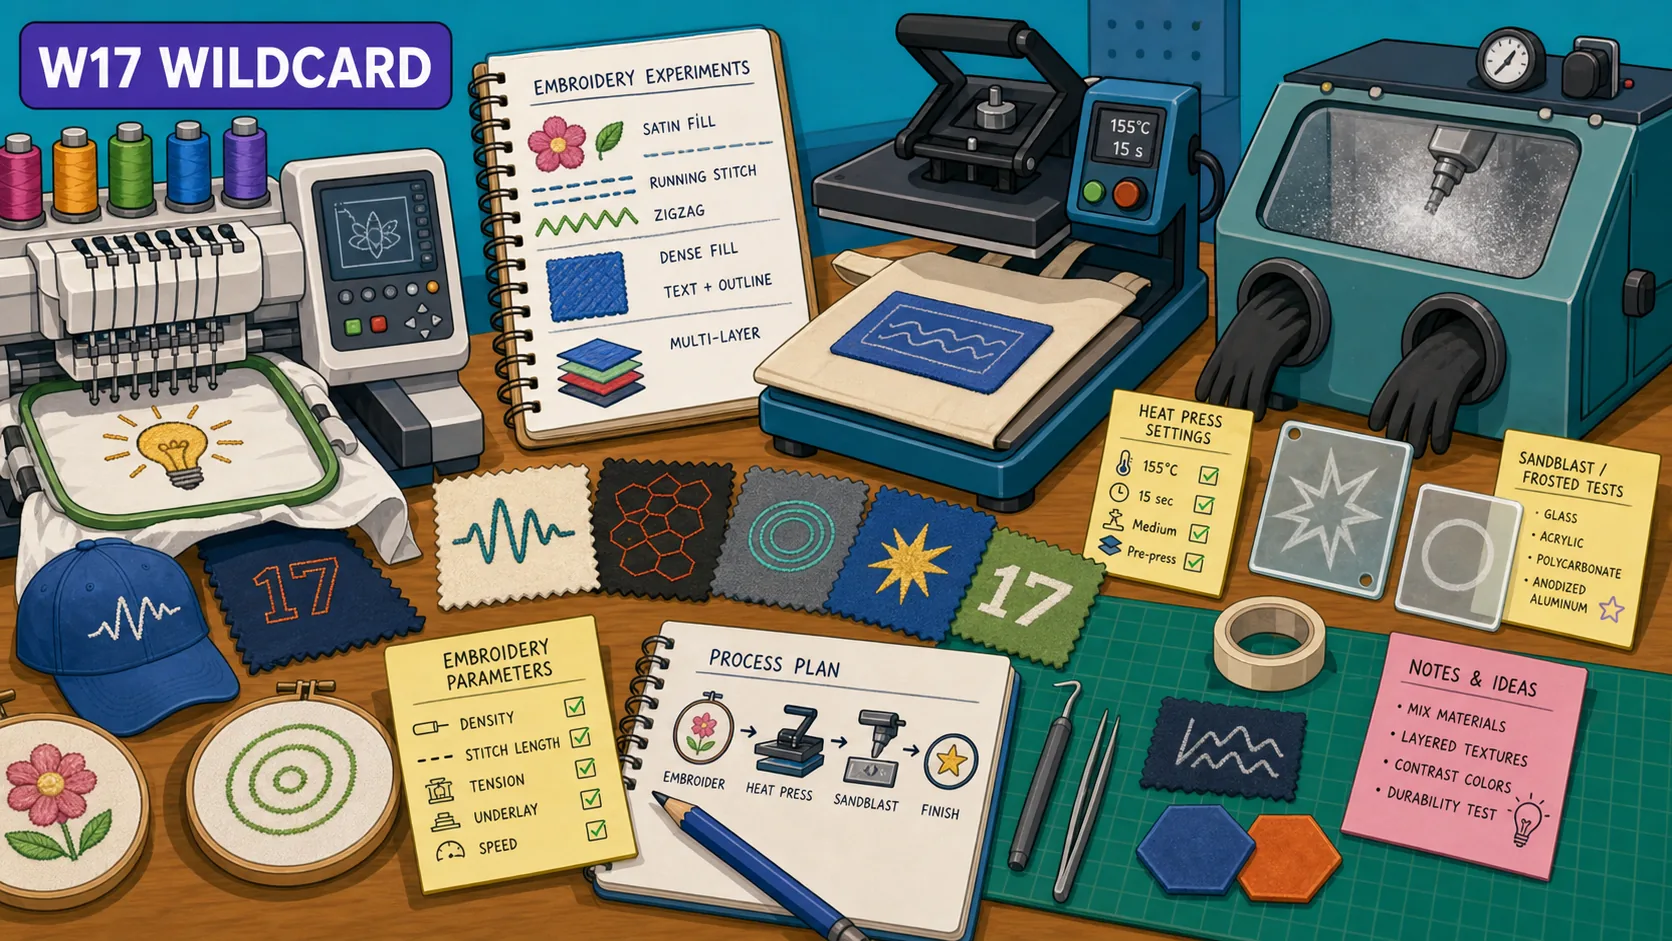
I used wildcard week for embroidery, heat pressing, and sandblasting: a logo test, a Syria design, and a few fabrication processes outside the normal electronics/CAD path.
This week was WILD, haha…
I know, sorry…
I worked with some new fabrication techniques that I found to be pretty cool, ngl. I embroidered, heat-pressed, and sandblasting. They were a mix of digital and non-digital techniques, but they were all fun.
Ask Yuichi :D
Learnings from Global Session
Wildcard week is basically: pick a digital process, say what requirements it meets, and show enough of the workflow that it can be repeated.
Digital process here means CAD/CAM or some kind of computer-controlled workflow. It cannot just be a manual skill. The documentation needs the requirements, the process, and what needs to be done to reproduce it.
What Counts And What Does Not
Some things are too close to previous weeks. A parametric box is not enough, since parametric design and laser cutting were already covered. Reflow and stencil soldering are not enough by themselves either.
Projection mapping alone also does not count unless it is connected to actually making something, have been seeing a bunch of cool content on that.
Machining And Cutting
Submerged CNC was interesting. The idea is that the cutting happens underwater so you are not breathing the dust, especially with harder or more annoying materials. You also do not just plunge the bit into the material. The path should ramp or spiral in with adaptive clearing.
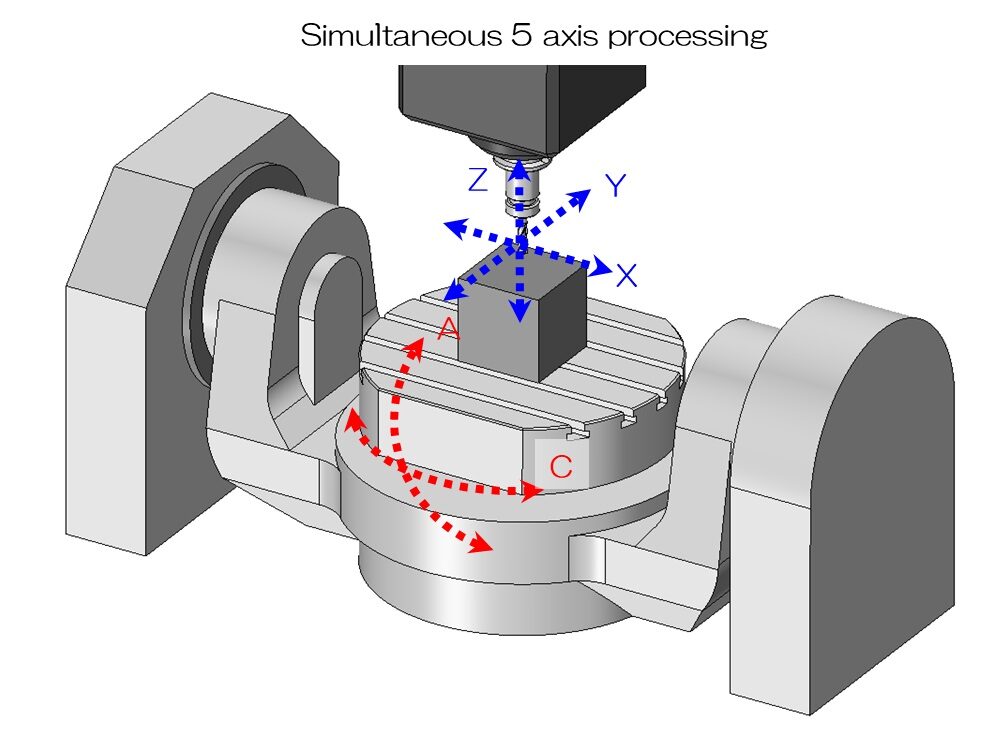
5-axis mills are very cool ngl. A normal CNC has X, Y, and Z. A 4th axis adds rotation, and a 5-axis machine can move the tool or part in more complex ways, so it can machine shapes that would be hard to reach from one direction.
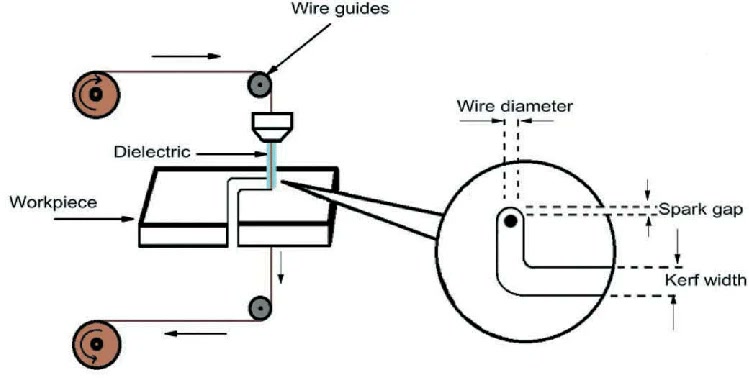
EDM is electric discharge machining. Instead of cutting metal with a bit, it uses a wire and electrical discharge to remove metal at high resolution.
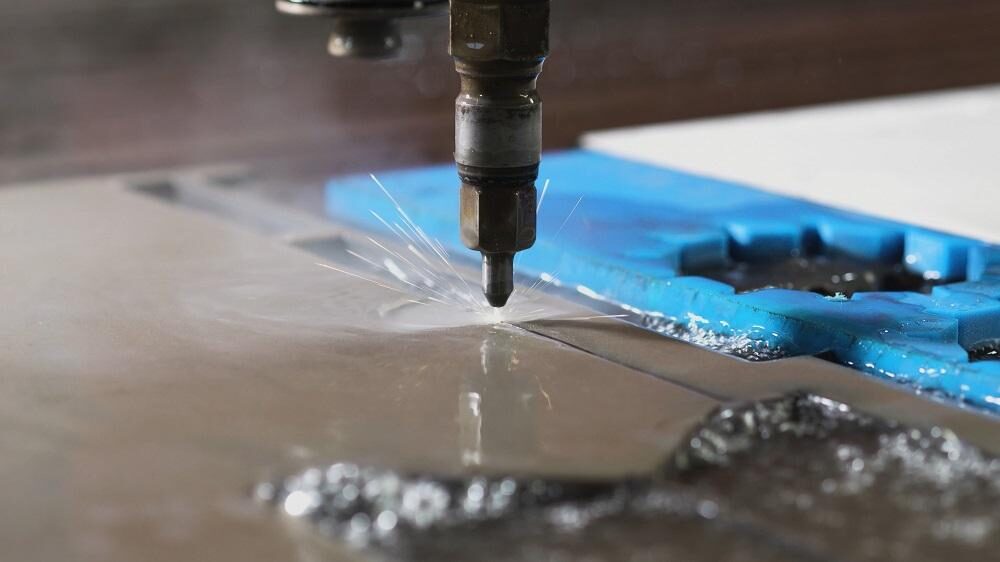
Waterjet is another process that works for wildcard: high-pressure water plus abrasive cutting through materials that would be difficult for a normal laser or mill.
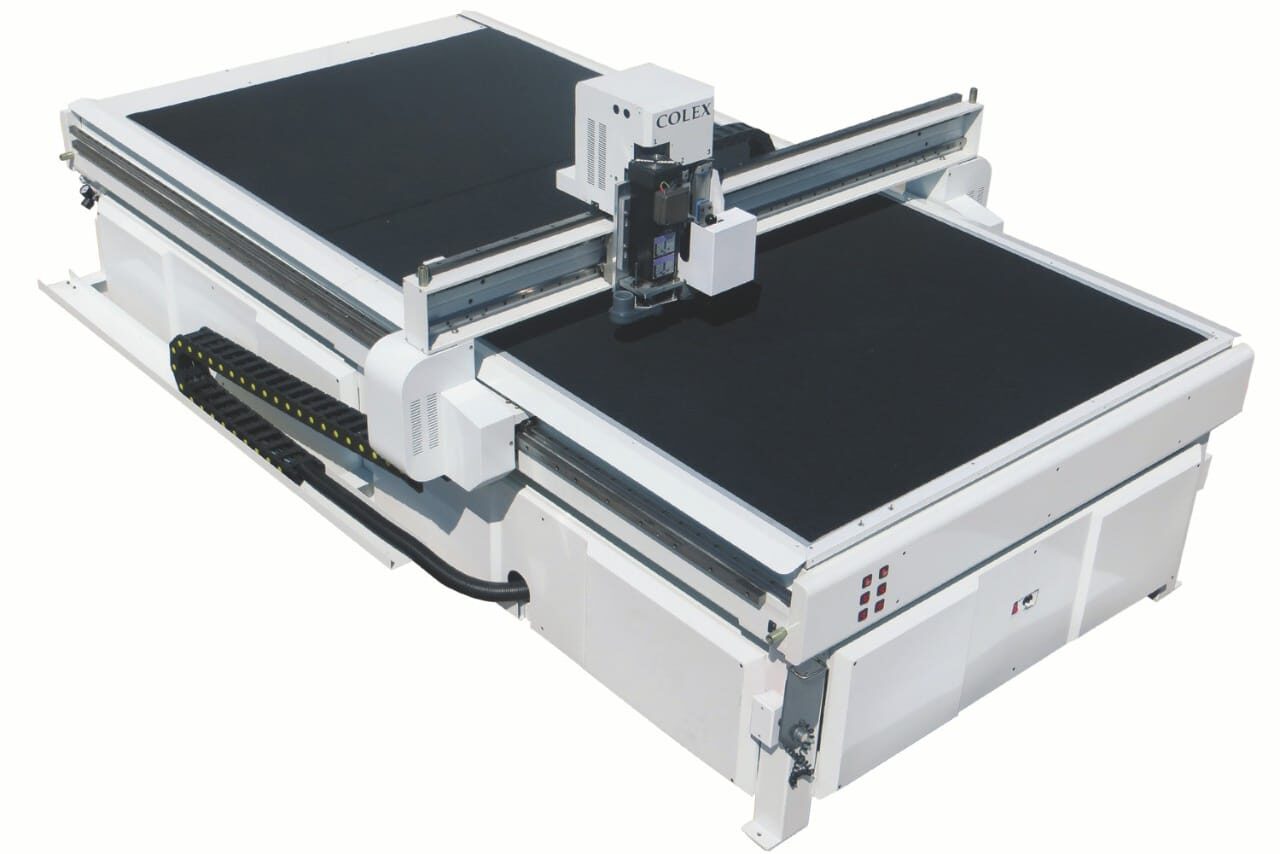
Flatbed cutting is like a giant vinyl cutter, but the knife is driven and can control its angle. That makes cardboard furniture and thicker sheet cutting more realistic.
Plasma cutters have apparently gotten much cheaper, under $1000 for some machines, and can be mounted on a gantry for metal cutting.
Fiber lasers and micromachining tools were also part of the machine tour. Micromachining is basically fabrication at a tiny scale, where the cuts and features are much smaller than normal shop machining.

Forming, Folding, And Robots
Welding can be used this week when the parts are CAD-designed and digitally cut first, then welded together.
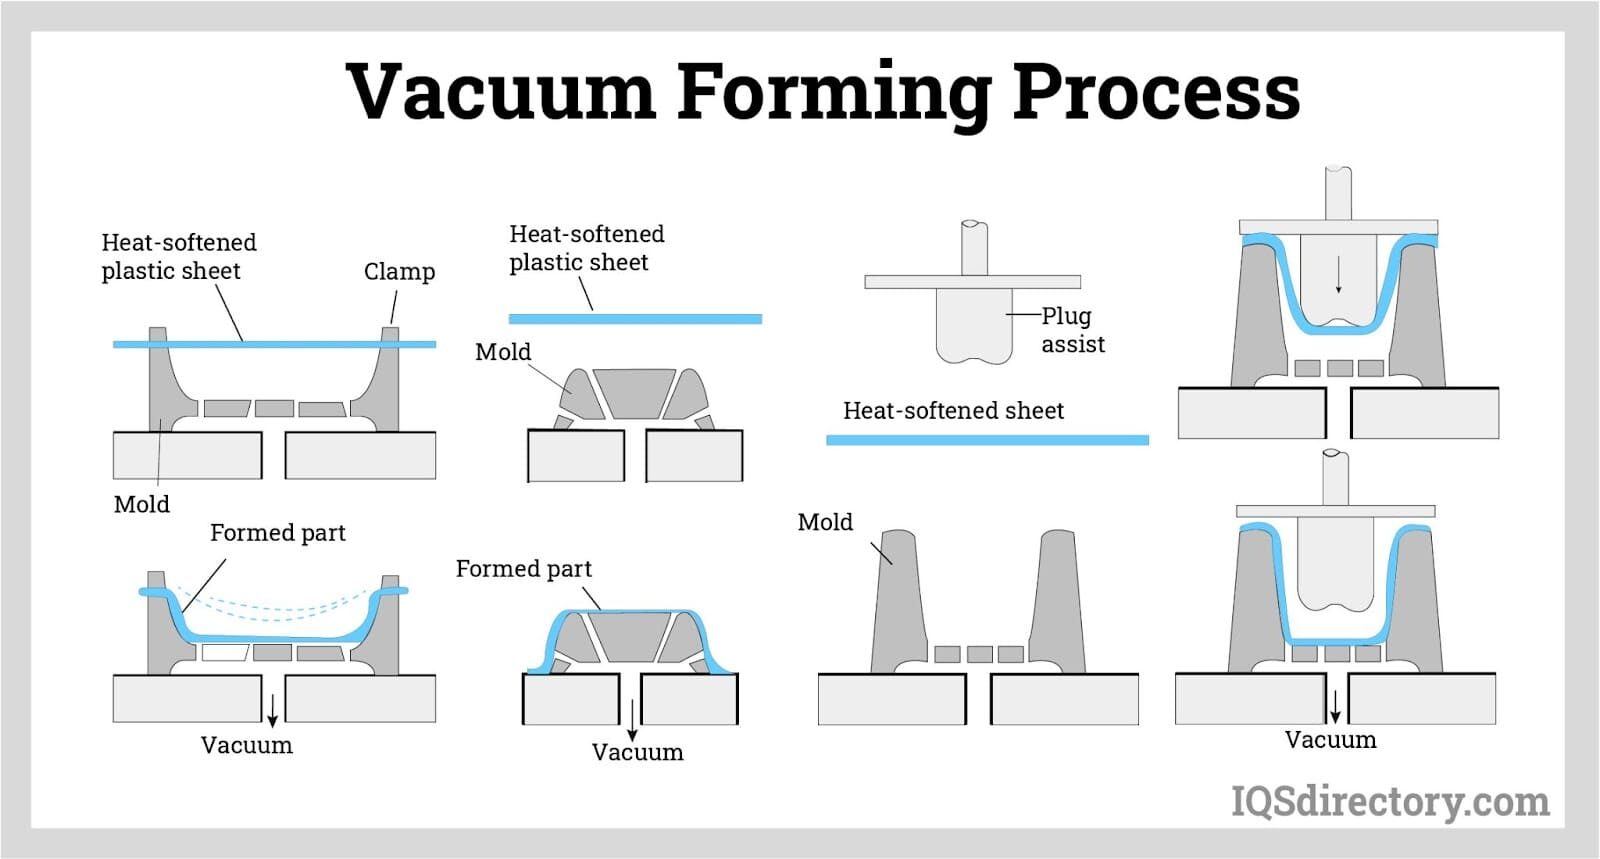
Vacuum forming can be a project by itself. You heat a plastic sheet and pull it over a mold with vacuum.
Rotocasting is another molding direction where the material coats the inside of the mold to make a hollow part. Here’s a link to Saverio’s, a Fab Academy 2021 student and a current instructor, documentation.
Folding was one of the stranger but cooler directions. A fold pattern can change how a material behaves: stiffness, elasticity, shape, and energy absorption. There was also an example of doing this with metal, which sounds wild because the fold pattern becomes the actual design logic.
This student was noted for doing some cool stuff with folding.
Robots can also be used as fabrication tools. A robot arm (if you had access to it or maybe built one by yourself) can assemble voxel/block structures, where the object is built from repeated small units instead of cut from one solid piece.
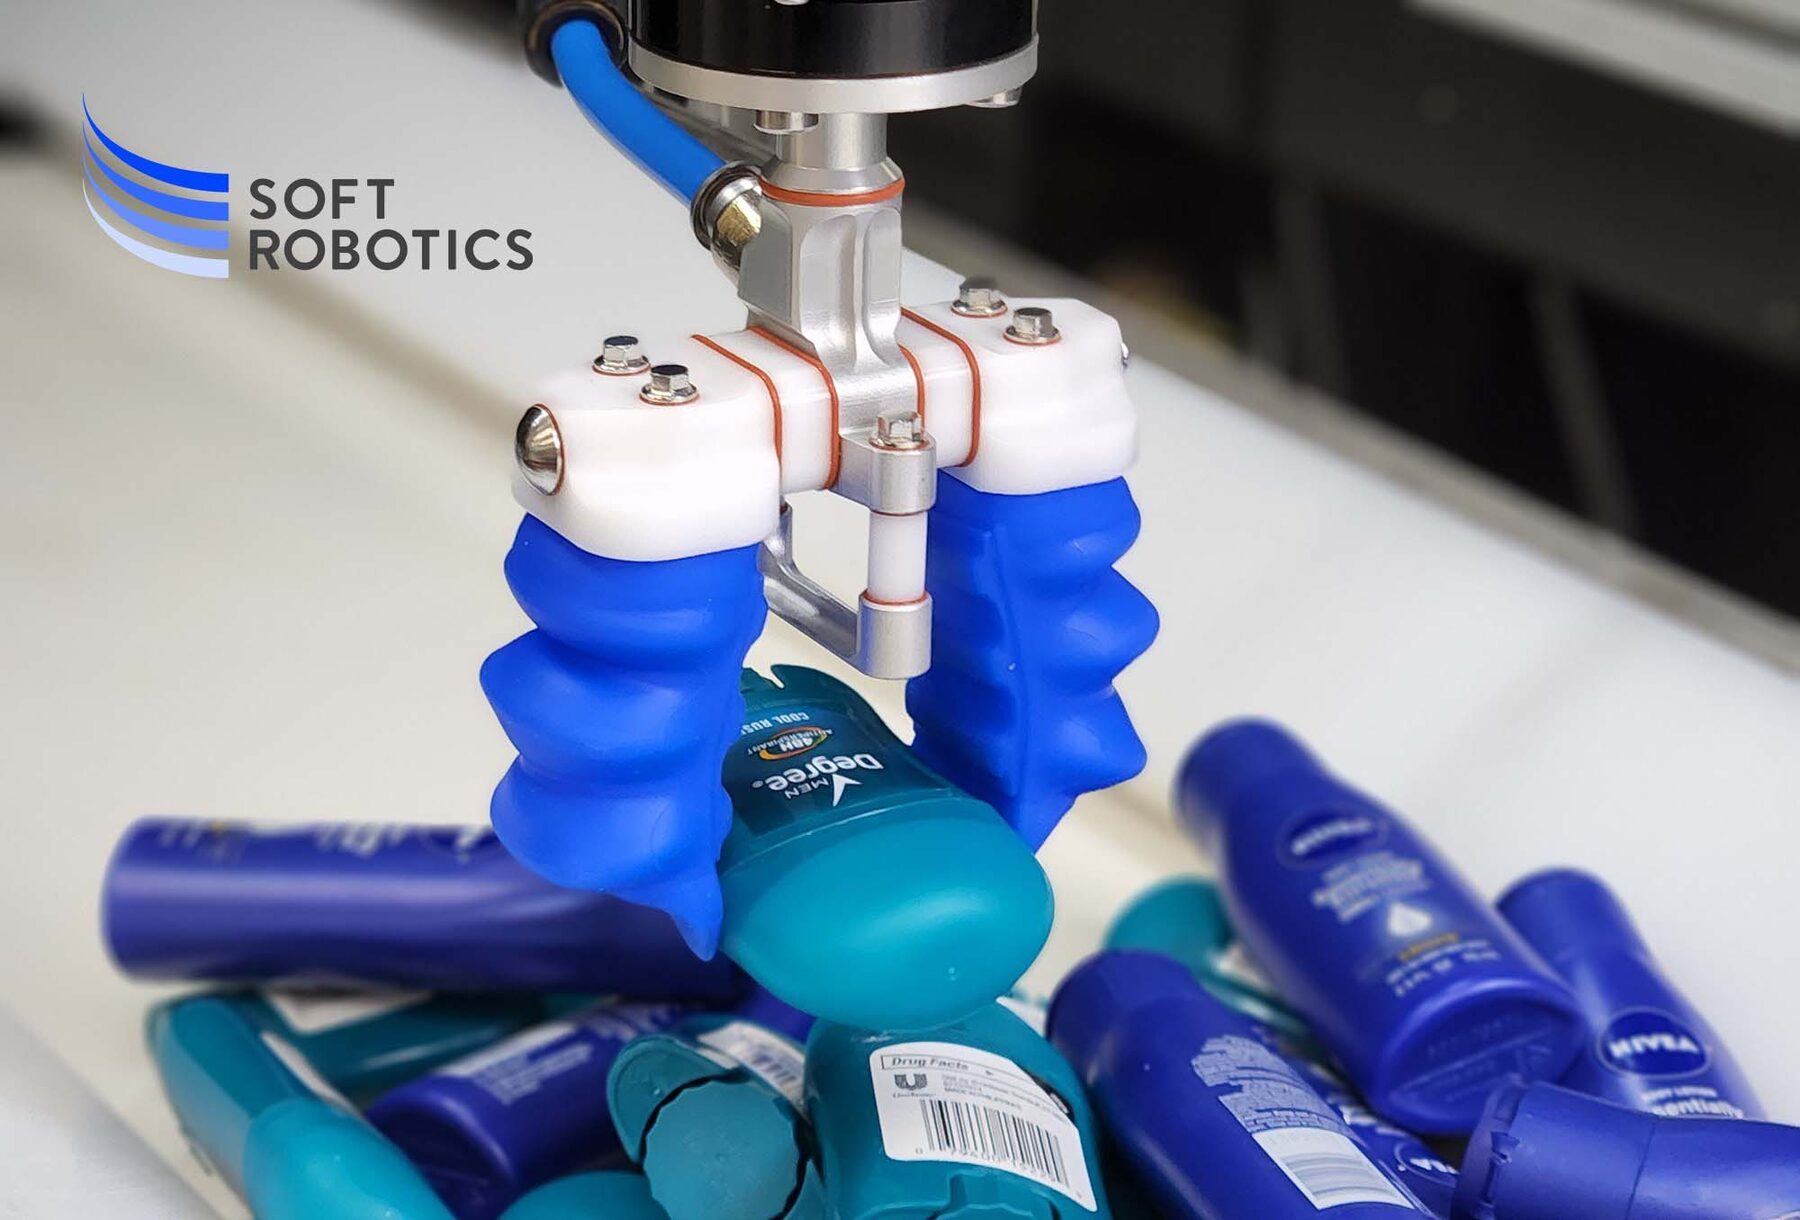
Soft deformable robots are another direction: instead of rigid joints and motors, they use flexible molded or sewn chambers that move when inflated.
Electronics, AI, Textiles, Food, And Bio
OpenPnP / pick-and-place machines are a wildcard option. A pick-and-place machine uses a nozzle, cameras, feeders, and placement files to pick electronic components from tape/reels and place them on a PCB.
Commercial machines are very expensive, but open-source or lower-cost versions make it possible to learn the process. This is different from just soldering a board by hand. The videos of those are quite awesome.
Programmable logic is also okay for wildcard. This means using something like Verilog and an FPGA, which is a different workflow from normal microcontroller programming.
Machine learning in embedded systems is also a cool option for this week. Since the process is not only writing code for a board; it includes preparing data, training or choosing a model, exporting it, putting it on the embedded system, and checking the output.
(Note from future Youssef: I worked on this, but you will find it noted down in my final project dev log)
CAD can also control weaving patterns, which made me think of grandma, lol. Textiles are not just handcraft if the structure or stitch pattern comes from a digital design.
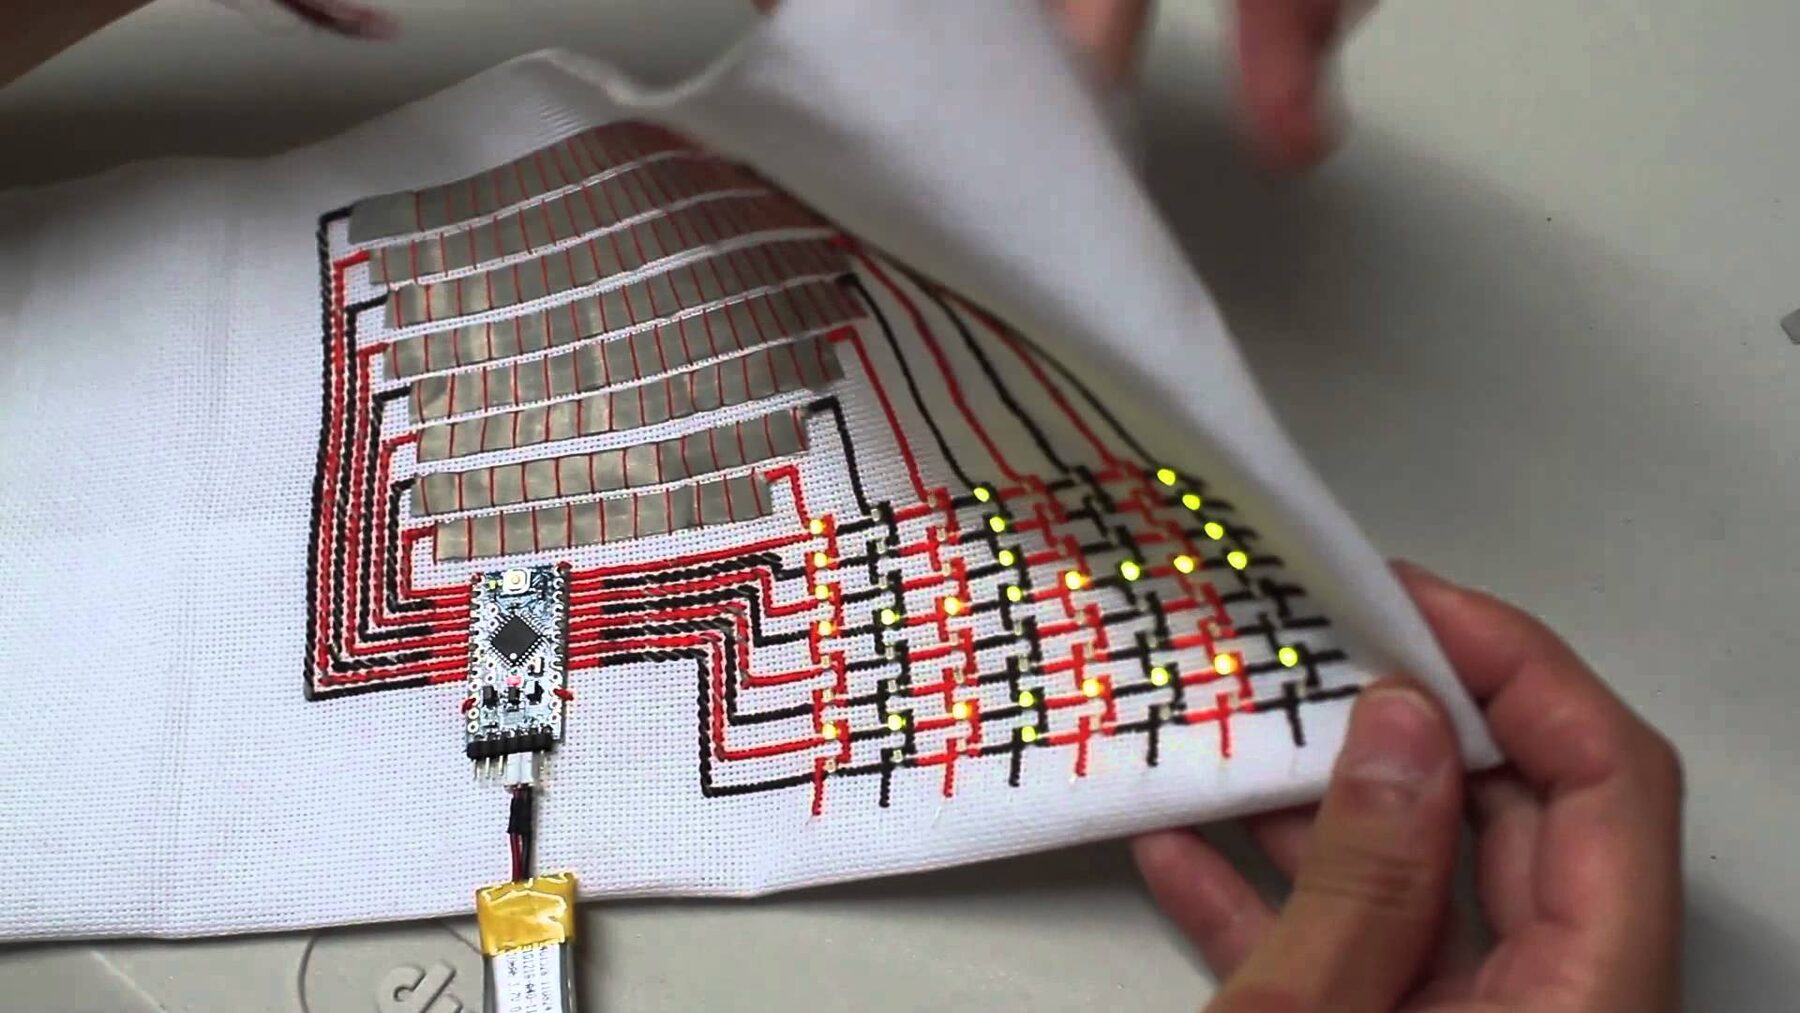
Embroidery circuits were also quite cool to see. Conductive embroidery can turn fabric into circuits, buttons, patches, labels, or connectors. Ink/Stitch and PEmbroider are tools for generating embroidery files, so the stitch pattern becomes the digital fabrication file.
Digital gastronomy was another direction: using digital fabrication for food. This could mean designing a shape, toolpath, mold, or machine workflow for something edible instead of treating food as only hand cooking.
Biotech / biomaterials are another path, building upon what we learnt from Materiom in the molding and casting week.
Composites
Composites were the big topic in the second half of the session.
A composite combines two materials with different properties. The simple version is fiber plus resin. The fiber gives tension strength, and the resin holds the shape. Concrete is a composite too: the rebar helps with tension.
Tires, adobe, FR1/FR4 circuit board material, wood, fiberglass, and carbon fiber are all composite examples.
In a Fab Lab, the usual starting point is sheets of fabric. Glass and carbon fiber are strong, but they are hazardous when post-processed. Natural fibers like cotton, linen, bamboo, wood, silk, and burlap are more approachable.
Entropy Resins (it is a company) are a more environmentally friendly epoxy option. It is still epoxy, but with bio-based content and lower volatility compared with some standard epoxies.
For skateboards, one route is thin wood veneers pressed together into a laminate. For more fabric-style composites, you make or machine a mold, cut the fabric, add resin, lay it up, compact it, and let it cure.
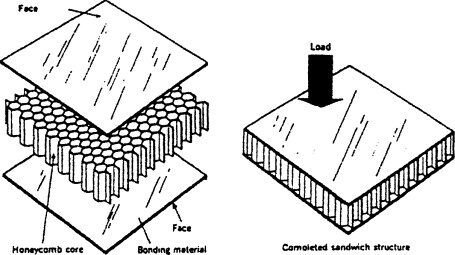
In bending, the fibers in the middle do not do much. The outside layers do most of the work, so you can have a low-density core in the middle. Foam, cardboard, honeycomb, or a lattice can separate the outside skins without adding a ton of weight.
If the fabric has to sit in a mold, it can bunch up in the corners. Darts are cuts in the fabric that let it wrap around a curved or cornered mold without wrinkling too much.
Net shape is cutting the fabric close to the final outline before adding resin, so the cured composite does not need much trimming later.
Commonly, the mold is designed/machined first, then the fabric plies are cut to fit that mold.
Coupon testing means making small test pieces to compare materials and processes.
Compaction is the process of getting extra resin out after the fibers are wet. Too much resin adds weight without doing much. Clamping can give strong compaction for smaller parts, while vacuum bagging is more common for bigger shapes.
The safety note is very serious with fiberglass and carbon fiber. The layup itself is not the dangerous part. The dangerous part is post-processing: sanding, drilling, trimming, or anything that creates short fibers.
Embroidering for the First Time
Well, to preface this, my Grandma was so proud of me when I showed her what I did this week :D
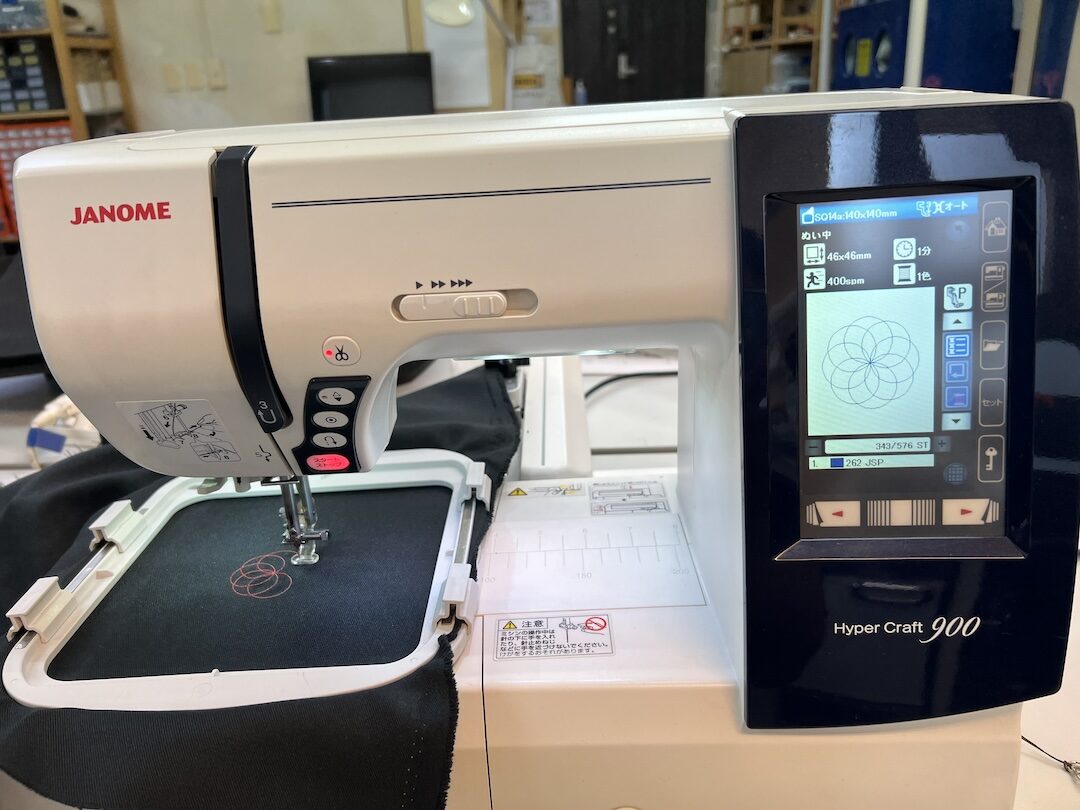
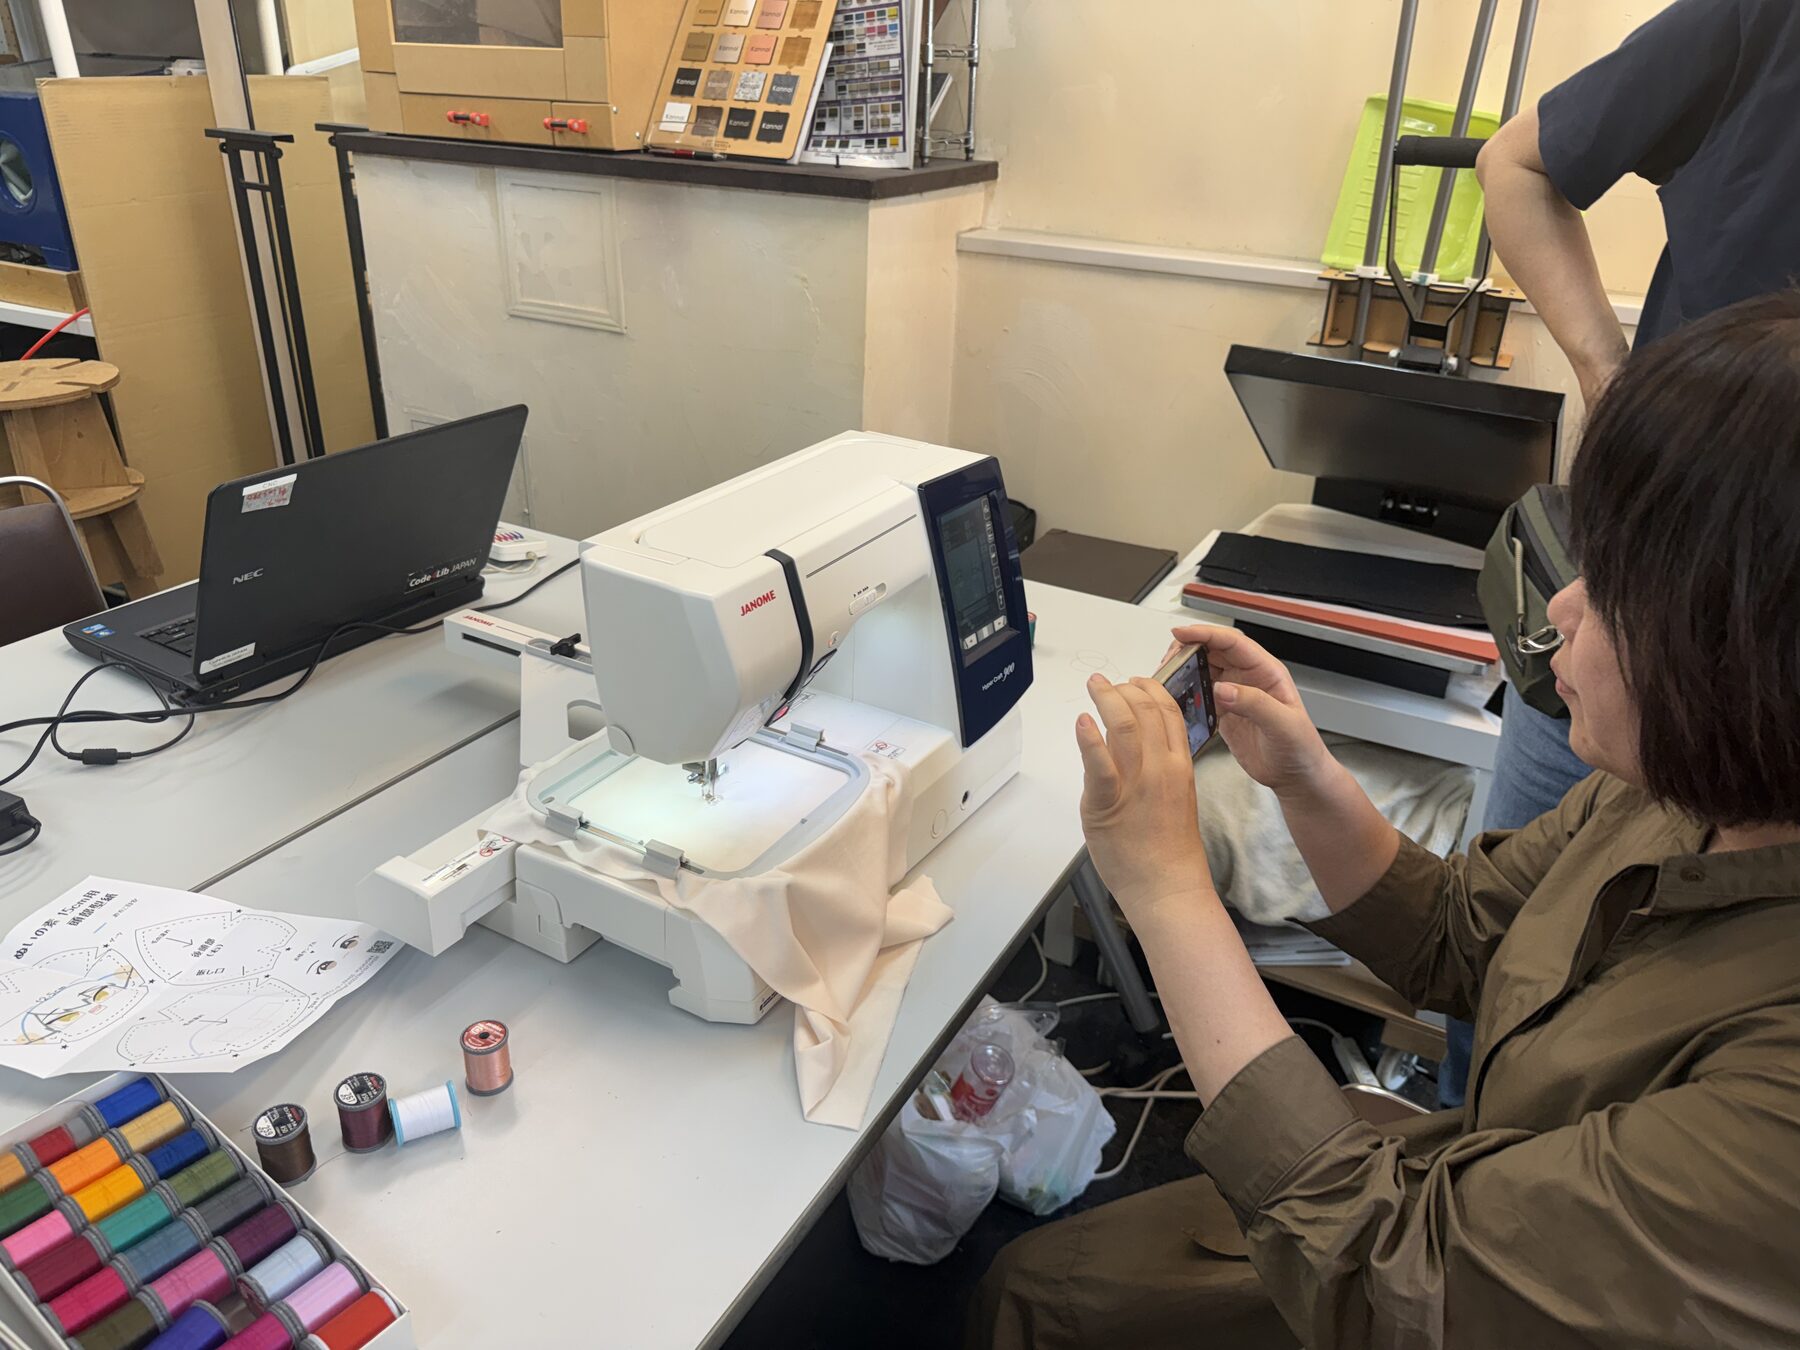
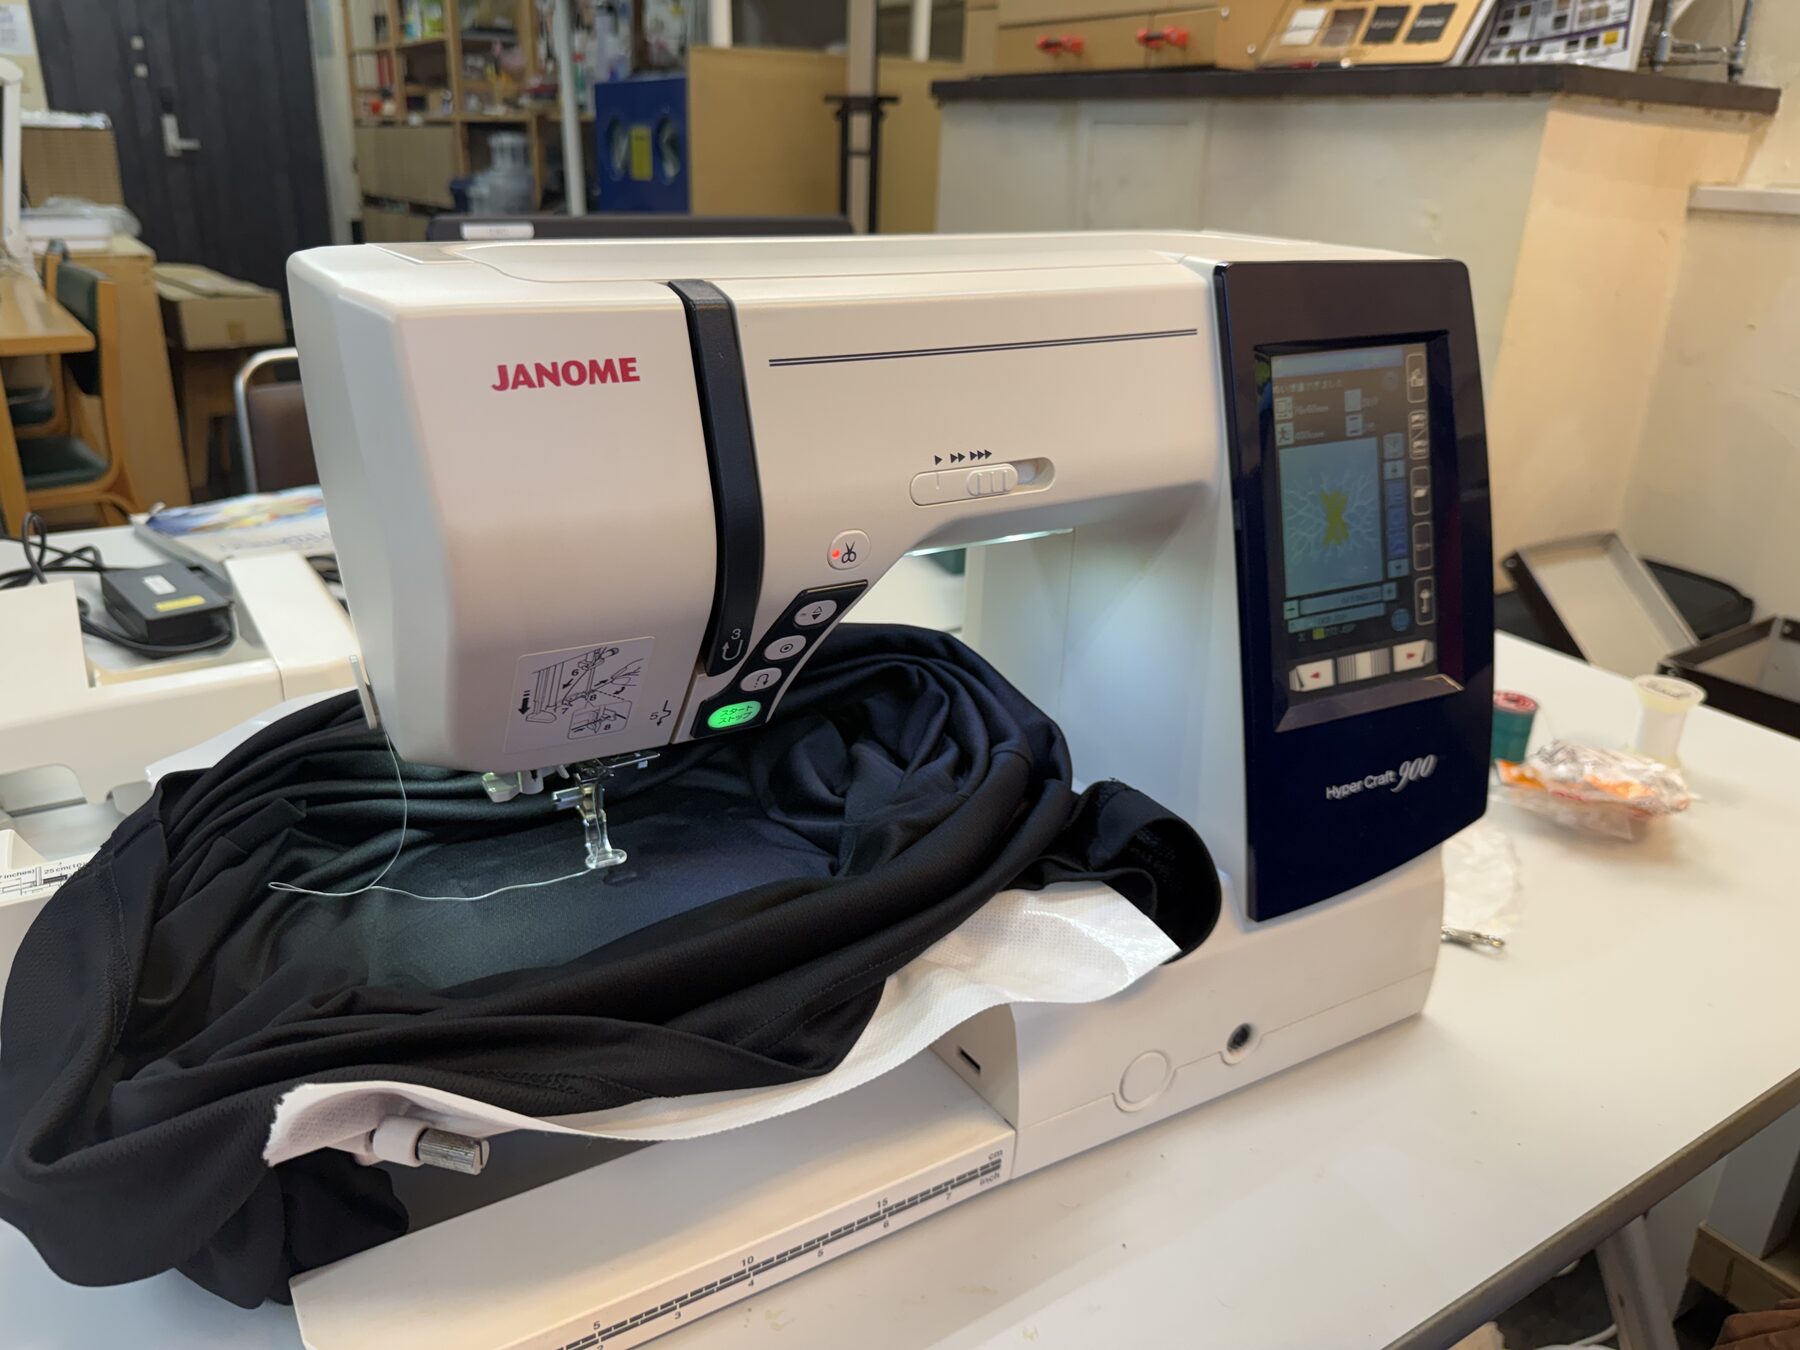
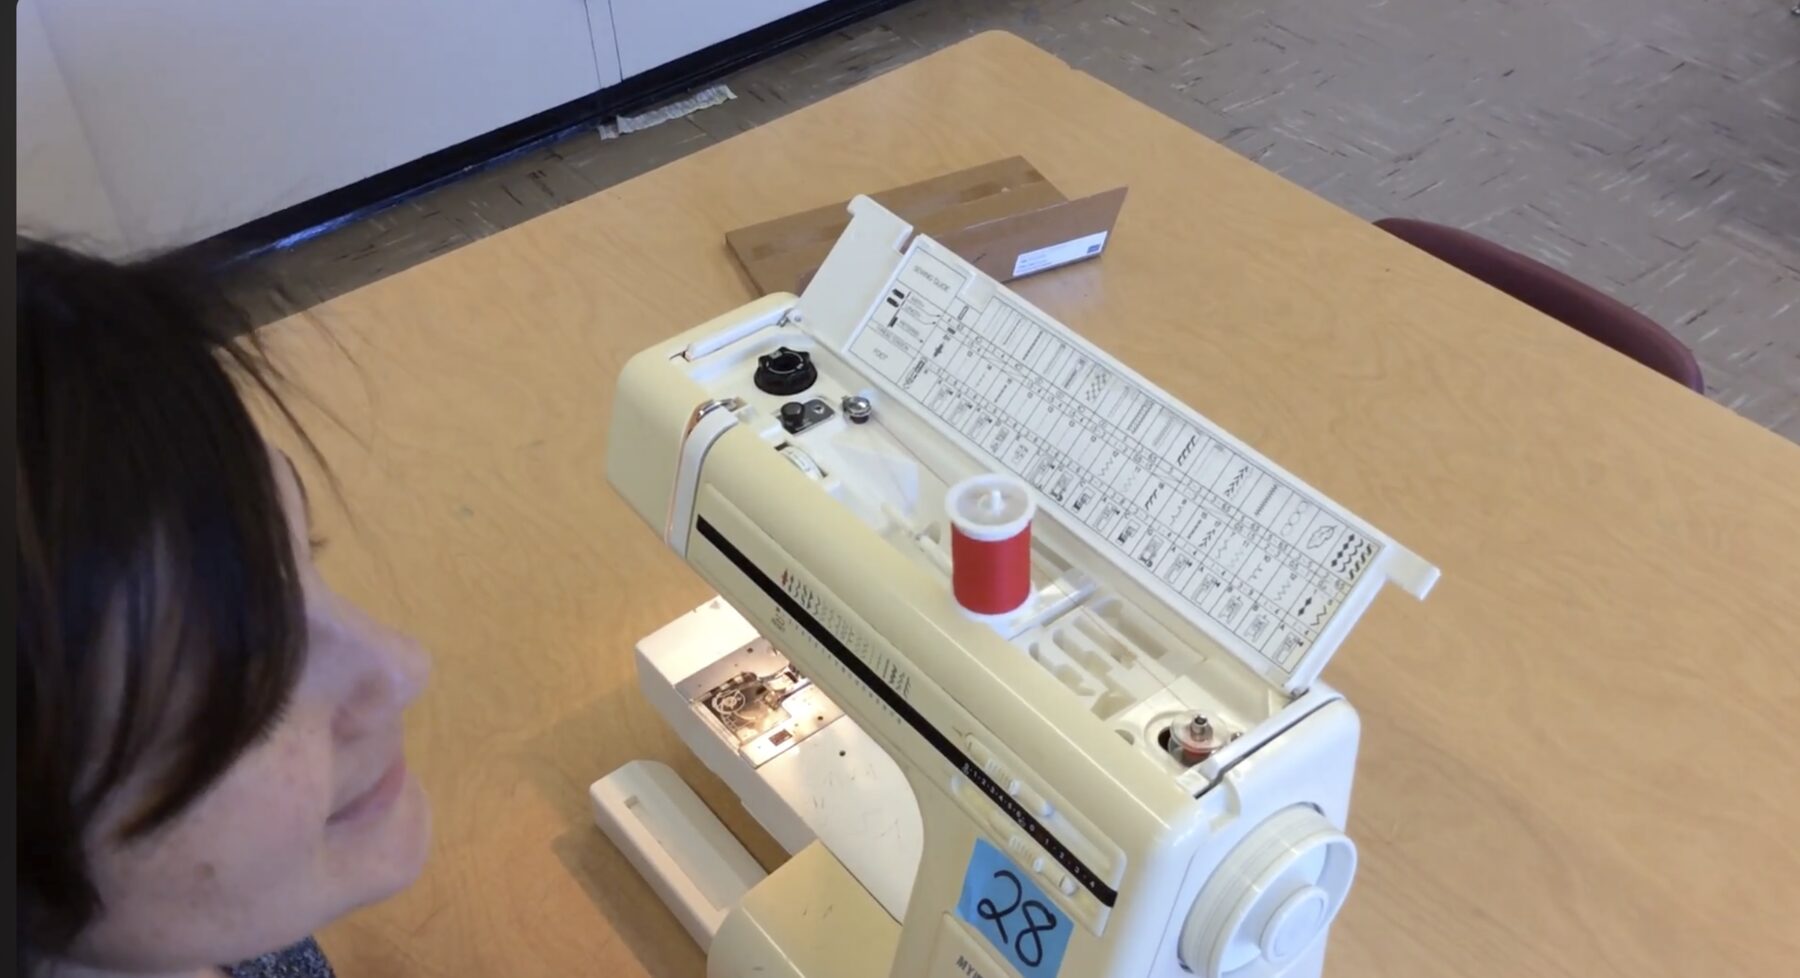
At the lab, we had a Janome Hyper Craft 900 machine. It is a computerized sewing and embroidery machine. It can stitch digital designs onto fabric, making it useful for patches, logos, and textile-based fabrication projects.
Honestly, It is a pretty cool machine, much more fancy than the one my grandma has xD.
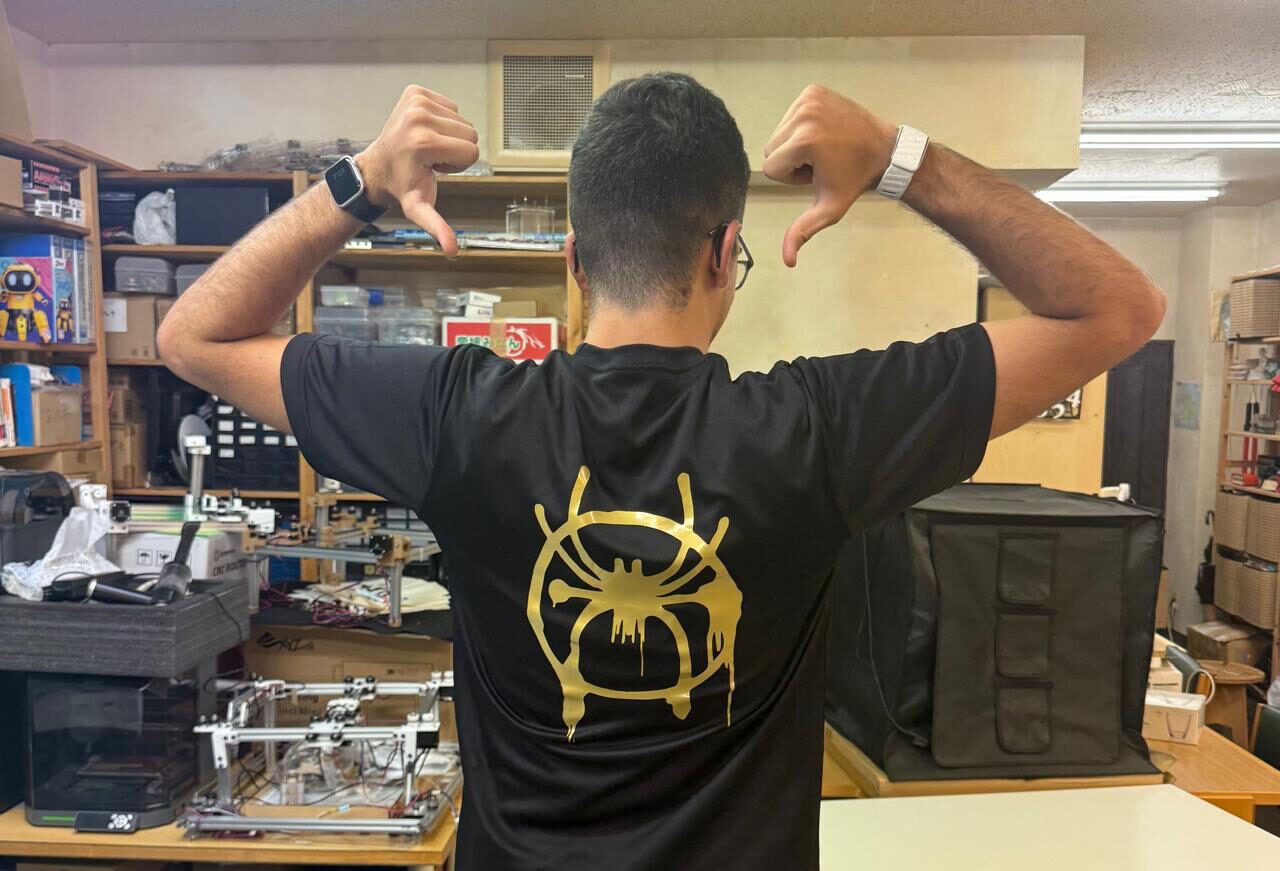
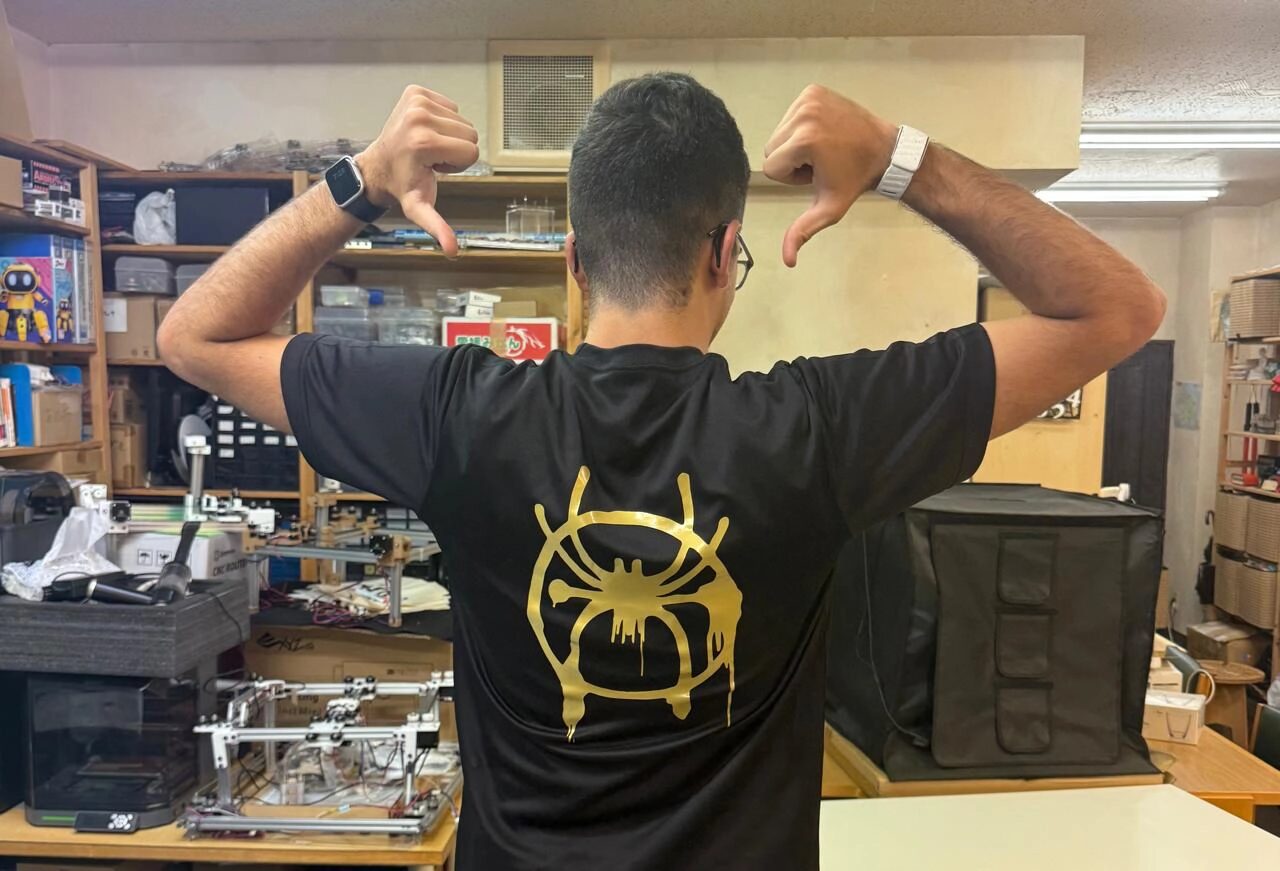
A Cool Logo Design
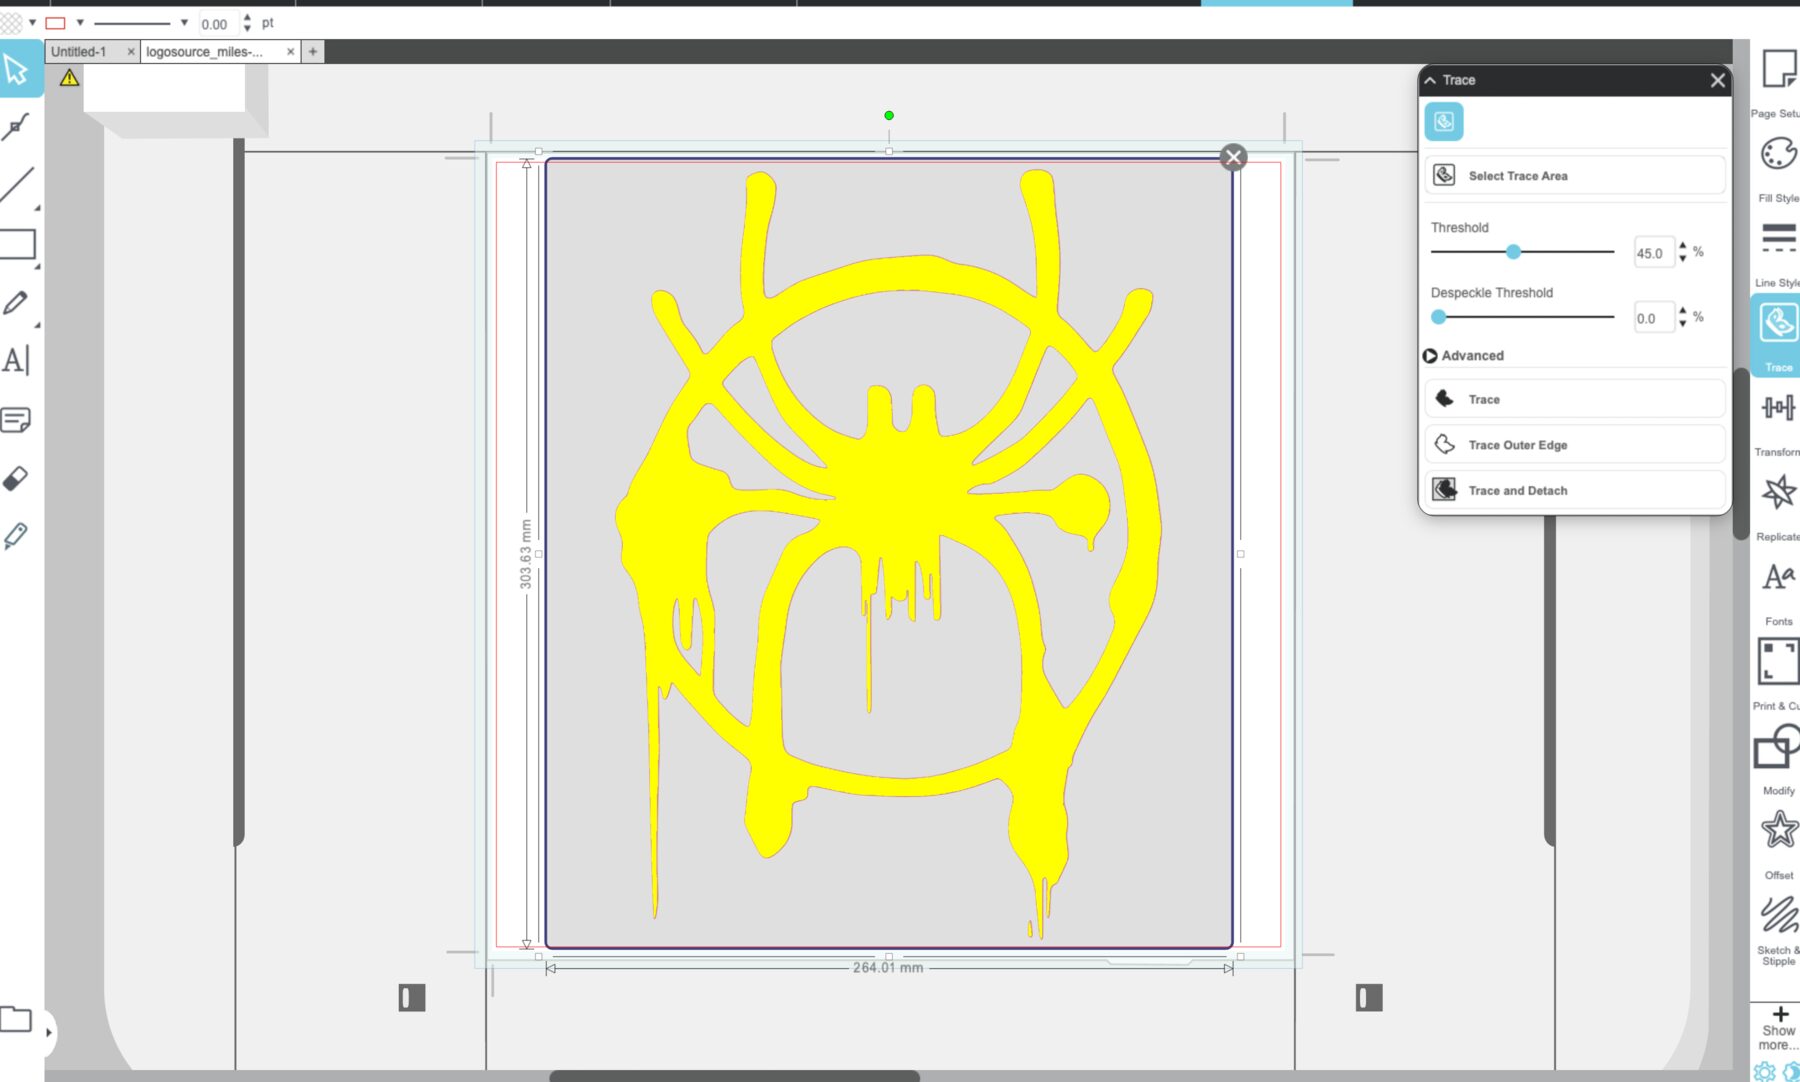
The first design I created was based off of my logo. I wanted to combine my logo with Spiderman, so I generated the following design using ChatGPT.
For context, that logo was fully designed by me a few years back, I gave it as context to ChatGPT.
Then, using recraft.ai I made the design into an SVG to open on Inkscape.

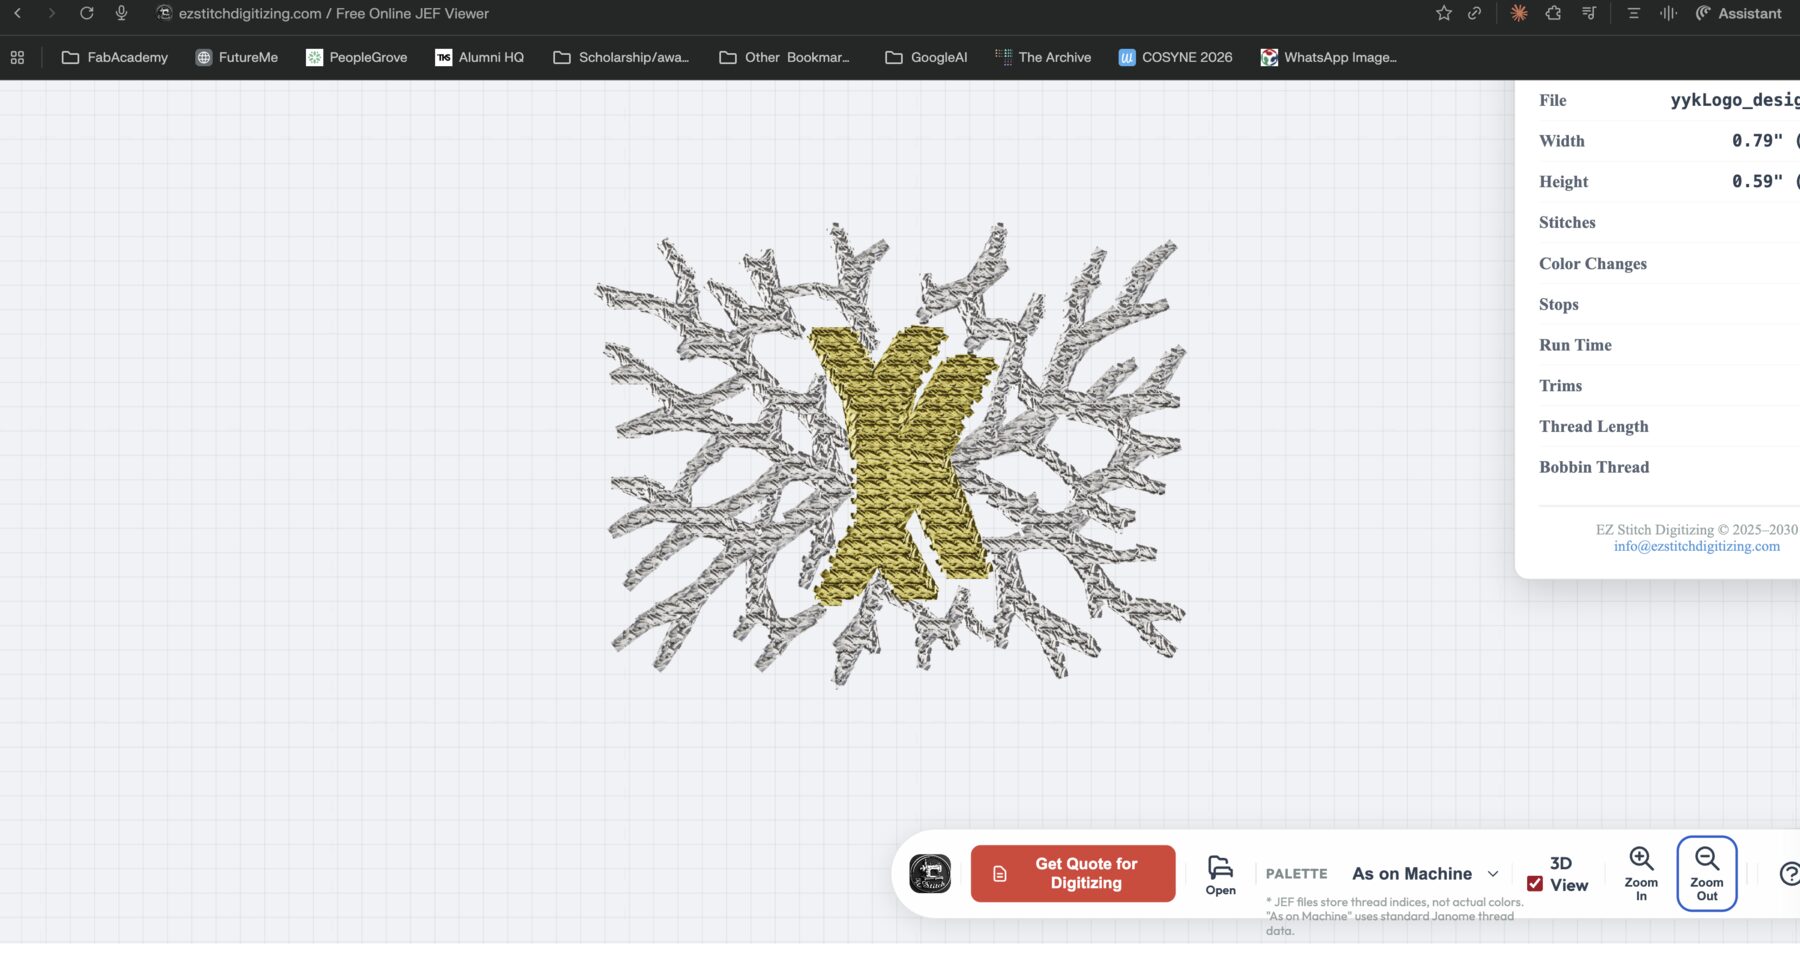
Then, I downloaded the Ink/Stitch plugin to be able to translate the SVG into a format that the Janome machine could understand: JEF or Janome Embroidery Format. You just save it as a JEF.
Before you save it, you could also simulate the path of the machine.
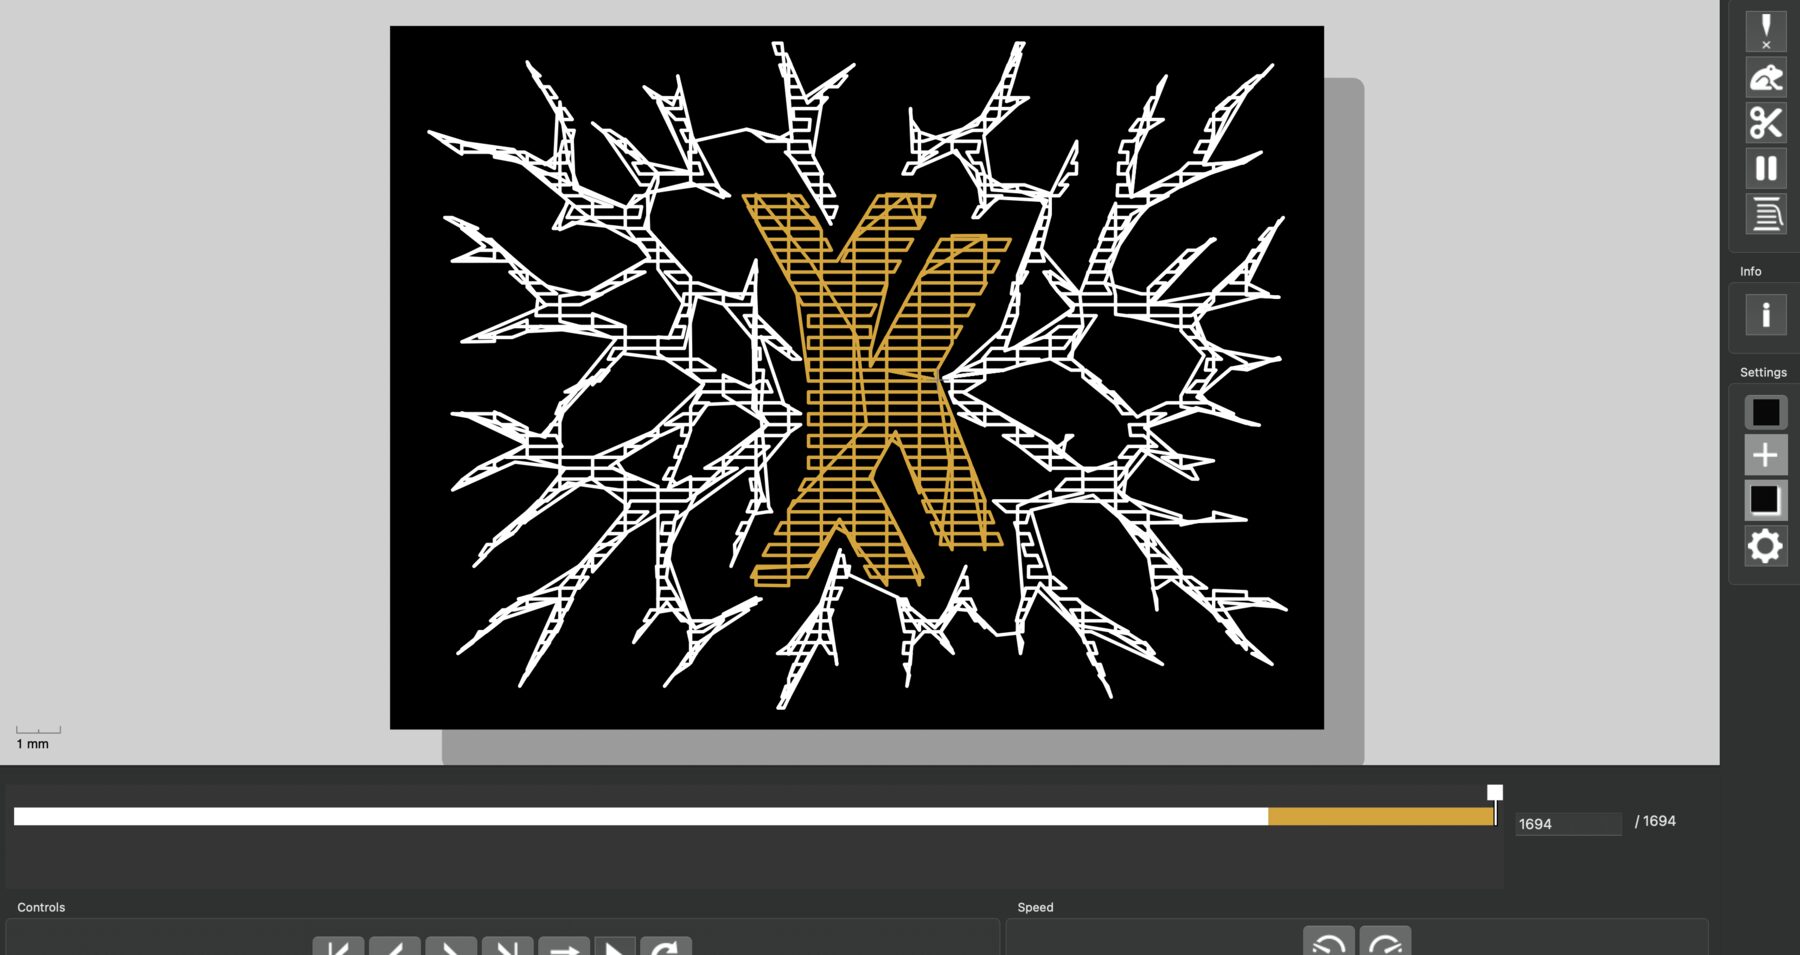
Afterwards, you could use a JEF viewer like Ez Stitch Digitizing to make sure of the final path if the simulation looked a bit weird.
We save this file in a flash drive that has a specific folder called EMB. And you plug that into the machine.
Then, you prepare the machine by attaching the embroidery add-on.
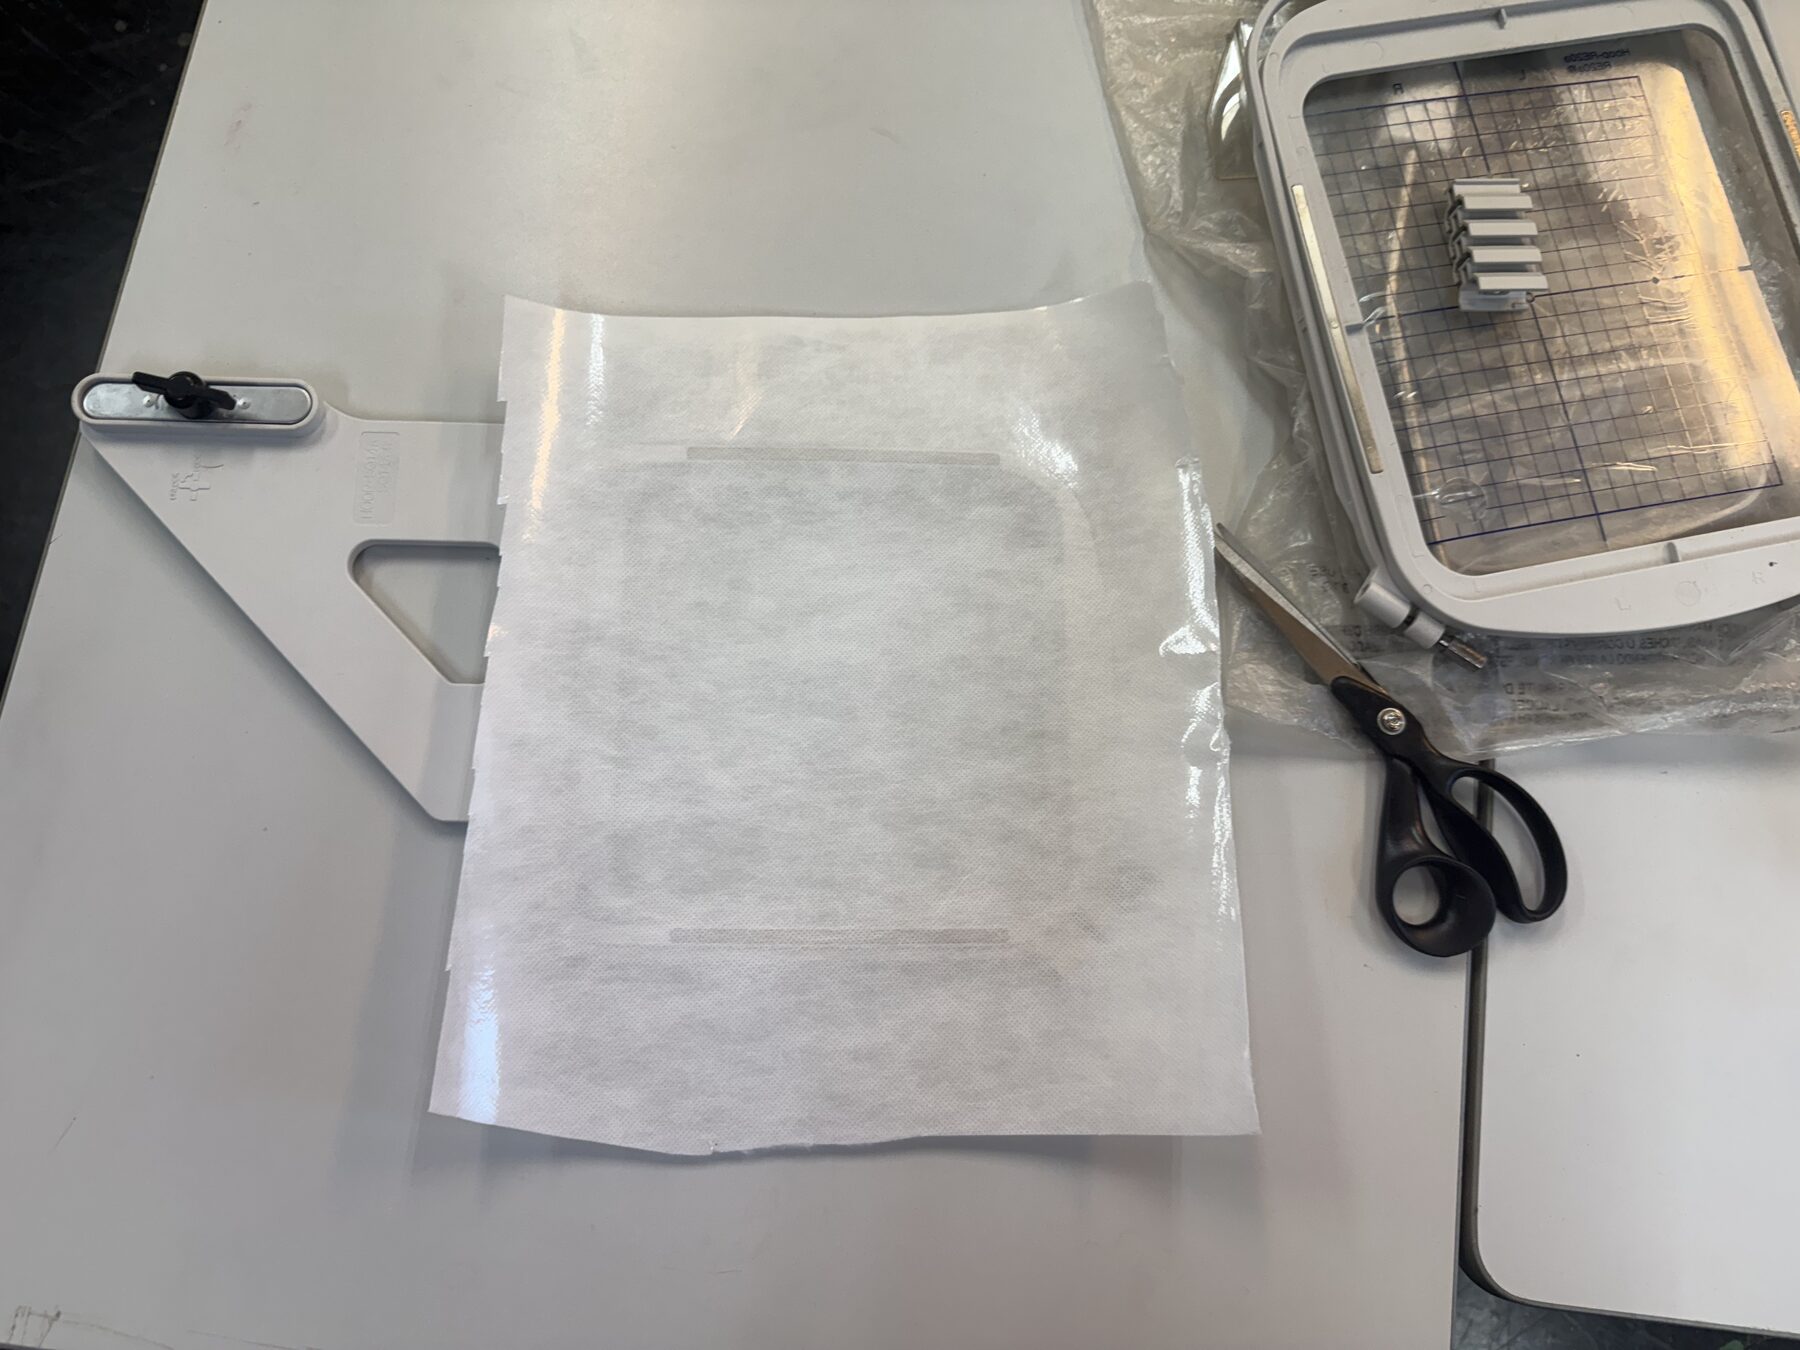
Since the t-shirt I used was quite thin, I needed to add a support “adhesive” layer to the back of it. First, I brought a cut piece of the material put it inside the workspace piece (I am not so sure of the names of those parts, lol).
Then, I put it under the machine to stitch a test of the design to get a feel for the size, but it was too small (this part was going to be cut anyway, we’ll come back to it).
The issue was quite simple. I thought I had the dimensions of my Inkscape project in millimeters, turns out they were in pixels :D
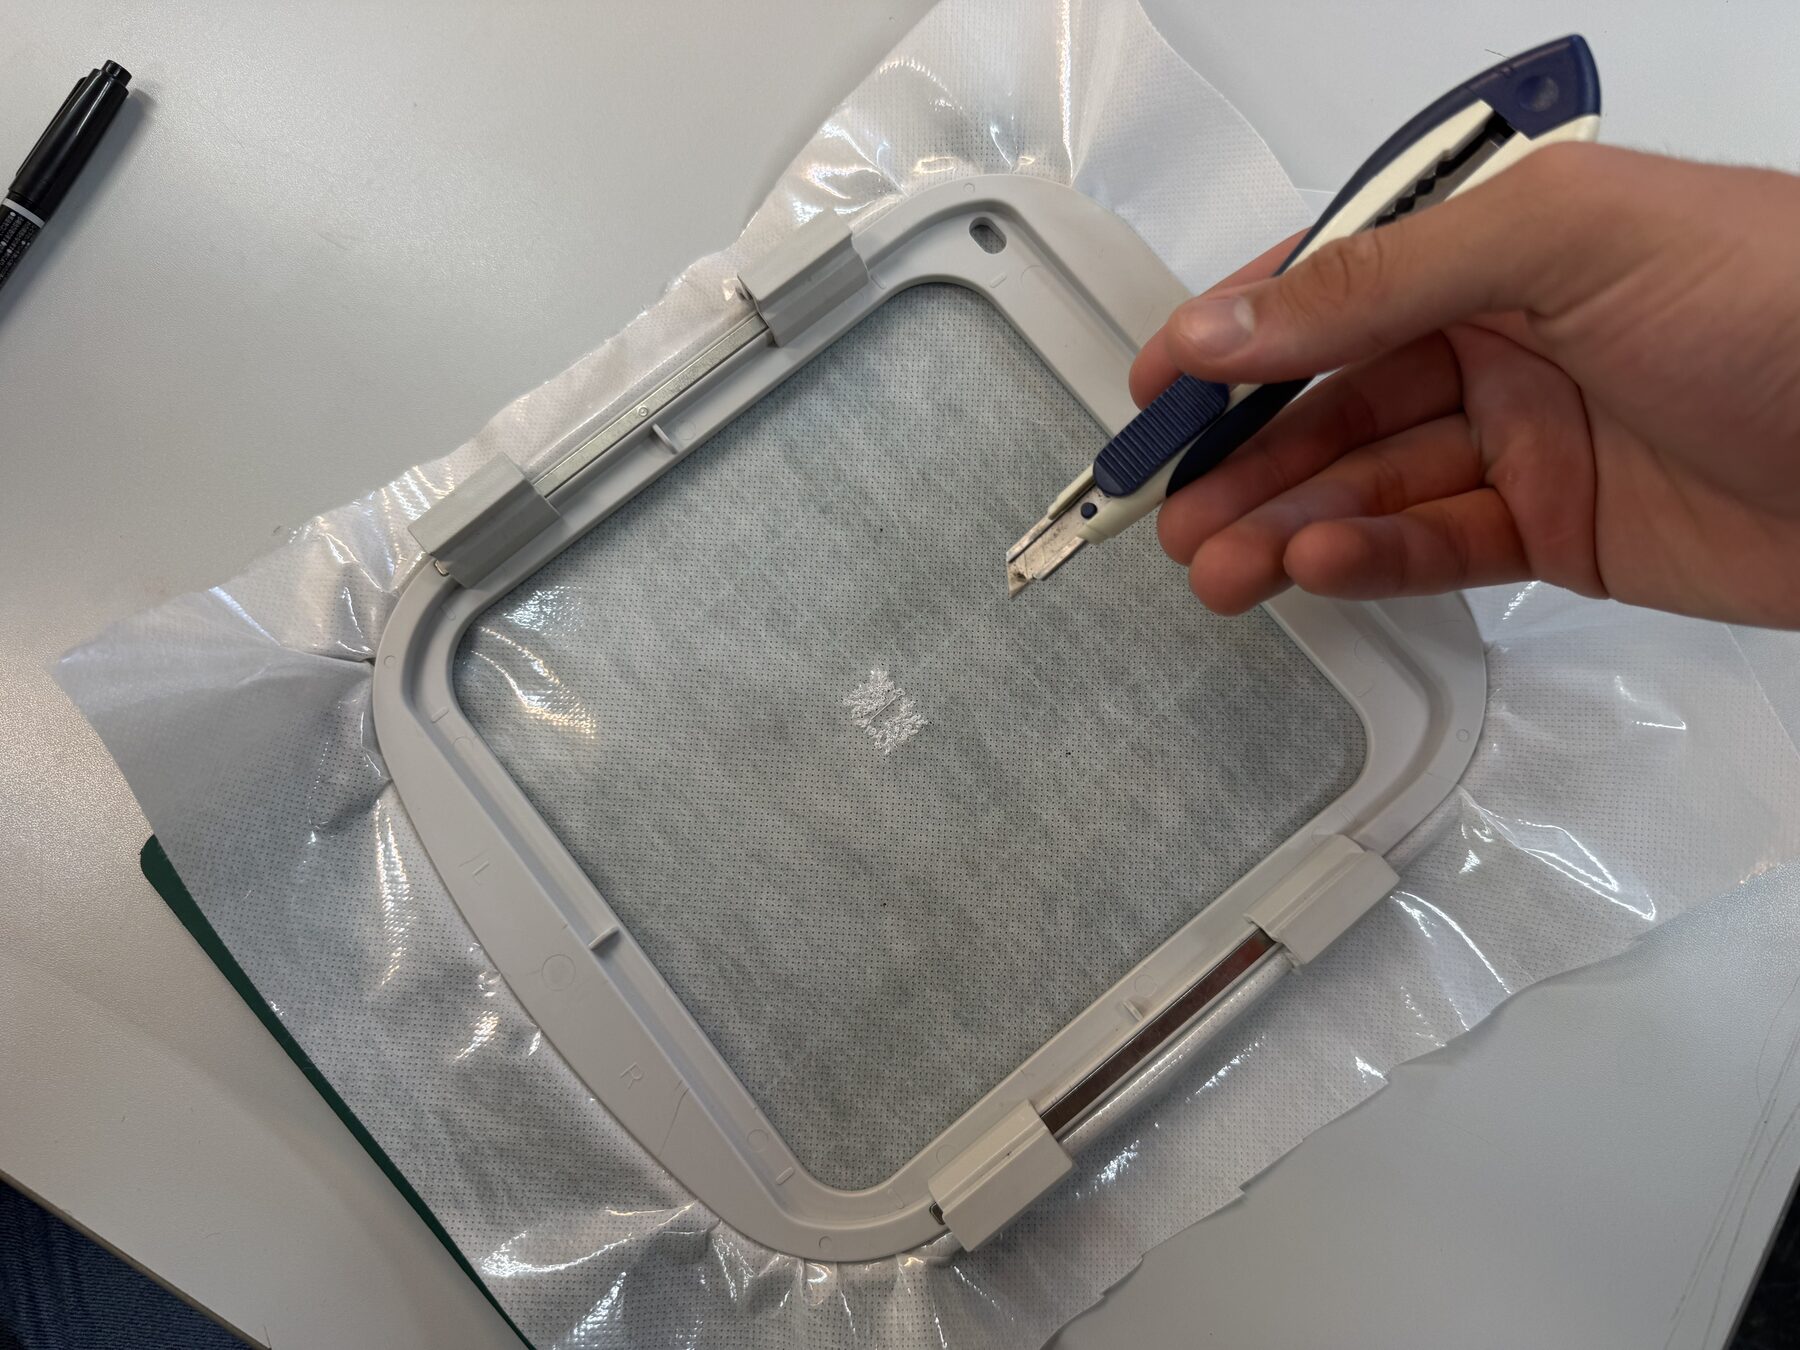
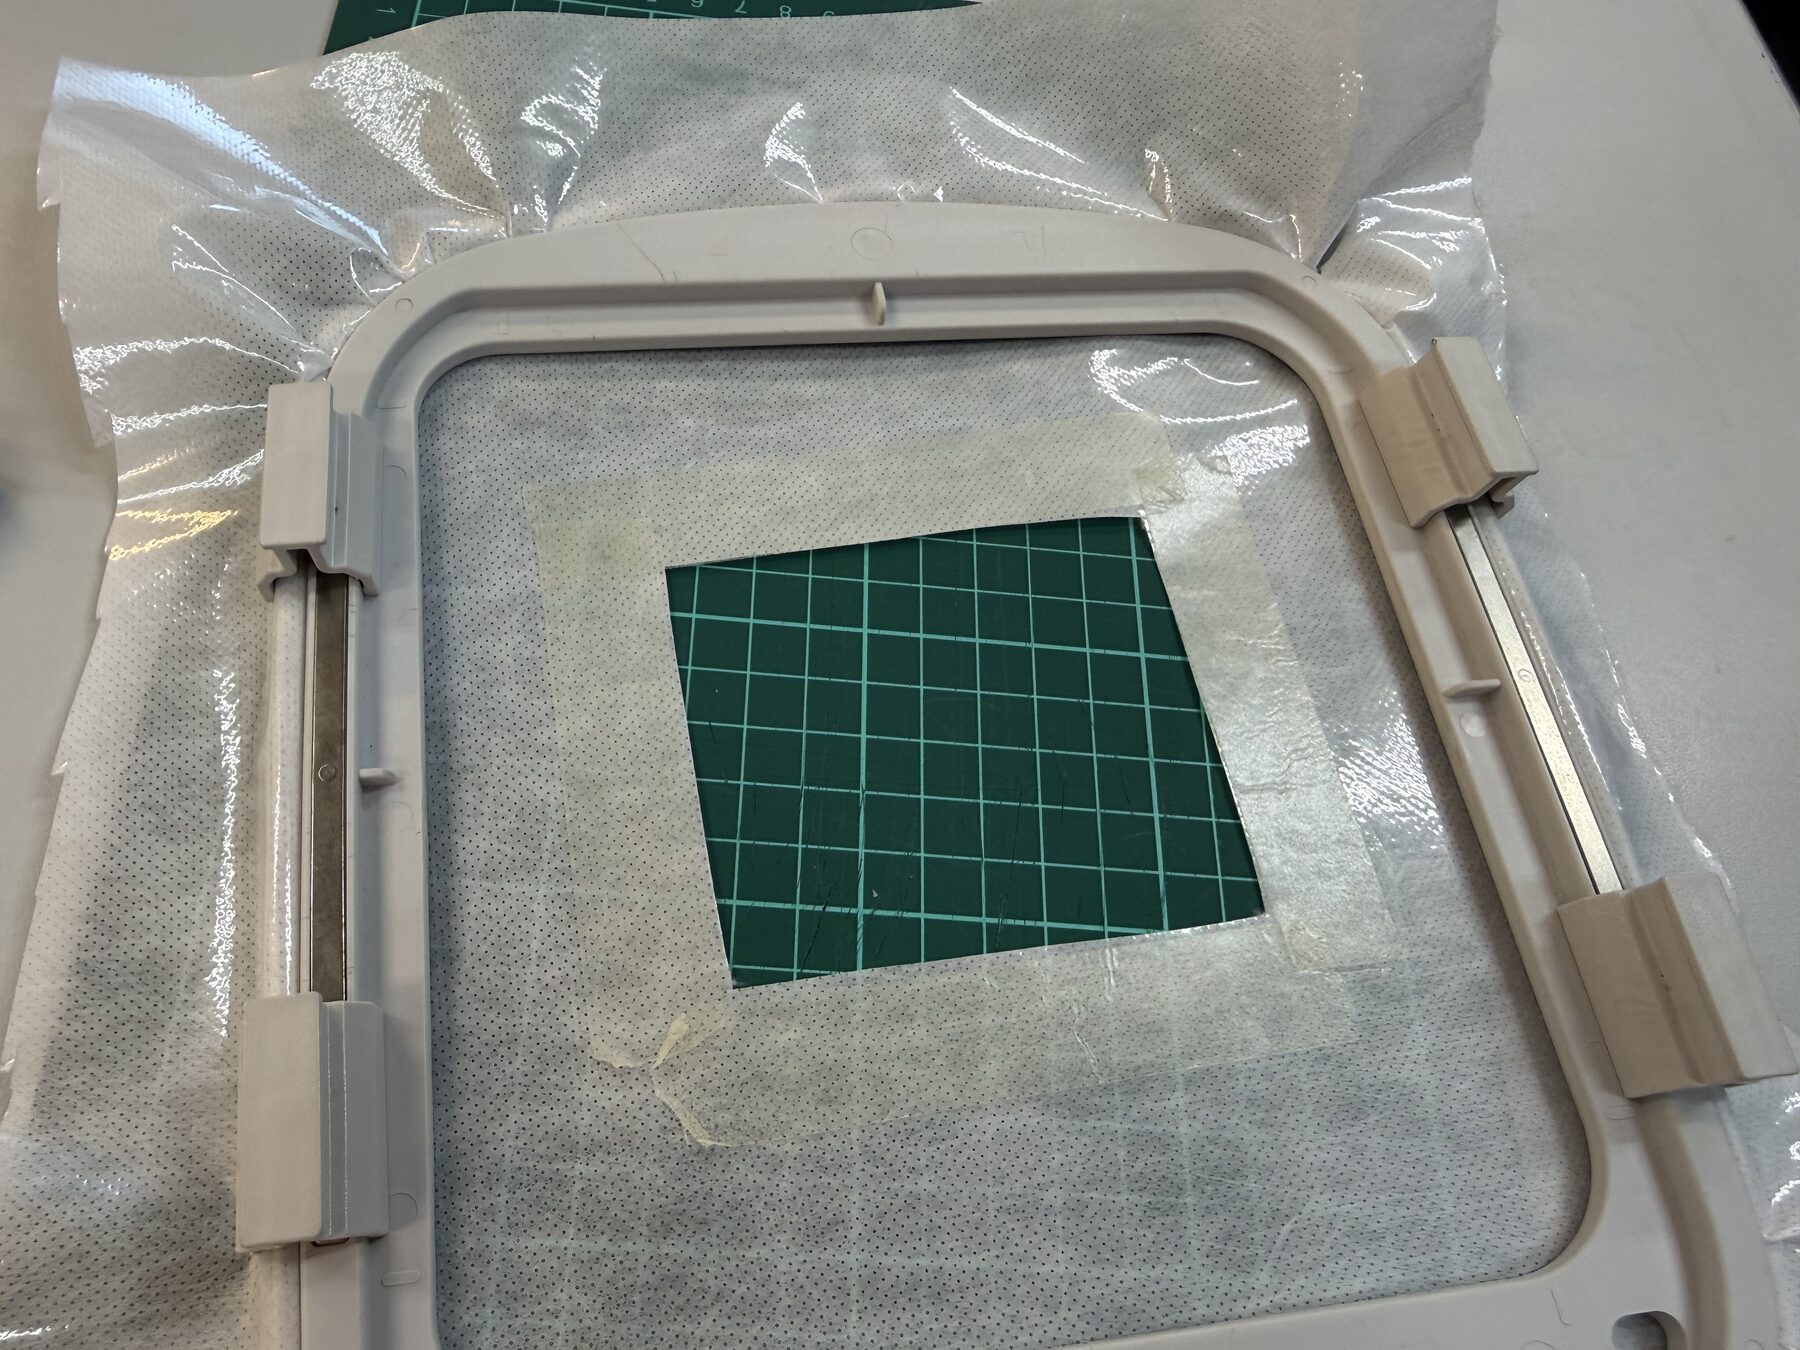
I cut out a reasonable work are from the material and placed some tape around the edge (this will later hold the t-shirt in place.
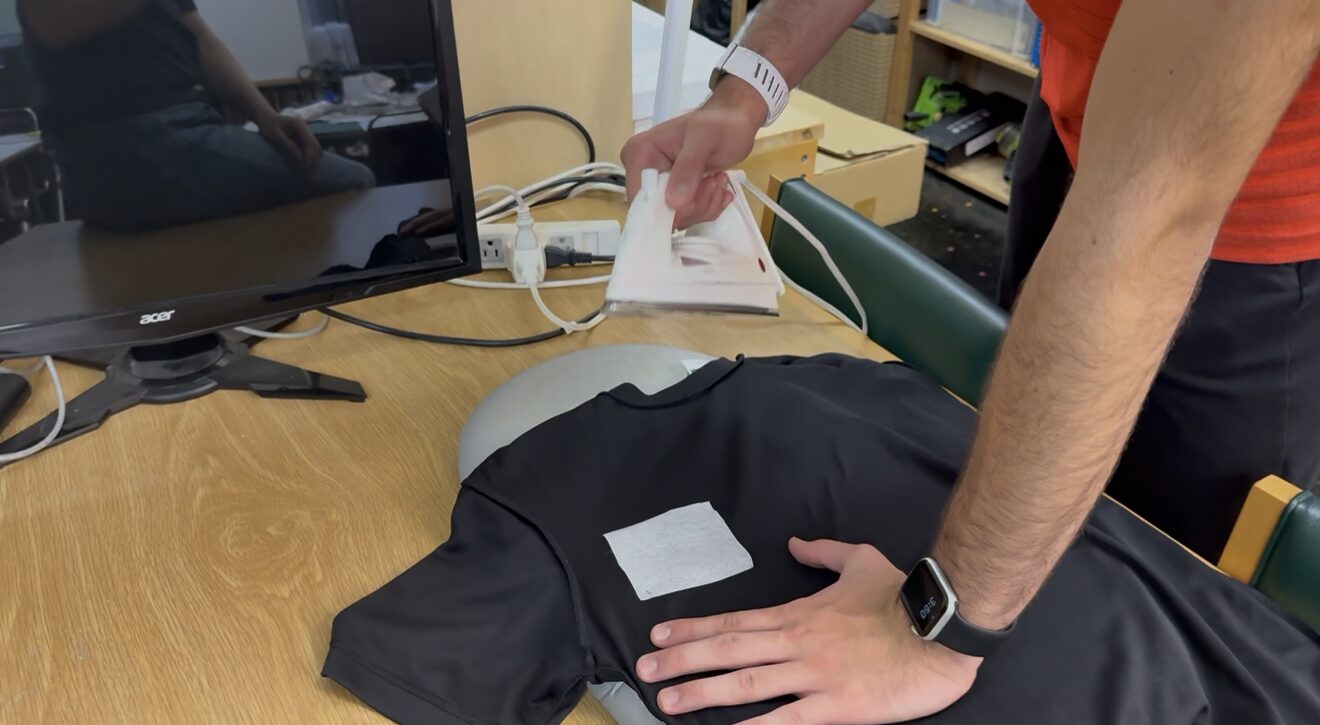
Then, I cut a piece of this adhesive material that’d fit inside the area I cut here, placed it on the t-shirt where the design will go (In hindsight, I should’ve moved it a bit more towards the center of the t-shirt), and I used an iron to stick it to the shirt.
Our work area on the shirt became thick enough for embroidery.
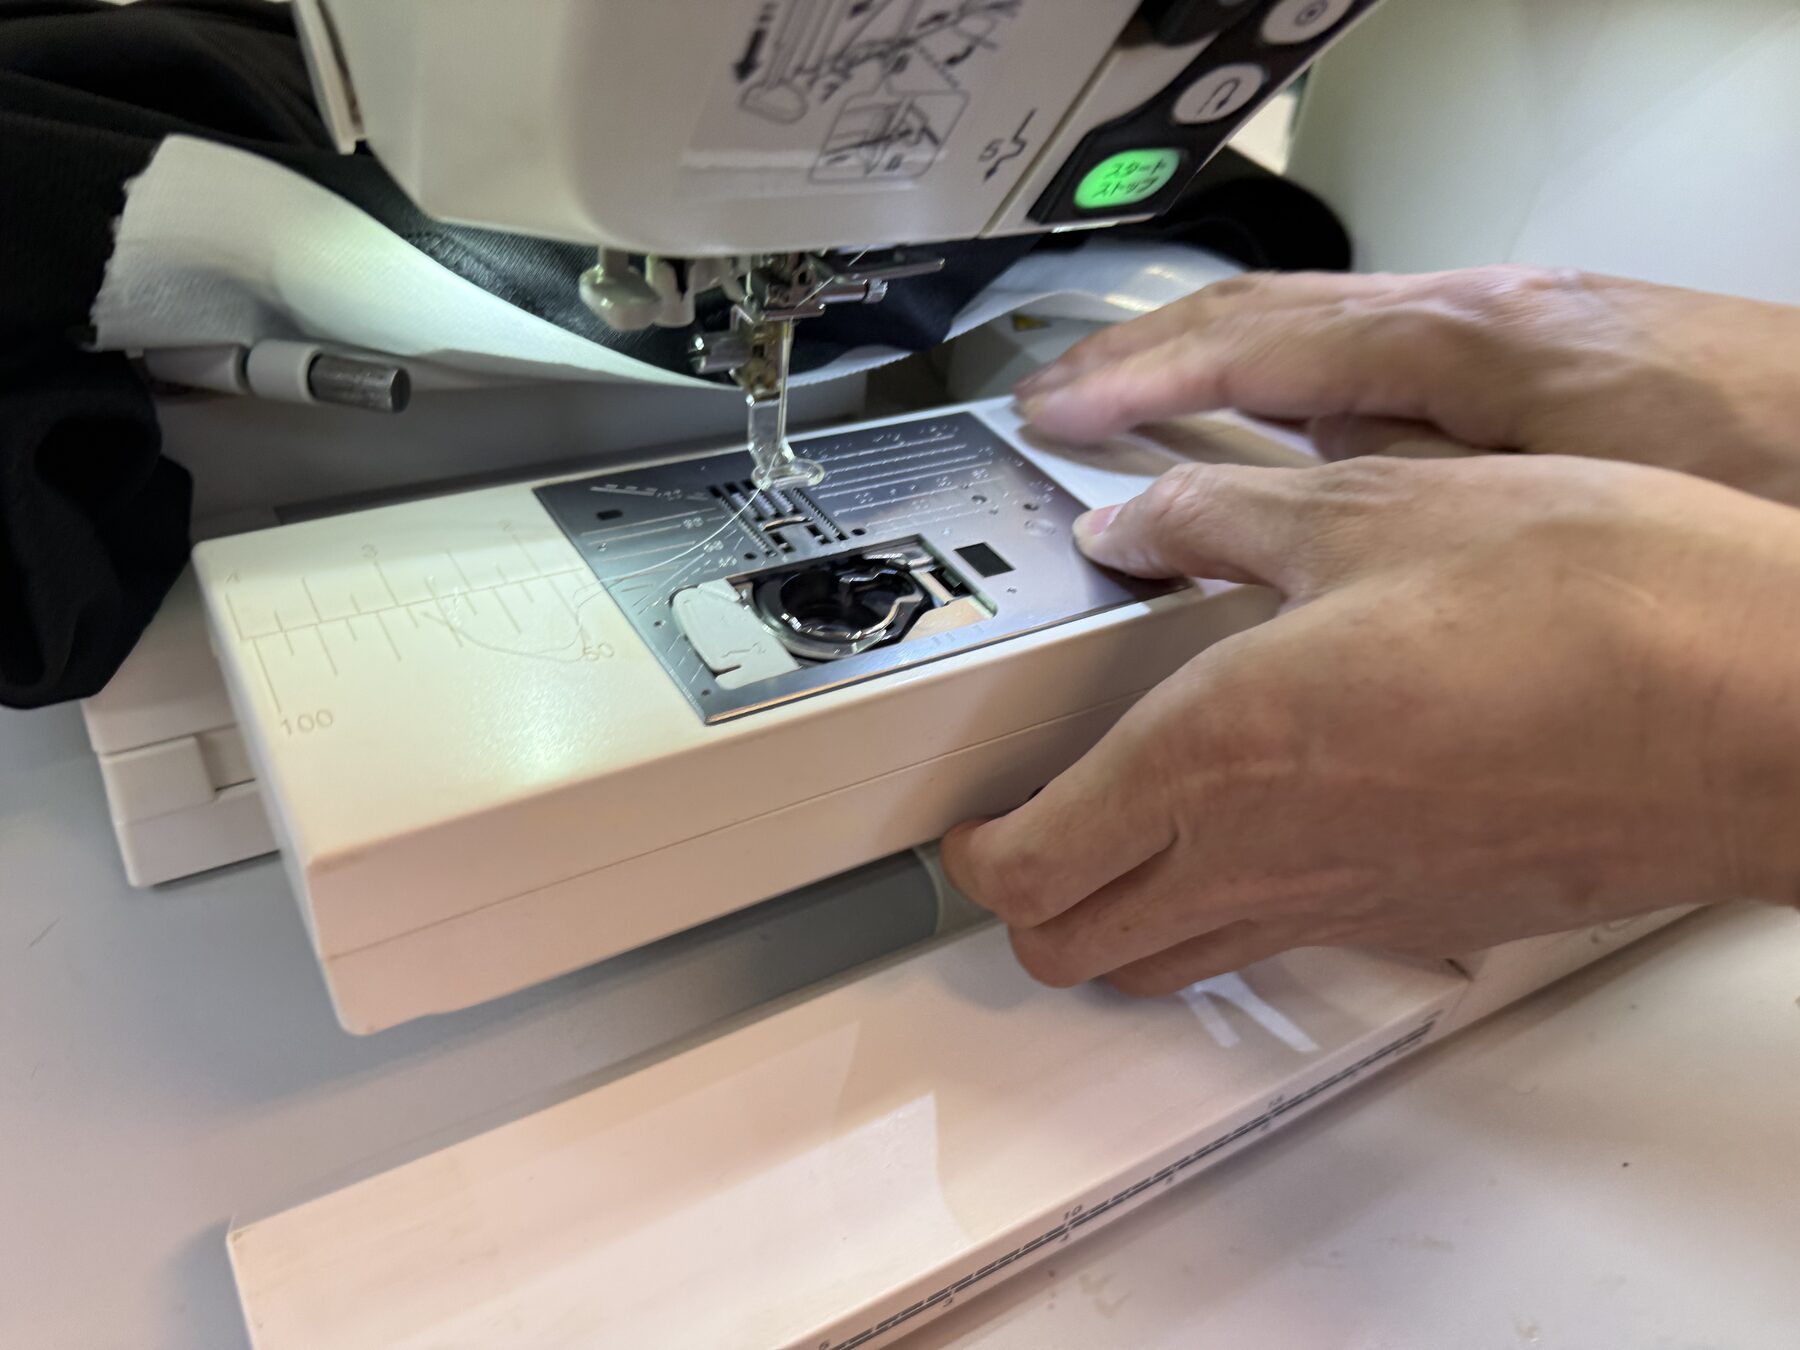
I align this work area, using the empty square we cut earlier, and use the tape we added to stick the t-shirt to the workspace piece. Then, slide it under the machine locking it in place using a simple lock like mechanism.
Then, I place the first thread color (I was using white and gold) as it appears on the screen at the top and loop it through the different places as clearly mentioned on the machine itself, as you can see in the picture below.
Yuichi had to show me a few times, but I eventually learnt :D
At one point, we ran out of the bobbin thread at the bottom part of the machine. It is used in machine embroidery to interlock with the top thread, securing the stitches on the back of the design.
The machine has a slot at the top that’d allow you to put in your bobbin thread and restock it. Here’s a video showing how you do it (cuz I forgot to take a video of that, lol).
Then, I let the machine cook, and I just replace the color when the first color is done, and remember the adhesive material you added in the inside of the t-shirt, you could just remove it now :D

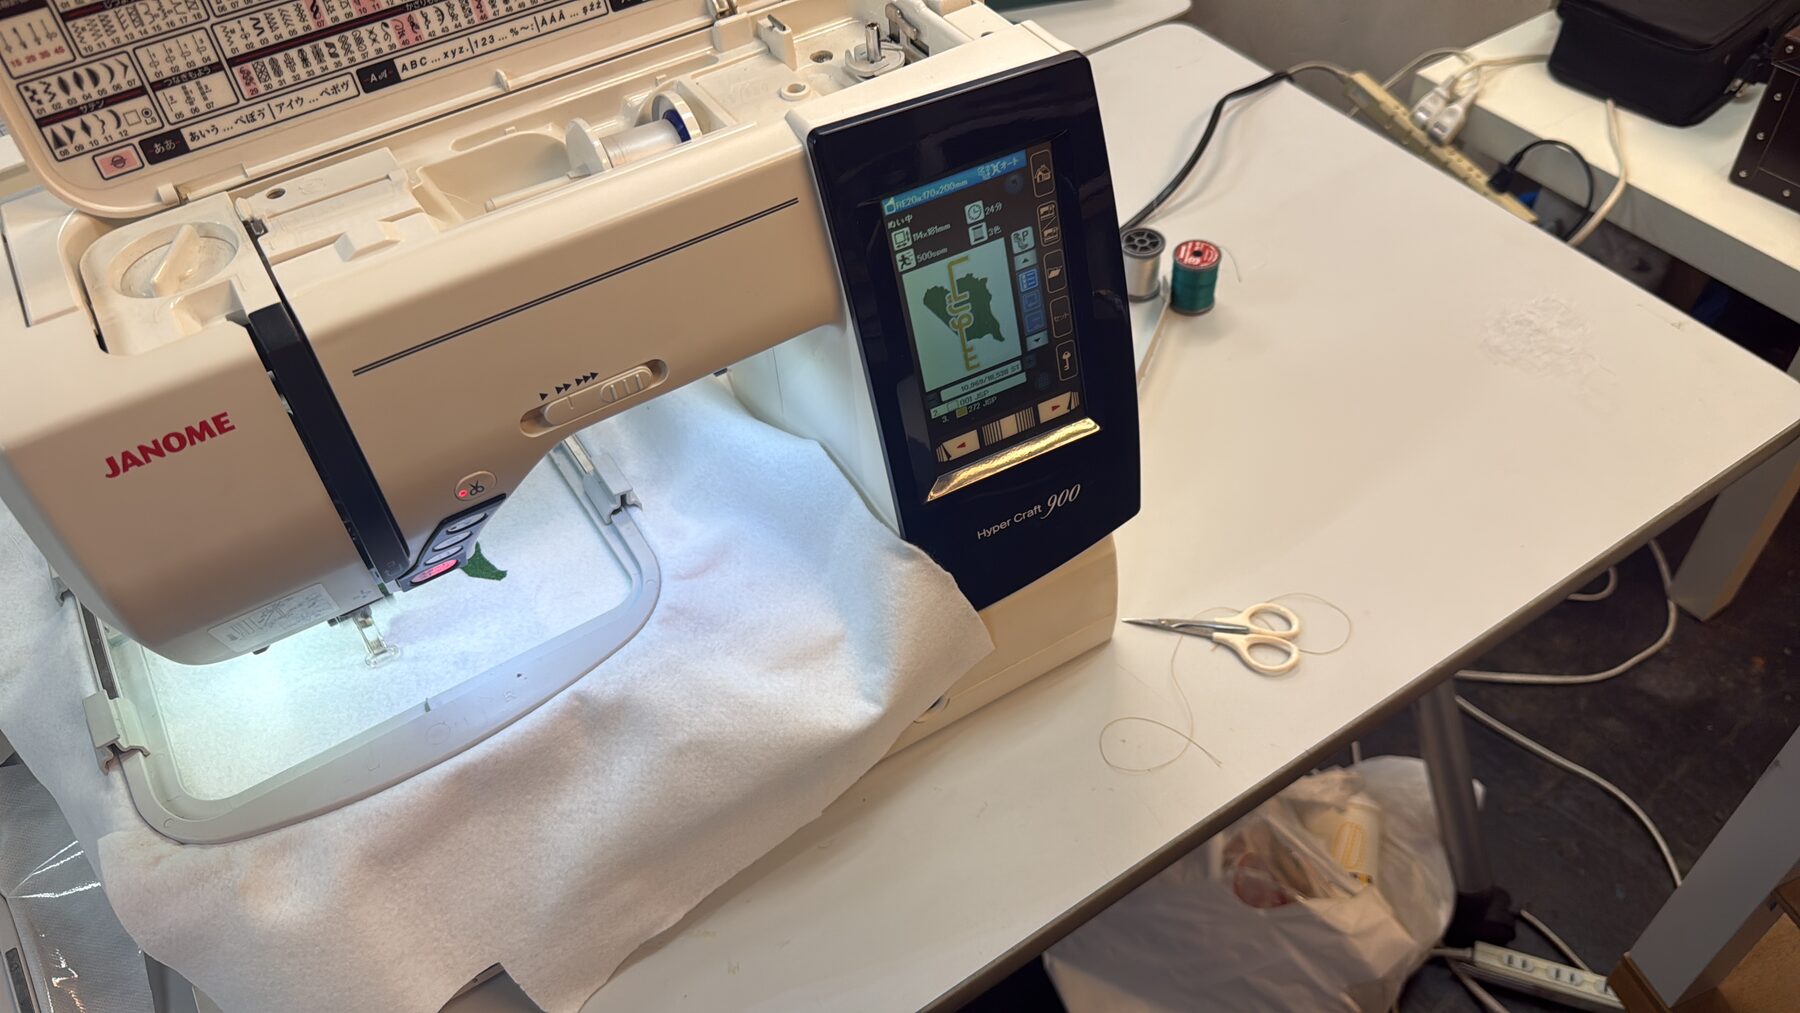
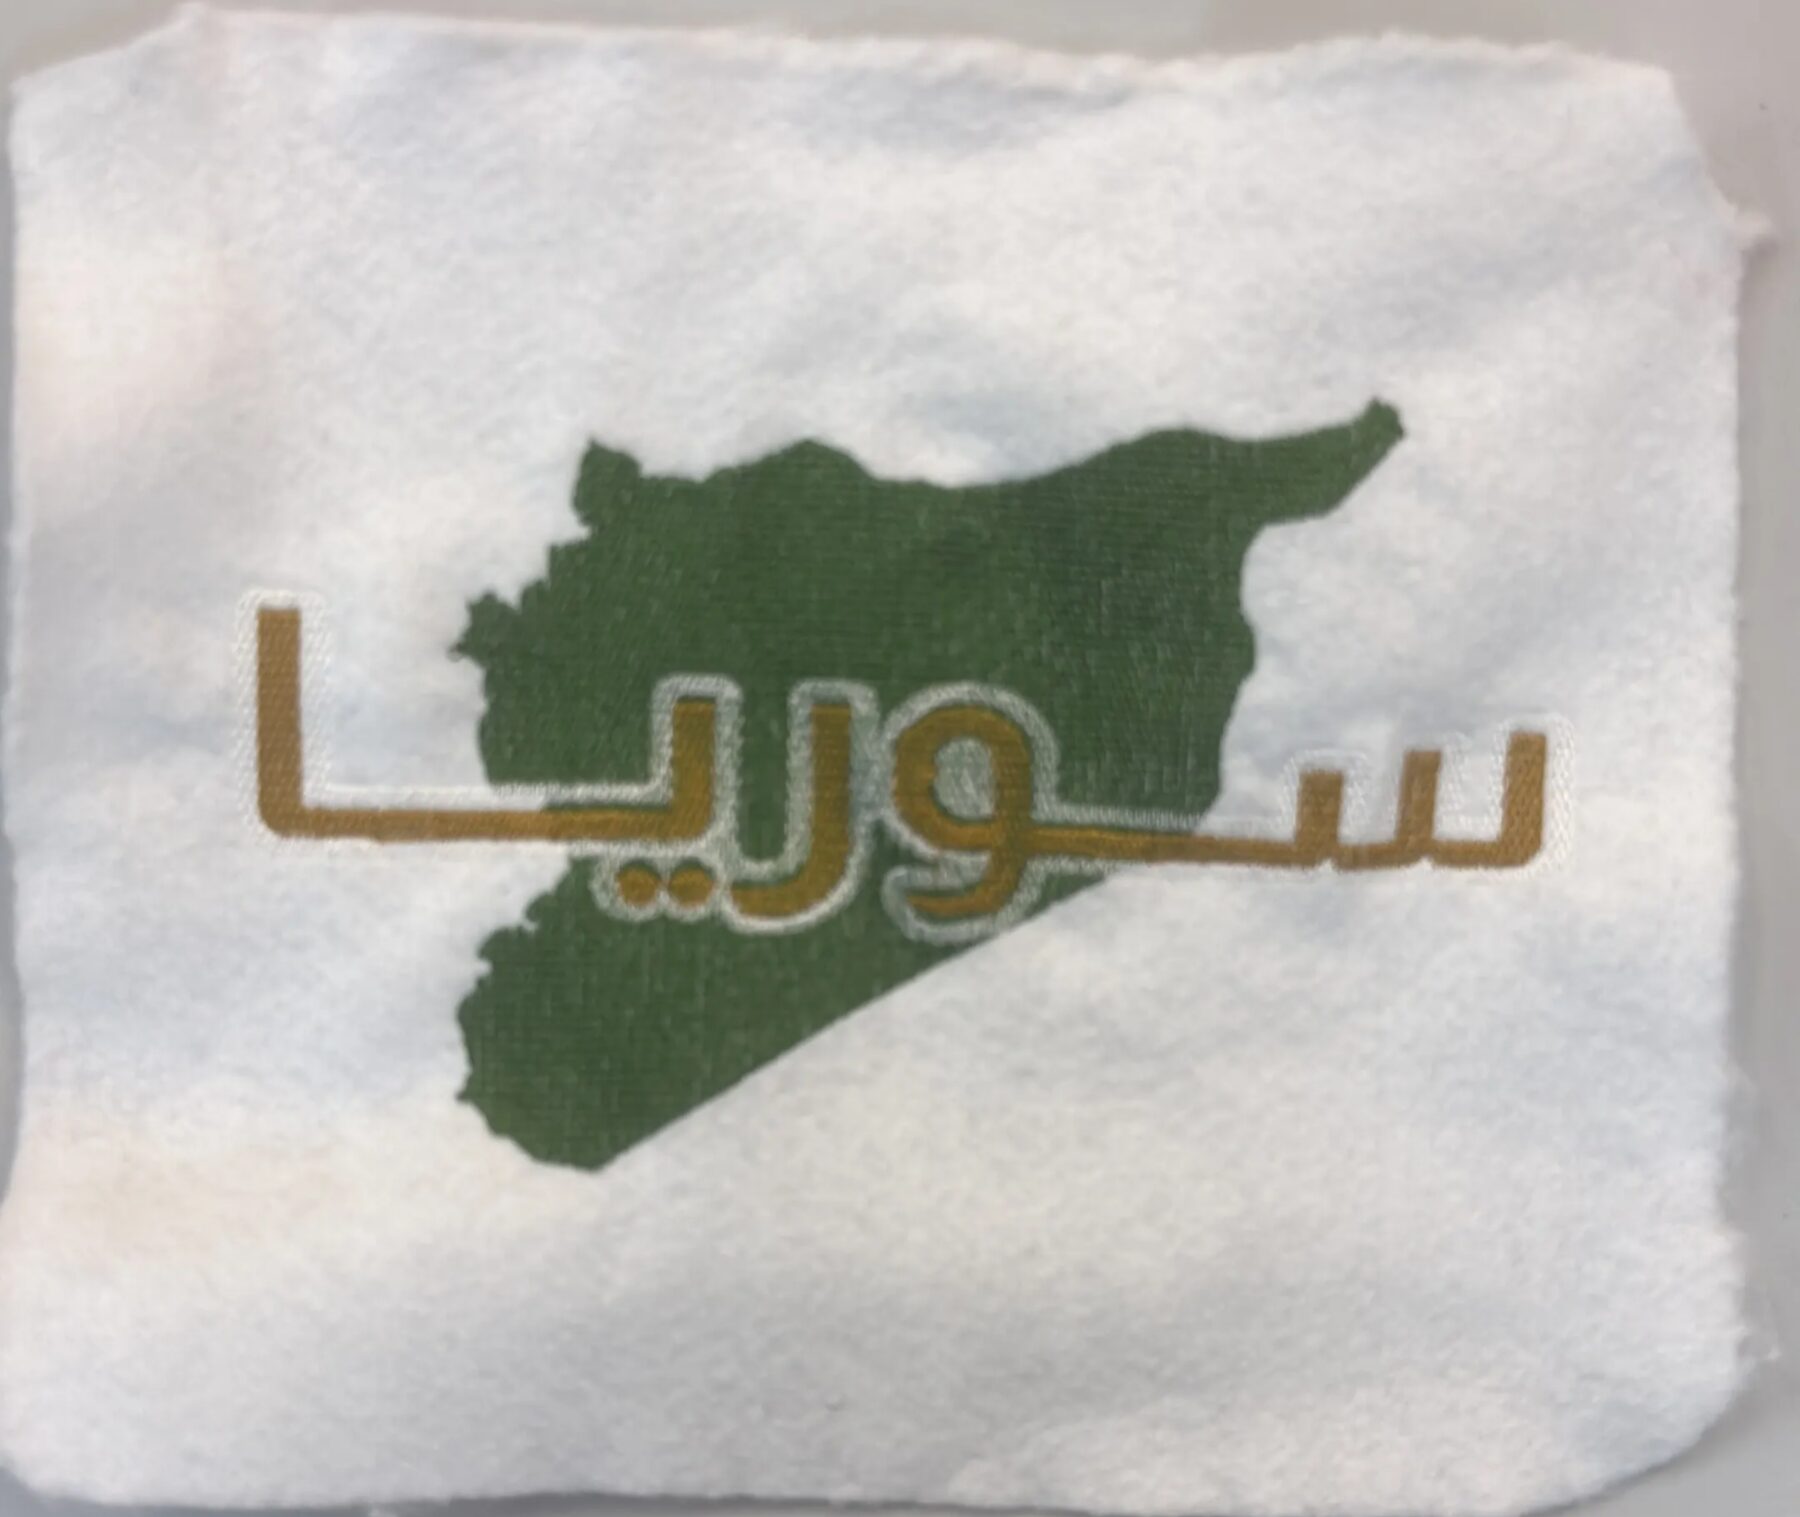
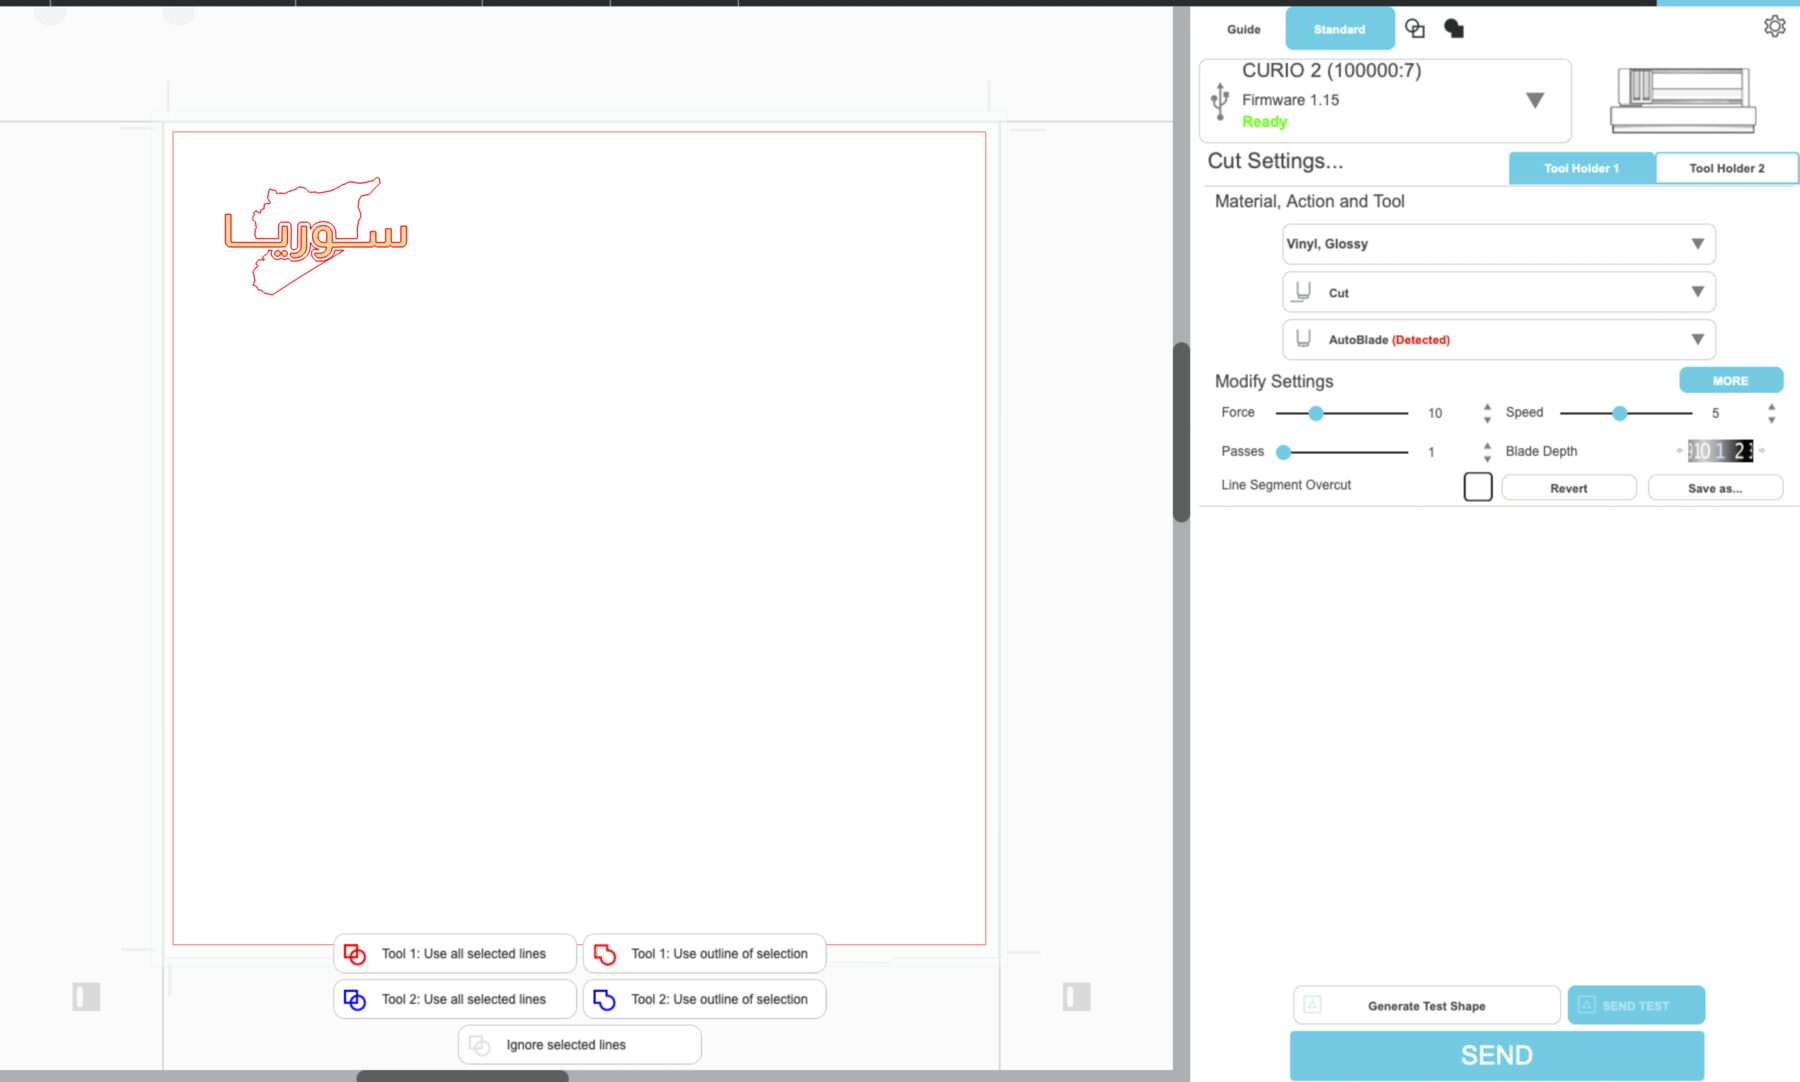
A Design for Syria
I also had an idea of a design involving Syria. It had the map of Syria and Syria written in Arabic across, and I used this design later for sandblasting.
I designed it myself using Inkscape and a cool Arabic font I found online (svg file can be found below).

When I was simulating the design on Inkscape using Ink/Stitch, it was running smoothly, but it wouldn’t show up on the machine. I tried a lot of things, made sure my measurements where within what the machine expected, and tried a ton of different troubleshooting methods I found.
The mistake ended up being the orientation, lol. Once I changed that and re-exported, it worked!
I had another issue with the tensioning of the material I was stitching on inside the workspace piece, so once I realized it between changing colors, it led to a slight misalignment at the ened.
Heat-pressing a Spiderman Logo
This process depended on the heat-press and our vinyl cutter. The material being cut is called Heat Transfer Vinyl.
I used this link to download the Miles Morales Spiderman logo and flipped the image horizontally since it flips back when applied on the t-shirt.
Then, I uploaded it to Silhouette Studio, which has a feature to utomatically trace what you upload, so I didn’t need to convert the png to SVG.
I explained how to use it back during Week 03. Since this material is thicker than normal Glossy Vinyl, I set force to 16 and blade depth to to 4.
Then, I transffered what I cut using the the transfer material, a pretty big piece of it, to the position I want it to be at the back of the t-shirt.
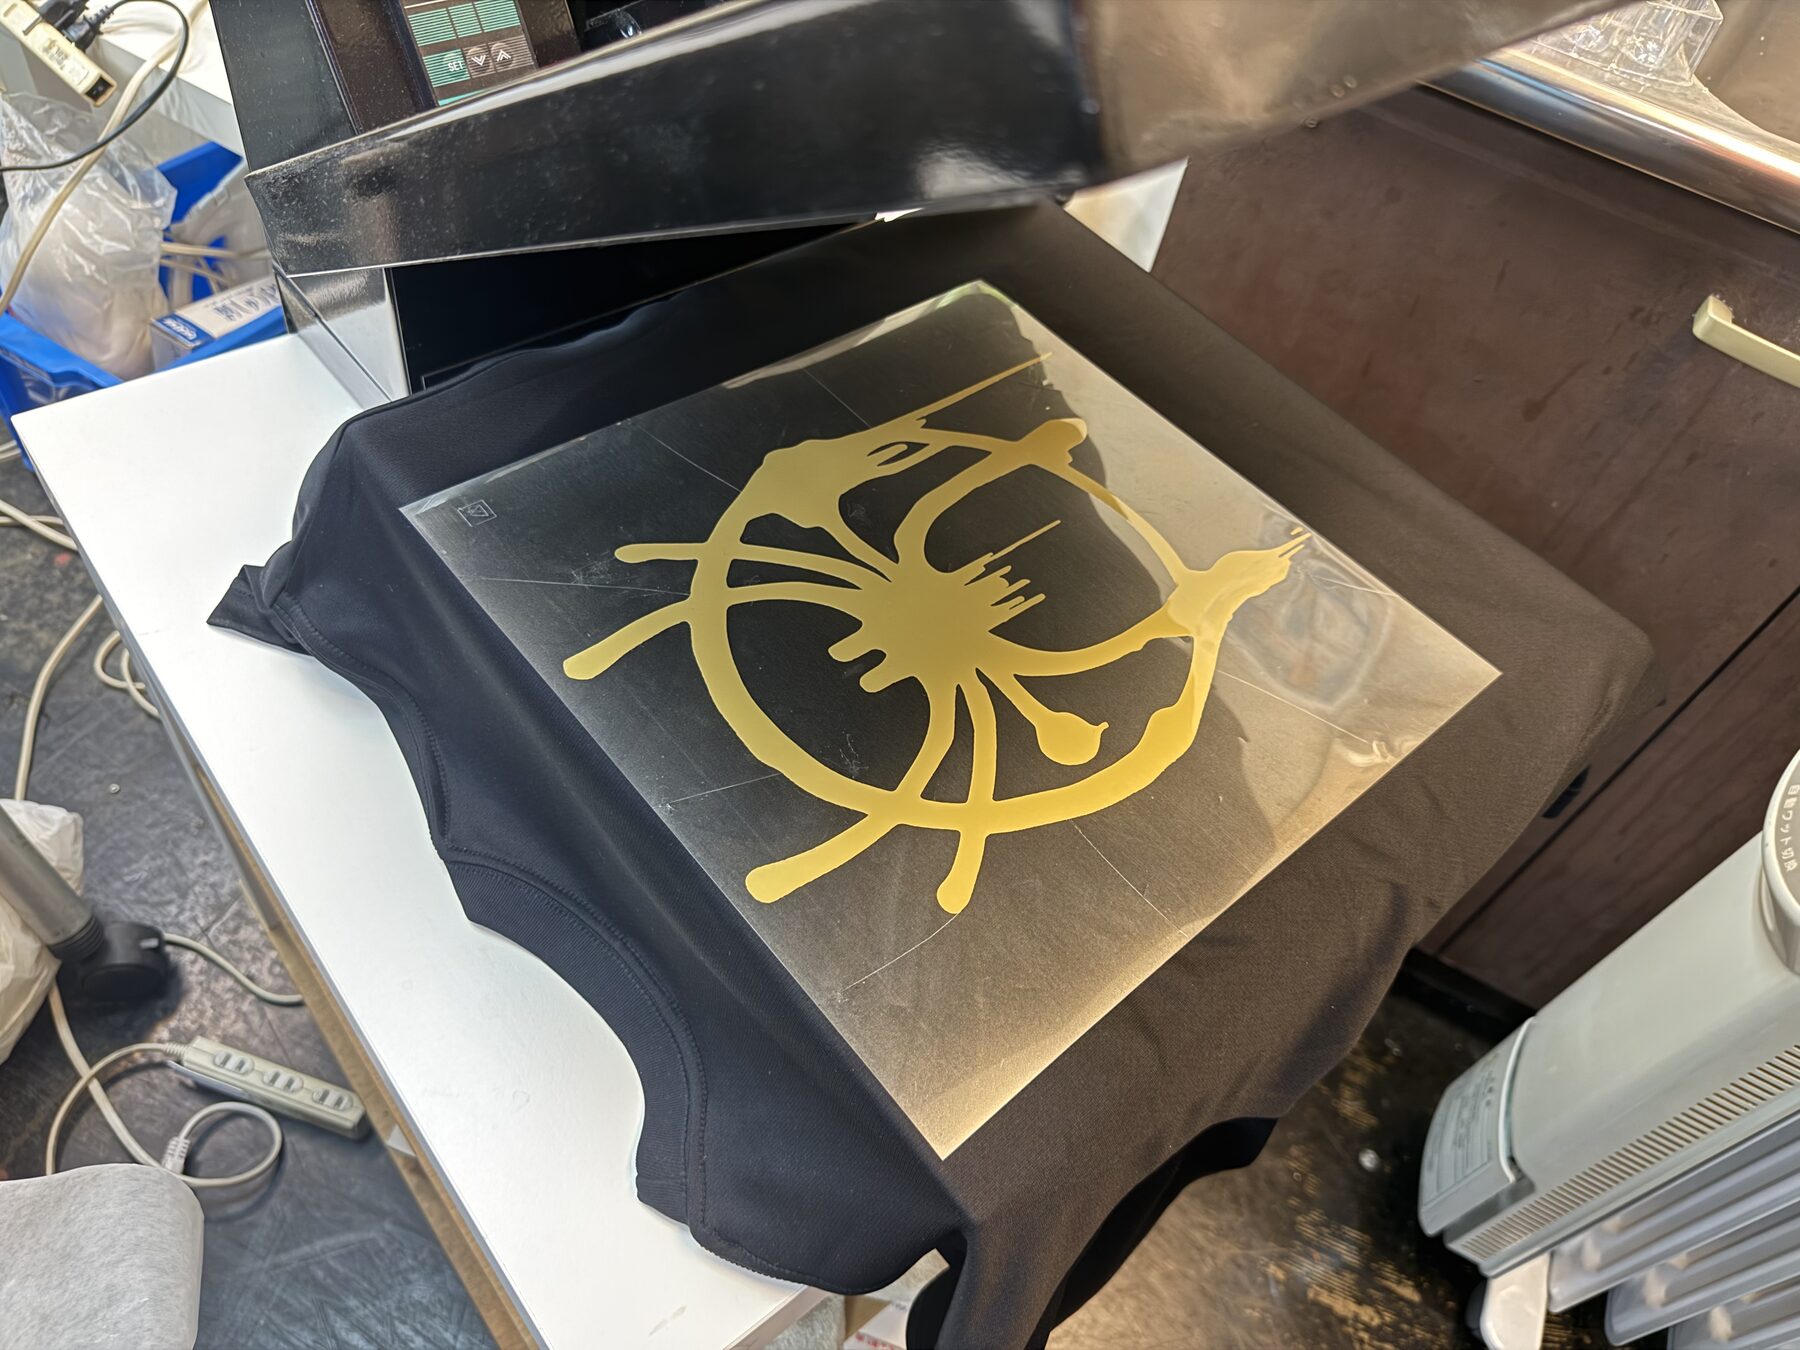
I placed it under the heat press and needed to make sure that 1) the surface being pressed was padded right under the area the design is being pressed 2) added a protective layer between the heat press and the design.
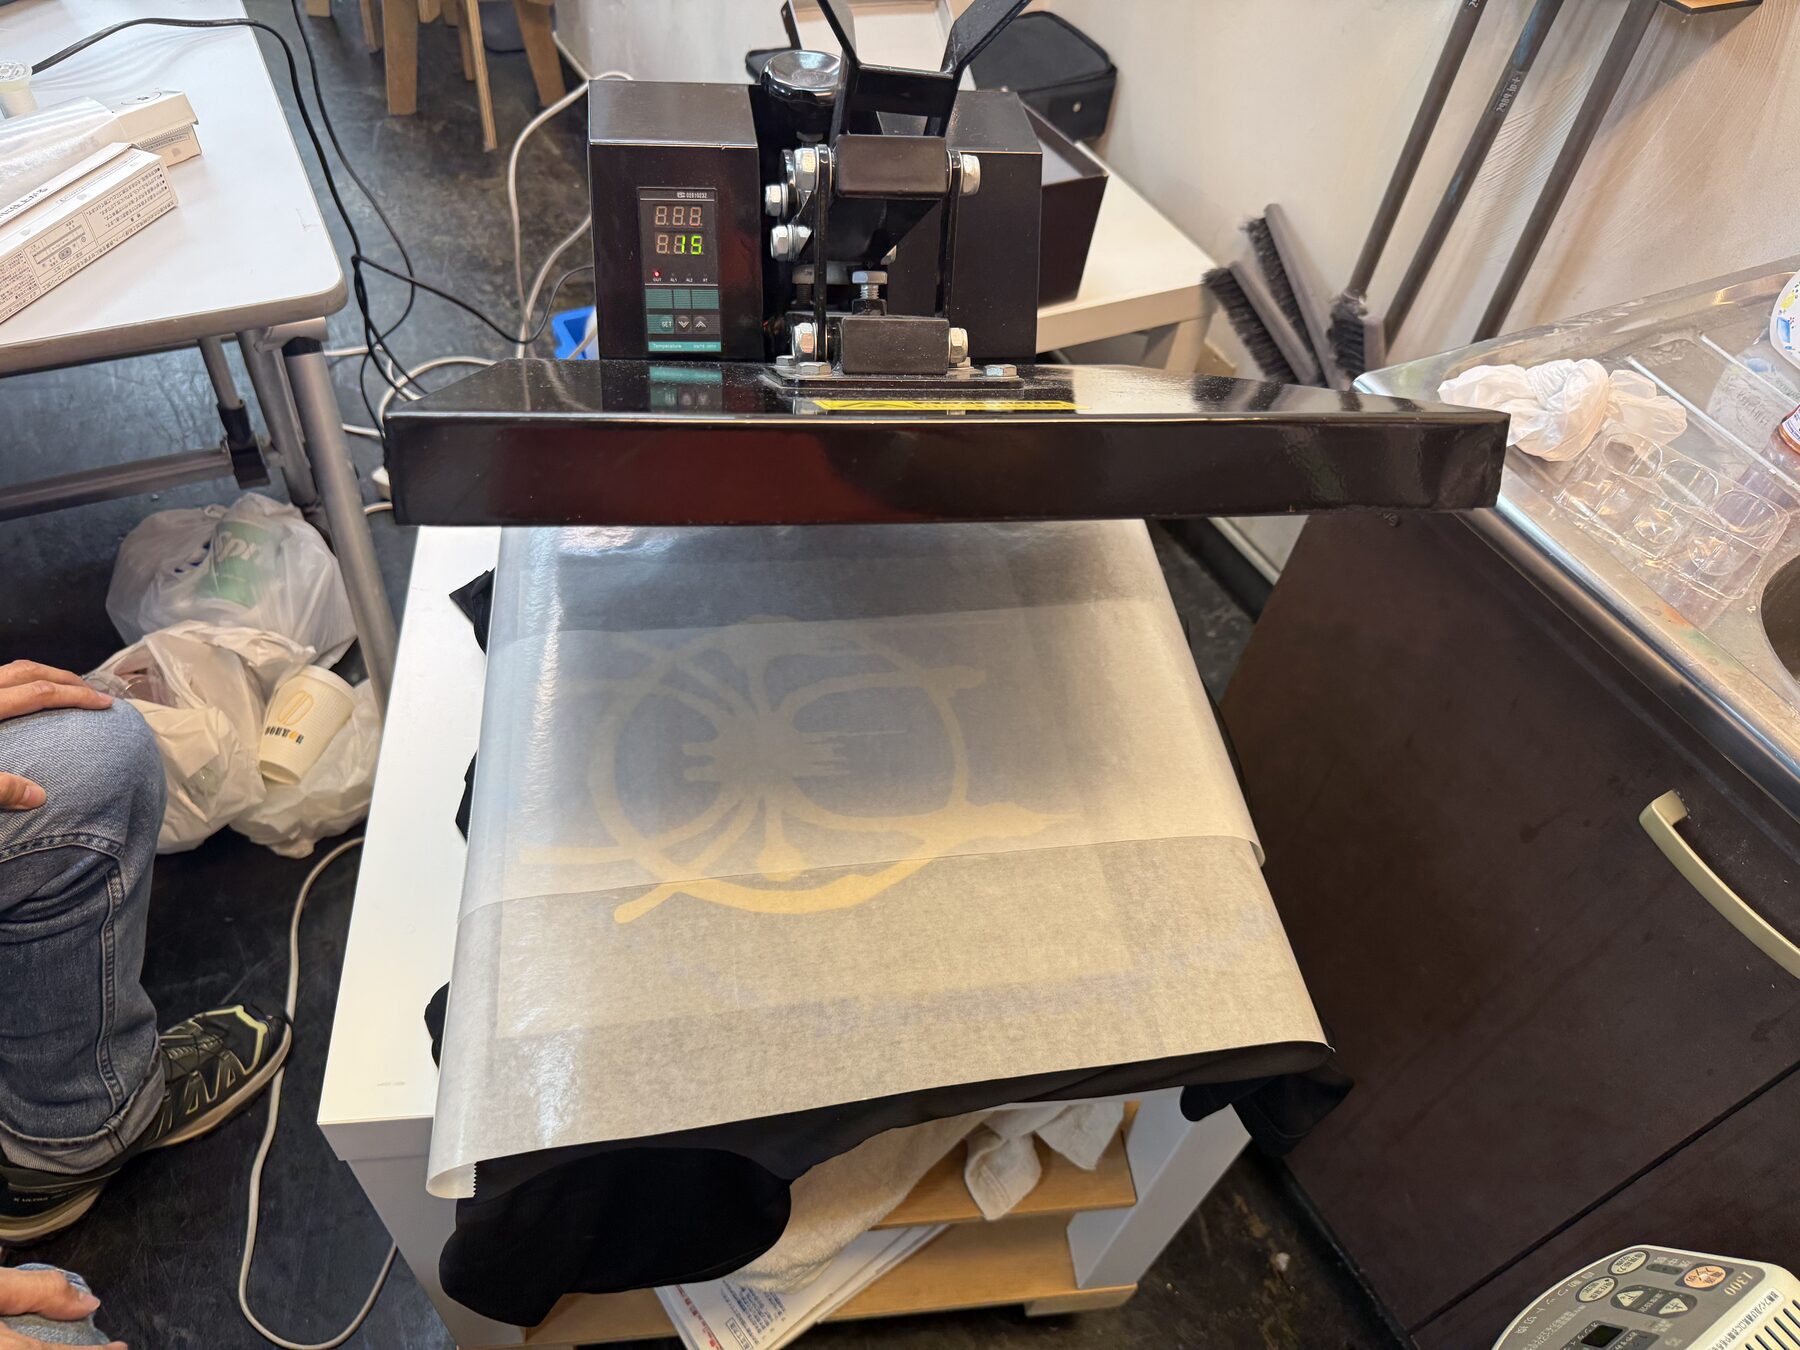
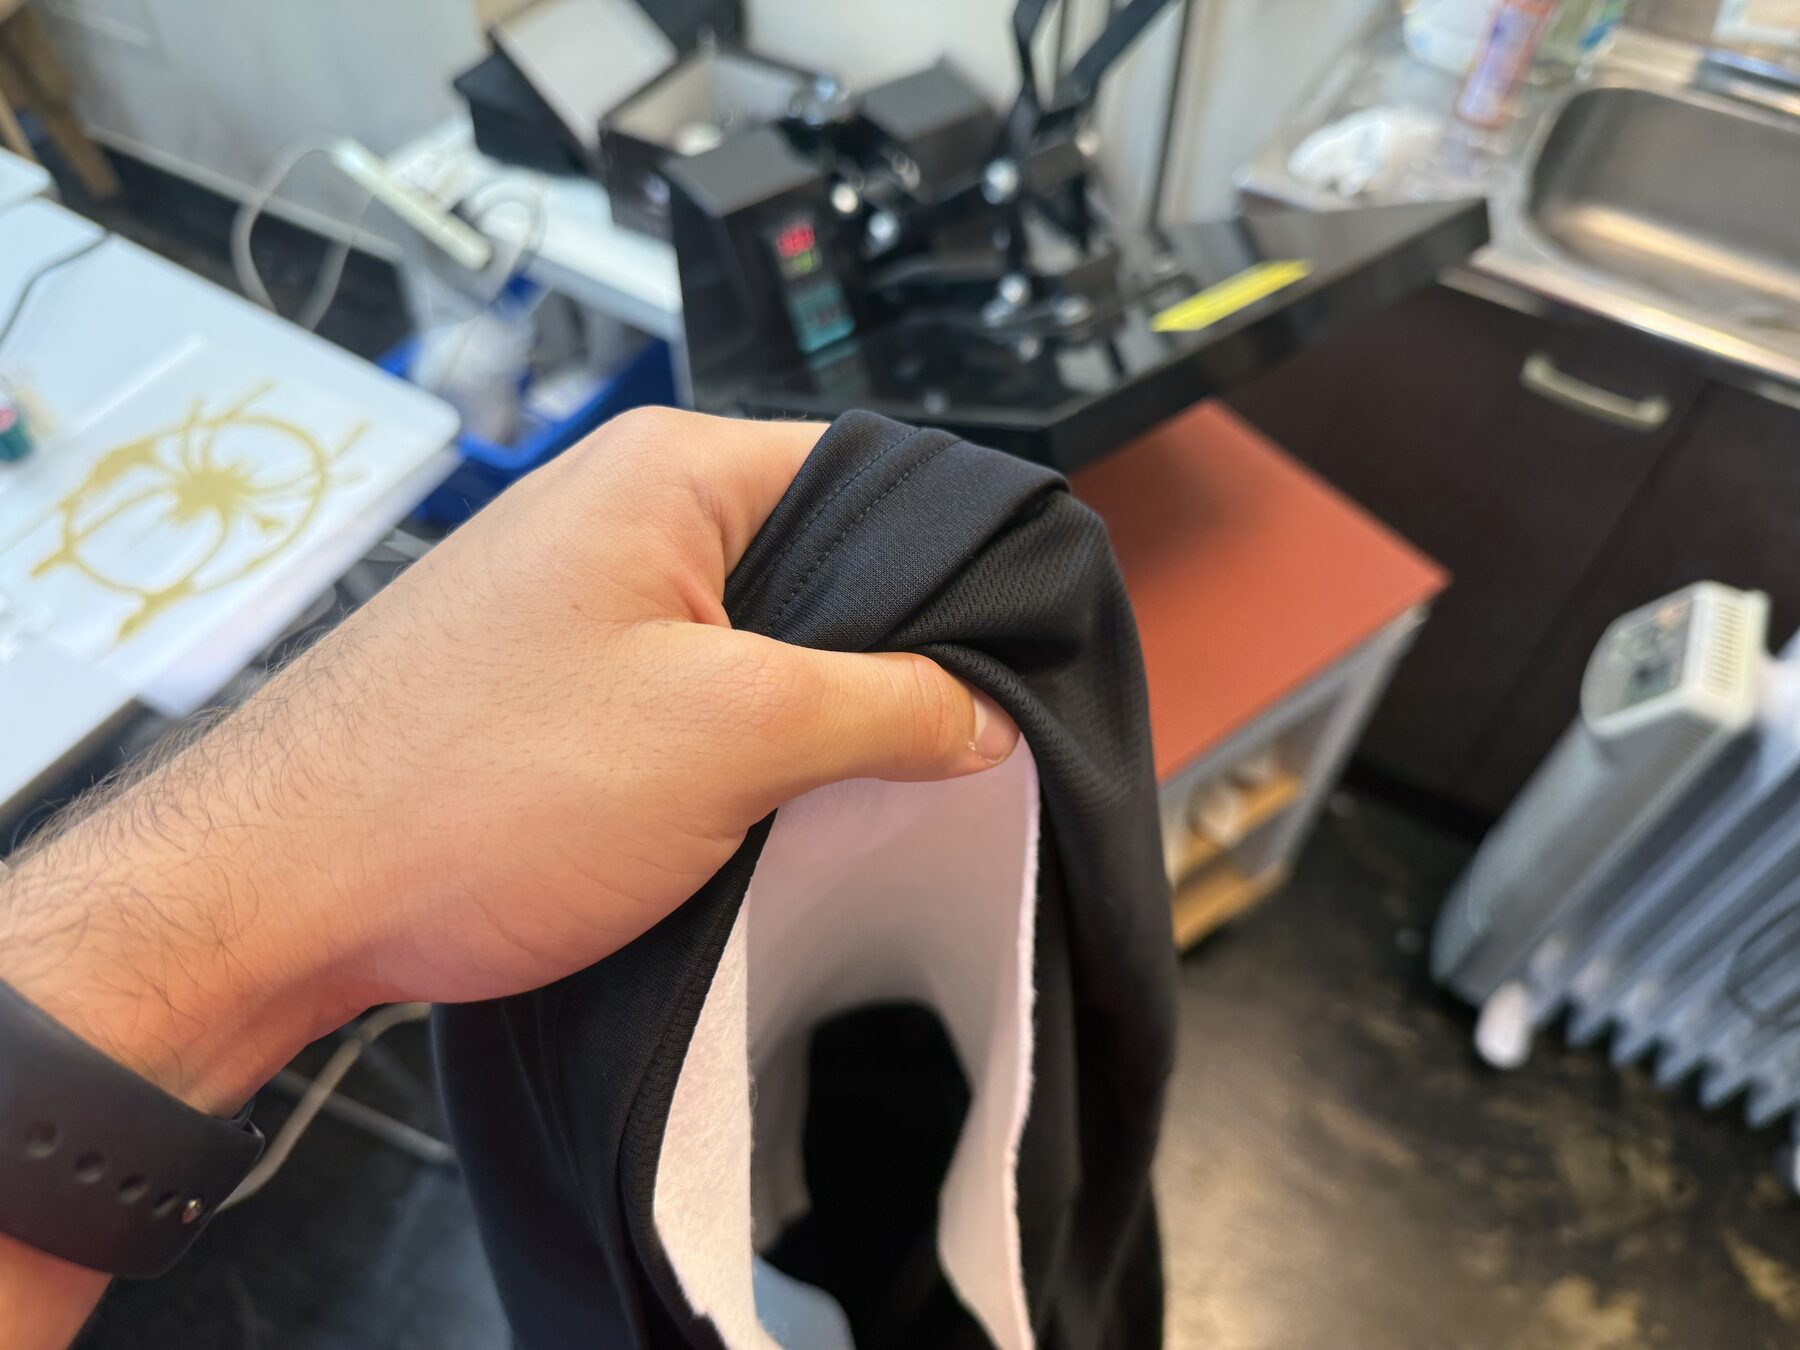
I left it to cool a bit and then slowly peeled the transfer material.
Sandblasting a Syria Design
Sandblasting to engrave glass is a technique that uses compressed air to blast fine abrasive particles (such as aluminum oxide) at high speeds onto the glass surface.
The first step was taking my Syria design from earlier and Vinyl cutting it, the material here doesn’t matter though.
After I cut the design, I transferred it onto a glass cup.
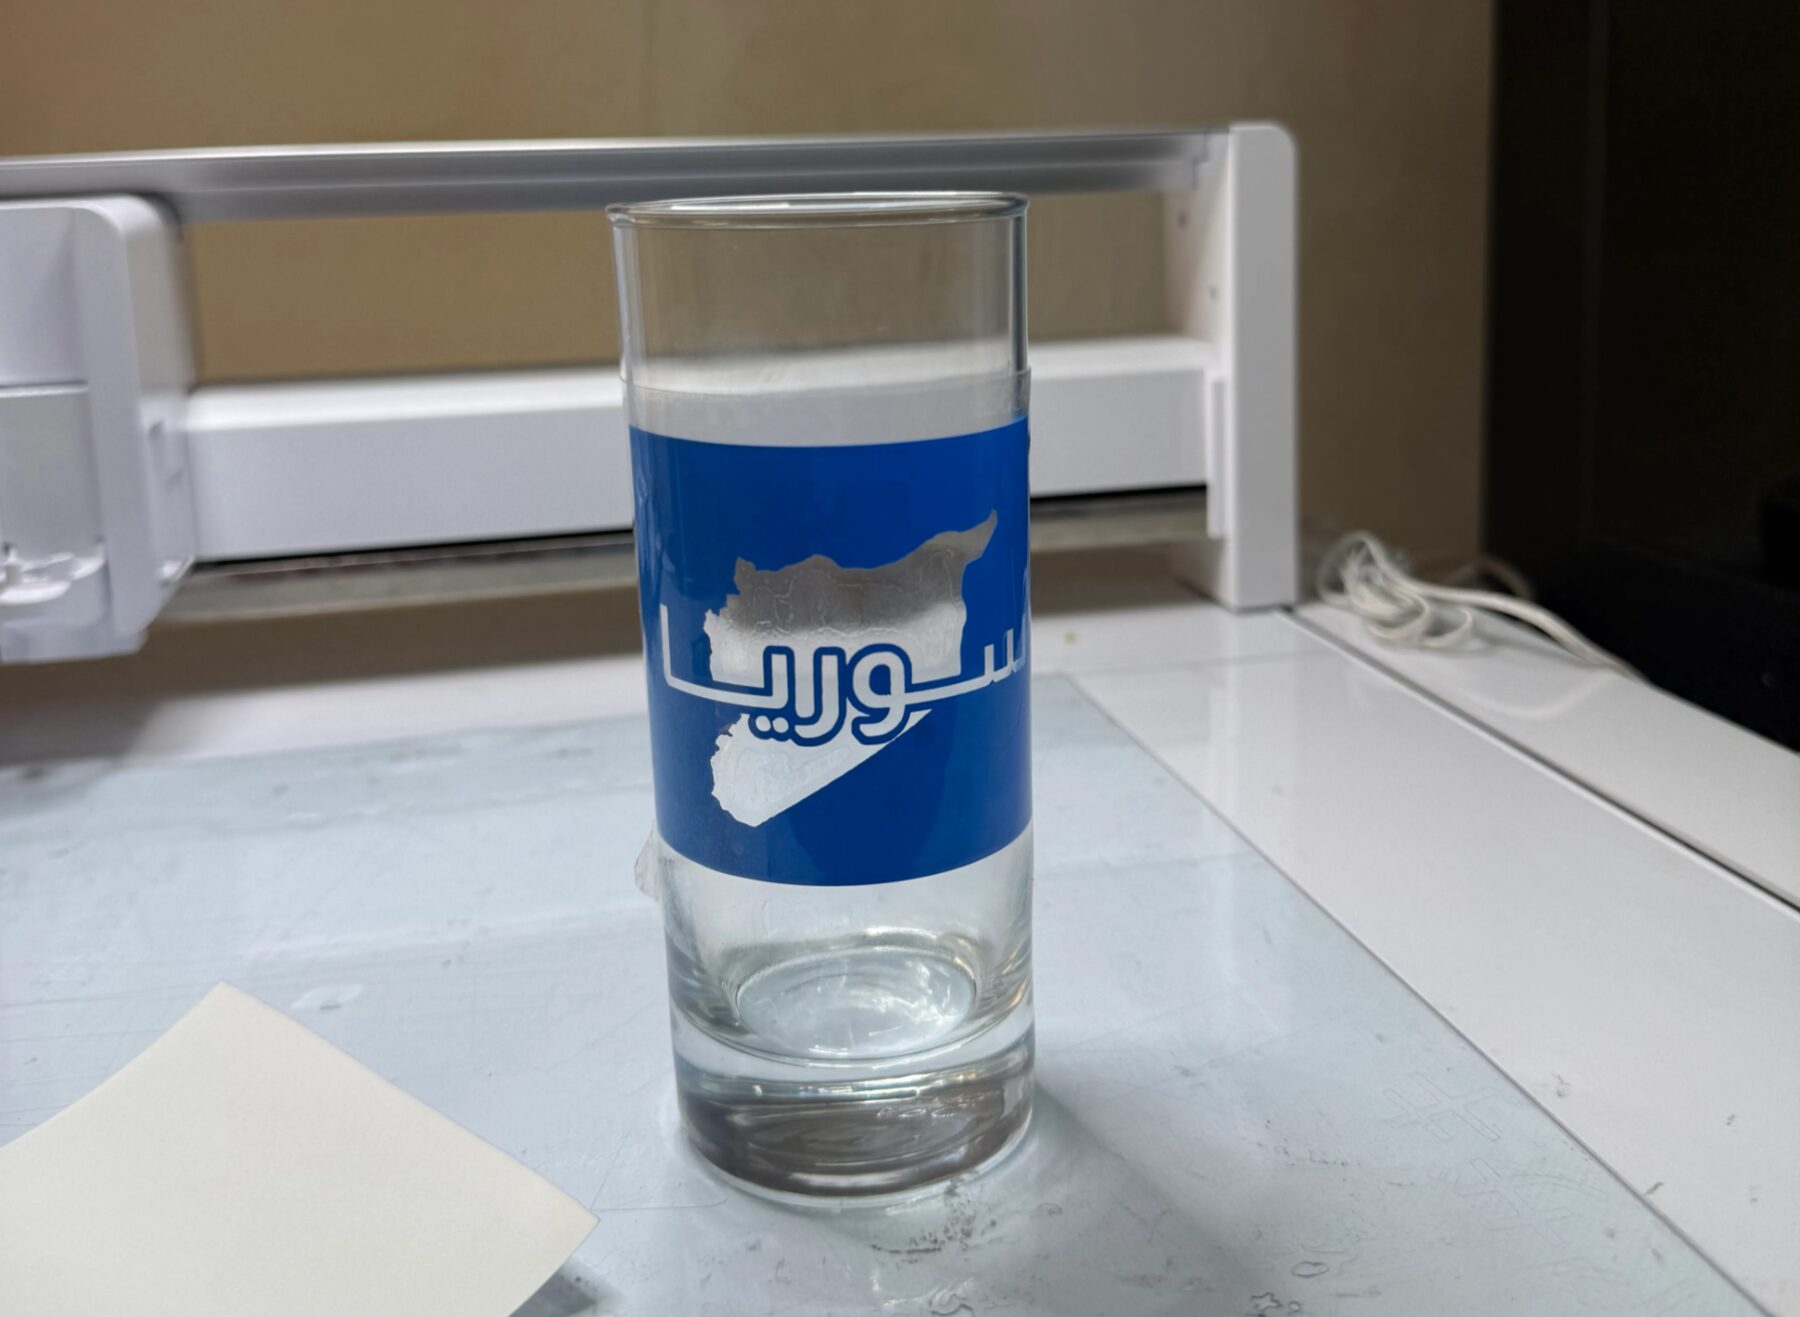
Then, I covered the whole cup, except the part I want to sandblast with tape and ensure there isn’t a single way particles could sneak into places they aren’t supposed to since any error is permanent.
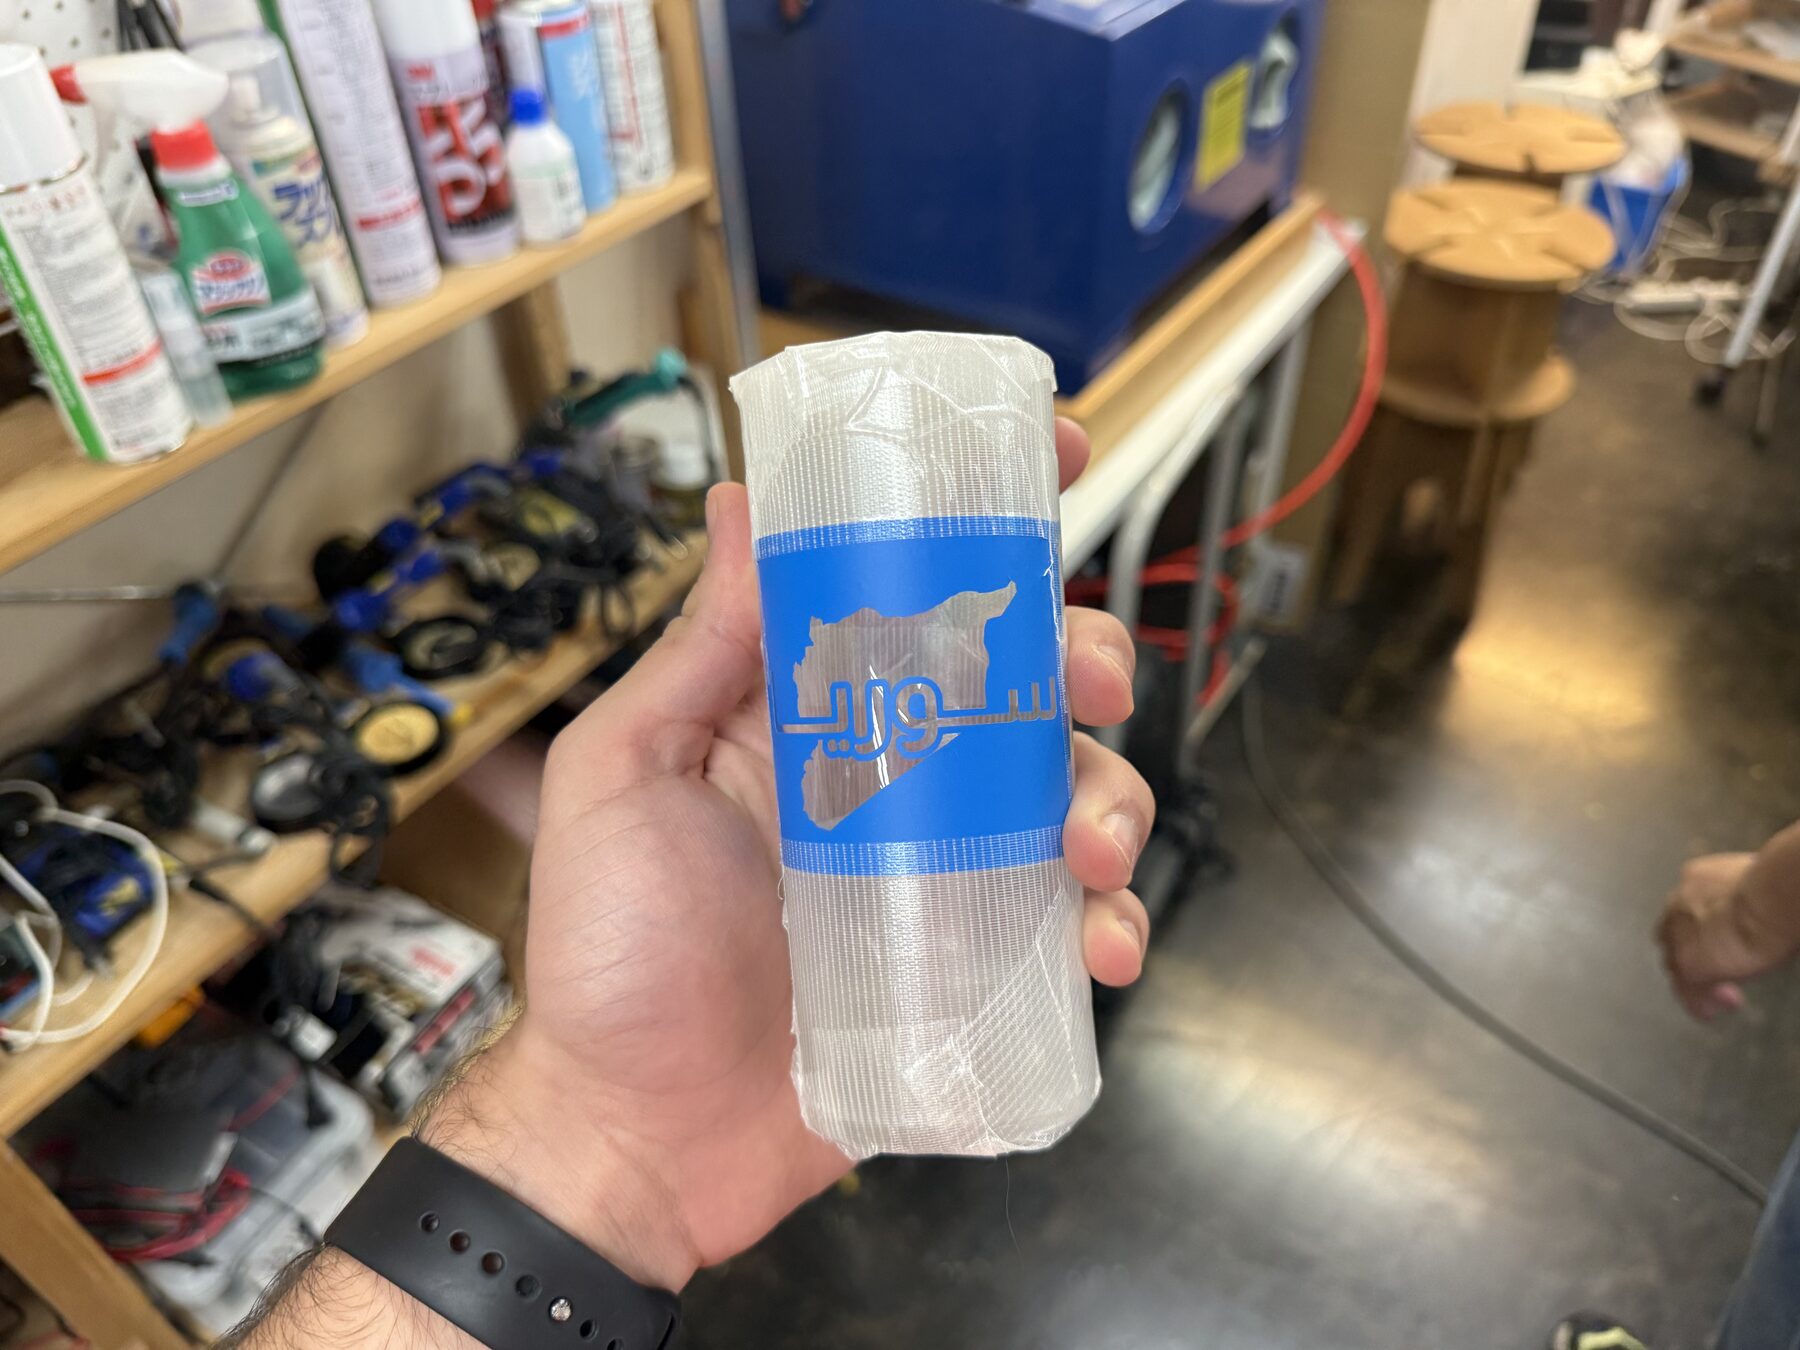
Here’s a video of the process, nothing is clear because of the dust, but there is like an air gun inside that after turning on the air compressor below the machine, whenever pressed, nblasts those particles everywhere.
After I finished blasting, I removed the tape, and got a really nice glass :D

All of these three processes haven’t been included in any previous week, especially embroidery, since it require a quite different workflow as it is considered another category of digital fabrication entirely.
While heat-pressing and sandblasting did relied on Vinyl cutting, but they produced a result a Vinyl cutter alone wouldn’t be able to produce. They acted as cool extras for this week.
Original Design
This week’s checklist
- Documented the workflow(s) and process(es) you used
- Explained how your process is not covered in other assignments
- Described problems encountered (if any) and how you fixed them
- Included original design files and source code
- Included ‘hero shot’ of the result