Week 3. Computer controlled cutting
Week Assignment
Group assignment:
-
Do your lab’s safety training
-
Characterize your lasercutter’s focus, power, speed, rate, kerf, joint clearance and types.
-
Document your work to the group work page and reflect on your individual page what you learned.
Individual assignments
-
Design, lasercut, and document a parametric construction kit, accounting for the lasercutter kerf, which can be assembled in multiple ways.
-
Cut something on the vinyl cutter.
Learning outcomes
-
Demonstrate and describe parametric 2D modelling processes.
-
Identify and explain processes involved in using the laser cutter.
-
Develop, evaluate and construct a parametric construction kit.
-
Identify and explain processes involved in using the vinyl cutter.
Have you answered these questions?
-
Linked to the group assignment page.
-
Explained how you created your parametric design.
-
Documented how you made your press-fit construction kit.
-
Documented how you made something with the vinyl cutter.
-
Included your original design files.
-
Included hero shots of your results.
Group and Individual Assignment
Safety Guidelines and Best Practices
Group assignment
In the Groupd assignment, the Safety Guidelines were studied and outlined key measures:
- Stay within the designated safety area during cutting. Keep in mind that the process involves high heat and potential fire hazards.
- Always have a fire extinguisher ready. Suitable options include a fire blanket, a water spray can, or a CO₂ extinguisher.
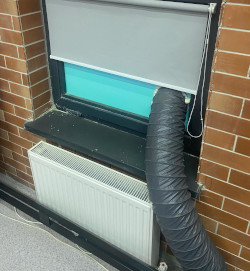
- Ensure three key systems are running: air assist, laser cooling, and fume extraction. These are essential for safe and efficient operation.
Itis importent to be cautious of the homing process and objects on the workbed. In the process of resetting, the laser cutter will automatically home.
- Keep protective features activated at all times. For instance, never disable the lid safety switch.
It is also vital to maintain your laser cutter regularly and take the following measures:
- Clear debris under the bed weekly.
- Clean the lens daily.
- Wipe down the mirrors weekly.
Secure materials properly with weights. Before starting, perform aWould you like Visual Studio Code to periodically run “git fetch”? ‘framing test’ in LightBurn. Take note of any additional movement, especially during engraving.
-
If there is no focus, check the lens. It might be installed upside down.
-
Experiencing unusual cornering? A loose lens could be the cause.
Coordinate and homing settings:
- Start jobs from the current position rather than the home position.
-
Avoid adjusting coordinates directly on the machine; use the computer to reposition the laser head.
There is the Important reminder that Machines don’t think for you—stay alert and use good judgment.
Using LightBurn software:
- Scan for any unexpected shapes by using the “Select All” command (Cmd + A).
- Utilize the “PowerScale” feature for test pieces, or try LightBurn’s built-in test file.
- Perform pre-flight checks:
- Use the preview function and a ‘frame’ test.
- After selecting “Get Coordinates,” you can also view the “Show Current Coordinate” option (though this is less relevant if starting from the current position).
- Ensure the correct origin setting is selected.
Reference material templates on the wall. These provide guidance, but always verify material settings, as they may be outdated.
Pre-flight routines for fixing a drawing: - Remove duplicate elements. - Use the “Auto Join” function for smoother cuts.
Individual Assignment
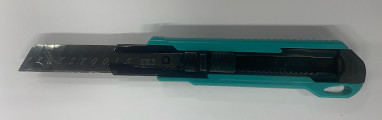
There were used several tools in the Lab.
Vinyl Cutter
The Computer-Controlled Cutting assignment began with studying the tools available in our lab. In particular, I used a vinyl cutter to cut vinyl, a wooden plate, and paper.

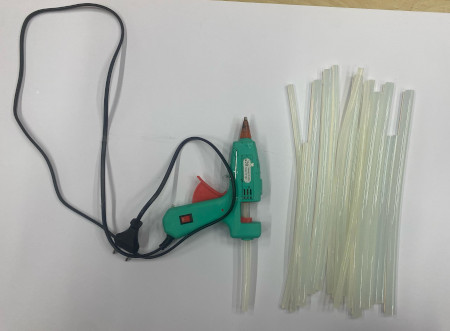
The Plexiglass Hot Gluer
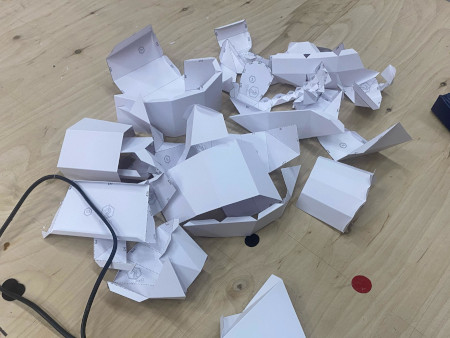
A plexiglass hot glue gun was used to join the corners of two planes. Specifically, paper shapes were glued along their edges.
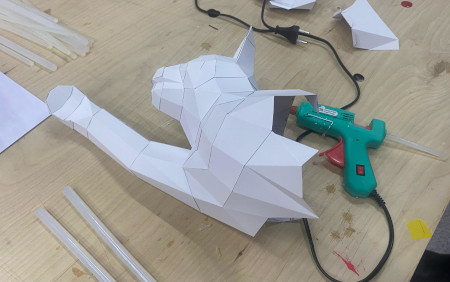
I’ve been practicing using a Plexiglass hot glue gun to assemble papercut pieces into a three-dimensional cat head. First, I prepared the individual paper shapes by cutting and folding them along the designated edges. Next, I carefully applied the hot glue to the tabs and edges, pressing each piece together until it held firmly. This required paying close attention to alignment so the 3D form would match the intended design. By working slowly and letting the glue cool between attachments, I was able to create a sturdy structure. Through this process, I became more comfortable handling the hot glue gun, managing glue flow, and ensuring the paper pieces formed clean seams.
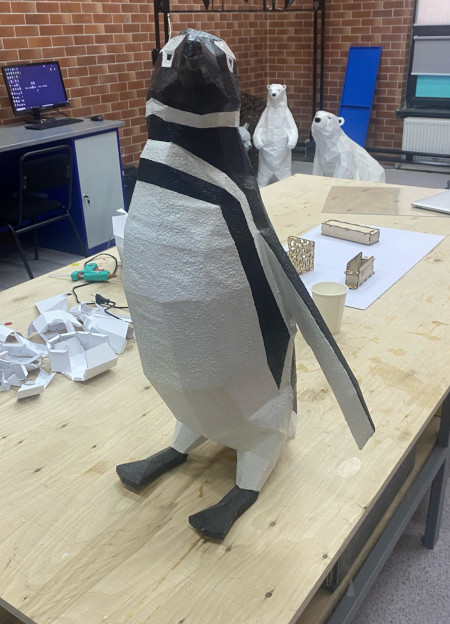
We created a 3D penguin, and I had the chance to assist in the process. It turned out to be quite a beautiful penguin after being colored.
Connecting papers with a Plexiglass hot glue gun is not an easy task, and occasional failures are inevitable.
Teneth Cutting Plotter
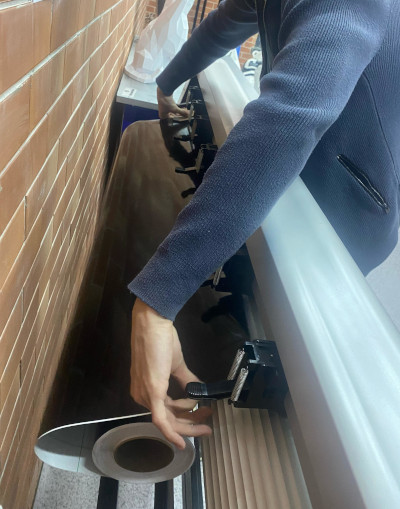
The Teneth Cutting Plotter was used to cut vinyl sheets. It offers a variety of colored vinyl sheets, which are used for decorating object surfaces.
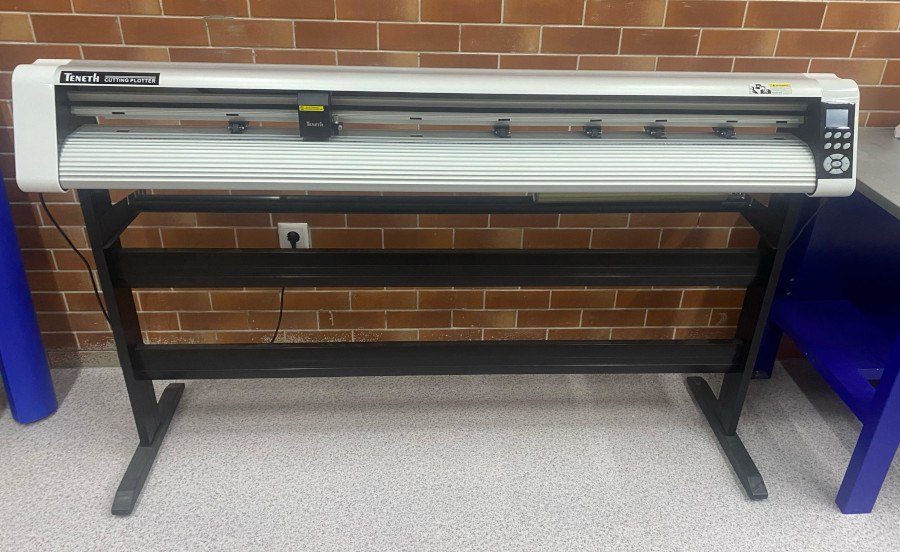
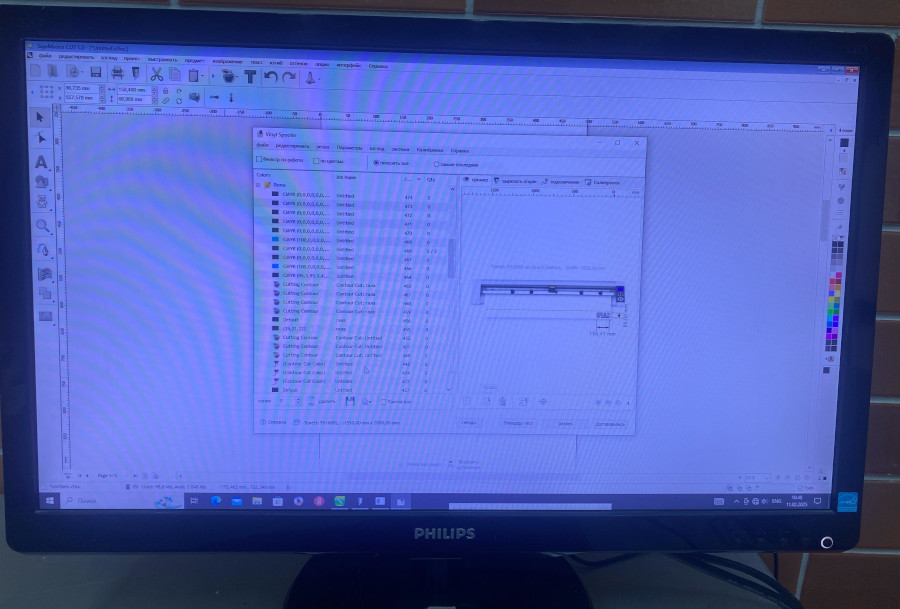
The Teneth Cutting Plotter is operated using a program called SignMaster CUT 5.0.

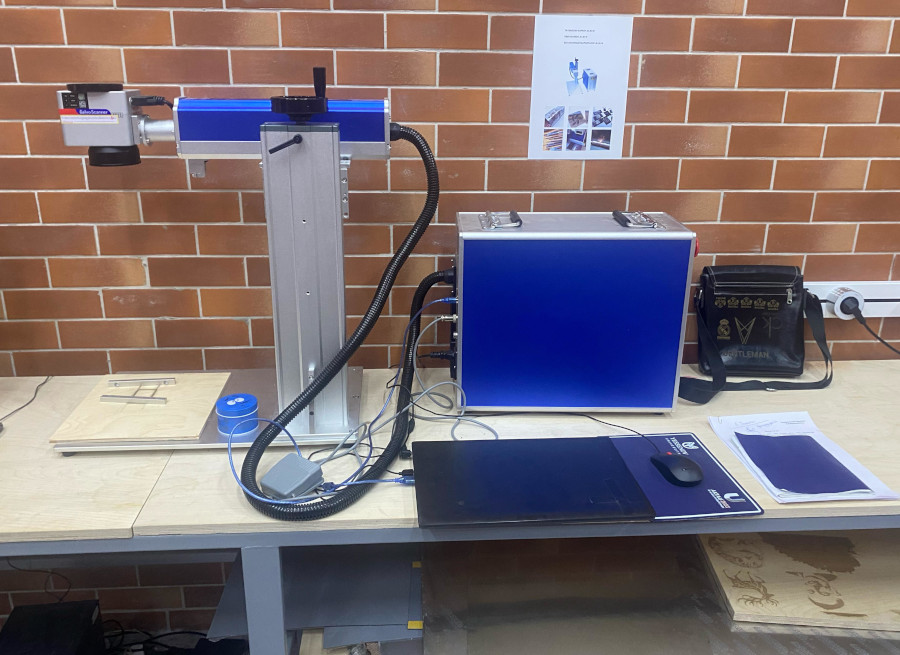
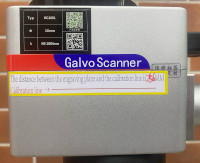
Galvo Scanner
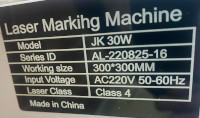
Galvo Scanner JK-30W: Description and Usage Characteristics Description
The JK-30W Galvo Scanner is a Class 4 laser marking machine designed for high-precision engraving and marking on various materials. It features a working area of 300 × 300 mm and operates on AC 220V, 50-60Hz input voltage. With a 30W laser power, it is well-suited for industrial and commercial applications, ensuring fast, efficient, and high-quality engraving.
Usage Characteristics
-
Material Compatibility: Ideal for marking metals (stainless steel, aluminum, gold, silver, brass). Can also engrave plastics, leather, wood, and some ceramics.
-
High-Speed Galvo Scanning: Uses a galvanometer-based system for ultra-fast beam positioning, enabling high-speed engraving with consistent accuracy. Provides sharp, clear, and non-contact engraving, minimizing material wear.
-
Precision and Accuracy: Ensures fine engraving with a small laser spot size, making it suitable for detailed patterns, logos, and barcodes. Repeatability precision of ±0.002mm, guaranteeing consistent results.
-
Large Working Area: 300 × 300 mm marking field, accommodating larger objects and allowing for more versatile applications.
-
Software Compatibility: Works with EZCAD, LightBurn, and other industry-standard laser software. Supports vector and raster graphics, making it ideal for customized engravings and industrial part marking.
-
Safety Considerations: Classified as a Class 4 laser, requiring proper safety measures (protective eyewear, enclosed workspaces). Operators should follow standard laser safety protocols to prevent exposure risks.
The Galvo Scanner was used to engrave designs on objects of varying heights and sizes, as its focus area is wide and square-shaped. It was even able to engrave designs on a cup despite its uneven surface.

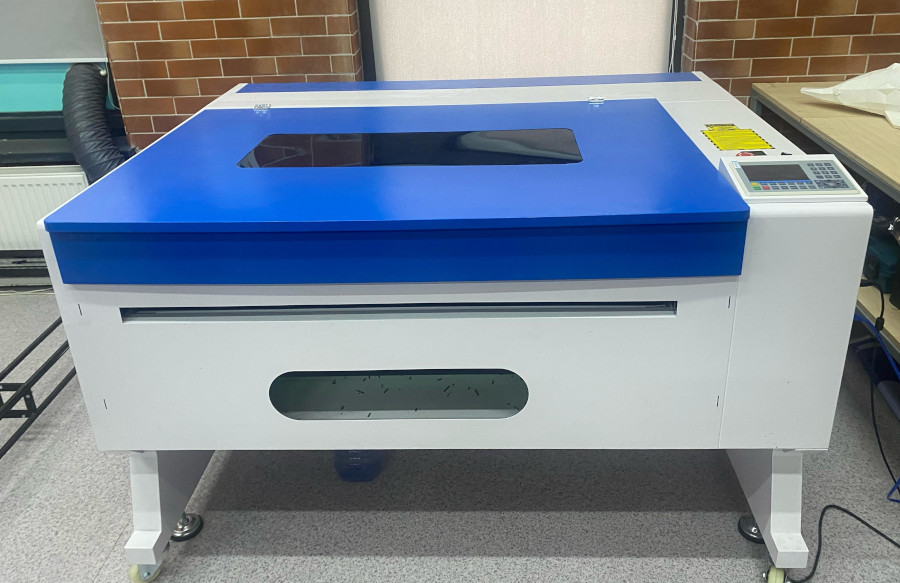
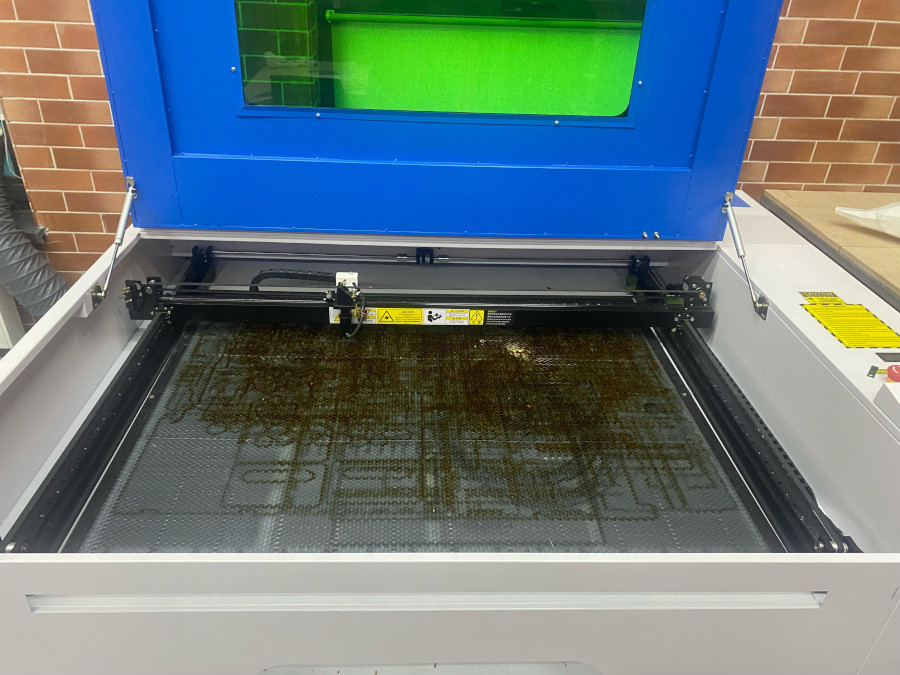
Laser Cutter VOIERN 1310 RD
Laser Cutter VOIERN 1310 RD: Description and Usage Characteristics Description: The VOIERN 1310 RD is a high-precision CO₂ laser cutting machine designed for cutting and engraving various materials, including wood, plastic, acrylic, leather, and fabric. It features a working area of 1300mm × 1000mm, making it suitable for both small-scale and large-scale cutting projects. Equipped with a powerful laser tube, it delivers clean and precise cuts while maintaining efficiency and speed.
Usage Characteristics:
- Material Compatibility: Capable of cutting and engraving materials such as wood, plastic, acrylic, MDF, leather, and paperboard.
- High Precision: Provides fine detailing with smooth edges, making it ideal for intricate designs.
- Adjustable Power and Speed: Users can control laser intensity and cutting speed, allowing flexibility in material thickness and cutting depth.
- Large Working Area: The 1300mm × 1000mm workbed accommodates larger sheets, reducing the need for multiple passes.
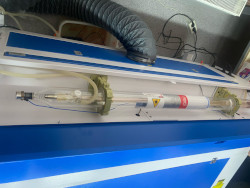
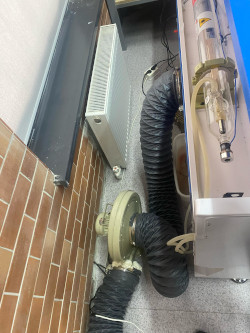
- Fume Extraction System: Ensures safe operation by removing smoke and debris, preventing contamination of the laser lens.
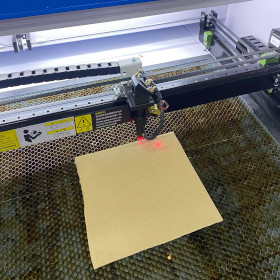
- Red Dot Pointer: Assists in precise positioning before cutting, improving accuracy.
- Air Assist System: Helps prevent material burning by directing airflow onto the cutting surface.
- Software Compatibility: Works with various design software such as LightBurn and RDWorks, allowing seamless workflow integration.
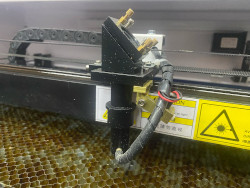
- Auto-Focus Feature: Ensures the laser remains in focus, optimizing cutting and engraving quality.
This laser cutter is widely used in industrial production, prototyping, signage making, model building, and artistic design, making it a versatile tool for makers, designers, and manufacturers.

Setting up laser configuration:power, speed and focus
We demonstrated the laser cutting process using the VOIERN 1310 RD with the given design and observed that the laser beam generates steam, as shown in a short video demonstration.
Dr. Henk indicated that our laser cutter is not properly configured, as the laser beam produces steam during the cut. He then provided specific tips for improvement, which are shown in the video
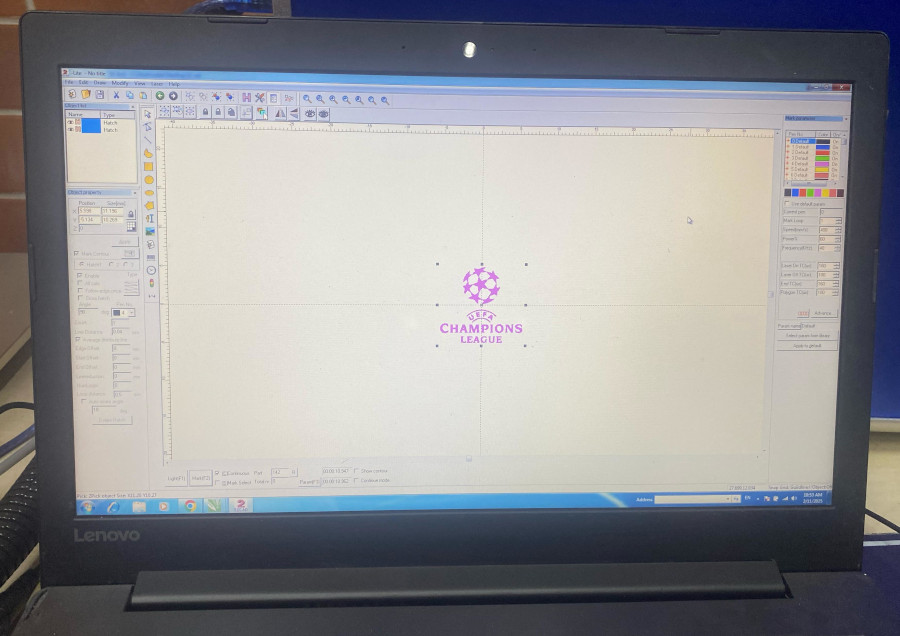
Before starting the laser cutting process, I first configured the necessary settings using specialized software, likely LightBurn or RDWorks. In this step, I adjusted key parameters such as power, speed, and focus to ensure precise cutting and engraving results. The software also provided a preview of the design before execution, allowing me to verify the layout and adjust any necessary settings.
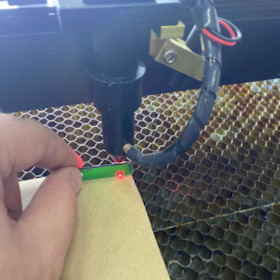
Next, I manually set the focus of the laser to achieve optimal precision. Using a focus gauge or manual adjustment, I ensured that the laser beam was properly aligned with the material surface. The red guiding laser helped in positioning, allowing me to make fine adjustments before the actual engraving process began. Proper focusing is critical, as it directly impacts the quality and sharpness of the engraving.

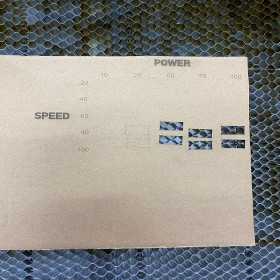
Once the setup was complete, I ran a test engraving to determine the best power and speed settings for the material. The test involved creating a power-speed matrix, where different combinations of laser power (horizontal axis) and speed (vertical axis) were applied to the material. Higher power results in deeper engraving or cutting, while higher speed reduces burn marks but may affect the engraving depth. The results from this test helped me identify the ideal settings for the specific material I was using.
Overall, this process ensured that the laser cutting and engraving were accurate, clean, and efficient while minimizing errors and material waste. Proper configuration of the software, laser focus, and test parameters is essential for achieving high-quality results in laser cutting and engraving.
This process was captured on video
Video
From Vimeo
We had Dr.Henk’s instructions for configurating air flow and laser focus:
air flow configuration
laser focus configuration
We had overall instruction and specific guide to configurate the laser focus and air flow from Henk’s presentation.
General instruction for Laser Cutter
Studying the parametric generators for laser-cut projects
Before making own 2D designed objects to cut, it is worth studying existing tools for designing boxes and other objects, because they help to understand the practical logic behind laser-cut construction, such as how dimensions, material thickness, kerf, tab size, slot size, finger joints, living hinges, dividers, and curved or sloped walls affect the final assembly. Tools such as Jerome Leary’s box and gear designers, Cuttle, 3axis Box Generator, Boxes.py, Make A Box, and Box Designer show different approaches to parametric design: some focus on simple box generation, some provide ready templates and tutorials, some include testing files for kerf and slot fitting, and others support more advanced forms such as flexible boxes, trays, inserts, shelves, gears, airfoils, and sliced 3D objects. By exploring these tools first, a designer gains a clearer understanding of how flat 2D panels are transformed into real 3D structures, how joints must be sized for the chosen material, and how different construction systems can be adapted not only for boxes but also for organizers, mechanical parts, decorative pieces, and modular objects.
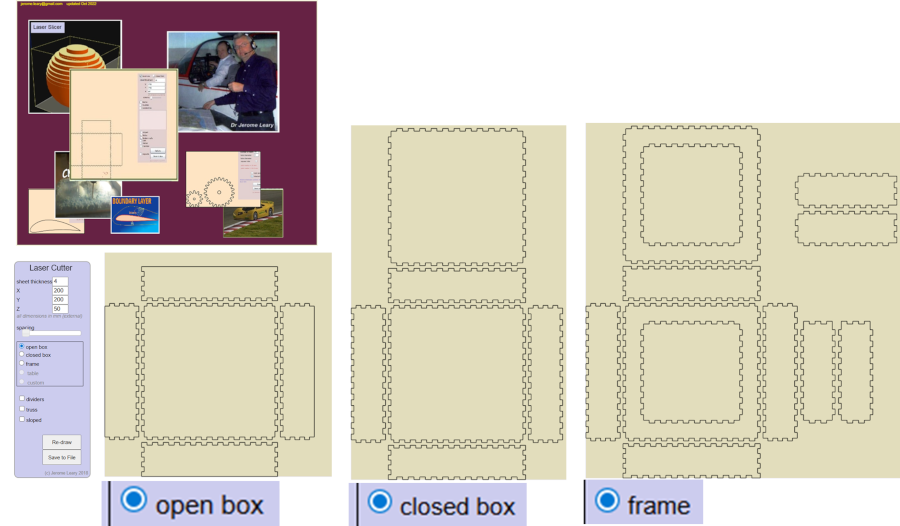
This is the main overview of Jerome Leary’s laser-cutting toolkit. The website links to separate tools for box making, gear design, and airfoil design, so it works more like a small collection of design utilities than one single app.
Open box, closed box, frame
the Laser Cutter box tool has 3 the main box layout modes: open box, closed box, and frame. The user enters sheet thickness and external X, Y, Z dimensions in mm, and the tool redraws finger-jointed panels that can be saved to file for laser cutting.
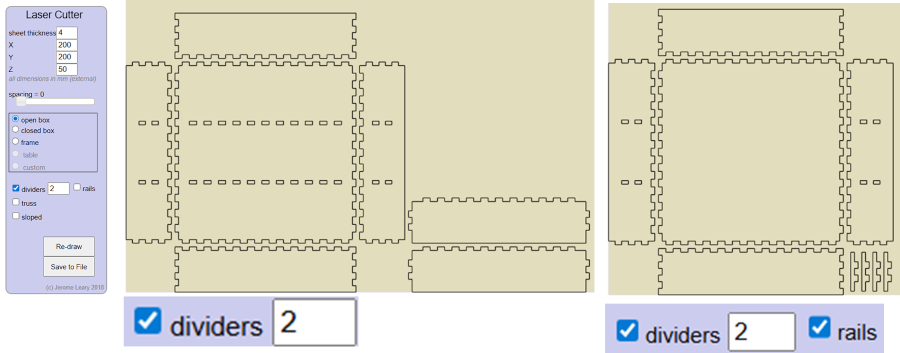
Dividers and rails
the box generator can be used with the dividers option, and in the second example with rails added as well. This means the software can create internal partitions inside a box, which is useful for organizers, trays, storage inserts, or compartment boxes.
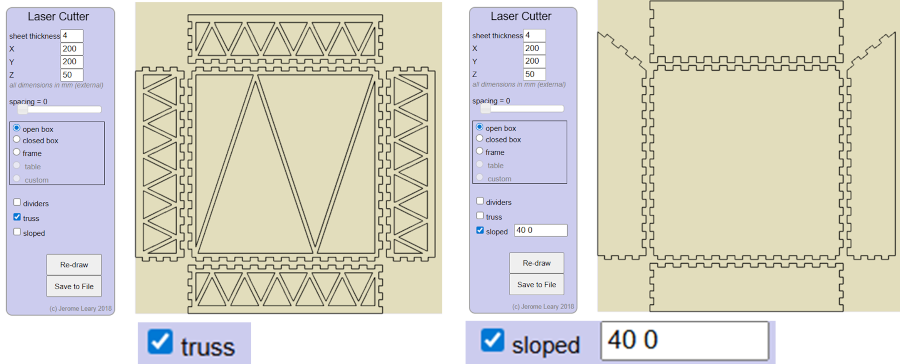
Truss and sloped options
the box generator has two structural variations of the box tool: truss and sloped. The truss option lightens or stiffens panels with triangular internal cut patterns, while the sloped option changes the side-wall geometry so the box is no longer purely vertical.
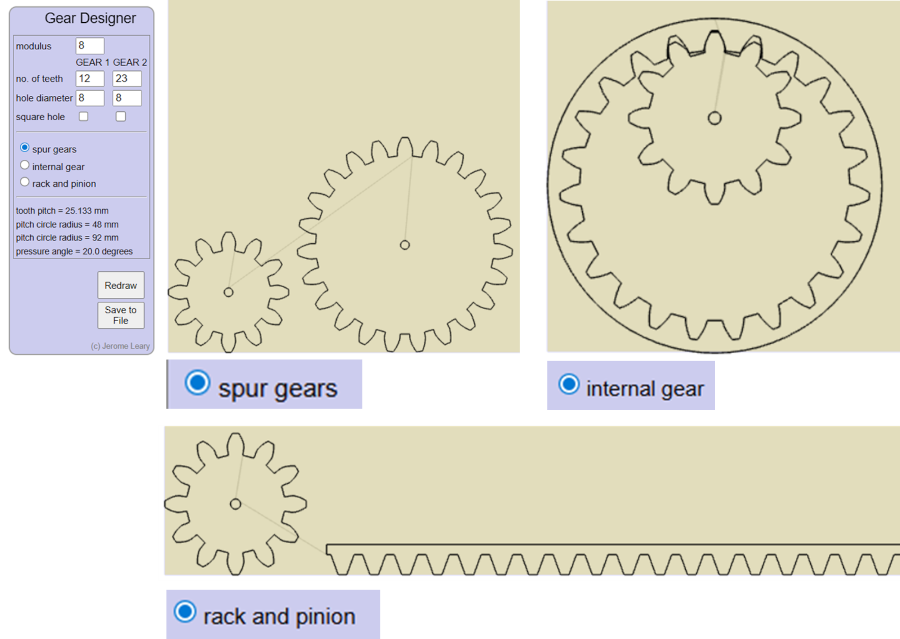
Gear Designer
This is a separate companion tool called Gear Designer, not the box generator itself. It lets the user set values such as modulus, number of teeth, hole diameter, and choose between spur gears, internal gears, or rack and pinion, then redraw and save the result for laser cutting.
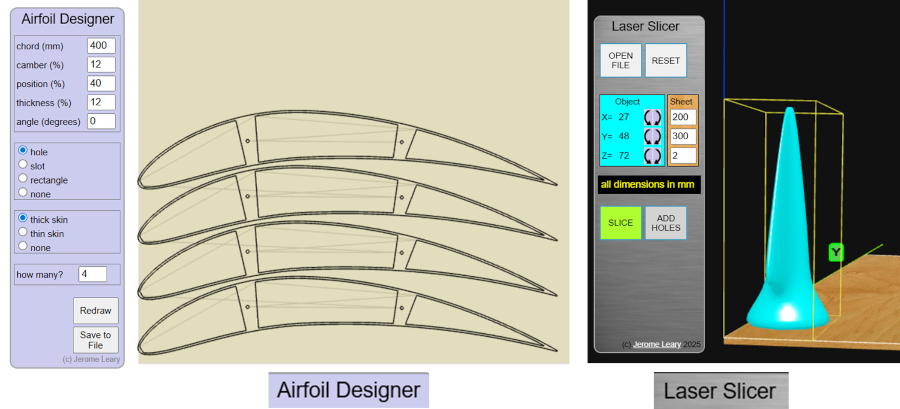
Airfoil Designer and Laser Slicer
On the Airfoil Designer, the user can control chord, camber, position, thickness, angle, and choose hole/slot/rectangle options plus skin thickness style and the number of sections. The right side shows a Laser Slicer workflow: a 3D object is sliced into flat profiles so it can be fabricated from sheet material on a laser cutter.
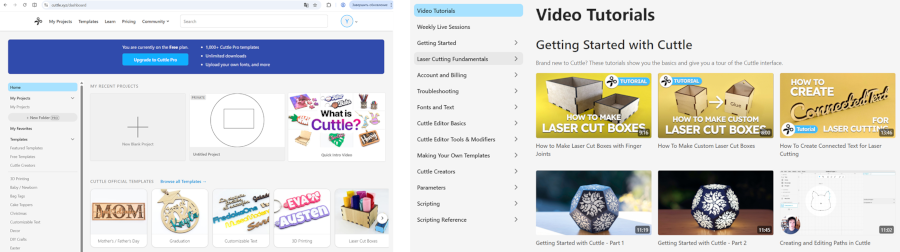
On the Cuttle.xyz dashboard, users can start a blank project, open recent work, and browse official templates for laser cutting and craft designs. The right side shows the Video Tutorials page, which helps beginners learn box making, connected text, path editing, and other basic laser-cutting workflows.
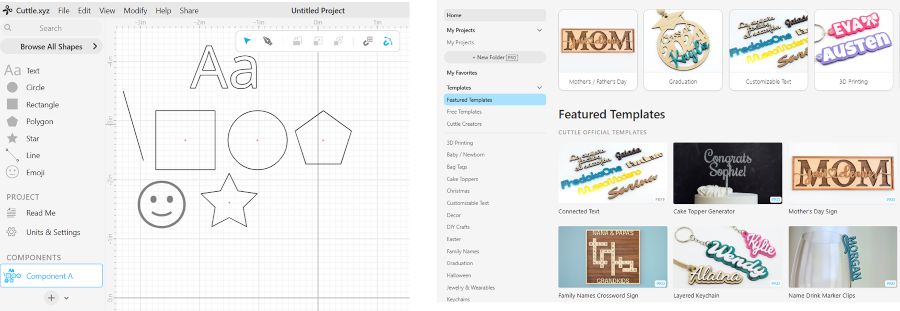
Cuttle editor and template library
With Cuttle editor workspace, users can draw and edit basic vector shapes such as text, circles, rectangles, polygons, stars, and lines on a grid. The right side shows the Featured Templates page, which provides ready-made design examples that can be customized instead of starting from scratch.
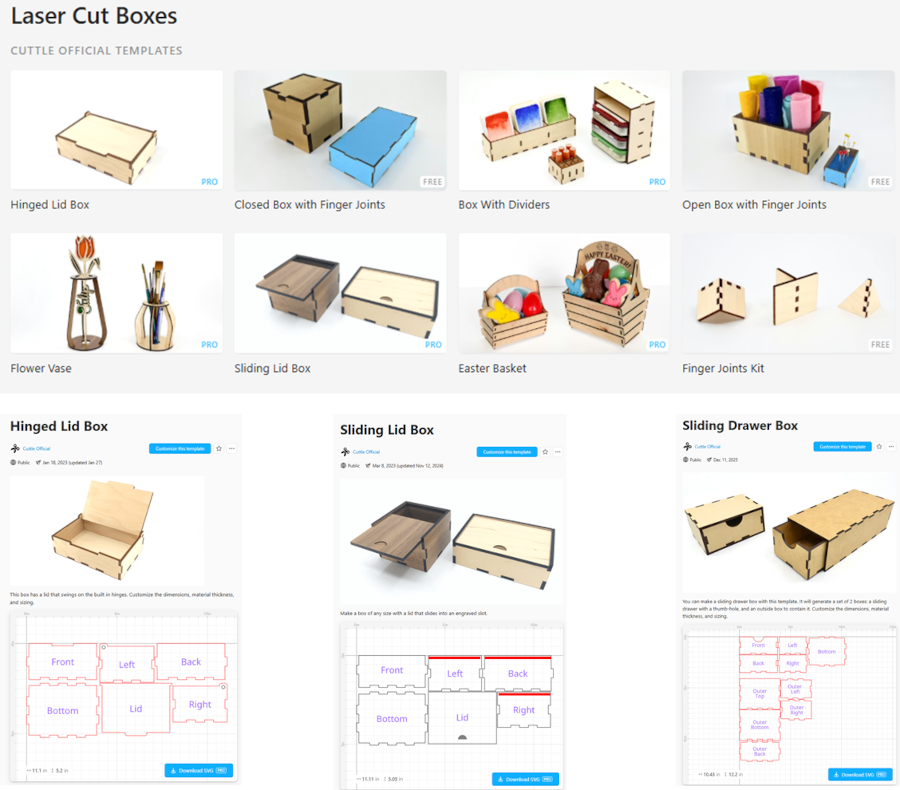
Laser cut box templates
laser-cut box templates available in Cuttle is useful not only for decorative projects but also for practical box construction where parts are already arranged for cutting and assembly.
Cuttle’s testing tools, especially templates like the Finger Joints Kerf Tester and Tab and Slot Tester. These are very important before cutting a real project, because they help the user find the correct fit between slots and tabs based on actual material thickness and laser kerf.
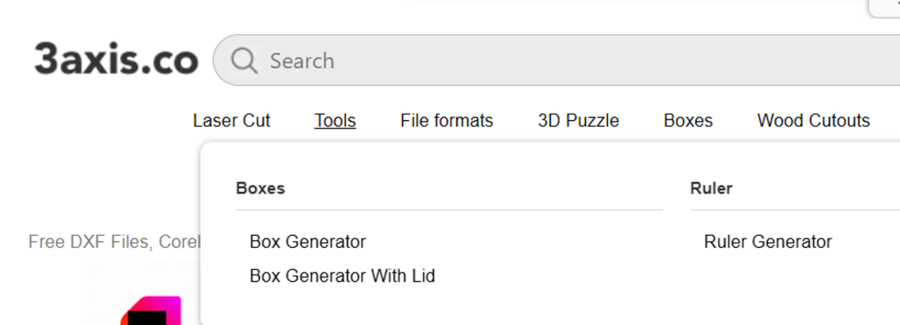
3axis.co provides a Box Generator, Box Generator With Lid, and also a Ruler Generator. 3axis.co is not only a file library, but also includes simple online utilities for creating laser-cut parts directly in the browser.
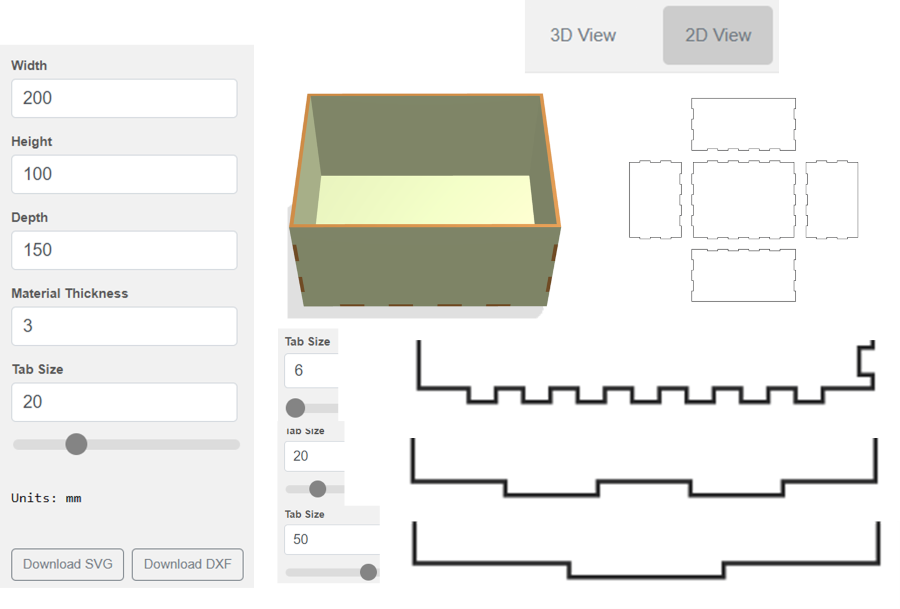
Box Generator interface
With box design tool, a user enters width, height, depth, material thickness, and tab size in millimeters, then switches between 3D View and 2D View to check the result. The tool also allows exporting the generated design as SVG or DXF, which is useful for sending the box layout to laser-cutting software.
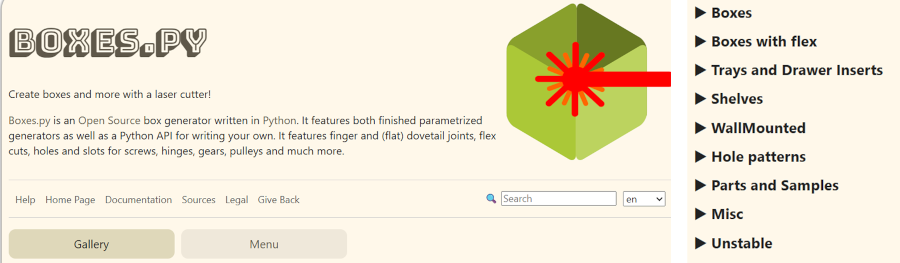
https://boxes.hackerspace-bamberg.de/
the Boxes.py is an open-source parametric generator for laser-cut projects created bythe hackaday.io. The menu on the rights shows designs into categories such as Boxes, Boxes with flex, Trays and Drawer Inserts, Shelves, WallMounted, Parts and Samples, which means the site supports many more constructions than simple boxes.
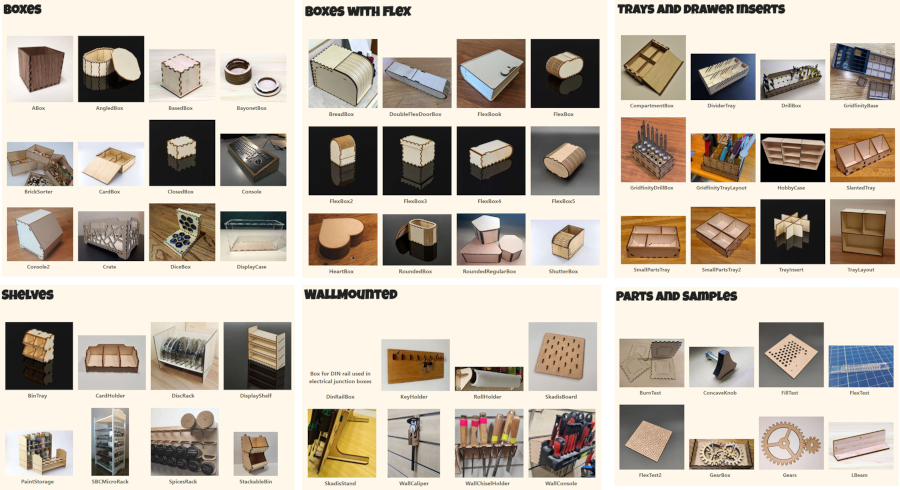
Boxes.py category examples
In the gallery of ready parametric designs, each thumbnail represents a different generator or box style and users can choose from many forms such as standard boxes, flexible curved boxes, trays, shelves, wall-mounted organizers, gears, and test parts, then customize them instead of drawing everything manually.
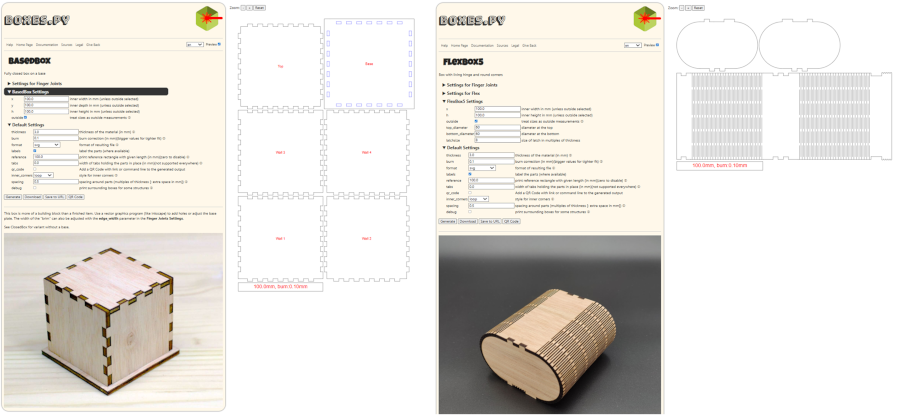
the BasedBox generator creates a fully closed box with a base and finger-jointed wall panels. On the left, the user can enter dimensions, material thickness, burn correction, spacing, and other settings, while on the right the software automatically generates the flat cutting layout for the laser cutter.
the FlexBox5 tool, which is designed for a box with living hinges and rounded corners. The right-side preview makes it clear that Boxes.py can generate not only rigid straight-edged boxes, but also curved forms made possible by flexible cut patterns in the material.
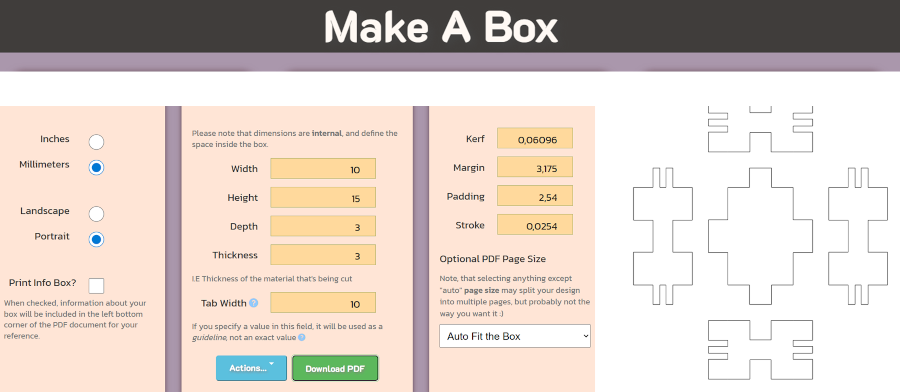
the Make A Box is an online box generator, where the user can choose units, page orientation, and enter internal box dimensions such as width, height, depth, material thickness, and tab width. It also includes fabrication settings like kerf, margin, padding, and stroke, and the right side automatically displays the flat panel layout that can be exported as a PDF for laser cutting.
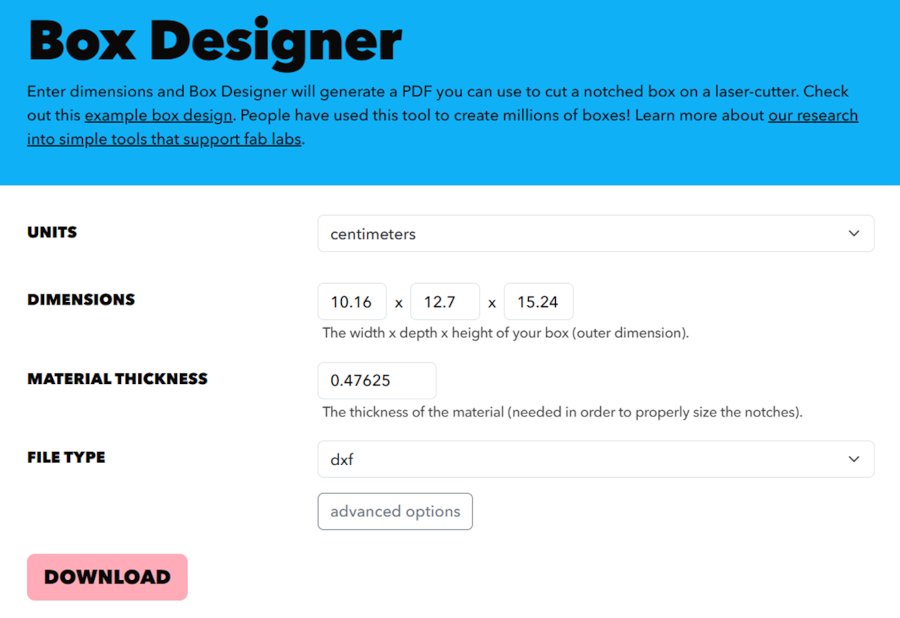
https://dataculture.northeastern.edu/box-designer/
the Box Designer is also online tool, where the user enters the units, box dimensions, material thickness, and file type to generate a laser-cut box pattern. It is a simple parametric interface: once the values are filled in, the tool produces a downloadable file such as DXF that can be used to cut a notched box on a laser cutter.
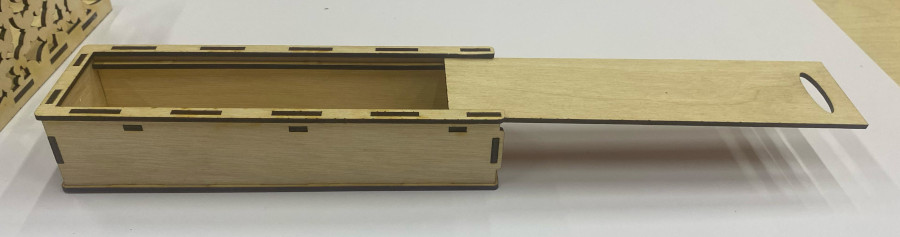
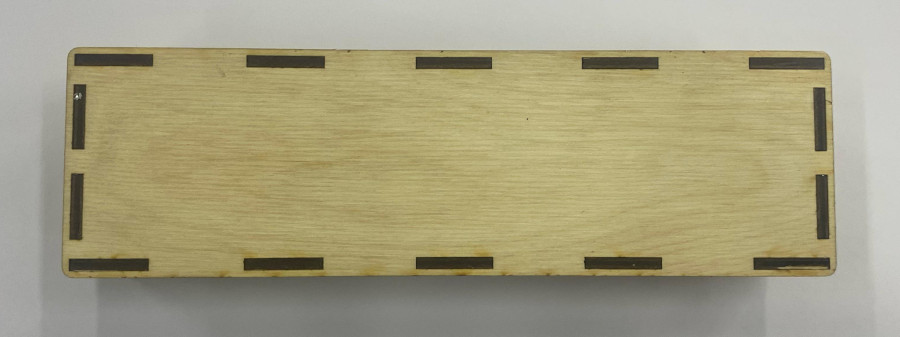
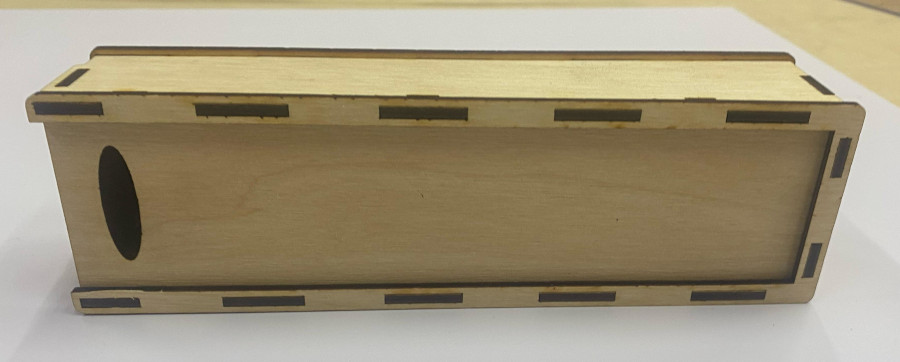
My laser cut box
Learning outcomes
For Computer-Controlled Cutting, I documented safety practices, tool setup, and hands-on results across several machines. I began with utility knives and a vinyl cutting plotter (SignMaster Cut), learning material prep, blade depth, and weeding for clean decals. I practiced hot-glue joining on paper/foamboard and helped assemble a 3D penguin, which taught seam control and the limits of quick adhesives. Next, I explored a galvo fiber laser for high-speed marking/engraving on metals and plastics, noting focus, hatch, and power/frequency tuning. The main build used a VOIER 1310 RD CO₂ laser: I set power, speed, and focus, ran kerf tests, and then cut a finger-jointed plywood box, iterating joints to fit without sanding. Overall, the week tied design, material characterization, machine parameters, and safe operation into a repeatable workflow from vector file to finished part.