Input Devices
Overview of week 9
Group Assignment
- Probe an input device(s)'s analog levels and digital signals
Individual Assignment
- Measure something: add a sensor to a microcontroller board that you have designed and read it
Group Assignment :
Connected the potentiometer to the microcontroller to observe varying analog voltage levels.
Interfaced the push button as a digital input and noted ON/OFF transitions.
Adjusted oscilloscope settings to clearly display waveforms and voltage variations.
Individual Assignment :
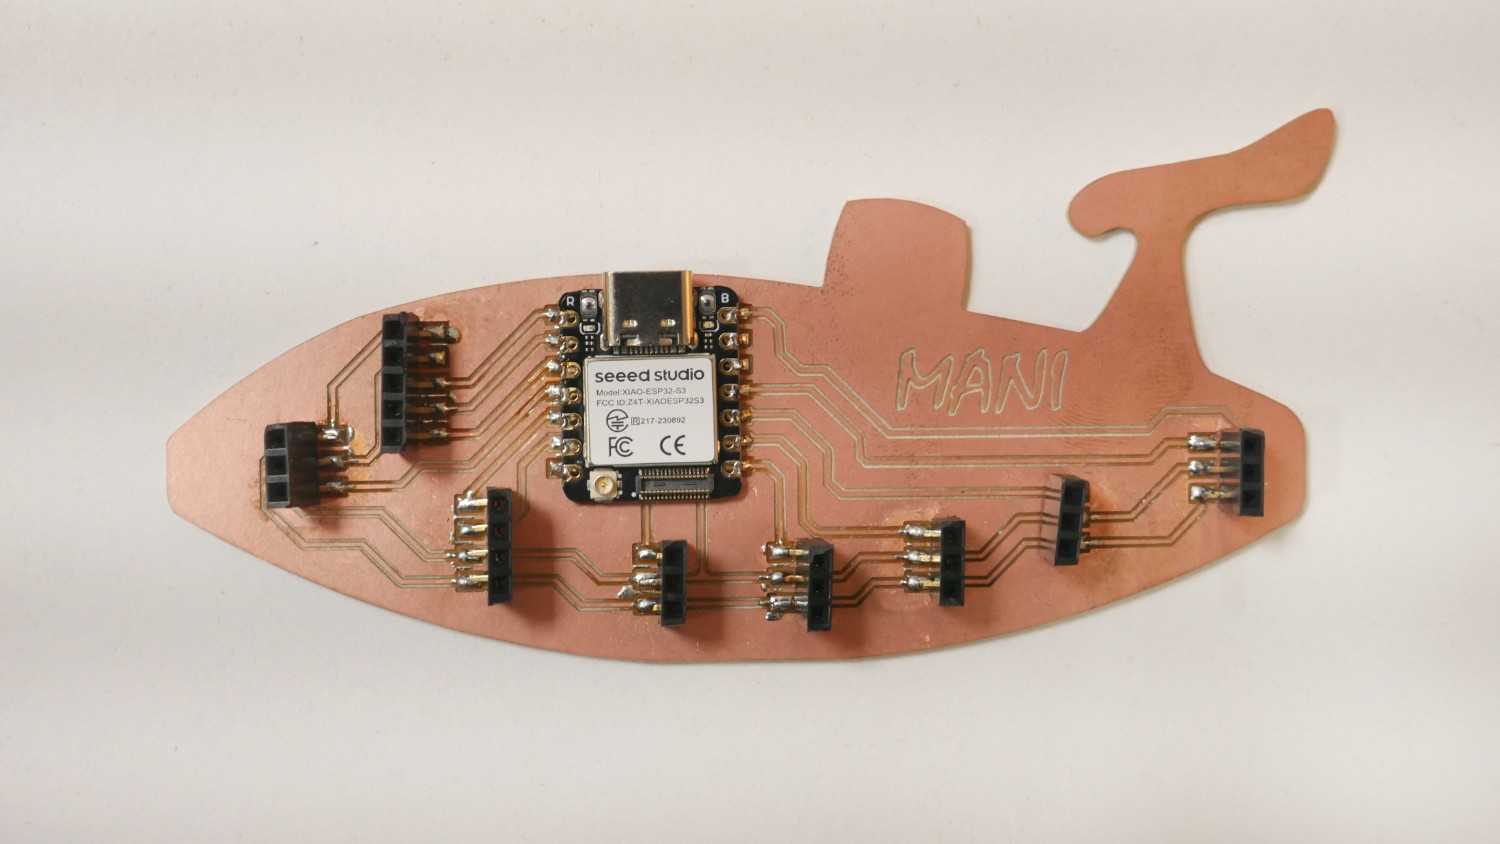
Hero shot
What is Input Devices ?
Input devices are hardware components used to provide data and control signals to a computer or microcontroller. Common types include keyboards, mice, touchscreens, sensors, and RFID readers. In robotics and embedded systems, input devices like infrared sensors, ultrasonic sensors, and accelerometers detect environmental changes. Microcontrollers process these inputs to execute actions. Advanced input devices include biometric scanners and brain-computer interfaces.
Sensors
Sensors are electronic devices that detect physical changes and convert them into electrical signals. It output either analog or digital signals, requiring appropriate interfacing with microcontrollers.
1. Accelerometer
An Accelerometer measures acceleration forces, including motion, tilt, and vibration. It is widely used in smartphones, robotics, and automotive applications for orientation detection, step counting, and impact sensing. It operates using MEMS (Micro-Electro-Mechanical Systems) technology to detect changes in velocity.
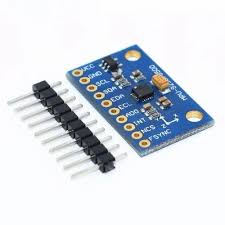
2. Gyroscope
A Gyroscope measures angular velocity and rotational motion. It is used in navigation, stabilization, and motion tracking applications, such as drones, smartphones, and VR systems. It works by detecting changes in orientation using MEMS or fiber-optic technology.
3. Magnetometer
A Magnetometer measures magnetic fields and is commonly used for navigation, detecting metals, and geophysical surveys. It helps determine direction by sensing Earth’s magnetic field, often integrated into digital compasses and smartphones. It operates using Hall effect or fluxgate technology.

4. Proximity Sensor
A Proximity Sensor detects the presence of objects without physical contact. It is commonly used in smartphones, industrial automation, and vehicle parking systems. It operates using infrared, ultrasonic, capacitive, or inductive sensing technology.

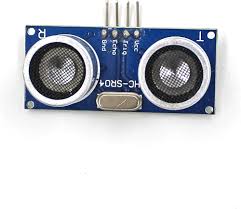
5. Ultrasonic Sensor
An Ultrasonic Sensor measures distance by emitting high-frequency sound waves and analyzing their echo. It is widely used in robotics, obstacle detection, and parking assist systems. It operates effectively in various environments but may struggle with soft or angled surfaces.
6. Infrared (IR) Sensor
An Infrared (IR) Sensor detects infrared radiation emitted by objects. It is commonly used in remote controls, motion detectors, and temperature sensing. IR sensors work in active (emitting IR light) or passive (detecting heat) modes, depending on the application.
_Sensor.jpg)
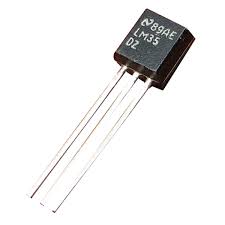
7. Temperature Sensor
A Temperature Sensor measures heat levels in an environment or object. It is widely used in HVAC systems, industrial automation, and medical devices. Common types include thermocouples, RTDs, and semiconductor-based sensors.
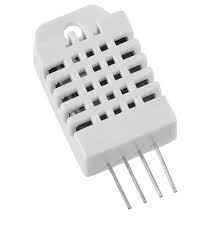
8. Humidity Sensor
A Humidity Sensor measures the moisture content in the air. It is widely used in weather monitoring, HVAC systems, and industrial processes to ensure optimal conditions. Typically, these sensors operate on capacitive or resistive principles to provide accurate humidity readings.
9. Gas Sensor
A Gas Sensor detects the presence and concentration of gases in the environment. It is used in industrial safety, air quality monitoring, and leak detection. Common types include electrochemical, infrared, and semiconductor-based sensors for detecting gases like CO₂, CO, and methane.

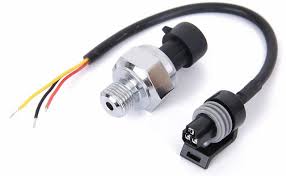
10. Pressure Sensor
A Pressure Sensor measures the force exerted by a fluid or gas. It is used in weather stations, automotive systems, and industrial applications. Common types include piezoelectric, capacitive, and strain gauge-based sensors.
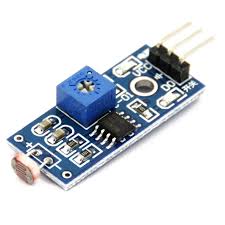
11. Light Sensor
A Light Sensor detects ambient light intensity and adjusts brightness accordingly. It is commonly used in smartphones, automatic lighting systems, and cameras. Common types include photodiodes, phototransistors, and LDRs (Light Dependent Resistors).
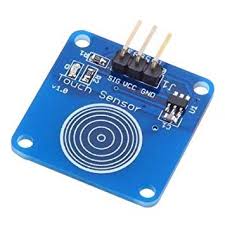
12.Touch Sensor
A Touch Sensor detects physical contact or pressure on a surface. It is widely used in touchscreens, interactive devices, and industrial controls. Common types include capacitive, resistive, and piezoelectric sensors.
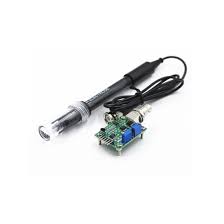
13. pH Sensor
A pH Sensor measures the acidity or alkalinity of a liquid. It is widely used in water quality monitoring, agriculture, and chemical industries. It operates using an electrode that detects hydrogen ion concentration in a solution.
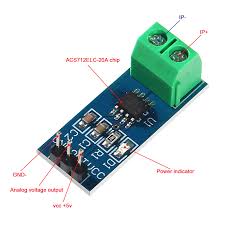
14. Current Sensor
A Current Sensor measures electric current flow in a circuit. It is used in power monitoring, battery management, and industrial automation. Common types include Hall effect, shunt resistor, and Rogowski coil sensors.
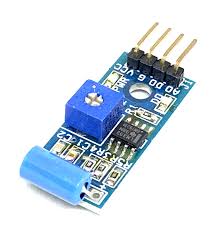
15. Vibration Sensor
A Vibration Sensor detects mechanical oscillations or movements in machines and structures. It is used in industrial monitoring, earthquake detection, and predictive maintenance. Common types include piezoelectric, MEMS, and accelerometer-based sensors.
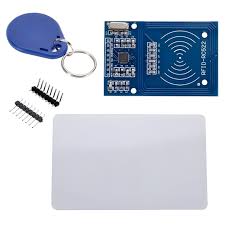
16. RFID Sensor
An RFID Sensor reads and verifies RFID tags using radio frequency signals. It is widely used in access control, inventory management, and contactless payment systems. It operates in low, high, or ultra-high frequency ranges depending on the application.
Prepare the PCB
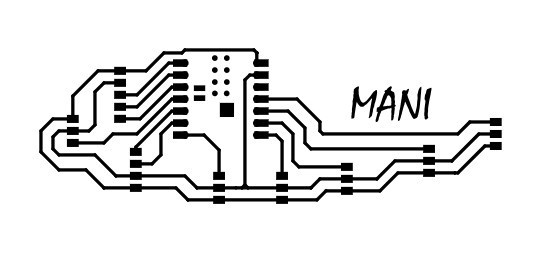
I used the Kicad software to develop my PCB board
I create the Circuit design with ESP32S3 microcontroller for my Final Project as well
I designed the layout diagram by using the Kicad software,
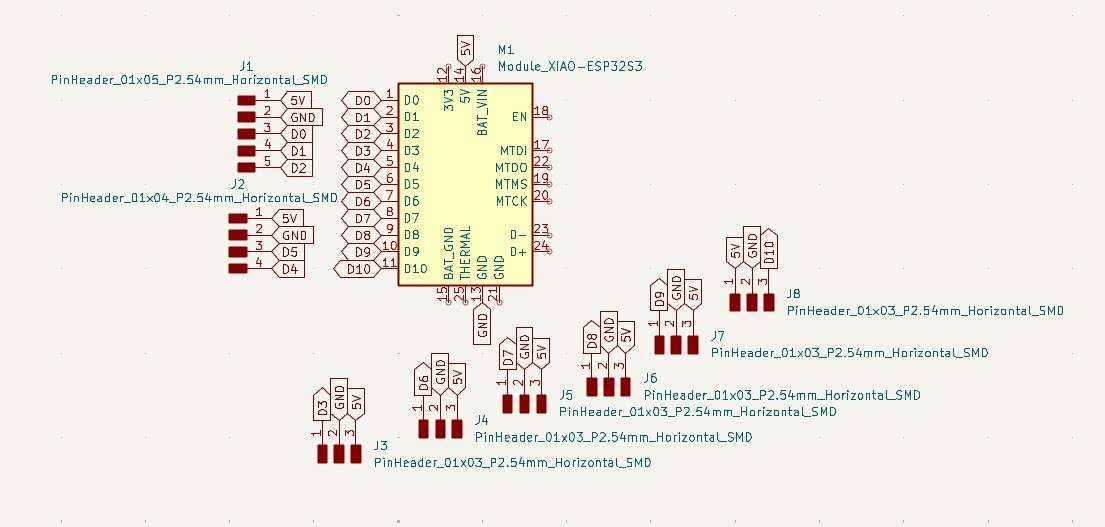
After did the Symbol editing then I update it into the PCB editor
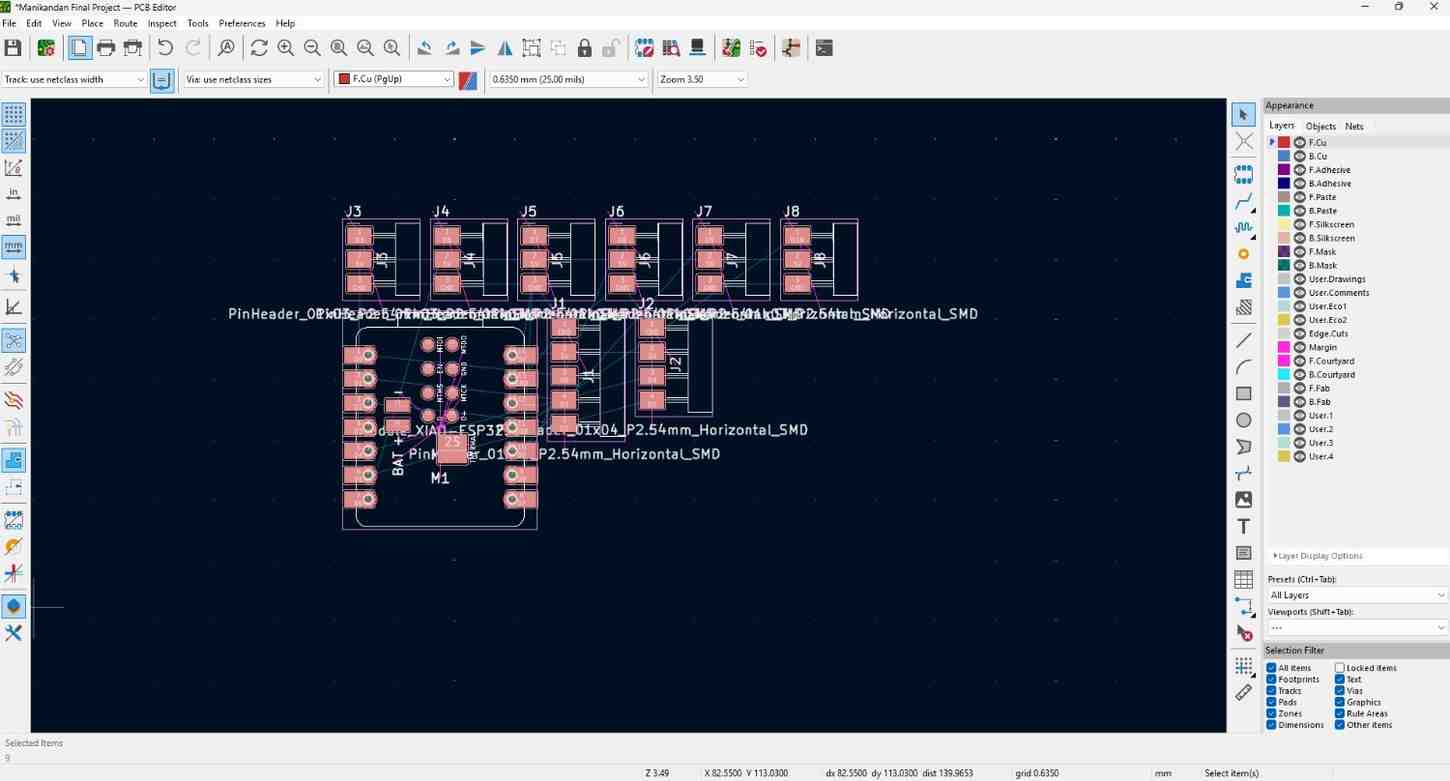
Then I rearrange it properly then add the trace connections.
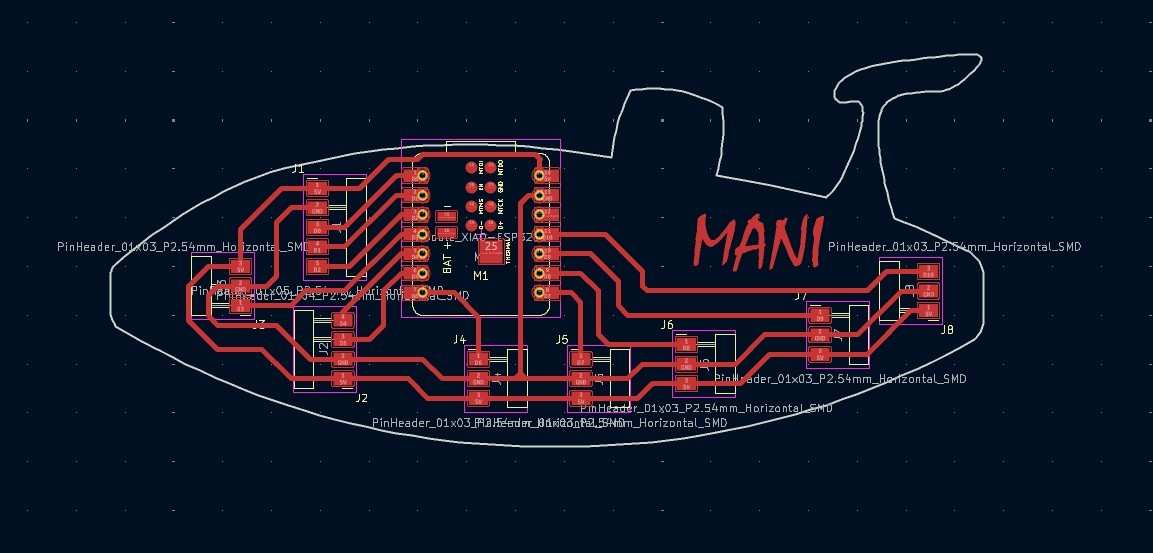
If you want to know more about how I design this board you can reach my final project page - Manikandan R Final Project
PCB Production
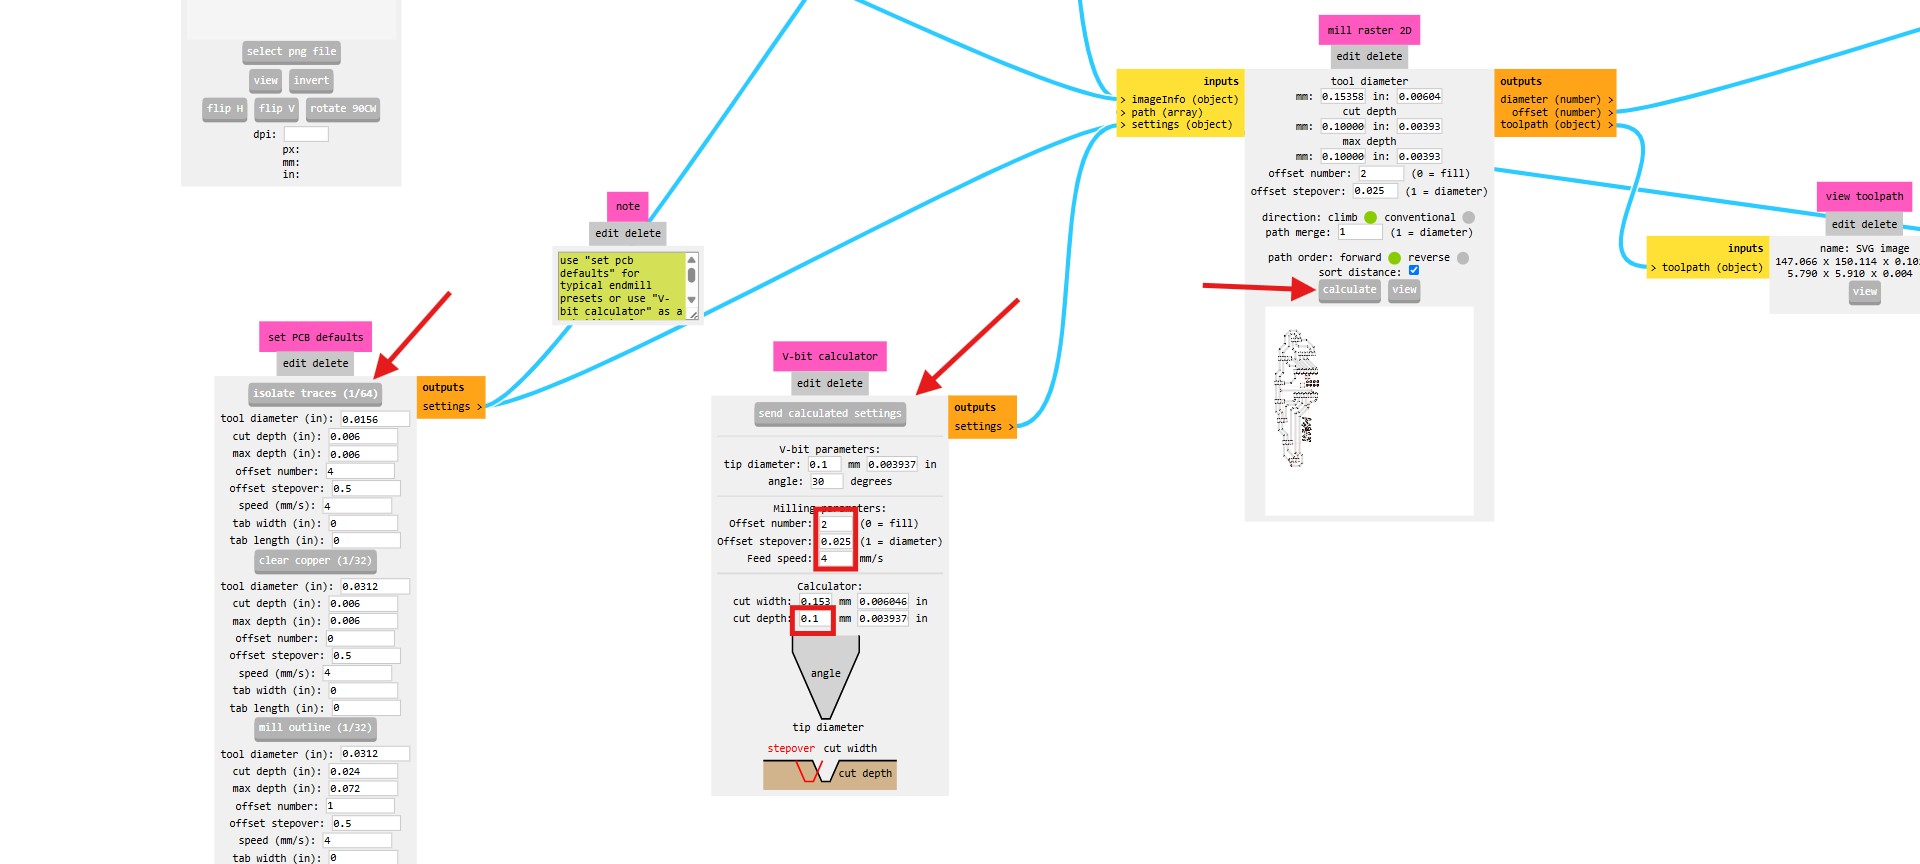
After done the PCB design I export it into the SVG file to generate the tool path
I used the MODS for the gcode generation, MODs is very easy to operate and change our parameters more often how we want with particular limitation, it is widely used by our Fab Academy students
After import it I set up the required parameters and take out the perfect gcode for my PCB milling

By using the Wegstr software I control the Wegstr PCB milling machine, I setting the milling tool in the spindle and adjust the tool position where I want to cut out my board.
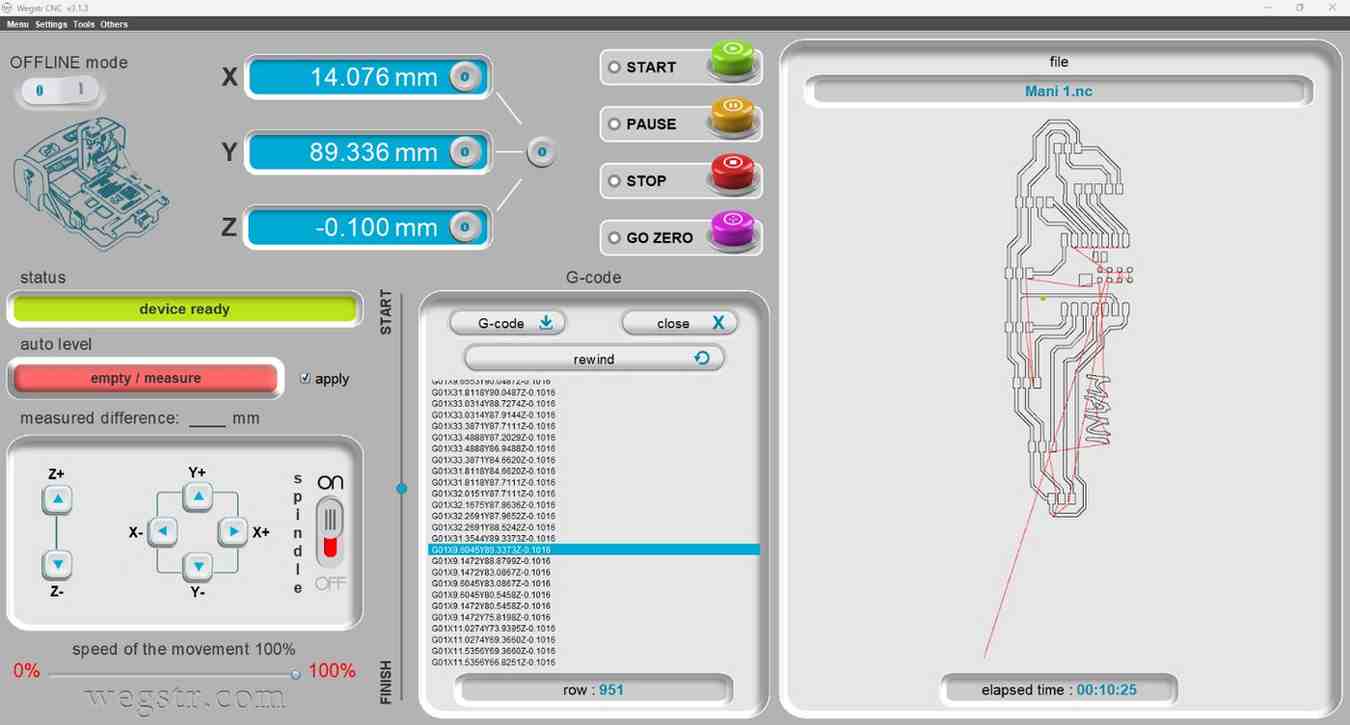
After the PCB milling process I check the board with Multimeter by continuity test and solder the components with the board
Sound Sensor
A sound sensor detects sound waves and converts them into electrical signals. It typically uses a microphone, such as a condenser or electret mic. The output can be analog (varying voltage) or digital (threshold-based). Sound sensors are used in voice-activated systems, alarms, and automation. They respond to sound intensity, not specific words or tones

- Microphone: Captures sound waves (vibrations in the air) and converts them into small electrical signals.
- Output Modes:
Analog Output - Proportional to the loudness of the sound.
Digital Output - HIGH or LOW depending on a preset threshold.
- LM393: The LM393 in a sound sensor compares the amplified microphone signal to a set threshold and outputs a digital HIGH or LOW based on sound level.
Programming
const int SOUND_SENSOR_PIN = A1;  // Analog input pin for sound sensor (GPIO1 / ADC1)
const int LED_PIN =D4;           // Digital output pin for LED

const int SOUND_THRESHOLD =180; // Adjust based on your ambient noise

void setup() {
  pinMode(SOUND_SENSOR_PIN,INPUT);
  pinMode(LED_PIN, OUTPUT);
  Serial.begin(115200);
}

void loop() {
  int soundLevel = analogRead(SOUND_SENSOR_PIN);

  Serial.print("Sound Level: ");
  Serial.println(soundLevel);

  if (soundLevel > SOUND_THRESHOLD) {
    digitalWrite(LED_PIN, HIGH);
    delay(500);  // Turn LED ON when sound is loud
  } else {
    digitalWrite(LED_PIN, LOW);   // Turn LED OFF when sound is quiet
  }

  delay(100);
}
- I connected the sound sensor analog pin with XIAO ESP32S3 board’s A1 pin, and also connected the 5V and GND with the Microcontroller.
- To check this I connected one LED in the microcontroller, I set the +Ve with D4 and connected the GND in that board
- I initially set the threshold value to analyze the sound sensor at 180, if we want to increase after the testing we can manually increase it by using the sound set point (screw)
- Then I set the sound sensor as input and LED as output, and give the serial begin 115200
- I wrote the code like whenever I make the noise above the threshold value the LED will blink, remaining time it only as off condition.
Testing
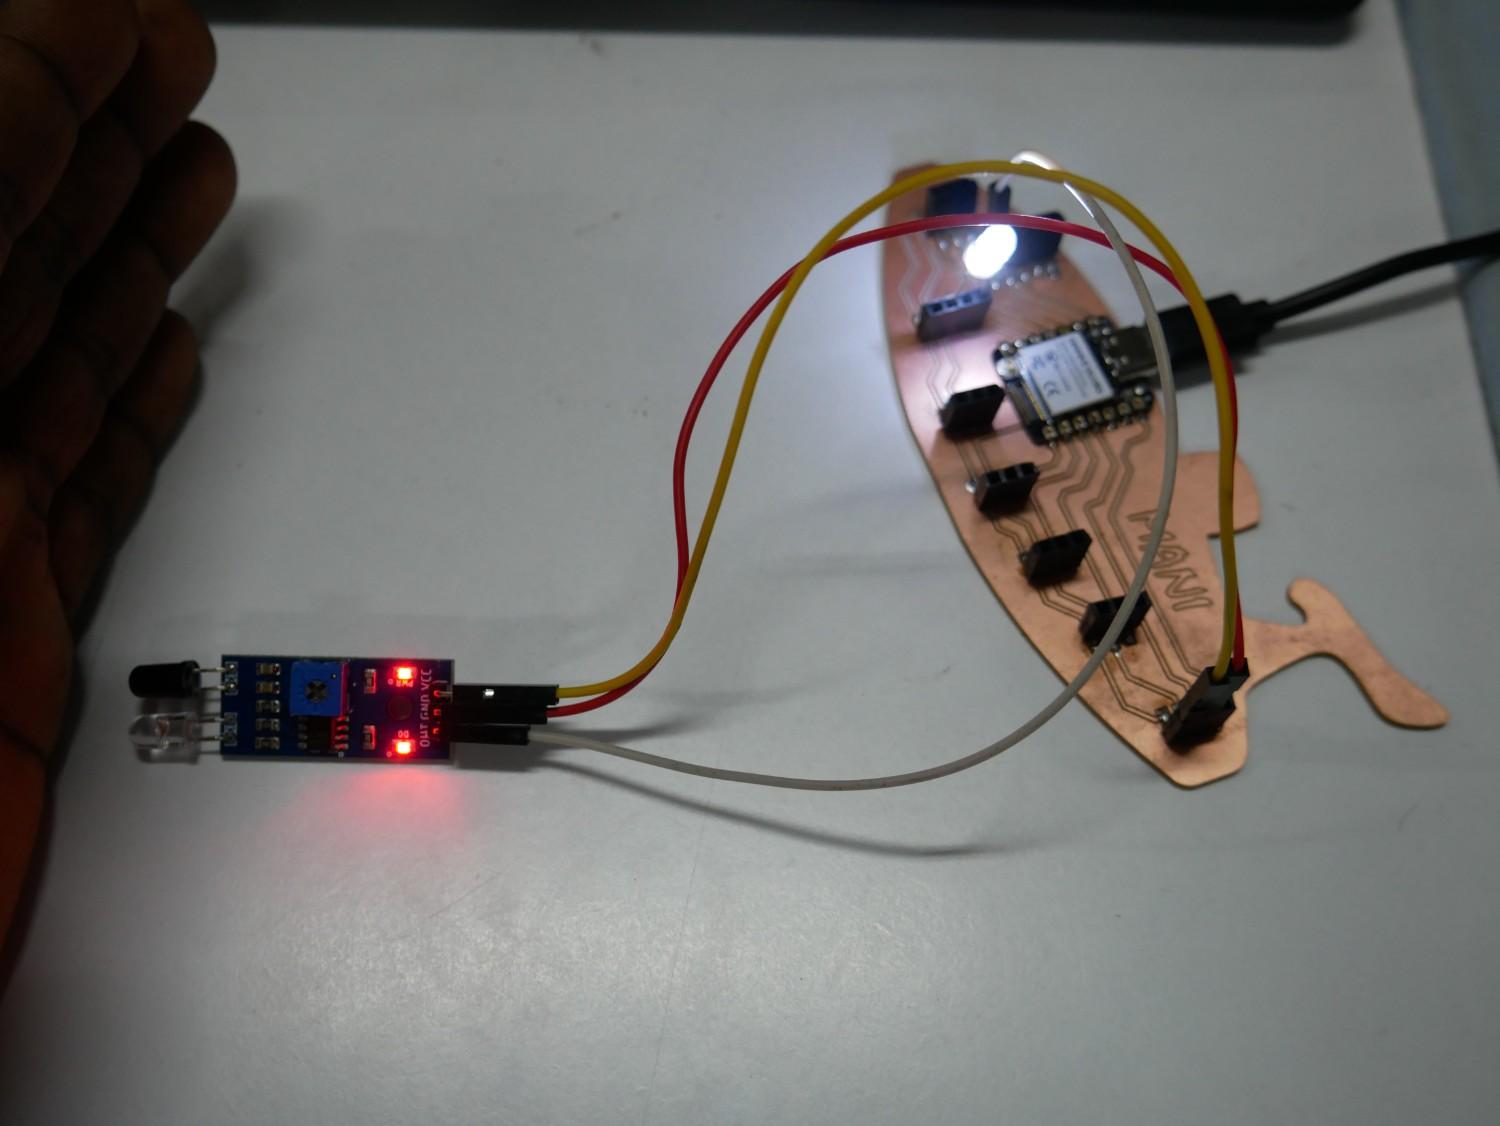
IR Sensor
An IR (Infrared) sensor detects infrared radiation emitted by objects. It consists of an IR LED that emits infrared light and a photodiode or phototransistor that receives it. IR sensors are commonly used for object detection, proximity sensing, and line following in robots. There are two main types: active (emits and detects IR) and passive (detects only IR from external sources). The sensor’s output changes based on the reflected IR light intensity. It works well for non-contact detection but can be affected by ambient light.
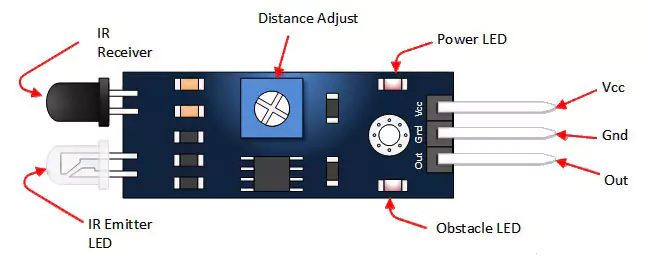
- IR LED (Infrared Light Emitting Diode):
Emits infrared light (typically around 940 nm wavelength). This light is invisible to the human eye but can be reflected by surfaces and detected by receivers.
- Photodiode or Phototransistor (IR Receiver):
Sensitive to infrared light. When it receives reflected IR light, its resistance changes, producing an analog signal. Phototransistors offer amplification and are more sensitive than photodiodes.
- Comparator (e.g., LM393):
Compares the voltage from the photodiode with a reference voltage. It outputs a digital HIGH or LOW signal based on whether the received IR intensity crosses a threshold.
Programming
const int IR_SENSOR_PIN =A2; // IR sensor output connected to GPIO 2 const int LED_PIN = D4; // LED anode connected to GPIO 3 through resistor void setup() { pinMode(IR_SENSOR_PIN, INPUT); // IR sensor is input pinMode(LED_PIN, OUTPUT); // LED is output Serial.begin(115200); // Serial monitor (optional) } void loop() { int irValue = digitalRead(IR_SENSOR_PIN); Serial.print("IR Sensor: "); Serial.println(irValue); if (irValue == 0) { // Object detected (many IR sensors pull LOW when triggered) digitalWrite(LED_PIN, HIGH); // Turn LED ON } else { digitalWrite(LED_PIN, LOW); // Turn LED OFF } delay(100); // Debounce delay }- I connected the IR sensor analog pin with XIAO ESP32S3 board’s A2 pin, and also connected the 5V and GND with the Microcontroller.
- To check this I connected one LED in the microcontroller, I set the +Ve with D4 and connected the GND in that board
- Then I set the IR sensor as input and LED as output, and give the serial begin 115200
- I wrote the code like whenever I keep any object near by IR sensor then the LED will blink, remaining time it only as off condition.
Testing
Conclusion
Learning outcomes
- I learnt about some of the input devices functionality and its working principle, how we efficiently used it for our required use cases.
- For this assignment I uses the sound sensor and IR sensor, I know about how we can manipulated the threshold values for our need
Challenges
At first I try with XIAO ESP32S3 board I couldn’t upload my code into it, there is some error came like fatal - port not connected. But I check my port its perfectly connected. Then I used the AI to figure out what was the problem
Then I know about whenever I want to update my code into XIAO ESP32S3 board I should long press the boot button and do the USB removal and again connection, then I will release the boot button
Now this time the code was uploaded perfectly