Mechanical Design & Machine Design
Overview of week 12
Group Assignment
Mechanical Design
- Design a machine that includes mechanism + actuation + automation + application
- Build the mechanical parts and operate it manually
MachineDesign
- Actuate and automate our machine
Individual Assignment
- Document our individual contribution
Individual Work :
Hero shot


Machine Design
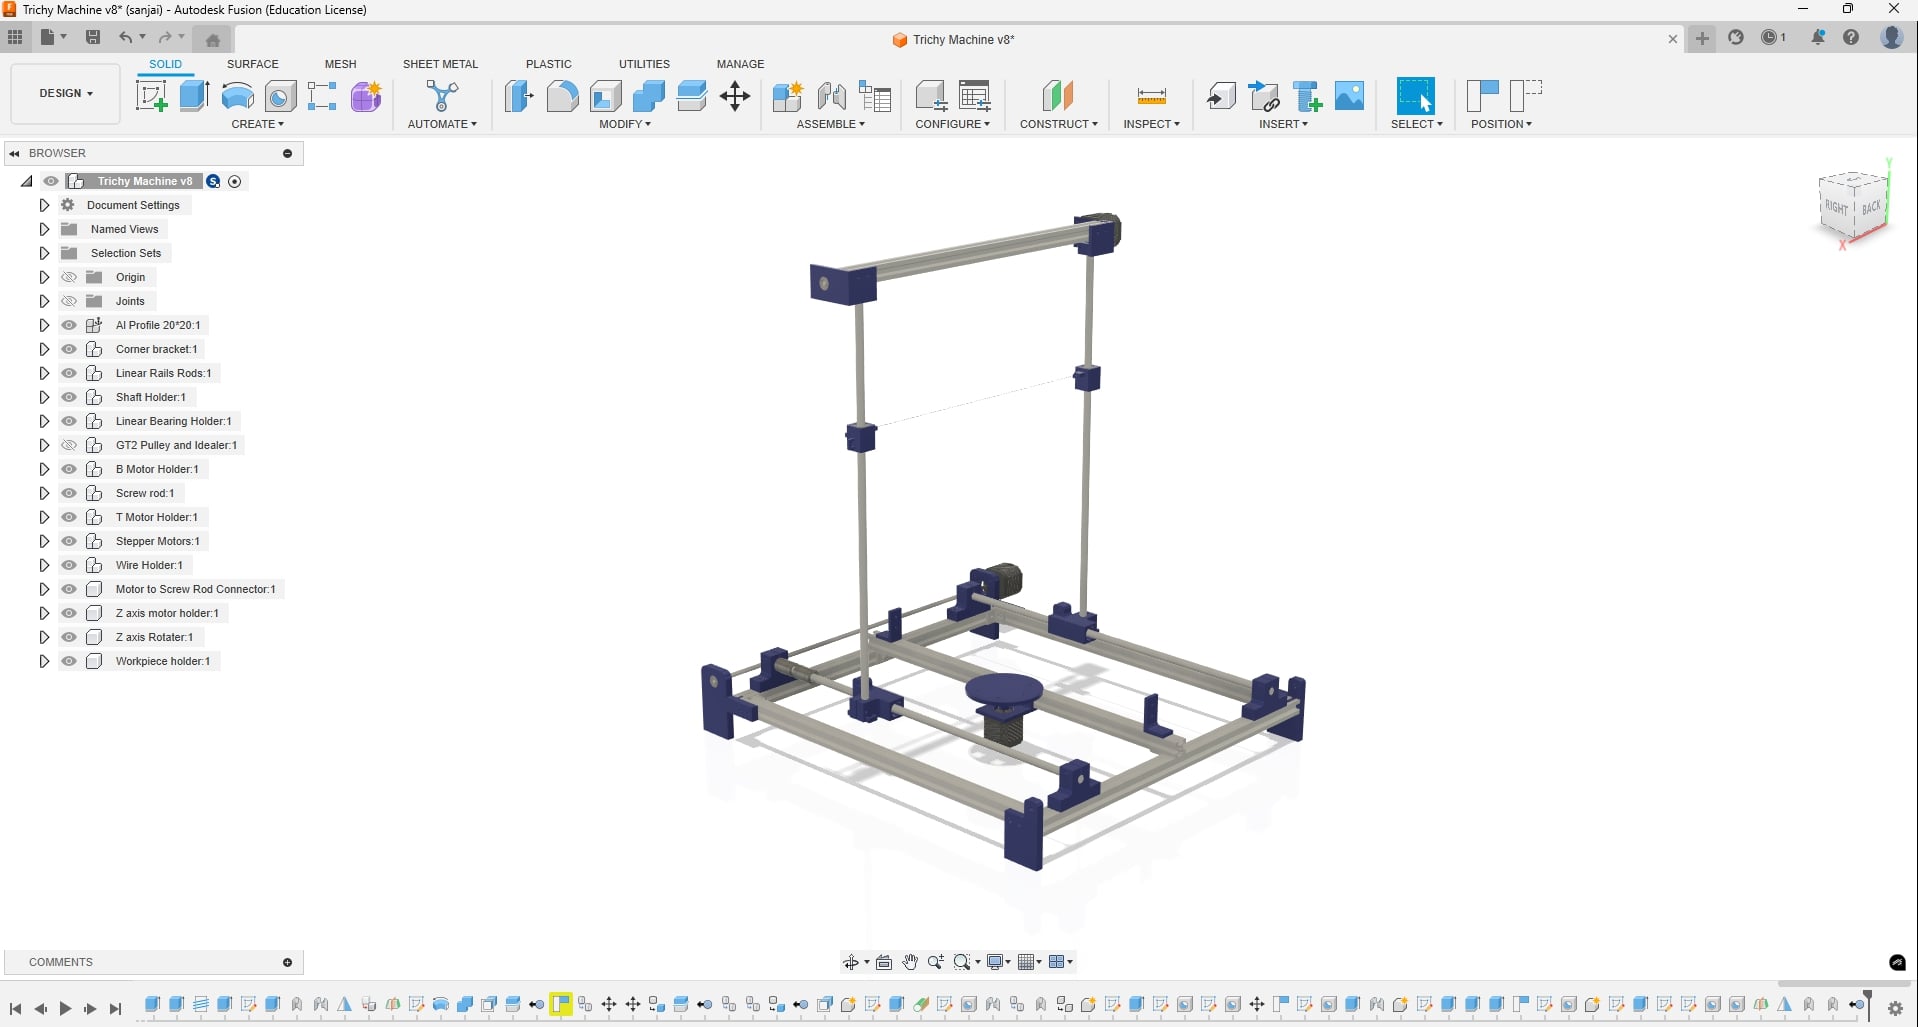
For the Machining week we planned to bulid a Hot wire Foam Cutting Machine. We divided the tasks among ourselves, and I was responsible for handling the design work.
I took the initiative to lead the machine design process and prioritized its completion.
I began designing the machine from scratch using Fusion 360 software.
Fusion 360
Fusion 360 is a cloud-based 3D CAD, CAM, and CAE tool developed by Autodesk for product design and manufacturing. It integrates design, engineering, simulation, and collaboration in a single platform. Users can create parametric, freeform, and mesh models with ease.
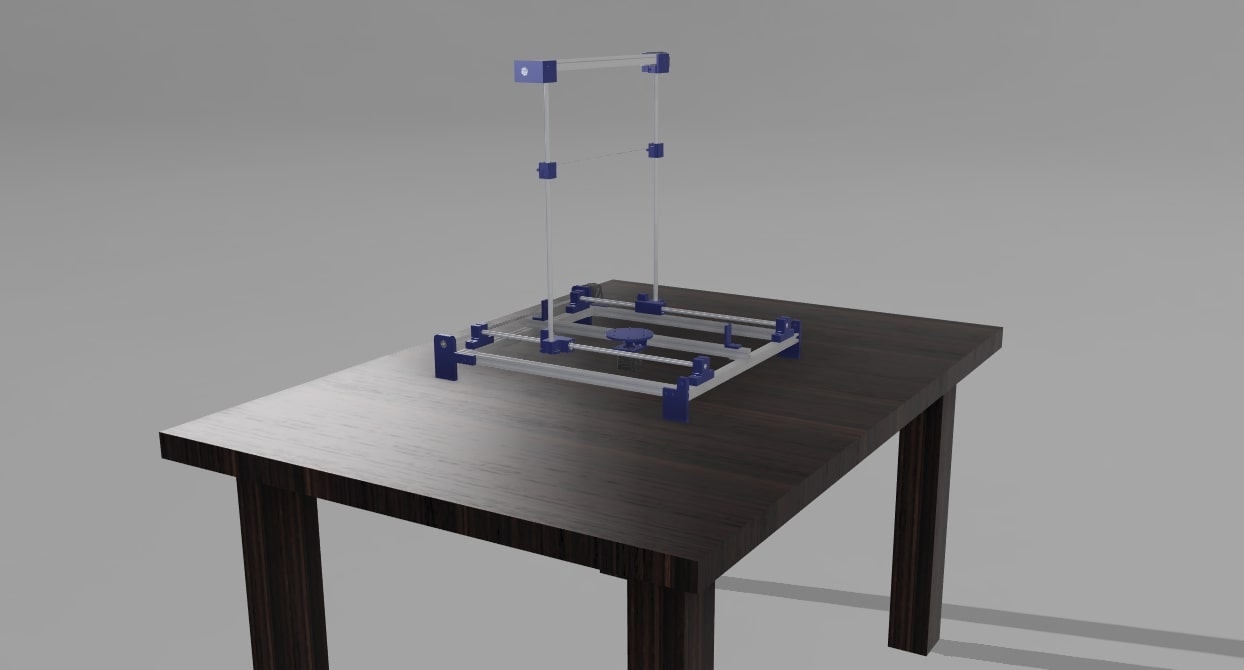
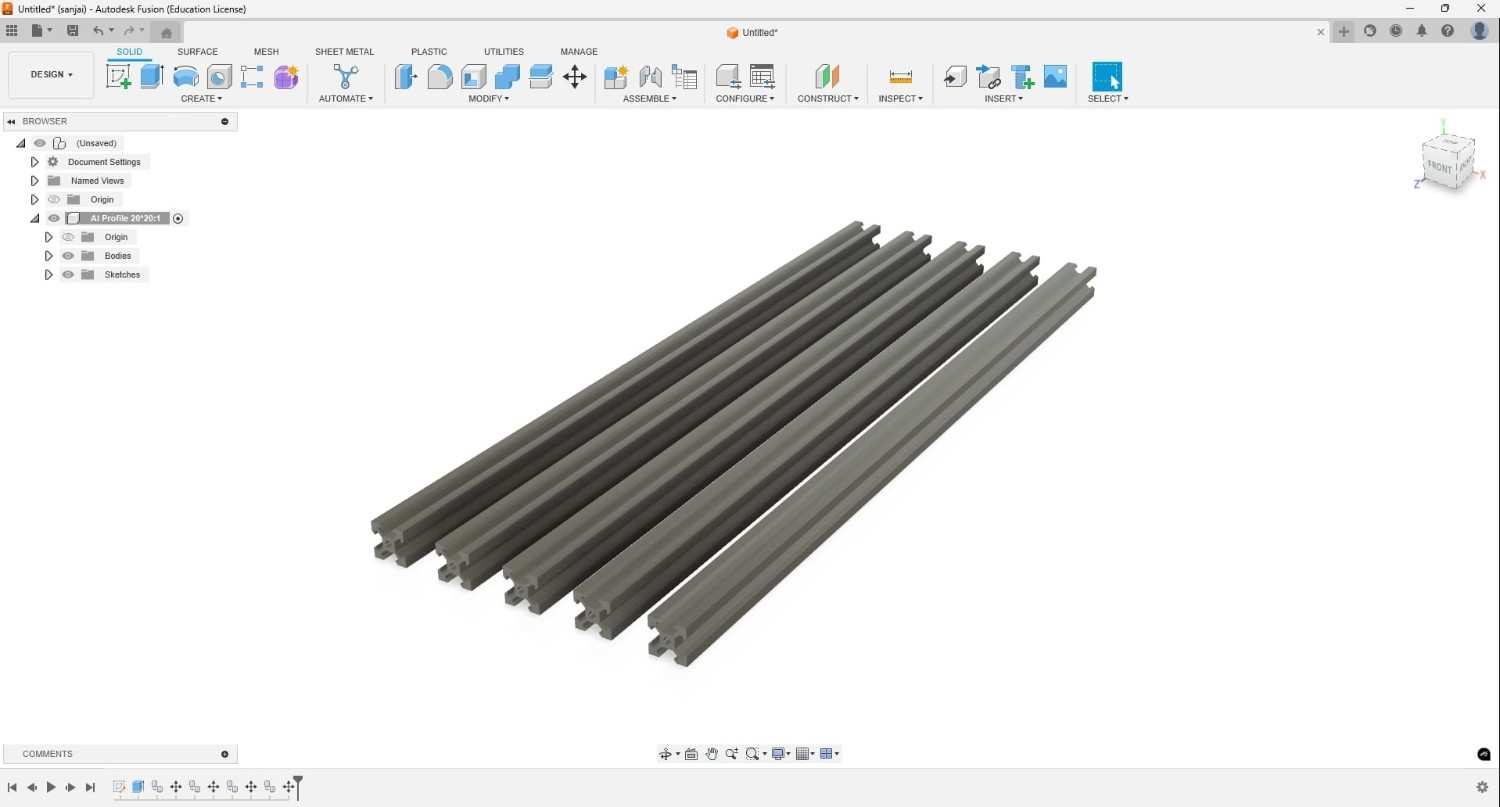
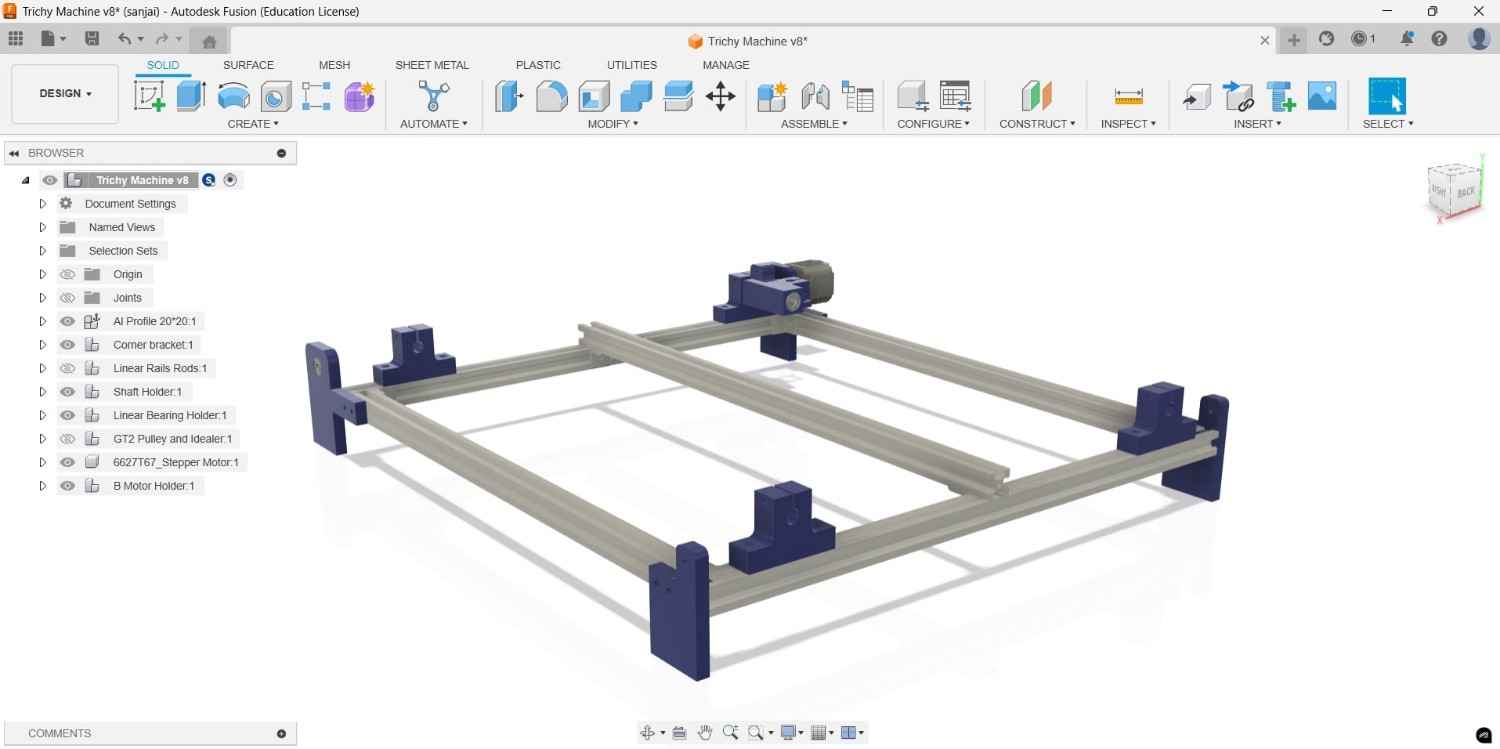
To begin constructing the machine, aluminum extrusion profiles we selected for the base.
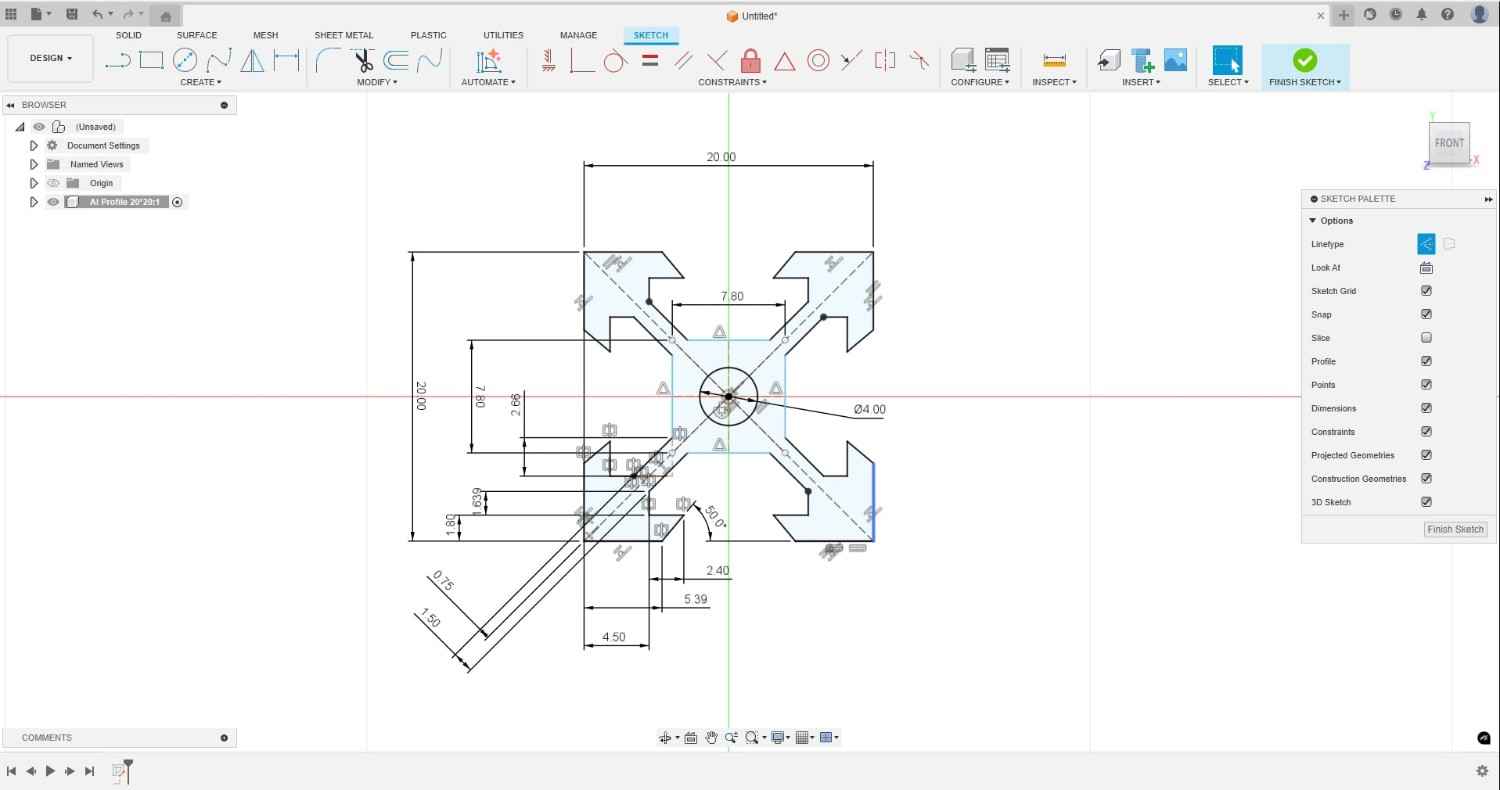
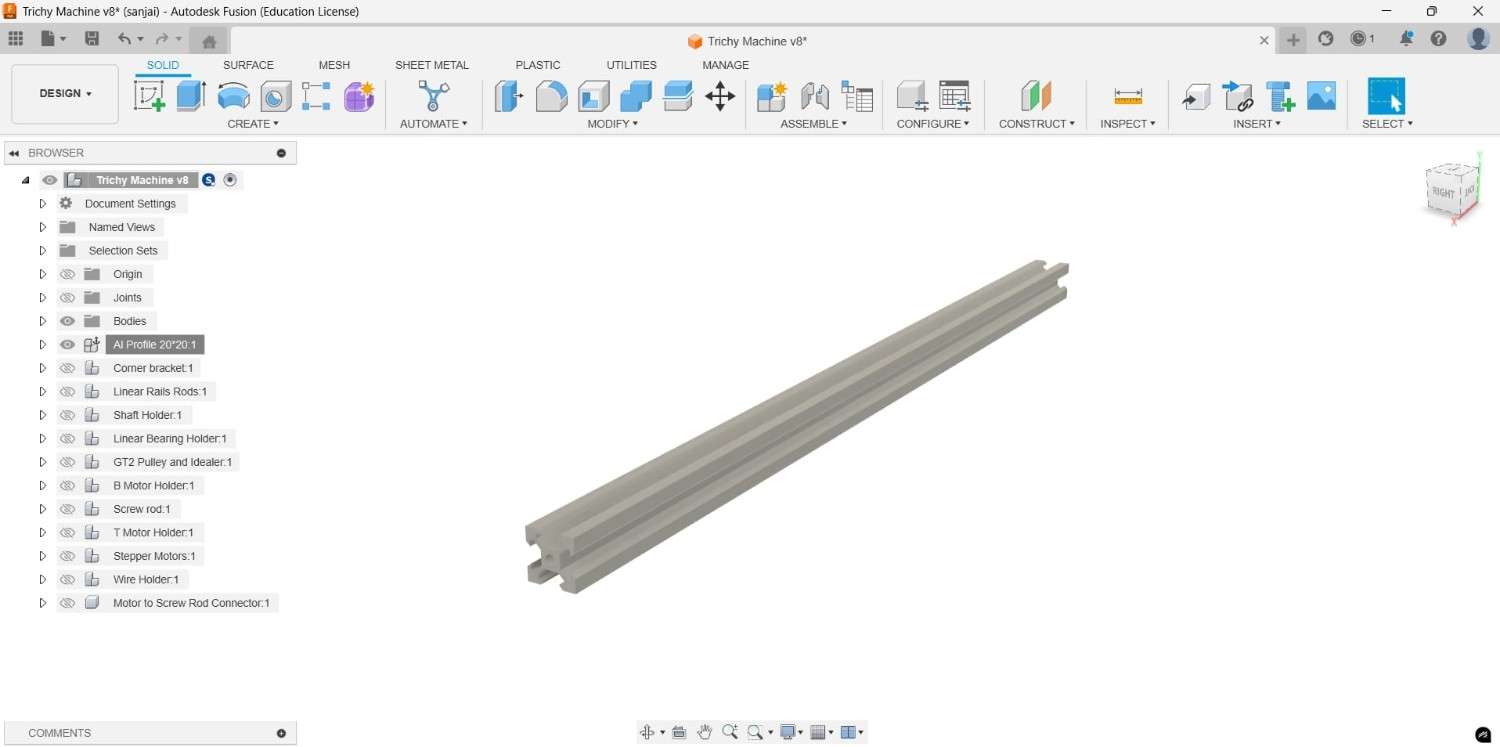
I created a total of five aluminum profiles: four for the base and one for the workpiece holder
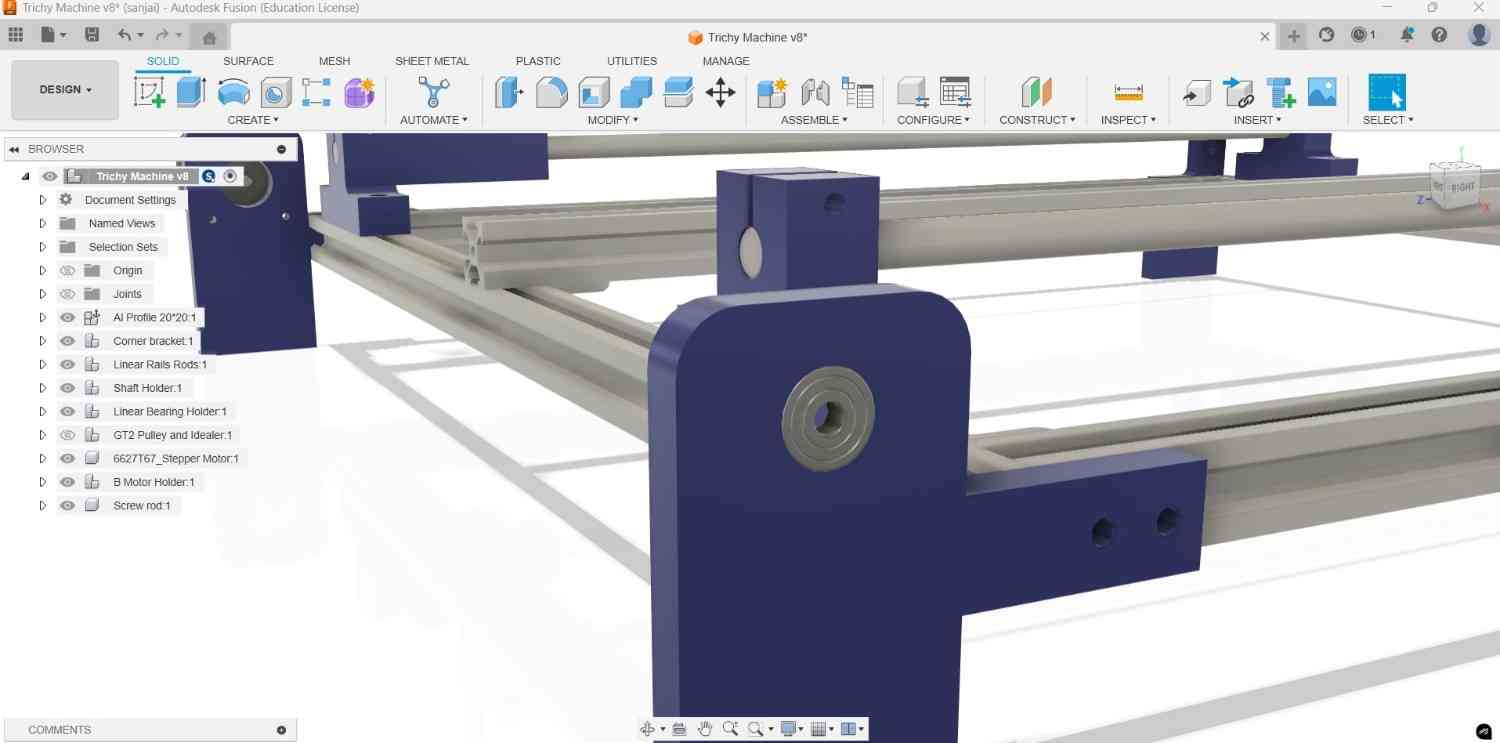
Next, assemble the parts using the assembly option with a rigid assembly method. In the actual build, I used corner brackets from McMaster in Fusion to secure the aluminum profiles, and positioned them in the desired location using the rigid assembly method.

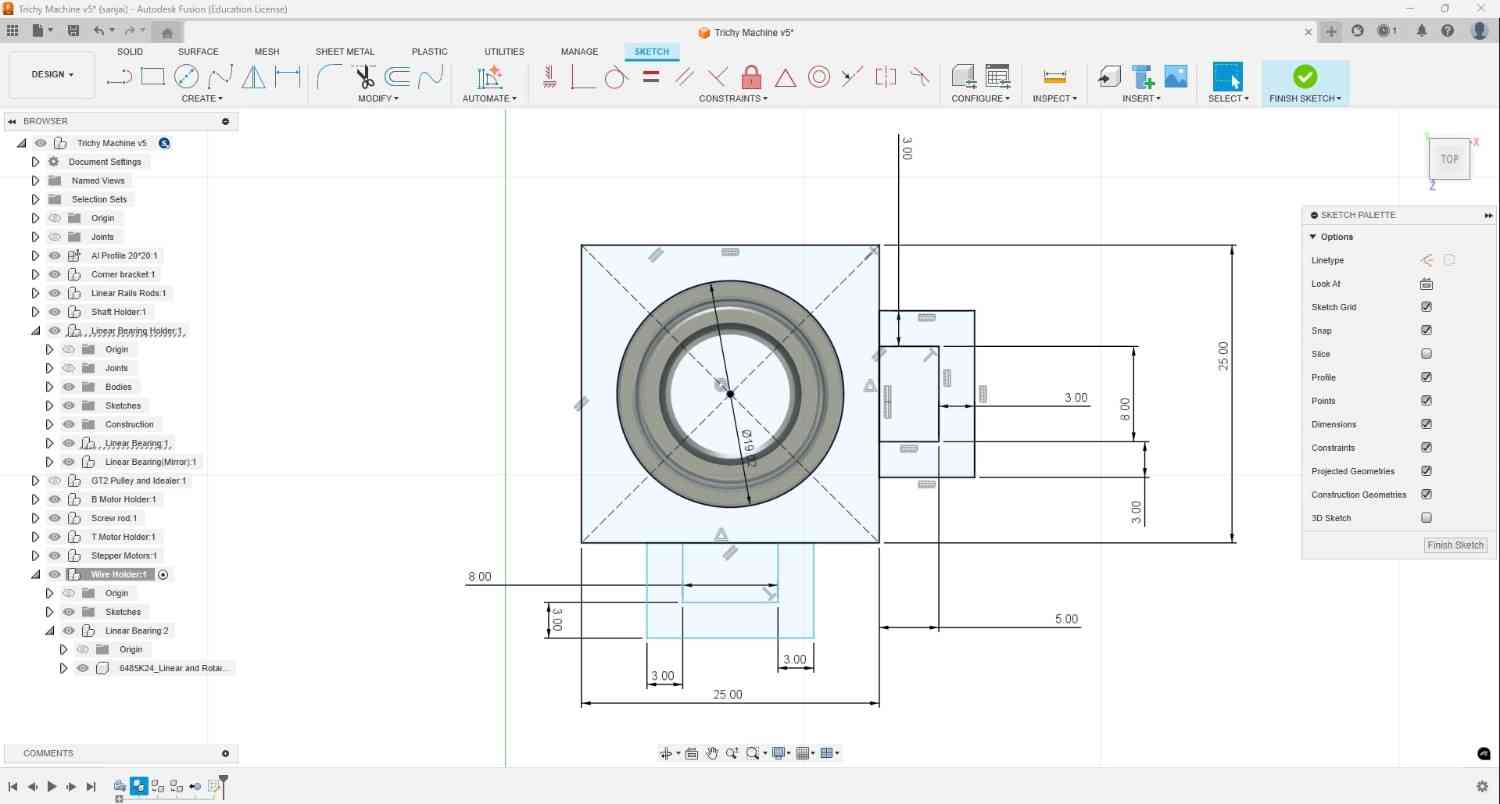
I created the linear rail rods, which function to move the hot wire during the cutting process.
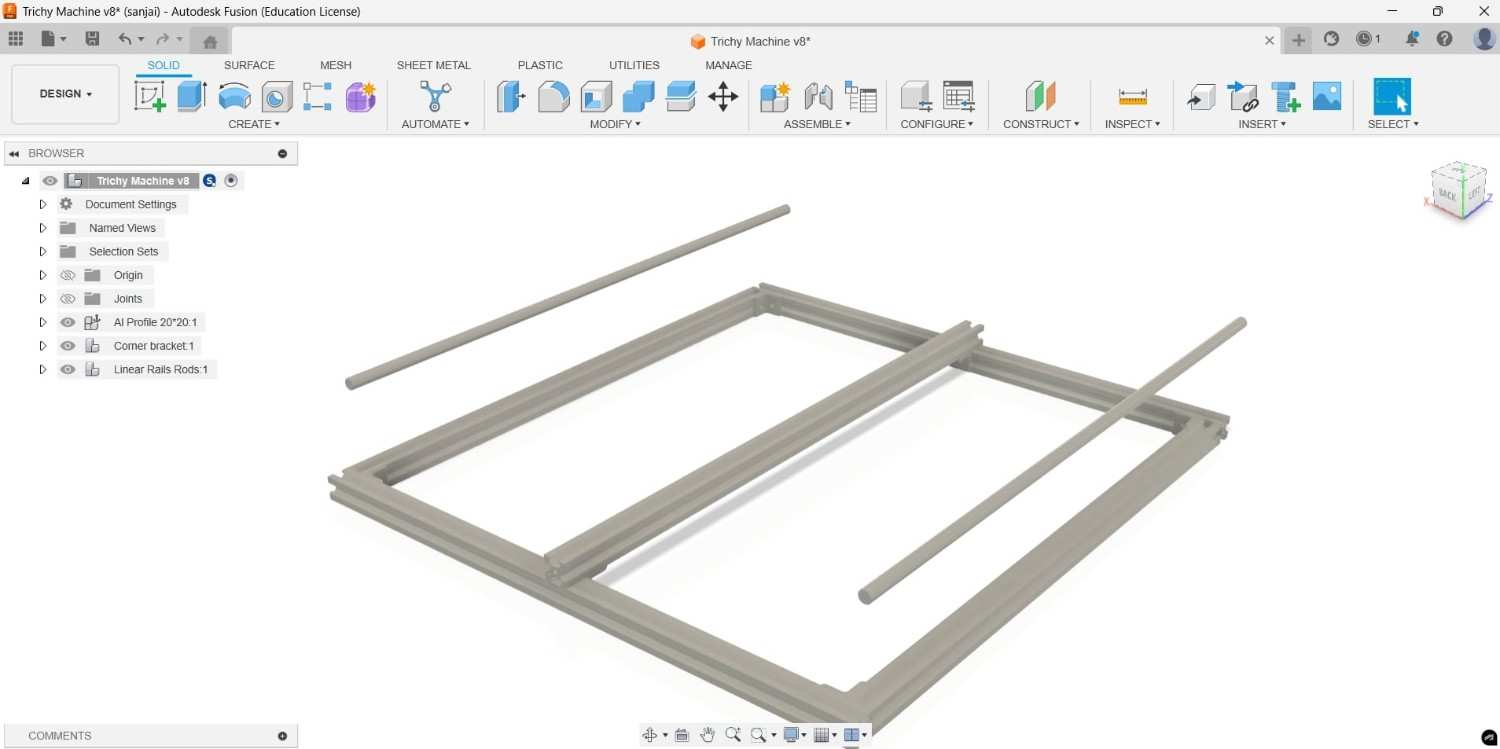
Then created the linear rail rod holders to secure them in place and prevent any slippage.
After assembling, I positioned the components in the desired location, ensuring proper alignment with the linear rail rods.

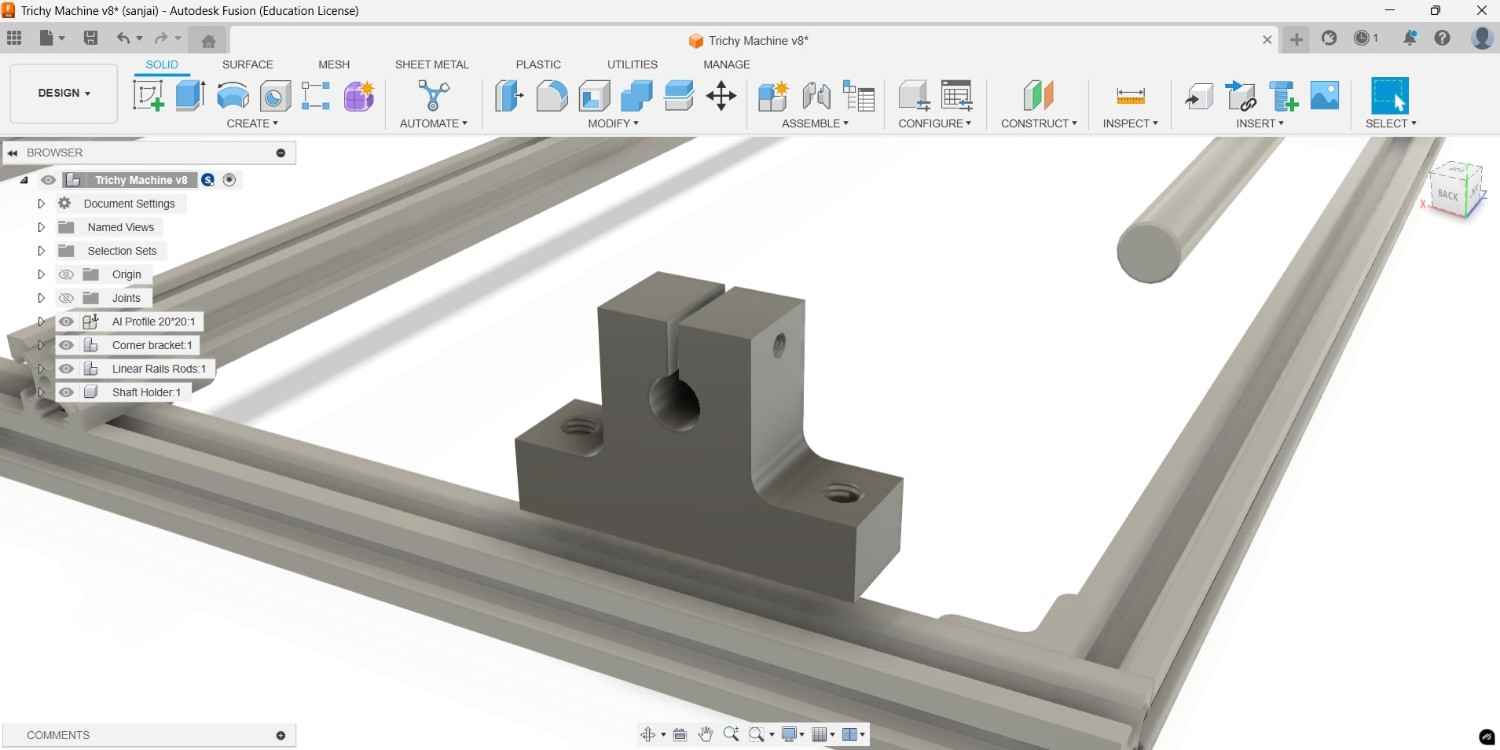
Next, I selected linear bearings from McMaster, which will be used to move the hot wire by traveling along the linear rail rods.
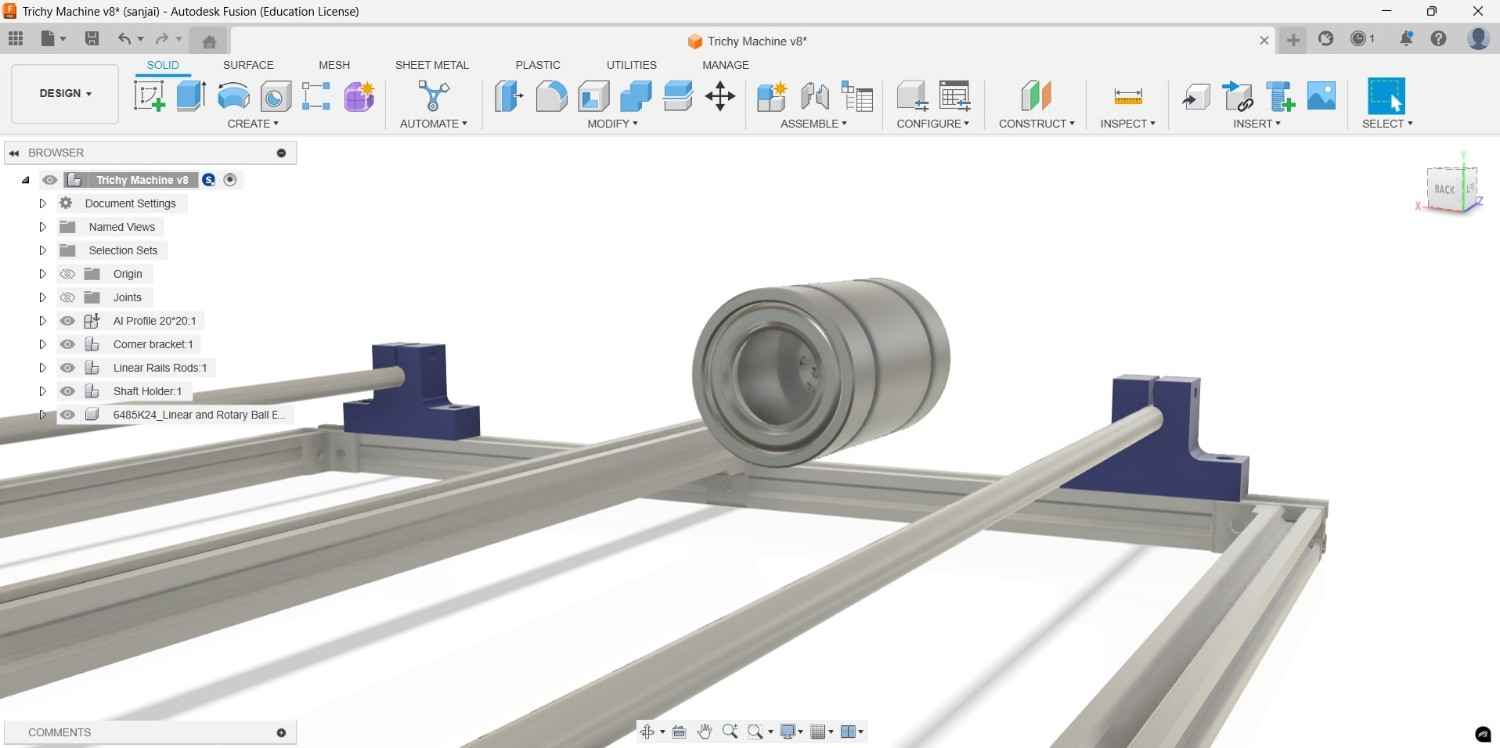
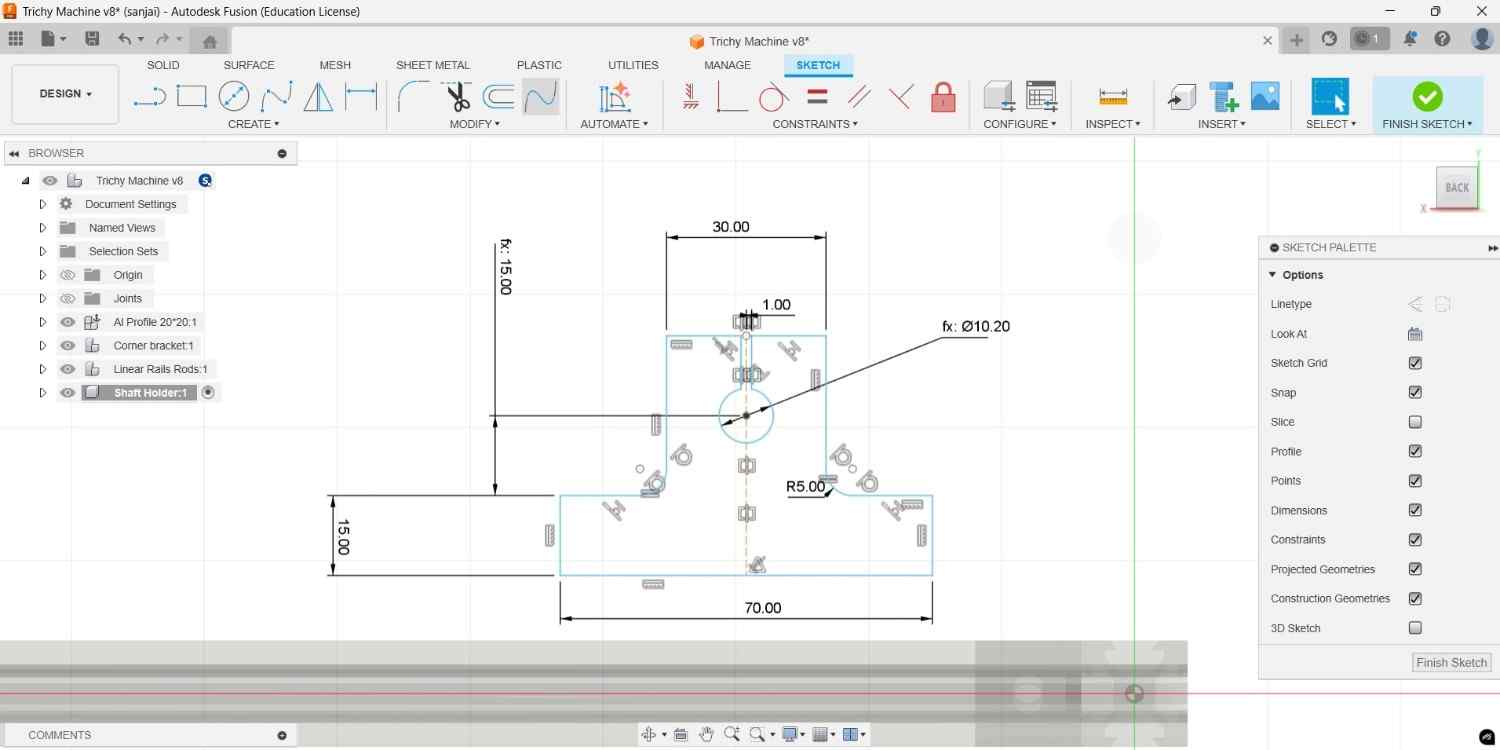
I created a block to hold the linear bearing and assembled it with the linear rail rod using the slider assembly option.
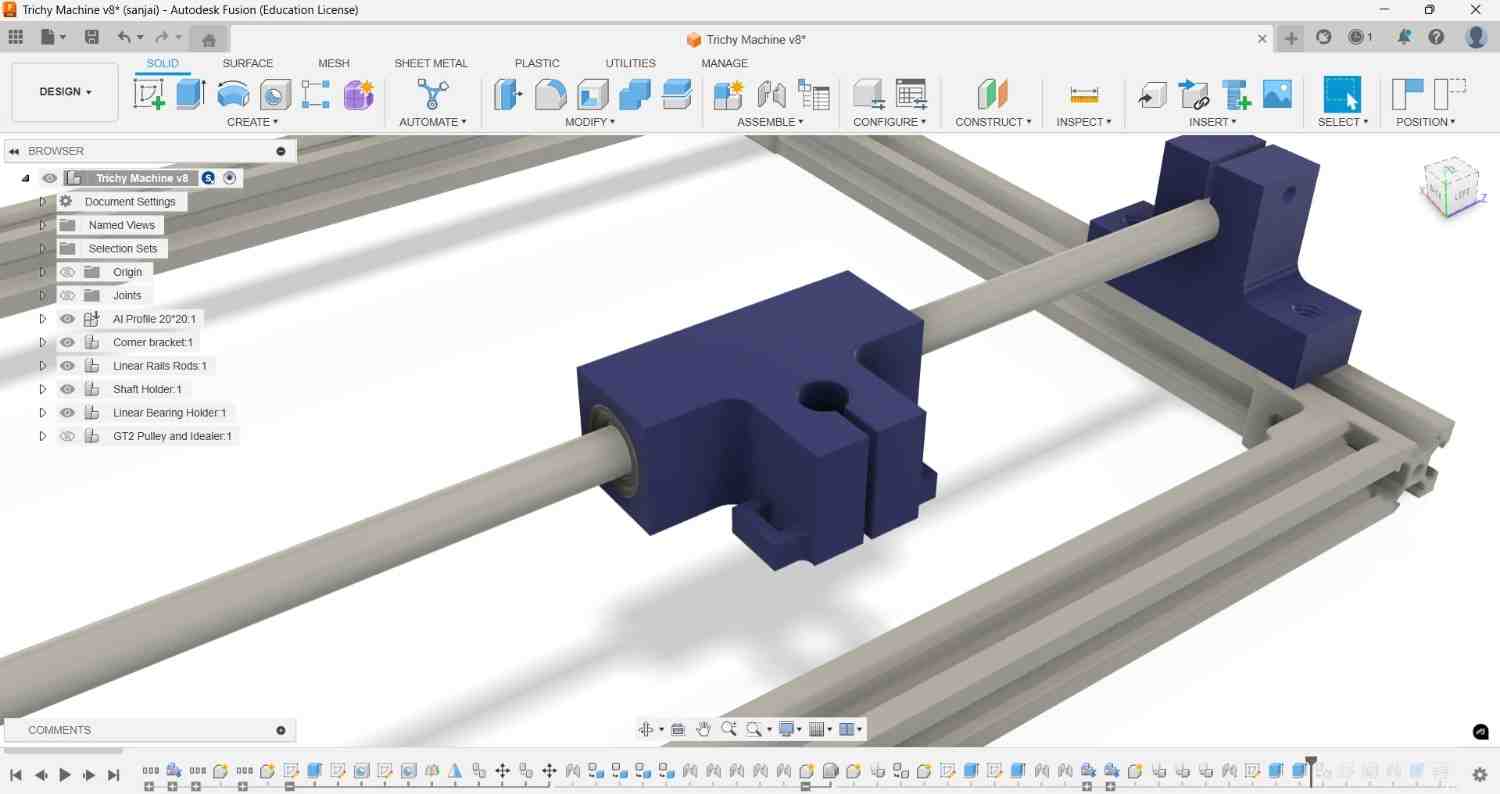
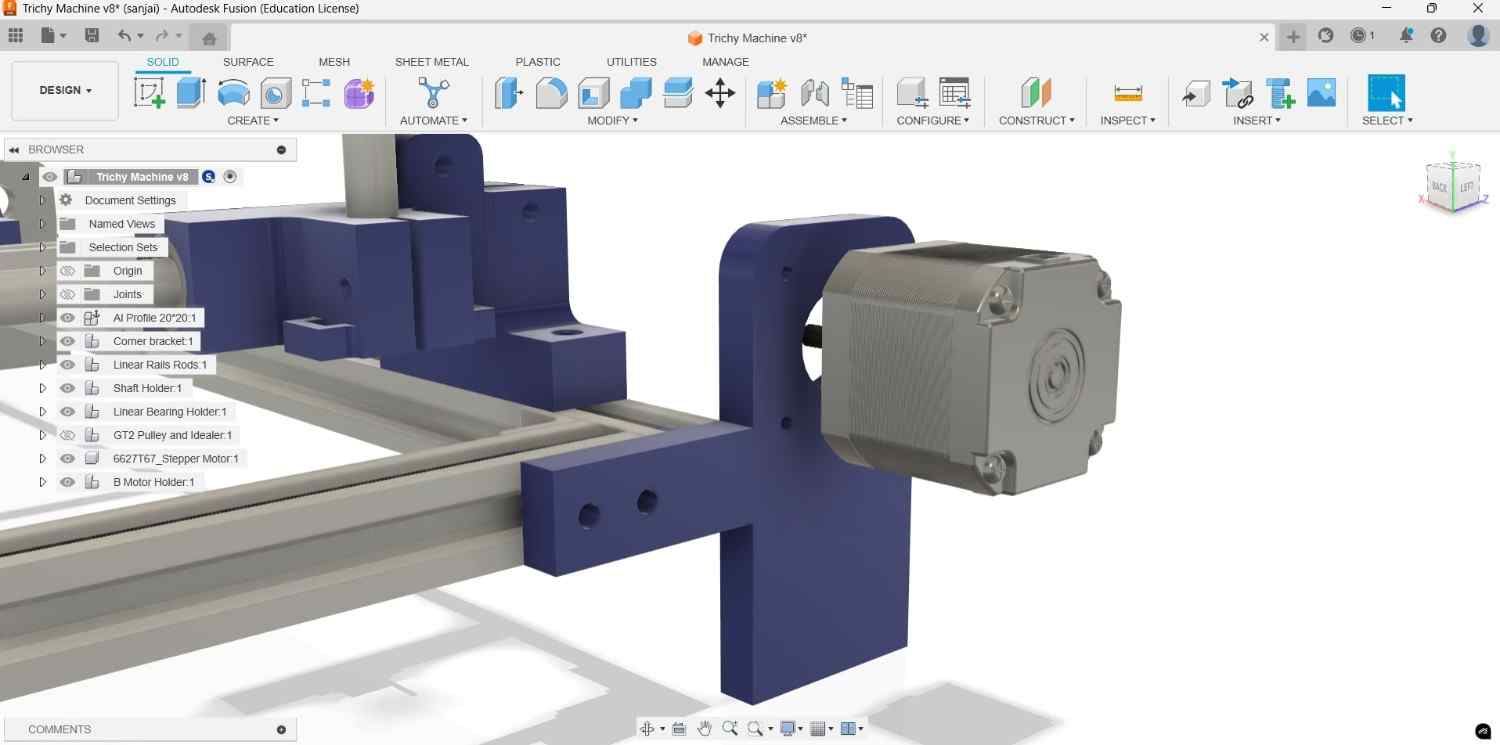
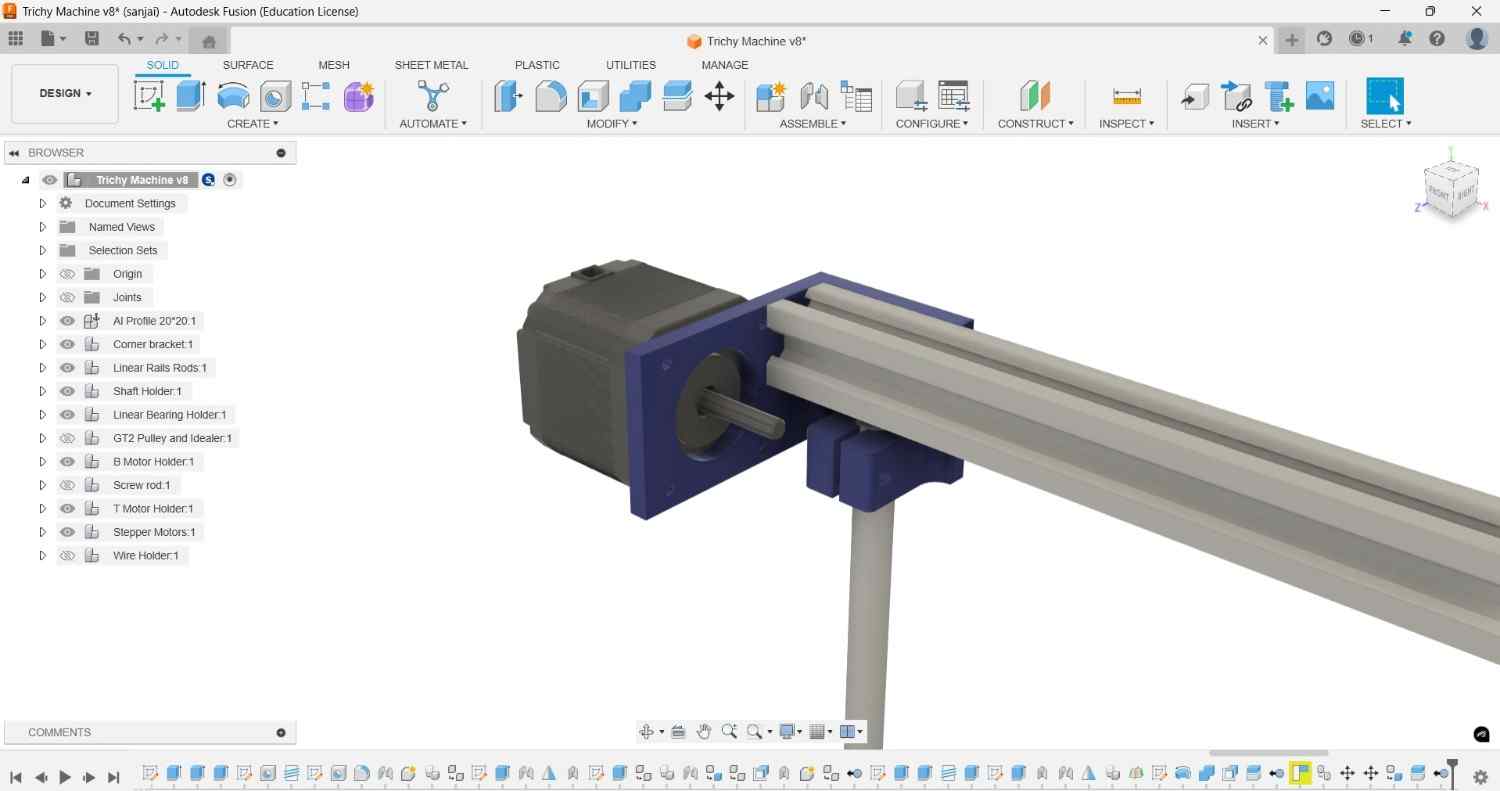
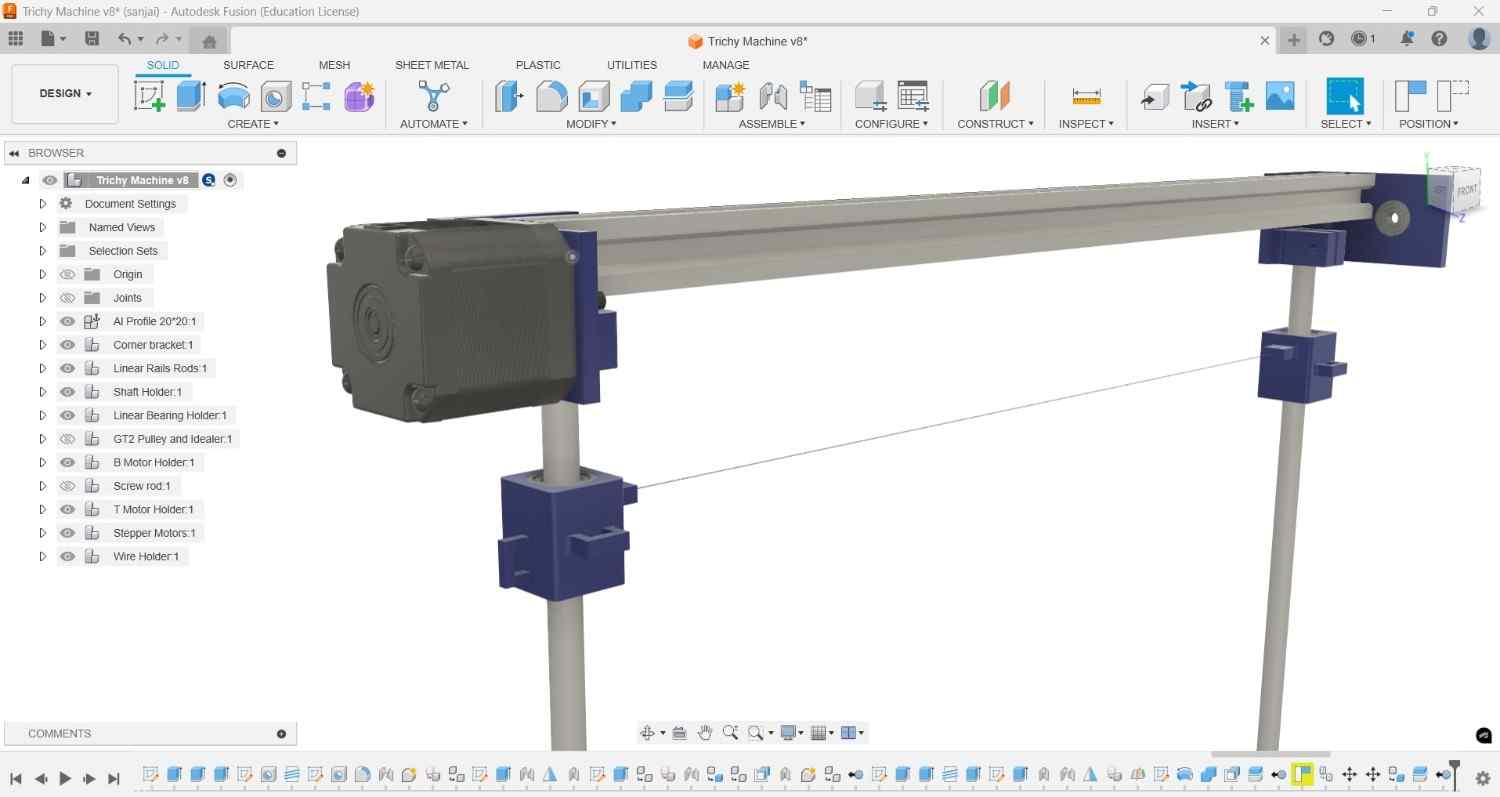
Next, I selected a NEMA 17 stepper motor from McMaster and created a motor holder to securely mount it in place.
Similarly, I created a base holder for the other side as well.
I selected ball bearings from McMaster to meet the design requirements and placed them in the desired locations using the rigid assembly method.
I then attached the components to the threaded rod using the revolute assembly method.
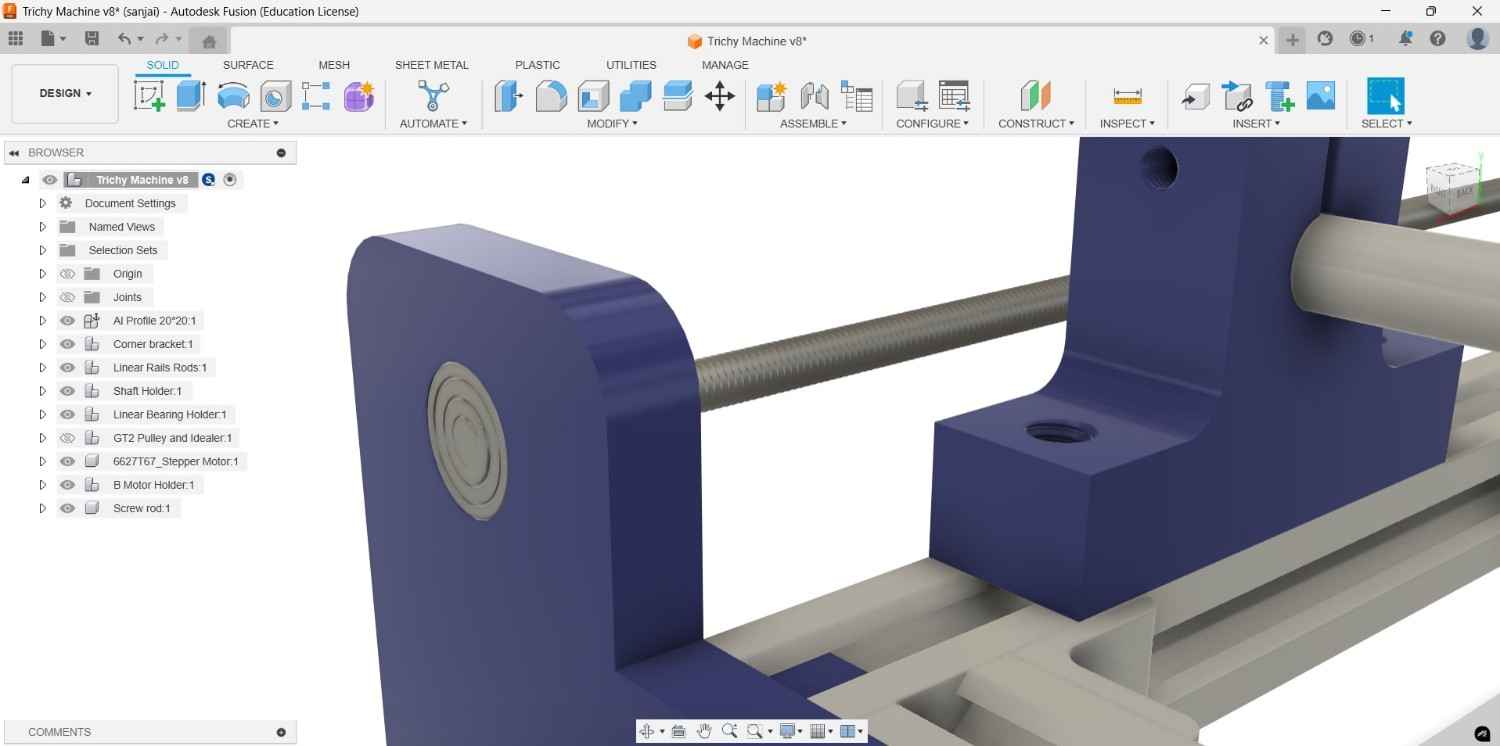
Afterward, I worked on the top section and created a component to hold all parts together, including the linear rail rod, aluminum profile, and NEMA 17 stepper motor.
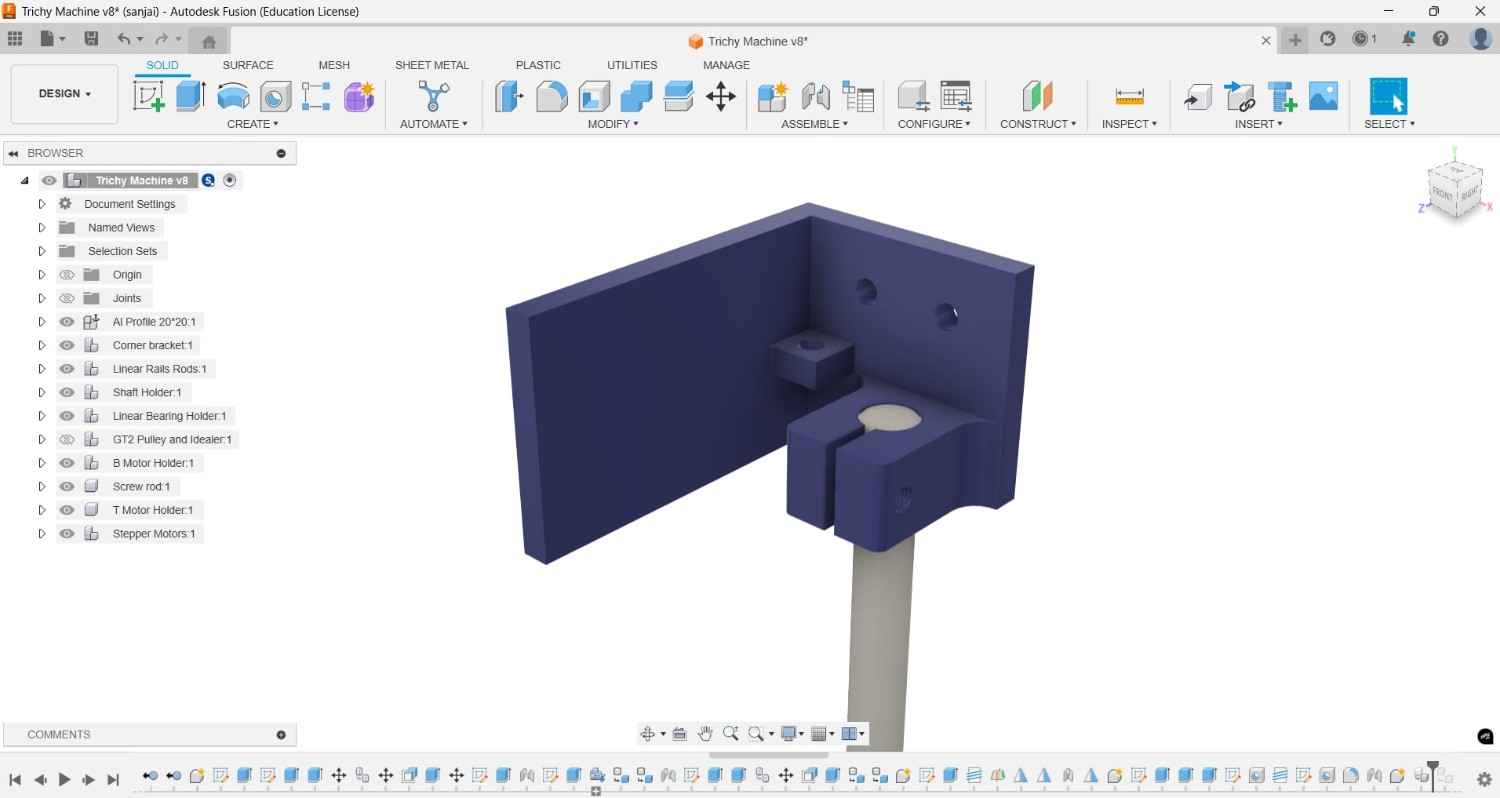
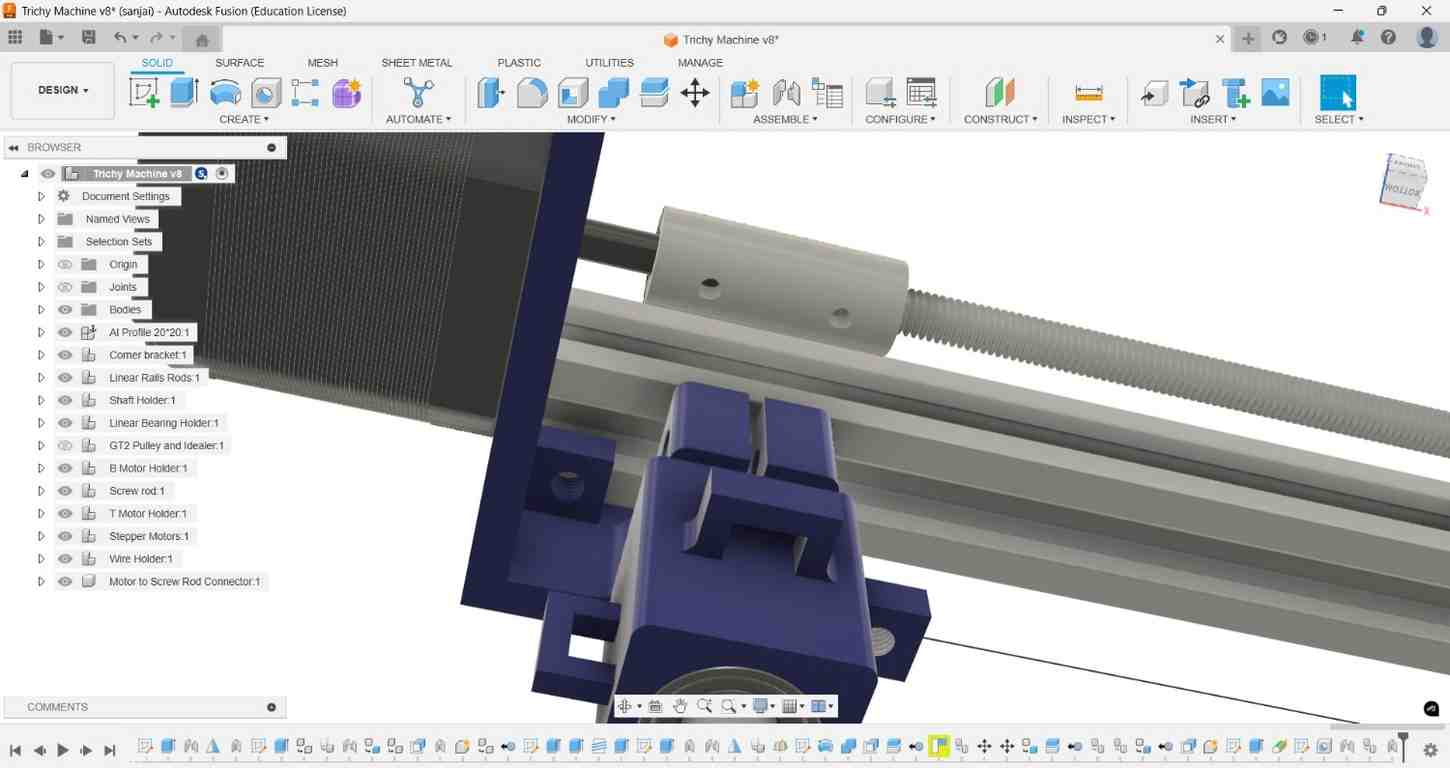
I then created the Z-axis moving component, integrating a linear bearing inside it to enable smooth vertical motion.
I designed a motor-to-screw rod connector to securely hold both components and ensure efficient transmission of motion in between.
I then designed the Z-axis rotational component, which holds the stepper motor; through its operation, this part rotates along with the workpiece.
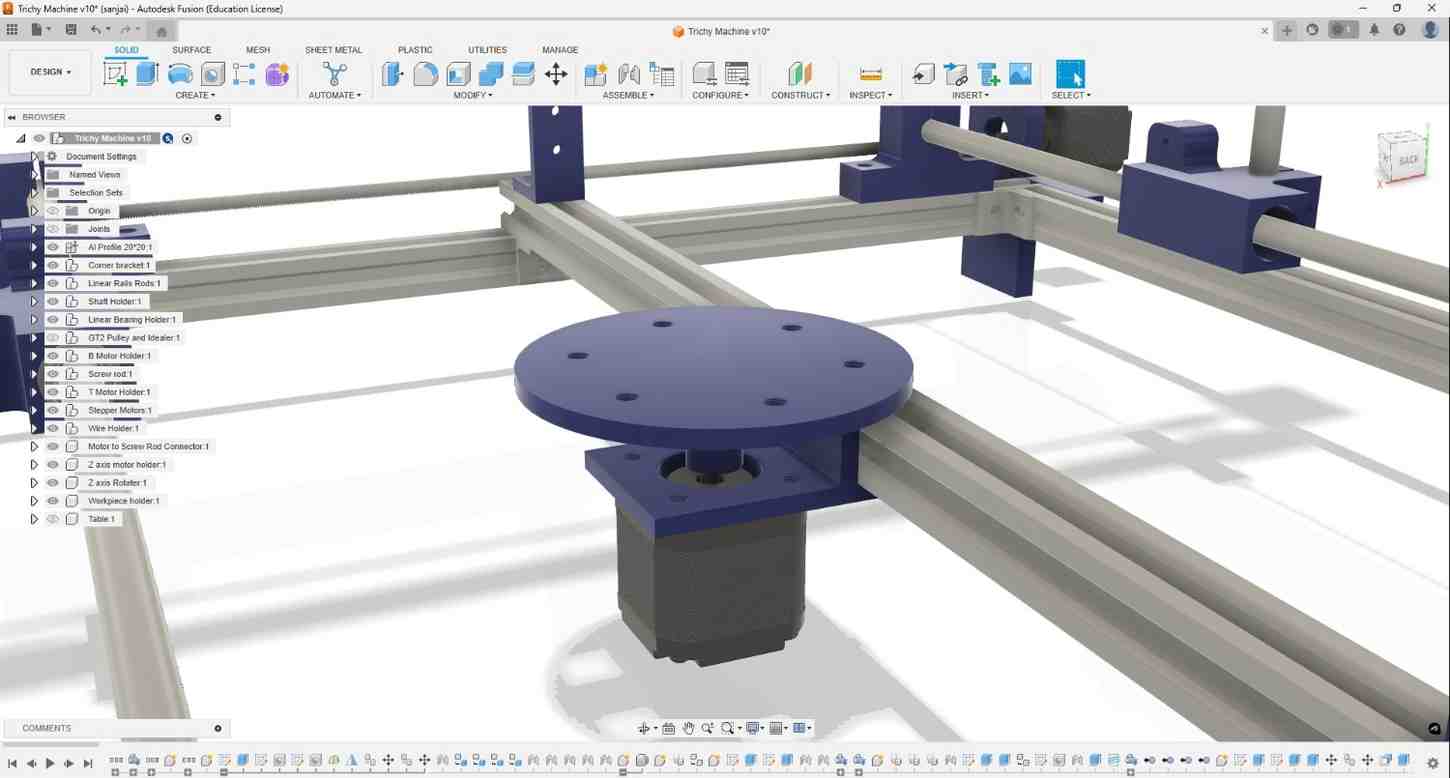
The final design of the Hot Wire Foam Cutting Machine, integrating all mechanical and motion components into a complete assembly.
Further I did the Rendering and also Animation of how I assemble those parts as well.
3D Printing
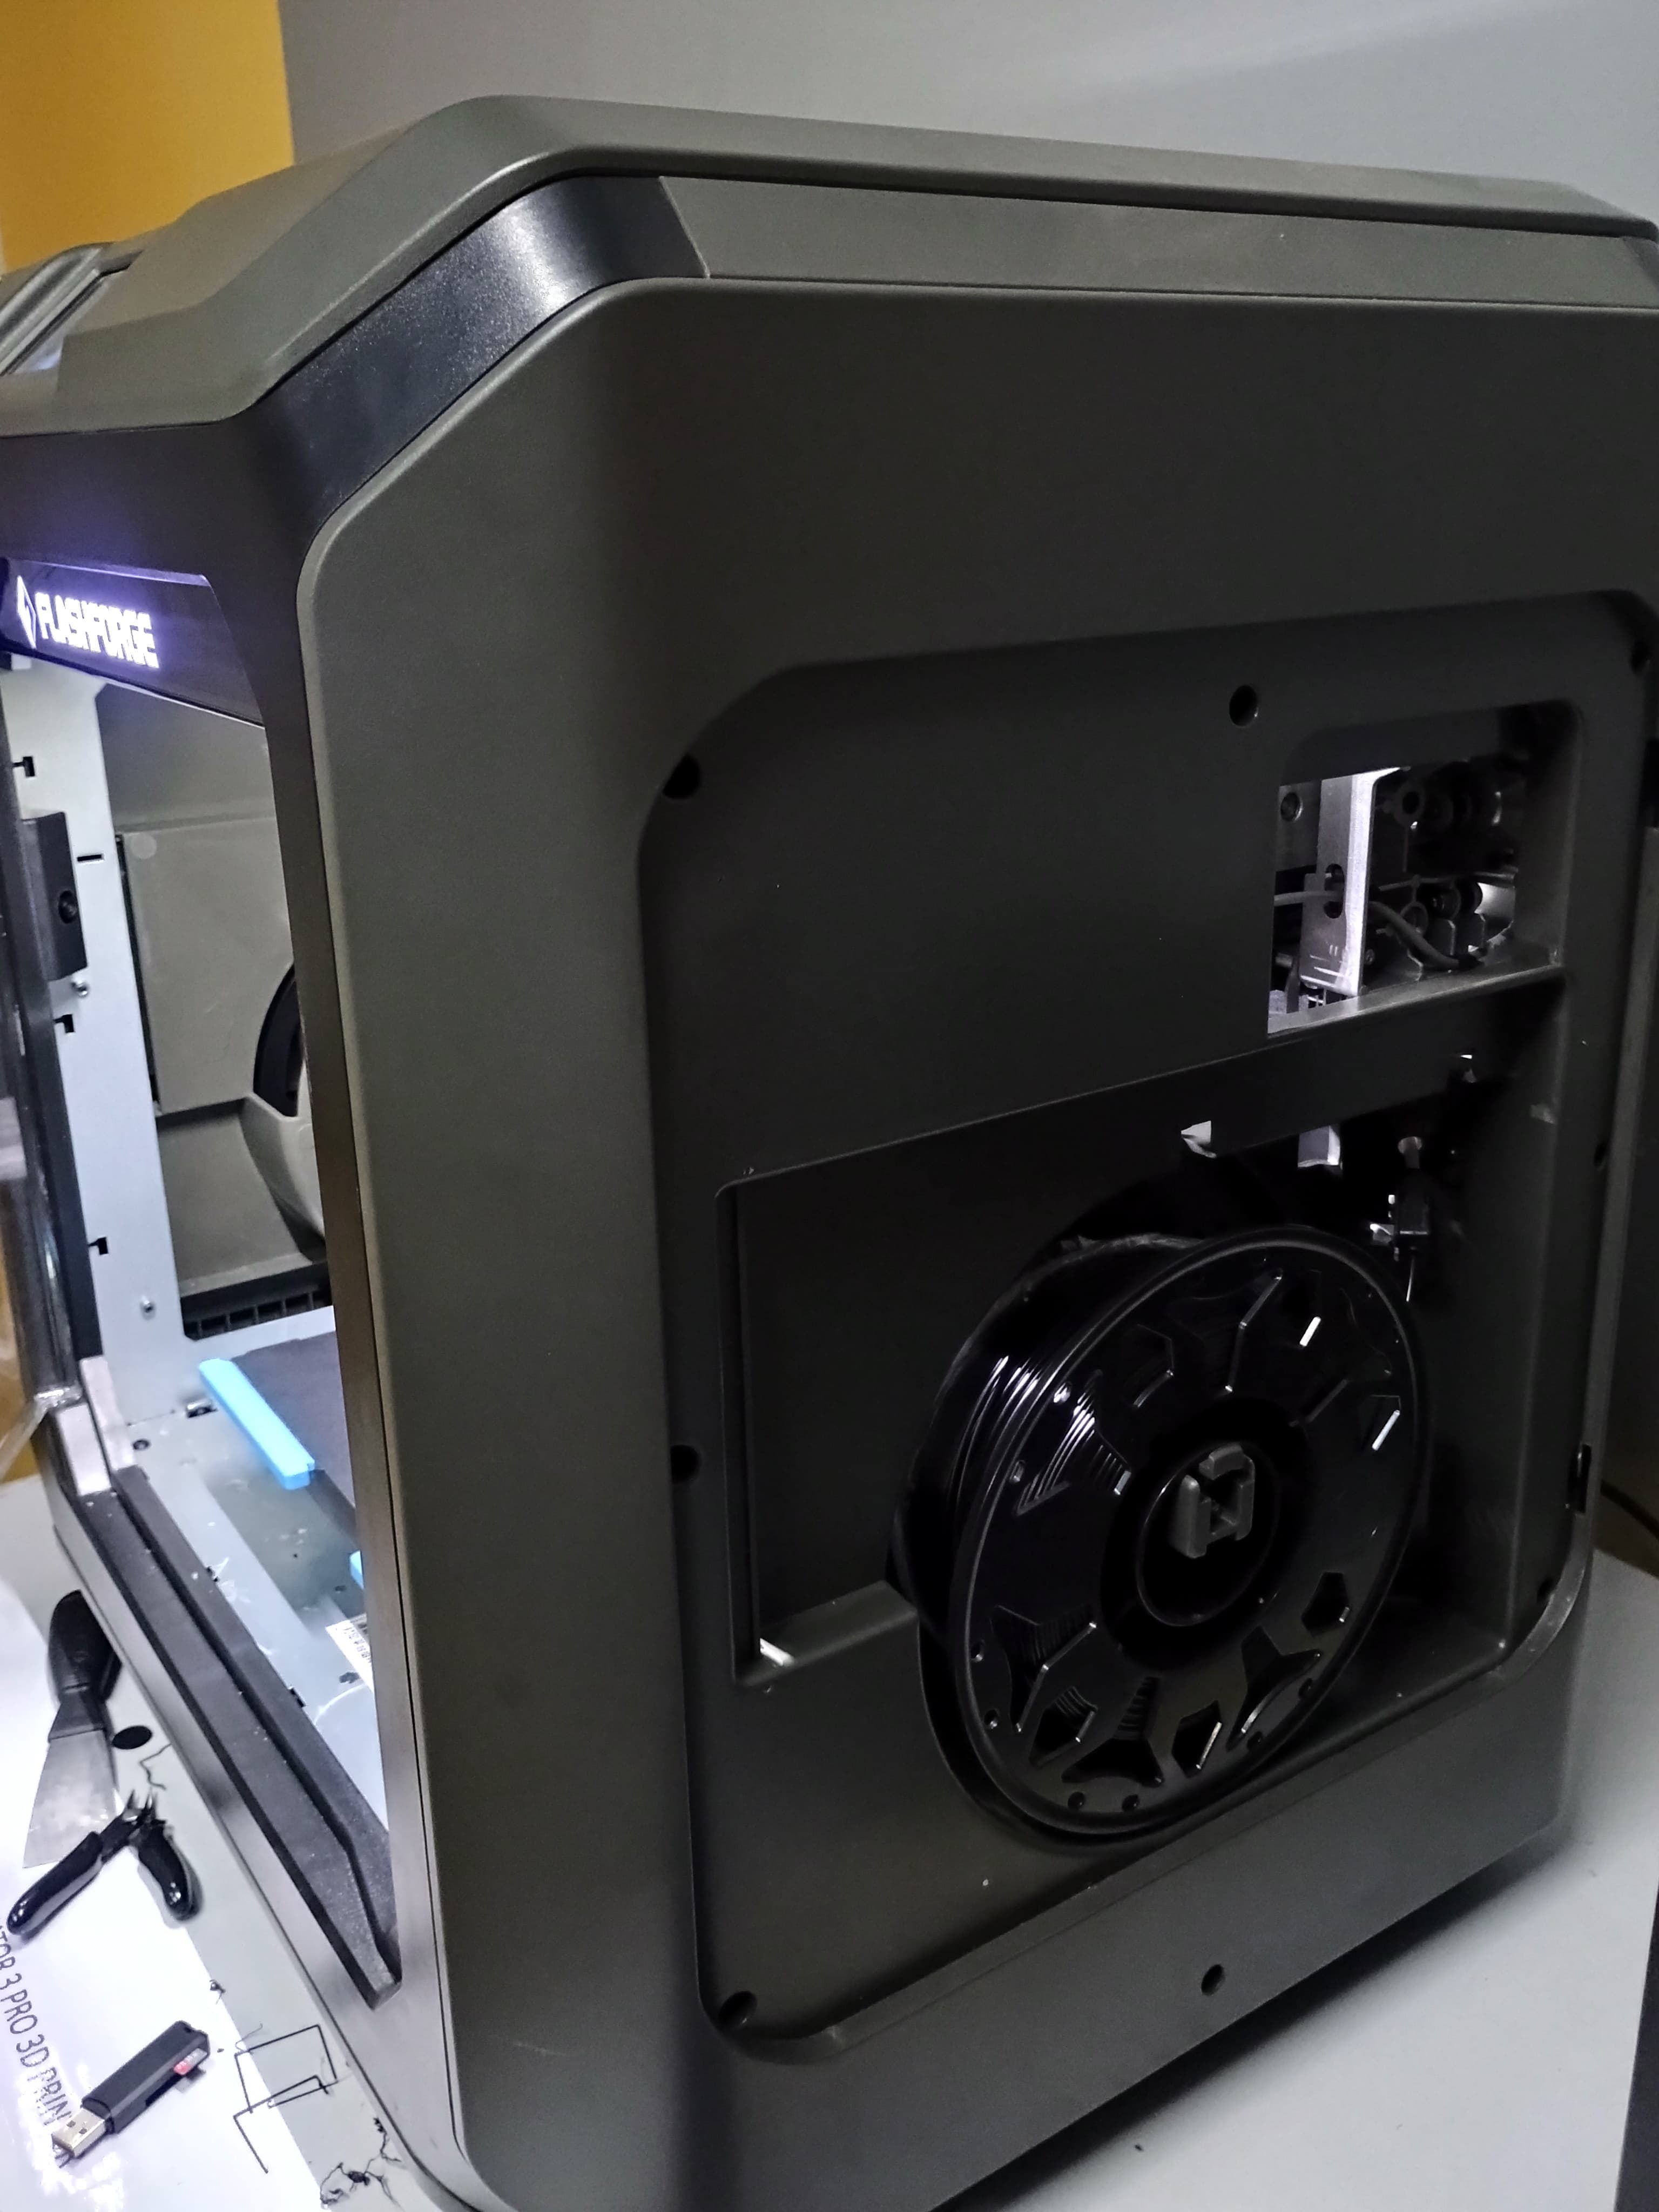
Flash Print
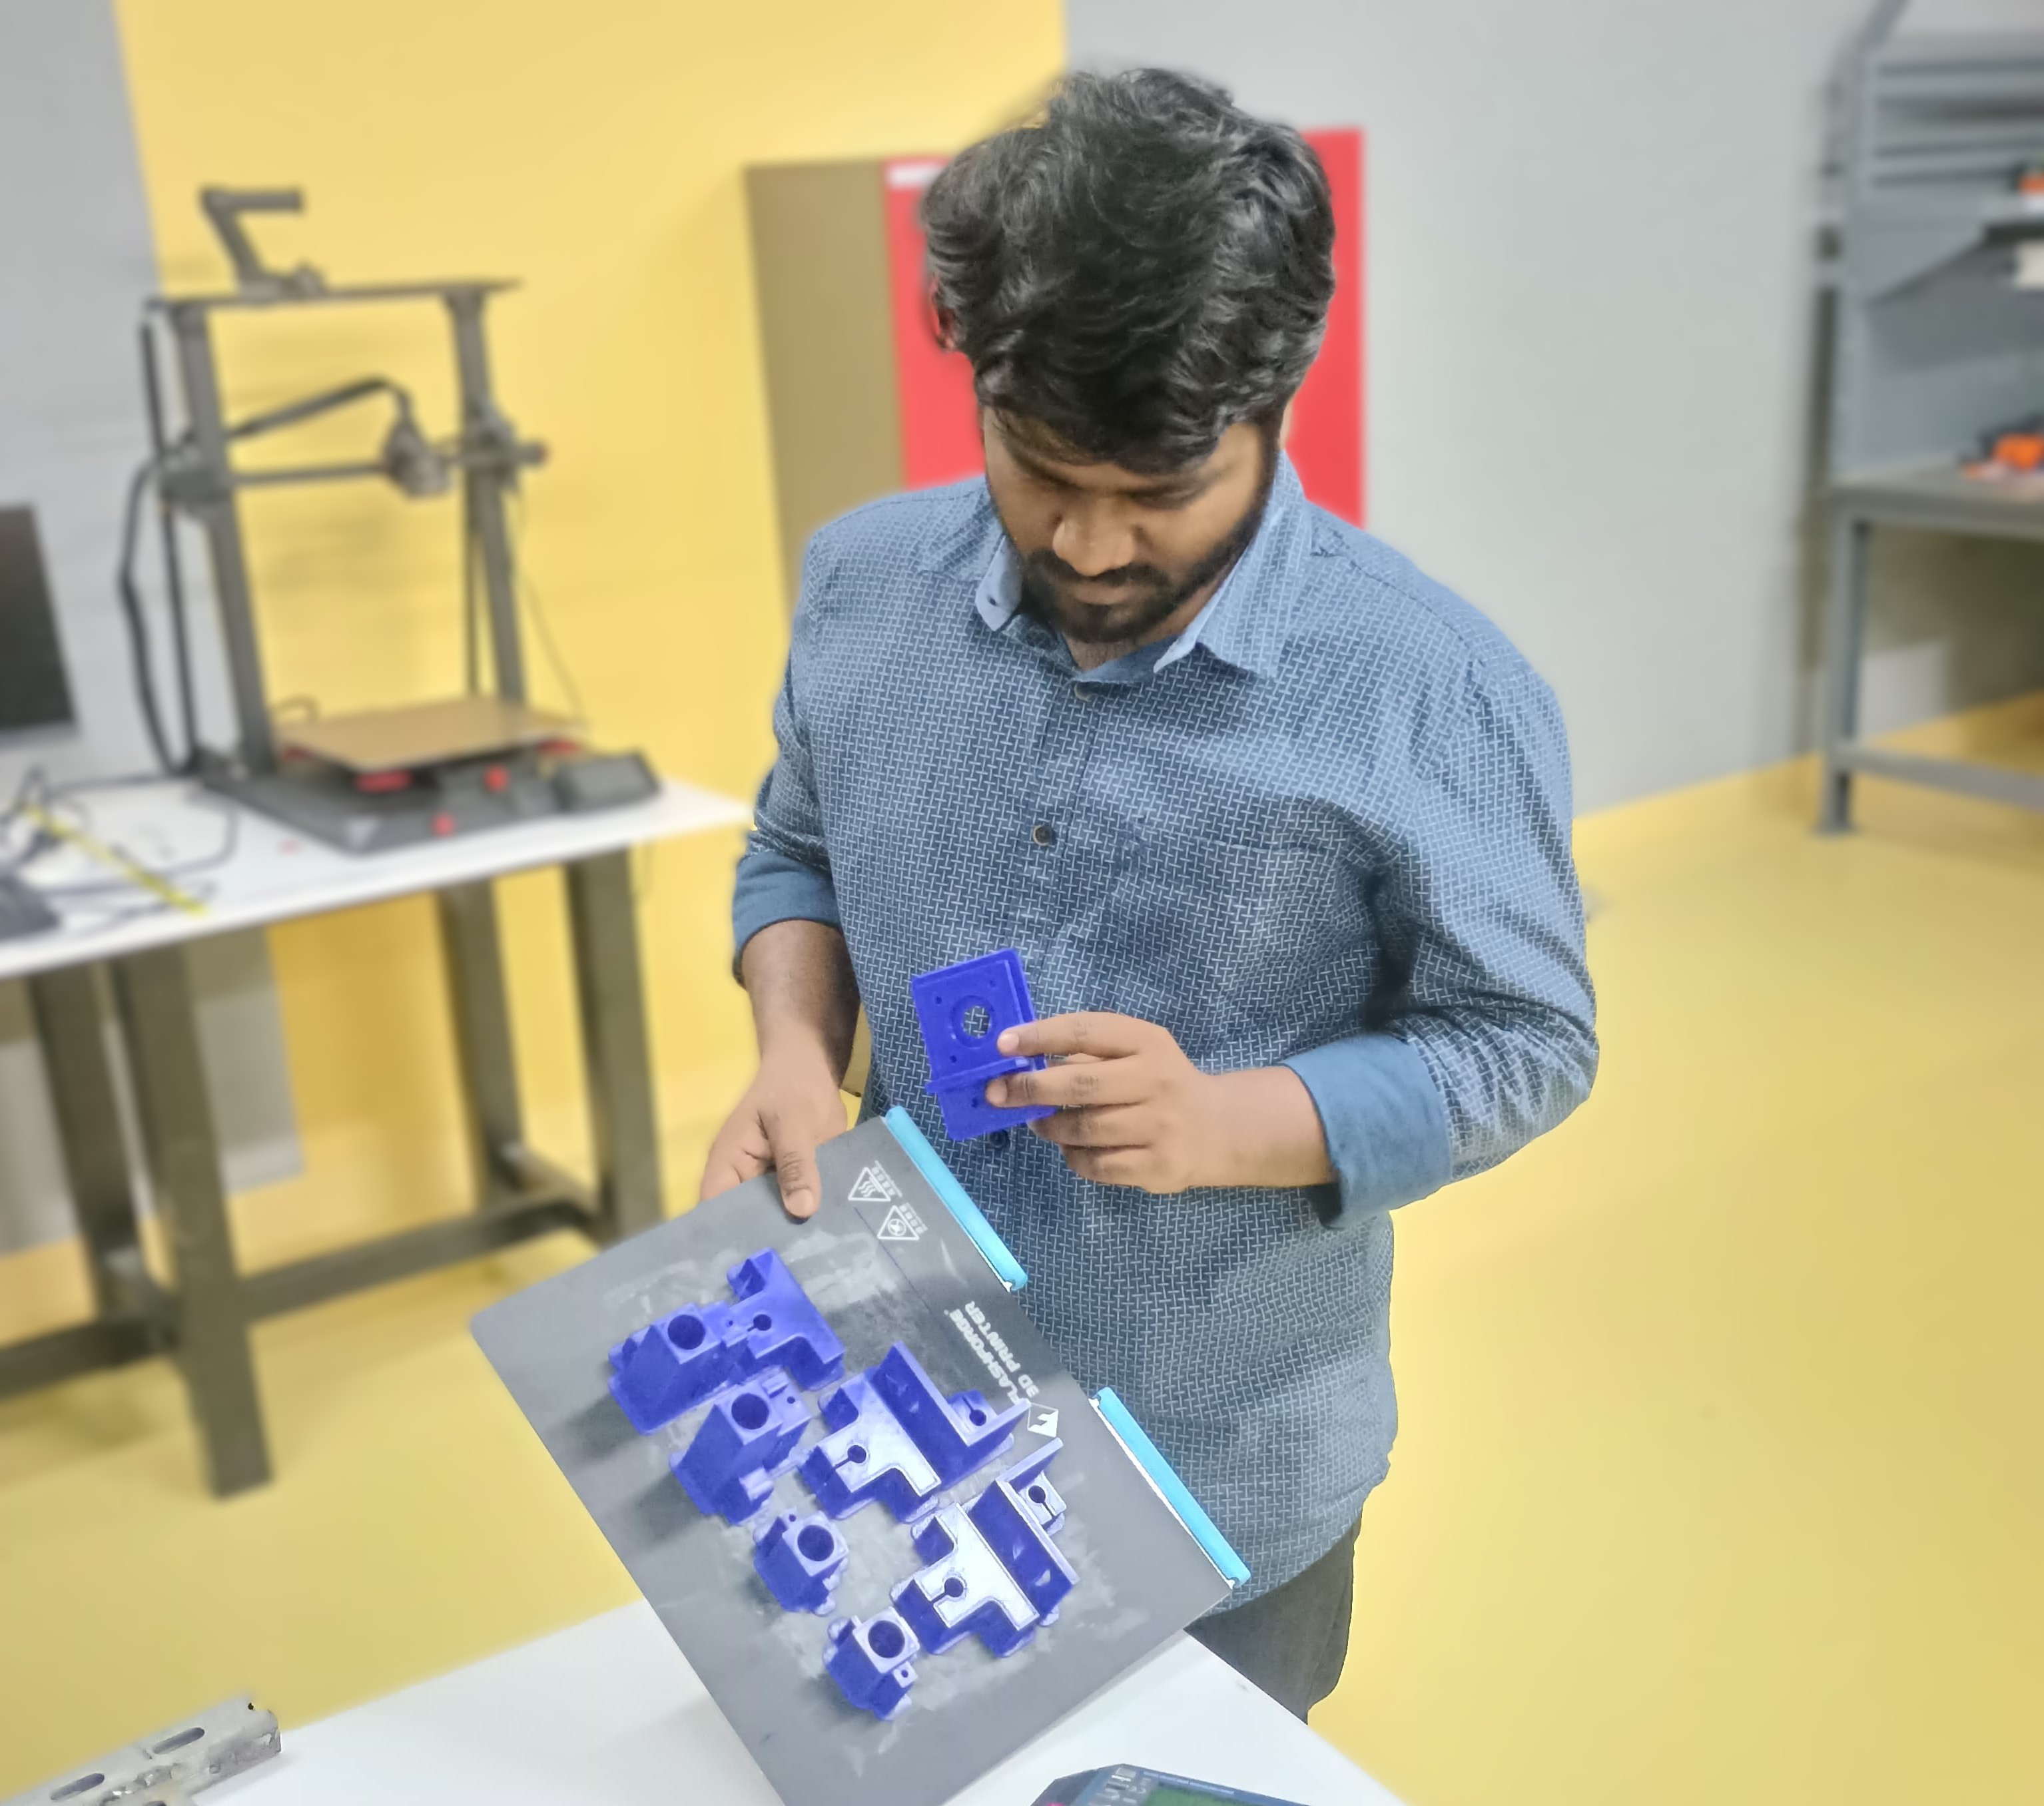
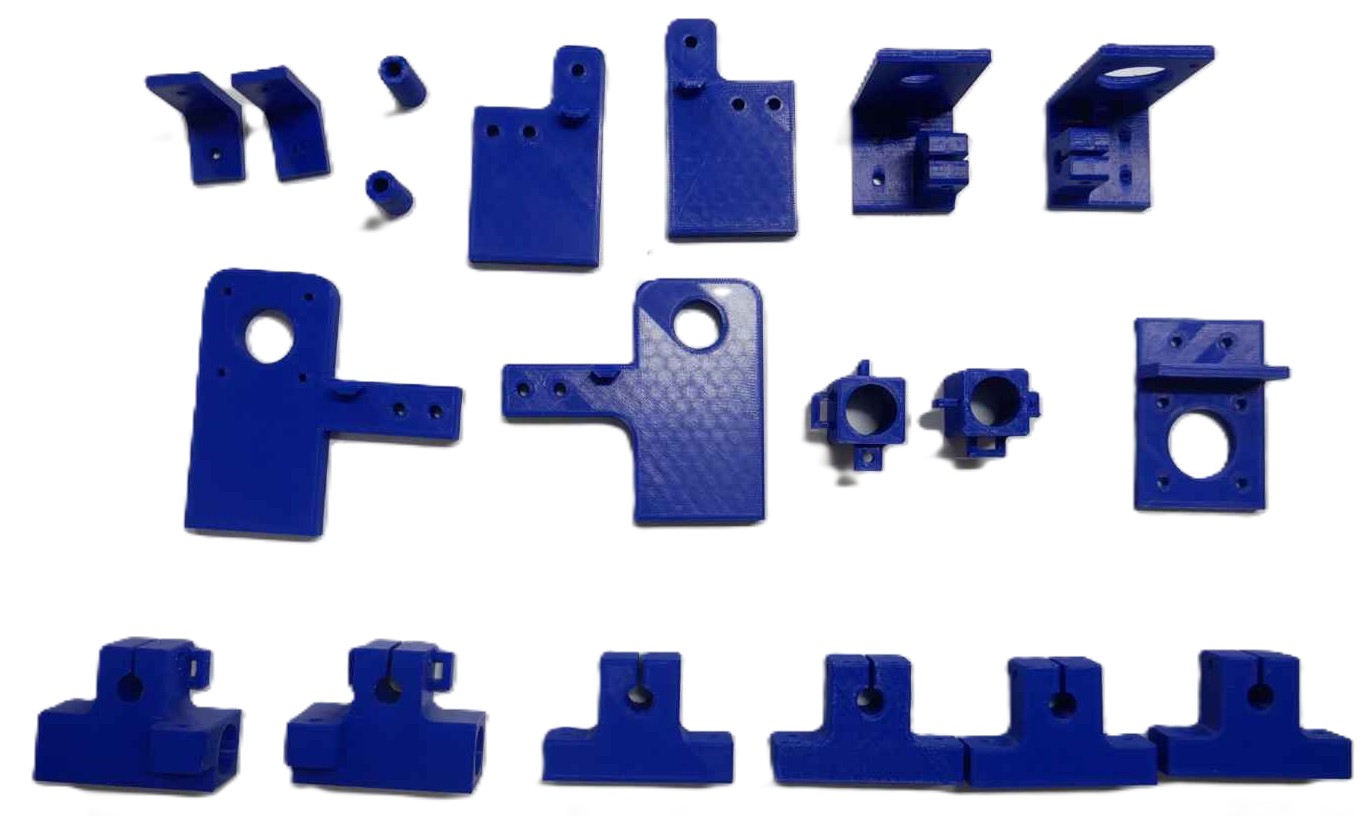
After completed the Machine design I 3D printed the design parts. In our lab we have the Flash Forge 3D printer so I uses the Flash print software for slicing the 3D model.
I export the required 3D printed parts from Fusion 360 as STEP File. Then import it into the slicing software.
I did the supports and for slicing I gave the infill density - 15%, infill pattern - Hexagon, also I enable the raft for optimizing the final good print.
If you give without raft, when the print part is more height then it will remove from the bed easily
So we must enable the raft for long time printings. Then I set up the nozzle temperature upto 205 degree celcius and bed temperature upto 50 degree celcius.
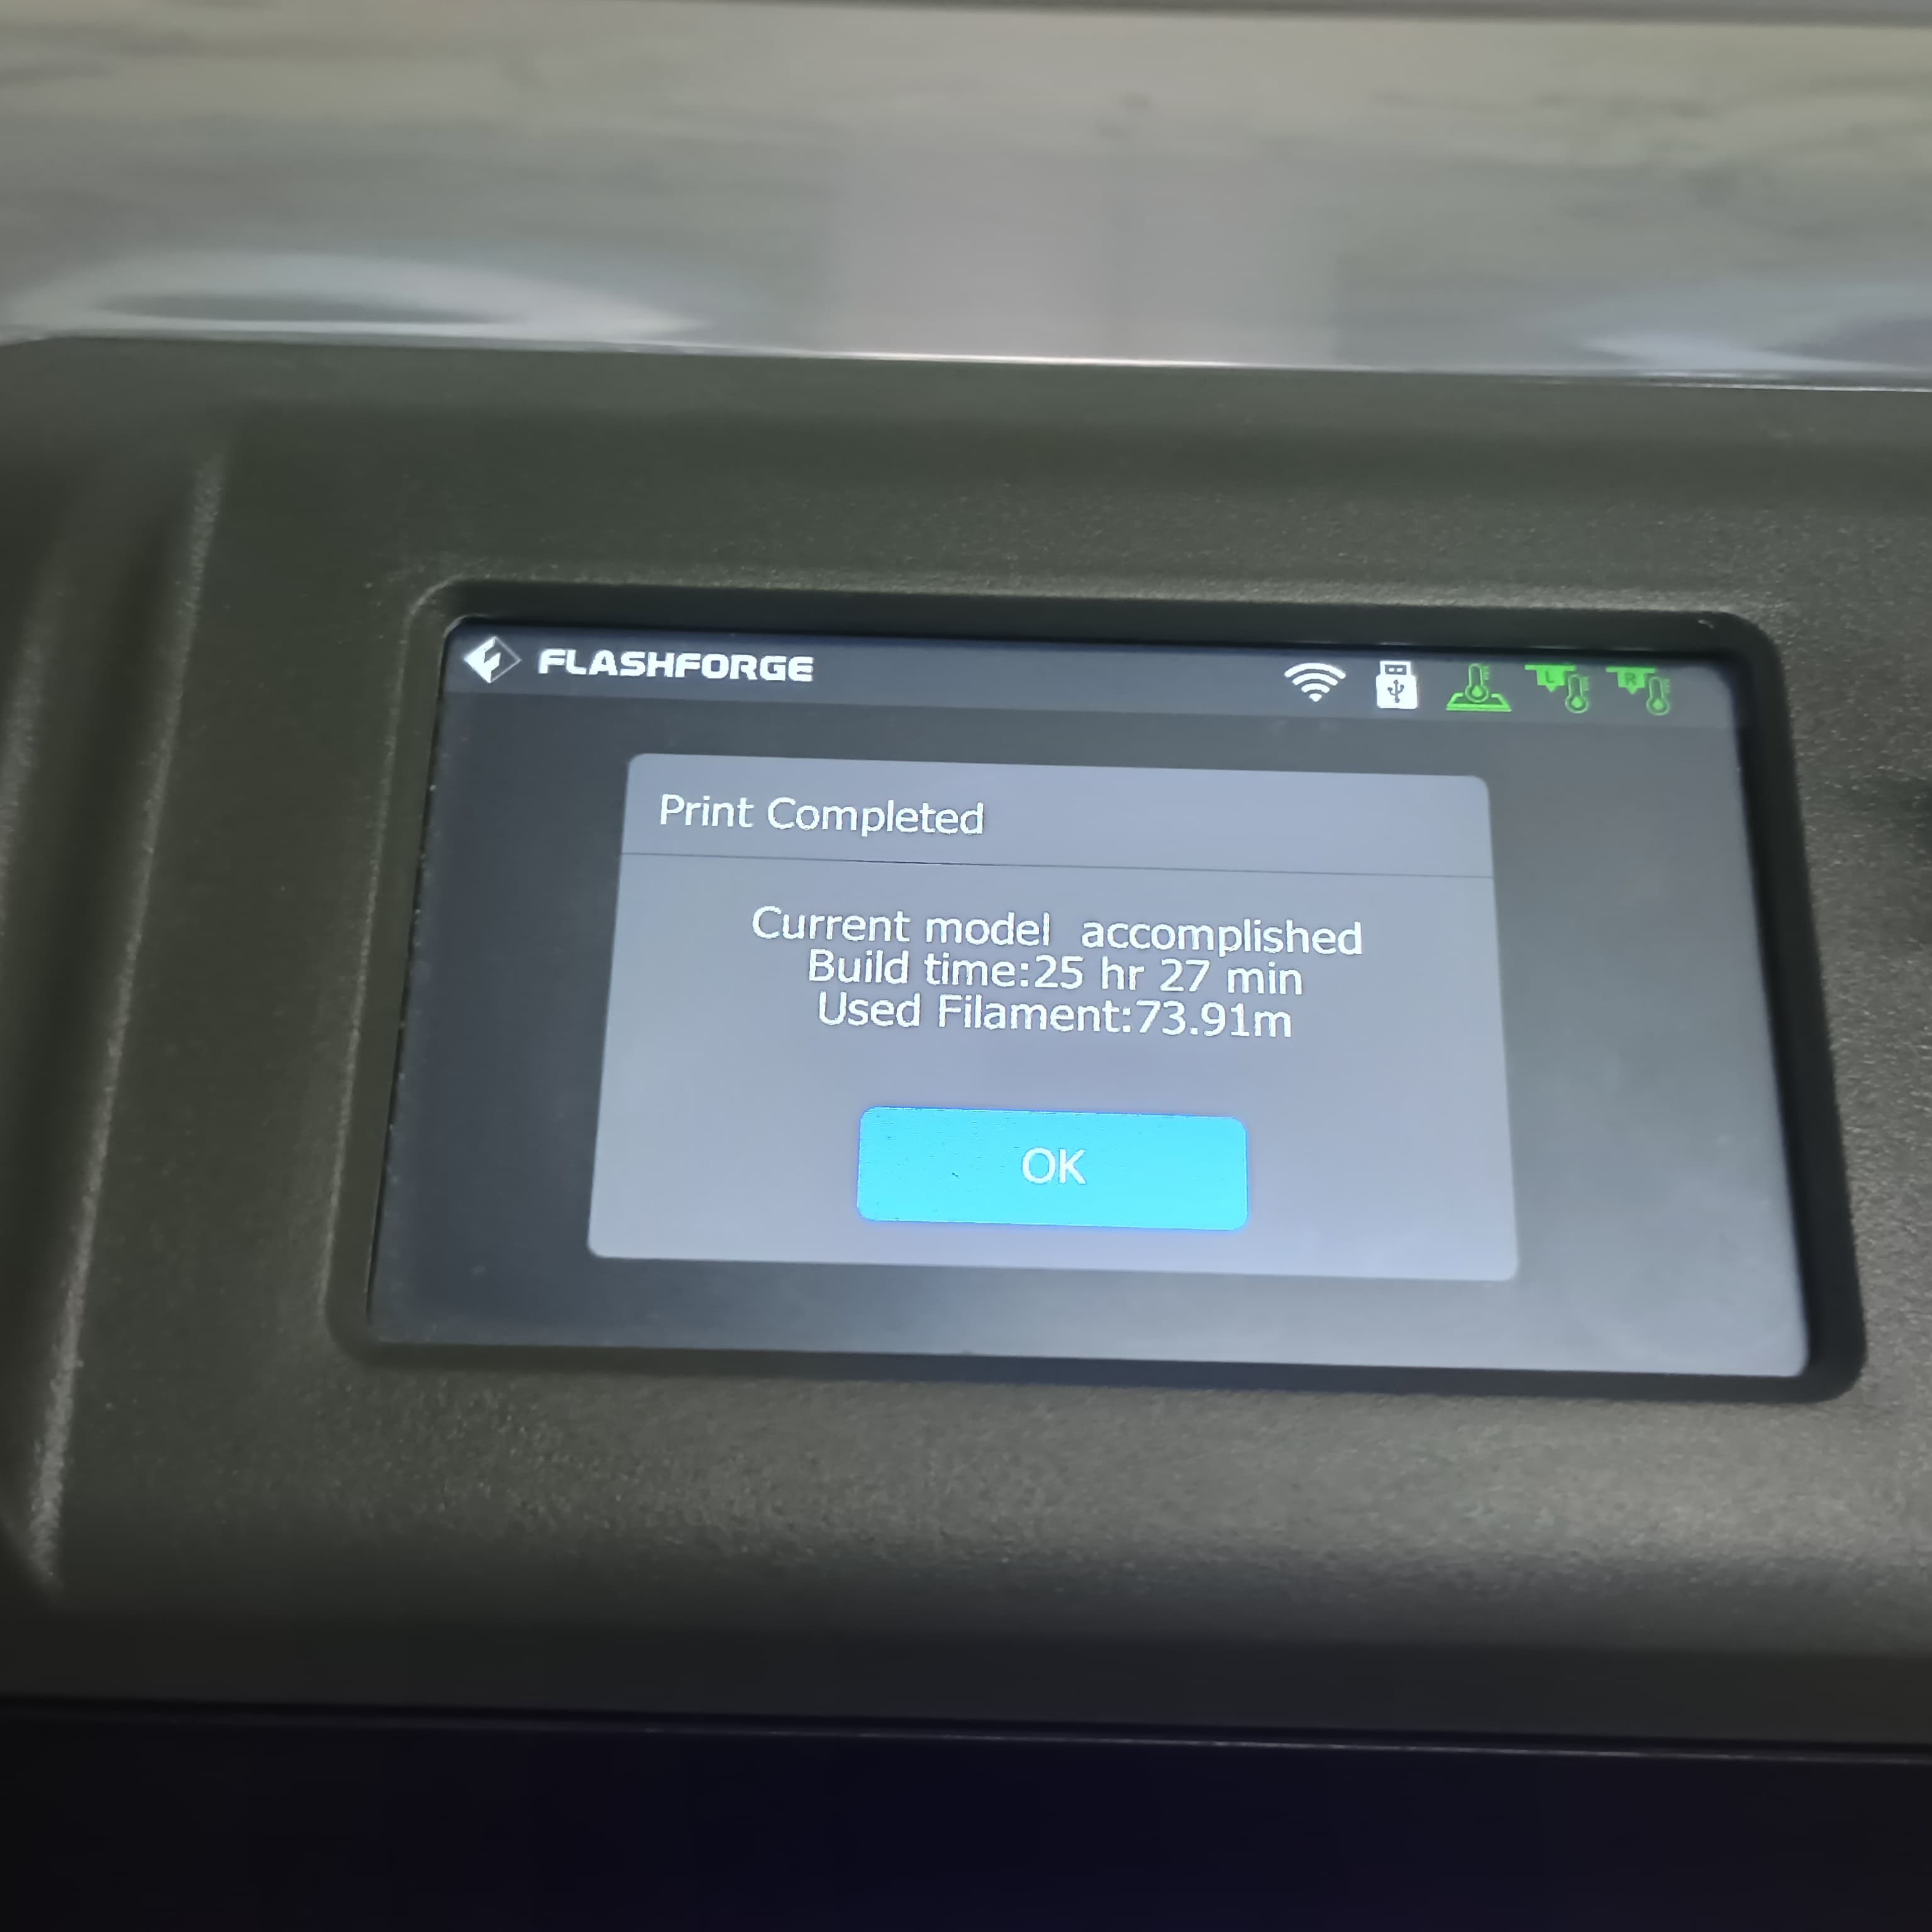
Then give the slicing and take out the Gcode, it seems like the print will be finishing upto 25 hrs and 45 mins, after I download the G-code and import it into the flash forge
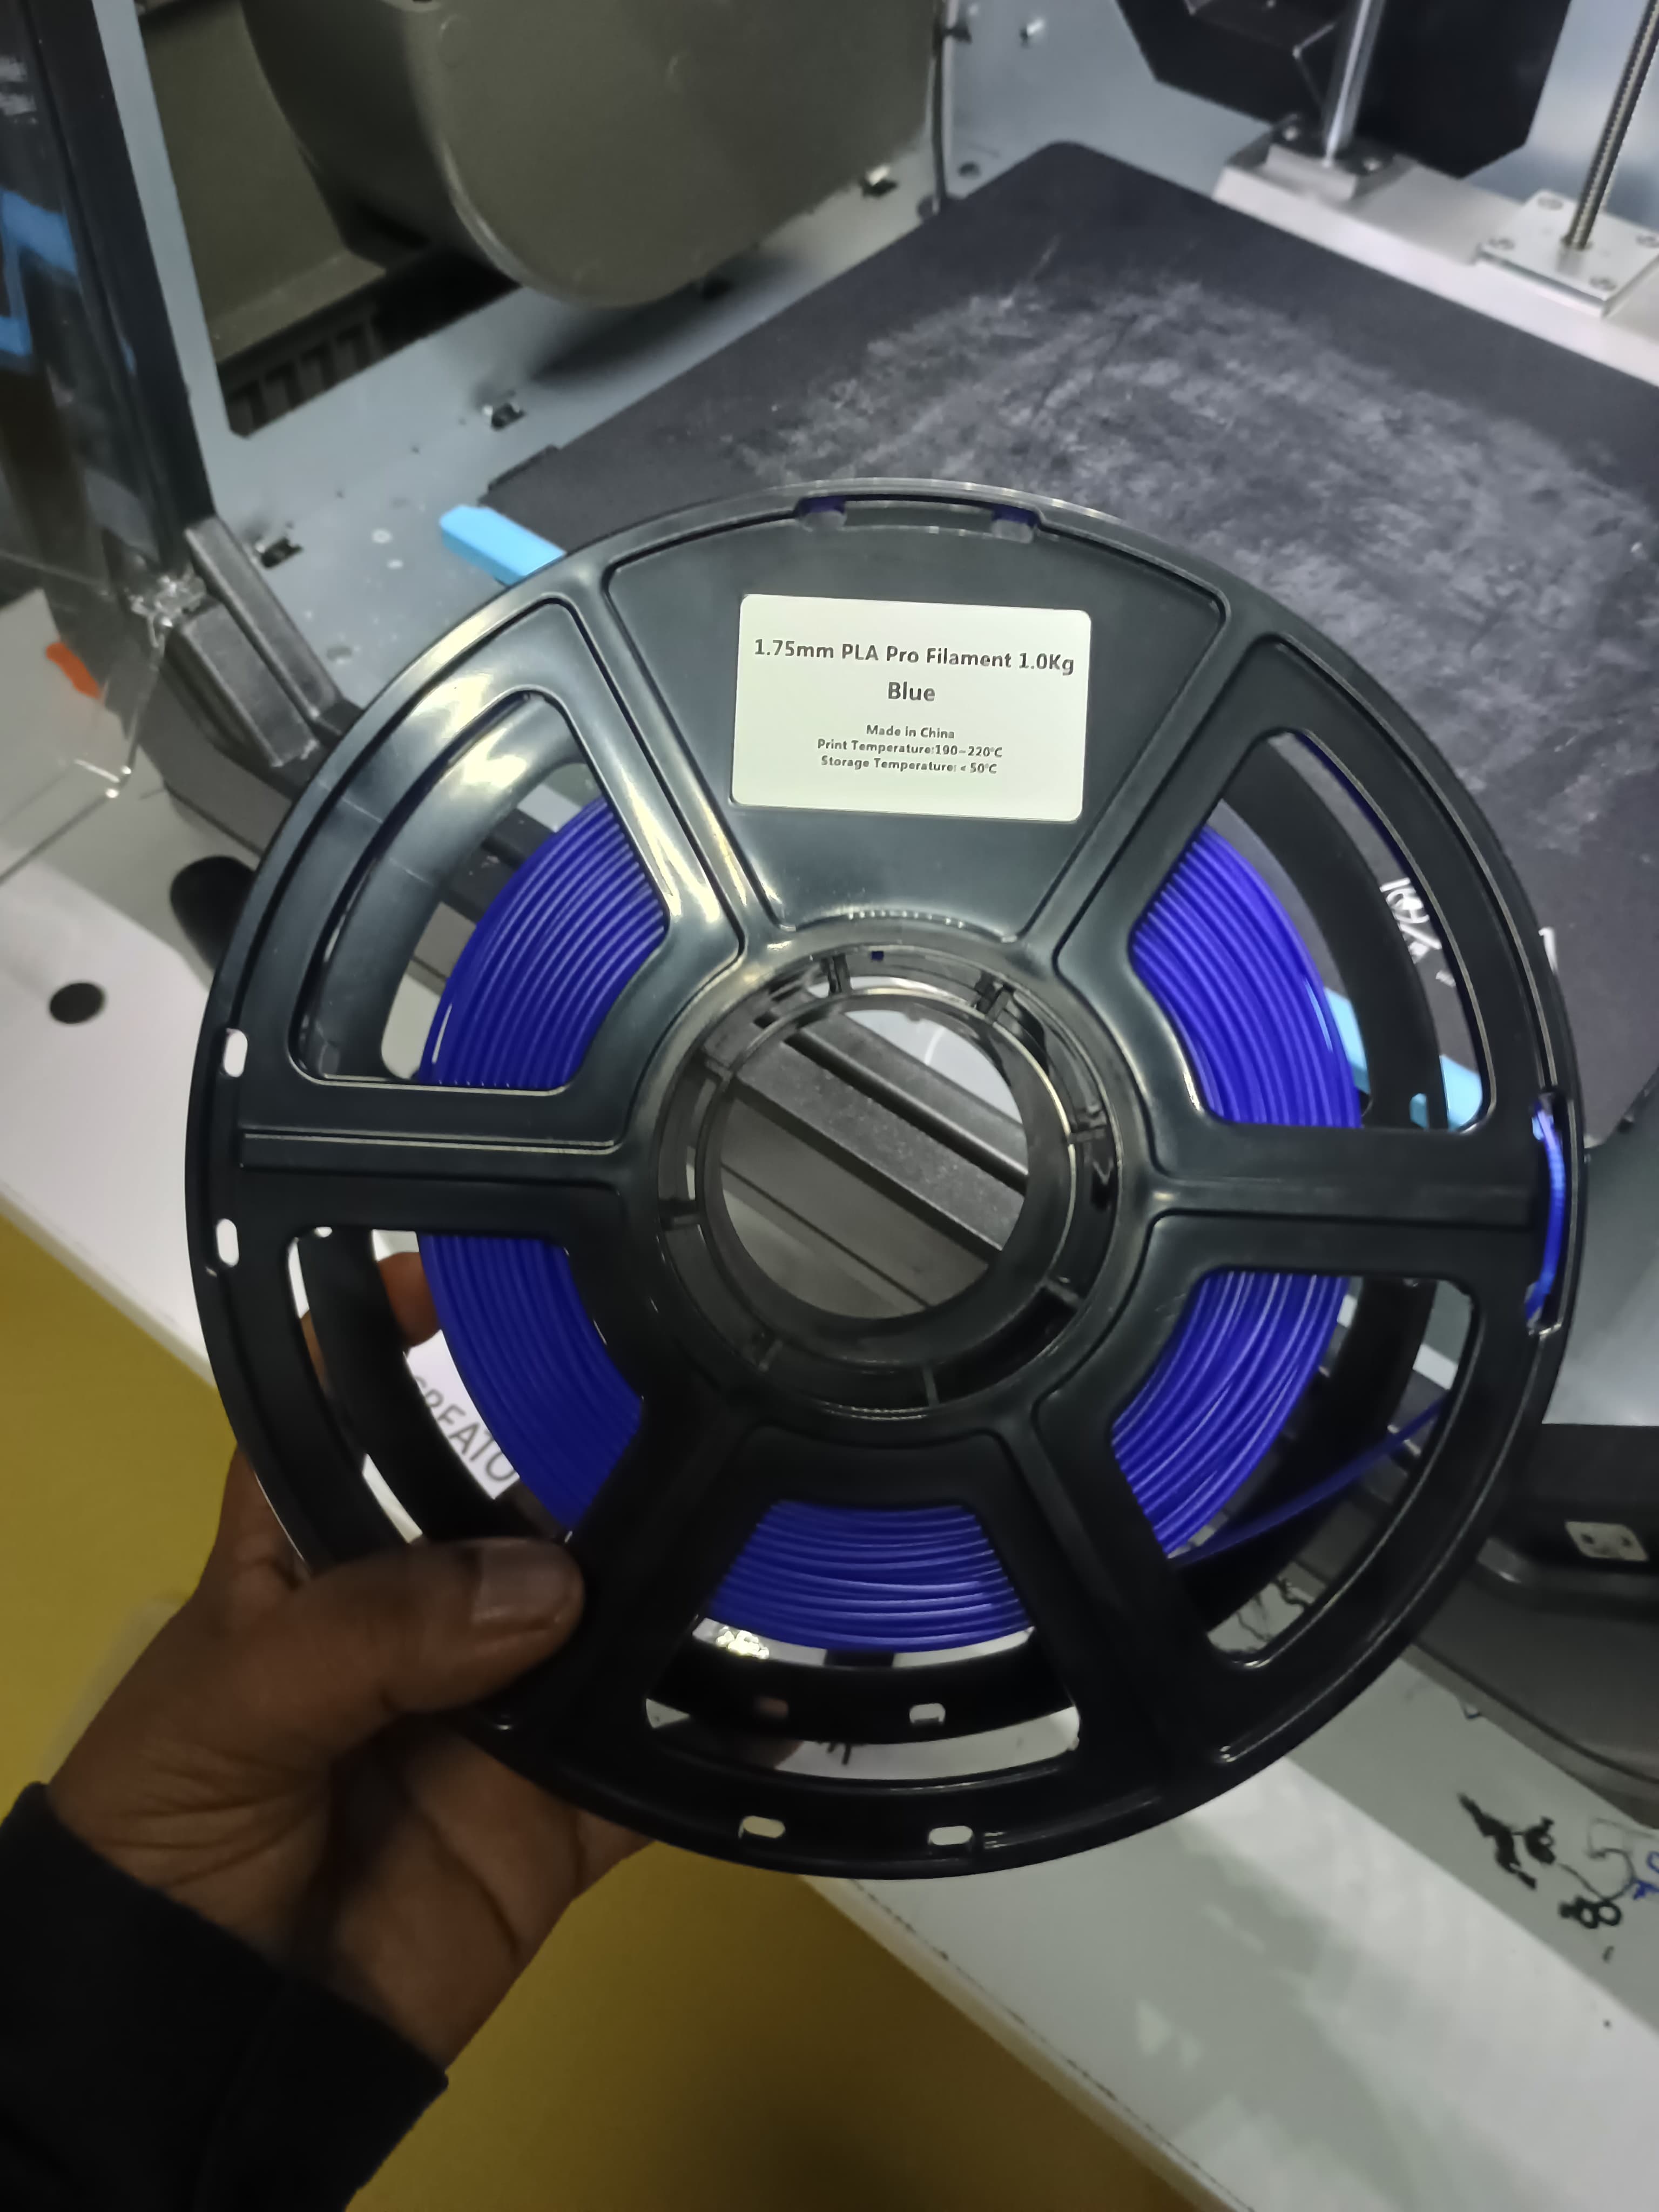
I load the filament PLA pro blue colour according to our colour expectation as well.
Then start the 3D printer with properly check with the bed layer whether it is good or not.
I start the printing in night, so morning we came and check the print, its going well.
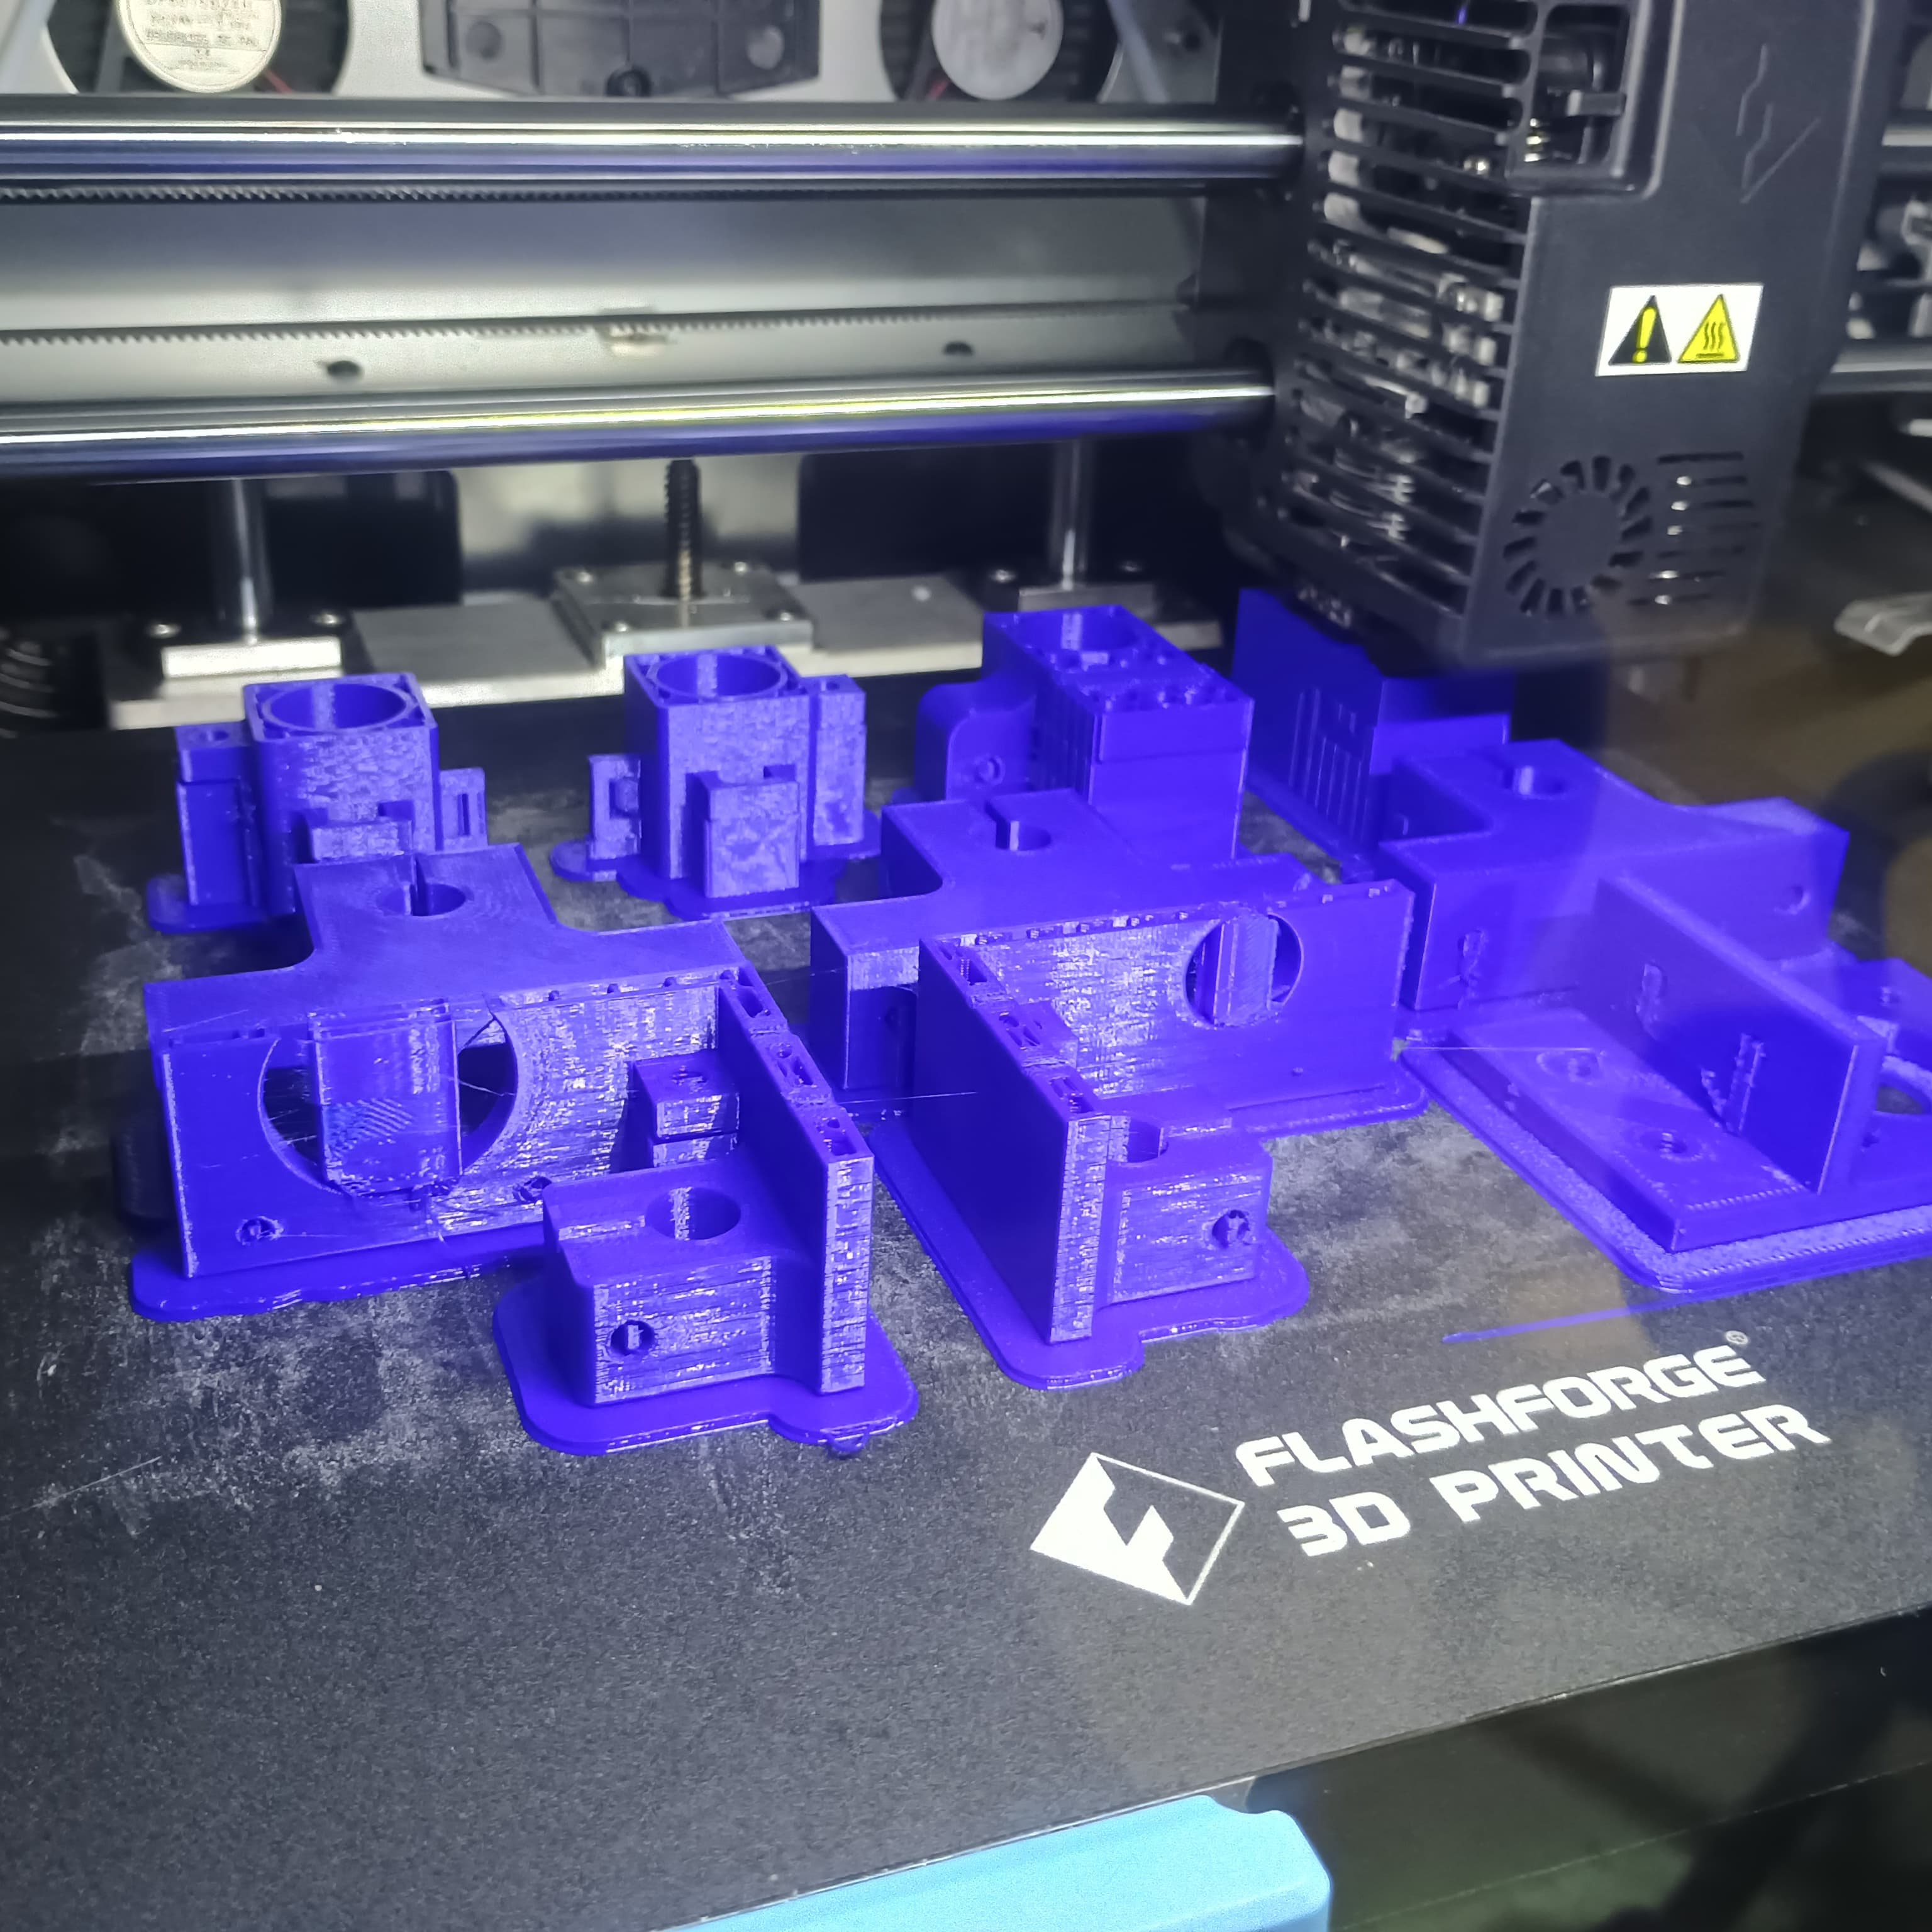
After the complete printing it takes the time upto 25 hrs and 27 mins and the filament usage upto 73.1 m
Fabrication
Then we start with the fabrication, I help Gayathri for his work too. I mark the required length for our maachine componets need to cut according to my design.
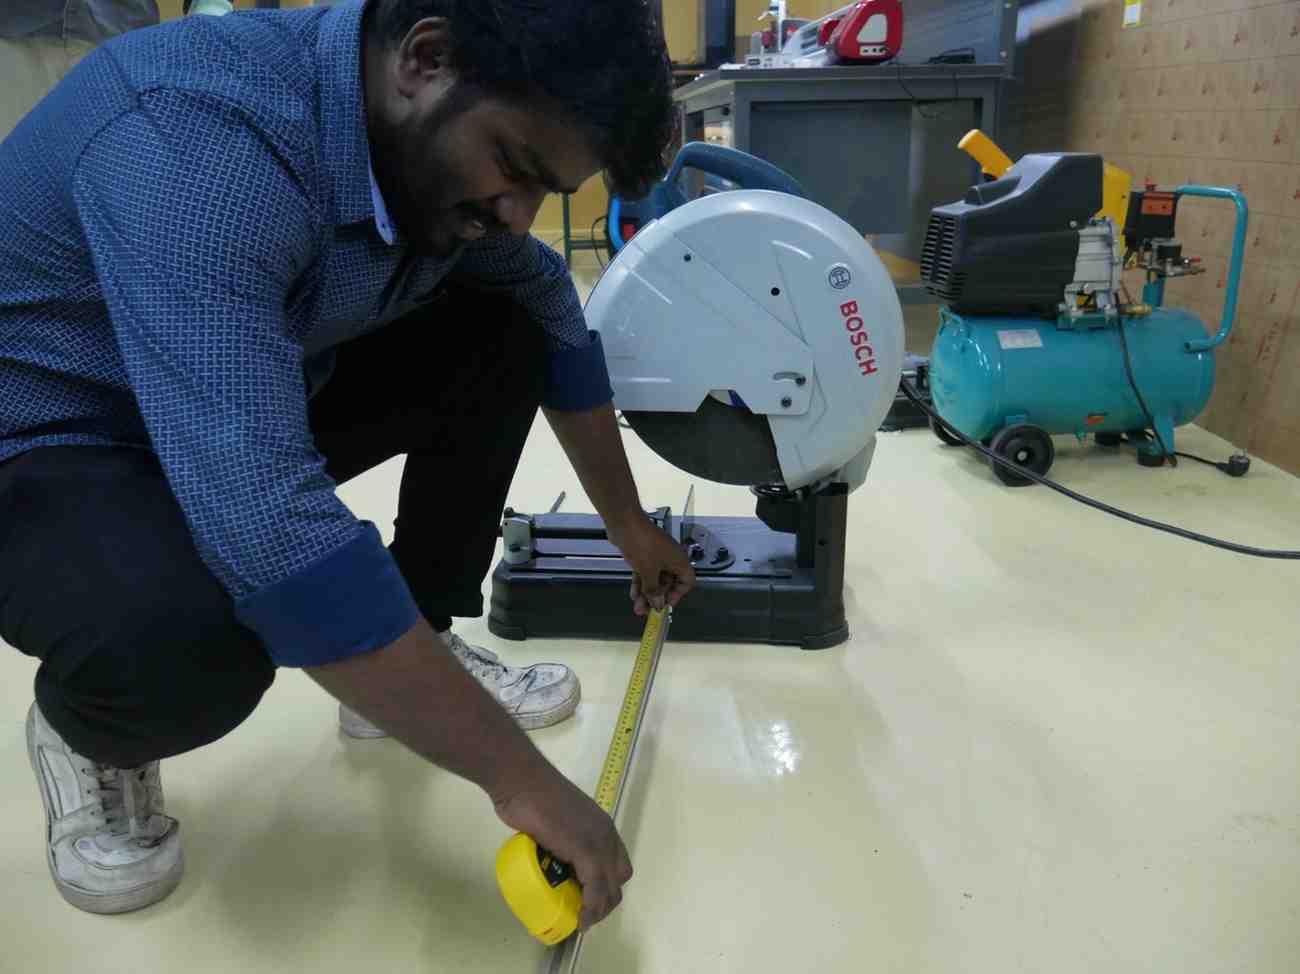
After the cut I assissting him to clean the burr in the Aluminium Profile corners by the help of grinding wheels.
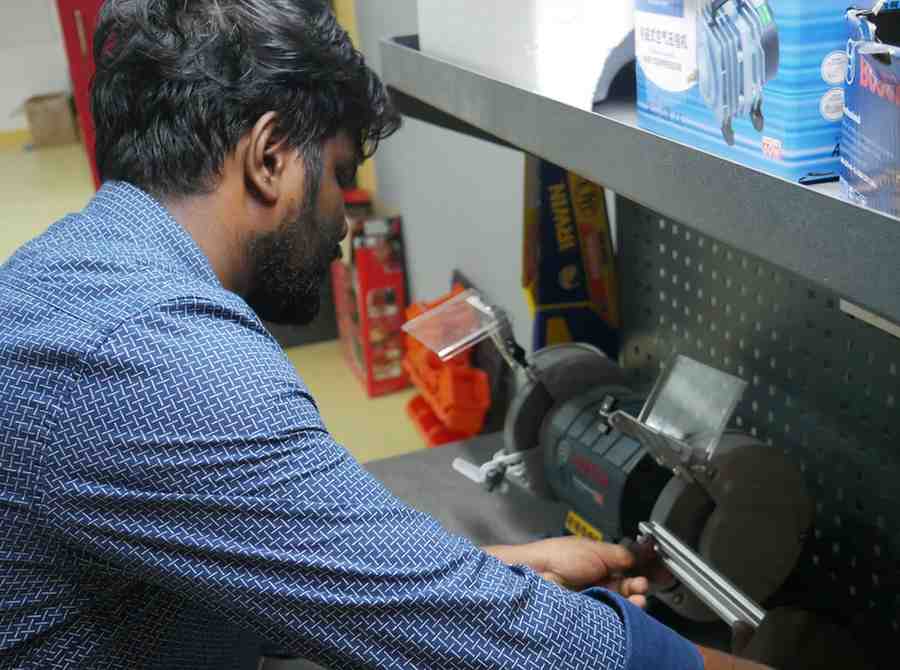
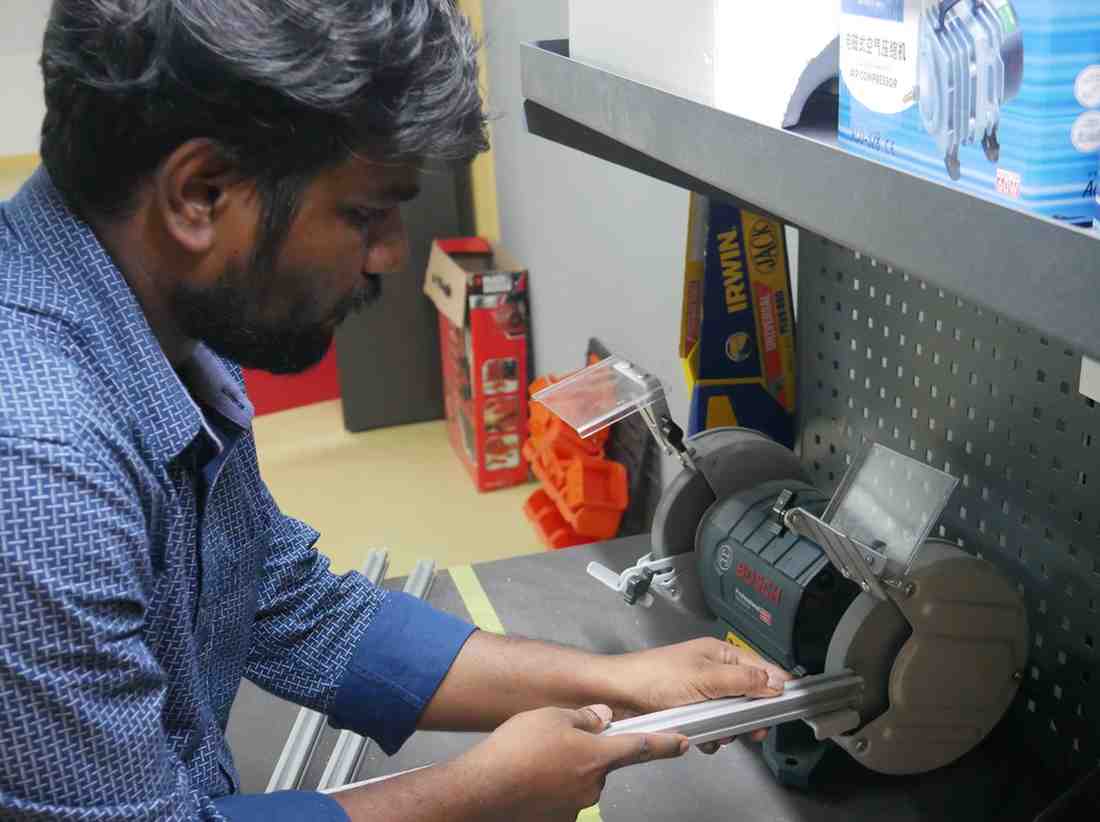
We drill out some required holes dimension in the corner brackets, etc…

Conclusion
Learning outcomes
- Led the mechanical design of a Hot Wire Foam Cutting Machine, using Fusion 360 to model all structural and motion components.
- Applied knowledge of CAD assemblies, using rigid, slider, and revolute joints to simulate real mechanical behavior.
- Prepared 3D printable parts by exporting from Fusion 360 and slicing with FlashPrint software using optimal parameters (e.g., raft, 15% infill, 205°C nozzle).
- Participated in the fabrication process—measuring, cutting, deburring aluminum profiles, and assisting in drilling and fitting tasks.
- Understood the full pipeline from digital design to physical assembly and manual operation of a functional machine.