Week 14 - Interface and Application Programming
Group assignment:
1. Compare as many tool options as possible.
2. Document your work on the group work page and reflect on your individual page what you learned
Individual assignment:
• Write an application for the embedded board that you made. that interfaces a user with an input and/or output device(s)
Group assignment
For this week’s Group assignment, I teamed up with my fellow Fab Academy buddy Haw Ren to explore tools for making apps .
The documentation for our Group assignment can be found here.
Group assignment reflection
This week’s Group Assignment introduced us to a new world of creating our own app tools. While we did not have much time to explore many tools (we only tried MIT App Inventor and Processing), and we have only tried very basic things, I have no doubt that I will be using some of these tools for my future projects. I have also come to realize that this is the last Group Assignment for Fab Academy.
With so many weeks of Group Assignments together, this is something that I should celebrate with my Fab Academy buddy Haw Ren. But we have no time to. There is still much to do, and we are behind schedule. We have this running joke that “we will do X if time permits” but at Fab Academy time NEVER permits so those celebrations will have to wait.
INDIVIDUAL ASSIGNMENT
OVERVIEW
This week, I attempt to turn an LED light connected to an ESP32-C on and off using Blynk. Since I am new to making apps, before starting, I referred to the assignment of my colleague and Fab Academy graduate Willie Tay to give me some idea of the steps required for my assignment.
Using Willie’s assignment as reference it seems that I need to:
1. Quickstart - Set up Arduino IDE to work with Blynk
2. Create a new Device in Blynk (Desktop App)
3. Run and test if the Blynk Desktop app can turn the LED on and off
4. Go to Blynk (Mobile App)
5. Run and test if the Blynk Mobile app can turn the LED on and off
Quickstart - Set up Arduino IDE to work with Blynk
To get started, I go straight into Blynk (Desktop App) and create my account. Once done, I sign into Blynk and I see the dashboard.

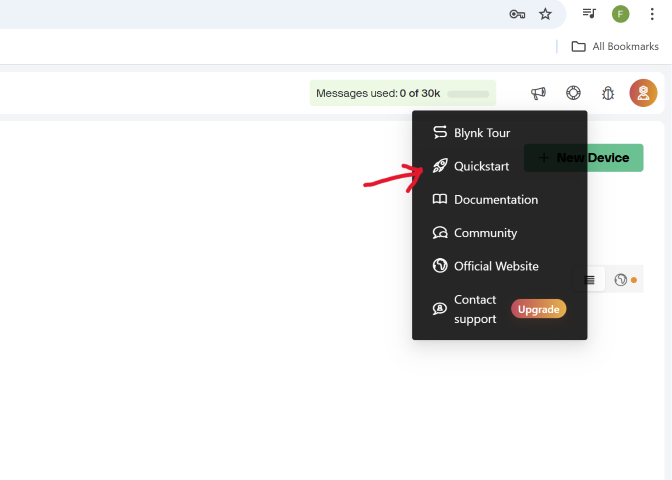
From the dashboard, I navigate to the Quickstart option (top right menu, Help> Quickstart). The Help button looks like a little lifebuoy.
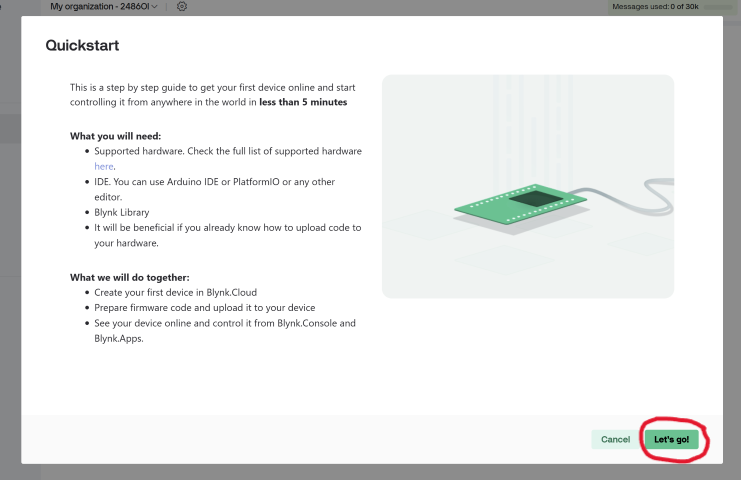
Clicking on Quickstart brings up a window that informs users of the things they need for the setup and roughly what we will do for the setup. Select Let’s go to proceed.
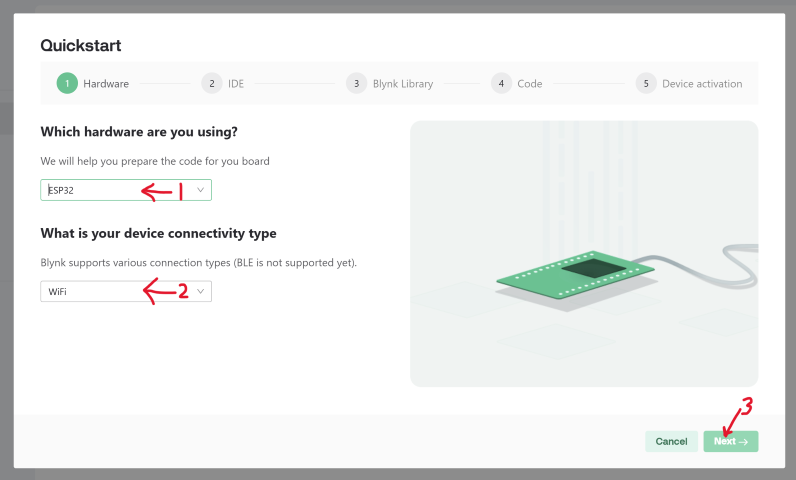
At the next window, select your device and connectivity type. For me, this was the ESP32 and WiFi respectively. When done, click Next to proceed.
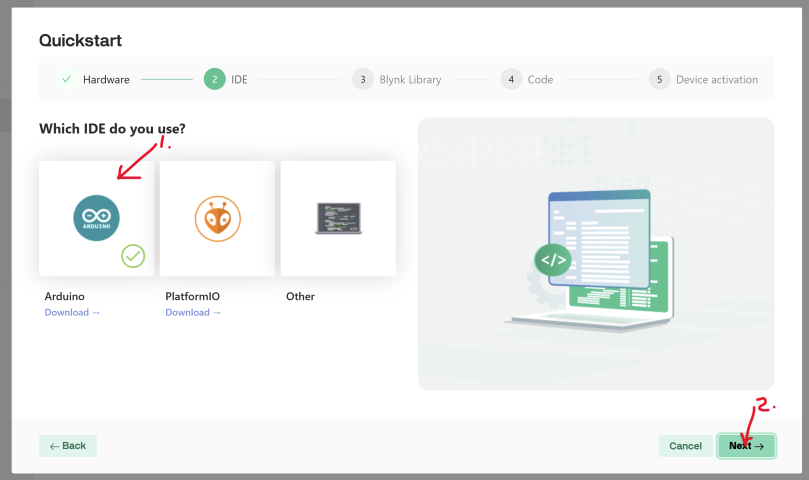
This brings us to the options where we choose our IDE. I choose Arduino, then click on Next to proceed.
For the next part, the Quickstart window tells us how to install the Blynk Library for Arduino IDE.
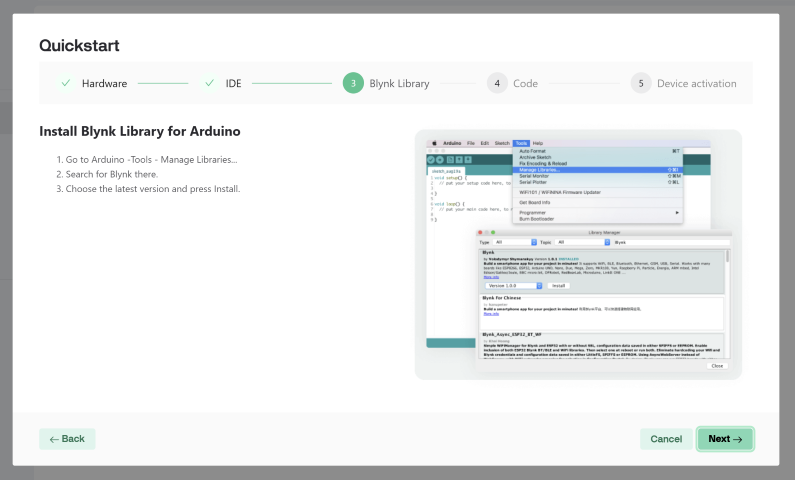
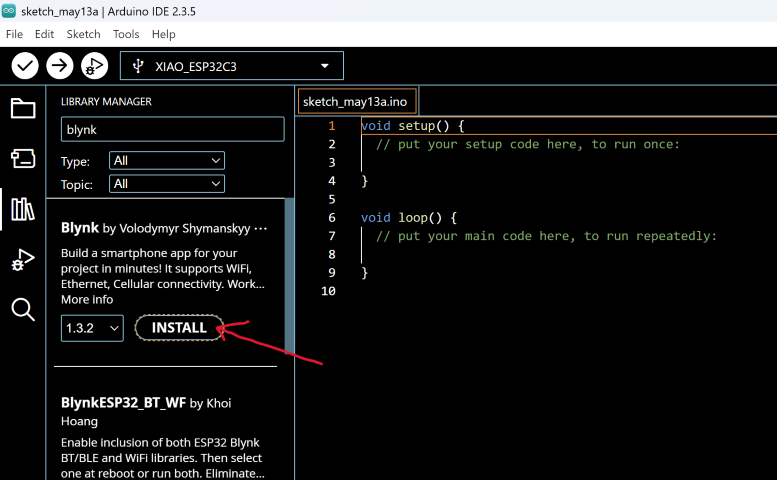
For this, I will need to go to Arduino IDE, navigate to the Library Manager (Tools > Manage Libraries), search for the Blynk library and install it.
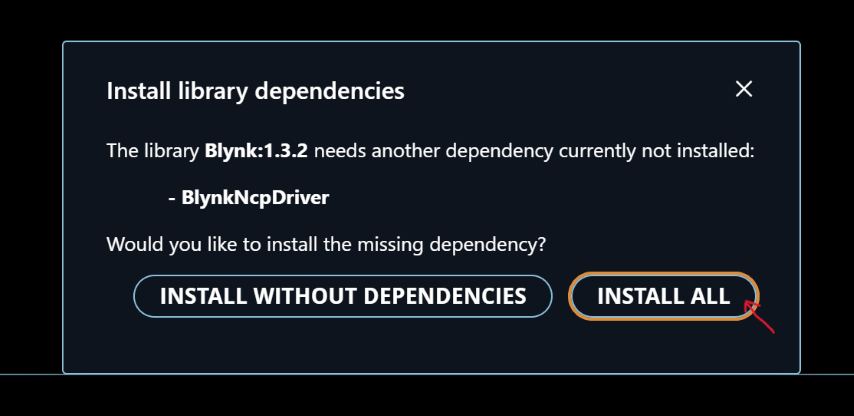
When it prompted me to choose to install library dependencies, I chose INSTALL ALL.
Once done, return to the Blynk (Desktop App) and click Next to proceed. The next window provides some code for me to copy into my Arduino sketch.
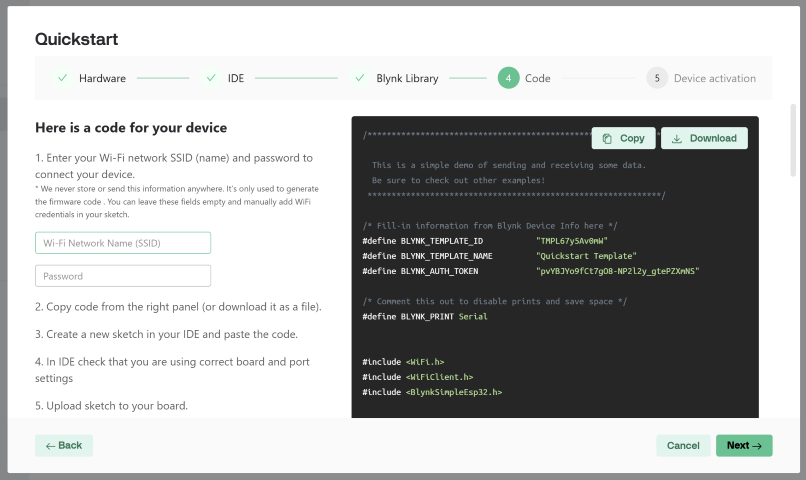
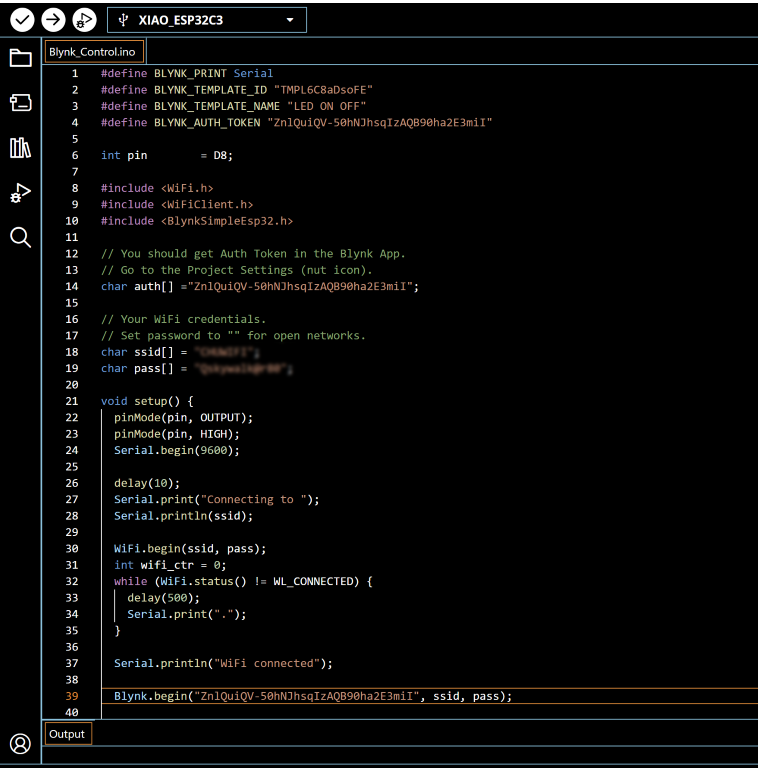
I copy the provided code over to a new sketch in Arduino IDE as shown below. You can download the code under Files at the bottom of this assignment page.
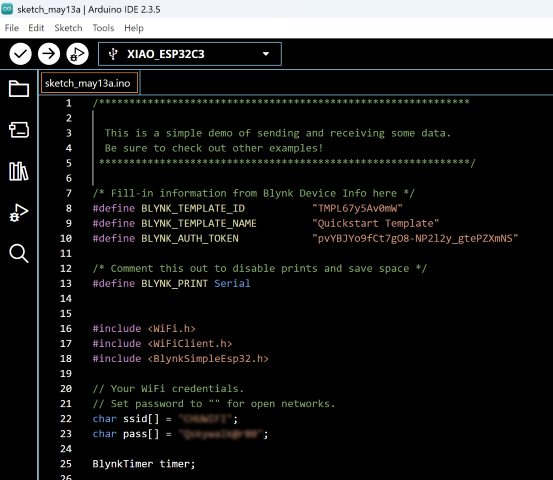
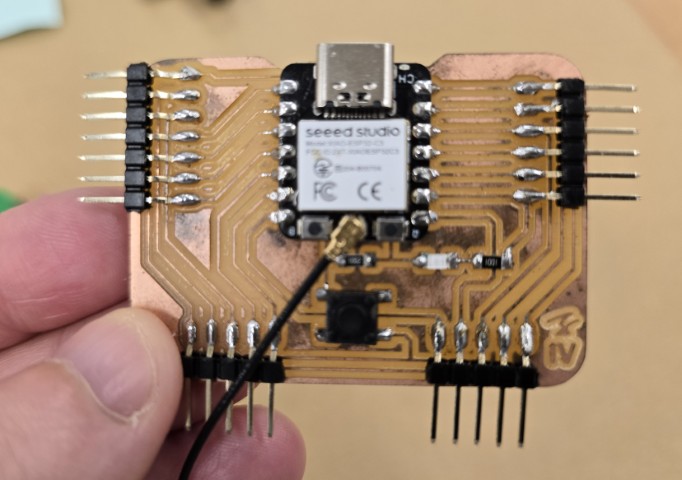
After copying the code, I upload the sketch to my board. The board that I am using for this assignment is an ESP32C3 that I had previously made for Week 11’s Networking and Communications assignment.
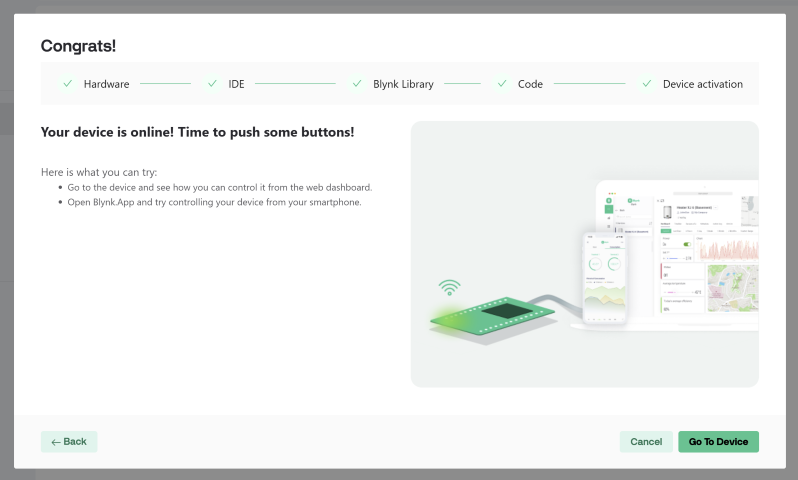
Once the code has been uploaded, I get confirmation that my device has been connected to Blynk and is now online.
Creating a new Device in Blynk (Desktop App)
Now that I have connected to Blynk with the Quickstart device, I want to create my own controls and interface to turn an LED light connected to an ESP32-C on and off.
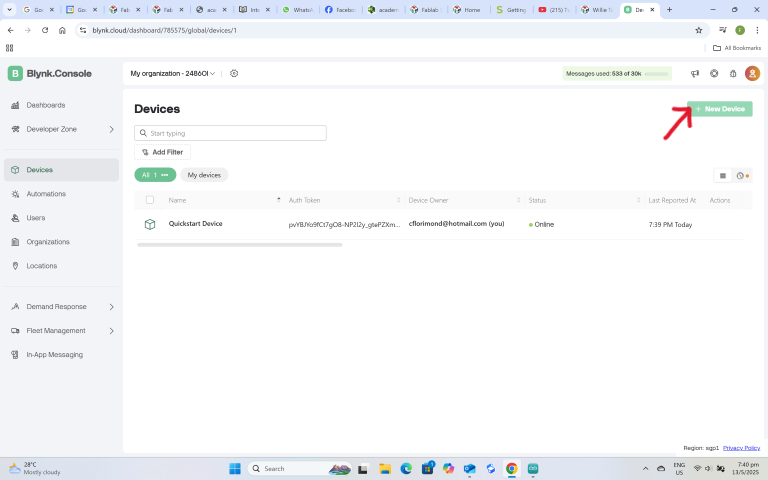
From the dashboard, select New Device.
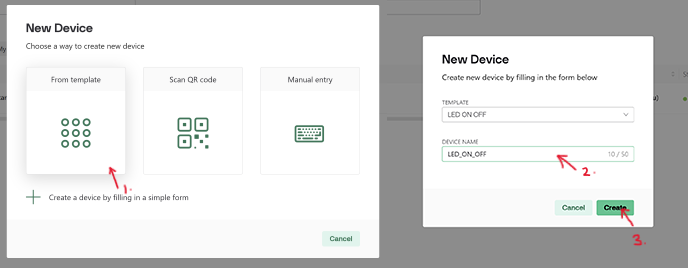
It brings up several options. I chose the template option, and this brings up a window for me to enter my device name. I name the device LED_ON_OFF (no spaces allowed) and proceed to the next part.
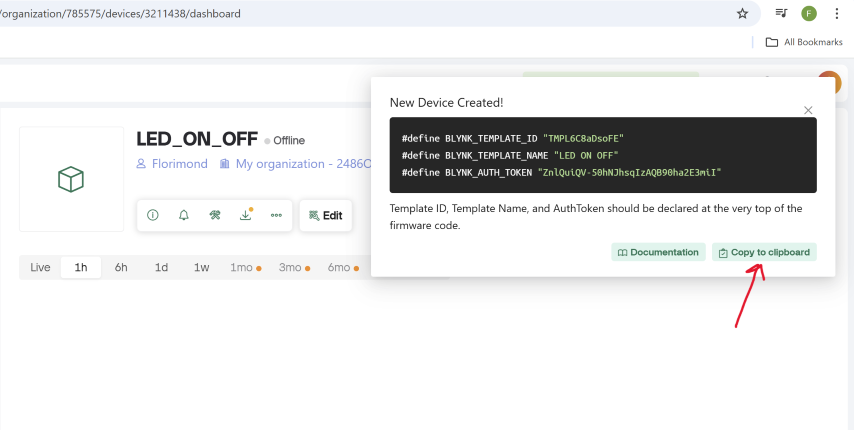
Once that is done, Blynk informs me that my new device has been created and prompts me to copy some device information onto a clipboard. This information needs to be included in the Arduino sketch for the device to work with Blynk.
I copy and paste the device information over to Arduino IDE and test it on the Blynk Cloud sketch that I referenced from Willie’s assignment. You can download the code under Files at the bottom of this assignment page.
I run it and a message appears in the Serial Monitor confirming that it works.

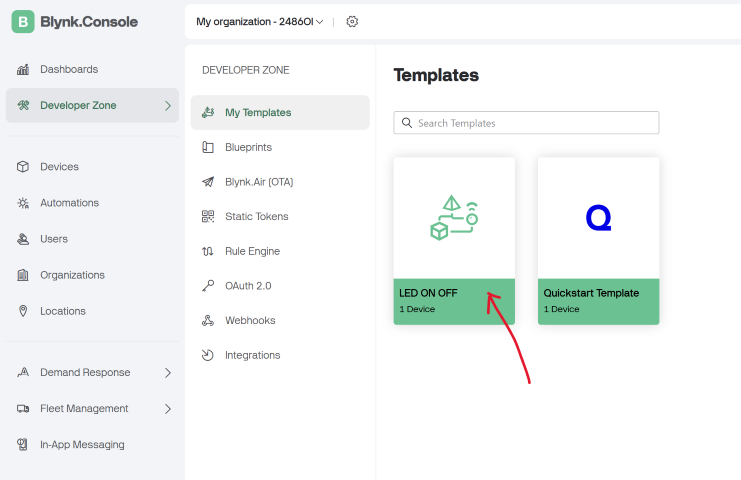
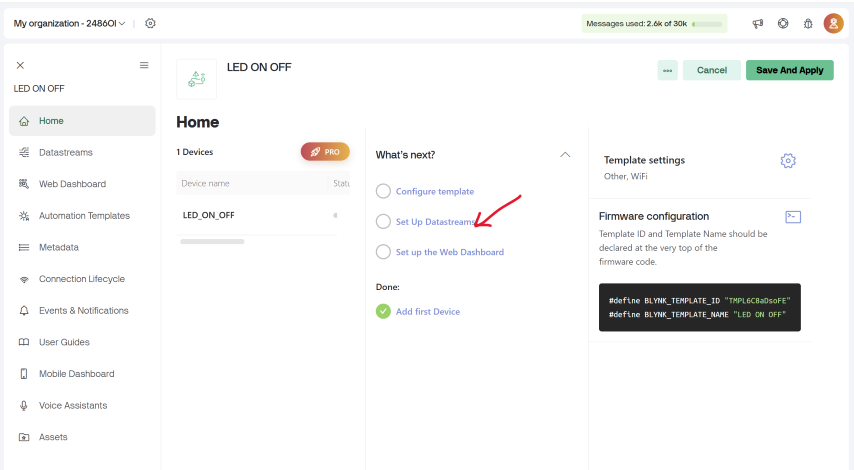
Now that my new device has been set up, I move on to creating a simple control and interface for my app. I navigate to the template I just created (Developer Zone > My Templates) and select it.
Once there, I select Set Up Datastreams.
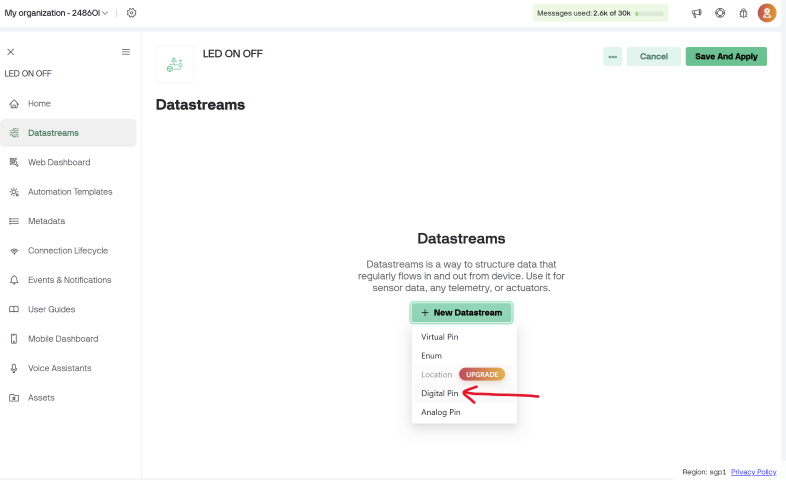
This will bring up a prompt to add a new datastream as shown below. Click the + New Datastream and select Digital Pin. This is because I am using Digital Pin 8 (D8) on the ESP32C3 as the signal pin to turn the LED on and off.
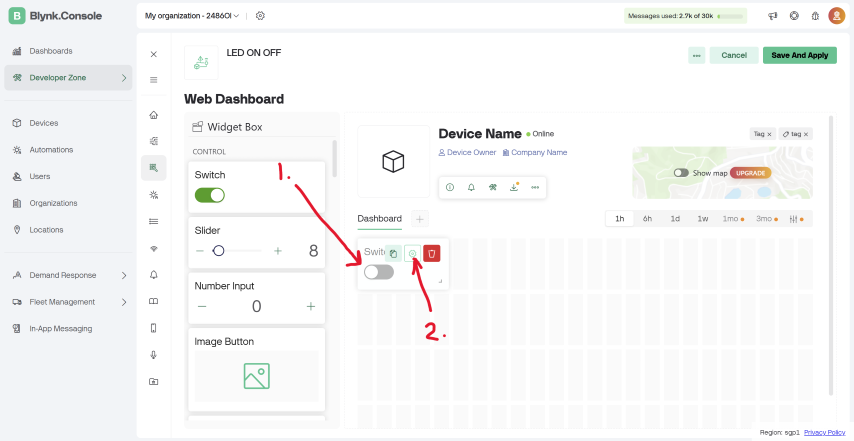
The next thing I did was to set up the Web Dashboard. Here, I picked a control from the Widget Box and dragged it onto the Dashboard. Hover over the switch and some settings pop out. Select the settings button to configure it.
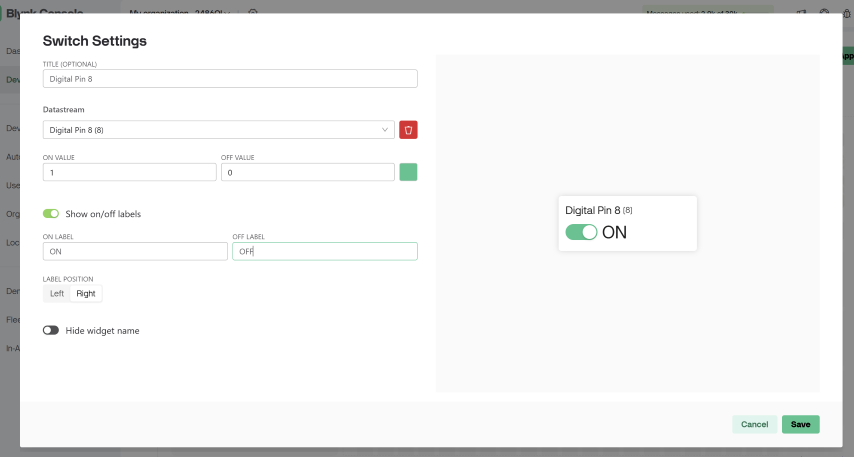
At the Switch Settings, set up the switch options as shown below. Save when done.
Now that I have my switch set up in Blynk, I want to test if my switch works using the Blynk Desktop app. However, before I do so, I will need a program in Arduino IDE for the ESP32C3 to turn the LED on and off.
Below is the code I used. You can download the code under Files at the bottom of this assignment page.
This code:
• Connects an ESP32 to Wi-Fi and the Blynk IoT platform.
• Prepares an output pin (D8) to send a signal to ON/OFF the LED
• Keeps the device connected to Blynk.
Run and test if the Blynk Desktop app can turn the LED on and off
I upload the code to my ESP32C3 board and test if the LED can turn on and off using the Blynk Desktop app. You can see in the video below that the test is successful.
Go to Blynk (Mobile App)
Next, I go to the Blynk Mobile App (Download and install from Google Play Store), sign in to my account and navigate to the LED_ON_OFF device.
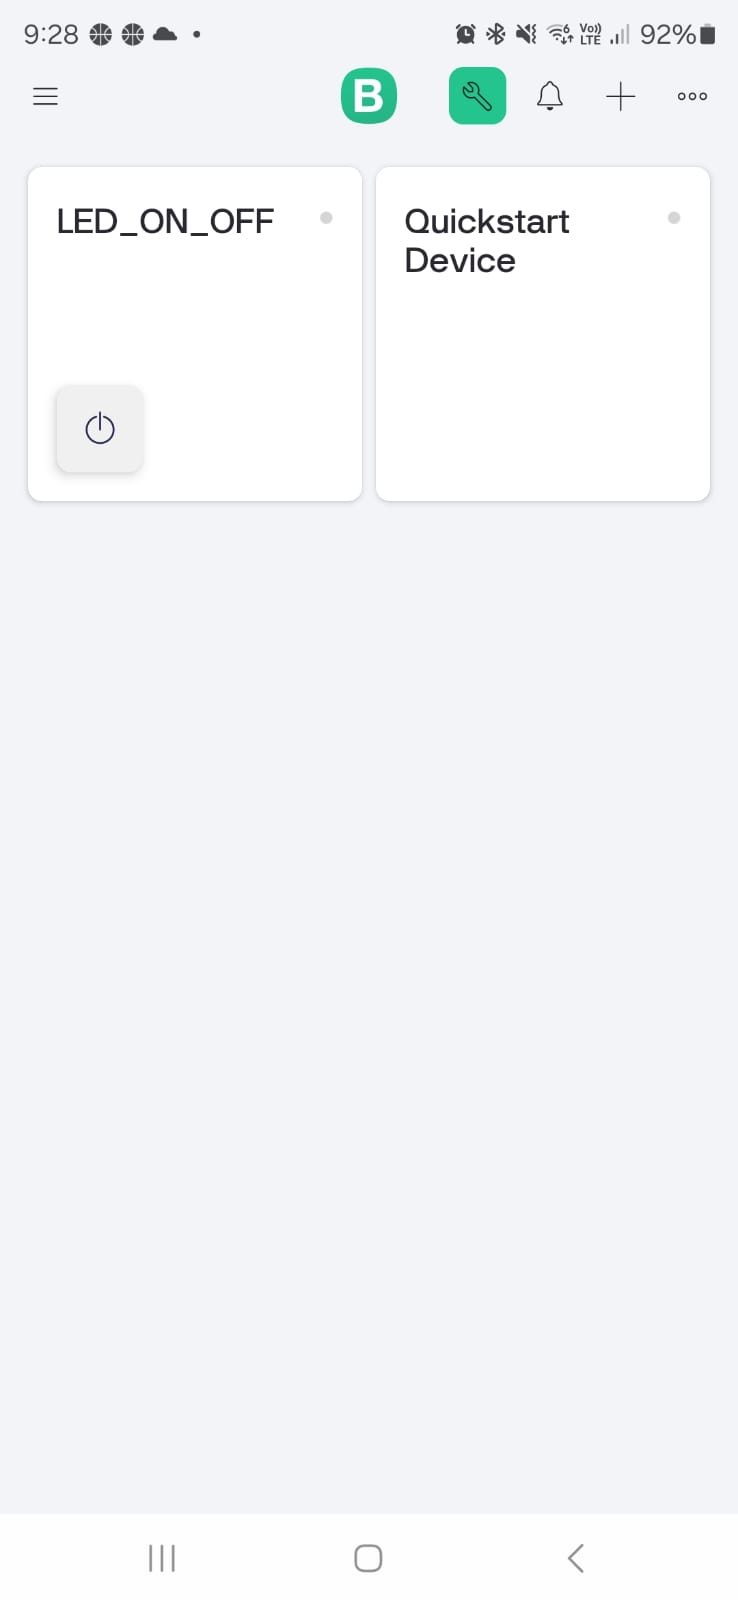
I look for the switch’s setting and select it.
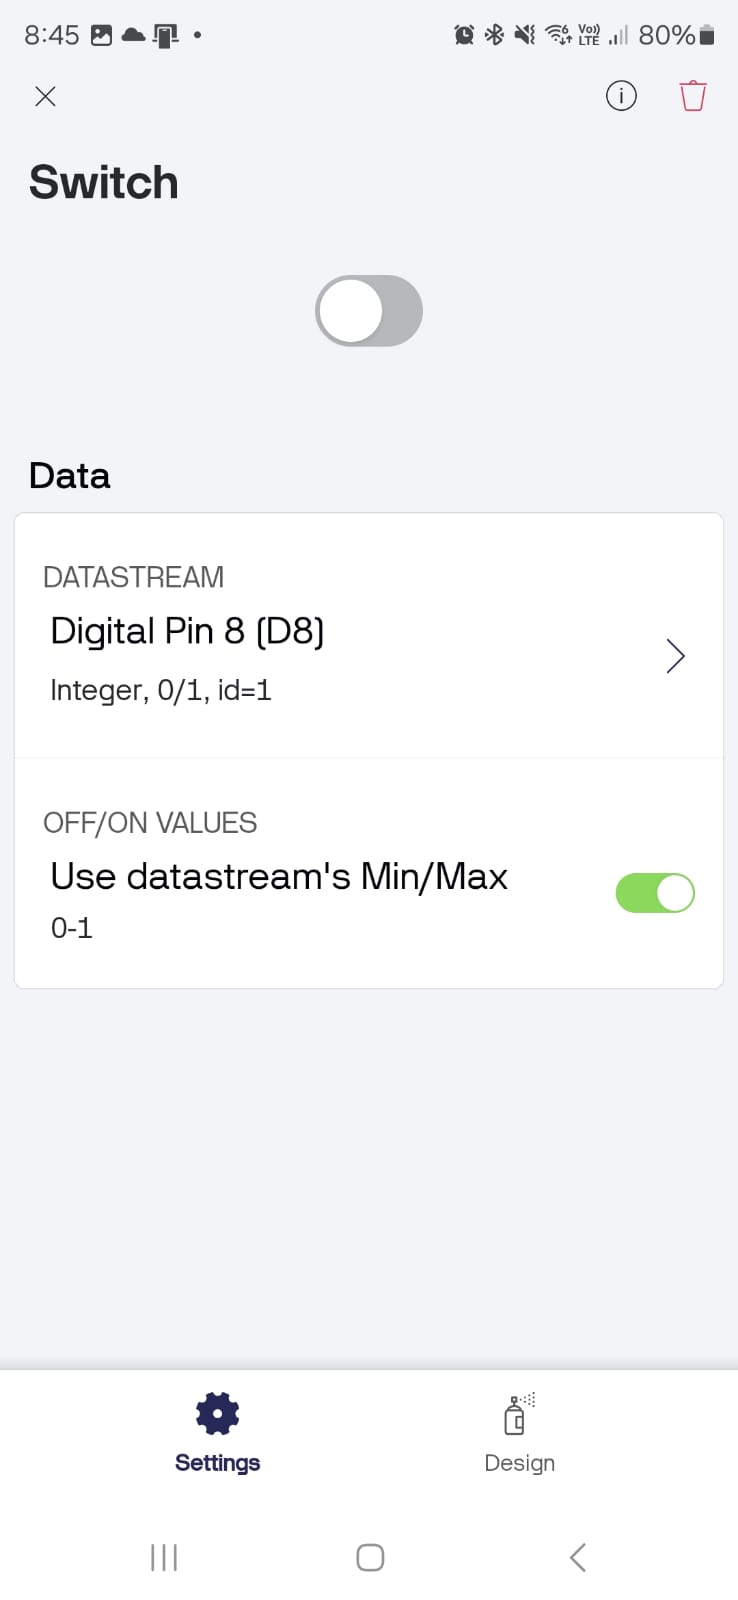
I set the datastream to D8.
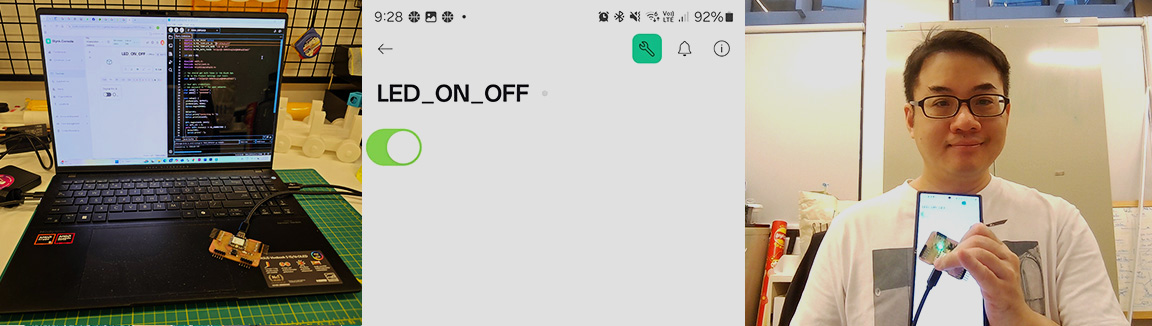
Run and test if the Blynk Mobile app can turn the LED on and off
Once I have done that. The last thing to do is to test if the Blynk Mobile app can turn the LED on and off.
It works!
Reflection
Working on apps this week was difficult for me as this is something entirely new to me (again). There are so many different platforms available, and I found myself going through many tutorials, only to discover later that something doesn’t work with the particular board I am using (e.g. BLE which is one of the connection methods for the XIAO ESP32C3 is currently not supported on Blynk).
However, I cannot deny that I was ecstatic when I eventually managed to turn on that damn LED light on with my mobile phone.
This concludes my assignment for the week.
Files
Reflection
Files
This concludes this week’s assignment.