Week 11 - Networking and Communications
Group assignment:
• Send a message between two projects
• Document your work to the group work page and reflect on your individual page what you learned
Individual assignment:
• Design, build and connect wired or wireless node(s) with network or bus addresses and a local input and/or output devices
Group assignment
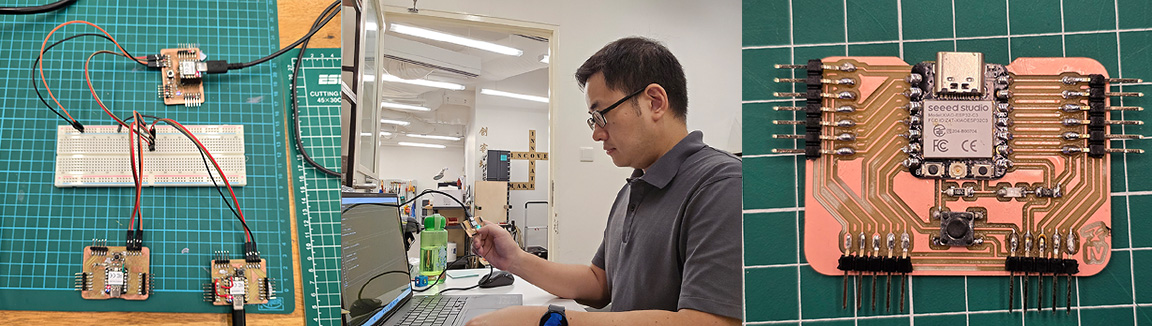
For this week’s Group assignment, I teamed up with my fellow Fab Academy buddy Haw Ren to send a message between our XIAO RP2040 boards.
The documentation for our Group assignment can be found here.
Group assignment reflection
This week’s group assignment required us to send a message between two projects and for this, we used the I2C capability of our XIAO RP2040 boards to send and receive messages. With help from our Instructor Steven, and our Fab Lab Alumni, Zi Hon, we managed to do this successfully and while this is probably very basic communication between devices, it was still satisfying to see it working. I can see how learning this can equip me with the knowledge and skill to work on more exciting IoT projects in the future.
Individual assignment
Overview
This week, I attempt to make a new ESP32 board and implement a web server.
Making the ESP32 board
So far in my Fab Academy journey, I have only been working with the XIAO RP2040 and while it is a nice board, I have been wanting to try the XIAO ESP32 for its Wi-Fi capability because for my Final Project, I want to have my clock set its time automatically by connecting to a local internet connection.
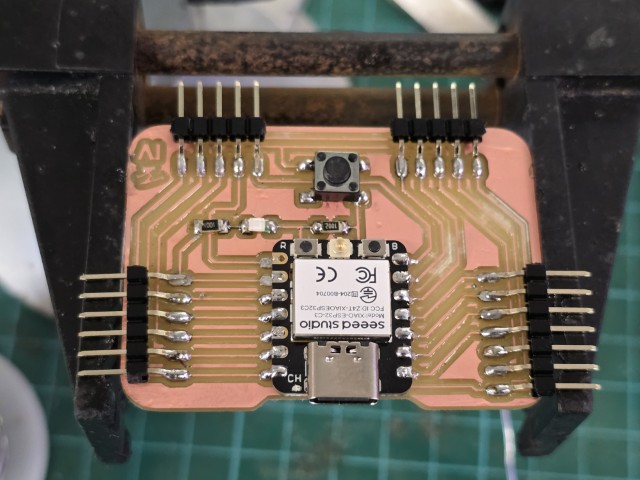
And so, I made a new board for the XIAO ESP32-C3. The process of making the board was not too different from the XIAO RP2040 board that I made for Electronics Production in Week 08. In fact, the footprint and the pinout of the XIAO ESP32-C3 is like the XIAO RP2040, so getting the board design done and generating the NC files (to mill the board) was not too difficult.
I milled out a board and soldered the components on and now I can test it…
Test 1
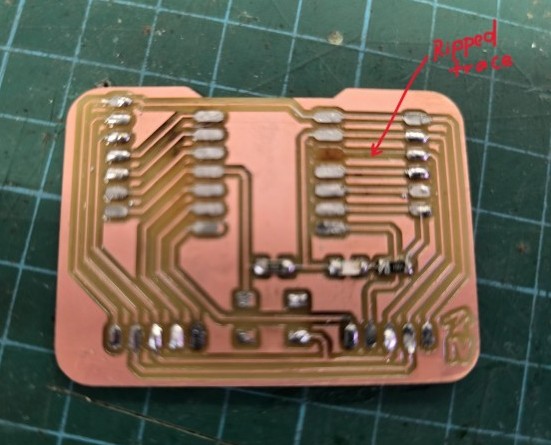
The first test did not go well. Although the ESP32-C3 was new, it gave me some strange (Serial Exit) error when I tried to upload a simple code to test it. I tried uploading to another ESP32-C3 and it did not produce the same error. So logically, I thought I should just swap out the malfunctioning ESP32-C3 for the working one. I used the rework station hot air gun to remove the malfunctioning ESP32-C3 and that was when one of the copper traces was accidentally ripped off, and so I had to start over again.
Another!!!
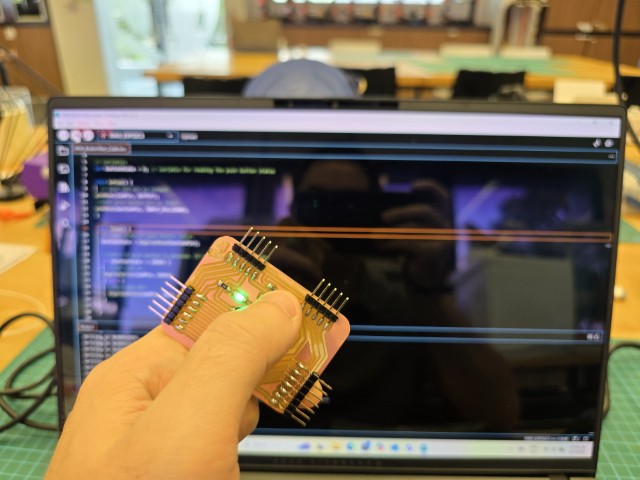
To be honest, while a little frustrating, I felt quite calm when starting again. I felt I did not struggle as much as when I made my very first board for Fab Academy and soon, I had my new board. I upload the push button code that I had from Week 08 and if it works, the LED should light up. It does, and I am back in business again.
Implementing a Web Server
Frankly, I had no idea how to do this next part and I looked for a tutorial online so that I can try this step-by-step. For this, I referred to this Implementing Web Server on ESP32 tutorial from Instructables by Common9899.
With this tutorial, I am now ready to begin.
Setup
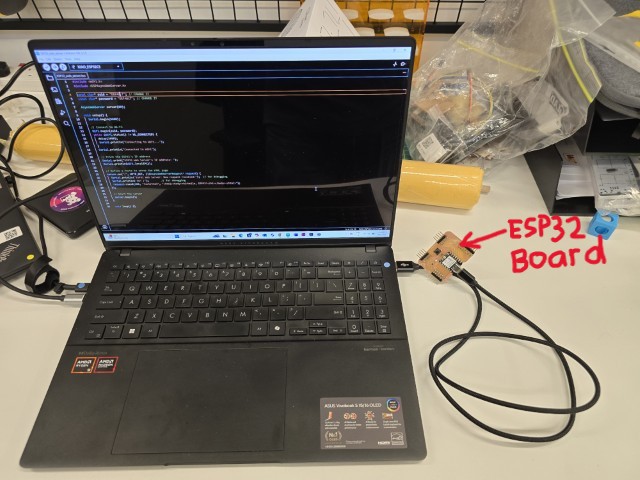
The setup for this week’s assignment is simple – I simply connect the XIAO ESP32 board to my PC using a USB cable and that is it.
Program
I need a program to tell the ESP32 microcontroller what to do. For this, I used the following program from the tutorial.
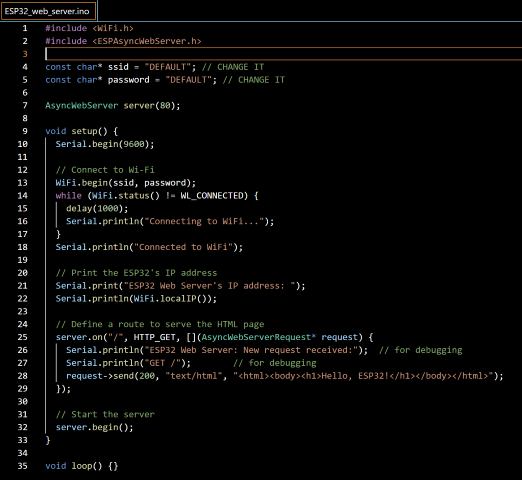
The program references several libraries so be sure to install those or the program will not work.
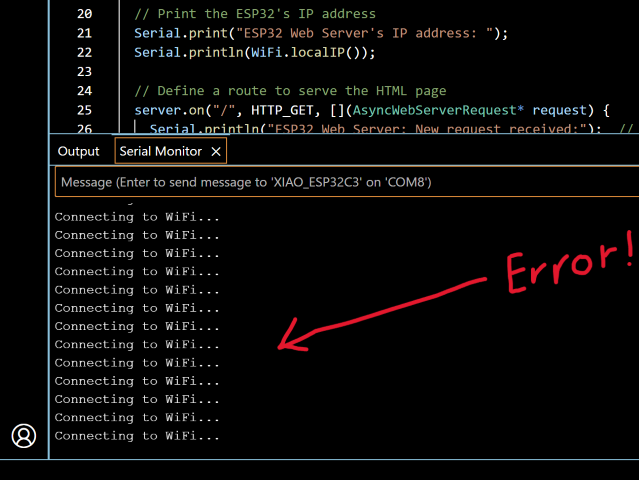
Test 1 (On school’s network)
Since I am working on this assignment from my polytechnic, I tried to use the ESP32 to the school’s internet network. Unfortunately, that does not work as the serial monitor just keeps returning “Connecting to WiFi”.
Stumped, I asked my Fab Lab colleague, Louis and he suggested that I first try the same program again, but this time to use my own mobile hotspot tether. The reasoning was that there could be some network restrictions on the school’s network that disallowed the connection.
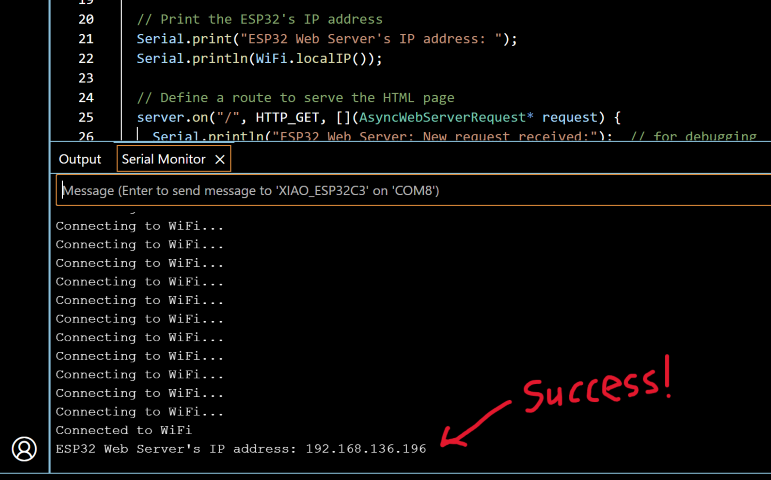
Test 2 (Using mobile hotspot tether)
As recommended, I test the connection using my own mobile hotspot and now it returns something different. It tells me that the ESP32’s IP Web Server is 192.168.136.196.
I copy and paste the IP address 192.168.136.196 into my web browser and I see this screen.
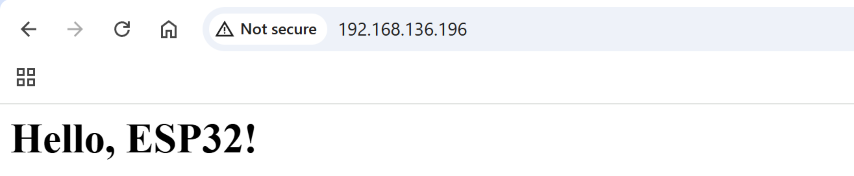
According to the tutorial guide, this is a successful connection, and I can now access this server from any device connected to the same Wi-Fi network by entering the ESP32’s IP address into a web browser (though I currently have no idea how).
Adding an Output device (and controlling it via Web Server)
After connecting to the Web Server, I try to add a Neopixel LED strip as an output device and turn it on and off. With reference to the previous Web Server program, I go to ChatGPT and use the following prompt:
“How can I adjust this code to turn an 8 segment neopixel strip on and off?”
ChatGPT advises that to control an 8-segment NeoPixel strip (e.g., WS2812B) using an ESP32, I will need to:
1. Include the Adafruit NeoPixel library.
2. Initialize the NeoPixel strip.
3. Add server routes to turn the strip on and off.
4. Modify the HTML page to include buttons. It also proposes the following code (that does the above-mentioned).
Breakdown: How NeoPixel ON/OFF Code Works
1. Function That Does the Work
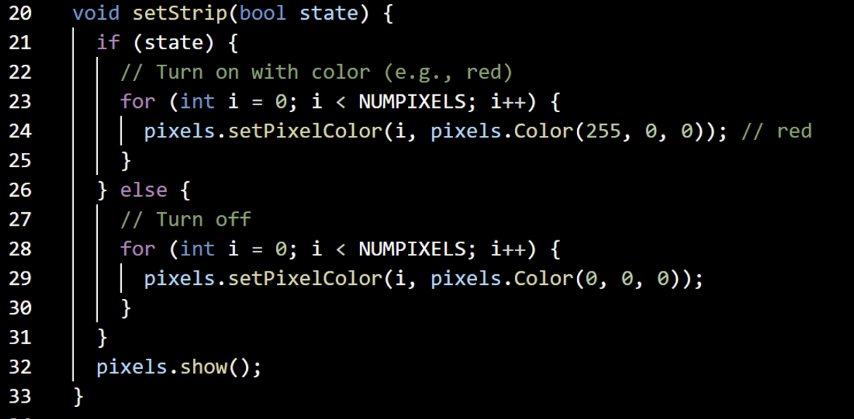
2. How It Gets Called These lines call setStrip(true) or setStrip(false) based on the button clicked in the web browser:
Turn ON

Turn OFF

3. Web Interface (HTML)
The browser shows buttons that trigger those /on and /off routes:
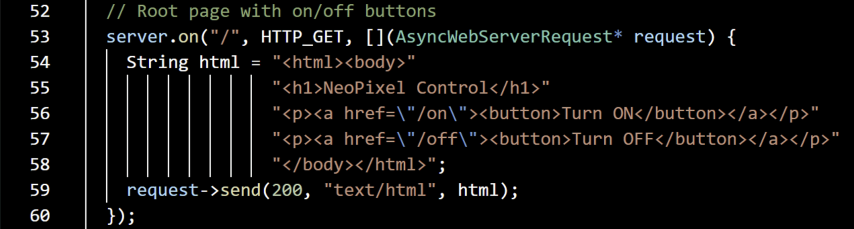
So when you click those buttons in your browser, the ESP32-C3 receives the HTTP request, calls setStrip(true) or setStrip(false), and updates the LED strip.
TESTING THE CODE
I connect the XIAO ESP32 board to my PC using a USB cable, and then connect a -LED neopixel strip to the board (D10 pin).
I upload the code to my ESP32 board, and it connects to the web server as before. I copy and paste the IP address 192.168.136.196 into my web browser and I see this screen.
There are html interface buttons that I can use to turn the Neopixel light strip on and off. You can see in the video below that the buttons can successfully turn the Neopixel light strip on and off.
Reflection
This week, I made a new board and while I had some bumps along the way, I felt a little more confident in addressing them. I learnt about new ways to connect devices and although I ran out of time and only managed to attempt one tutorial for this week, I felt that I am taking the first step into something bigger and more exciting.
Files
Web Server Neopixel ON/OFF Program
This concludes this week’s assignment.