Compare as many tool options as possible. Document your work on the group work page and reflect on your individual page what you learned.
In the realm of embedded systems and microcontroller projects, displaying information is often a critical requirement. The LCD 16x2 is a popular choice due to its ability to clearly display characters and basic graphics. When paired with the I2C (Inter-Integrated Circuit) communication protocol, this display becomes even more efficient, as I2C allows for simplified wiring and reduced pin usage.
This assignment focuses on interfacing an LCD 16x2 with the XIAO ESP32C3 microcontroller using the I2C interface. The XIAO ESP32C3, developed by Seeed Studio, is a compact and powerful microcontroller with built-in Wi-Fi and Bluetooth capabilities, making it ideal for modern IoT applications.
The objective of this documentation is to provide a detailed guide on setting up the hardware and software required to interface the LCD 16x2 with the XIAO ESP32C3 using I2C. By the end of this guide, you will have a functional LCD display connected to your microcontroller, ready to display information from your projects.
#include <Wire.h>
#include <LiquidCrystal_I2C.h>
// Set the LCD address to 0x27 for a 16 chars and 2 line
            display
LiquidCrystal_I2C lcd(0x27, 16, 2);
void setup() {
// Initialize the LCD
lcd.begin();
// Turn on the backlight
lcd.backlight();
// Print a message to the LCD
lcd.setCursor(0, 0); // Set cursor to column 0, row 0
lcd.print("Hello, world!");
delay(2000); // Display message for 2 seconds
}
void loop() {
// Create a scrolling message
            String message = "This is a scrolling text example on an I2C LCD
            16x2 display ";
int msgLength = message.length();
// Scroll the message from right to left
for (int i = 0; i < msgLength; i++) {
lcd.clear();
lcd.setCursor(16 - i, 0); // Scrolls from right to left
lcd.print(message.substring(i));
delay(300); // Adjust scrolling speed
}
delay(1000); // Pause before repeating the scroll
}
Tools > Board > ESP32 Arduino > XIAO_ESP32C3.
Tools > Port and select the port to which
your XIAO ESP32C3 is connected.
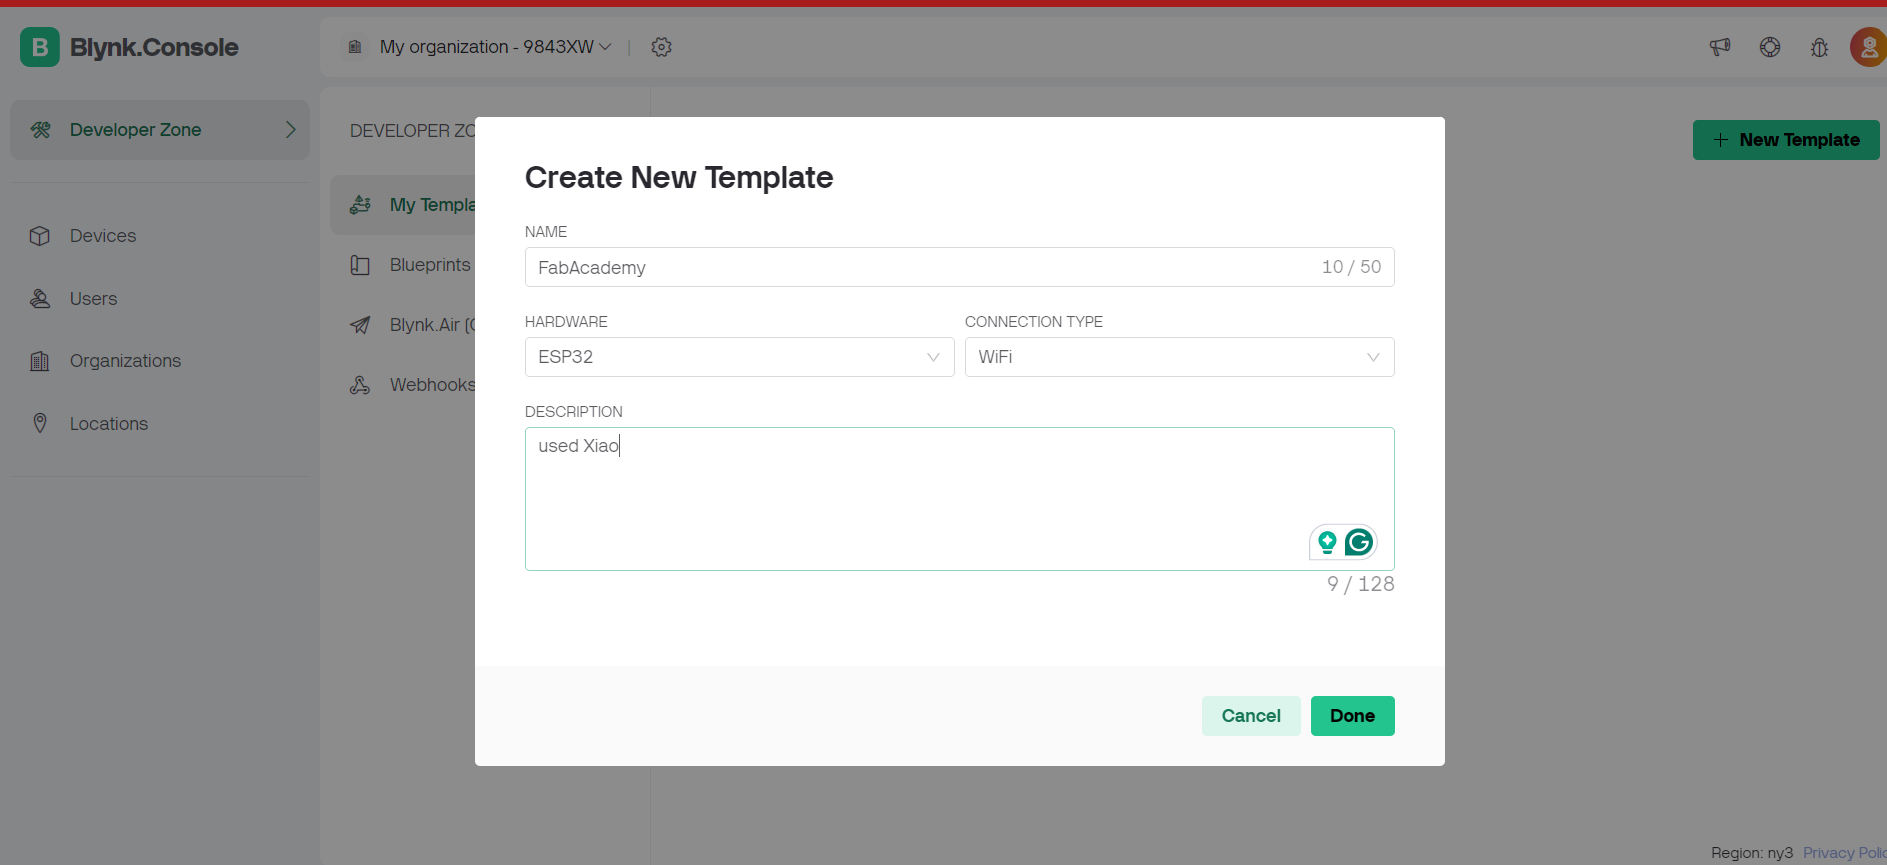
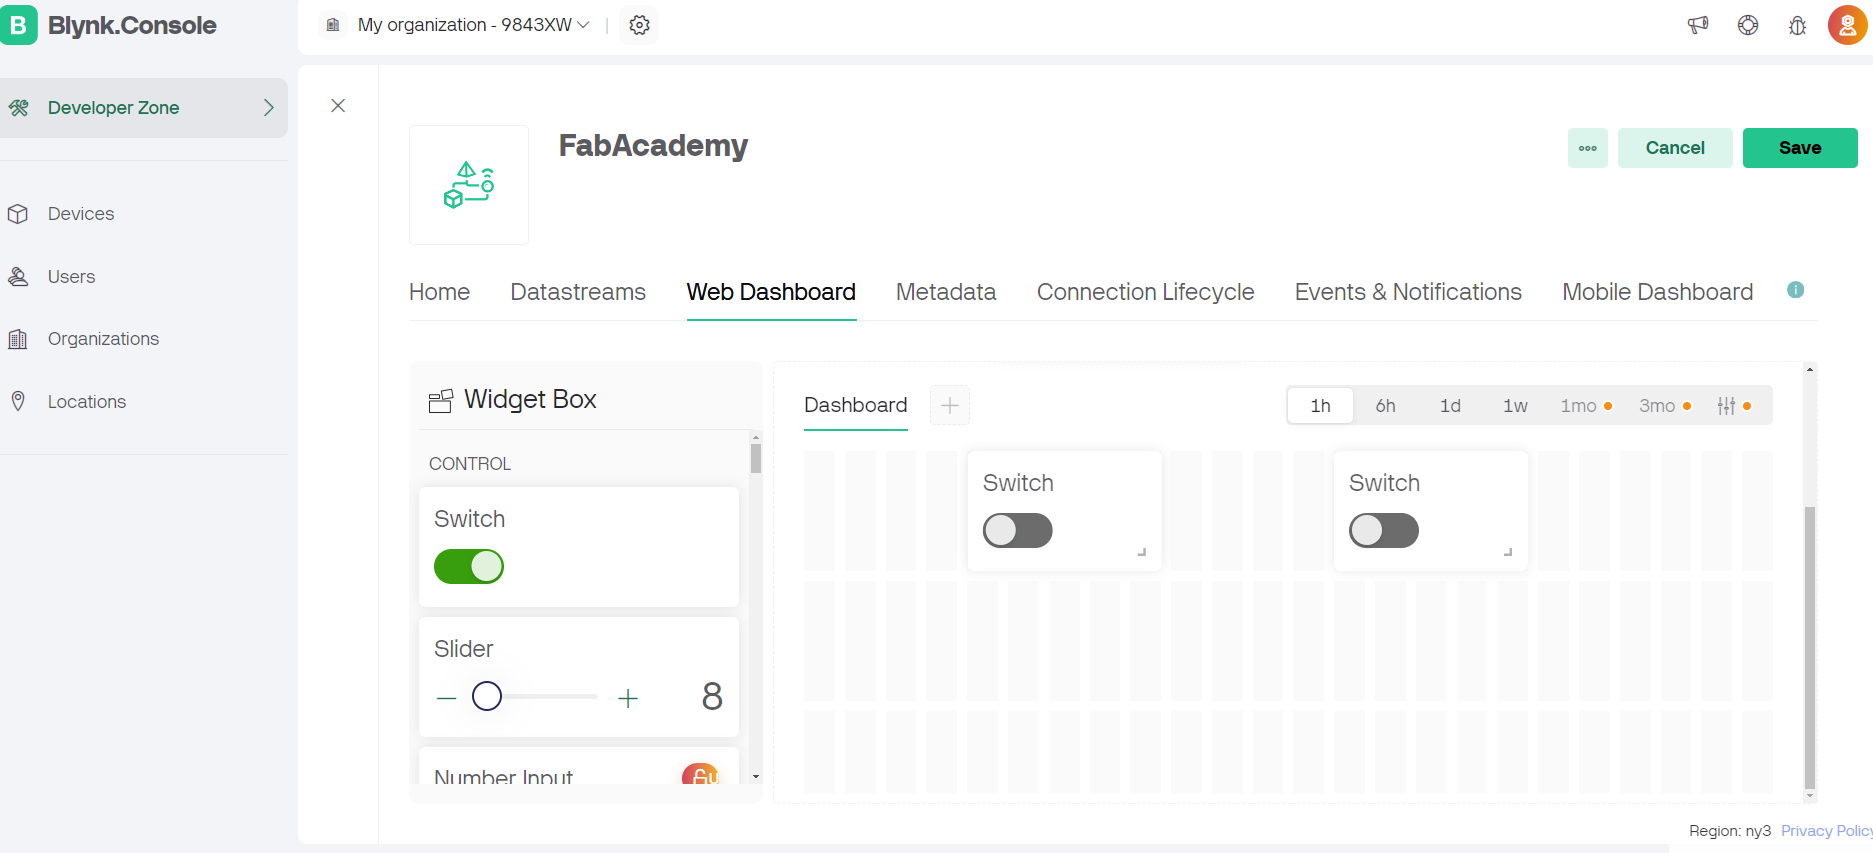
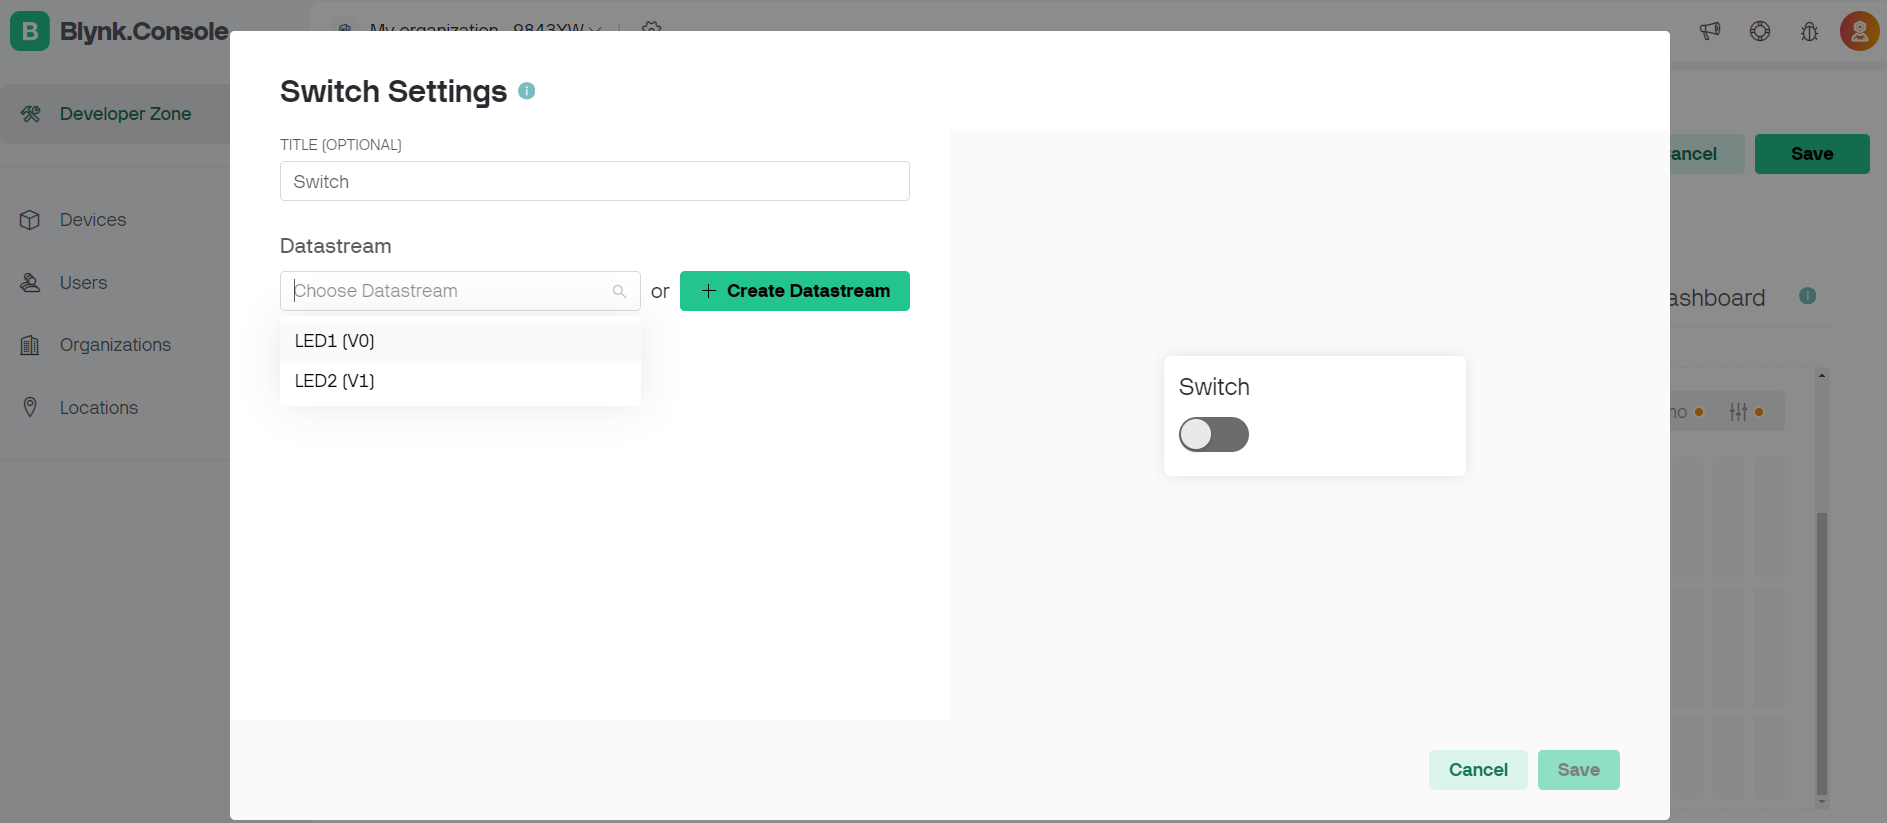
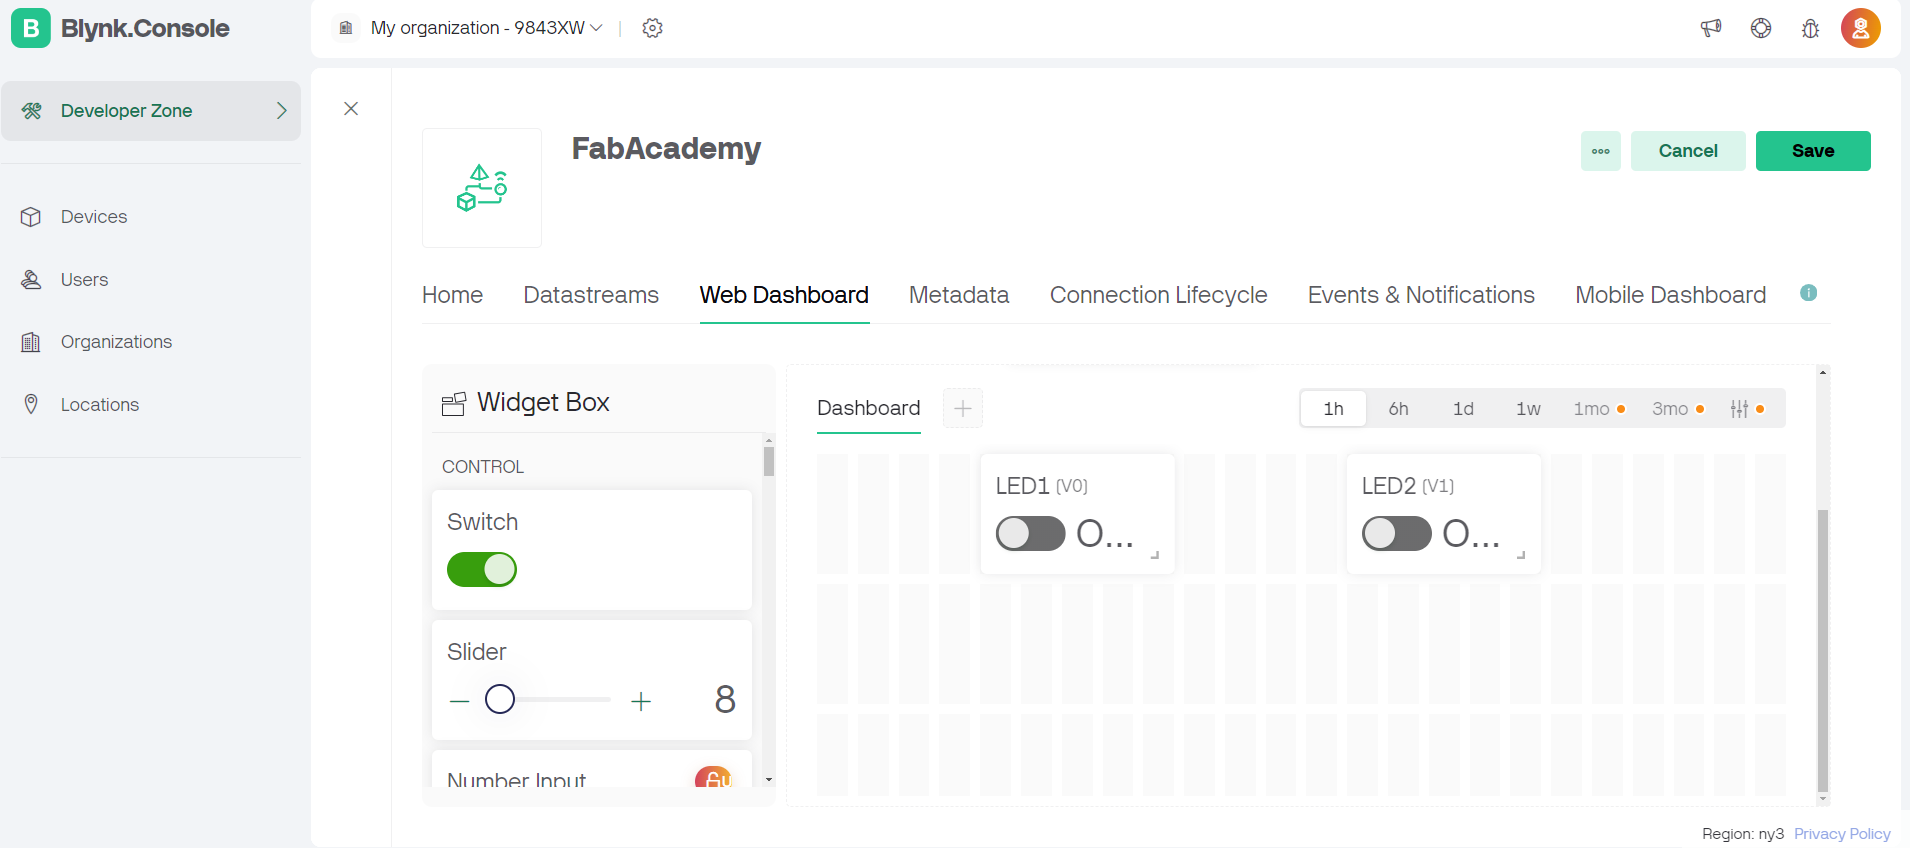
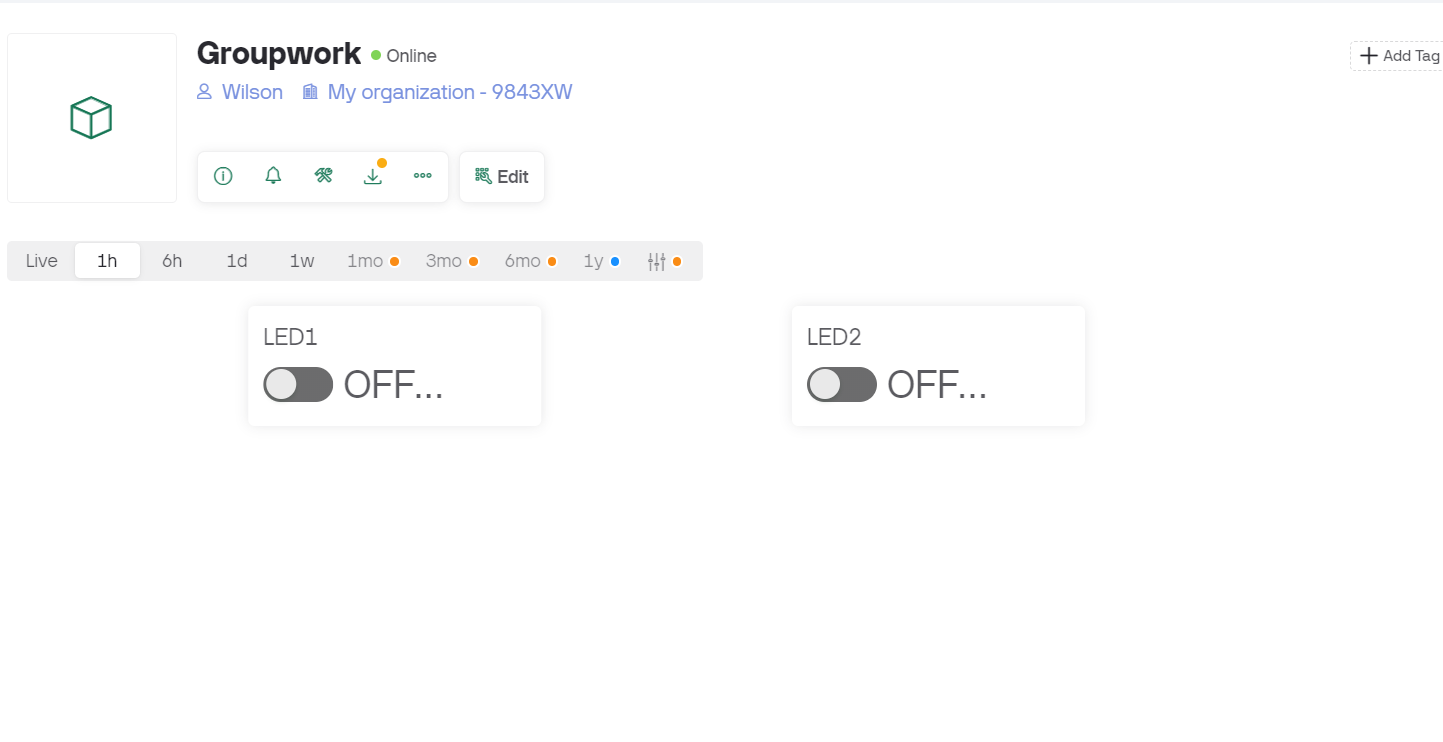
The Blynk app is a popular platform for building IoT applications. It allows users to create interfaces for projects by dragging and dropping widgets.
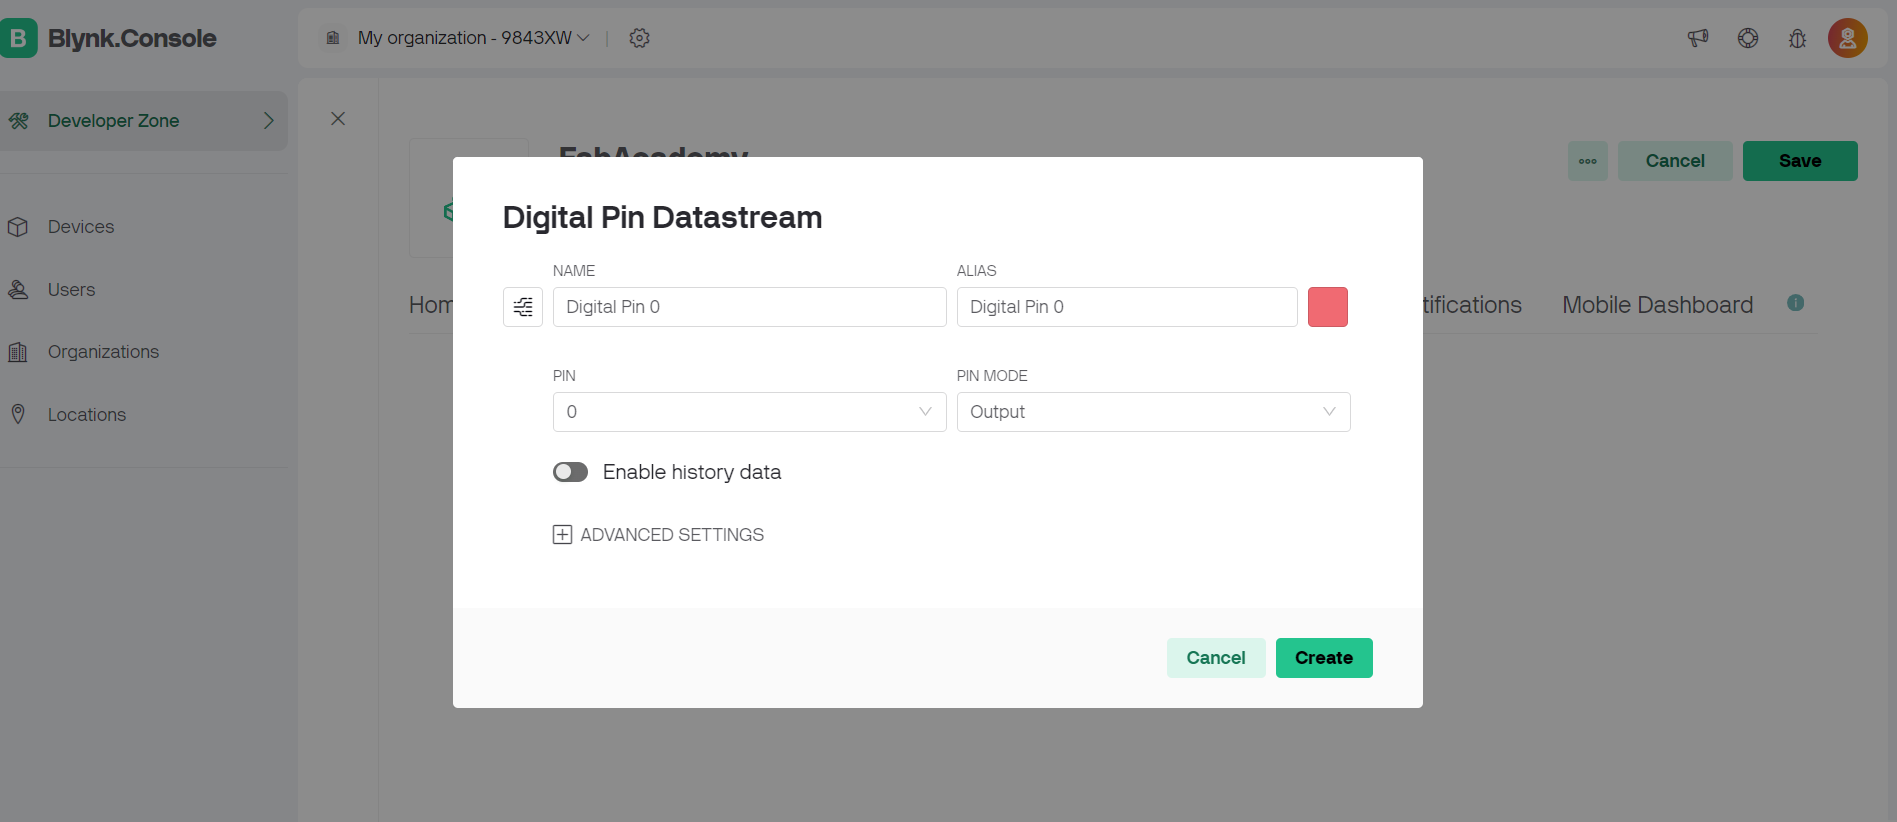
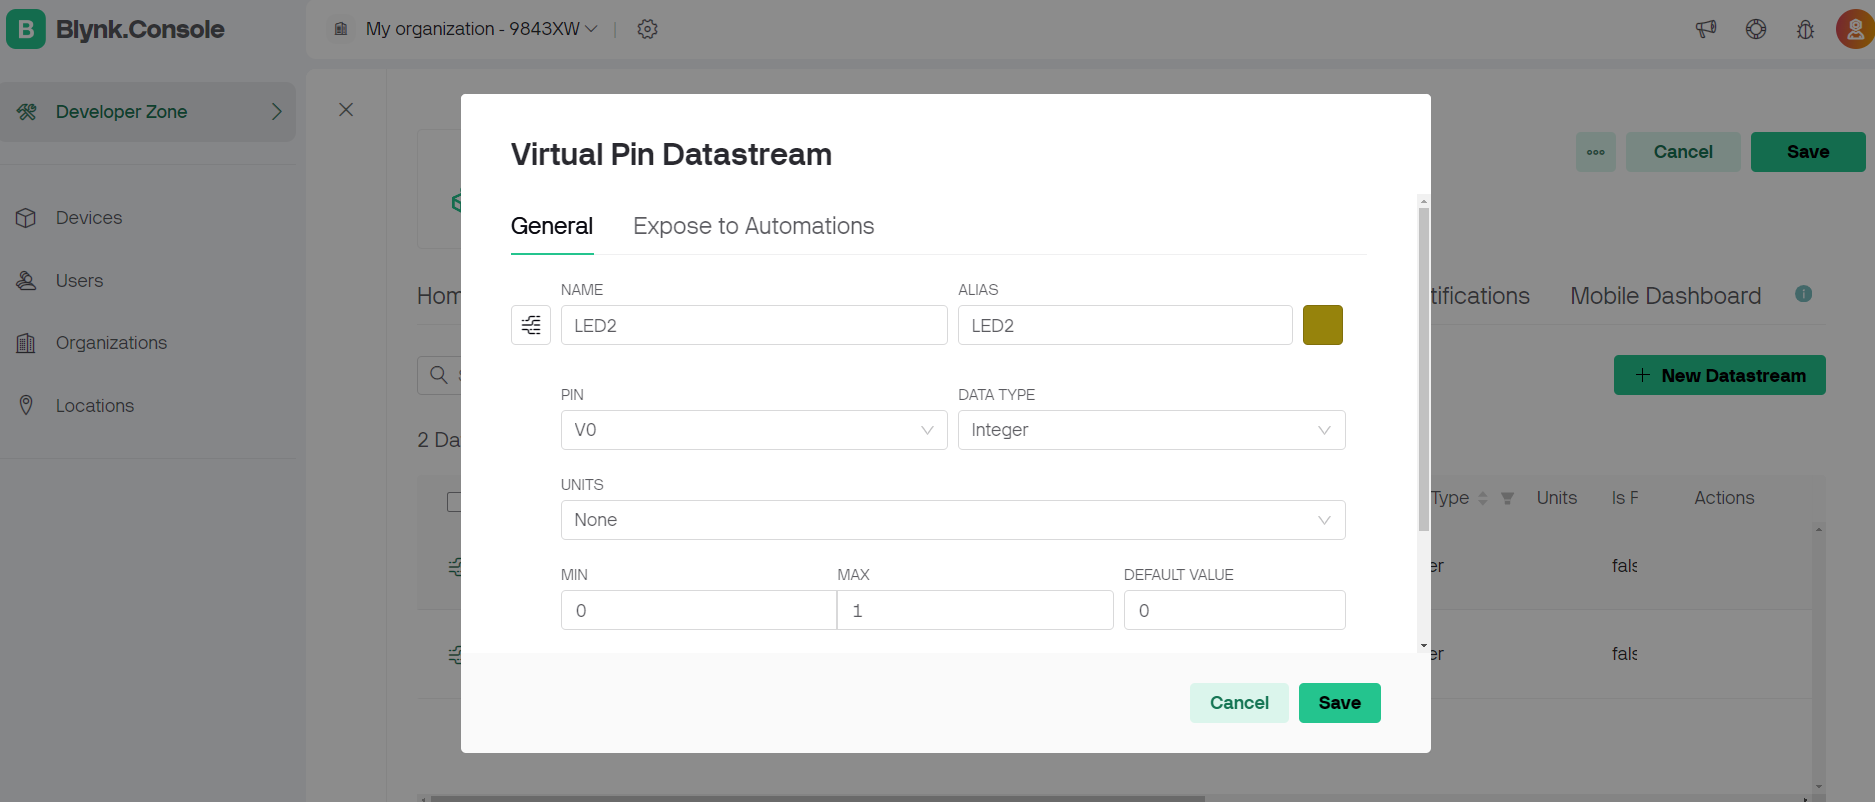
Steps followed on blynk app.
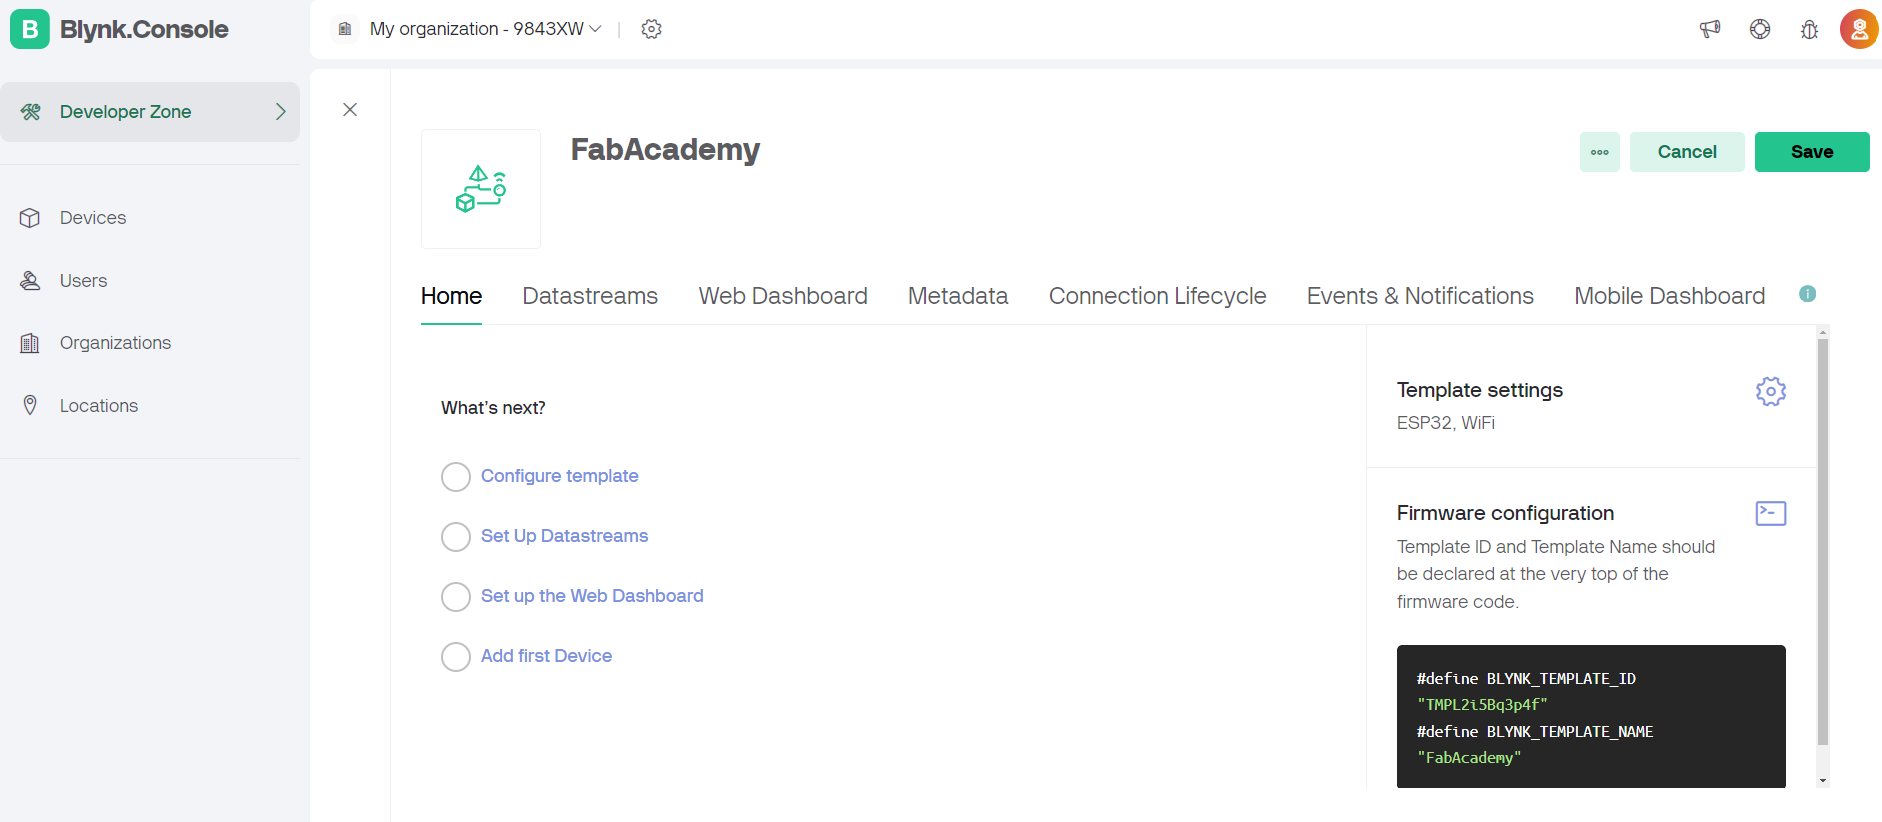

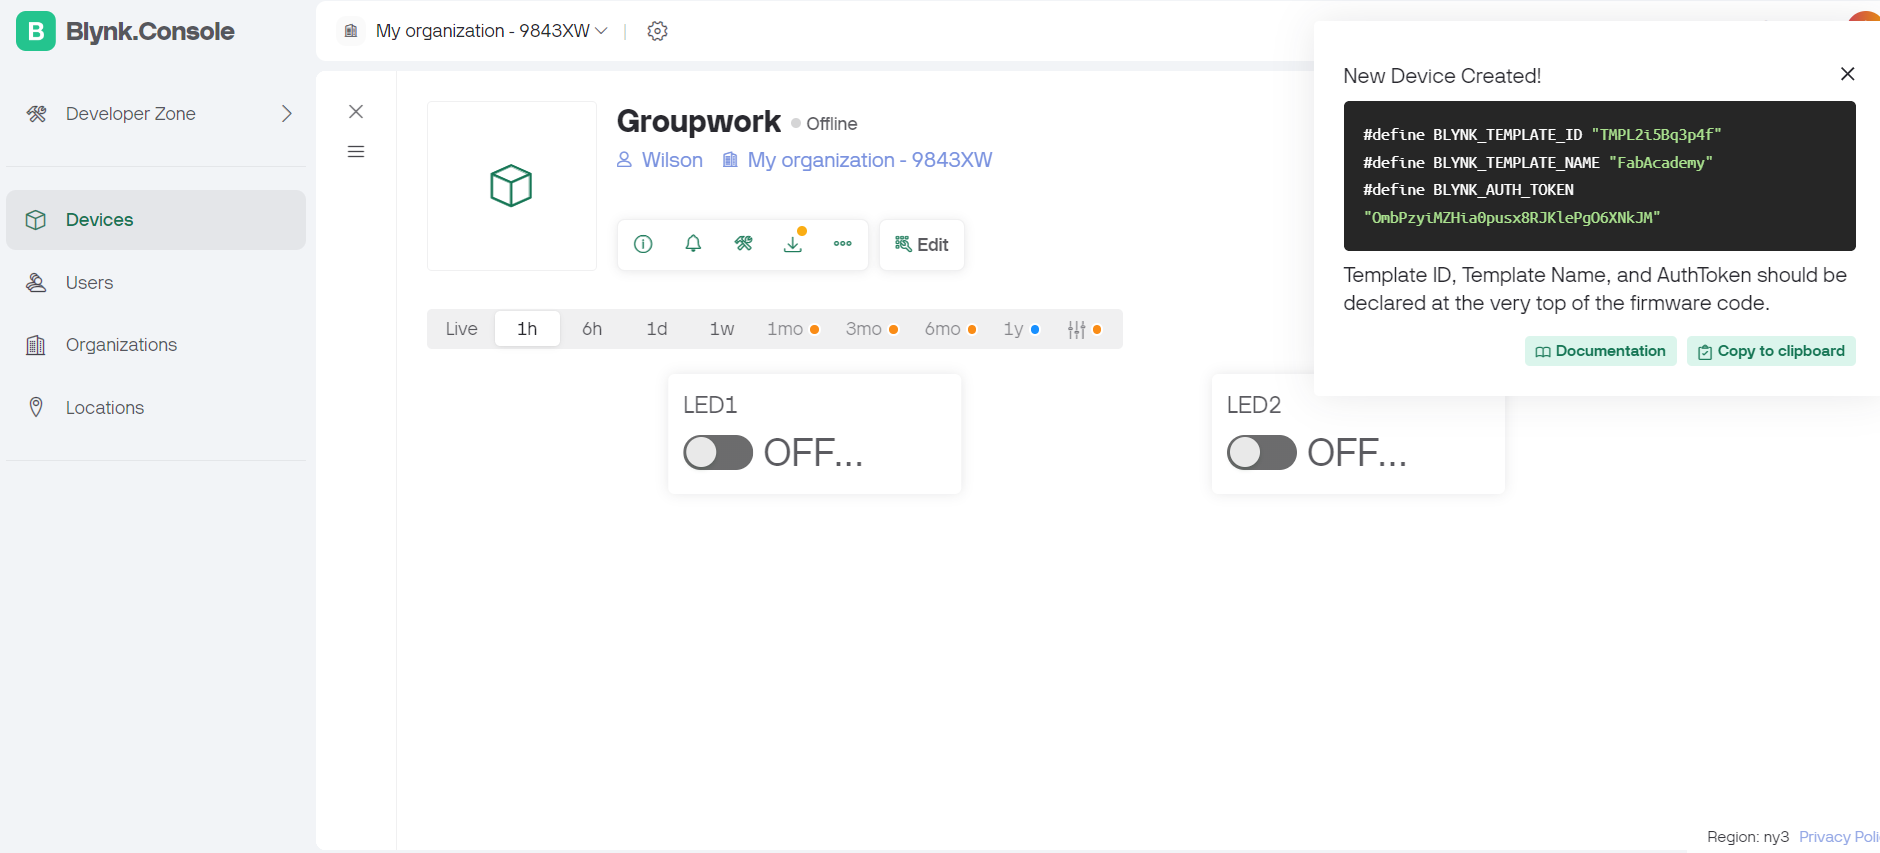
#define BLYNK_TEMPLATE_ID "TMPL2i5Bq3p4f"
#define BLYNK_TEMPLATE_NAME "FabAcademy"
#define BLYNK_AUTH_TOKEN "OmbPzyiMZHia0pusx8RJKlePgO6XNkJM"
#include <BlynkSimpleEsp32.h>
char auth[] = BLYNK_AUTH_TOKEN;
char ssid[] = "STARLINK 2";
char pass[] = "innovate";
// Define LED pins
const int ledPin1 = 4; // D4 corresponds to GPIO 4
const int ledPin2 = 5; // D5 corresponds to GPIO 5
void setup() {
// Debug console
Serial.begin(115200);
// Initialize Blynk
Blynk.begin(auth, ssid, pass);
// Set LED pins as outputs
pinMode(ledPin1, OUTPUT);
pinMode(ledPin2, OUTPUT);
// Ensure LEDs are off initially
digitalWrite(ledPin1, LOW);
digitalWrite(ledPin2, LOW);
}
// V1 LED Control
BLYNK_WRITE(V1) {
int ledState = param.asInt(); // Get the state of the virtual button
digitalWrite(ledPin1, ledState); // Turn the LED on/off
}
// V2 LED Control
BLYNK_WRITE(V2) {
int ledState = param.asInt(); // Get the state of the virtual button
digitalWrite(ledPin2, ledState); // Turn the LED on/off
}
void loop() {
Blynk.run();
}