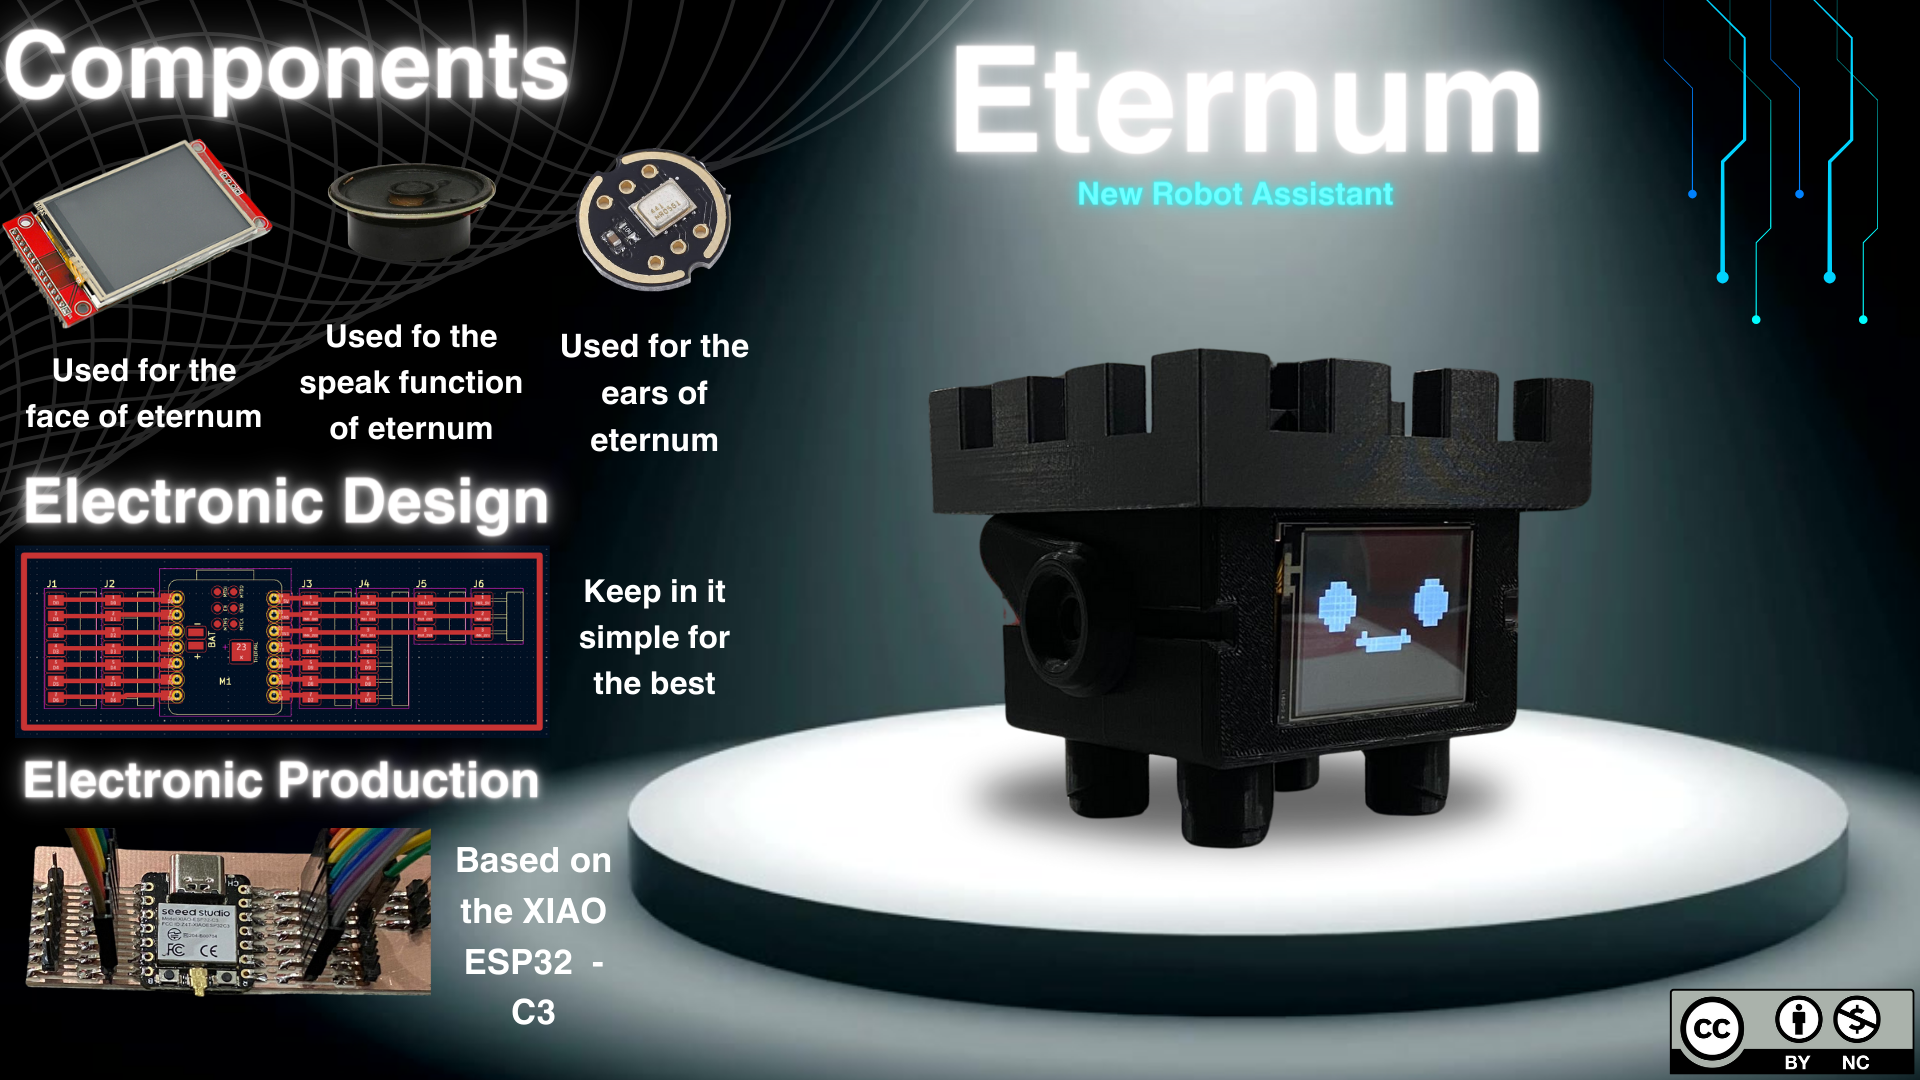
Eternum
Slide
Video
Research
Assisting robots, also known as service robots already exists, they come in various designs tailored to aid humans in different tasks. They range from simple household chores to more complex healthcare duties, depending on specific needs. These robots are equipped with different features to handle a wide array of tasks efficiently. Here are a few examples:
Tour Guide Robots:
Robots designed to assist and guide are commonly deployed in places such as museums, restaurants, tourist attractions and even banks. They offer various services including providing information, answering questions, and guiding people.
For example Pepper is a robot designed for people. Built to connect with them, assist them, and share knowledge with them – while helping your business in the process. Friendly and engaging, Pepper creates unique experiences and forms real relationships.
Waiter Robots:
In the hospitality industry, waiter robots are becoming increasingly common. These robots can take orders, serve food and drinks, and even handle payments. They help in the dining experience by reducing wait time and freeing up human staff to focus on other tasks.
A good example of a waiter robot is BellaBot can navigate between tables, deliver food and drinks to customers and it has a 10 meter range for obstacle detection, helping the dining process.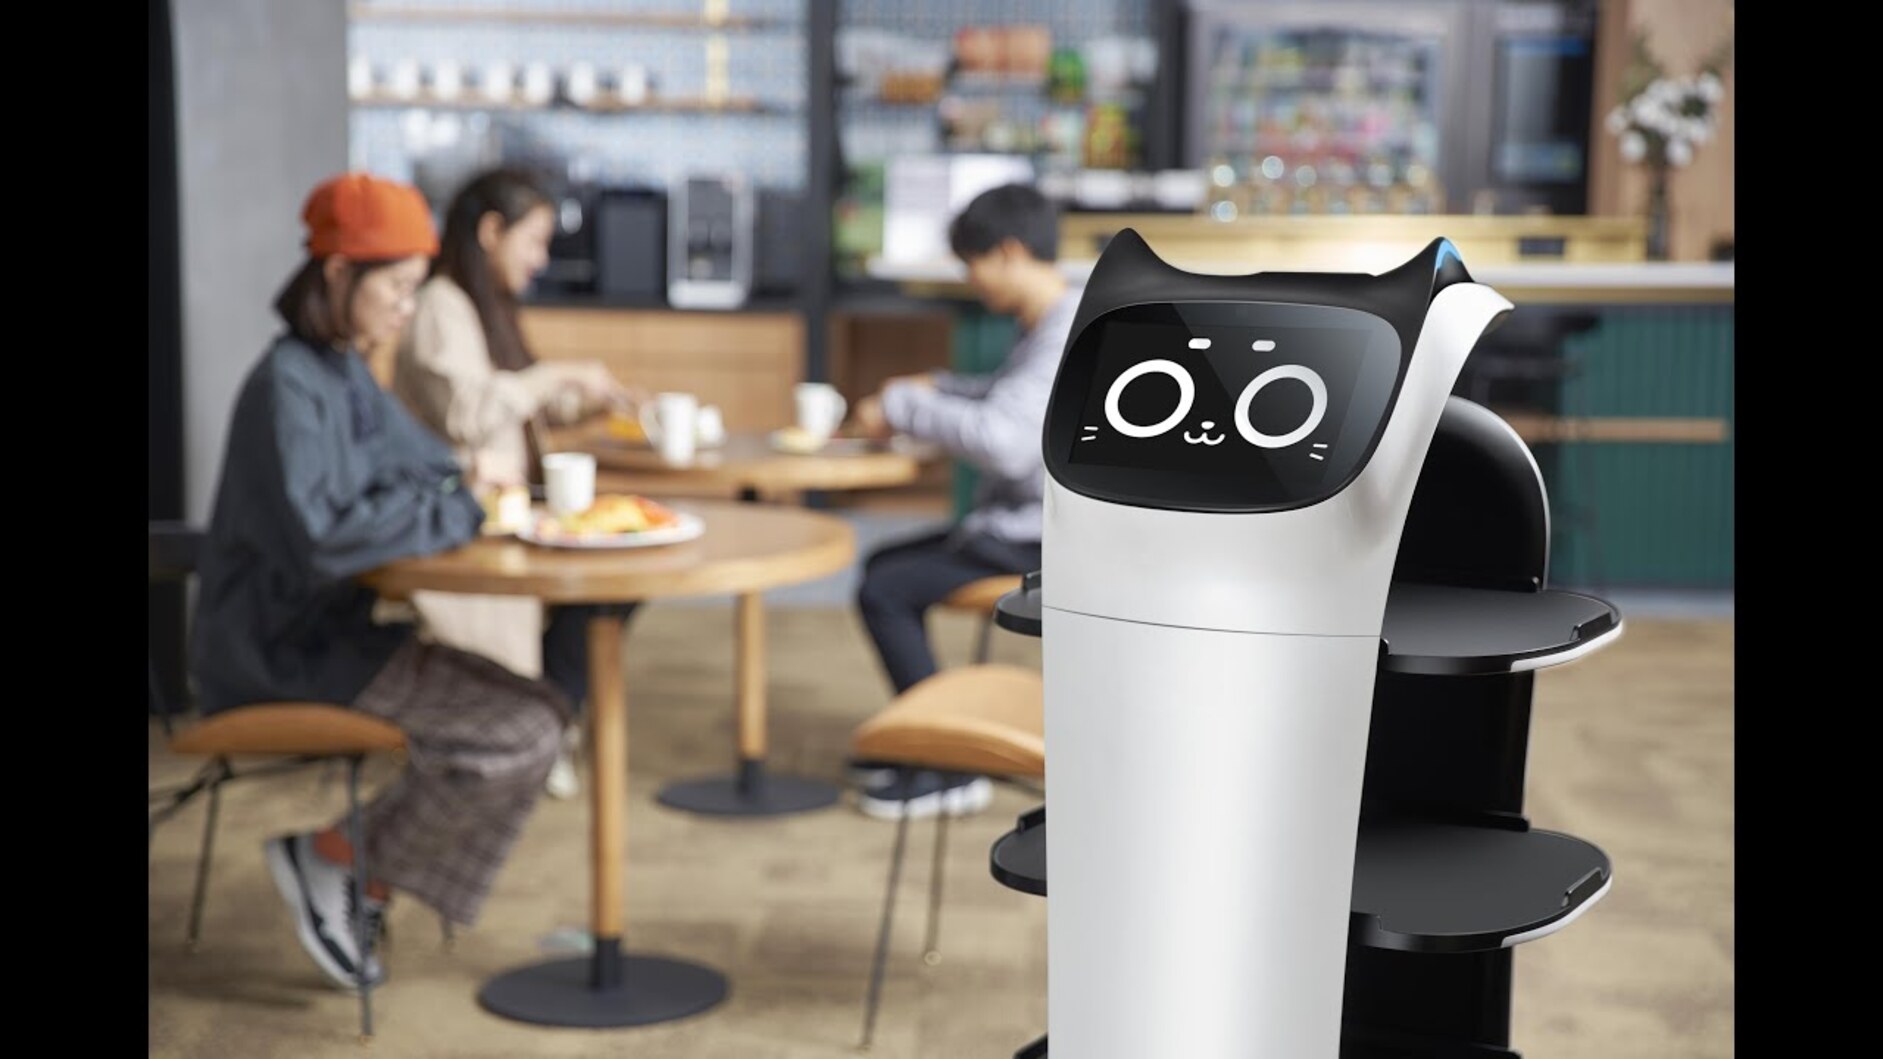
Customer Service Robots:
Customer service robots are used in various settings, including retail stores, aiports and hotels. They can assit customers by providing information about products and services, helping with check-in procedures and even offering personalized recommendations. These robots often have touchscreens or voice recognition systems to interact with customers effectively. For example
LoweBot it's desing to help customers find what they are looking for and keep them up-to-date on current promotions. For example, LoweBot could help customers with more simle need navigate through the store and guide them to the product they are looking for, allowing them get in and out quickly with exactly what they need.
Healthcare Robots:
In healthcare, robots are used to assist medical professionals and provide care to patients. For example, some robots can deliver medication, take vital signs and assist with rehabilitation exercises. Others are used for tasks like cleaning and disinfecting hospital rooms.
The best example for this type of robot is the Da Vinci robotic surgical systems is for hospitals committed to increasing the scale and efficiency of minimal invasive surgery. Built from nearly three decades of experience integrating robotics technology with advanced software, da Vinci systems deliver precision, vision and control.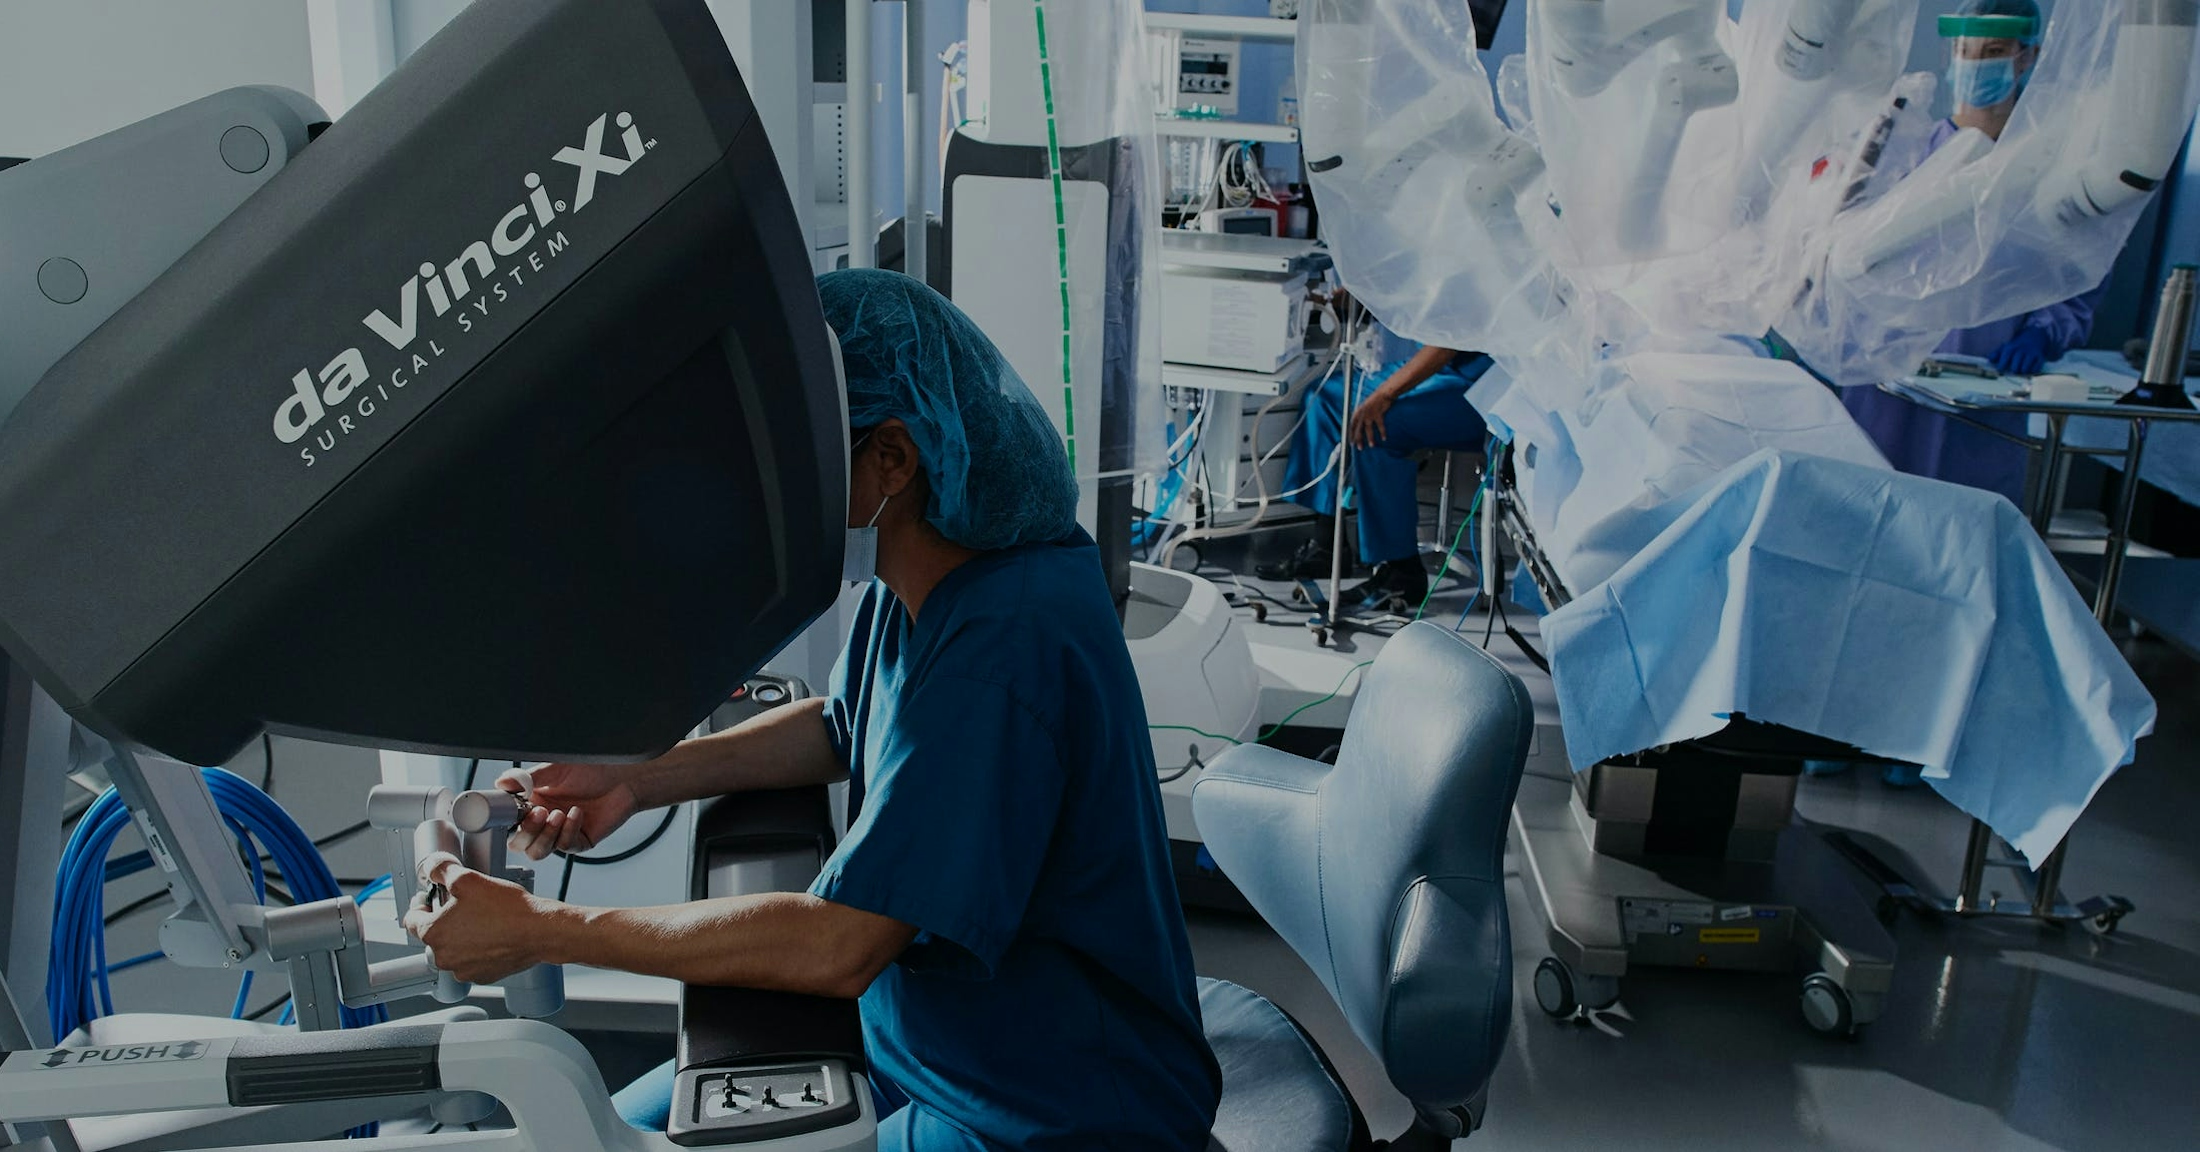
Home assisted robots:
Home assistant robots are engineered to assist with various household tasks including cleaning, cooking, and monitoring home security. They are becoming increasingly popular due to their ability to control smart home devices, offer information, and provide entertainment. Within this category, there is significant diversity among robots, with examples ranging from vacuum cleaners like Roomba to virtual assistants like Amazon's Alexa.
Questions
-
What tasks have been completed?
Everything has been completed!
-
What tasks remain?
None! 😉
-
What has worked? What hasn't?
The screen works perfectly, displaying animations flawlessly. The robot's body and its components are well-crafted. However, the speaker could benefit from a better quality speaker and amplifier. Unfortunately, during transportation, the microphone broke, rendering it unable to understand anything now all it produces is noise.
-
What questions need to be resolved?
What is the next goal?
How can it be different this time?
I want to redo the project in a different way, using more complex components and creating a more friendly, recognizable character for the robot. To achieve this, I need to learn more skills, dedicate more time to development, and possibly work with a team to perfect it. The goal is to create a truly helpful robot that can answer any question. With the help of AI, it will become more independent, making it a truly worthy project. -
What will happen when?
In the short term, I aim to upgrade to a larger screen and possibly integrate a Raspberry Pi to handle all the information processing. Looking ahead in the long term, I envision a completely different project that serves as a legacy. I hope to accomplish all of this within a maximum timeframe of one and a half years, focusing on meticulous planning and execution for optimal results.
-
What have you learned?
I've learned a lot from all the weeks of this project, becoming more conscious of how much time even simple tasks can take. This experience has opened my mind to my capabilities and shown me how much I can improve if I continue following this path and exploring new things. It has greatly benefited both this project and my career.
Sketch
What is it?
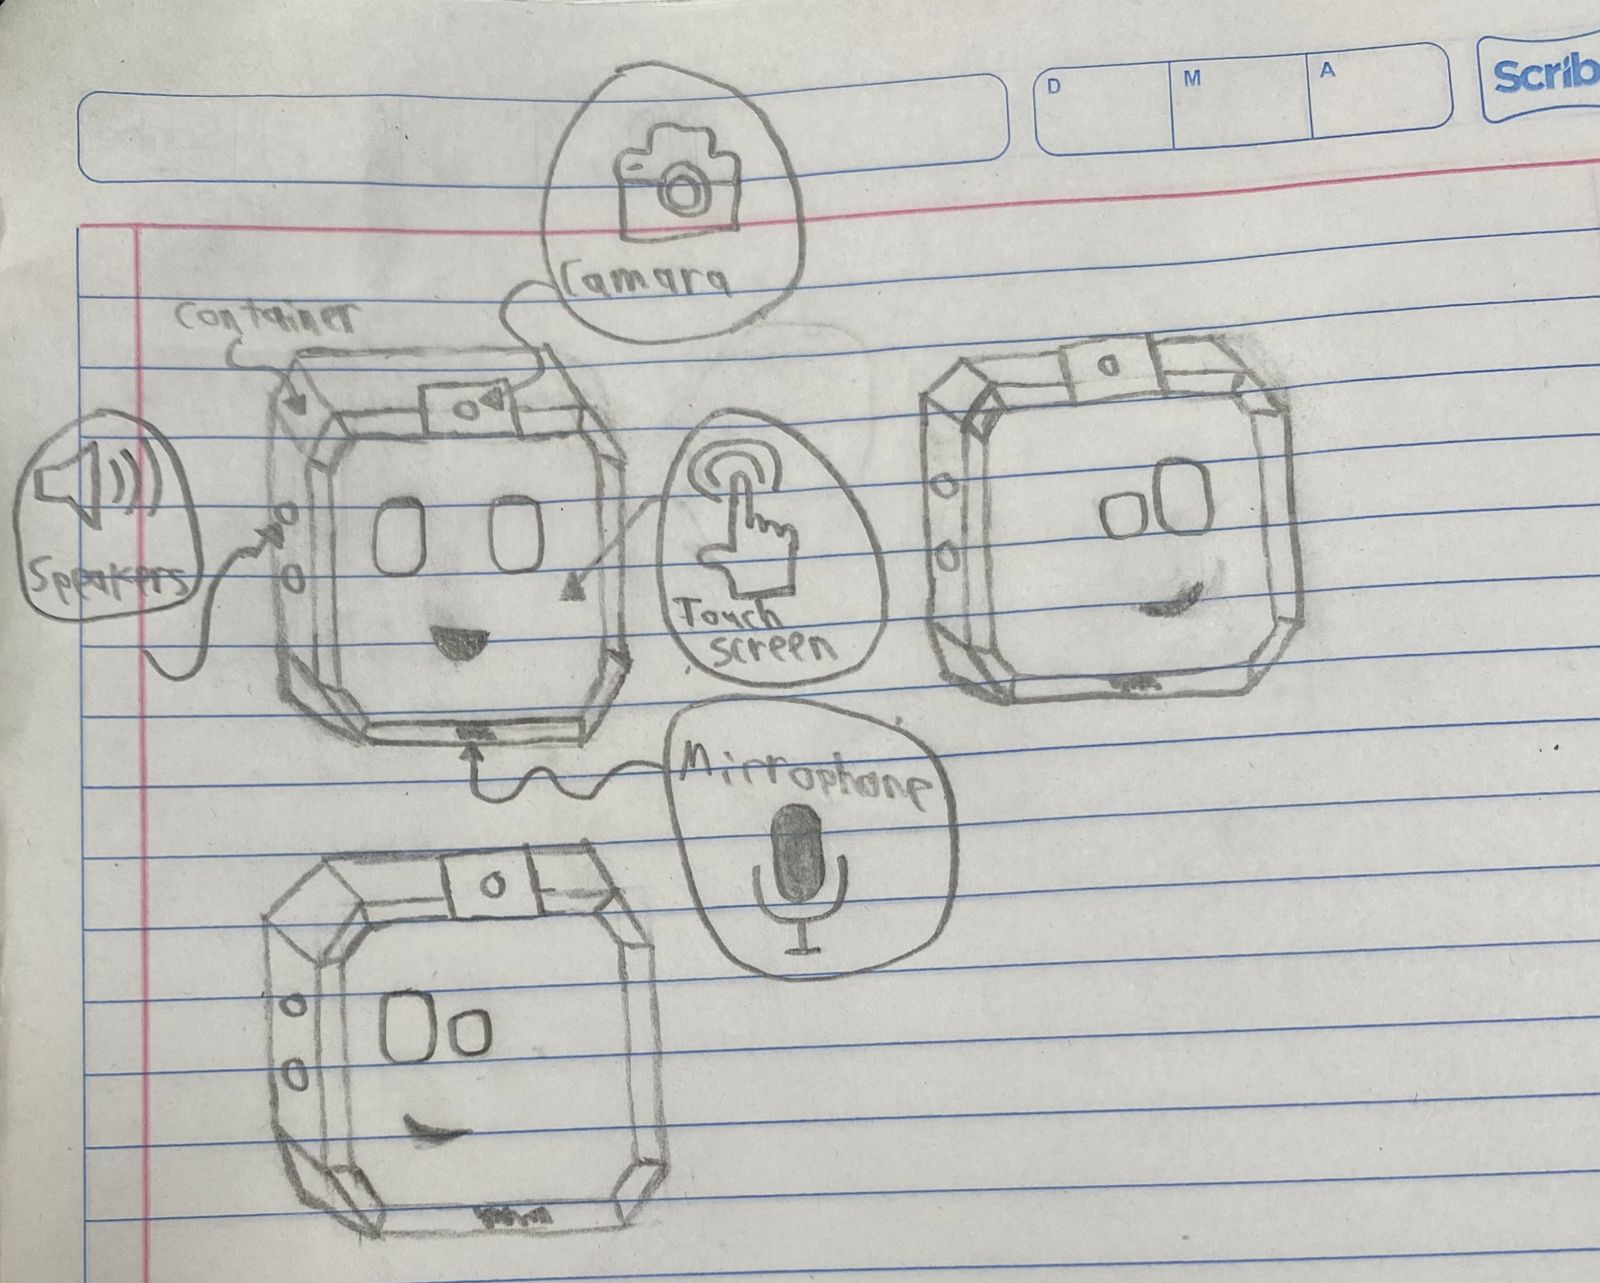
Eternum is a stationary robot designed to assist anyone seeking directions within the perimeter of
Ibero Puebla University. Its primary objective is to provide helpful guidance. Eternum is equipped
with a microphone and a speaker and features a friendly face to enhance user interaction. The robot
uses its speakers to deliver instructions, offering guidance throughout the university.
Note: The final product differs from the sketch in that it does not include a camera or a
touchscreen.
Materials
| Name | Description | Price | Link |
|---|---|---|---|
| XIAO ESP32 | The Xiao ESP32 is a compact development board featuring the ESP32 microcontroller with dual-core processing, Wi-Fi, and Bluetooth capabilities. | $ 20.39 USD | Buy here! |
| 2.4 TFT inch Display | The 2.4-inch TFT display is a small, color screen with 240x320 resolution, often touch-enabled, suitable for microcontroller projects. | $ 12.34 USD | Buy here! |
| Speaker 1.5w 8 ohm | The 1.5W 8 ohm speaker is a compact audio device for projects needing sound output. It works well with microcontrollers and can handle moderate volume levels effectively | $ 6.93 USD | Buy here! |
| INMP441 MICROPHONE | The INMP441 is a compact digital microphone with a MEMS sensor and I2S interface, ideal for capturing high-quality audio in portable devices and IoT applications. | $ 5.17 USD | Buy here! |
| PLA Black filament | PLA (Polylactic Acid) black filament is a type of 3D printing material commonly used for printers. | $ 26.50 USD | Buy here! |
Schedule (Mid Term Review)
| Week | Task | Status |
|---|---|---|
| Week 1 | Principles and Practices, Project Management | Done |
| Week 2 | Computer-Aided Design | Done |
| Week 3 | Computer-Controlled Cutting | Done |
| Week 4 | Electronics Production | Done |
| Week 5 | 3D Scanning and Printing | Done |
| Week 6 | Embedded Programming | Done |
| Week 7 | Computer-Controlled Machining | Done |
| Week 8 | Electronics Design | Done |
| Week 9 | Output devices | Done |
| Week 10 | Mechanical design & machine design | Done |
| Week 11 | Input devices | Done |
| Week 12 | Moulding and Casting | Done |
| Week 13 | Embedded Networking and Communications | Done |
| Week 14 | Interface and Application Programming | Done |
| Week 15 | Wildcard Week | Done |
| Week 16 | Applications and Implications | Done |
| Week 17 | Invention, Intellectual Property and Income | Done |
PCB
As you might expect, a PCB is necessary to fit all the components together. Based on the list
of components, a lot of pins are required. Some connections, such as communication buses, can
be joined together, but there aren't many. A special note is that I forgot to add a transistor
to the PCB. This transistor, the 2N2222, is used to improve the sound quality of the speaker.
If you don't add this transistor, the system will still work, but the speaker won't sound as
good.
So without further ado, let's jump right into making the PCB. This process is similar to one of
the previous weeks, so if you want a step-by-step guide on making this PCB, you can check it by
clicking here.
KiCad
So, for this part, the first step is to create a schematic, followed by designing a PCB. With that said, let's jump right in.
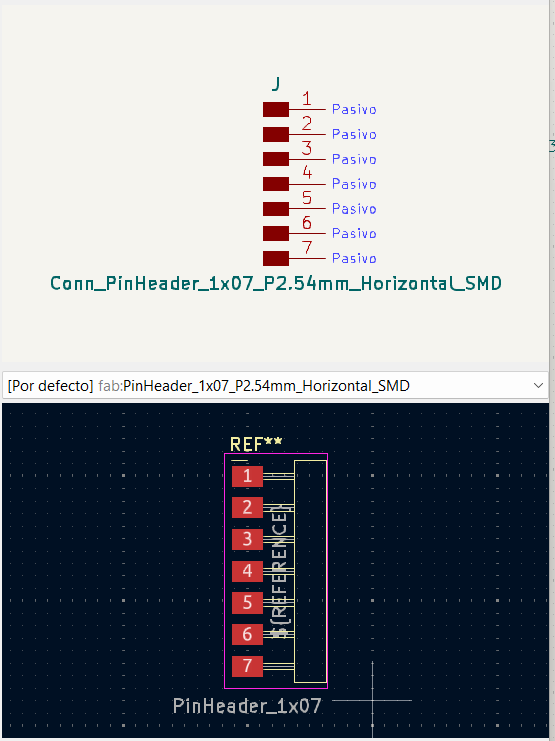
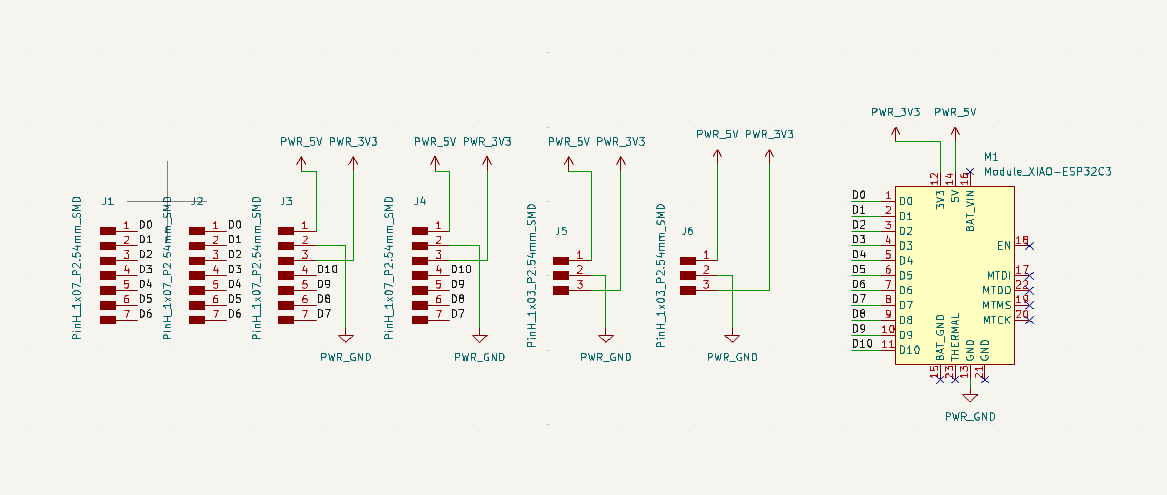
Schematic
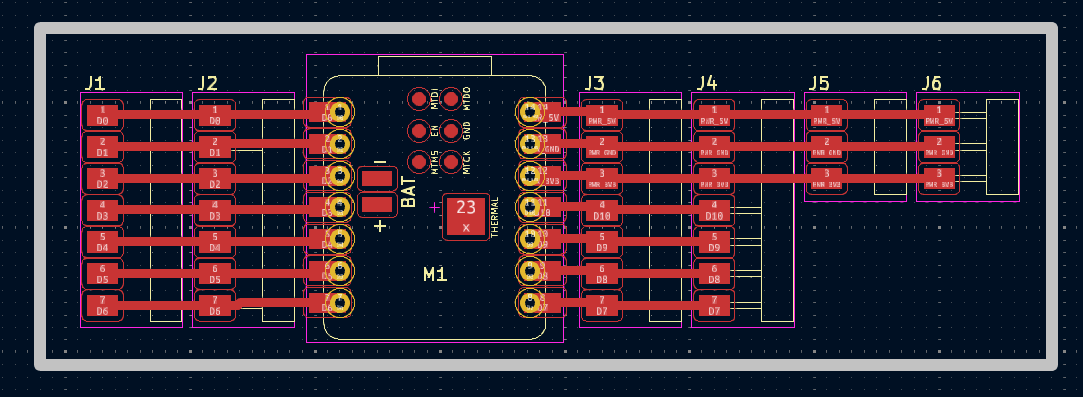
For the schematic, I kept it simple. The screen uses a lot of pins, and since it has an SD card slot, it will be easier to use images and create animations. For now, the schematic mainly includes pin headers. I forgot to include the transistor, but if you want to add it, that's fine. If not, it will still work. You can also use an amplifier for better sound quality if you prefer.
PCB
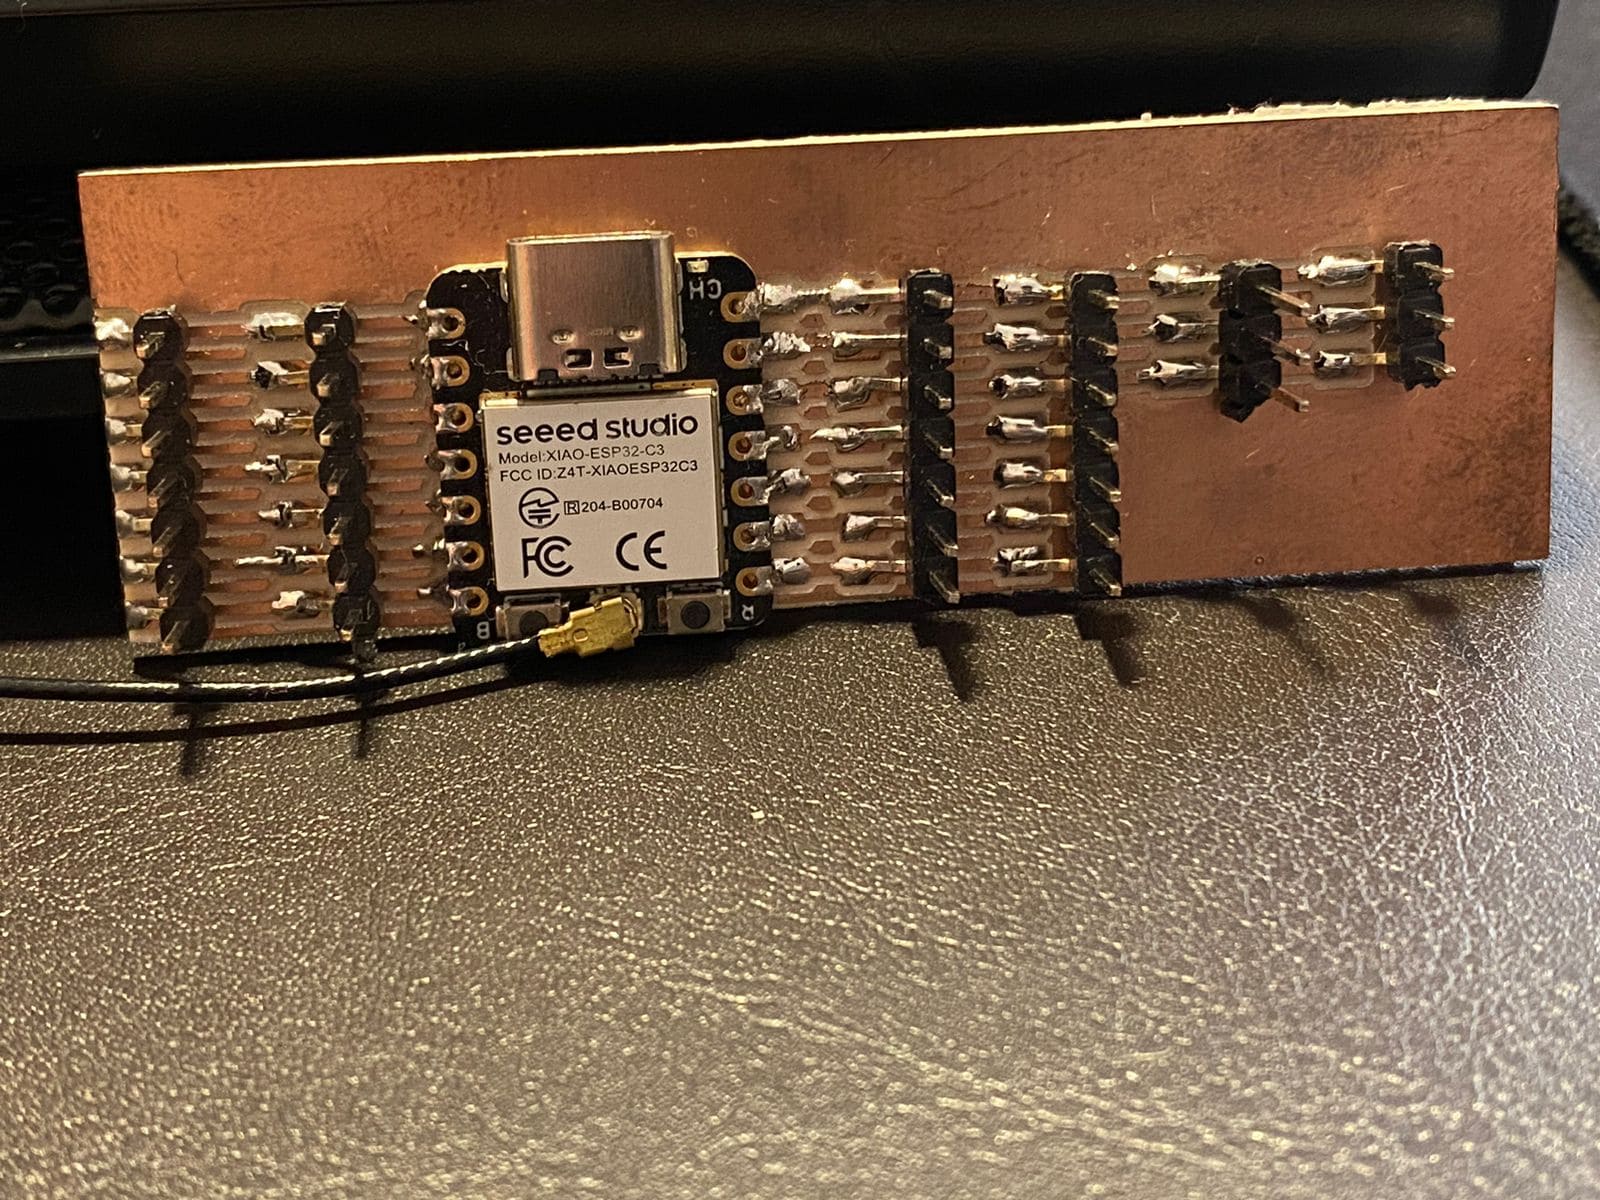
Now that the schematic is complete, it is time to order the PCB. Since the design of the case is relatively small, the PCB needs to be smaller than 8 cm in width and no more than 4 cm in height. With this in mind, I kept the components on the PCB as tightly packed as possible. When I manufactured it, the bottom part came out a bit weird, possibly due to a cutting problem, but it wasn't a big deal afterward. So here is the PCB.
Components
-
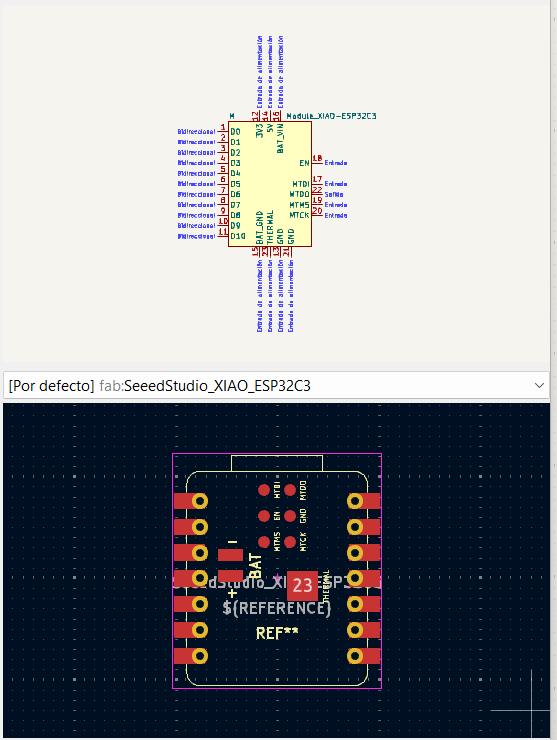
XIAO ESP32

The Xiao ESP32-C3 is a compact, low-power microcontroller board that features the ESP32-C3 chip. This chip is based on the RISC-V architecture and offers Wi-Fi and Bluetooth 5 connectivity. The board is designed for IoT applications, providing a small form factor, multiple I/O pins, and a USB-C interface for power and programming. It is ideal for projects requiring wireless communication and low energy consumption.
-
2.4 TFT inch Display
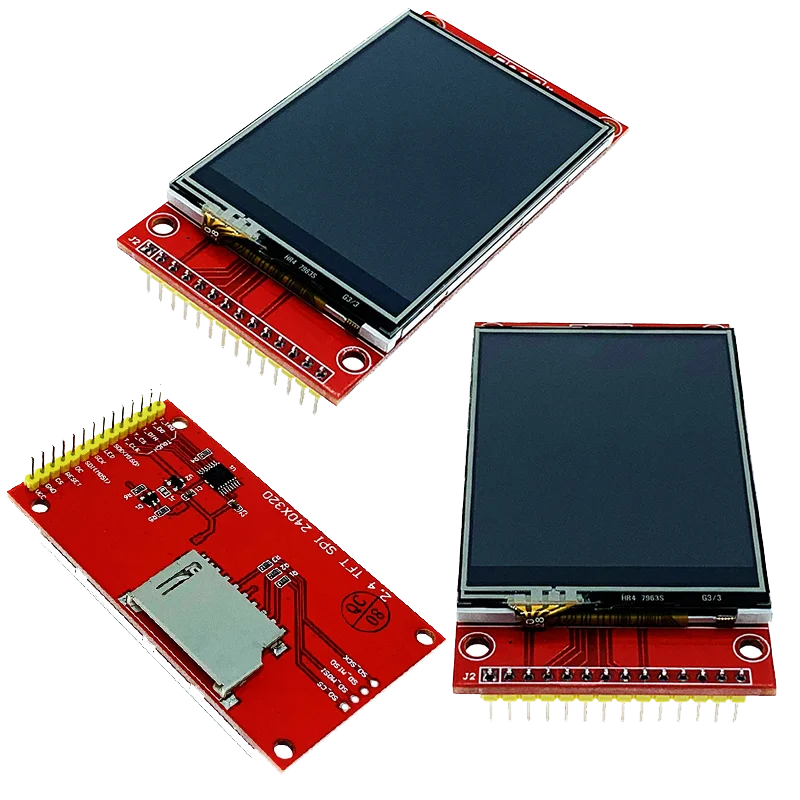
The 2.4-inch TFT display is a small, color LCD screen commonly used in electronic projects. It typically has a resolution of 240x320 pixels, providing clear and vibrant visuals. The display often includes a touch interface and communicates with microcontrollers via SPI (Serial Peripheral Interface). Its compact size makes it ideal for portable devices, user interfaces, and compact projects.
-
Speaker 1.5w 8 ohm

The 1.5W 8-ohm speaker is a small audio output device suitable for low-power applications. It can deliver clear sound at up to 1.5 watts of power and has an impedance of 8 ohms, making it compatible with many audio amplifiers and microcontrollers. This speaker is often used in compact electronic projects, such as portable audio players, alarm systems, and voice output devices.
-
INMP441 MICROPHONE
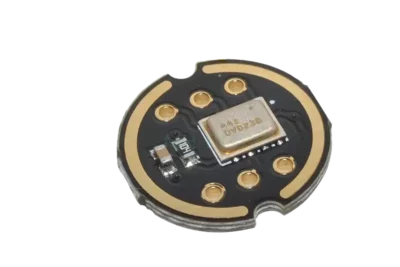
The INMP441 is a high-performance, low-power digital MEMS microphone. It features an I²S (Inter-IC Sound) interface, allowing for direct digital audio output. The microphone provides high-quality audio capture with a wide frequency response and low noise. It is ideal for voice recognition, audio recording, and sound detection applications in compact electronic projects.
3D parts
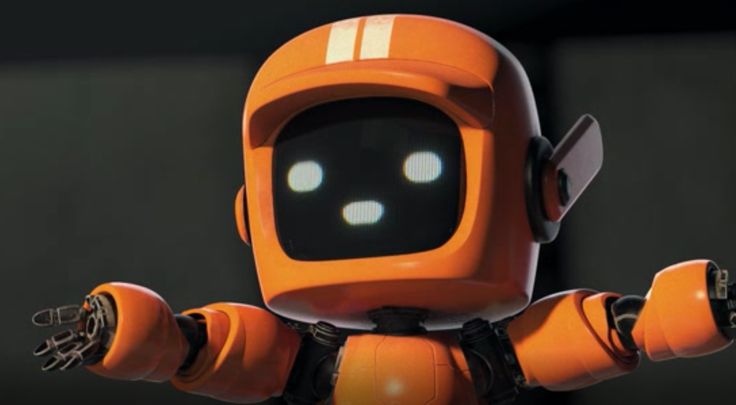
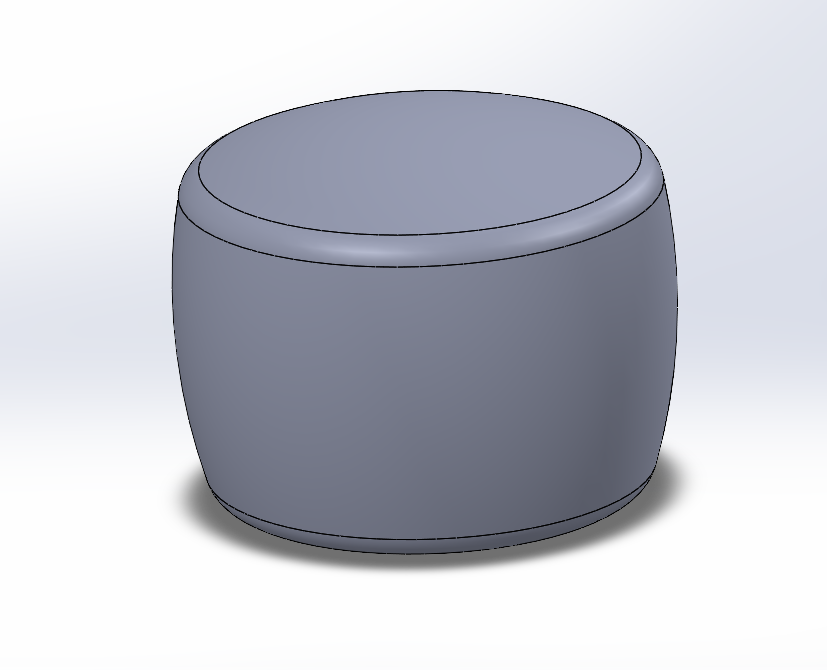
For the robot's body, I didn't have a defined design initially. The one I was considering was based on the robot from the popular Netflix series "Love, Death & Robots," specifically the character K-VRC. However, I didn't stick with this design because I wasn't sure how to execute it. Whenever I tried, I kept ending up with a head that looked like some sort of weird knob.
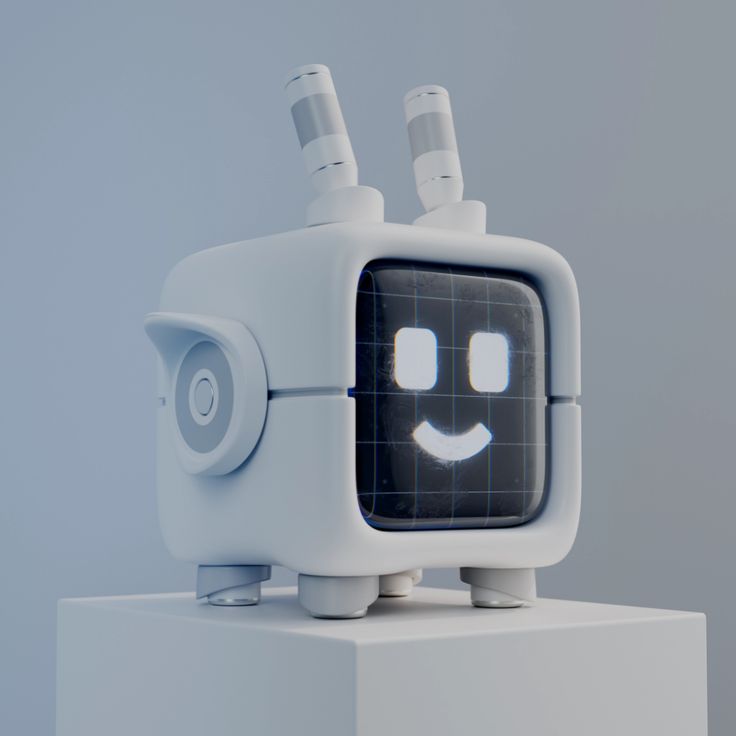
After searching through many references, I finally settled on a design that had the characteristics I wanted and needed. The design had to be cute and friendly to attract attention while also being functional. This combination allowed me to create a robot that is both appealing and practical.
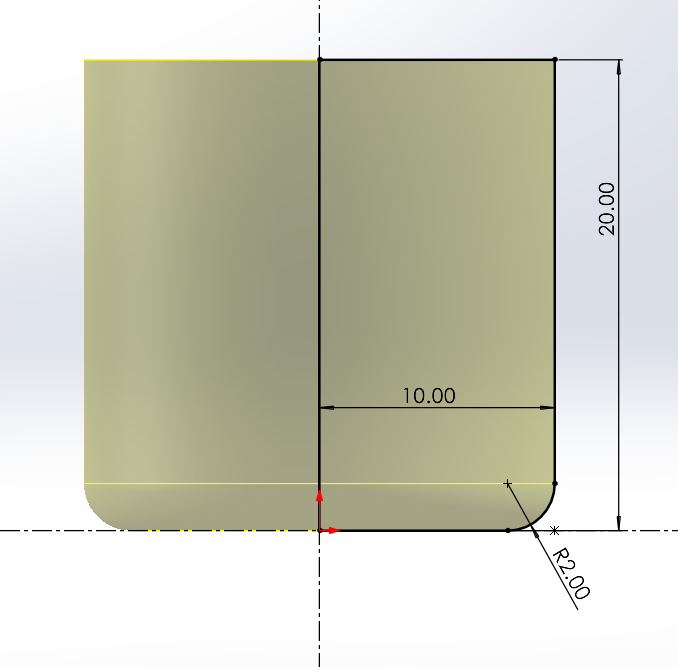
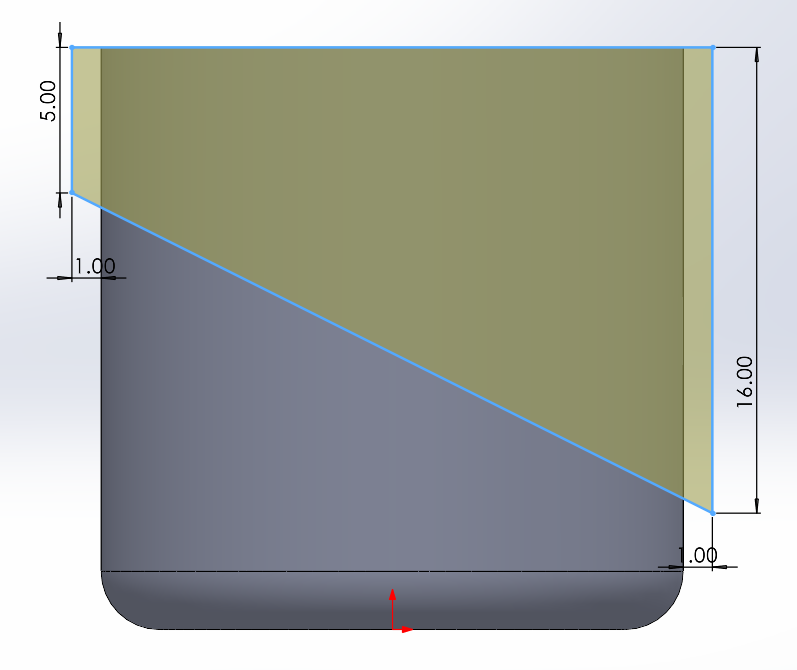
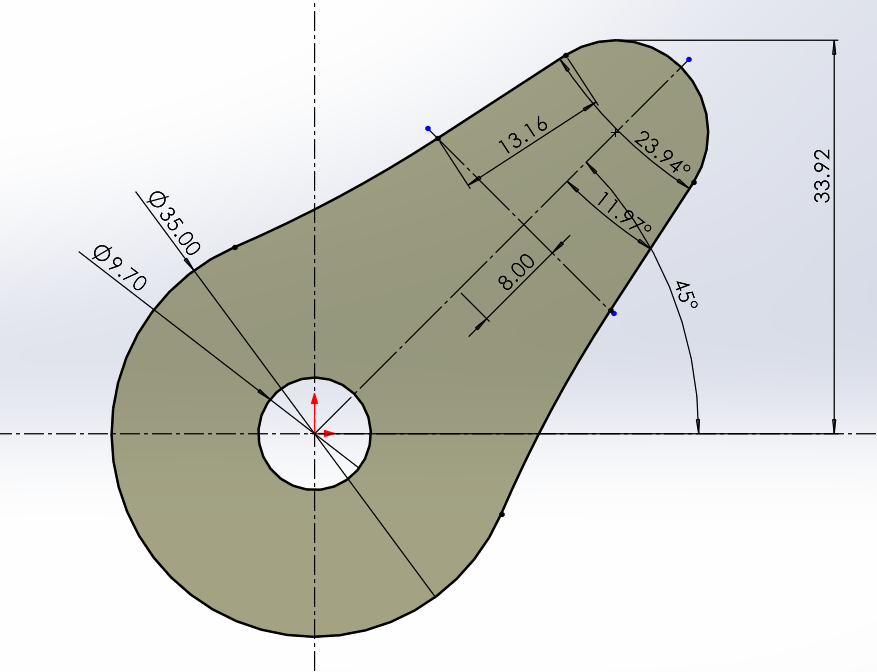
The first thing I did was the toes. The design is straightforward, involving a revolve
around the central cylinder. Then, I created a parallelogram shape that extrudes from
the cylinder, followed by cutting away the unused parts. Finally, I extruded a cylinder
from the top part of the piece.
Note: You will find all the files for the pieces at the bottom of the page. If
you want more information on how to create these 3D parts, you can check some of my
other pages where I detail this process, by
clicking here or
here.
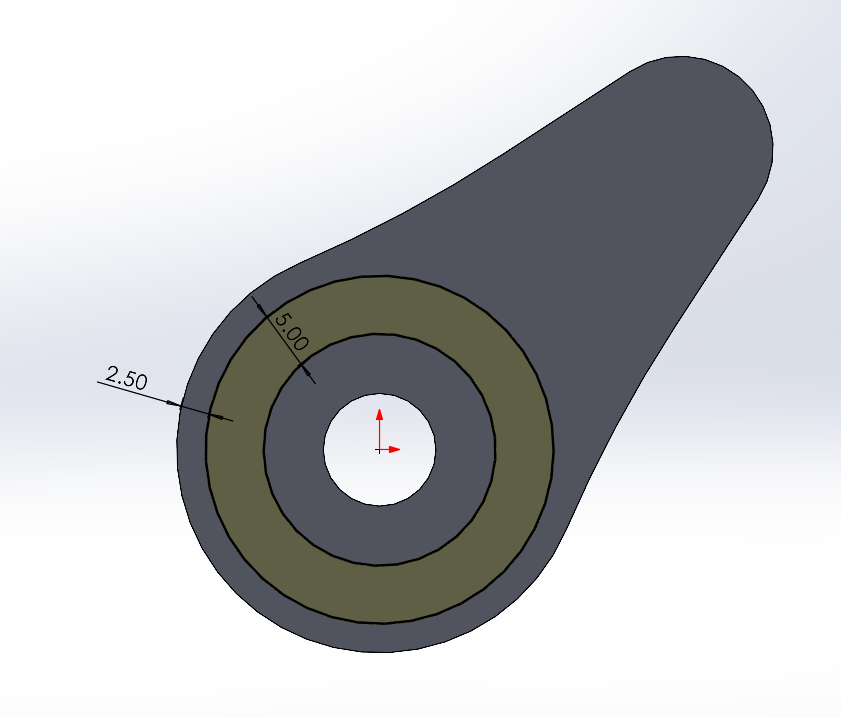
I spent more time than I expected on the ears because I wanted a smooth surface. First, I created a 2D design and then extruded it. I added another circle inside and extruded that as well. Afterward, I filleted all the edges with a 2mm rounding. Lastly, I created a circle in the center of all the circles to add depth and made a cylinder so it could fit into the main body.
I kept the front case very slim because the screen has an SD slot that takes up space. This is why it is thinner than the rest of the components. The cylinders that hold the screen in place were created through trial and error.
For the case in the back is the same thing, but this time is more thick and has a hole in the middle for the speaker.
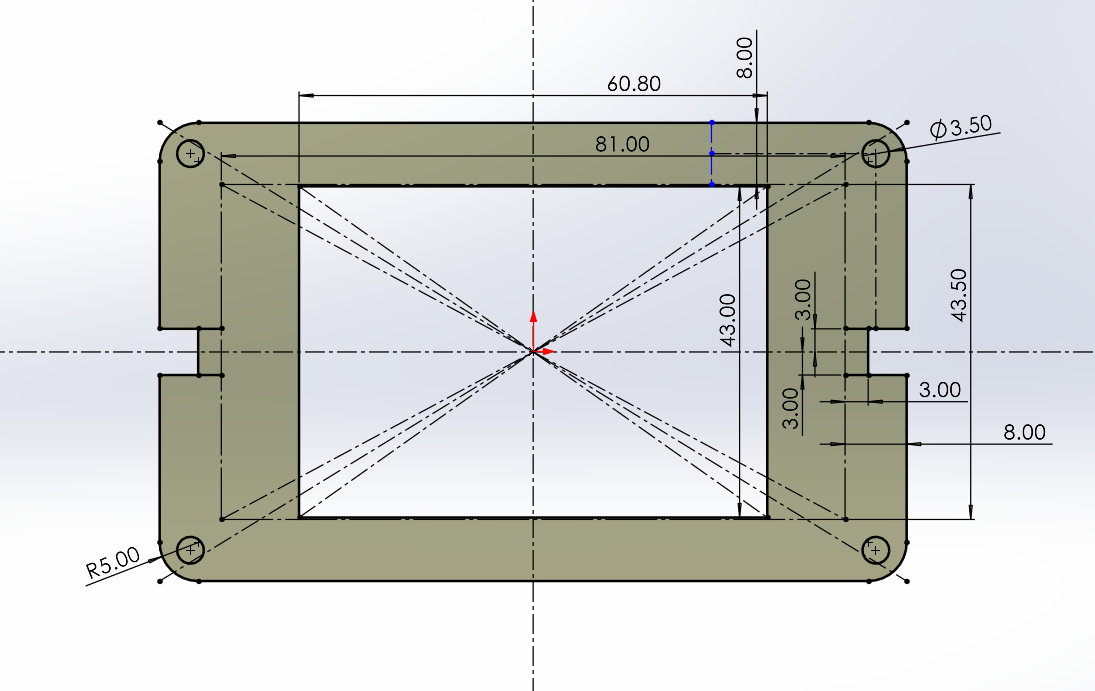
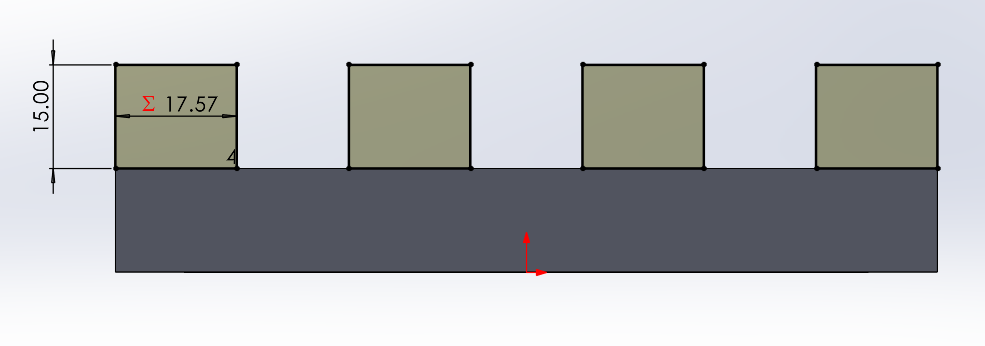
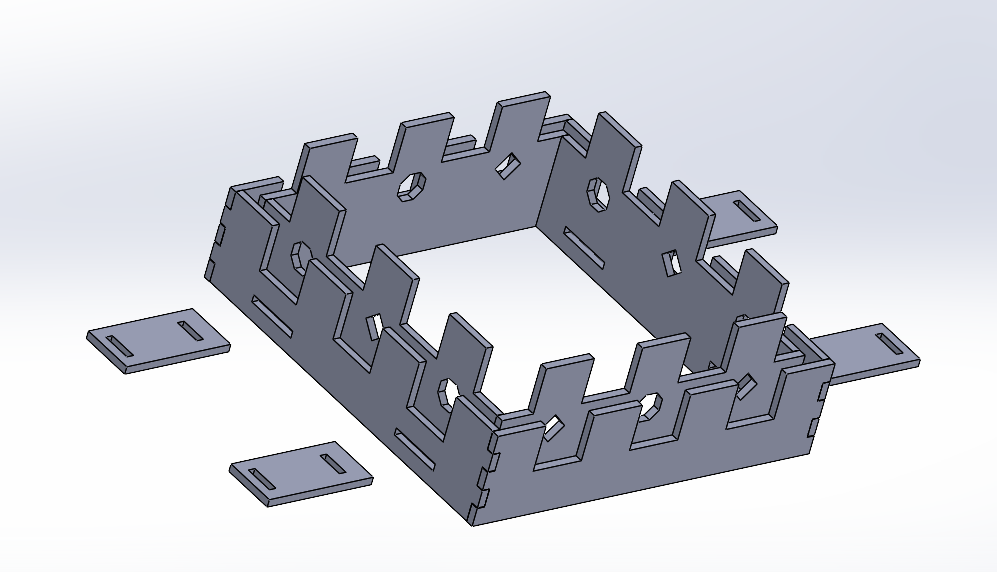
For the body, I followed the design from the image to maintain a consistent look. It has multiple holes to keep all the pieces together, allowing them to fit through pressure.
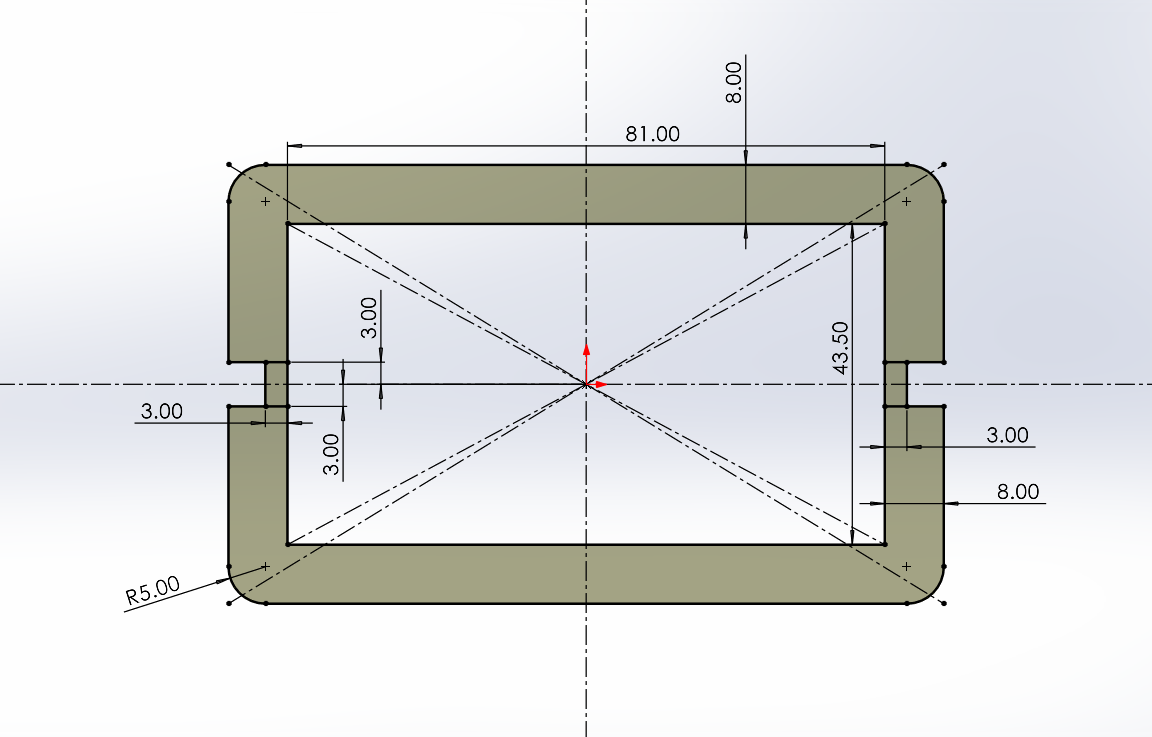
The reason I added a crown is because the body has a hole where the SD card sticks out, preventing the body from increasing in height. However, this makes the SD card visible, so I created the crown to cover it. That's why the design doesn't include the antennas from the original.

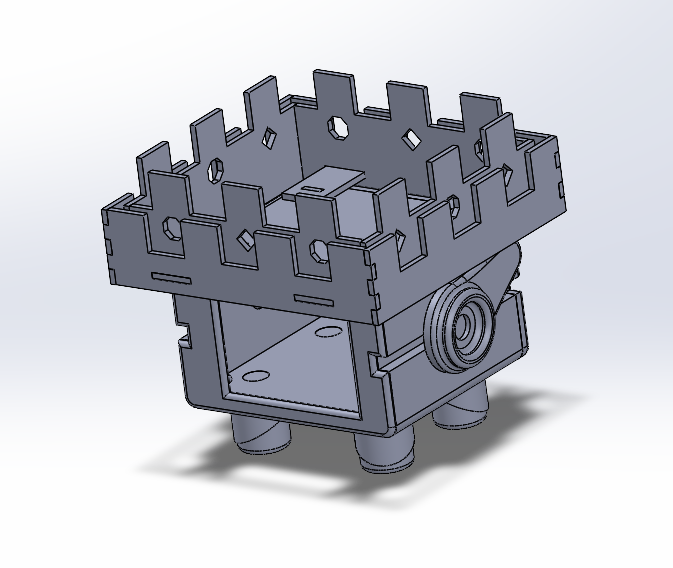
So with all this features this is the final result.
Crown styles and more
As mentioned earlier, the crown is now 3D printed. I decided to make it
customizable with different designs or types of crowns. I created the crown with
a different material, which required a slightly different design.
The main idea behind the new custom crown was to keep it similar to the original
but with a unique twist. I wanted it to stand out on its own. Since I used MDF with
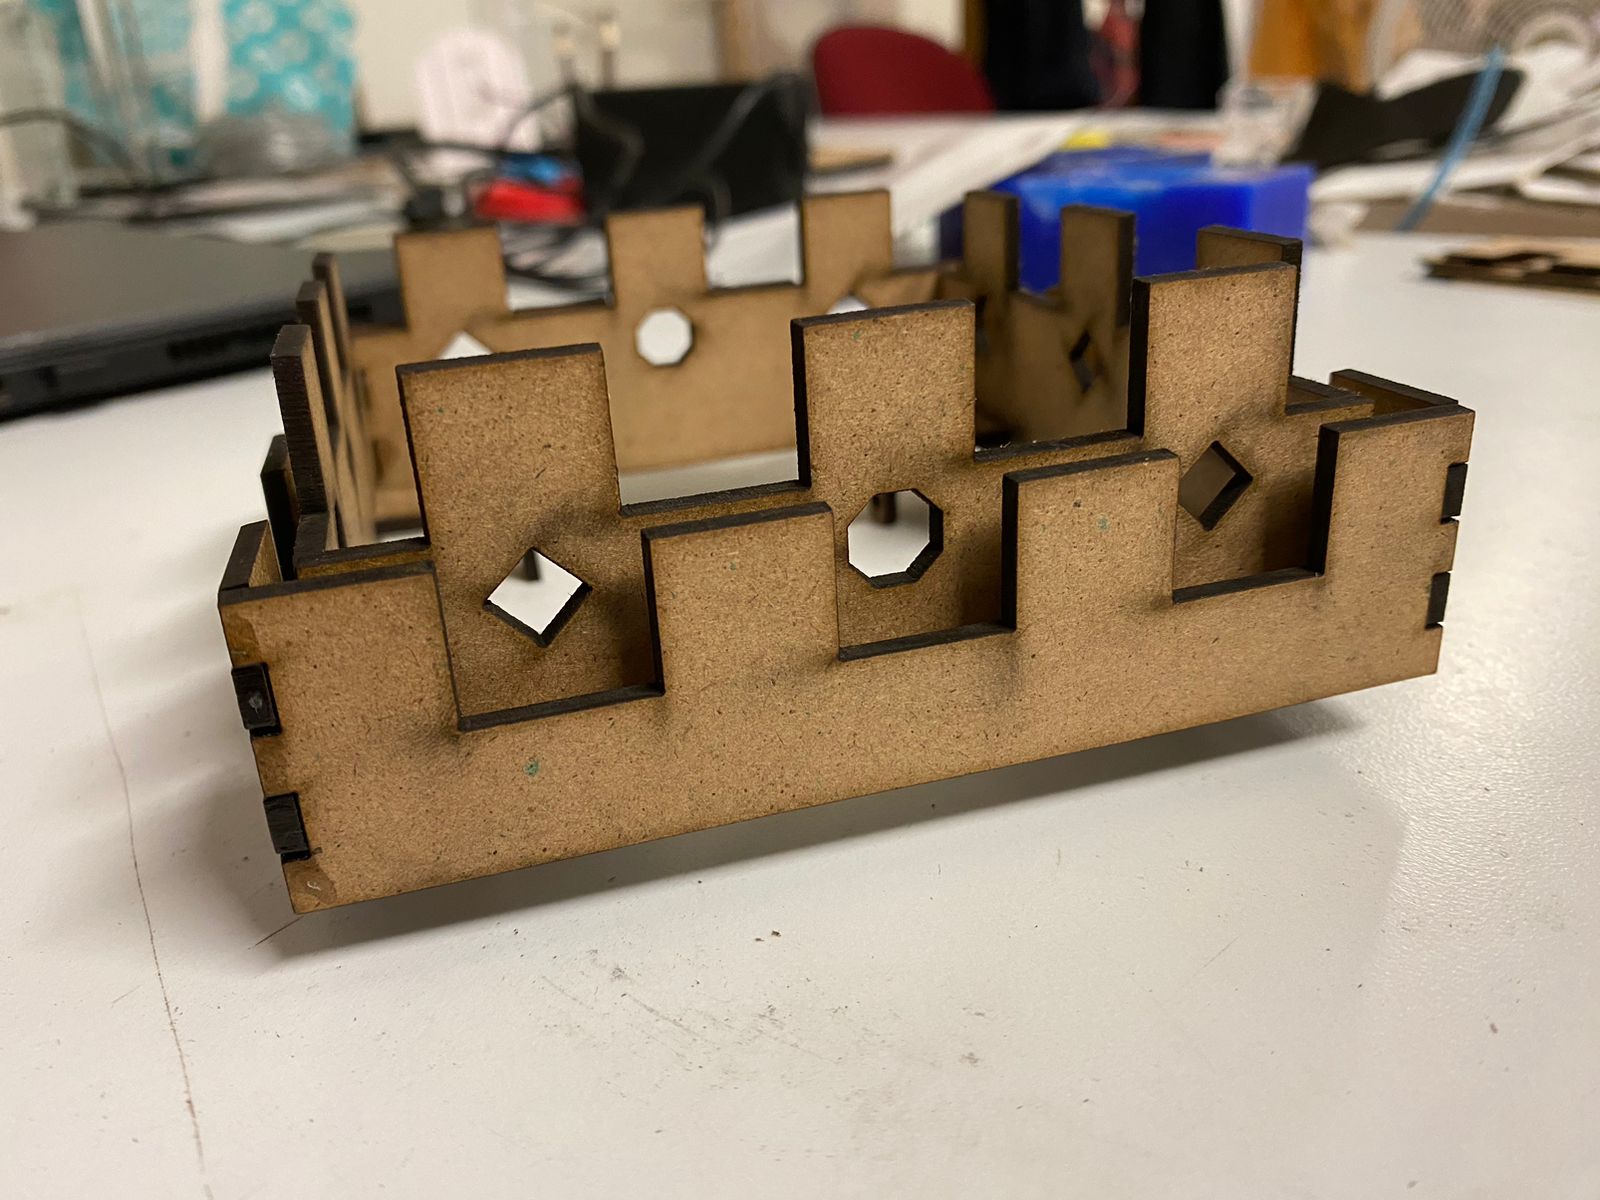
a thickness of 2.5 mm, I came up with this distinctive design.
First, the crown design consists of two layers. The first layer serves as the base
of the crown, while the second layer adds the impression of more depth and height,
including details like holes for gemstones. There are two gaps in the first layer
that extend through both layers and the back of the crown. These gaps are for
special pieces that join the first and second layers. Additionally, these pieces
have holes at the end to fit another piece that goes through the head of the robot,
locking the crown in place.
For the pieces that fit into those gaps, I used some old pieces I found. These are
only to further secure the crown in place. Even without these pieces, the crown would
still look the same and function similarly.


Additionally, I cut some vinyl to stick onto the robot's ears. It's not a significant
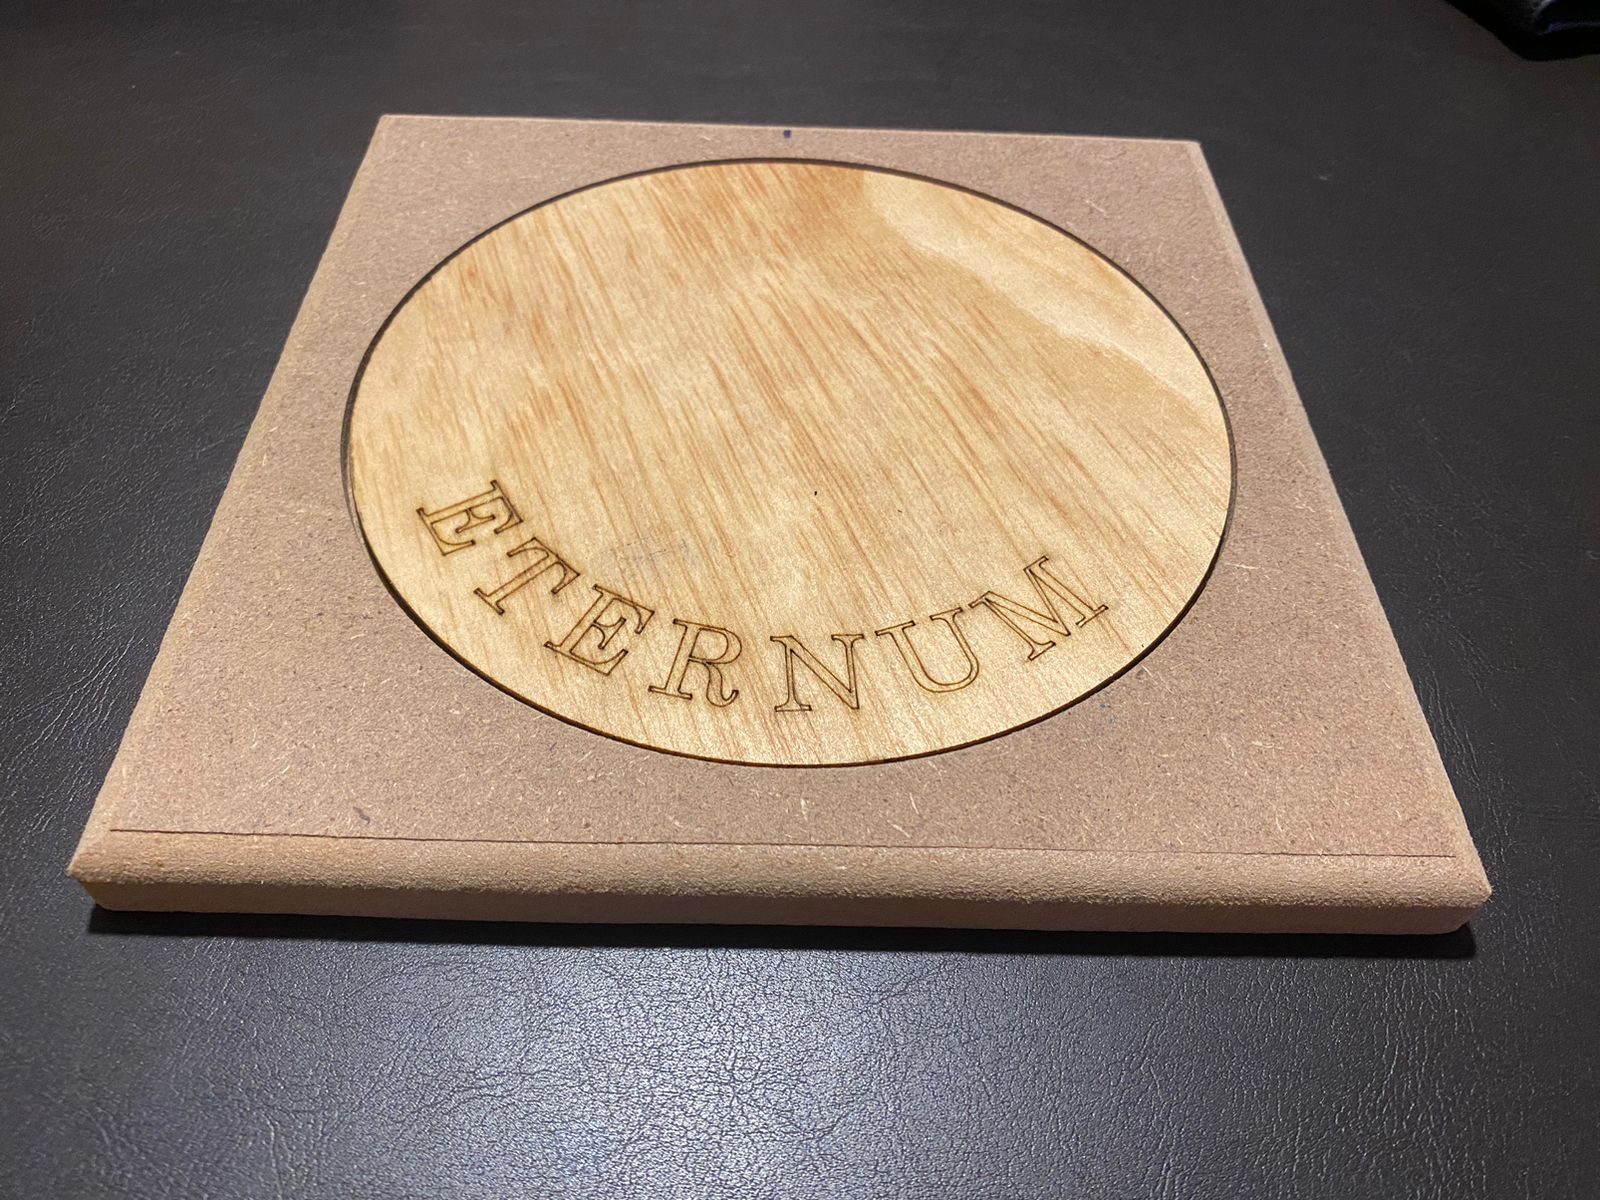
change, but I thought it would look funny with the vinyl. I also made a base for the
robot to give it more presence. I cut a square and a circle in the middle so I could
replace it with another MDF piece, engraved with the robot's name. I also rounded the
edges of the table to give it more style.
Note: For more information on this topic or to see a step-by-step guide on how
I completed these three processes, you can
click here
for laser cutting and engraving,
and vinyl cutting. Additionally, you can
click here
for the CNC table.
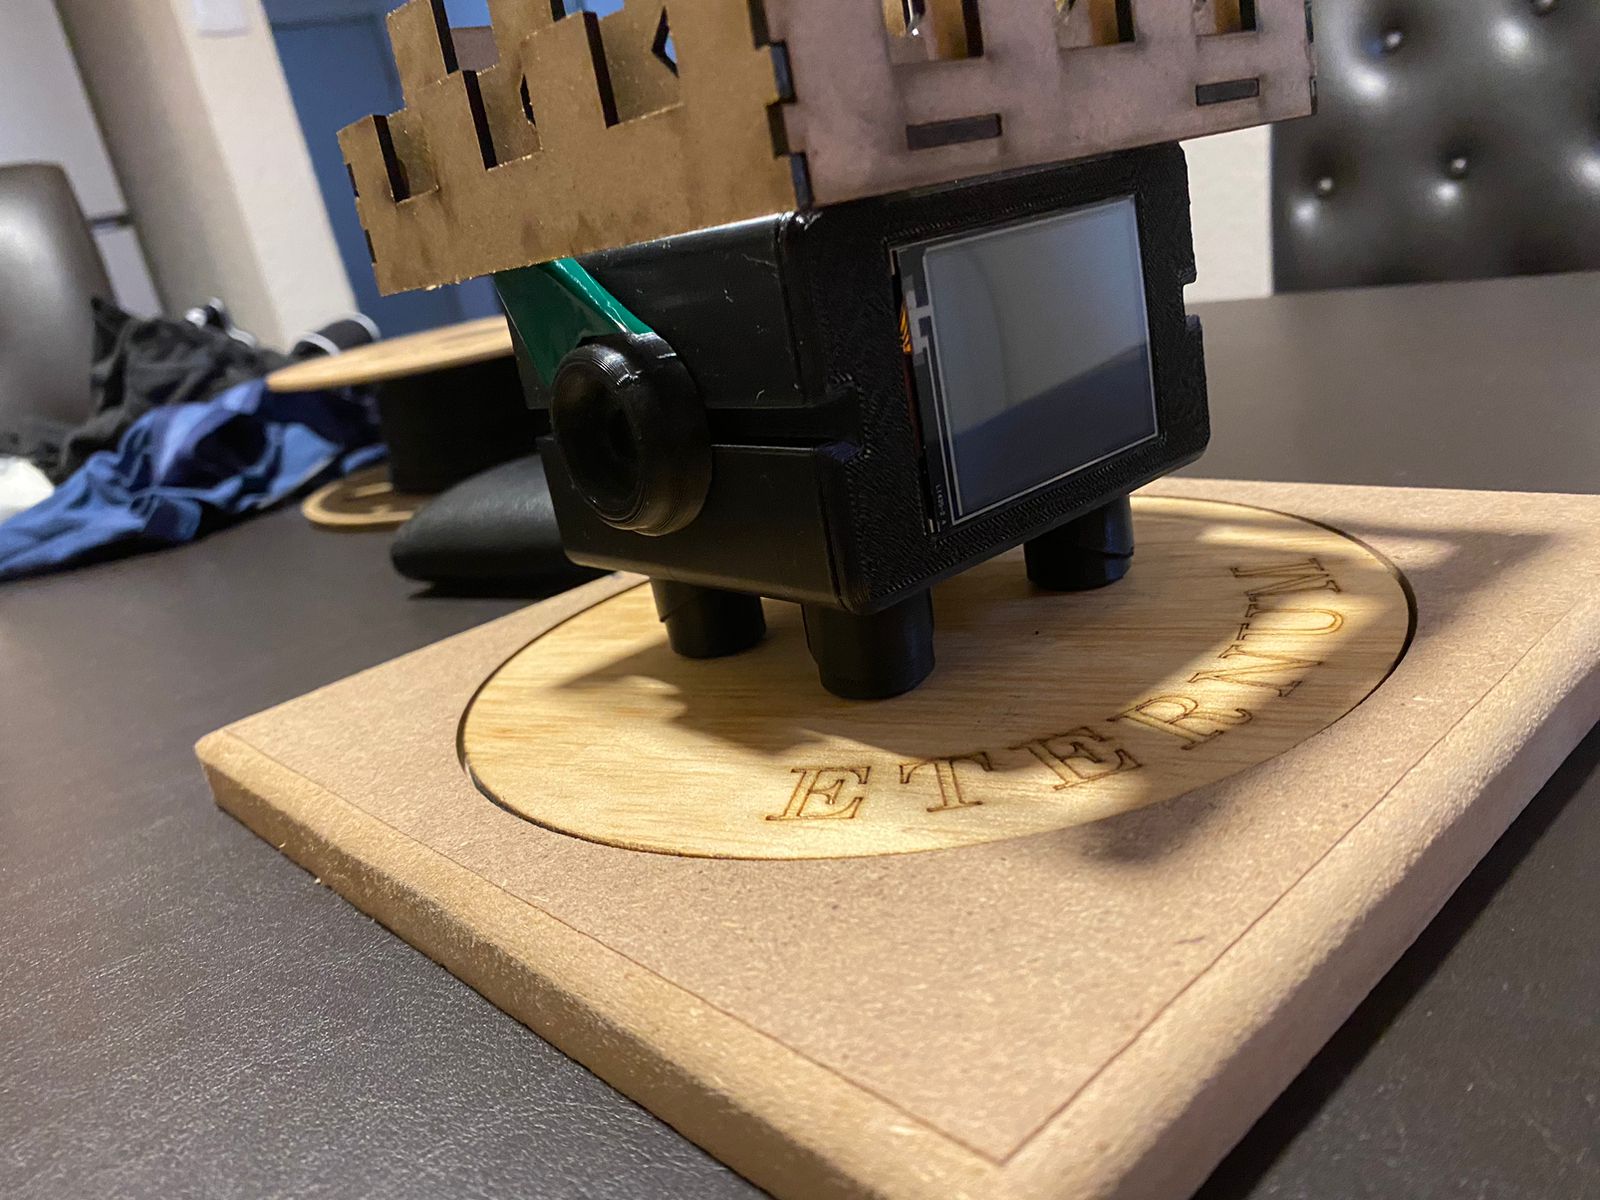
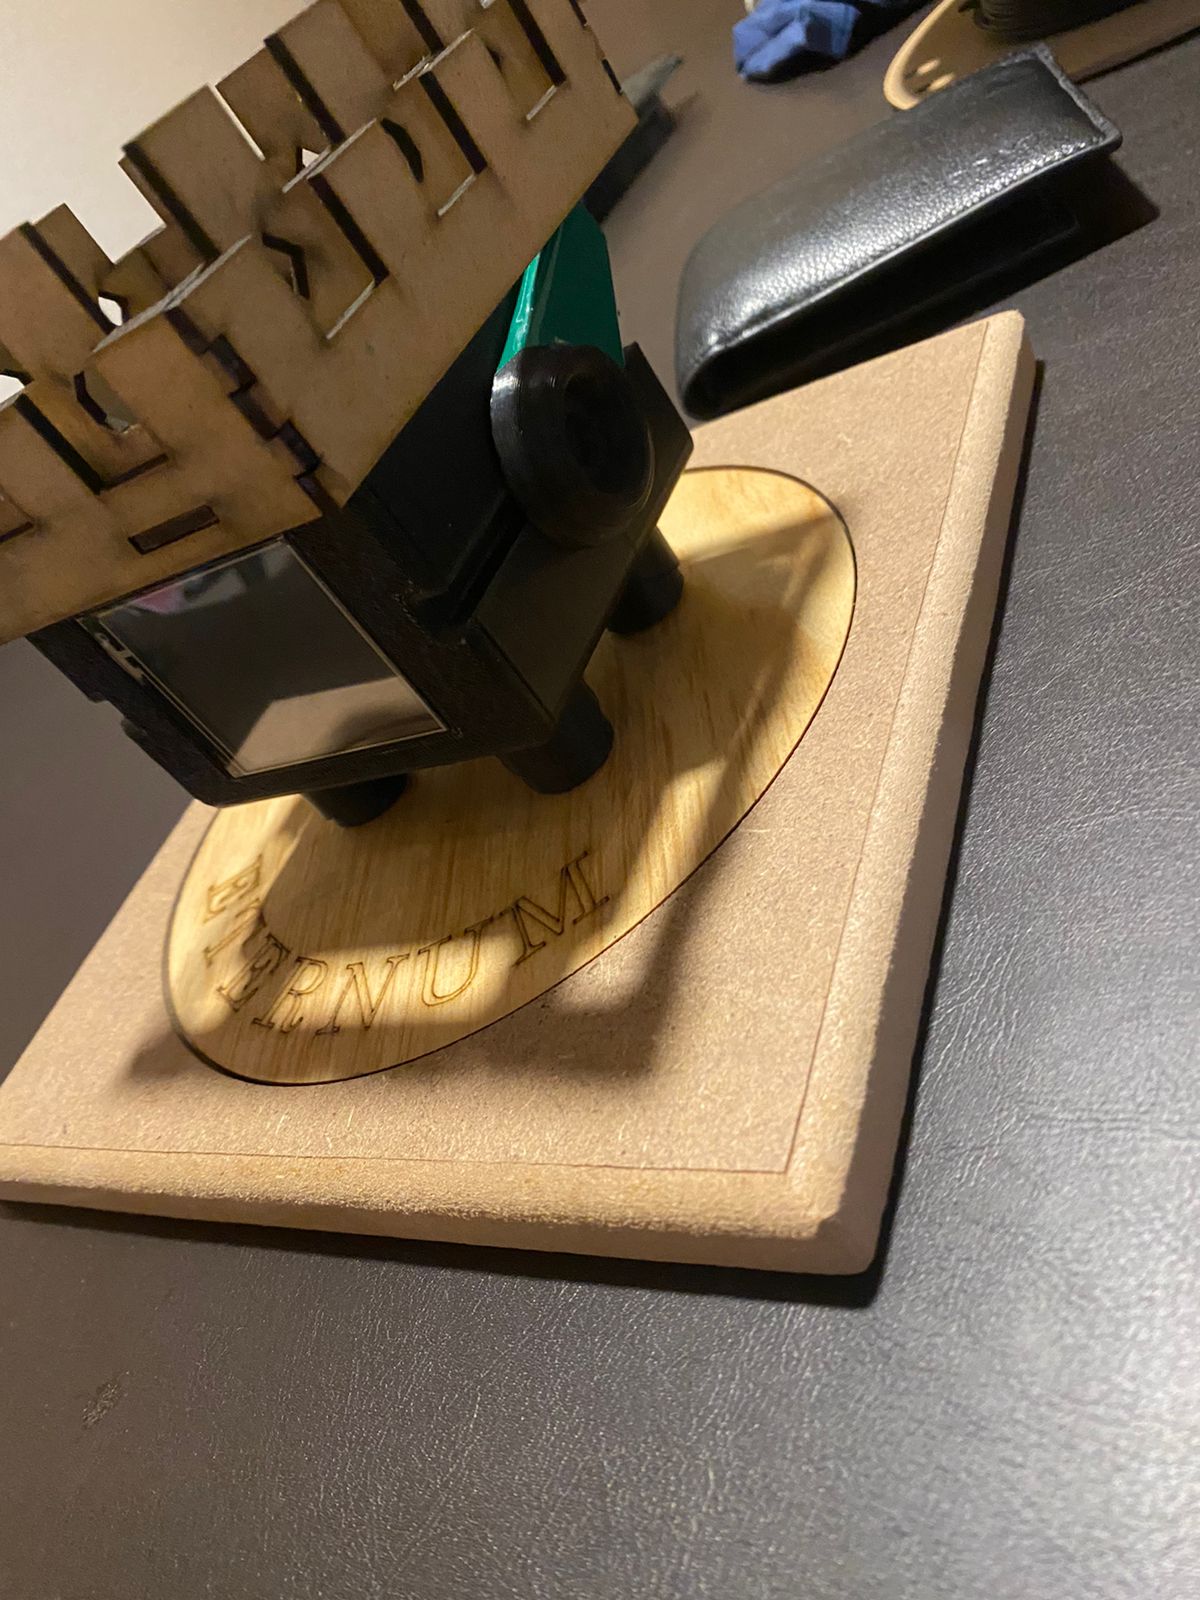
With all of these elements combined, the final product looks like this. I think it's pretty cool and gives the robot a unique style.

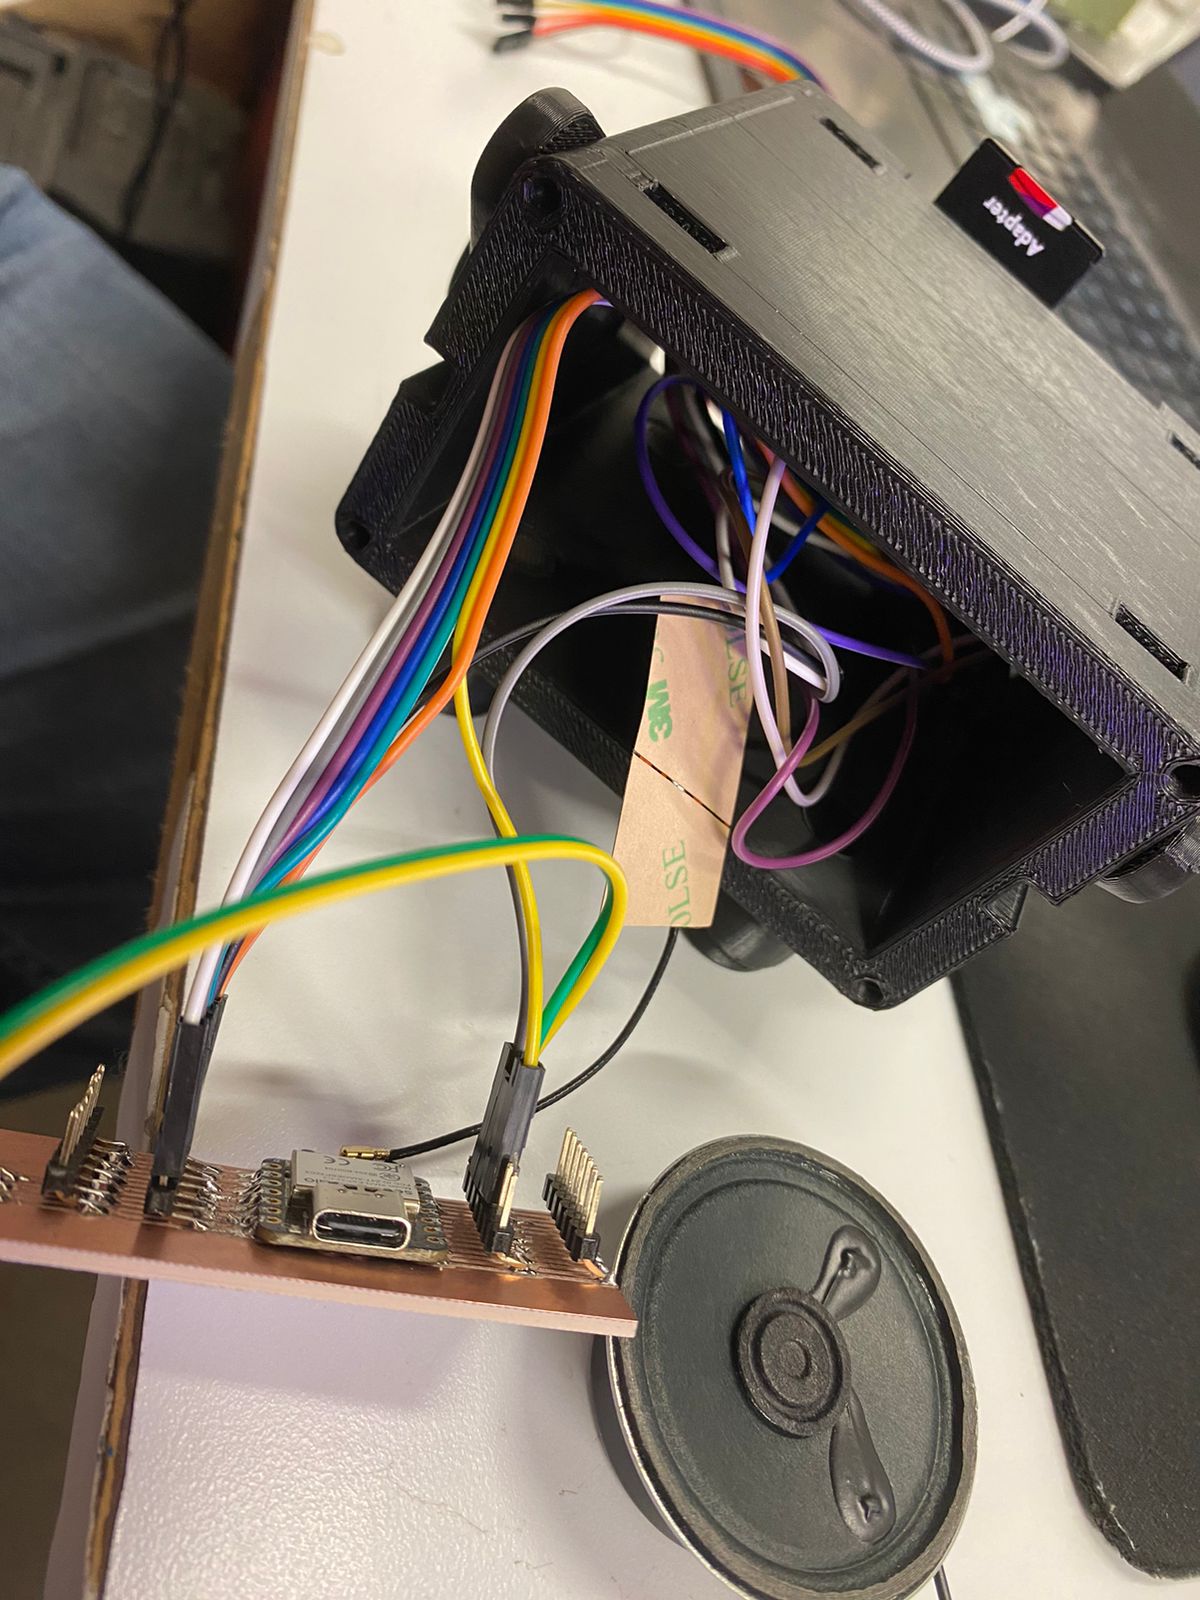
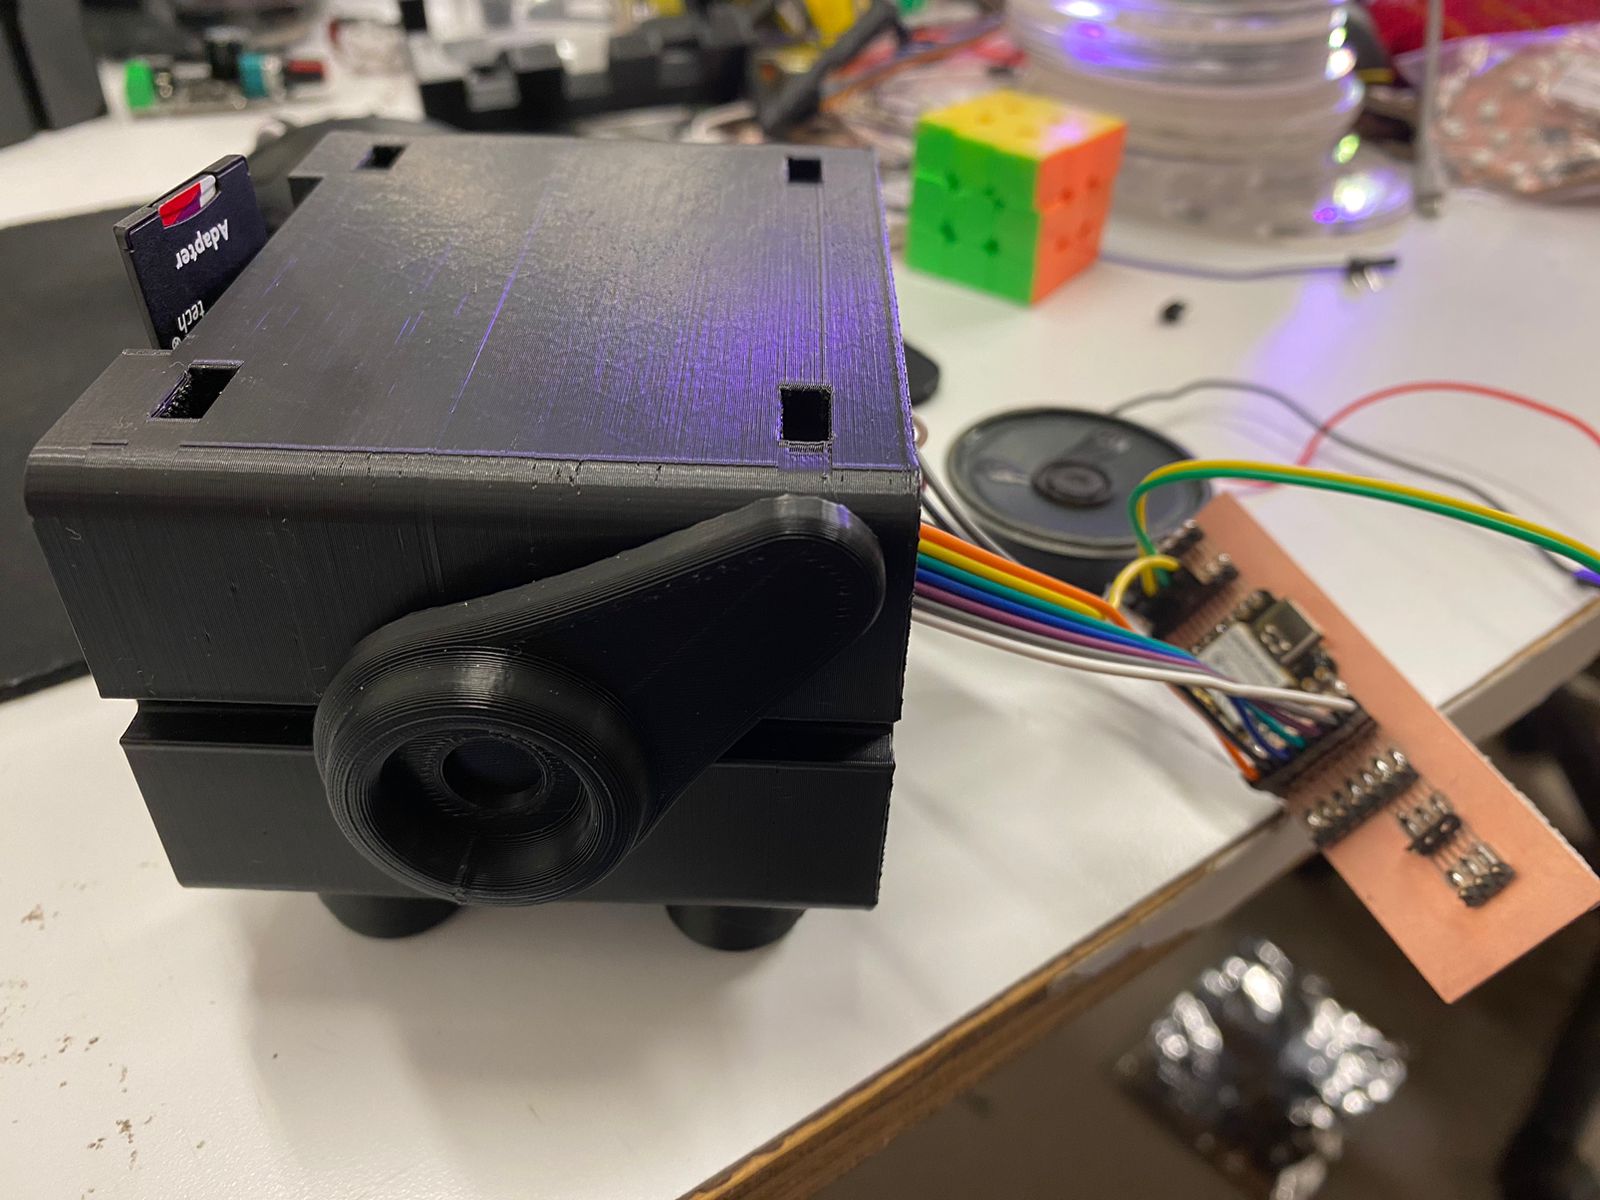
System integration
For system integration, due to its relatively small size, all components need to be tightly packed to fit properly. I connect them using small jumper wires to ensure everything fits perfectly.

Code
This is the final code, and it is fully commented for clarity.