3D Scanning and Printing
This week's assignment focused on creating a unique piece that couldn't be made using subtractive methods on any other machine. Additionally, the assignment involved learning through the process of using and testing 3D printers. Separately, the week also covered scanning an object and highlighted how using a scanner significantly simplifies the 3D printing process.
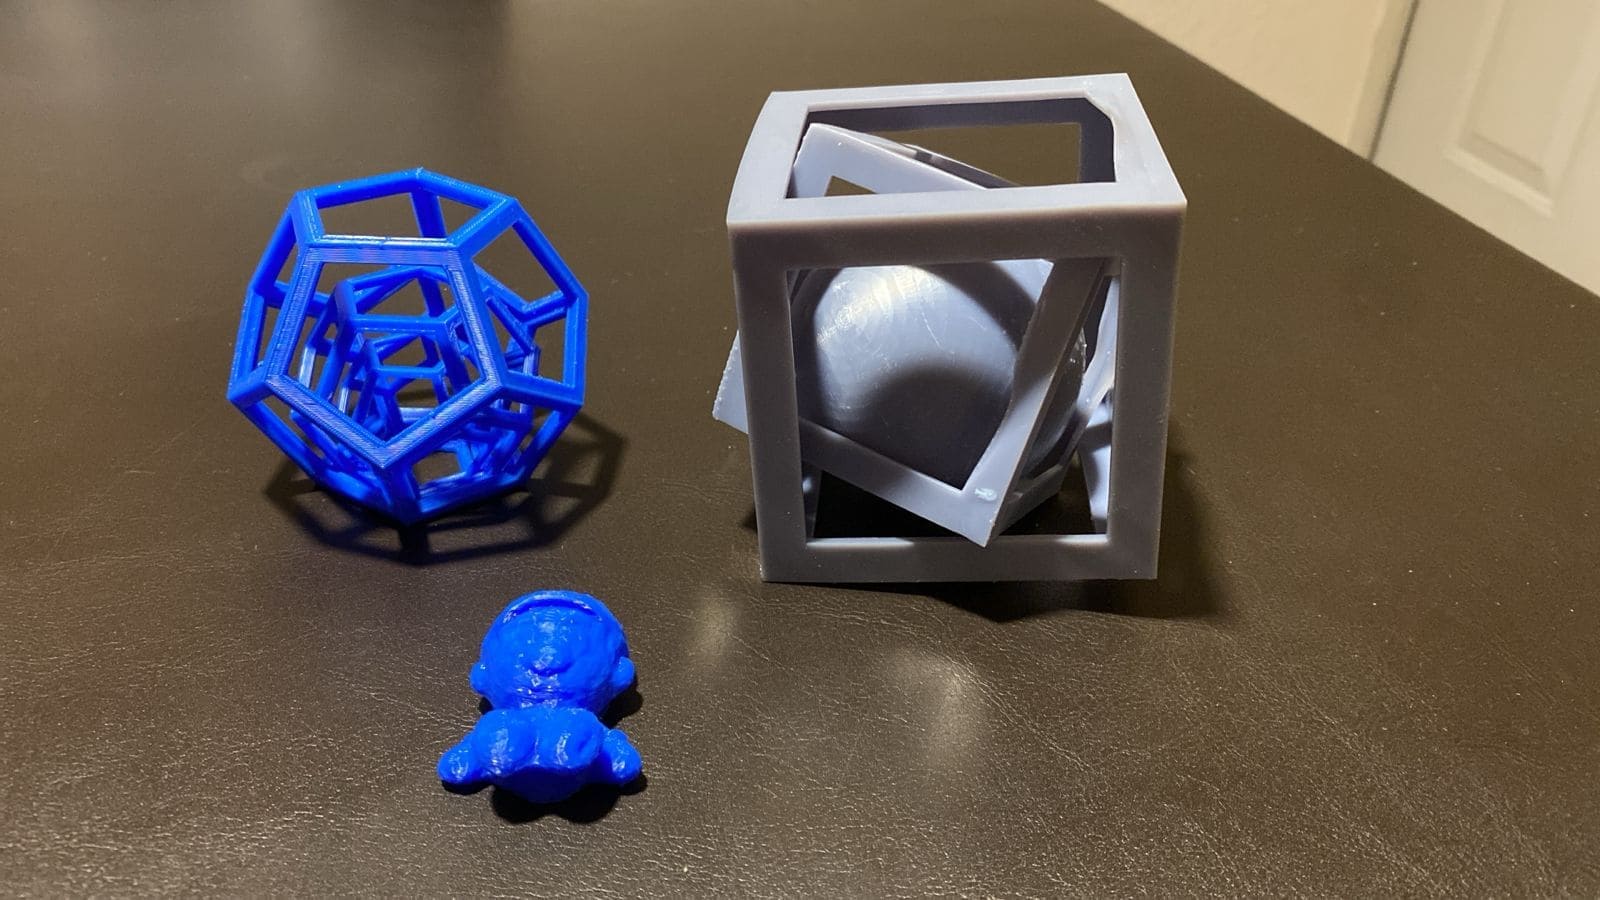
3D Printing
It was my first experience using the 3D printer, and initially, I anticipated it would be more challenging han it turned out to be. However, after conducting some research and seeking guidance from my tutor, I realized it wasn't as daunting as I had imagined. Nonetheless, there are moments when it can feel overwhelming, especially if the model fails during the printing process whether its has insufficient support or incorrect heat settings for the material being used. This can sometimes lead to frustration and a temptation to switch focus to other tasks. That's why it's crucial to ensure the settings are correctly configured and the piece is well optimized beforehand.
ENDER 3 S1 PRO
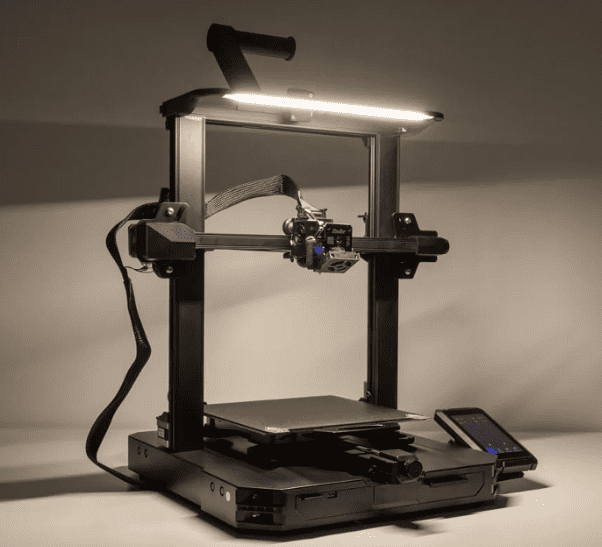
- Printing Technology: FDM
- Build Volume: 220 x 220 x 270 mm
- Printing Speed: 150 mm/s
- XY resolution: ± 0.1 mm
- Layer Height: 0.05 - 0.4 mm
- Nozzle Temperature: Up to 300° C
- Supported Materials: PLA, ABS, PETG, TPU, PA, WOOD
ANYCUBIC PHOTON M5s
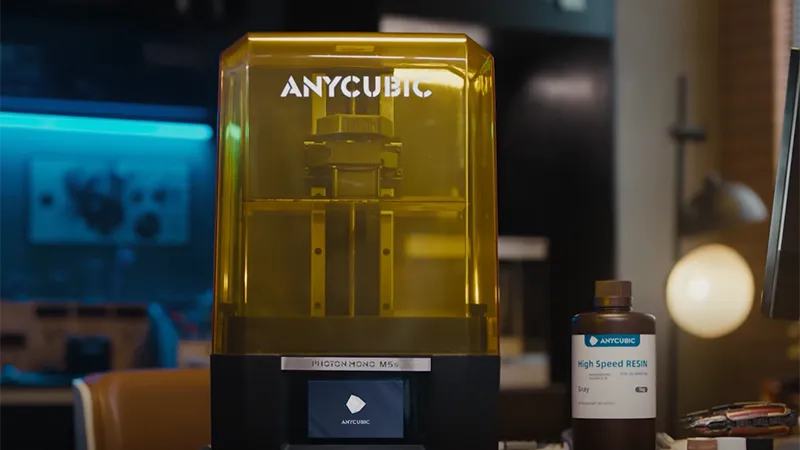
- Printing Technology: MSLA
- Build Volume: 200 x 218 x 123 mm
- Printing Speed: 70mm/hr
- XY resolution: 19x24μm
- Layer Thickness: 0.01 mm
- Supported Materials: PLA, ABS, PETG, TPU, PA, WOOD
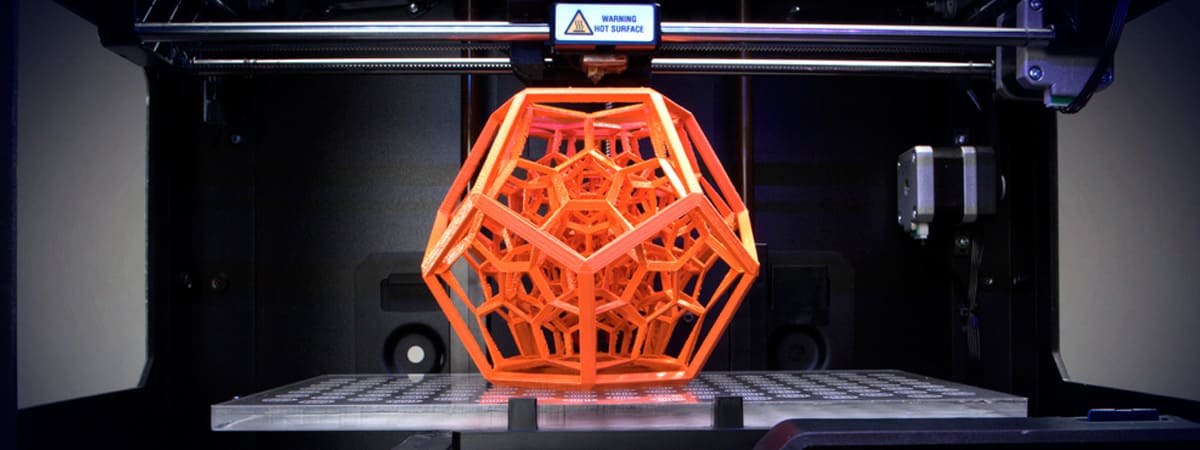
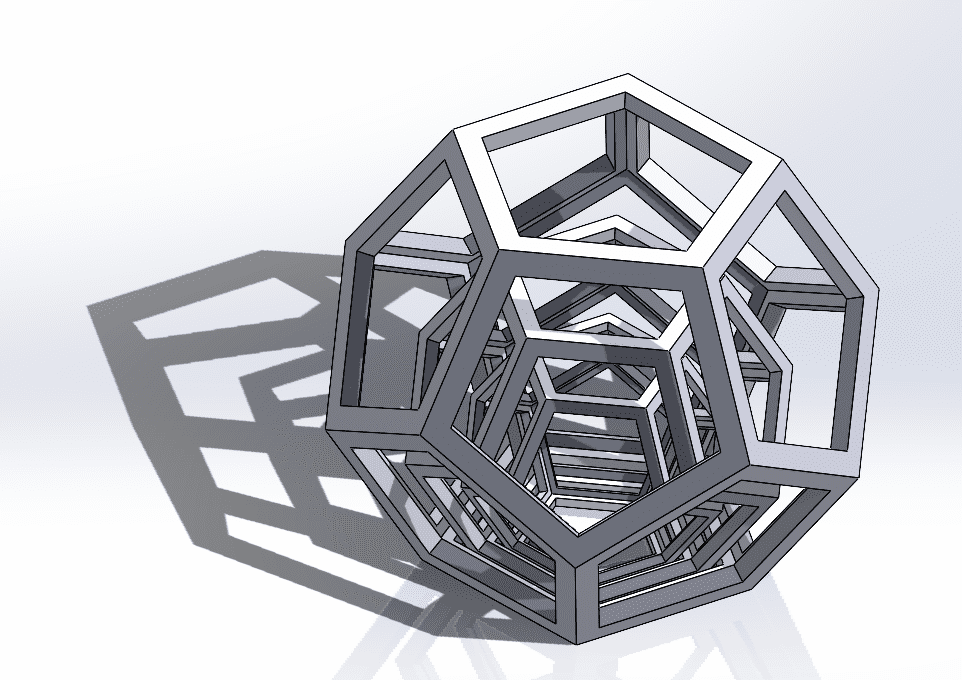
Dodecahedron
This image inspired me to explore 3D printing, as the subtraction method used here would be very challenging to replicate using other machines.
Design
The first step is to create a sketch. Within the sketch menu, locate the "polygon" option. Use this tool to generate a pentagon shape, ensuring it's positioned at the origin point in the top plane. Set the dimensions to 80 mm and establish a horizontal relation on the bottom edge of the pentagon.
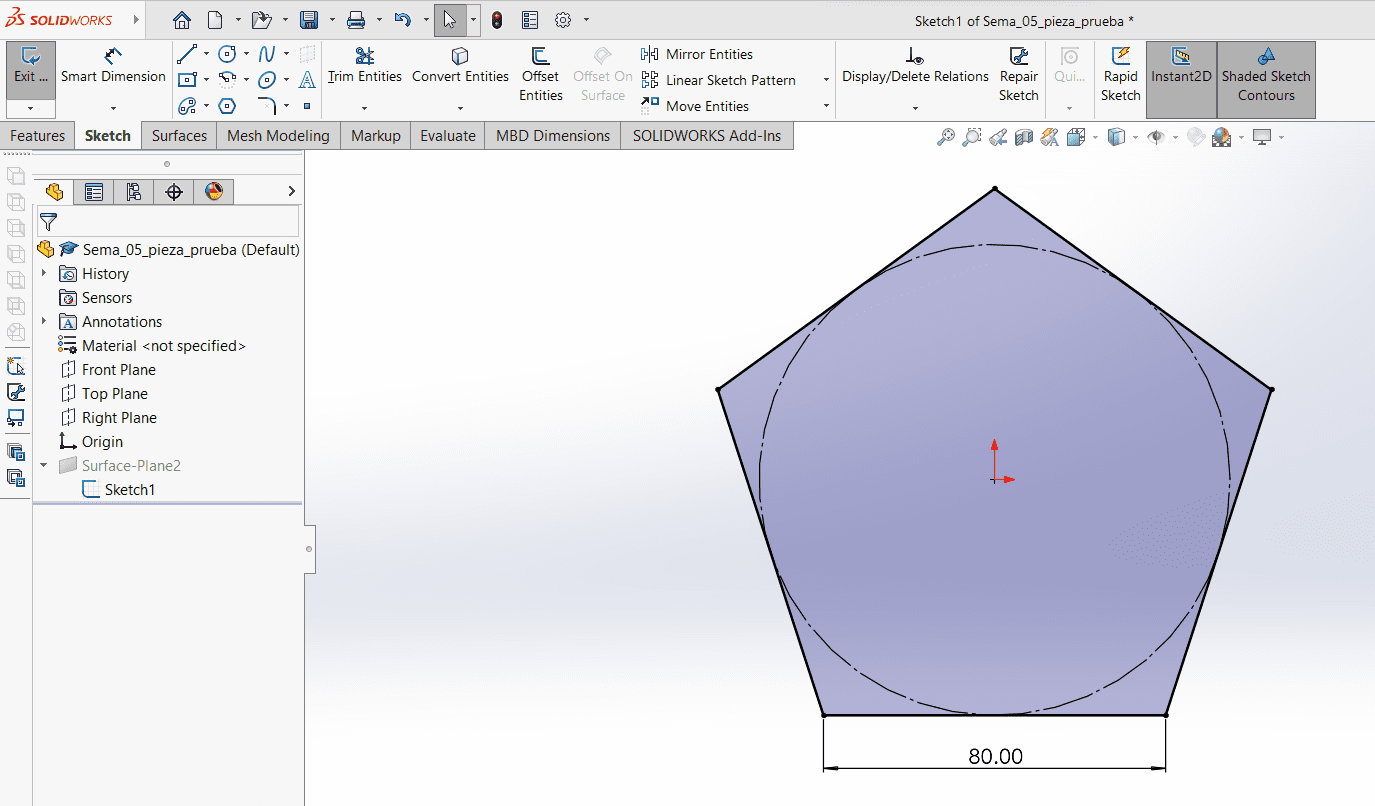
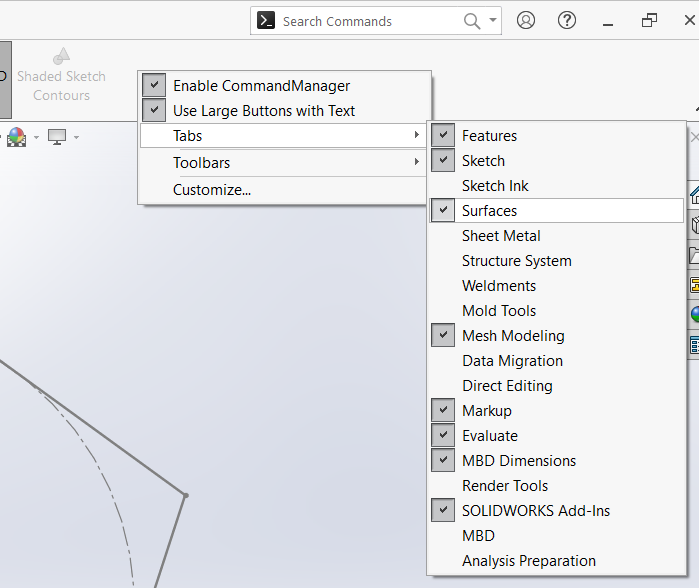
Next, navigate to the "surfaces" tab, which I have recently discovered. This tab is a game changer in creating the entire piece and subsequent components. To enable this tab, right-click on the blank space of the top sidebar menu. Then, click on "tabs" and select "surfaces." Once the surfaces menu is enabled, create a surface using the pentagon shape, utilizing the "planar surface" option.
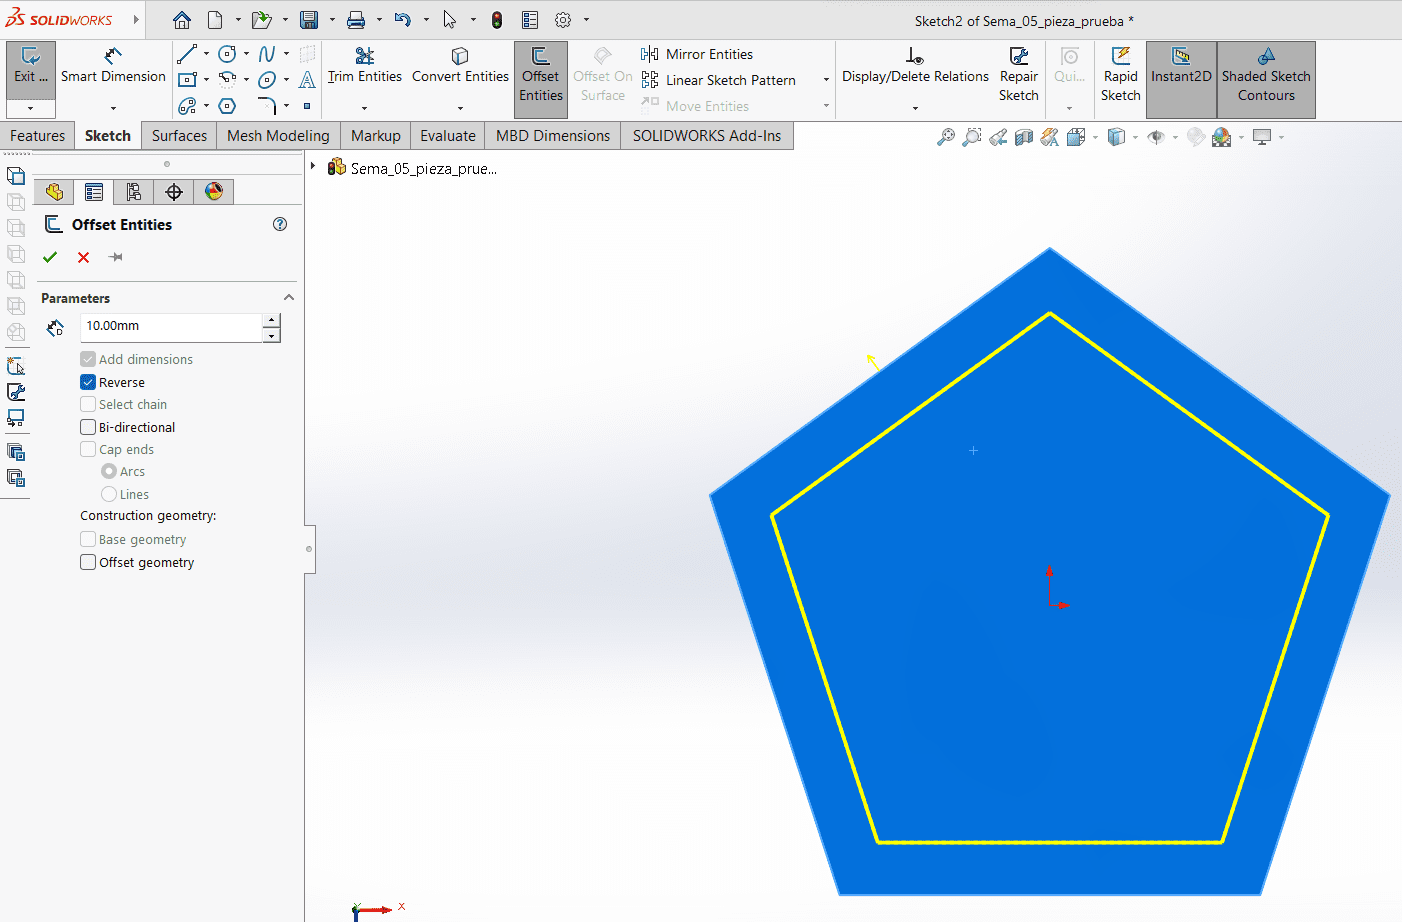
After creating the pentagon surface, proceed to make a new sketch. Within this sketch, add another pentagon using the "offset entities" function. Adjust the offset so that the new pentagon shape is positioned inside the existing one, leaving a space of 10 mm. This will determine the width of the sides of the pentagon.
With the newly created pentagon, utilize a tool called "split line," which is both unique and highly useful.
This tool divides regions, making it easier to perform specific operations for the end of the piece.
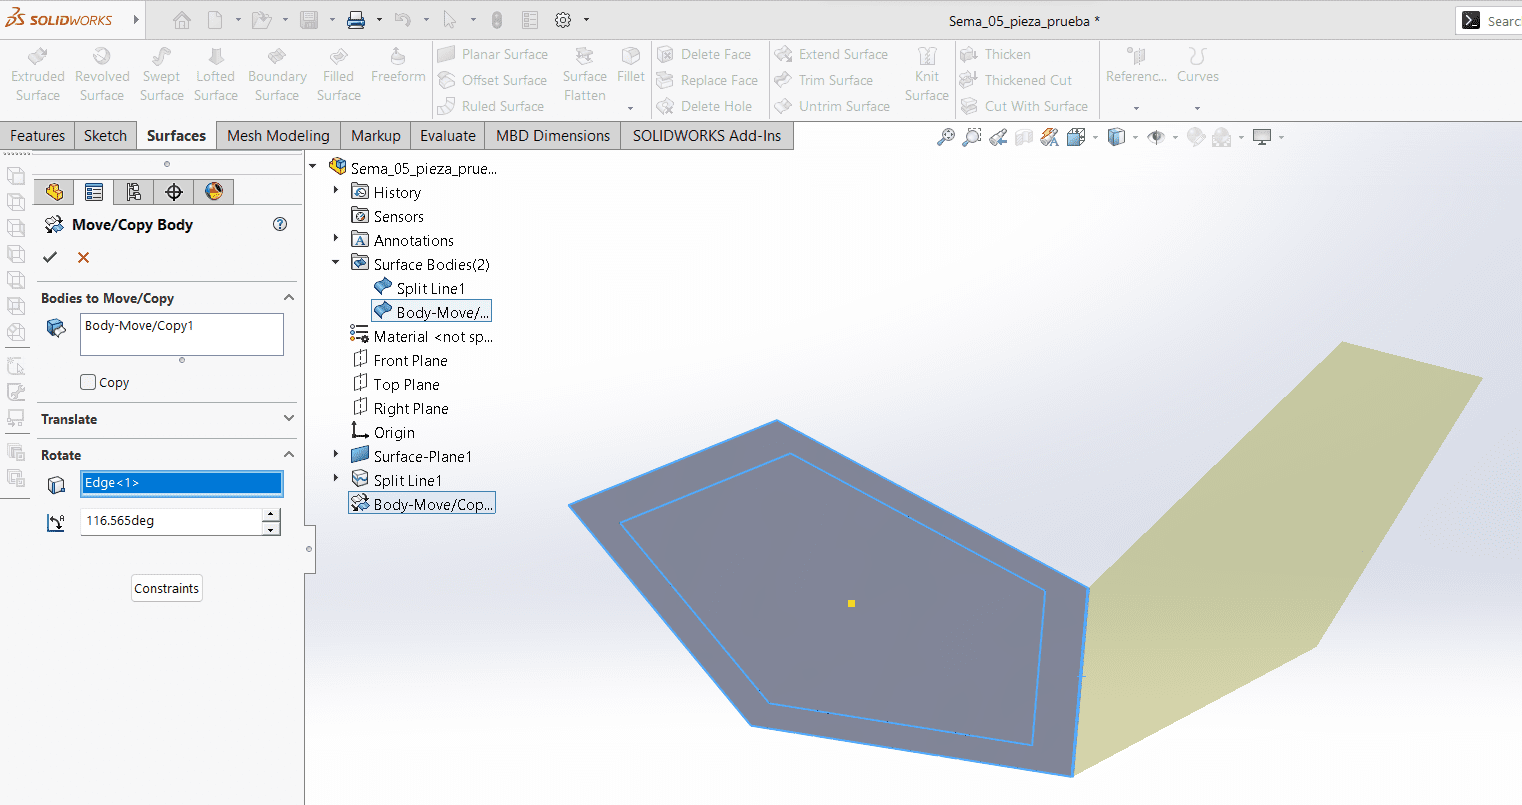
Now, create a copy of the surface. This tool can be found by navigating to "Insert" on the top left side,
then selecting "Features," followed by "Move/Copy." After making the copy, hold back from rotating or moving
it simply leave it in its current position. Next, repeat the same operation, but this time do not create
a copy. Instead, select the surface that was copied and rotate it by 116.565° degrees.
Then create an axis from the origin of the top plane, proceed to make a circular pattern. Utilize the axis as the direction for the pattern. Then, select the surface to make five copies using the circular pattern tool.
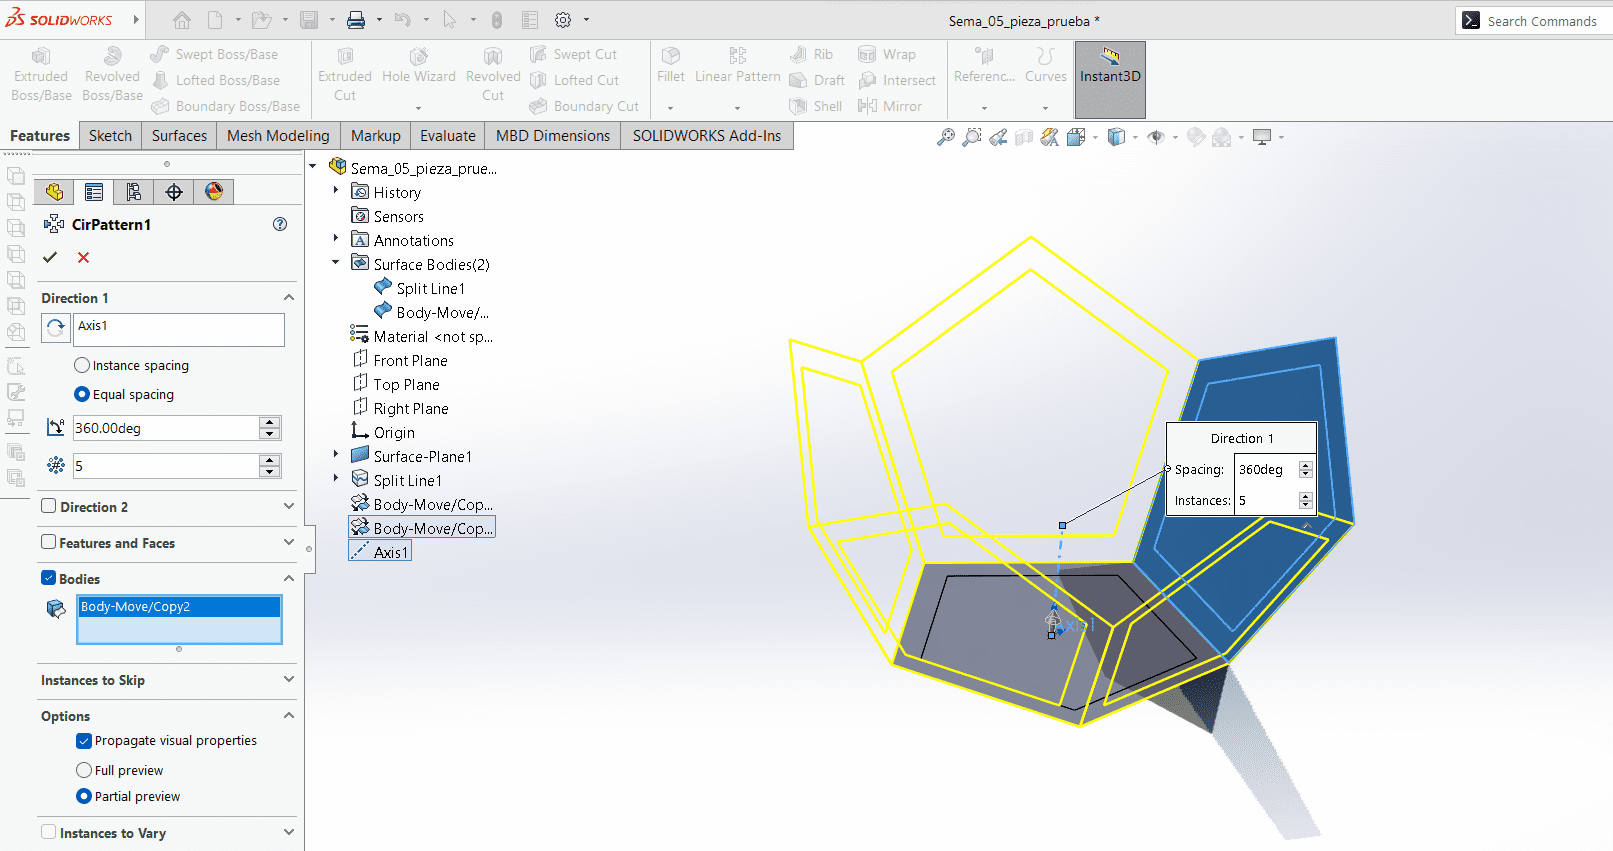
Next, knit the surfaces together to form a single figure. Once this is done, mirror the figure to create two identical figures.
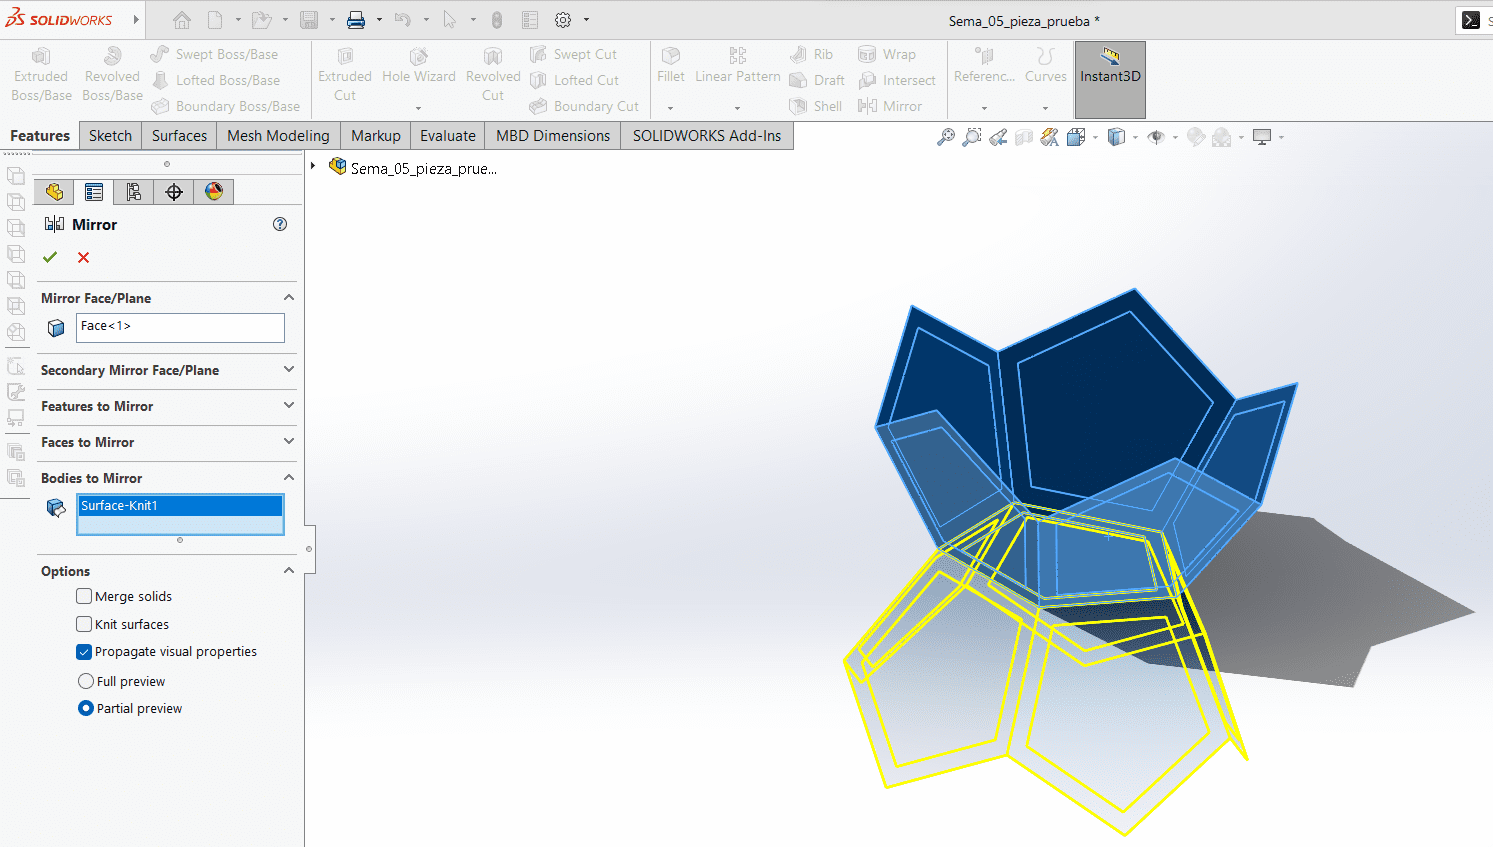
To proceed, utilize the "Move/Copy" command. First, rotate the figure 180° degrees in the y-axis. After rotation, translate the figure 178.2 mm in the y-axis. Then, knit all the pieces together. Ensure to select the option to create a solid, allowing the two figures to converge into one solid. Then utilize the "Shell" tool in the features menu. This option removes selected faces from a solid object and assigns a specified thickness to the walls, effectively creating a hollow figure.
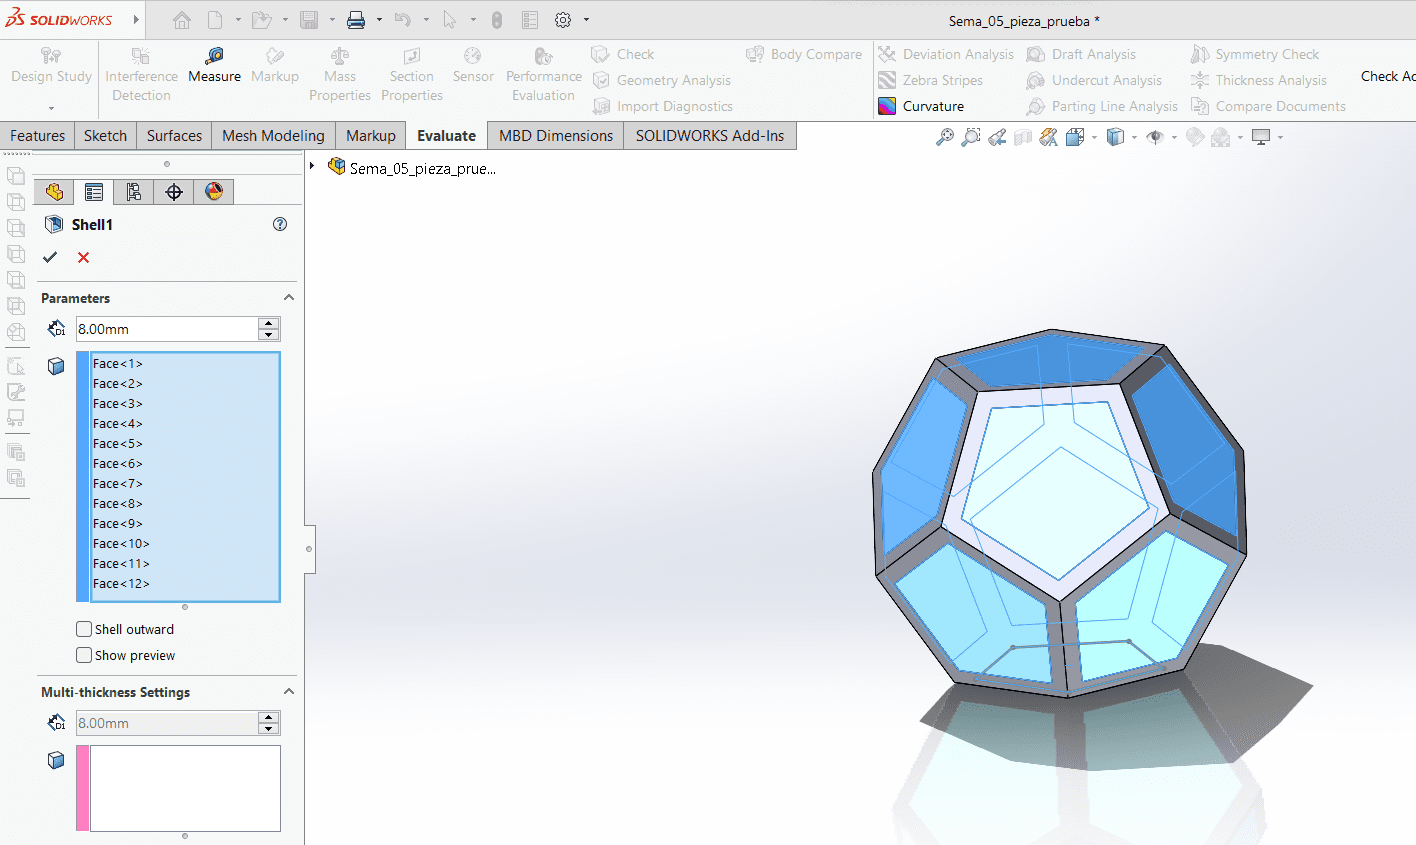
Now that the final figure is completed, make a copy and drag it away from the original figure. Then, utilize the "Scale" tool found in the "Insert" menu and then the "Features" menu. After scaling the figure to 0.7, return the figure to its original position and translate it to the correct position, subtracting -27 mm from the y axis.
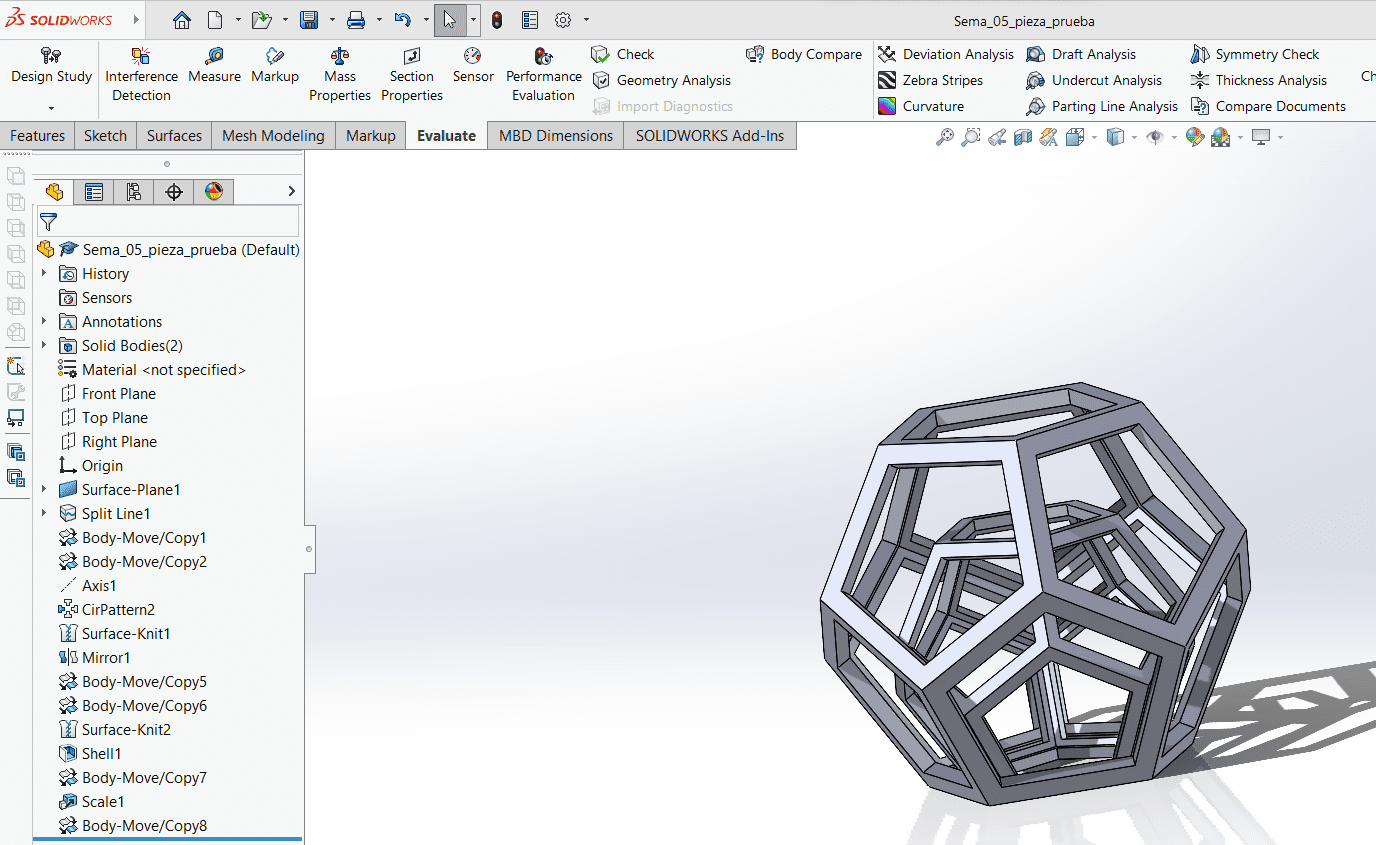
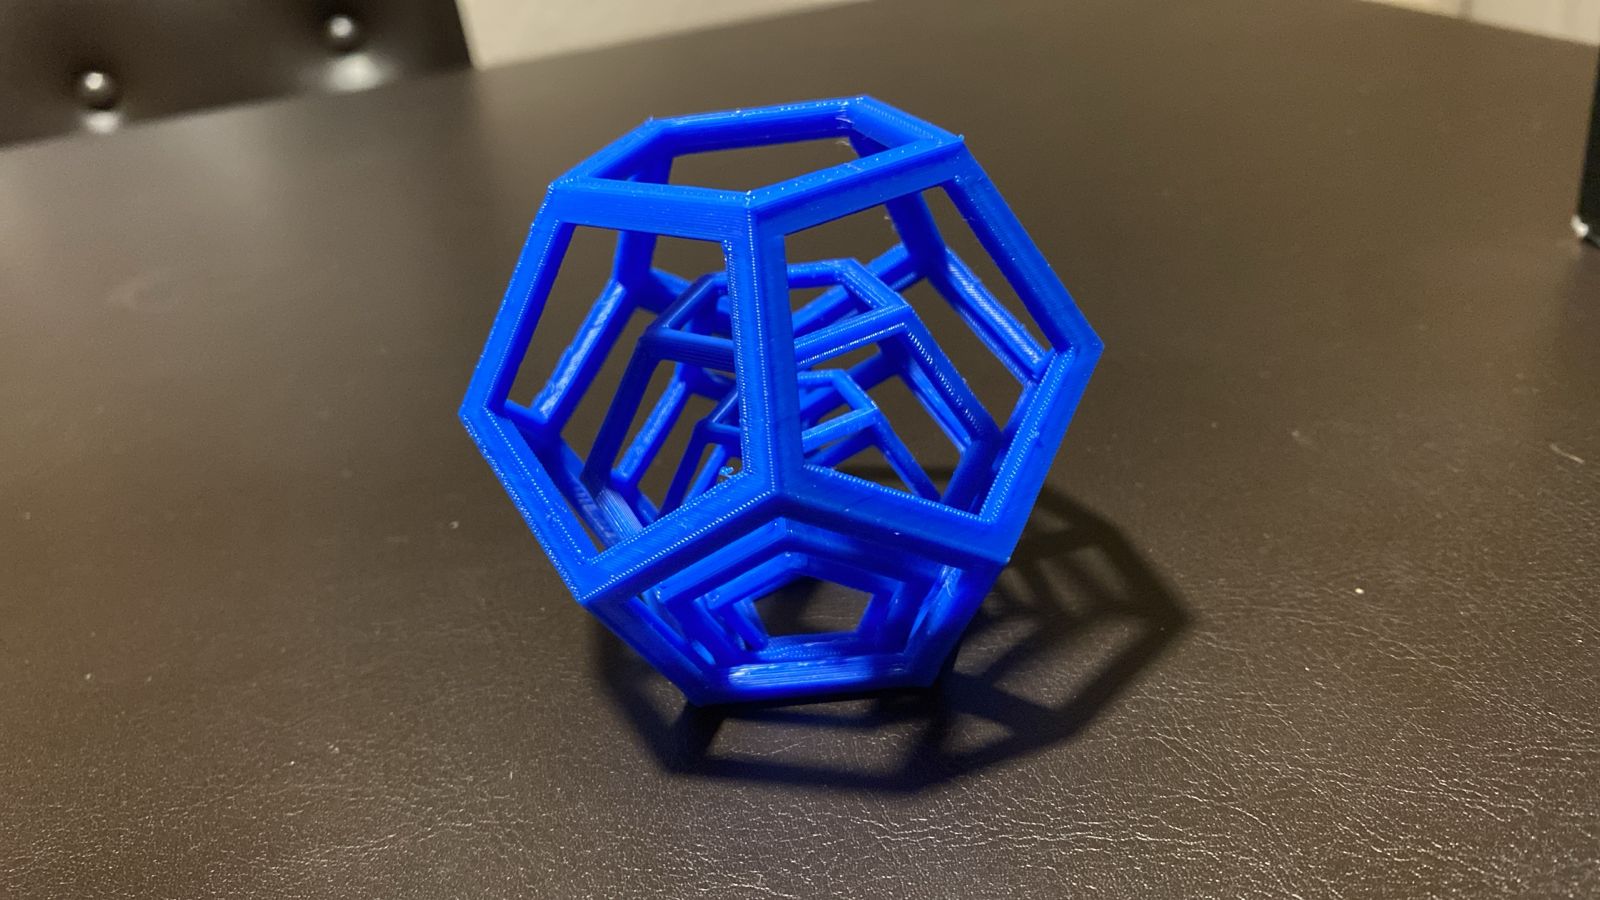
Now repeat this process, but this time subtract -18.50 mm in the y axis. Once everything is done, it should look like this.
Ultimaker Cura
Now that the piece is complete, save it as an STL file so it can be opened in a slicer software such as Ultimaker Cura. You can download the Cura software by visiting the webpage to install it, or click here. Once the software is downloaded, open the STL file in the blank canvas of Ultimaker Cura, and you'll see something similar to the image below.
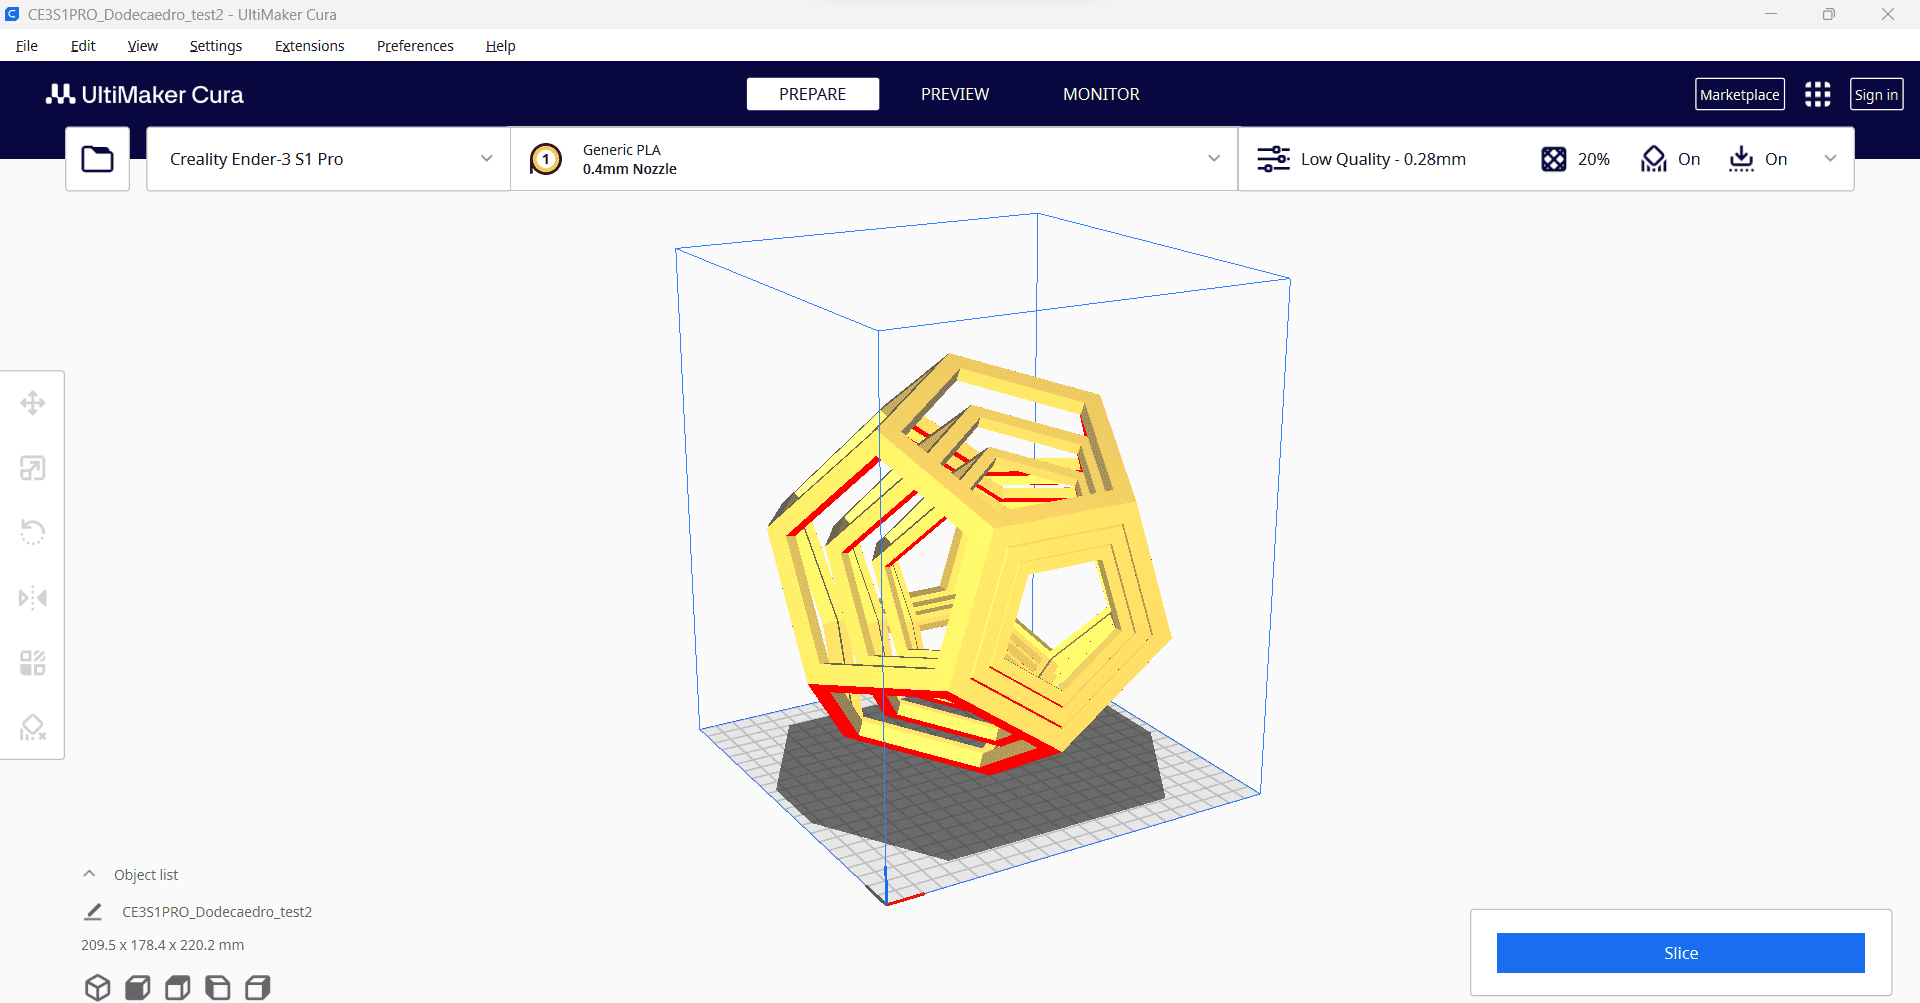
Upon opening your STL file, a menu will appear on the left side of the software. Here, you can find options to move, scale, rotate, mirror, adjust per-model settings, and use support blockers. Among these options, I primarily utilized move, scale, and rotate because they are fundamental and applicable in most cases. In my specific case, when I opened my STL file, the piece appeared oversized and the base was not positioned correctly. Therefore, I utilized these three menus to adjust and position my figure as desired.
Furthermore, there is another menu where you can adjust the print settings located on the top right wich have settings such as supports, speed, infill, and more. For example, in my case I opted for tree supports because they are easier to detach and occupy less space due to their tree like structure, thereby reducing print time. However, you can explore these settings in-depth to customize them according to your requirements. Without further ado, here are the settings I used for printing this object.
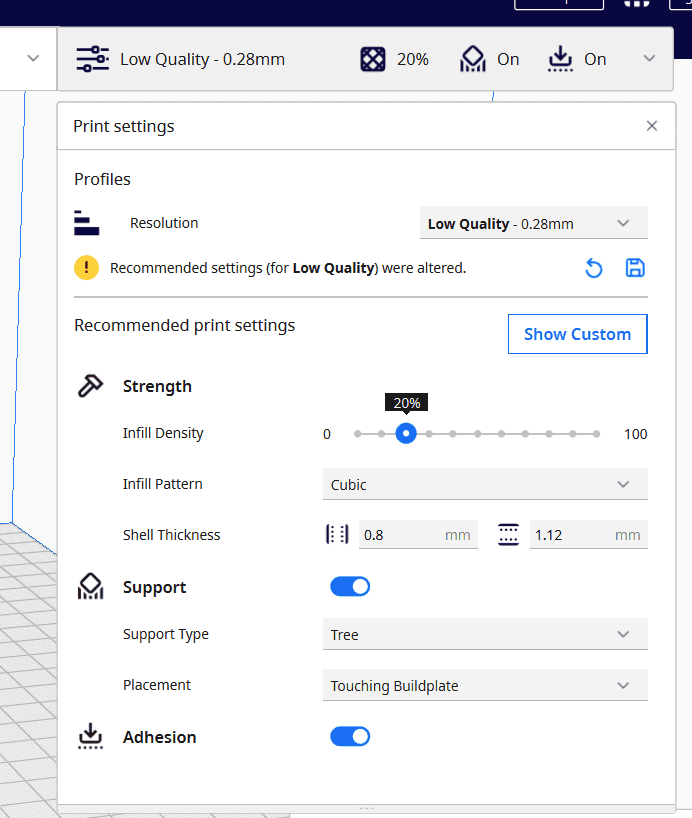
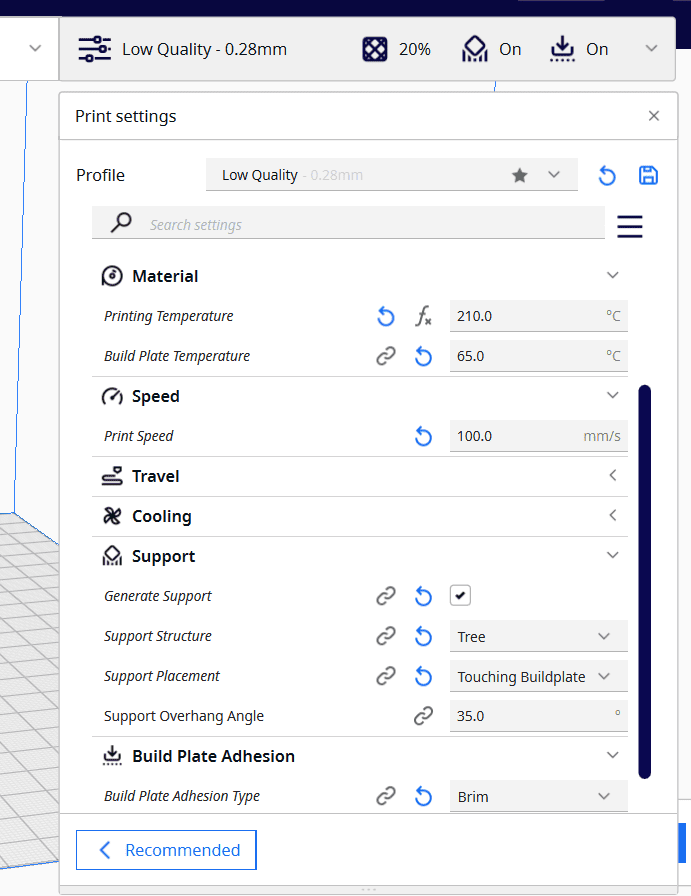
Once you have configured your settings, click on the "Slice" button. This will generate a preview where you can visualize each layer of your model and how the machine will print it. You can navigate through the layers by clicking on the sidebar located on the right side of the software and dragging it up or down to observe the printing process layer by layer.
Printing
If you're satisfied with how the piece looks in the slicing software, save it to an SD card. Insert the SD card
into the 3D printer, taking care to avoid jamming it and potentially damaging the port. Once the SD card is
inserted, select your file from the printer's screen.
Before hitting the print button, check if there's enough filament. If not, you have two options: either wait until
the filament runs out and replace it, or grab a new filament spool. To change the filament, follow these steps:
- On the printer's screen, select "In" or "Out."
- Incrementally increase the length (usually in millimeters) until the filament begins to move out of the extruder. Typically, starting with 20 mm is a good initial value.
- If the filament doesn't start moving, continue increasing the length until it does.
- Once the filament starts to come out, carefully pull it out manually, ensuring it clears the sensor located at the top of the printer.
- After removing the old filament, insert the new filament into the filament sensor and feed it into the extruder. Once it reaches the extruder, then use the "In" button on the printer's screen to feed the filament, or manually push the filament into the extruder by gently pulling the lever and inserting the filament carefully.
After completing these steps, select your file from the printer's screen and begin the printing process. Initially, the printer will heat up both the filament and the bed. Once the desired temperatures are reached, the printing will start.
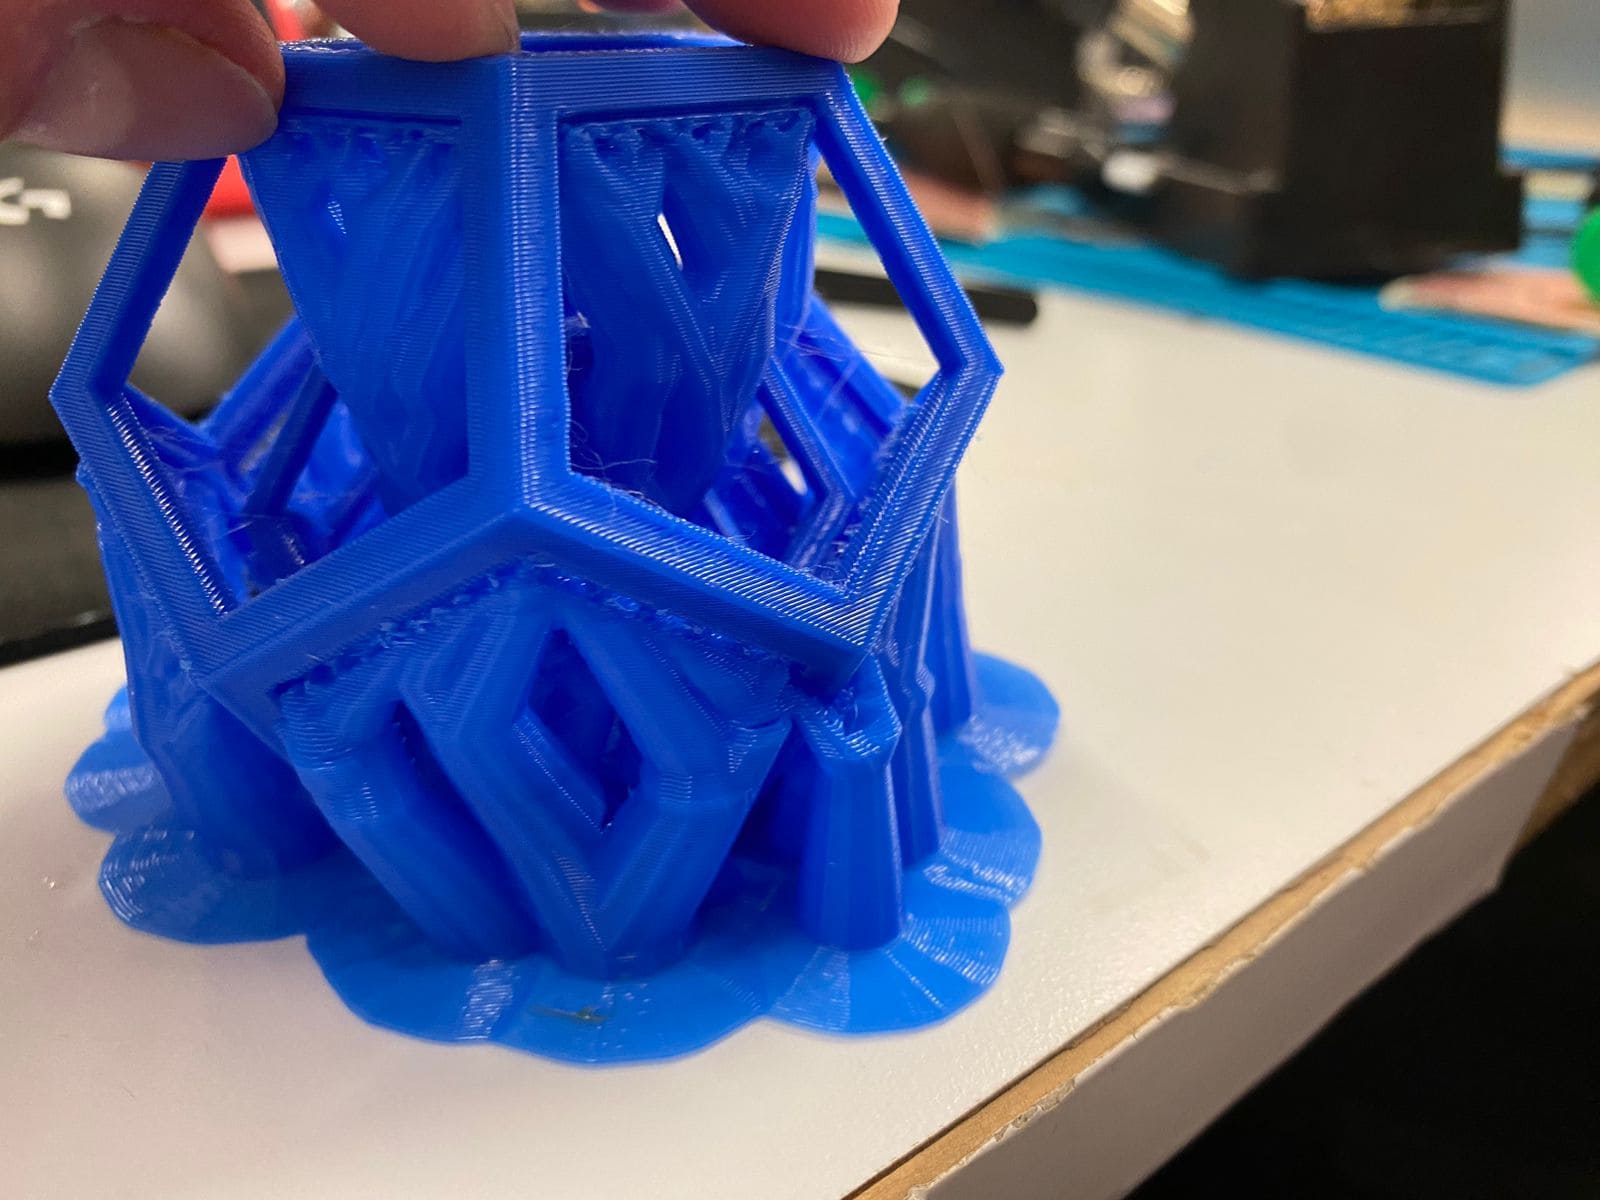
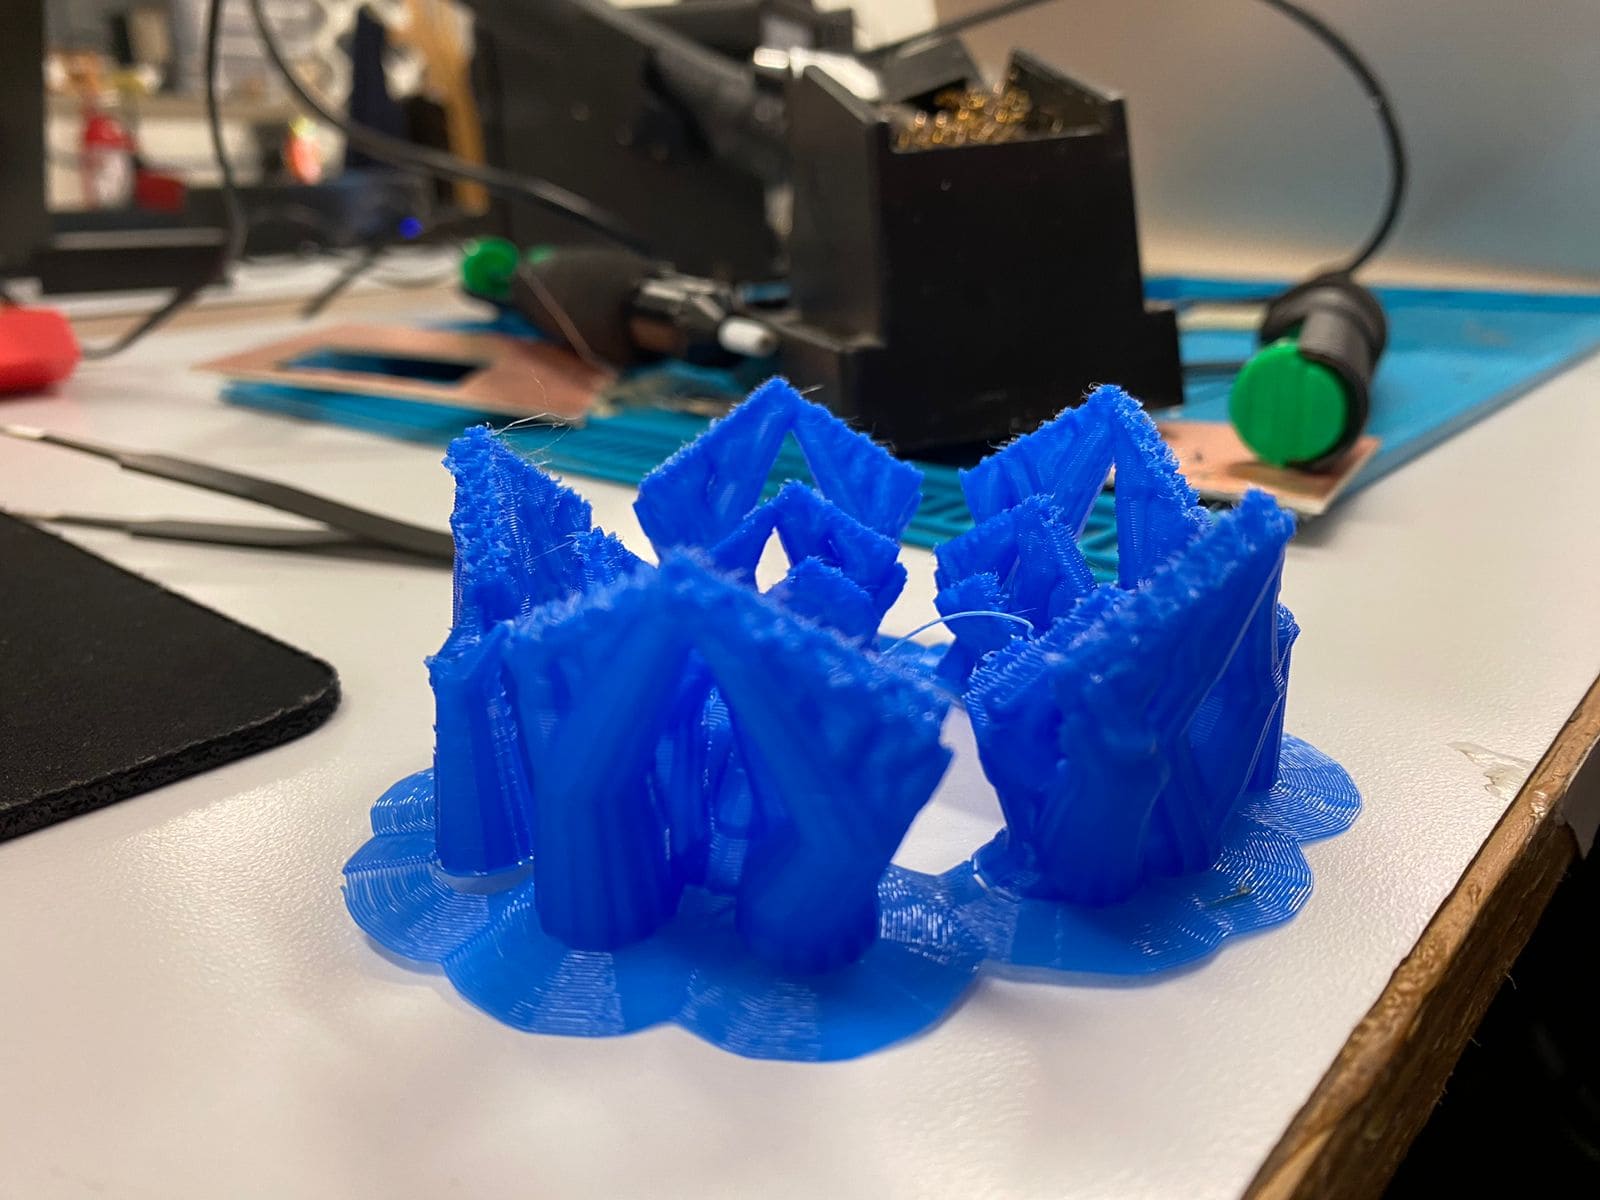
Once the printing process is complete, the finished figure should resemble the image below. Thanks to its well designed structure, the supports should be easy to remove, except for the middle one, which may require cutting into pieces and careful extraction.
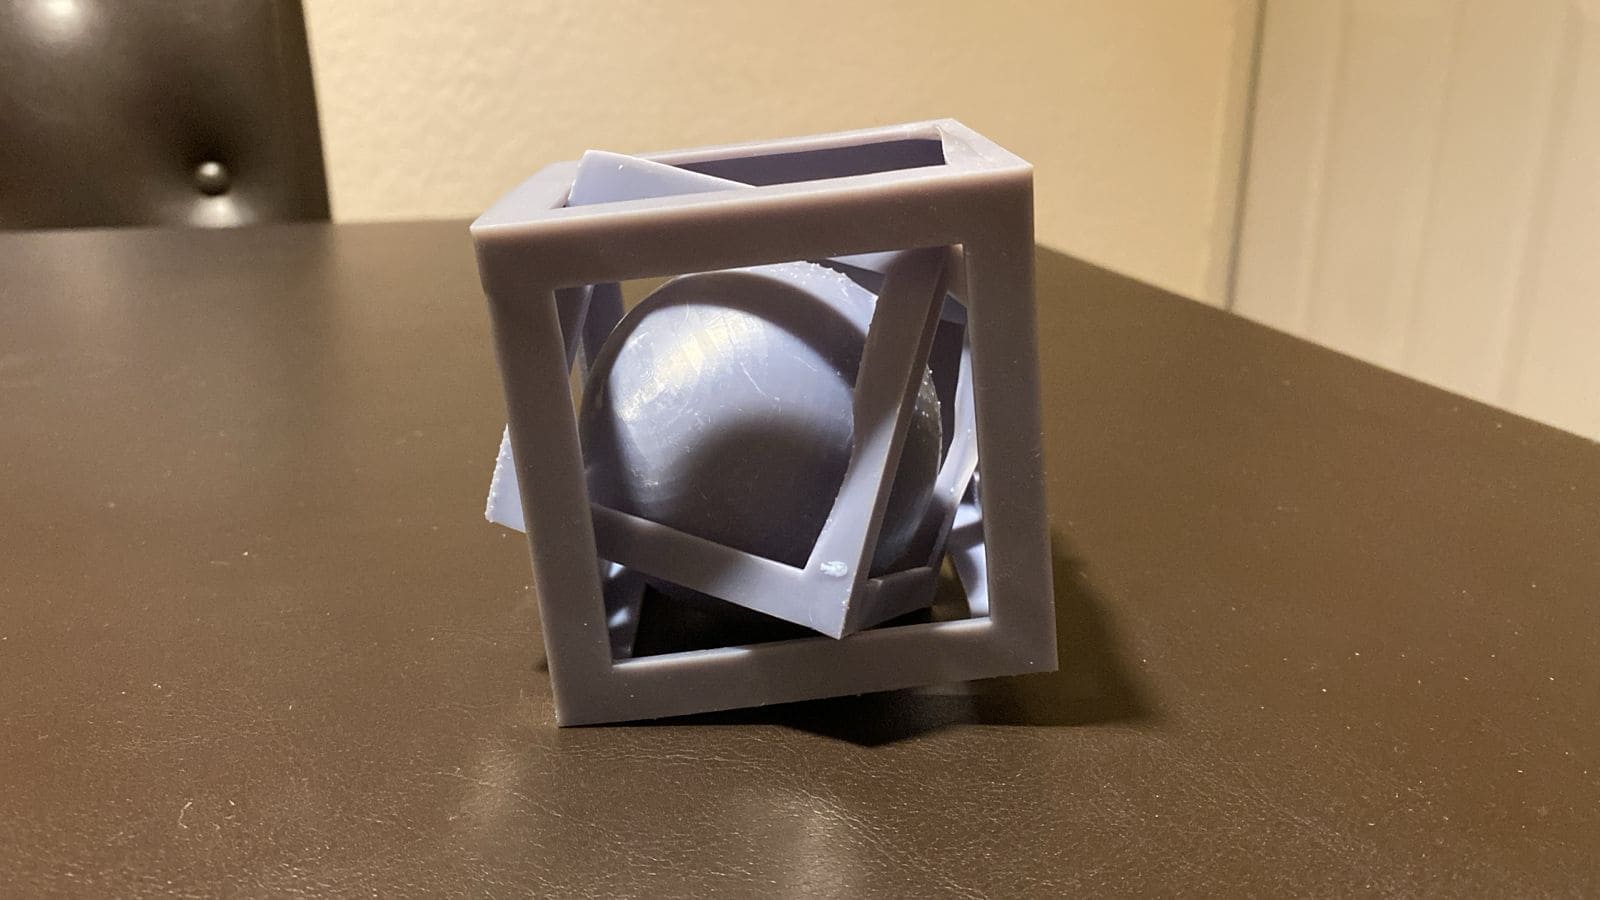
Nested Box with Enclosed Ball
I decided to create another intricate figure, this time opting to print it in resin for testing purposes. Despite being a box like structure, this figure contains sharp edges that might pose challenges when printed using a standard printer. While not impossible, printing on a regular printer would require extensive supports and time. Resin printing offers advantages in this scenario, requiring fewer supports and allowing for different positioning compared to PLA printing.
Design
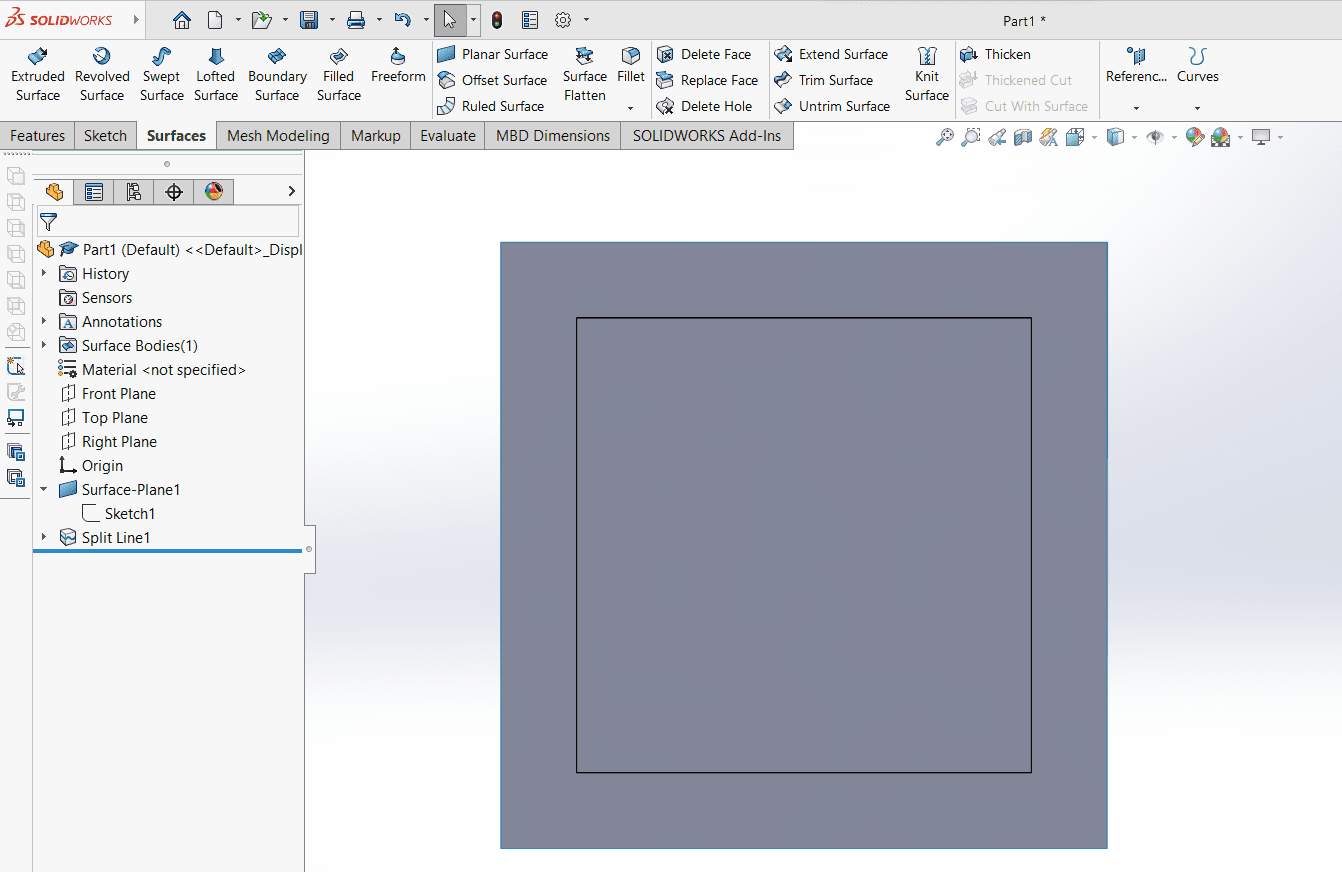
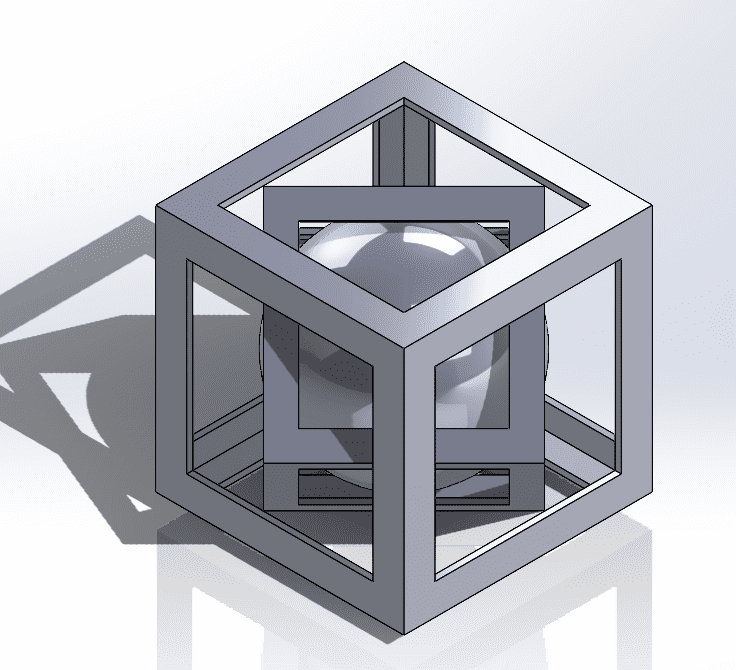
First, create a new sketch on the top plane and use the center rectangle tool to draw a square with sides equal to 80 mm. Convert this sketch into a surface. Then, create another sketch and use the offset tool to create a new shape offset by 10 mm. Finally, use the split line tool with this sketch.
Next, duplicate this surface, but don't move it yet. Once duplicated, use the rotation command to rotate it 90 degrees from one of its edges. Then, add an axis in the middle of the figure and create a circular pattern using this axis. Now, you'll have a box with four floors. Finally, duplicate this surface again and position it on top of the box.
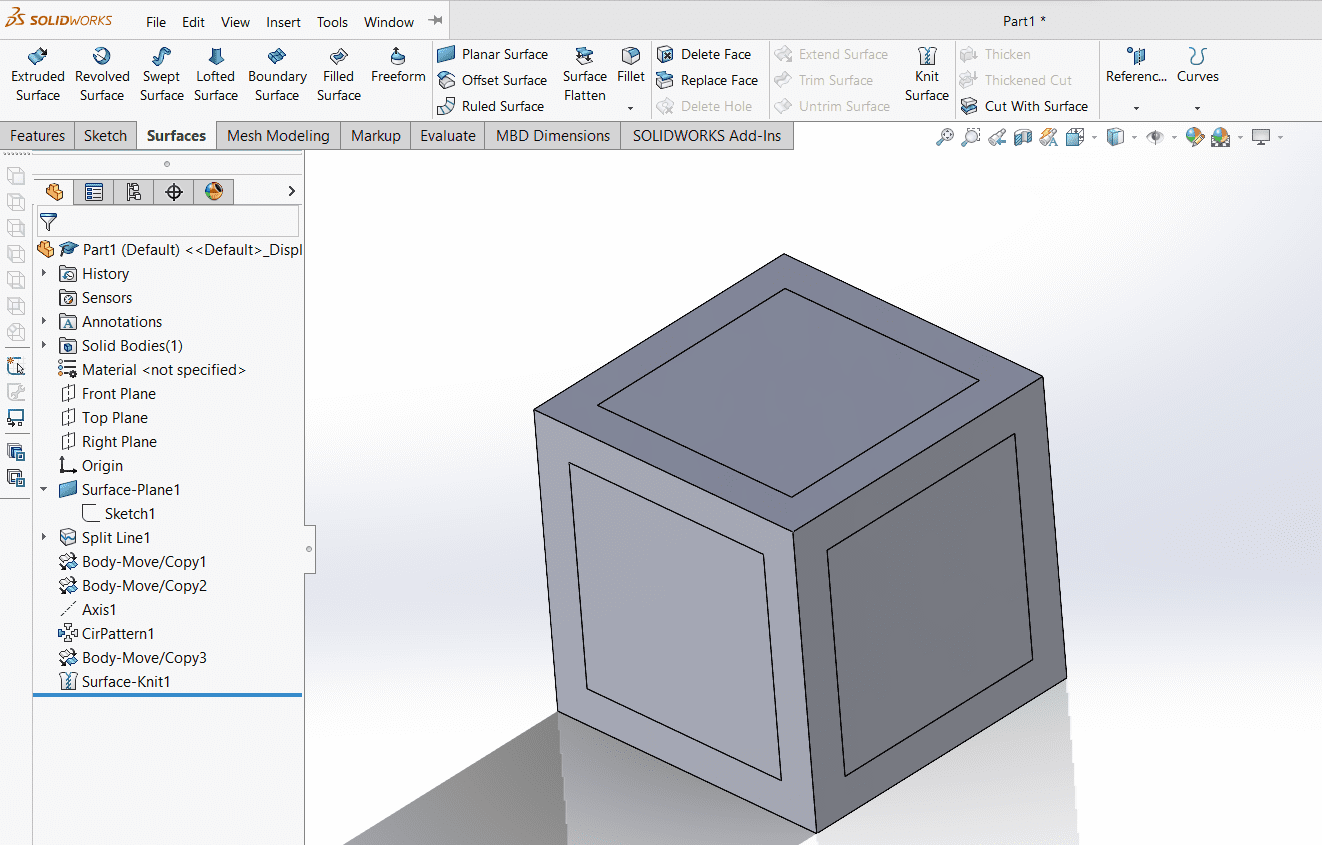
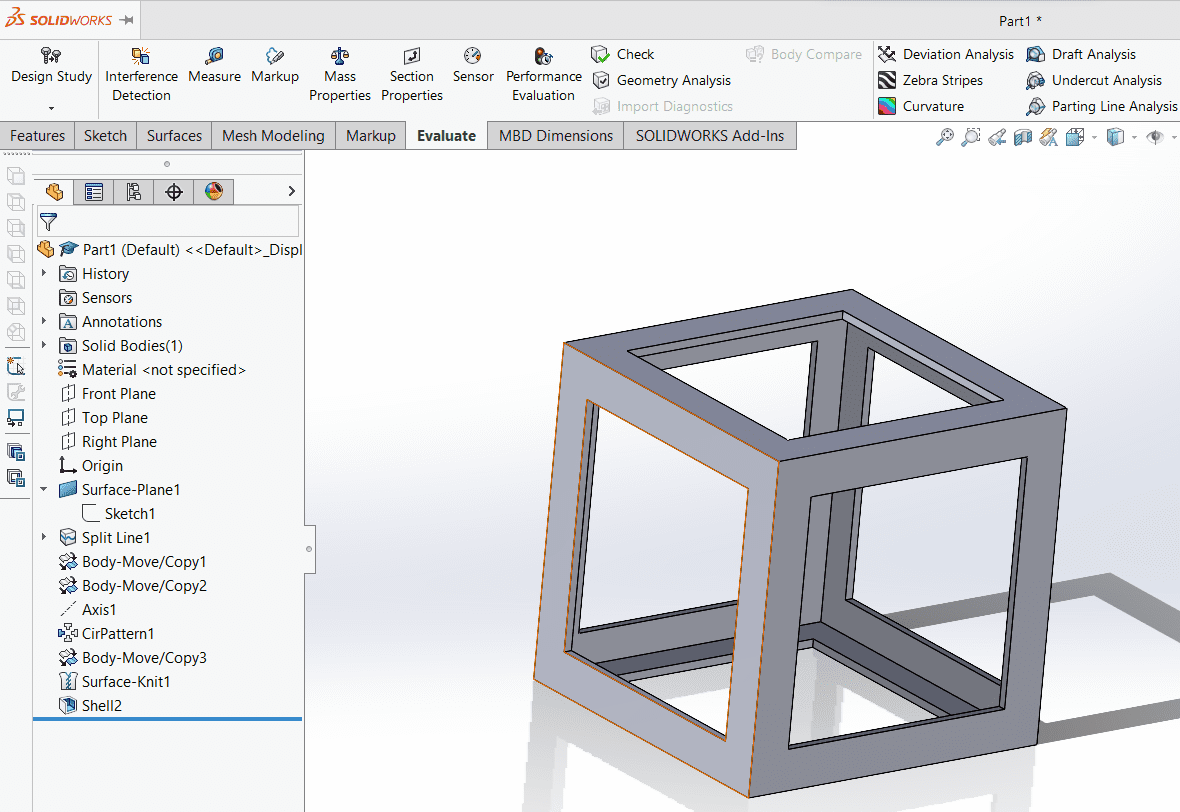
After knitting all the surfaces together to form a solid, you can use the shell function to hollow out the figure.
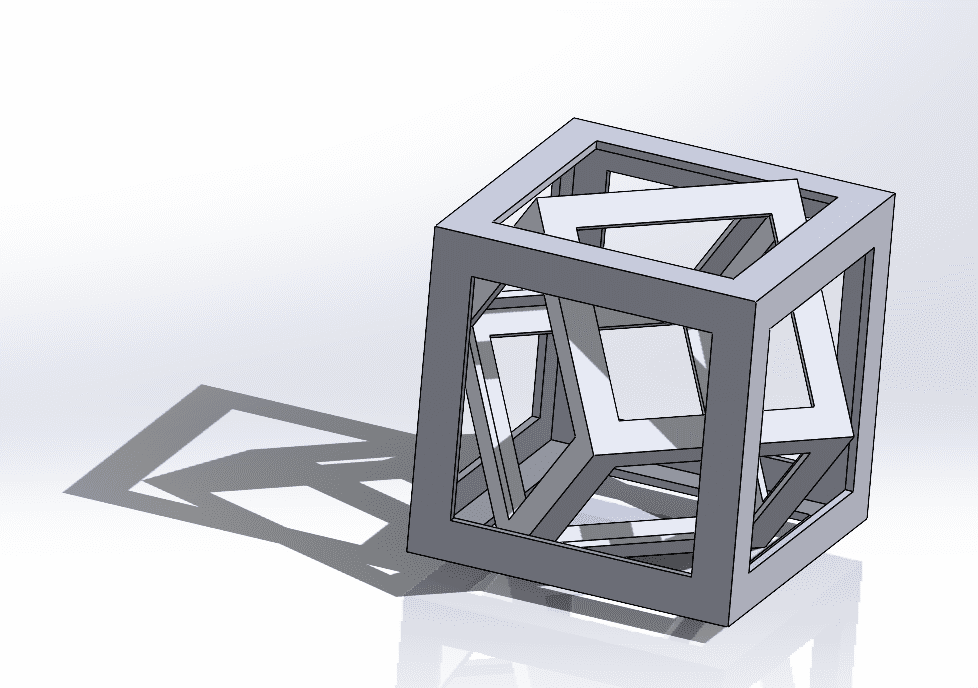
First, create a duplicate of the figure and move it away from the original. This will make it easier to scale. Once scaled, position the figure in the center of the original and rotate it 45 degrees in both the x and y axes to twist it without overlapping the original.
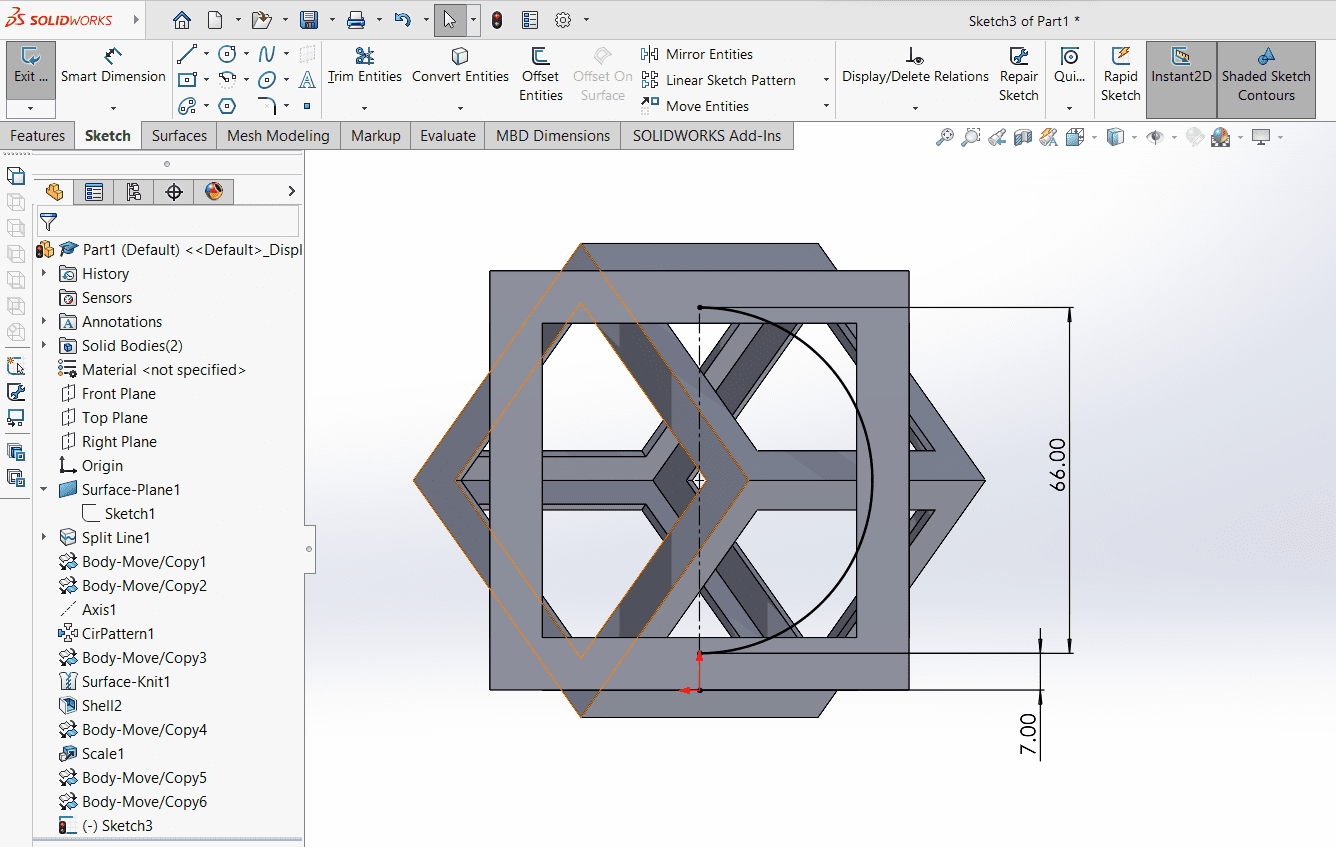
Create a new sketch on the front plane and draw a semicircle. Ensure the centerline acts as the axis, and the semicircle has a height of 66 mm and is 7 mm away from the x-origin. Next, revolve the semicircle around the middle axis to complete the final piece.
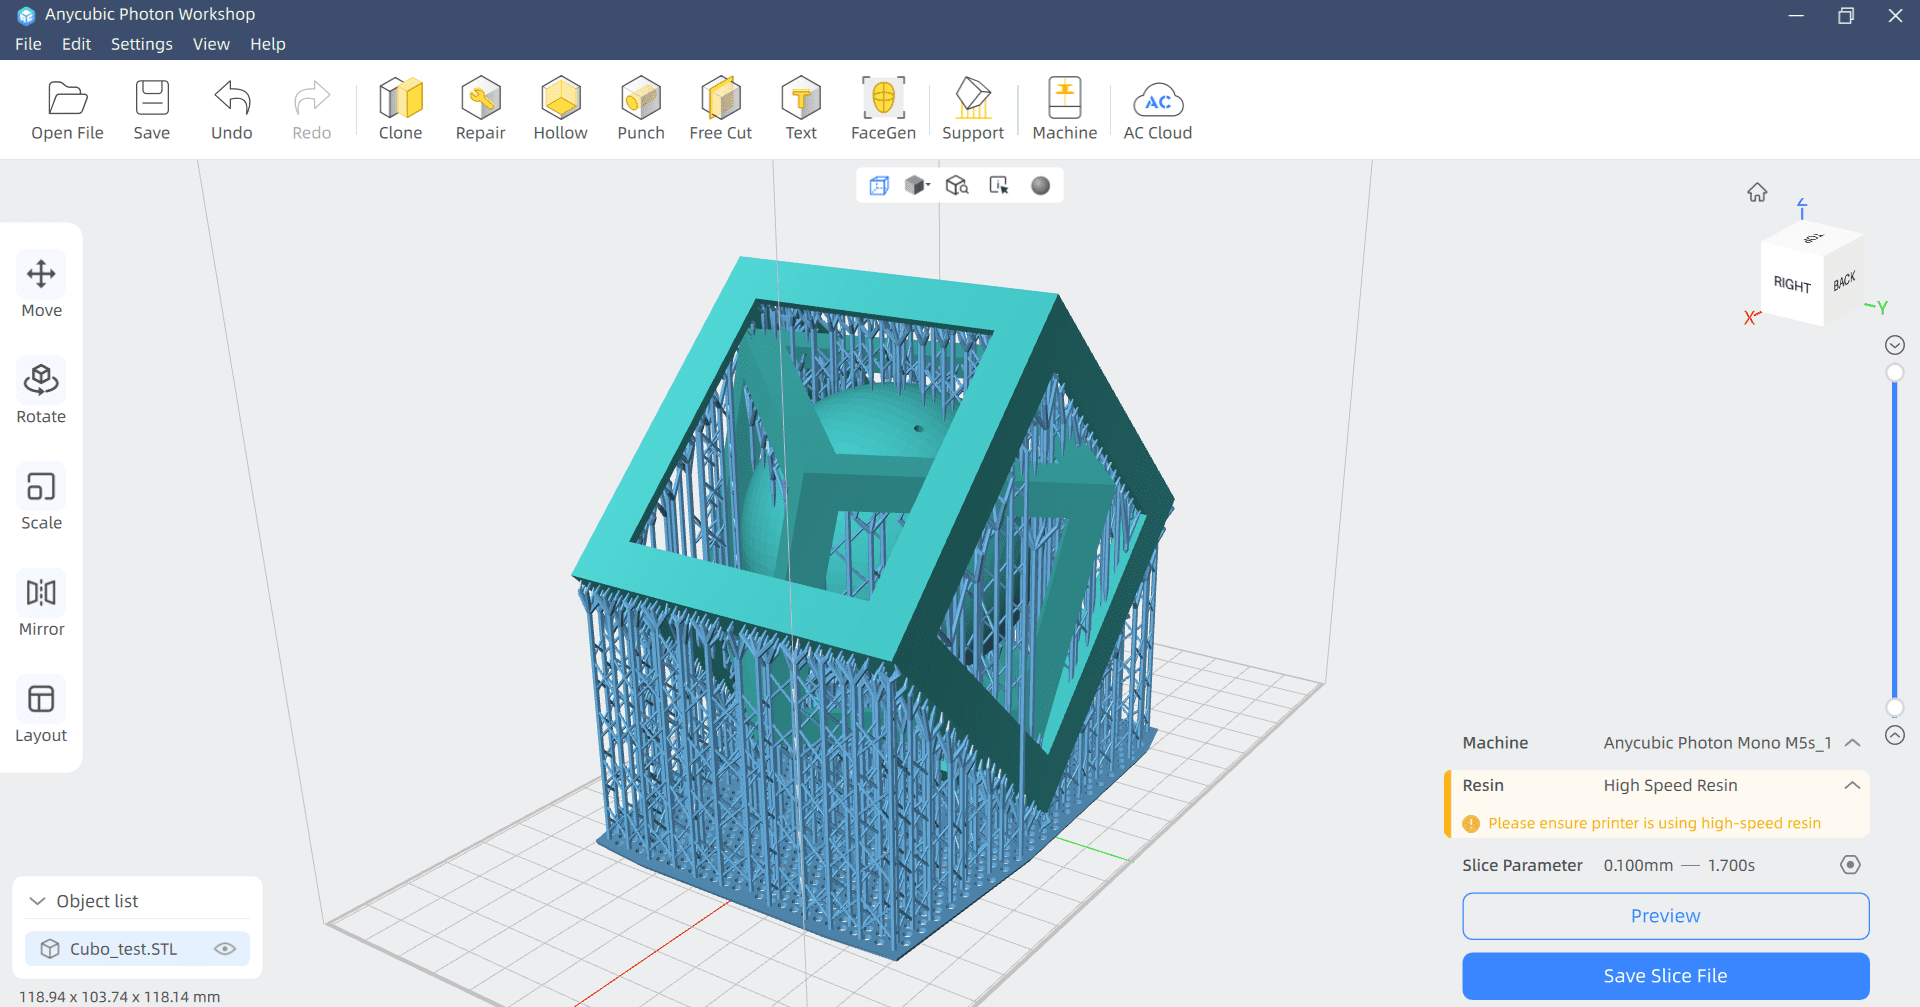
Anycubic Photon Workshop
Now that the final piece is complete, save it as an STL file. To print with resin, download the software
Anycubic Photon Workshop from their website or by clicking here. This software is similar to Ultimaker
Cura. Upon opening Anycubic Photon Workshop for the first time, you'll be prompted to select a printer.
If you want to select a different printer, you can do so from the top bar menu., navigate to "Machine"
and select the appropriate printer and resin type, in this case select "High Speed Resin".
Important: Printing with "High Speed Resin" requires attention to certain aspects. It's advisable
to ensure that the printed piece has walls at least 2 mm thick. Parts thicker than this should be
"Hollow" and "Punch". Additionally, it's crucial to note that resin can be toxic, so safety precautions
should be taken. Avoid direct skin contact by wearing gloves, ensure proper ventilation in the room, and
consider using a respirator.
In the Anycubic Photon Workshop software, you'll find familiar options for manipulating the figure, such as
move, rotate, scale, mirror, and layout. These first three functions are similar to those in Cura software,
with the difference that Workshop offers additional features for more precise adjustments and customization.
To add supports in the Anycubic Photon Workshop software, navigate to the top bar menu and select "Support."
Here, you can choose the type of supports you need. For this piece, light supports were used with a Z lift
height of 5 mm. After setting the parameters, click "Generate Automatic Supports" to apply them to the model.
To hollow out the model in Anycubic Photon Workshop, navigate to the top bar menu and select "Hollow." Here, you'll
only need to specify the desired wall thickness. Remember, for this case, it should be 2 mm thick due to the
high speed resin.
To create a hole in the sphere for proper resin drainage, go to the top bar menu and select "Punch." Then,
simply click on the surface where you want the hole to be, which in this case is on the sphere.
If you like how it sees save it to a usb and put the usb to the machine.
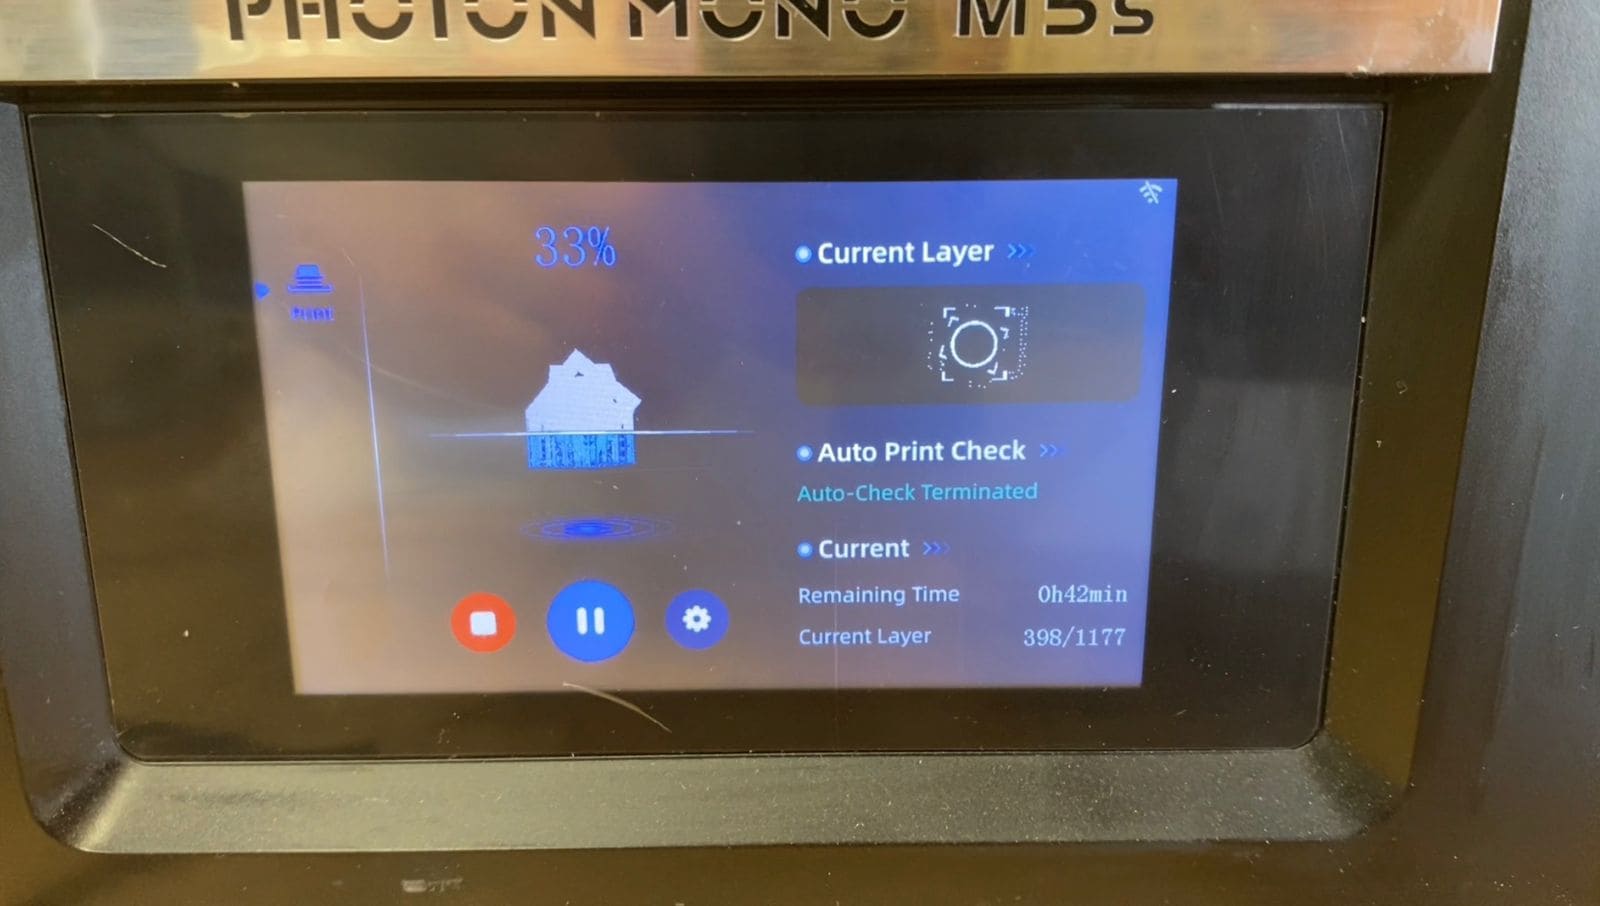
Printing
For resin printing, begin by turning on the Resin printer and filling the bed with high-speed resin. Seal the printer with its case, select your file from the screen, and hit print. Once printing is complete, remove the figure from the resin bed and allow it to drain excess resin. Subsequently, wash the figure with isopropyl alcohol for 5 minutes, remove all supports, and place the figure in a UV sunbath for 15 minutes. That's all!
- Turn on the Resin printer.
- Fill the printer's bed with high-speed resin.
- Seal the printer with its case.
- Select your file from the screen.
- Hit the print button.
- After printing is complete, remove the figure from the resin bed.
- Allow the figure to drain excess resin.
- Wash the figure with isopropyl alcohol for 5 minutes.
- Remove all supports from the figure.
- Place the figure in a UV sunbath for 15 minutes.
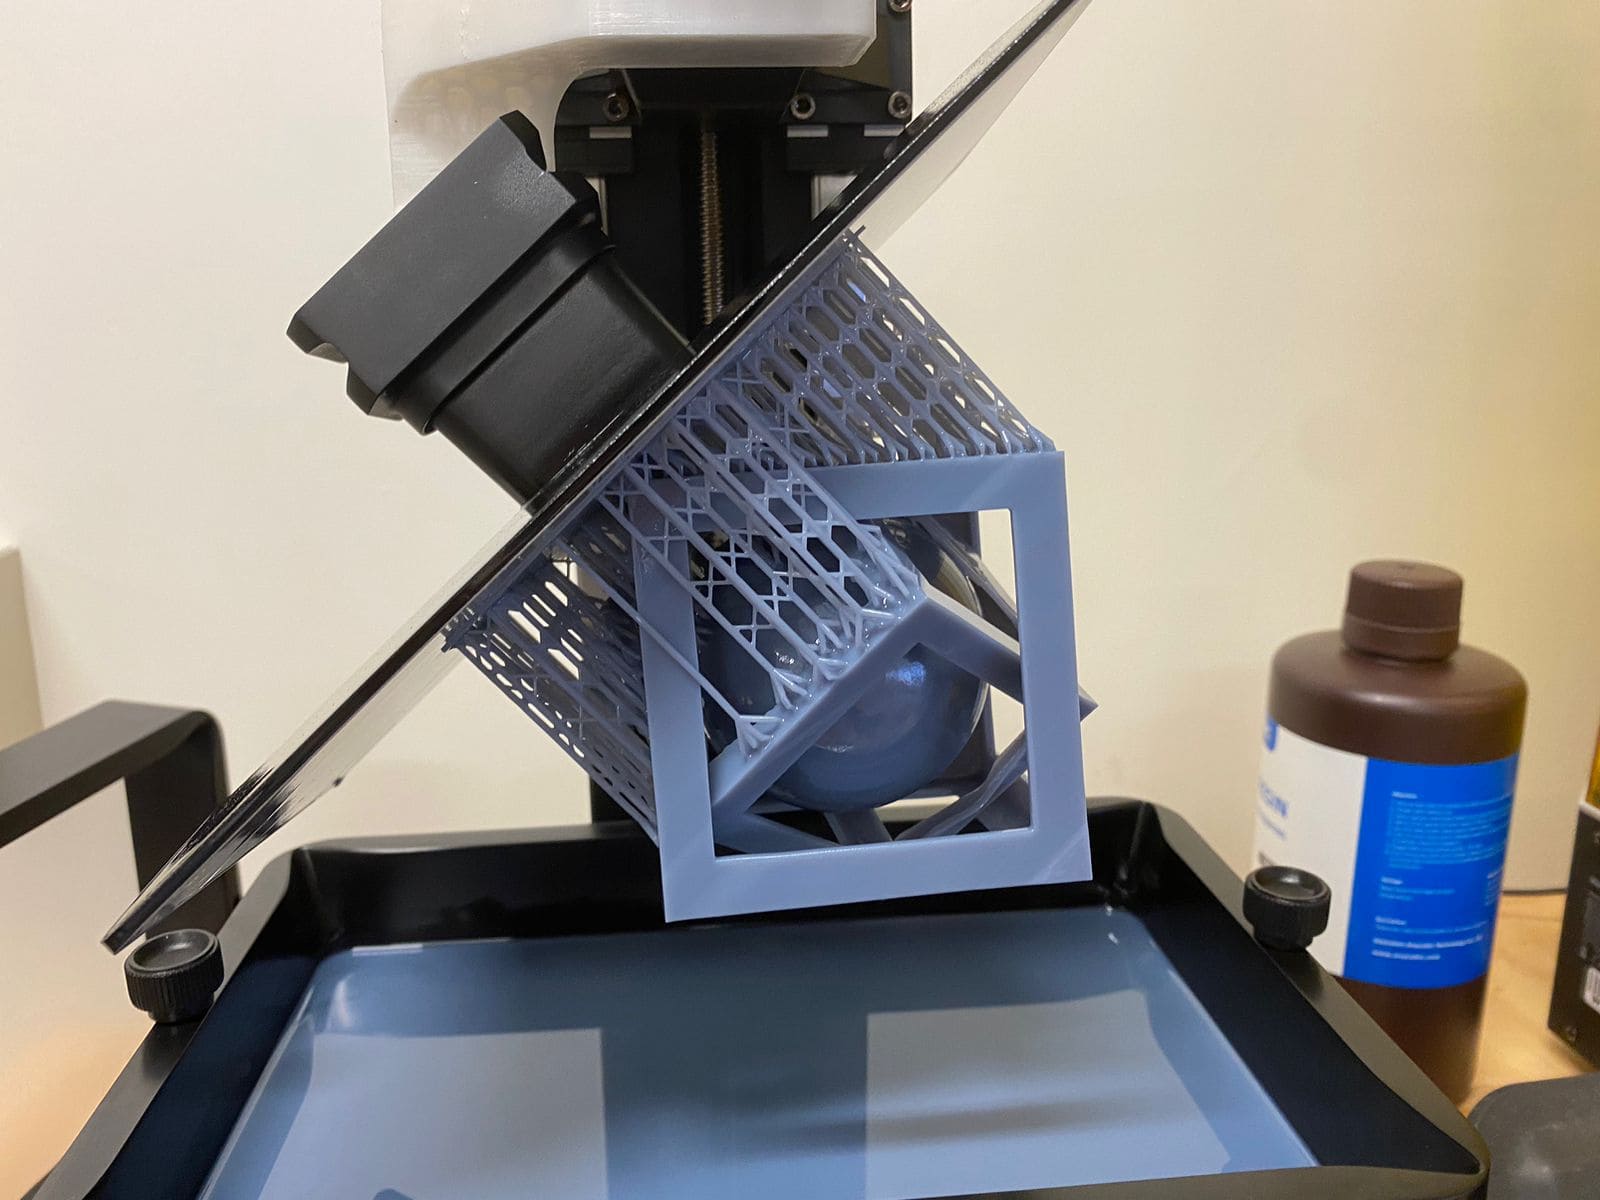
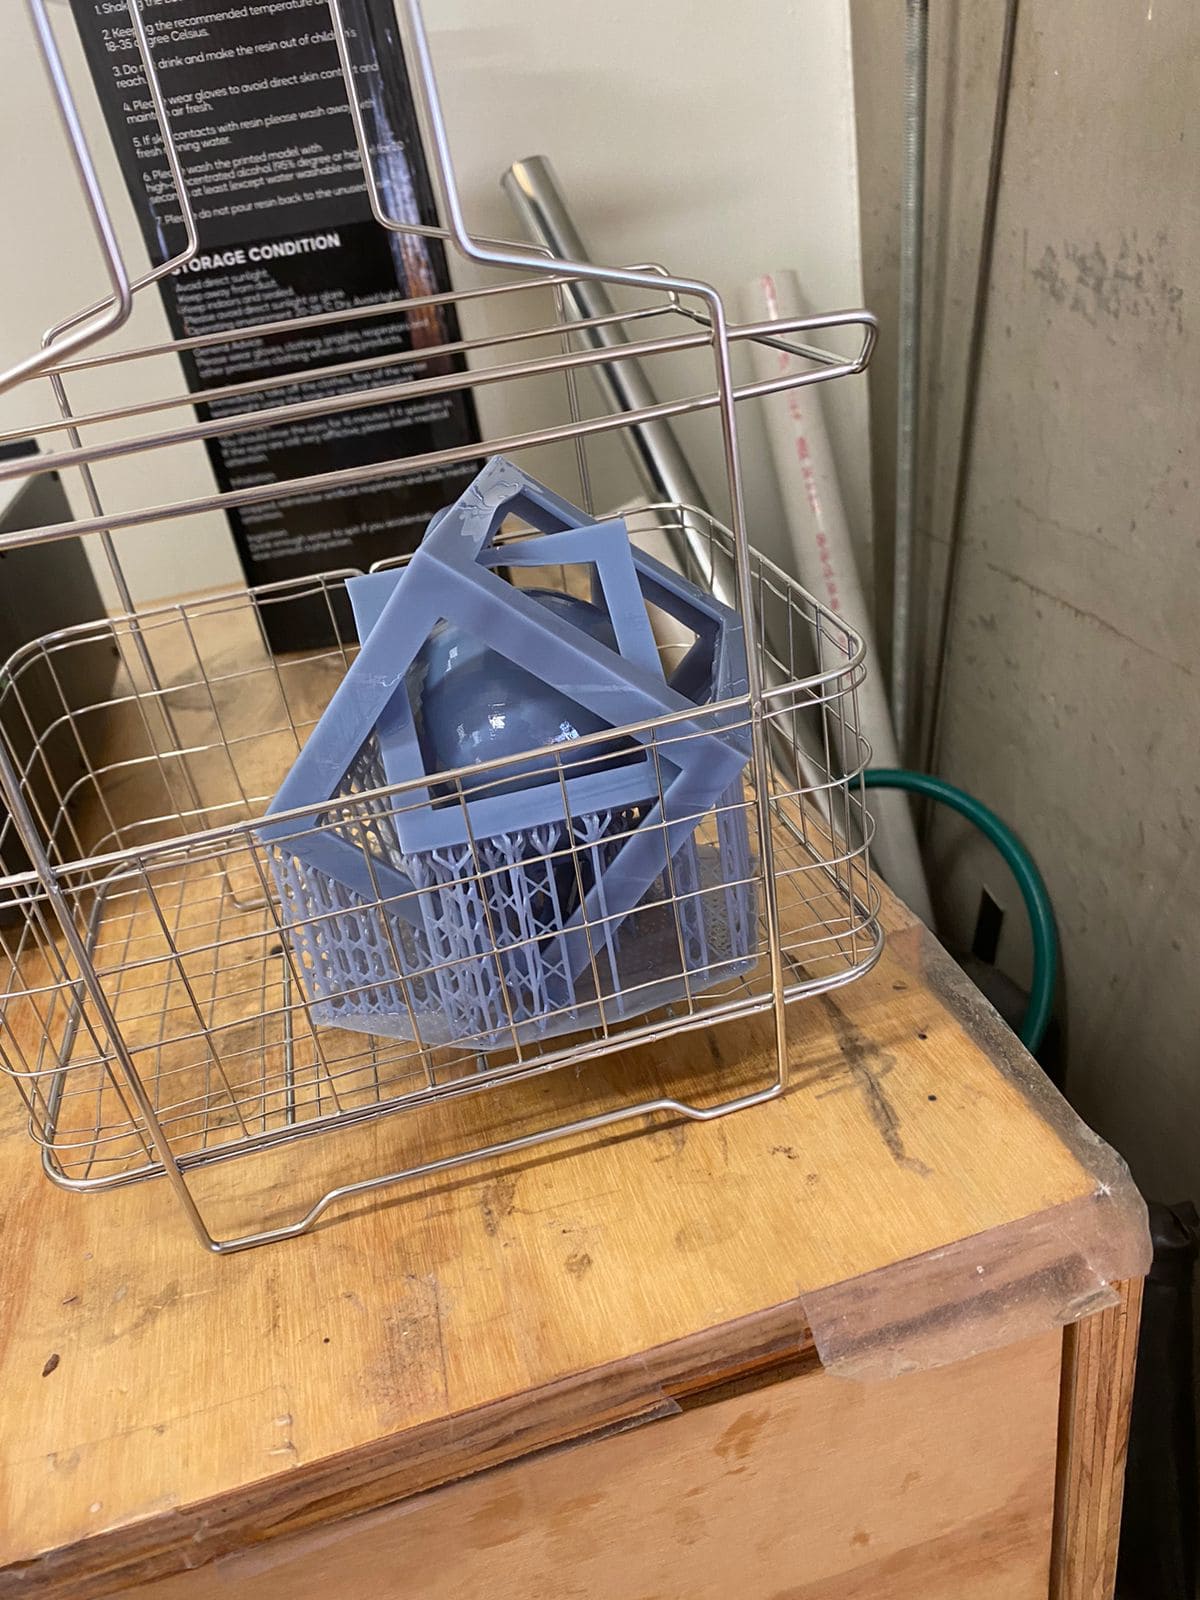
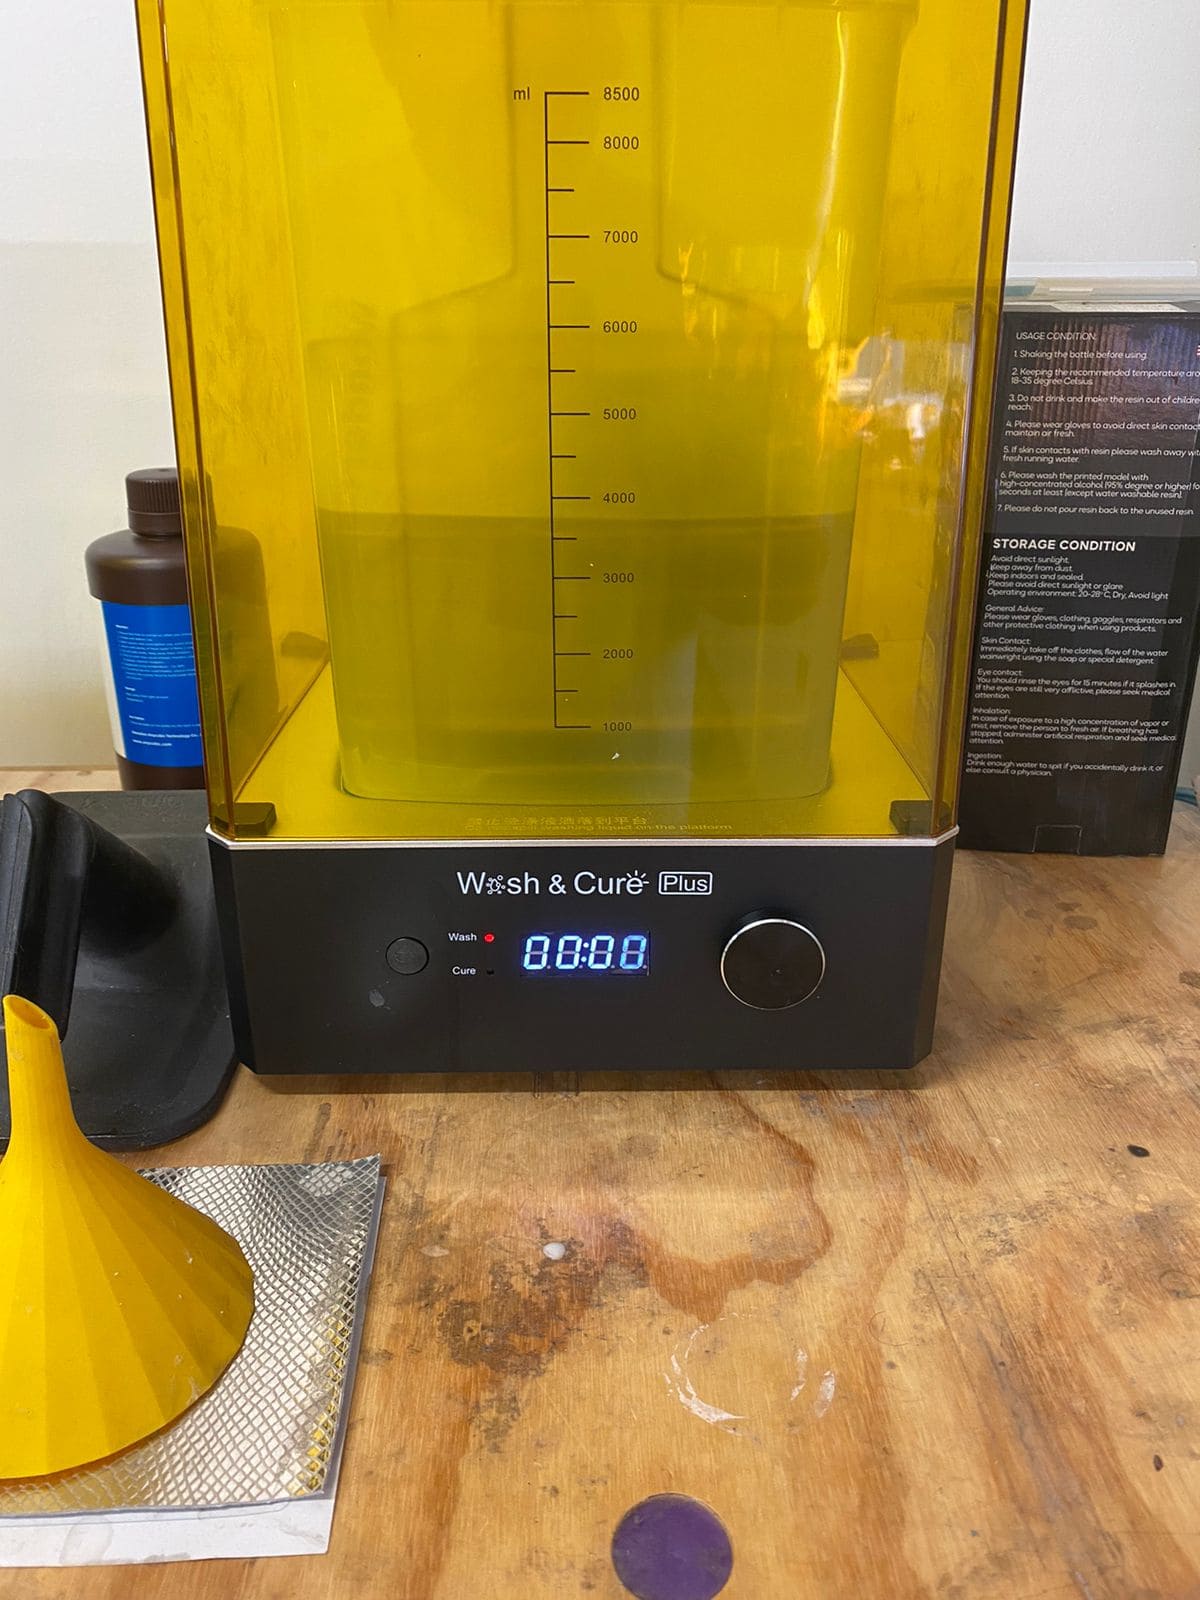
After completing the resin printing process, the final figure emerges from the bath with clean, polished surfaces. Excess resin is drained, supports are removed, and a UV sunbath enhances durability. The result should look like the image below.
3D scan
I had never used a 3D scanner before, but when Professor Rafa introduced us to how we could scan with our cellphones, I was both relieved and intrigued. The process turned out to be quite simple. For this task, I utilized two mobile apps: "Kiri Engine" and "Polycam." While both offer advanced features under a paid subscription, the free version includes "Photo scan" and "Lidar scan" functionalities, which I'll explain in more detail in the following sections. After completing the scans, both apps allow you to export the scan as an STL file, which can then be used for printing.
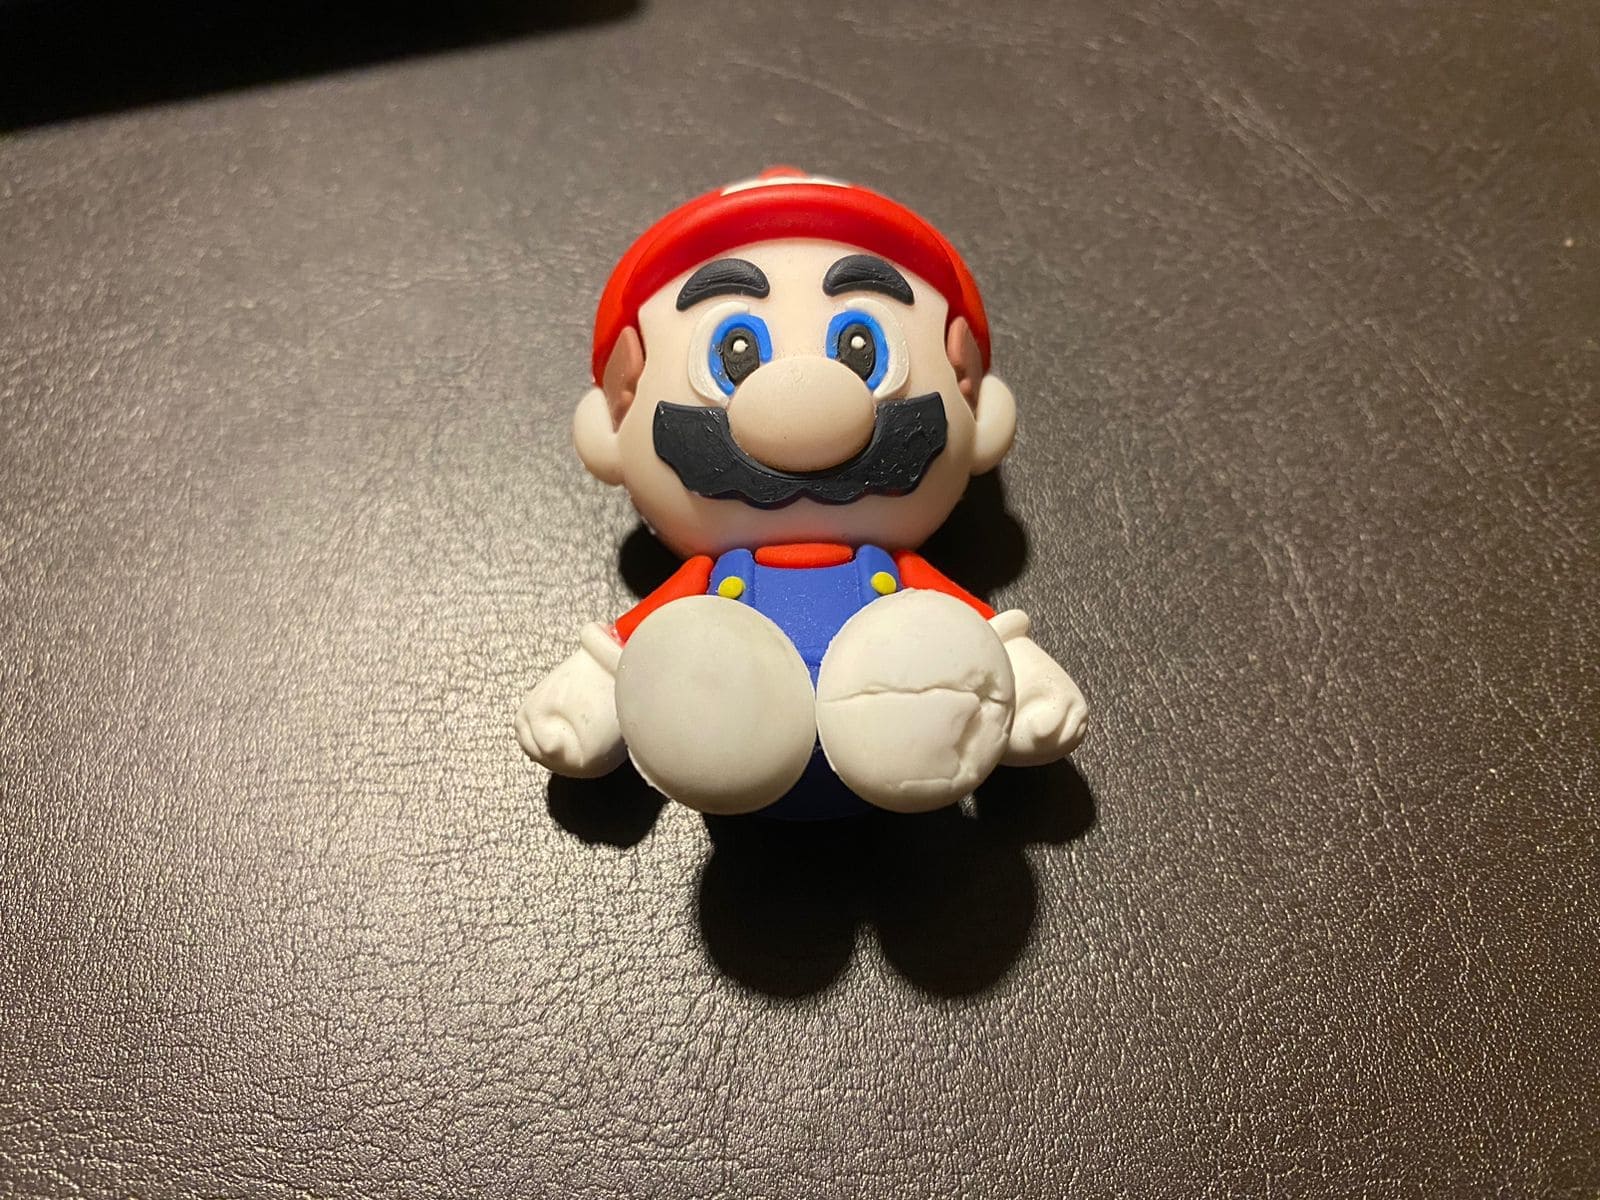
Photo scan or Photogrammetry
Photogrammetry, or photo scanning, creates 3D models from multiple overlapping photos. Good lighting and focus are crucial for clear images. More photos improve scan quality. A high quality camera captures finer details. Software aligns photos, generates a point cloud, then a mesh. Texture mapping adds color and texture. After refining, models can be exported for various uses.
Lidar scan
LiDAR, short for Light Detection and Ranging, utilizes laser pulses emitted from a device to scan objects or scenes. In a LiDAR scan, the object is positioned at the center of the scanning device. Laser pulses are emitted in various directions, and the device calculates object details based on the return of light. By measuring the time it takes for the light to reflect back to the sensor, LiDAR systems generate a point cloud representing the object's surface.
Polycam
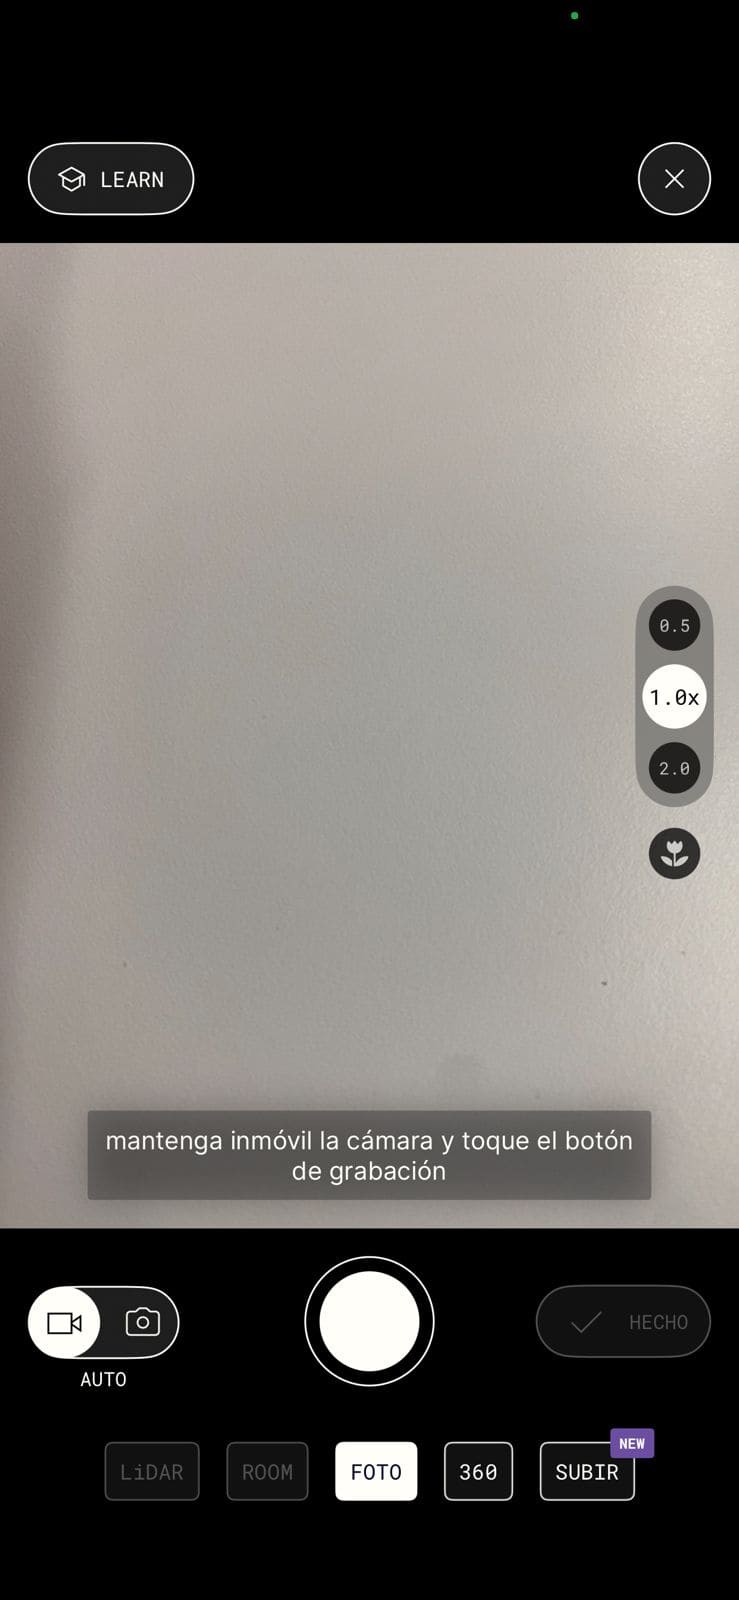
When you open the app, it immediately activates the camera, offering several options. On the right side,
you'll find controls for zooming in or out. At the bottom, there are five main options: Lidar, Room, Photo,
360, and Upload. The Lidar and Room options are specifically for phones equipped with Lidar scanning
capabilities, which I didn't have access to, so I utilized the Photo scan feature.
For the Photo scan, there are two modes available: auto and manual. In auto mode, the app captures photos
in a video-like sequence for you, while in manual mode, you take each image individually until you're
satisfied with the capture. It's worth noting that the more photos you take, the better the quality of
the 3D scan will be.
Once you've completed taking photos, press "Done" and upload them. After a processing period, the app
will generate the 3D scan for you to review.
Kiri engine
When you open Kiri Engine, the main menu appears, and at the bottom, you can hit the plus sign to
begin scanning. You'll see different options: Photo Scan, Lidar Scan, Featureless Object Scan, and
3DGS (beta). The last two options require a pro subscription, and since I don't have Lidar scanning
capabilities, I chose Photo Scan.
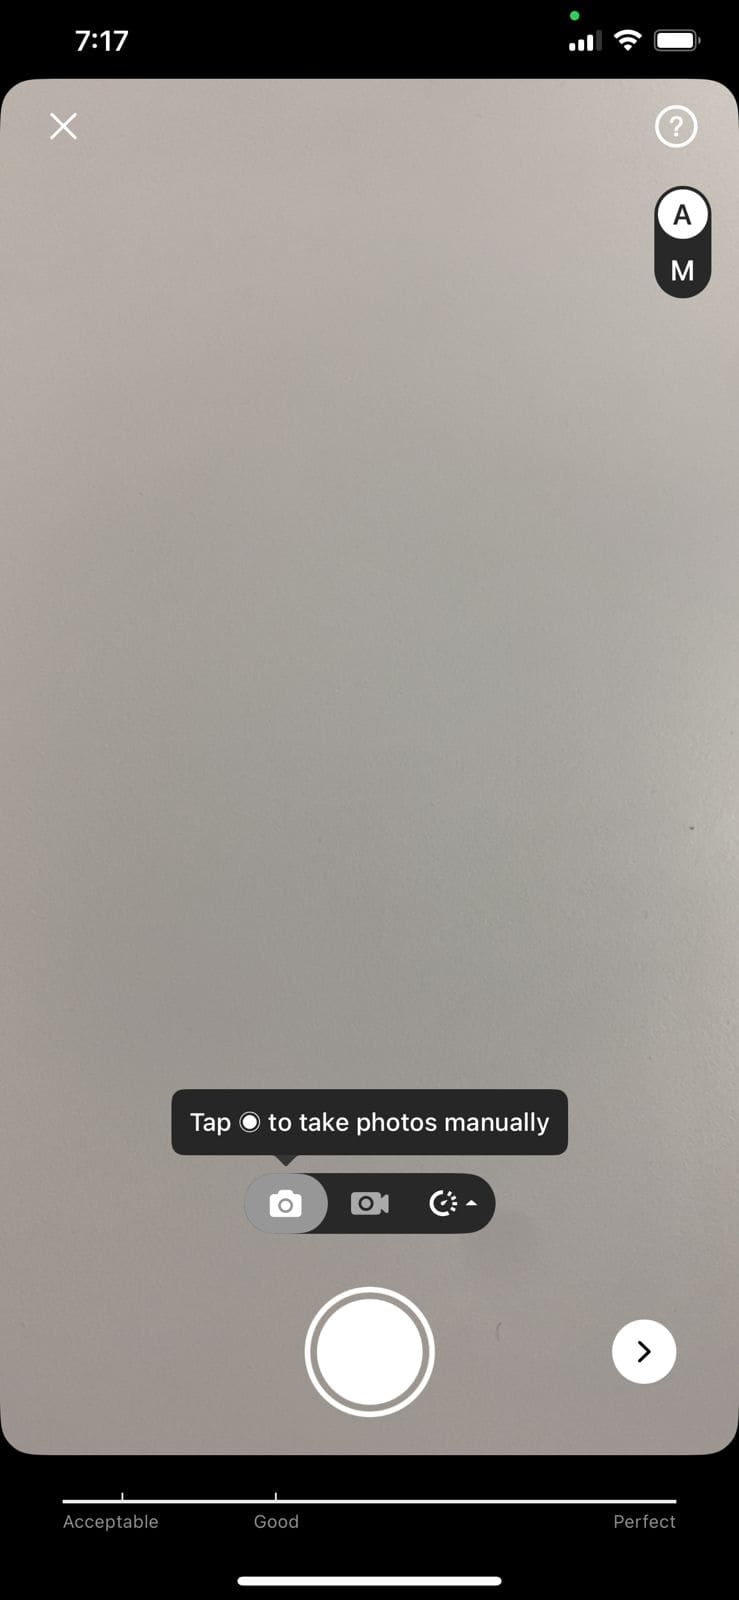
When the camera is active, there are fewer options to interact with. On the right side, there are
two buttons: A and M, representing Automatic and Manual modes, respectively. In Automatic mode, you
don't need to adjust anything, while Manual mode offers various camera settings for customization.
Since I'm not familiar with most of these settings, it's up to you to explore and understand their
functions.
At the bottom, there are options for taking pictures, similar to Polycam. Additionally, there's an
option for a timer, allowing you to set a delay of 1 to 5 seconds between each photo capture. As
with Polycam, more photos generally result in a better scan quality. Once you've finished taking
photos, click the right arrow to upload them for processing. After processing, the app should
generate a 3D scan.

My 3D scan
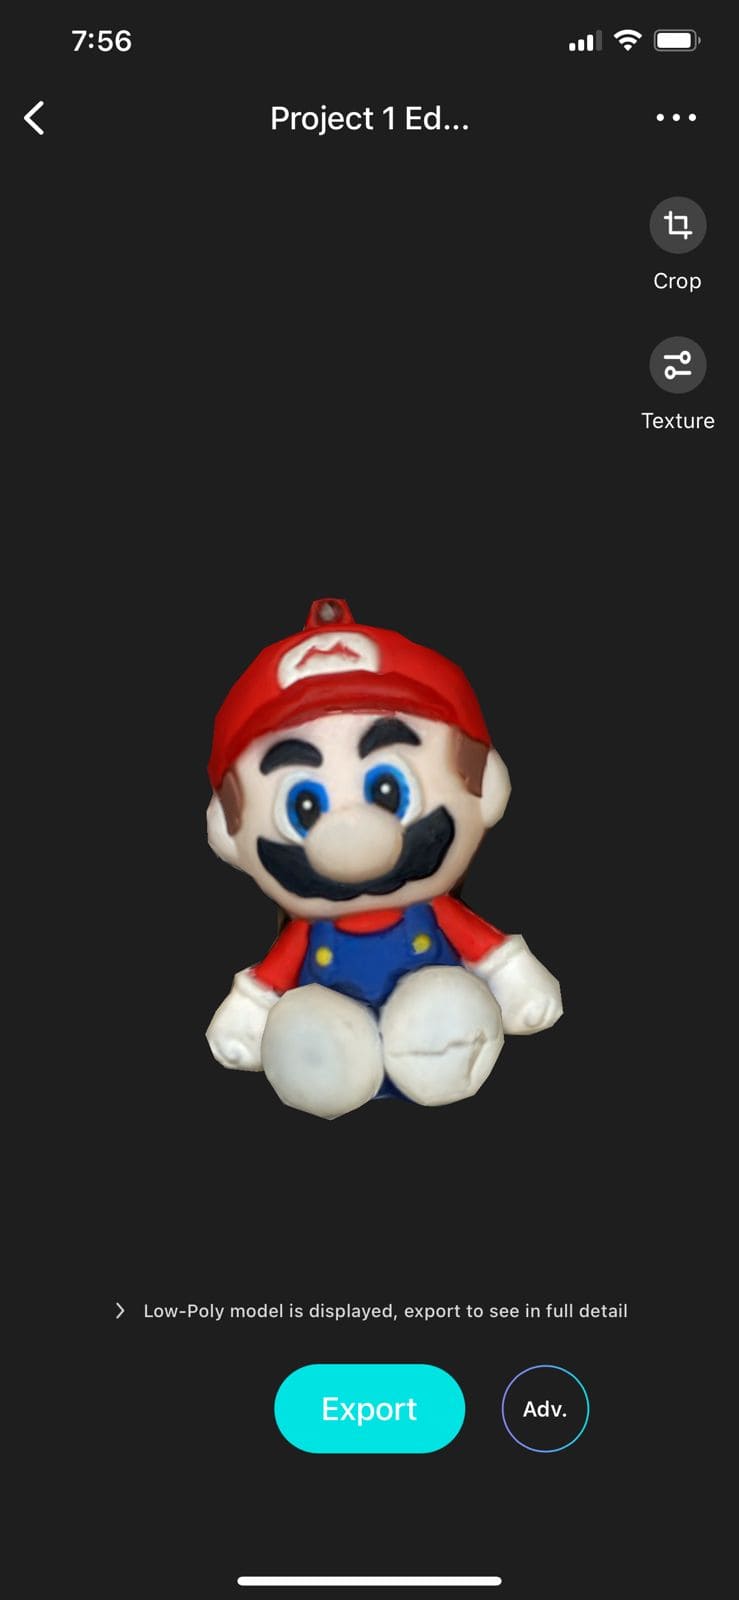
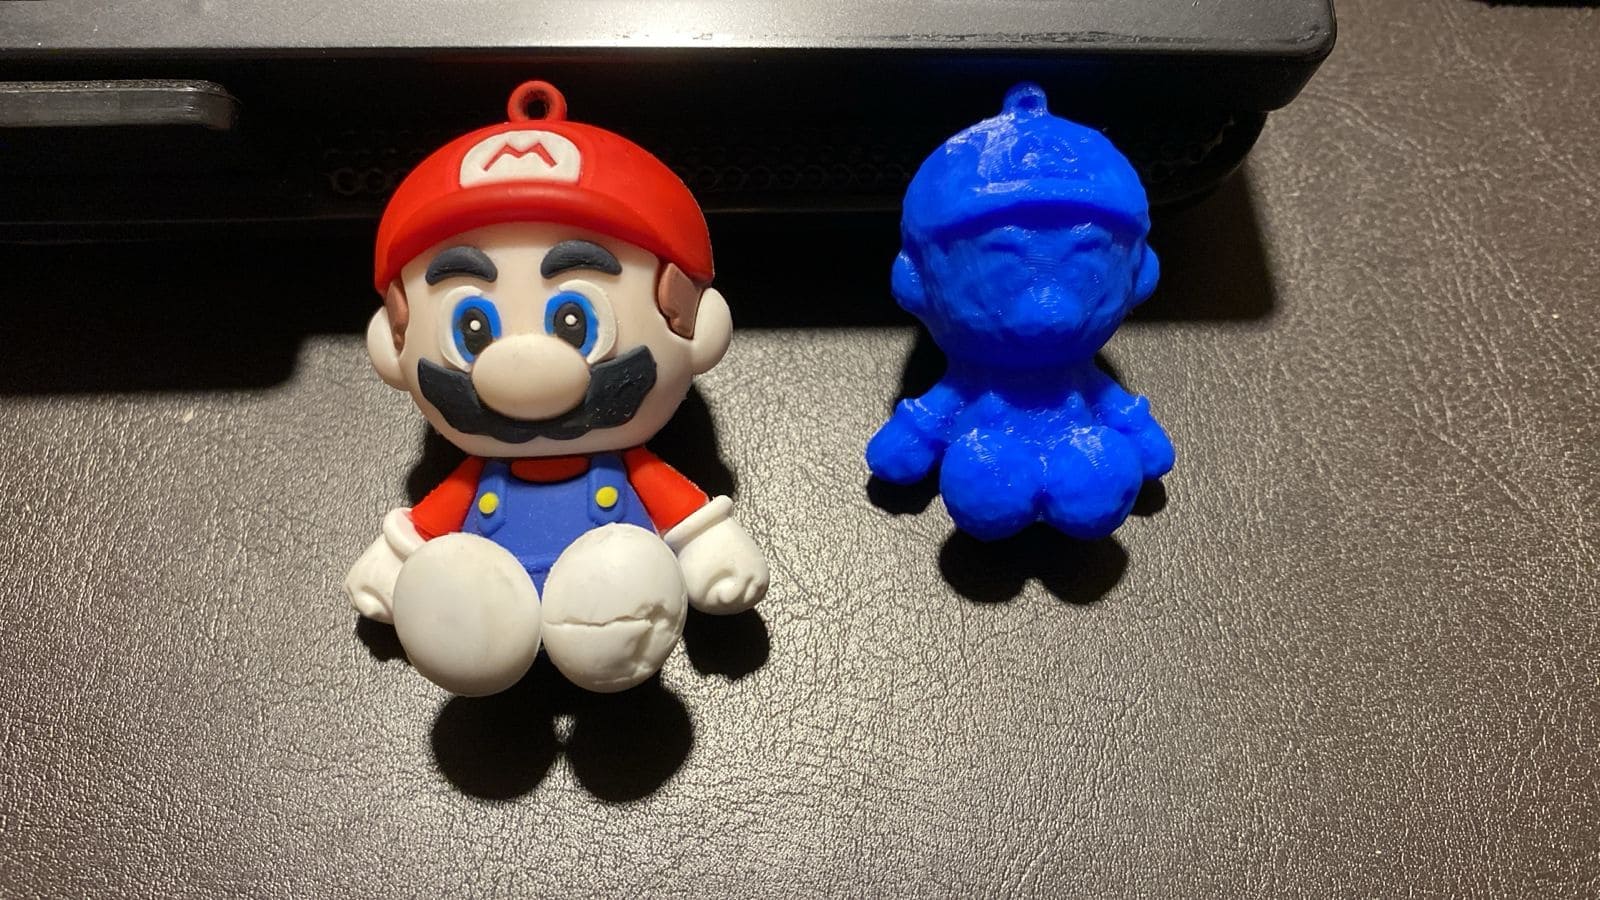
With that said I used the Photogrammetry because I find it quite simple, so then I use both of the
applications with the same method and personally I scan a Mario that, wich Kiri engine made a little bit
diferent scan, so then the Polycam made a better one and then I print the one that Polycam made it.
When I upload the file to the Cura software there was a huge problem, the figure was hollow, but when I
added the print settings the figure became complete and I was able to print it like that.
Group assignment
This week's group assignment, focused on testing the capabilities of various 3D printers and understanding their unique characteristics. In the group assignment webpage they are detailed insights into how each machine operates and its specific parameters. For more information on this valuable resource click here.
