Week5
"3D scanning and printing"
WEEK GROUP PRACTICES AND PRINCIPLES Project Management Documentation tips
Assignments
Our tasks for this week are:
-
Group assignment:
- Test the design rules for your 3D printer(s)
- design and 3D print an object (small, few cm3, limited by printer time) that could not be made subtractively
- extra credit: personalize the board
- 3D scan an object (and optionally print it)
- Dual Extruder
- Better print effects
- Temperature auto-regulation
- 230*150*140(mm)Build Volume
- Touch Screen
- 120℃ Heating Build Plate
- Matching with multiple slicers, FlashPrint, Simplify3D, Slic3r, Skeinforge, Cura.
- 3D printing allows the creation of personalized objects that I love because we can modify and adapt to the user's needs.
- 3D design makes prototyping easier, allowing me to make multiple products easier and faster.
- 3D printing can help reduce significant costs compared to traditional manufacturing methods such as subtractive wear-resistant manufacturing.
- Additive manufacturing uses only the amount of material necessary to create the object, allowing no more material to be wasted.
- 3D printing allows the creation of objects with more complex shapes and geometries that will be difficult or impossible to manufacture with the traditional methods typically used. Limitations
- Maintaining a 3D printer is not complex, if you are just starting out it could be difficult.
- which can be a barrier for some users, my printer got stuck but I could see how to fix it by heating it up and using the T-tool to remove the stuck material.
- 3D printers have limitations in terms of the size of the object they can print in my case, I had a 13 by 17cm one, well if you want to print something larger than that you will have to split it and then do post-processing.
- The scanner has a 1.3 megapixel camera that can capture the colors and surfaces of the object being scanned.
- Objects up to a volume of 700x700x700 mm can be scanned in free scan mode.
- The scanner delivers standard file formats such as STL or OBJ, ensuring that the data can be used in most 3D CAD applications.
- Apply a matte spray to easily scan dark, shiny and transparent objects
- Scan with a dark background
- Use the correct scanner settings
- Set up your scanner
- Create a controlled environment
- Avoid scanning moving objects
Flashforge Dreamer
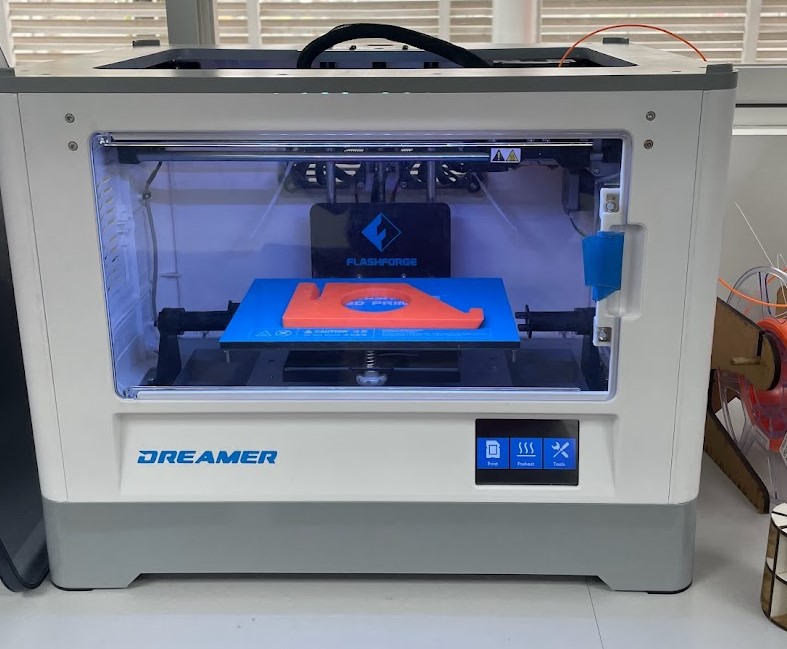
Characteristics
Parametric design tutorial.
3D Printing Test Tutorial
7 essential tests to calibrate your 3D printer
Advantages and limitations of 3D printing
-
Advantages
PRINTING
FDM AND RESIN
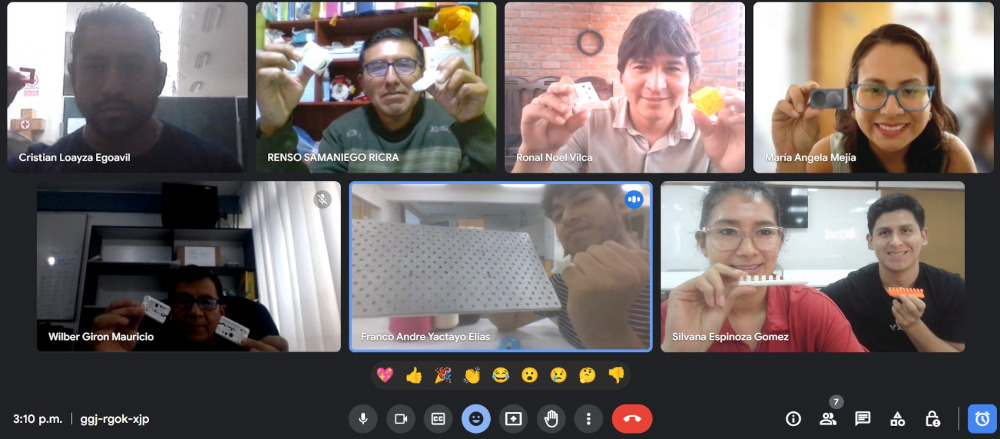
In this group task we did 3D printing test with our partners we got together in a hybrid way (virtual presential) and started to distribute the pieces that we were going to print each one with different types of 3D printers, a group of partners who printed in FDM and another group who printed in resin, in these experiences each partner presented the results and explained how was the process and the results of each print, what differences we saw with each type of printer, and that we can improve printing configurations, are similar the results of manufacturing in resin and fdm, everything will depend on the parameters you use in FDM to be finer finish.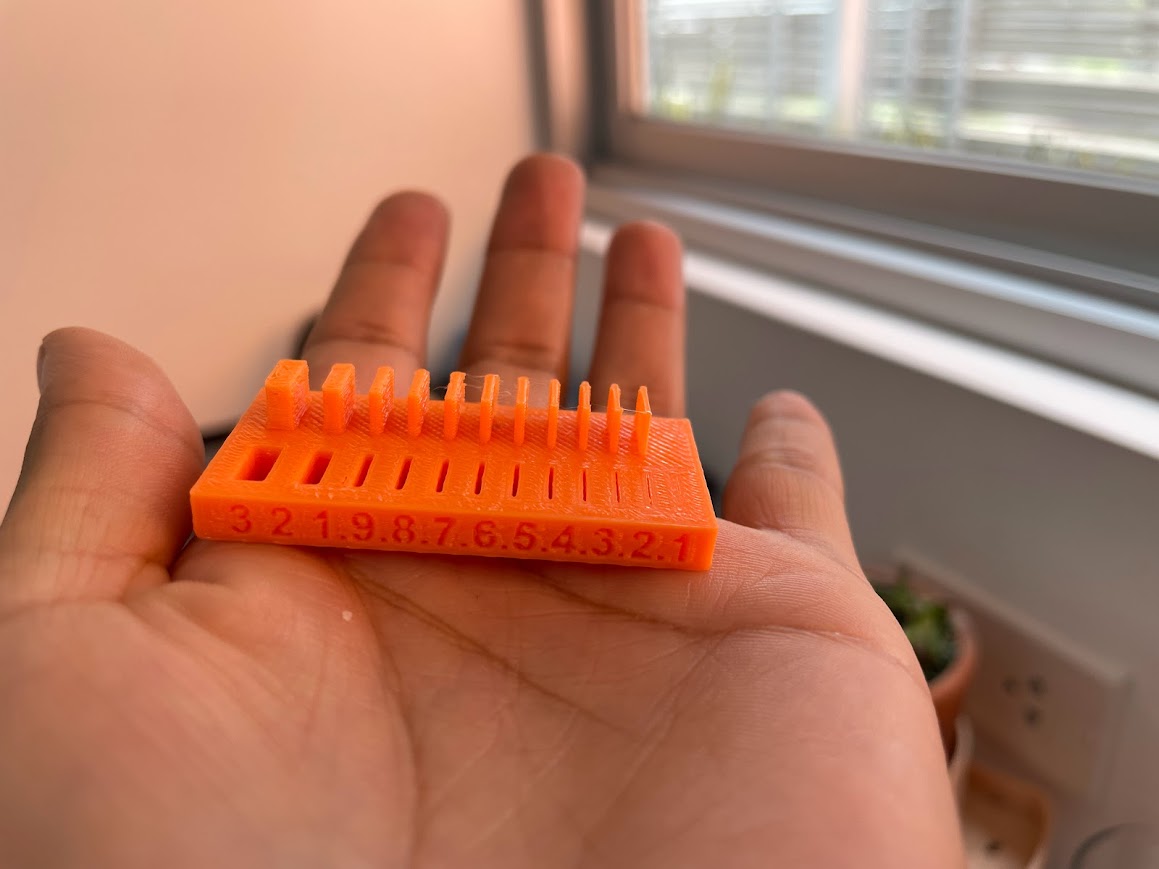
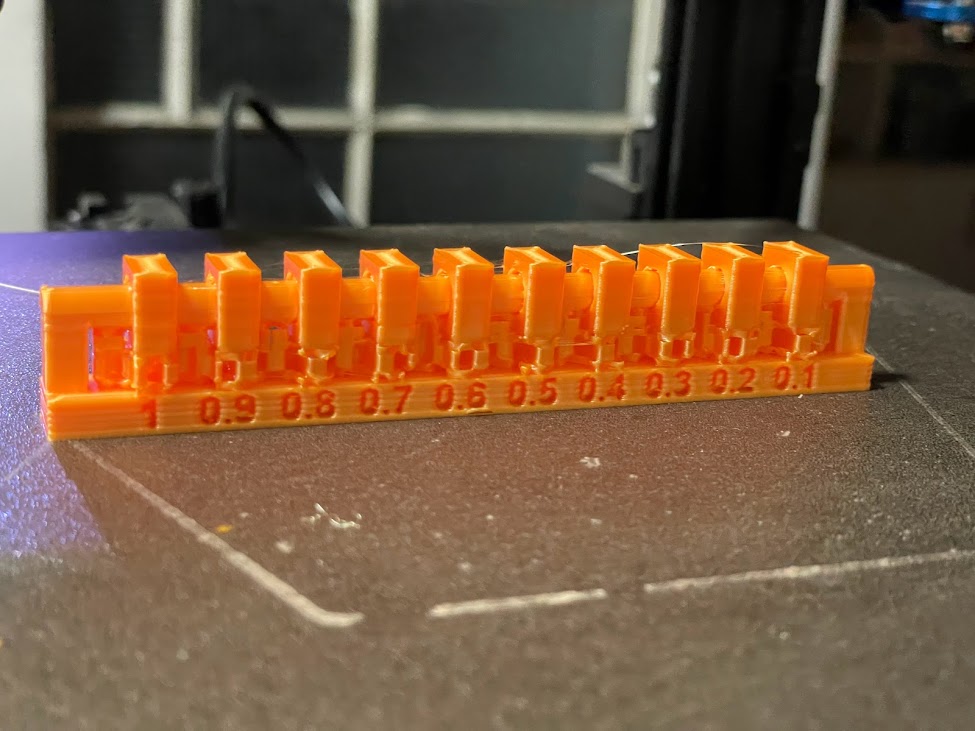
First impressions with the list Neil provided us with. I love it.
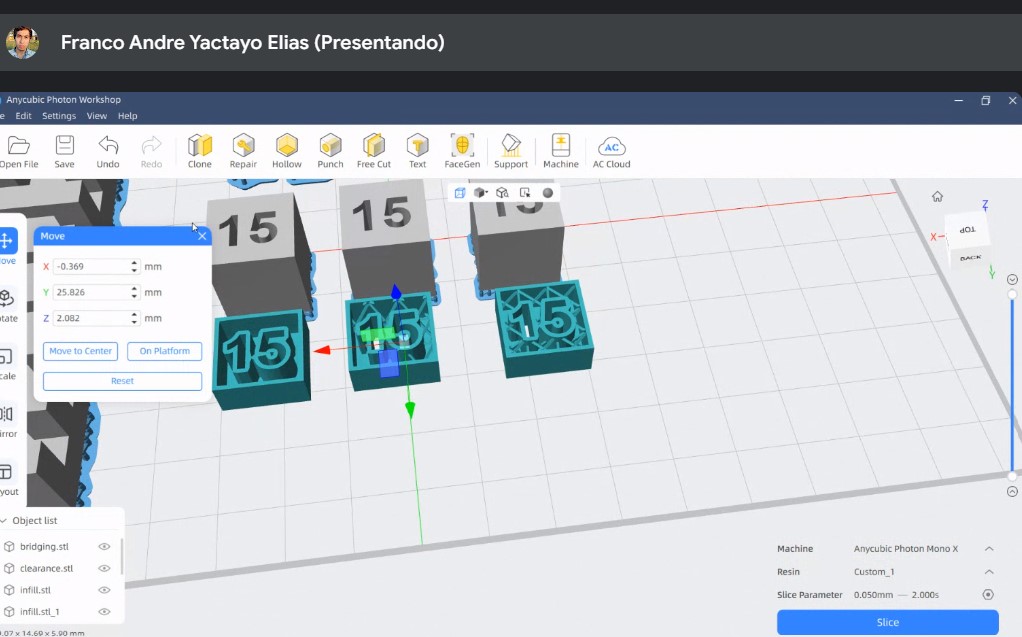
Here Franco explained how he did the 3D resin printing process.
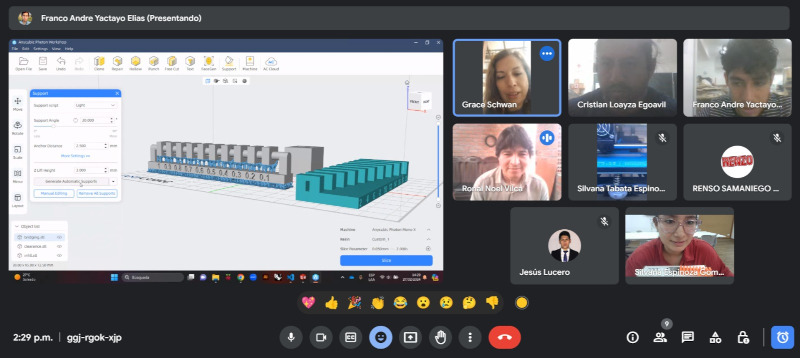
All listening to how we did our parts and seeing the test results.
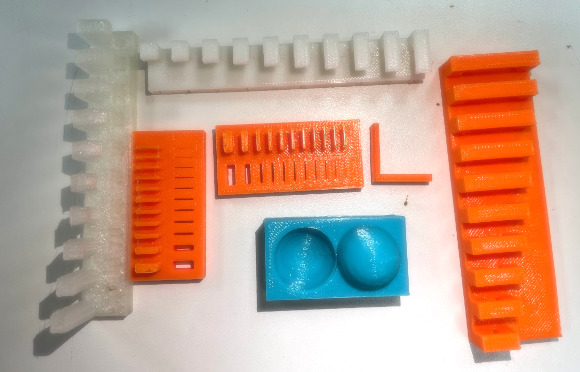
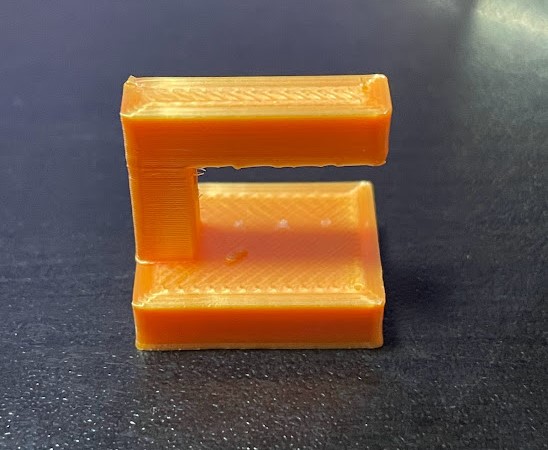
Unsupported
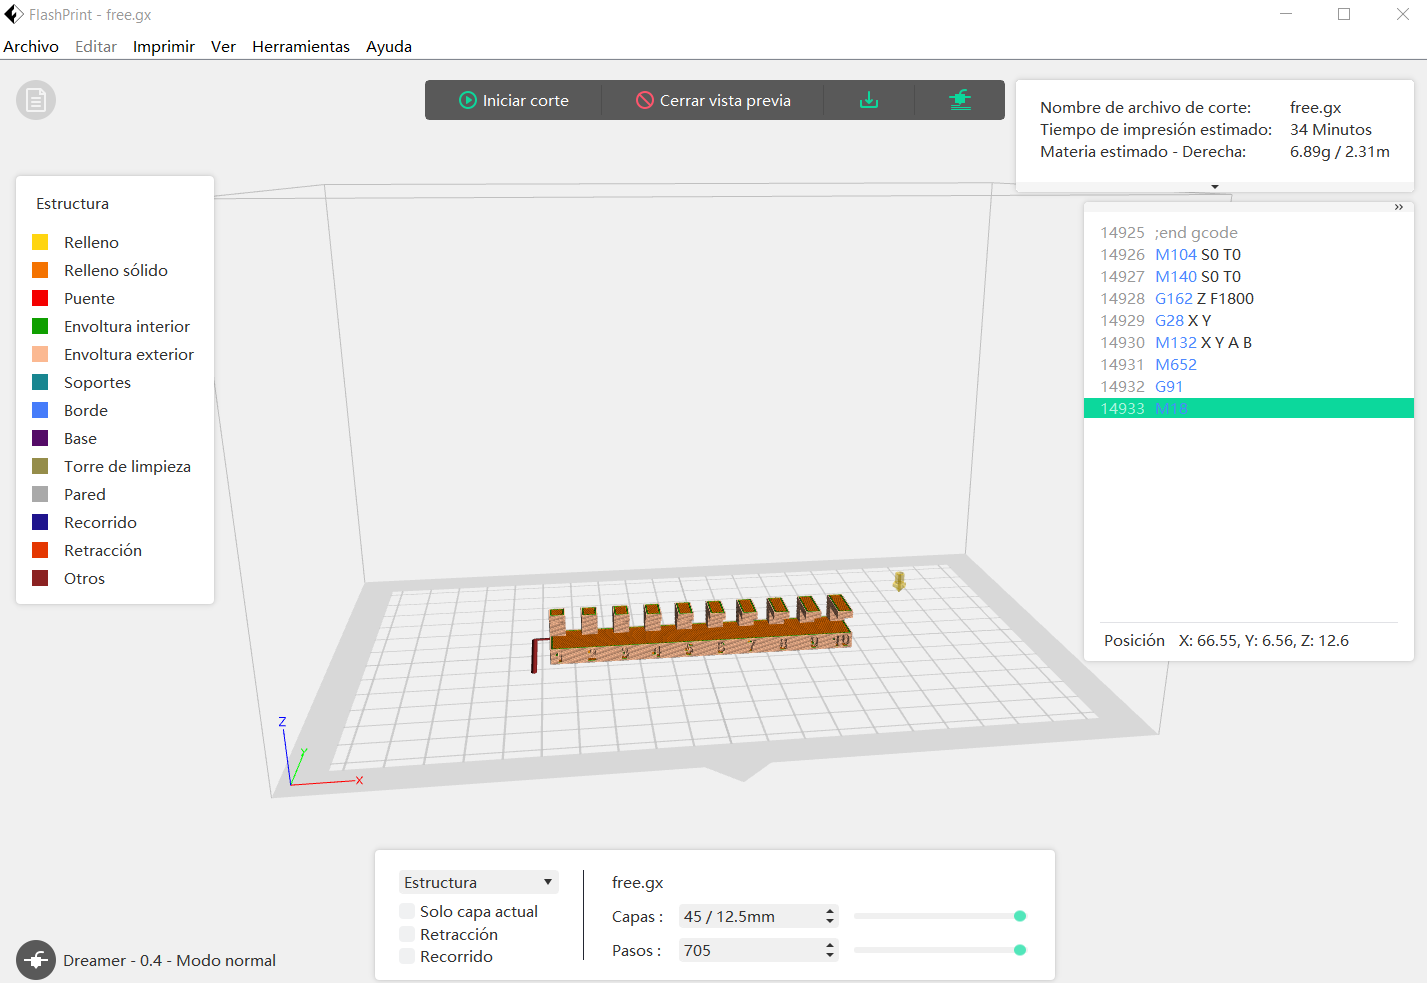
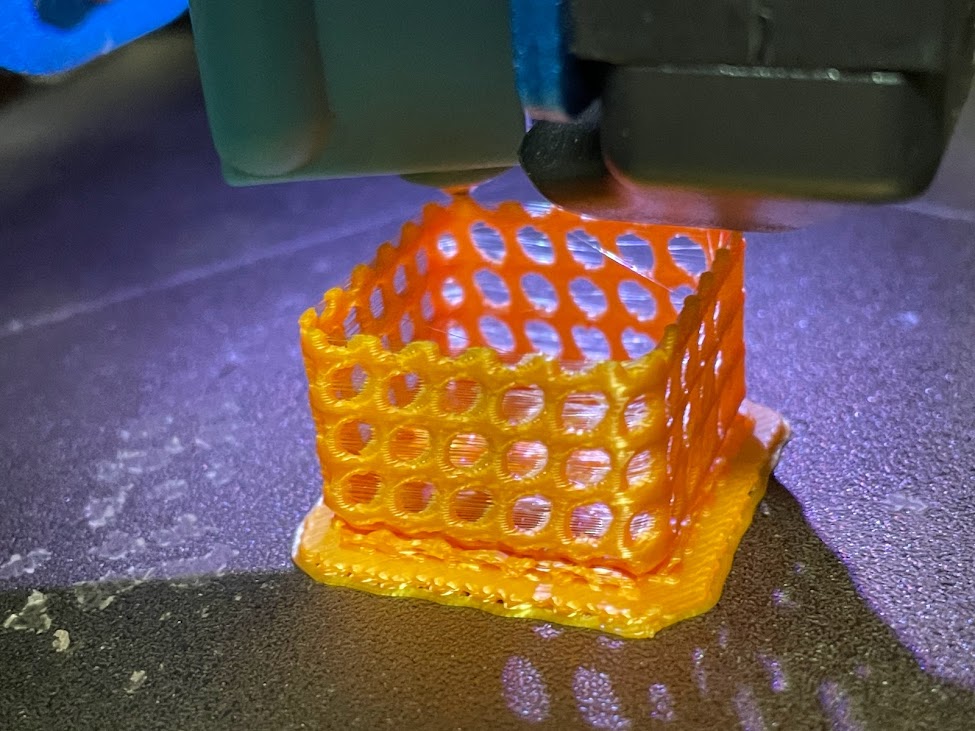
Seeing the best parameter for fast printing
We tried a faster speed and found that it did the same finish and quality but faster.
This piece we try to put little padding 10%.
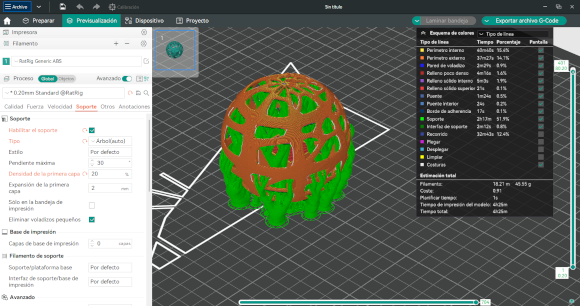
Supports
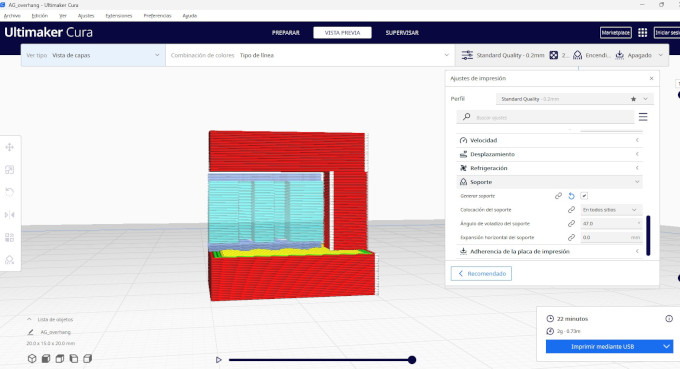
Slicer in Cura, since in these tests he used the Artillery Genius
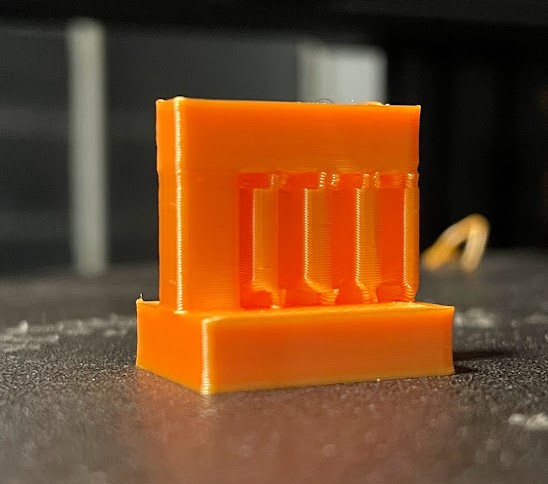
Part with bracket, it was easy to remove.
All listening to how we did our parts and seeing the test results. Weaverbird – Topological Mesh Editor
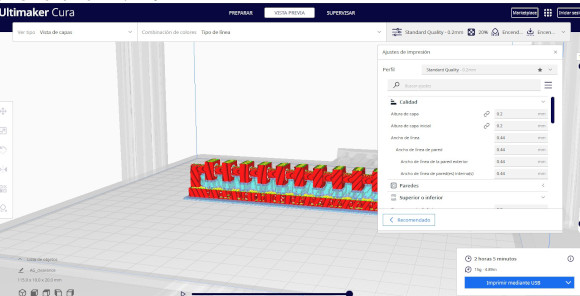
Seeing the support and the type of padding to make it easy to remove.
It was very difficult to remove the bracket, I even broke it T_T
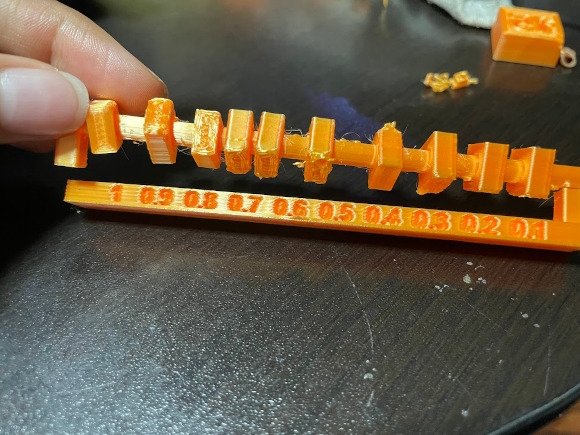
Here it is broken but functional, at least when it is thick enough to rotate on the shaft.
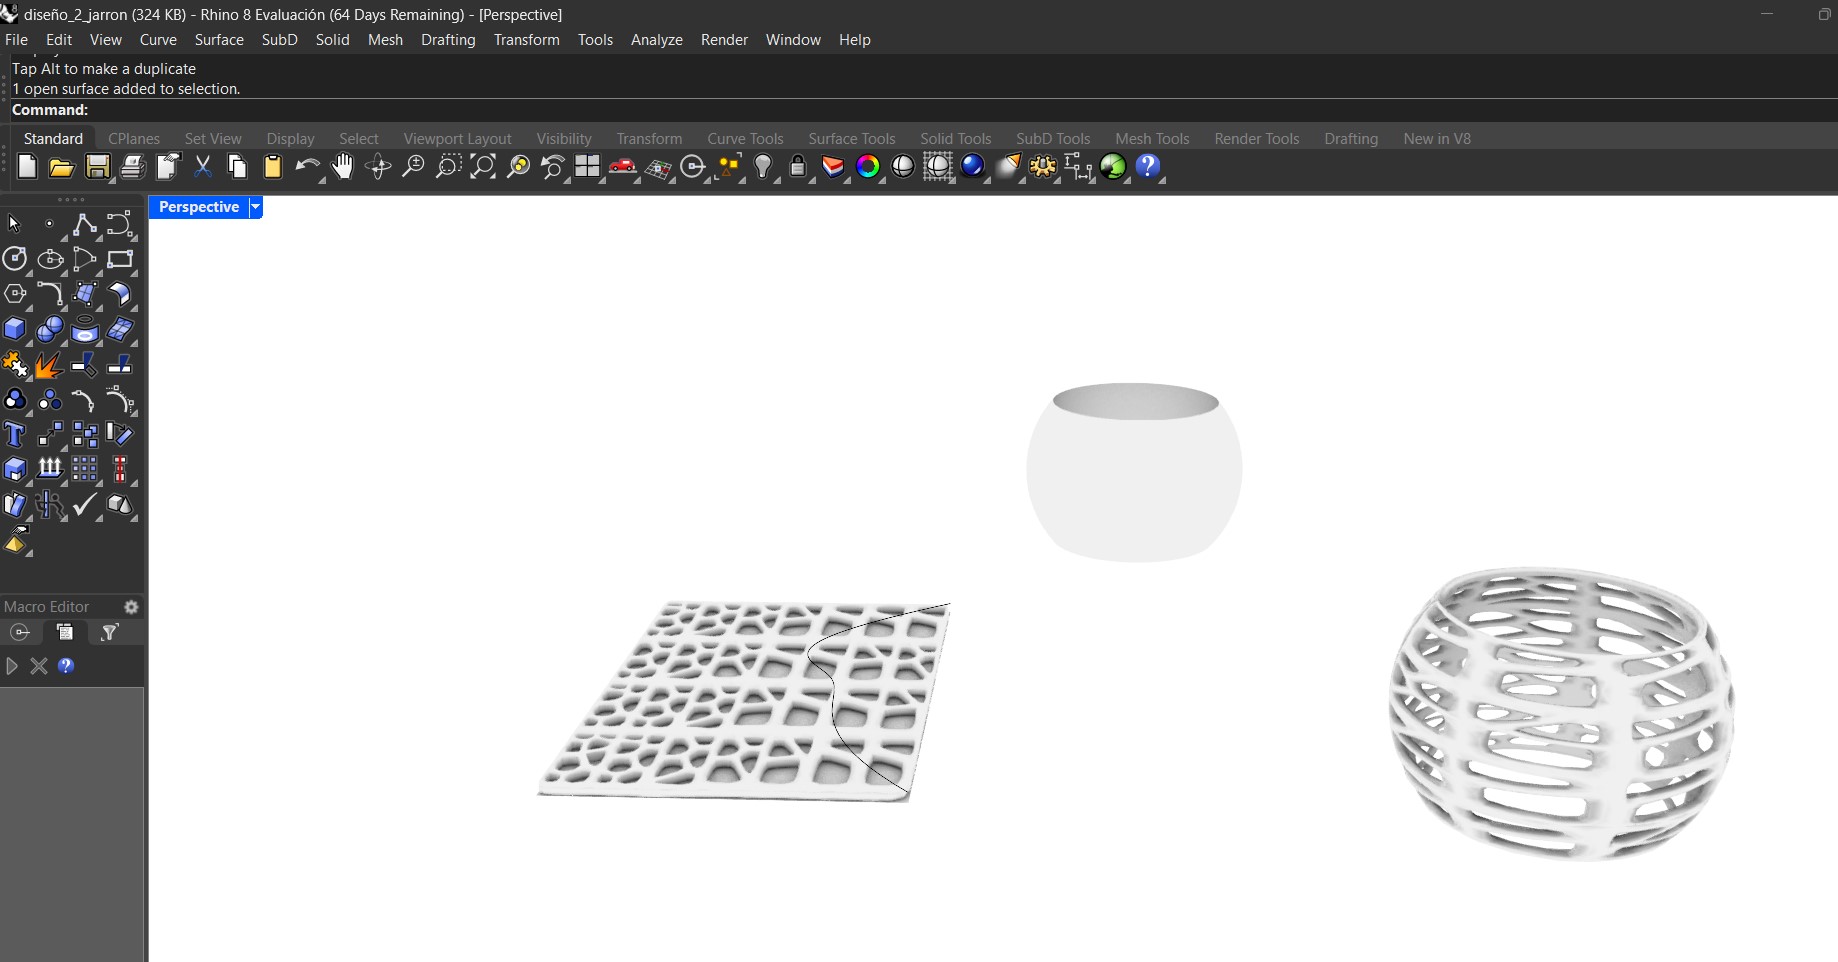
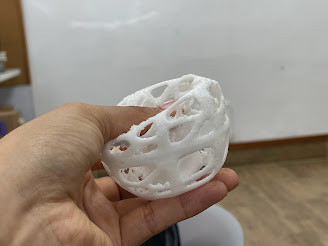
Design and 3D print an object
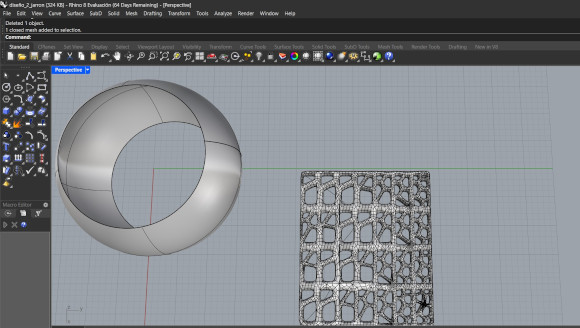
Rhino
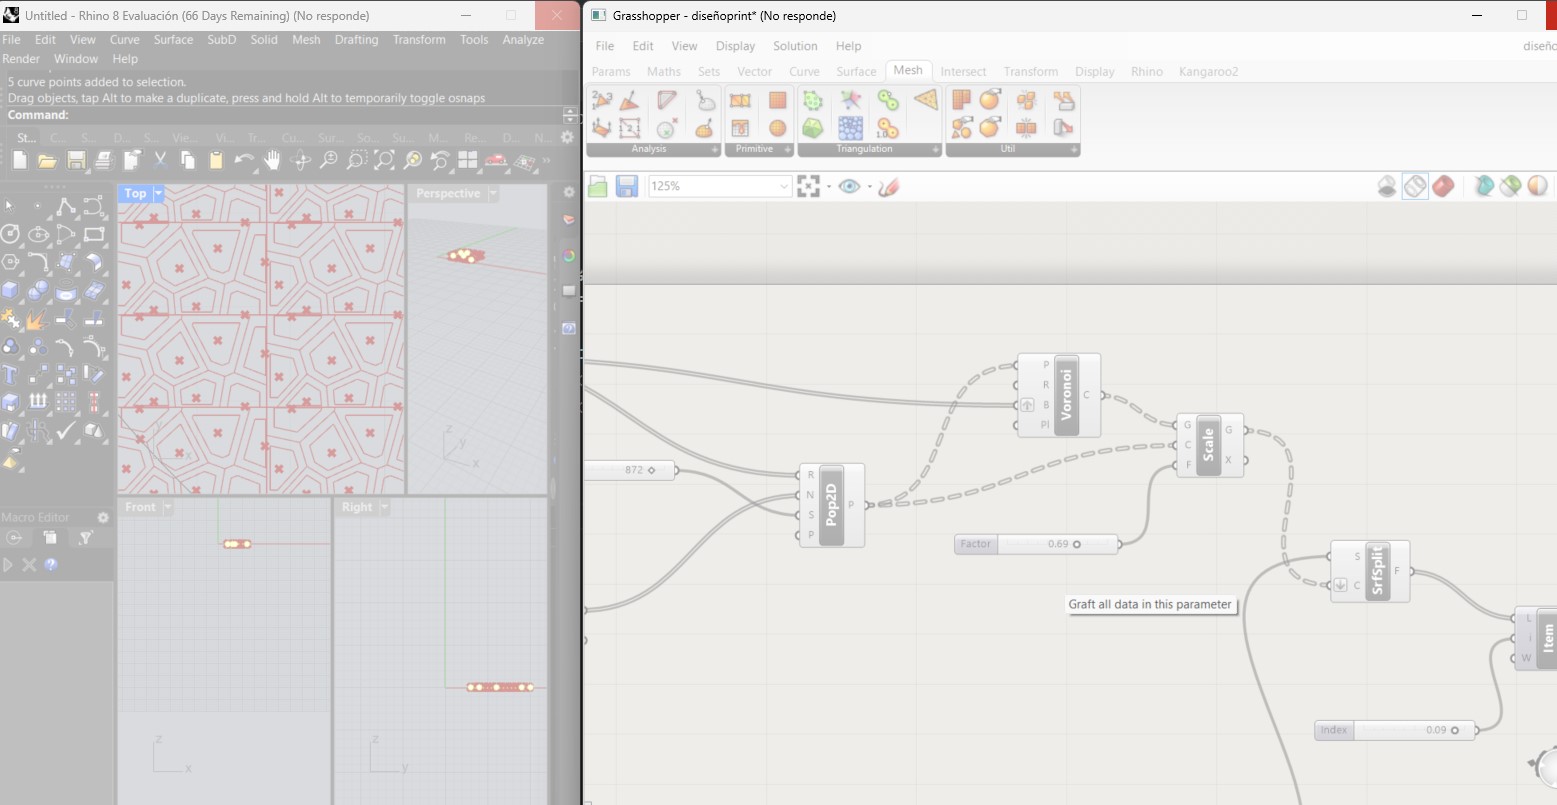
Grasshopper
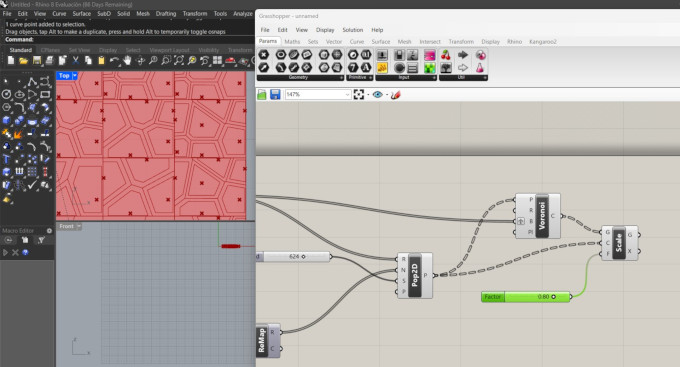
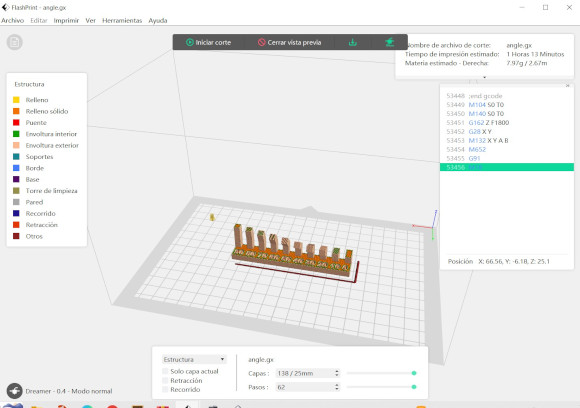
Designing a parametric part from grasshopper to be able to print.
I had already been designing for many hours, and I could go on for more, but my computer was no longer...
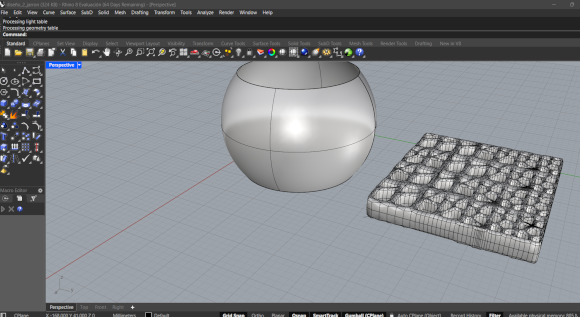
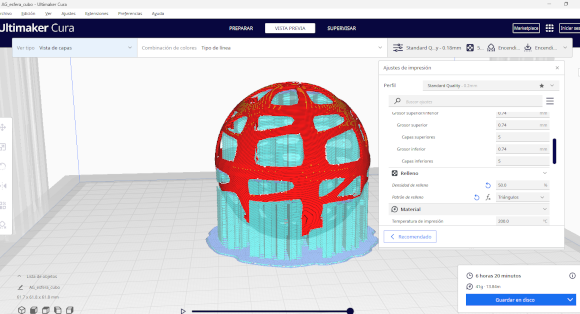
We can observe the solid object ready to put on the layer designed in parametric
I really like this view, I imagine many useful things I could do with this algorithm made in blocks.
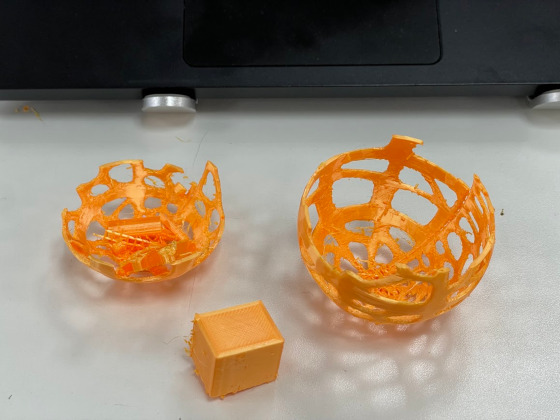
I had some problems when trying to make the union of the solid and the piece designed in parametric, since to do the overlapping action you required a base.
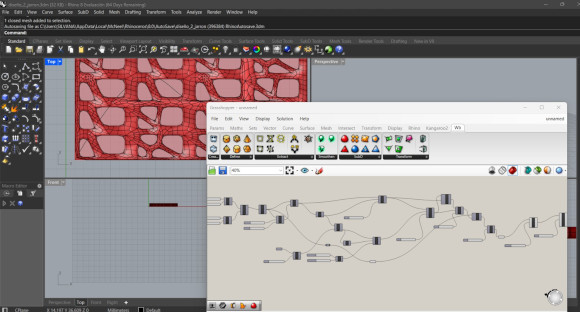
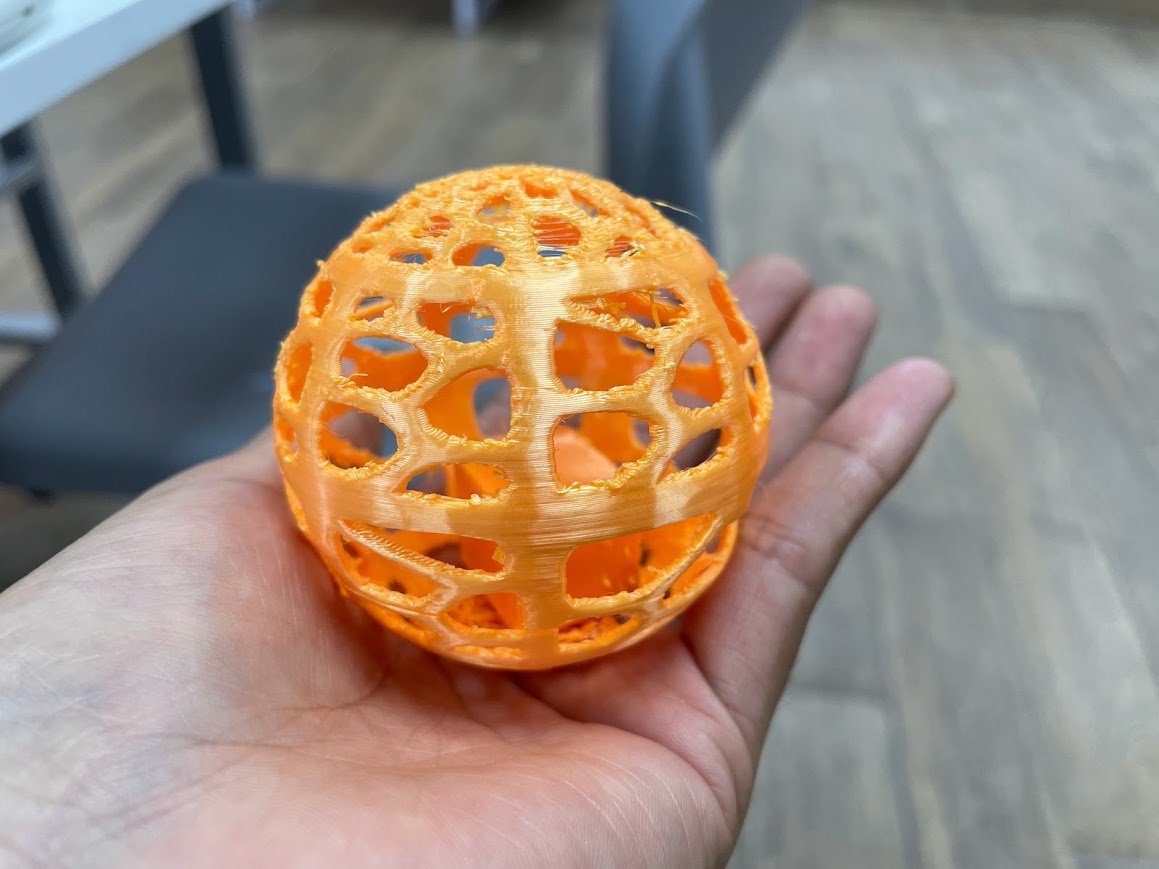
With grasshopper it is much easier to make this type of pieces, since it allows me to modify data to change the shape.
Tutorial
Archive Rhino
Grasshopper PRINT-PLA
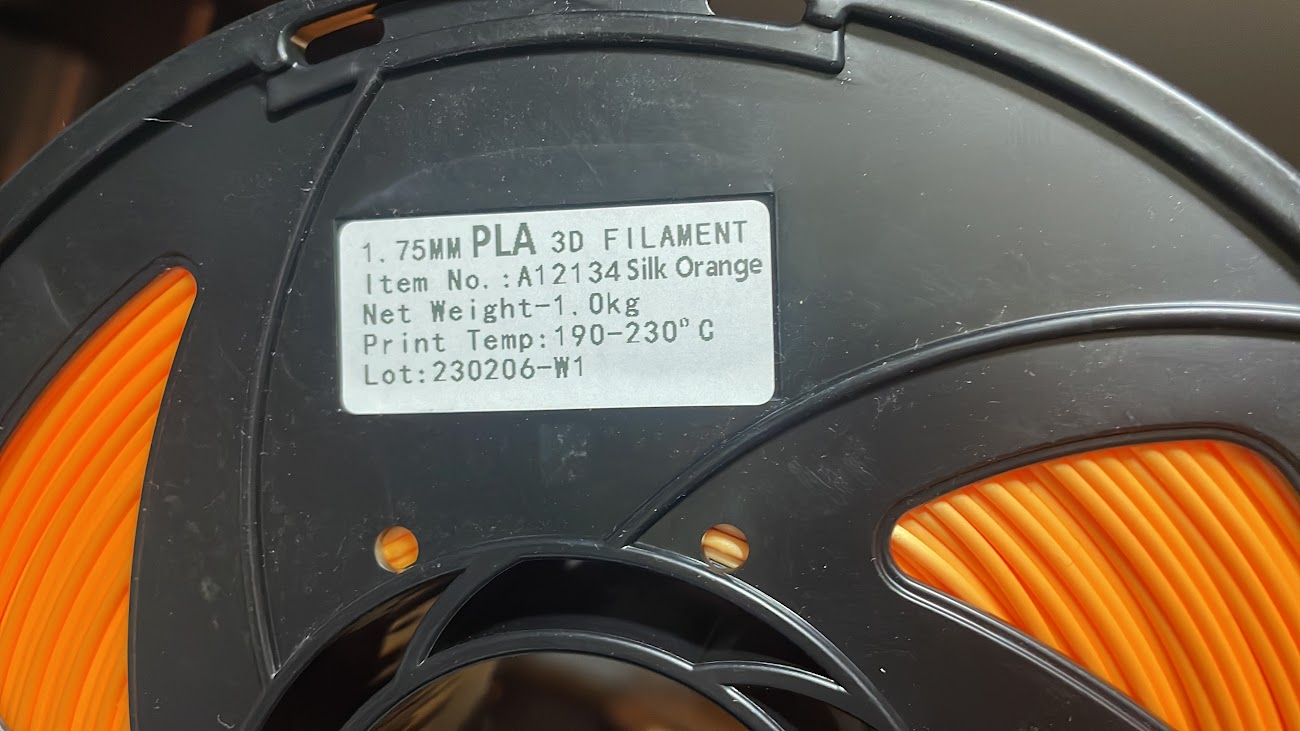
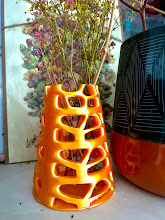
I chose this Silk PLA, it seemed like a good color to encourage me to make many objects.
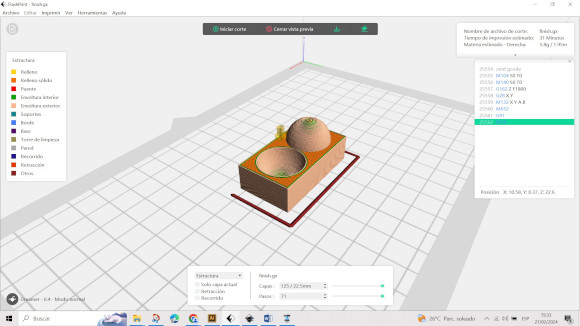
A good view of the design, before placing the solid
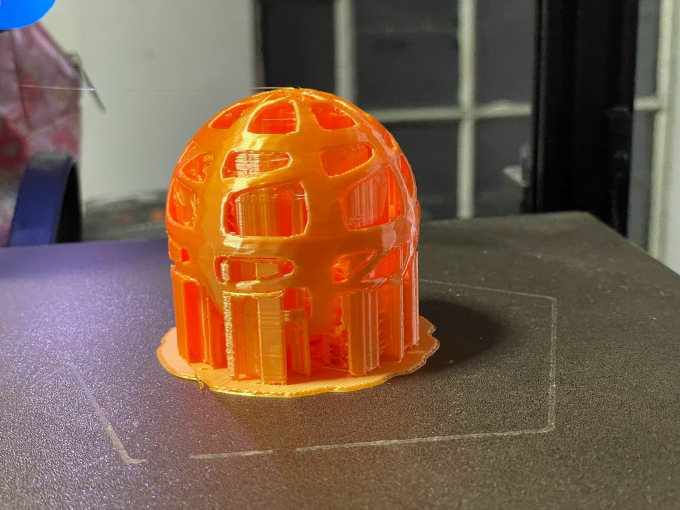
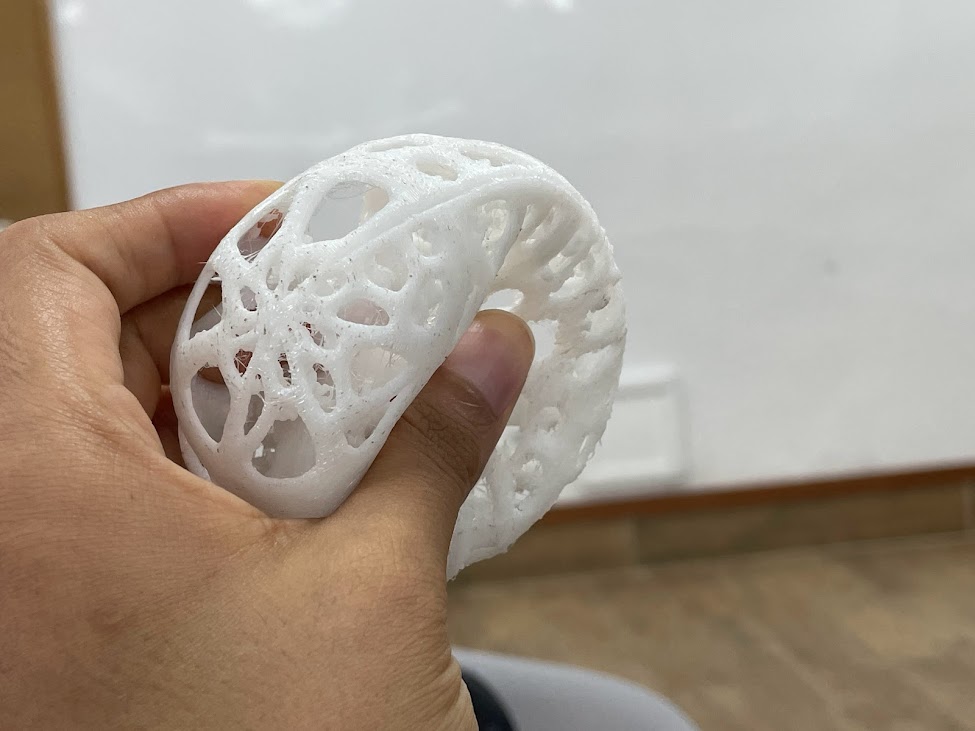
The printed piece, in this case, places a cube inside to give complexity to the design.
I chose this Silk PLA, it seemed like a good color to encourage me to make many objects.
A good view of the design, before placing the solid
The printed piece, in this case, places a cube inside to give complexity to the design.
Rhino
Grasshopper PRINT-eTPU
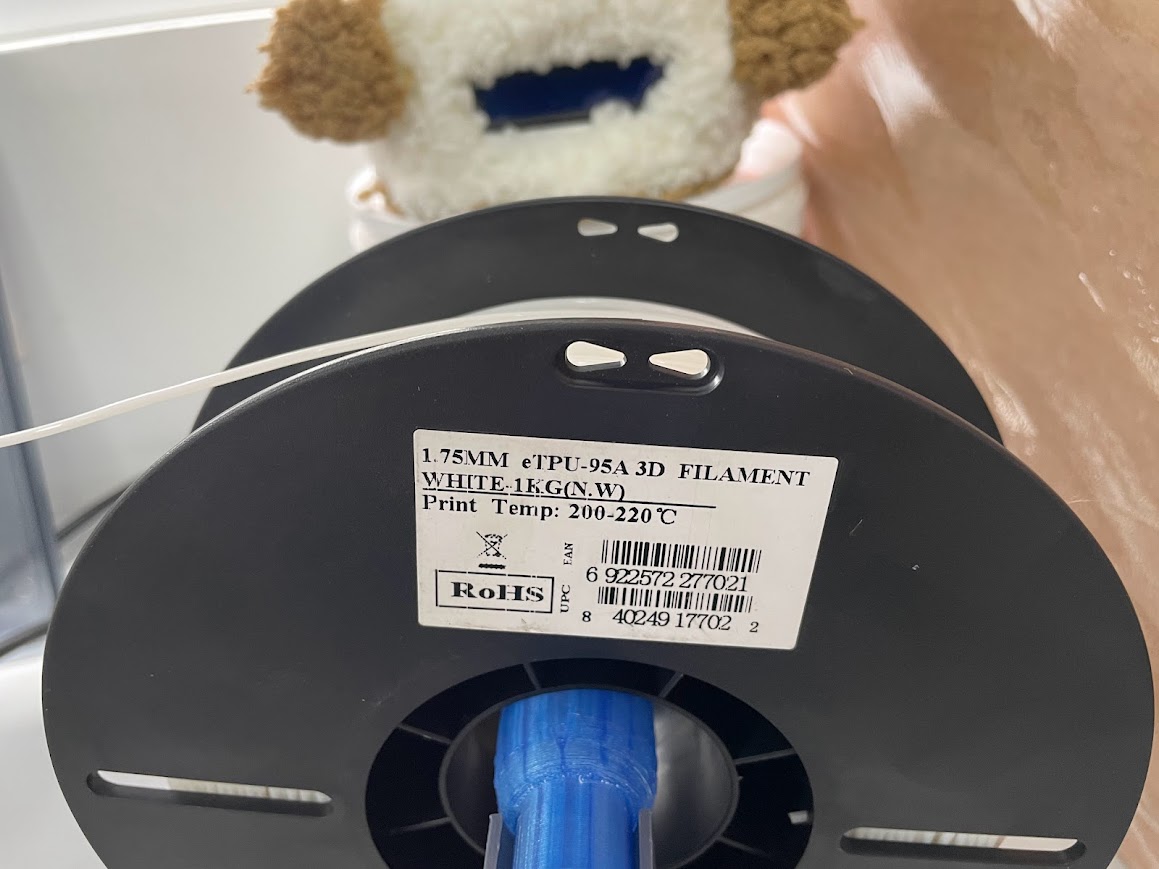
Work with white eTPU filament.
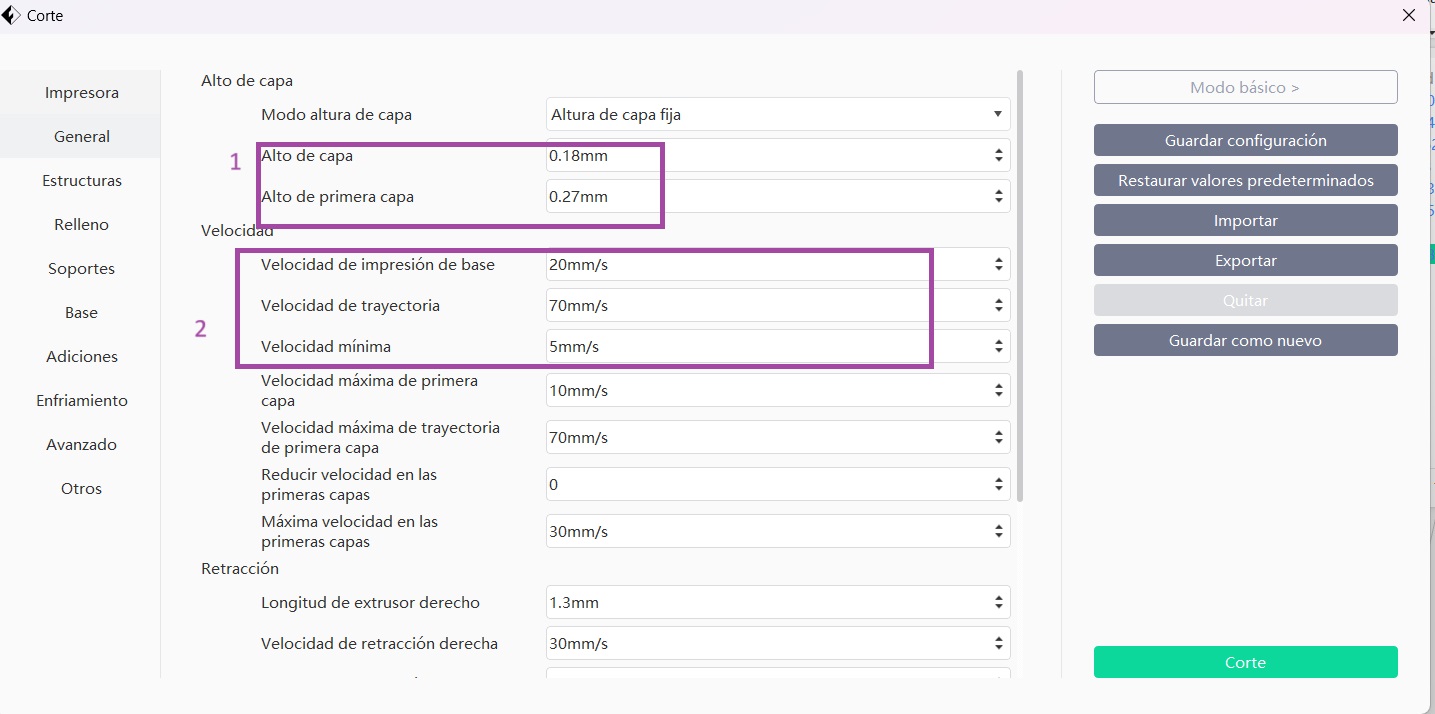
Here I was with the Flashprint laminator and modifying the parameters.
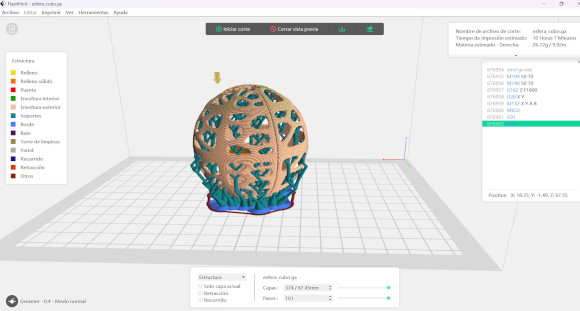
Place support on tree, I don't know if it was a good decision since removing it took a long time. but its de-stressing. Love!


Horrible, I still need to print my piece that I am designing in rhino T_T
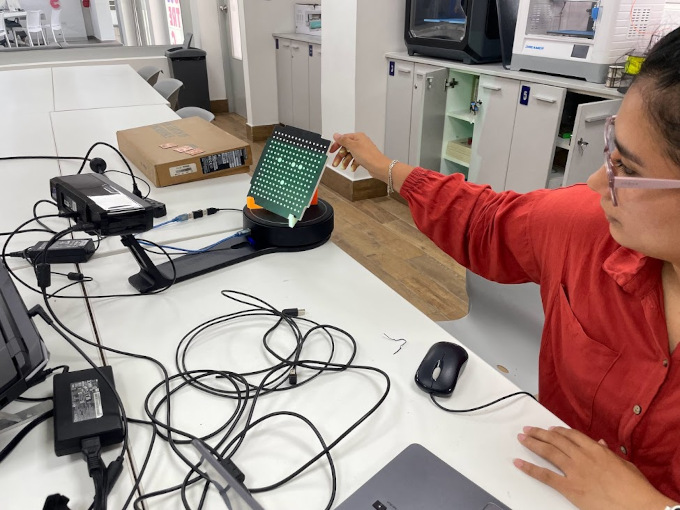
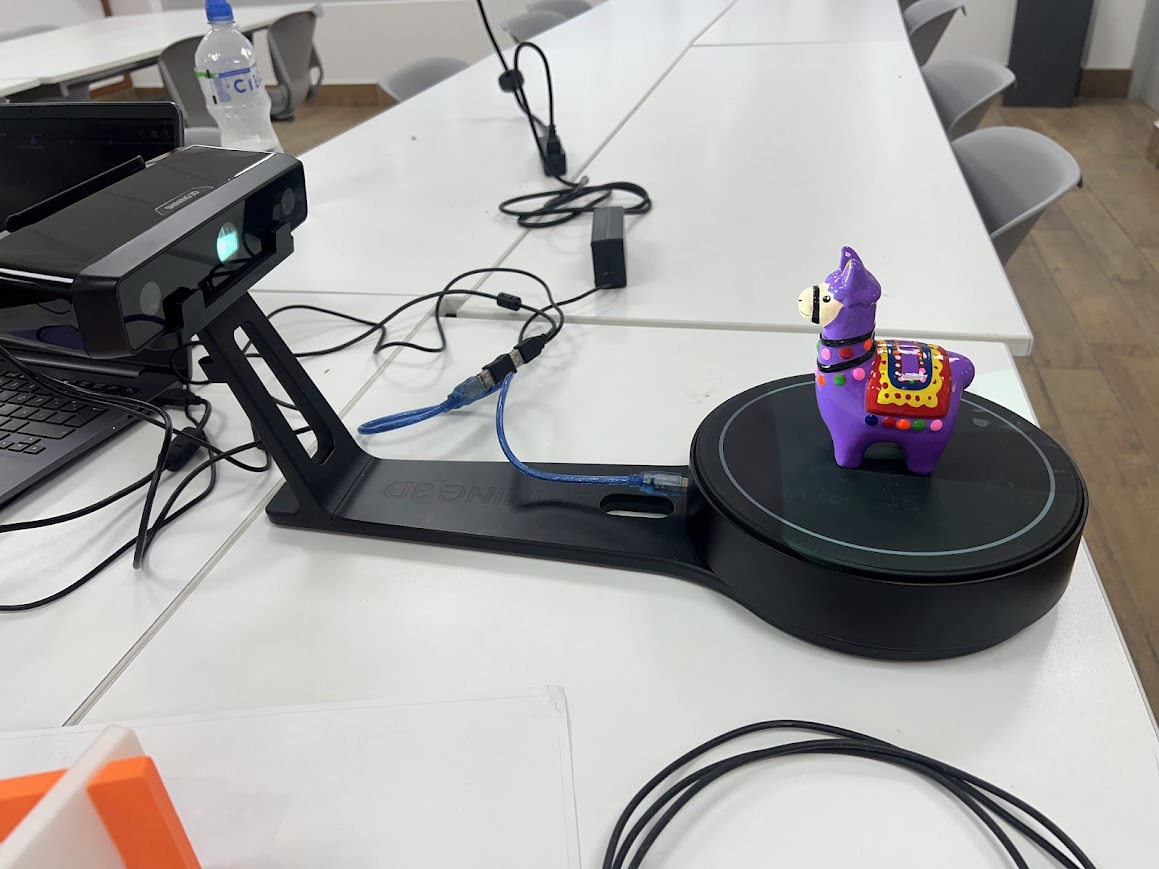
3D scan an object

I had to adjust while the program was indicating the positions of the points.

We can see how the base is visualized, and how it should rotate.
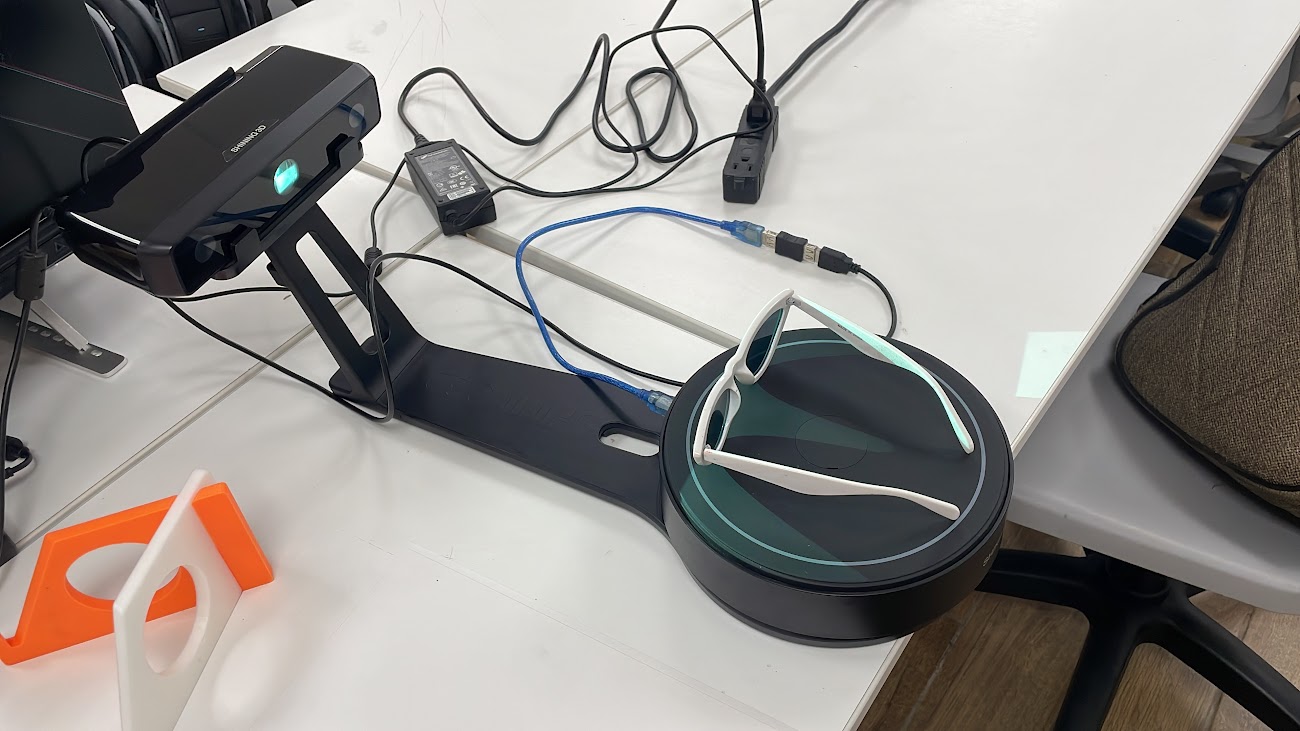
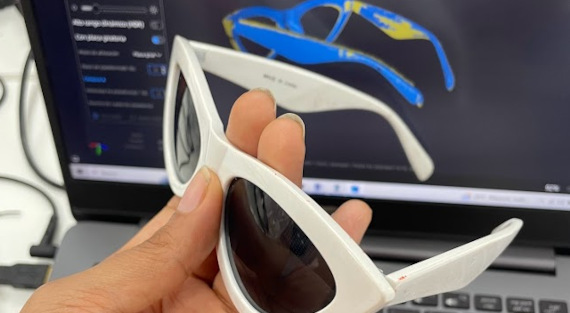
The scanner scanned white objects better, try with my sun lens.
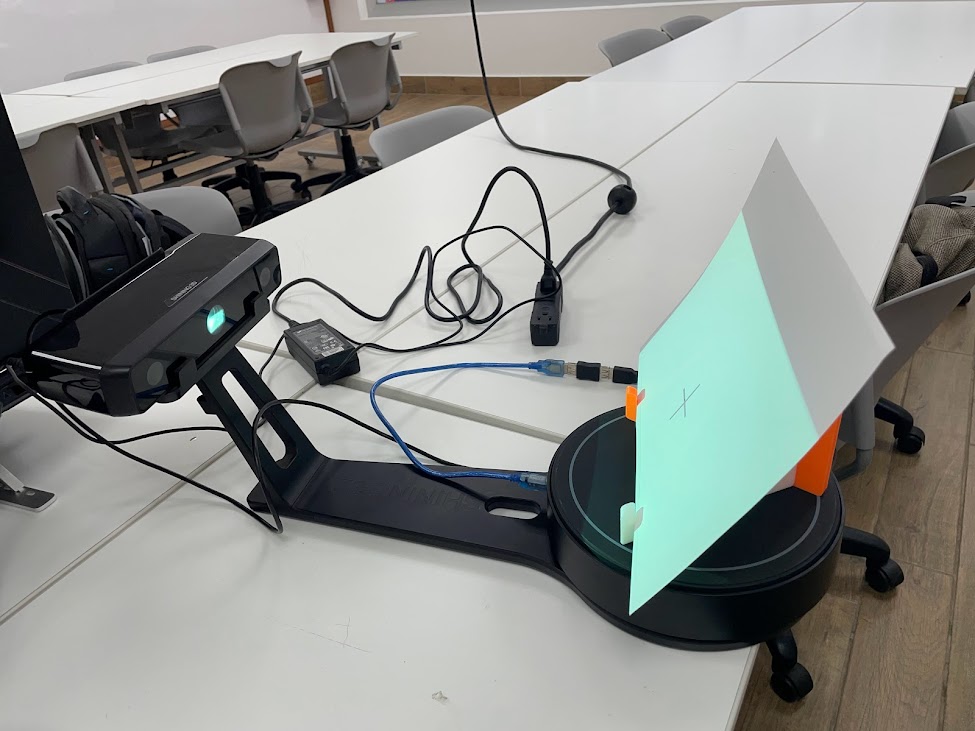
Here it tells me that I should place a white paper to complete the calibration.
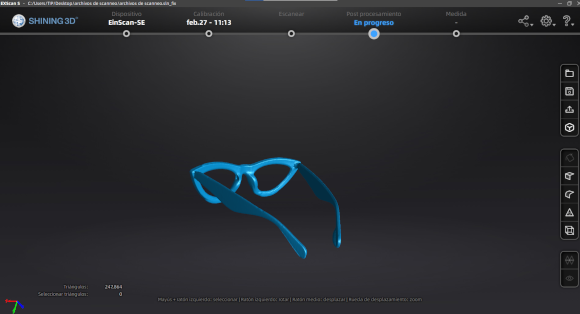
My glasses turned out beautifully

I scanned a multimeter, I promise to do more tests.
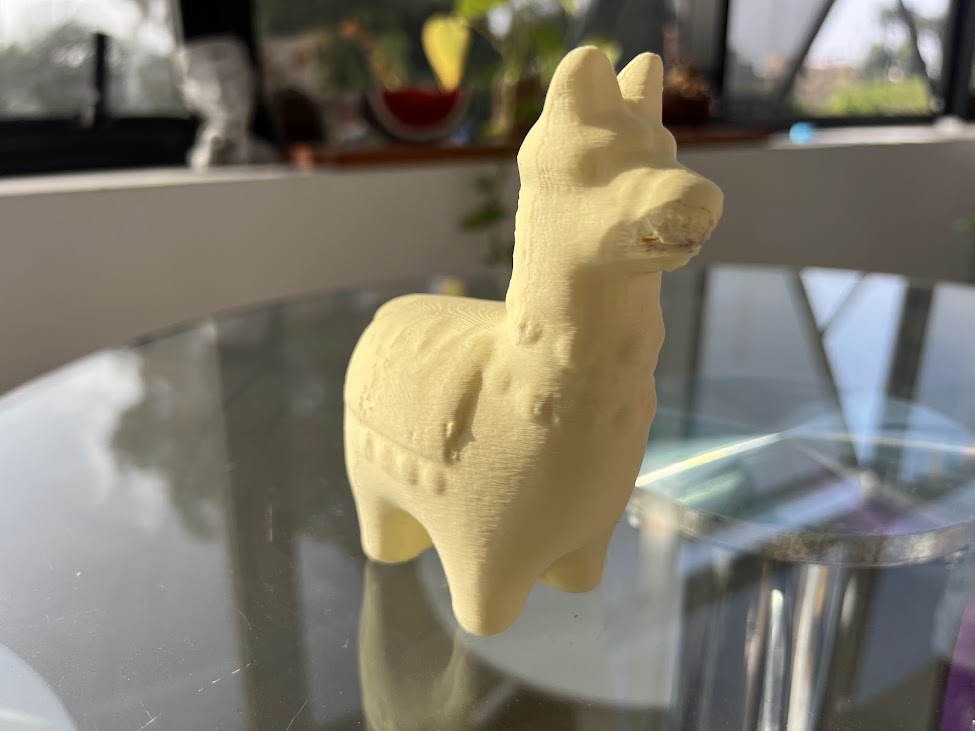
LLAMA
Here after weeks, I was able to have an object that I really wanted to replicate, a llama that I saw at a student fair in the university courtyard, now I love the result, even though I see that the printer did not take out some details.
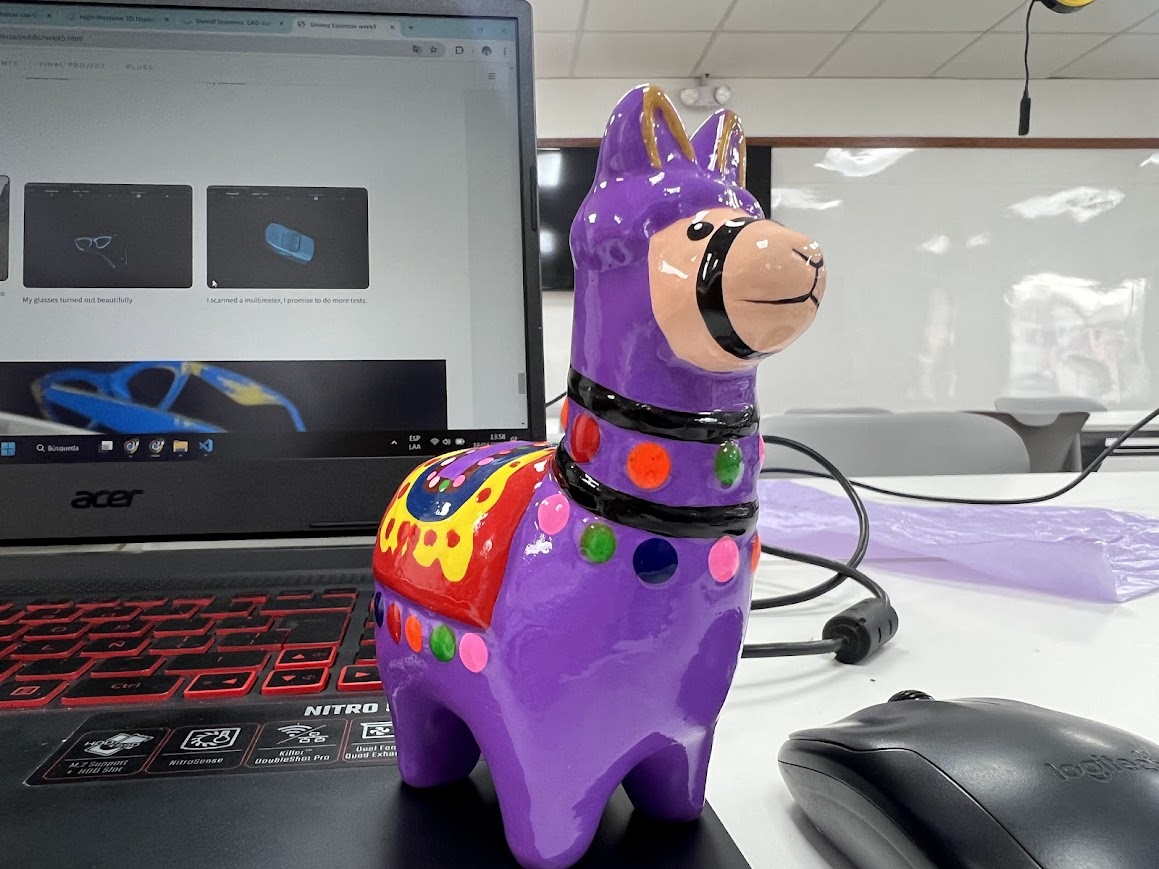
Beautiful my flame, waiting to be replicated
I used the dreamer so I think I will use another printer to see better results in my 3D printing
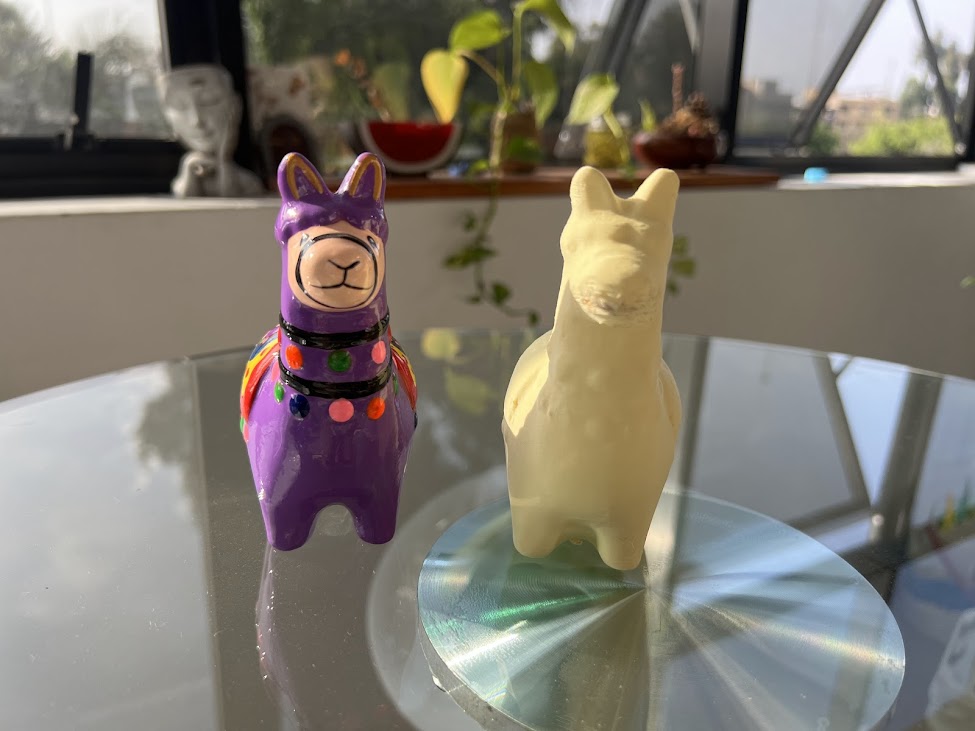
Comparing the details, even the surface with volume and some details came out very well, I really want to paint it.
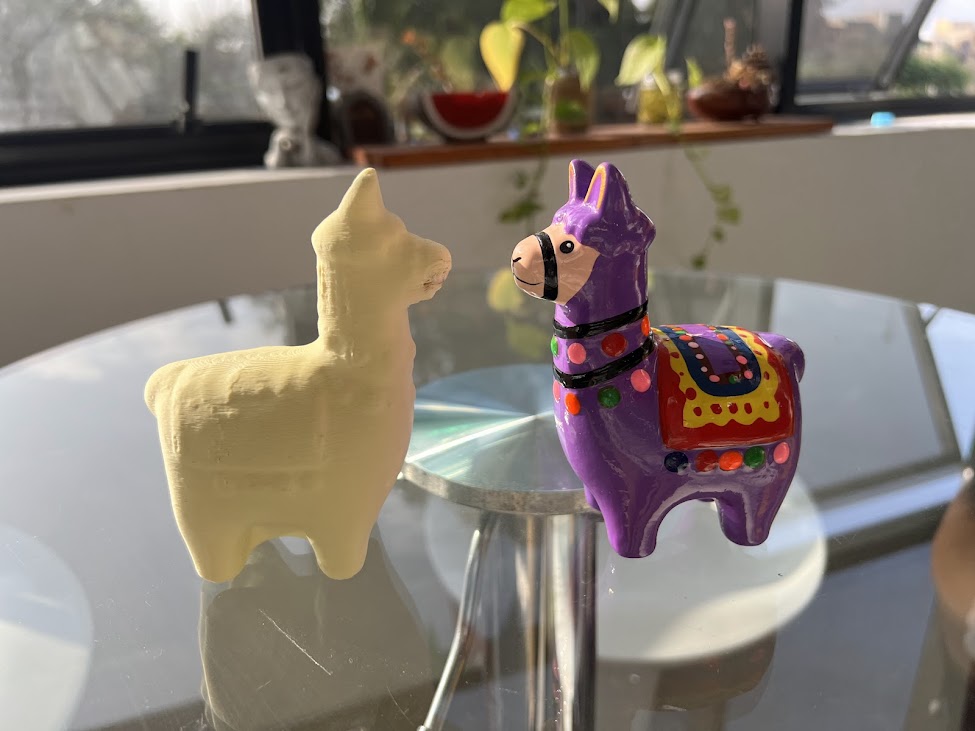
I really liked the result, I print other small versions with other printers to see the difference, and if they come out in better quality, I appreciate that the dreamer required maintenance, but I still loved the result.