

Background
It is a requirement to complete a final project in order to graduate from fab academy. AT the beginning i had three potential project ideas and i was hoping to work on one of the as my final project. All my ideas are based on their potential market available in Nigeria and the feasibilty of making more of them after my FabAcademy training. the projects are
- Waste bin seperator
- Thumb print control locker (TouchGuard)
- Art carving of map of Nigeria
At the end of The day i decided to work on TouchGuard which is a thumbprint based locker system and i am really looking forward to making it come to reality.
TouchGuard
|
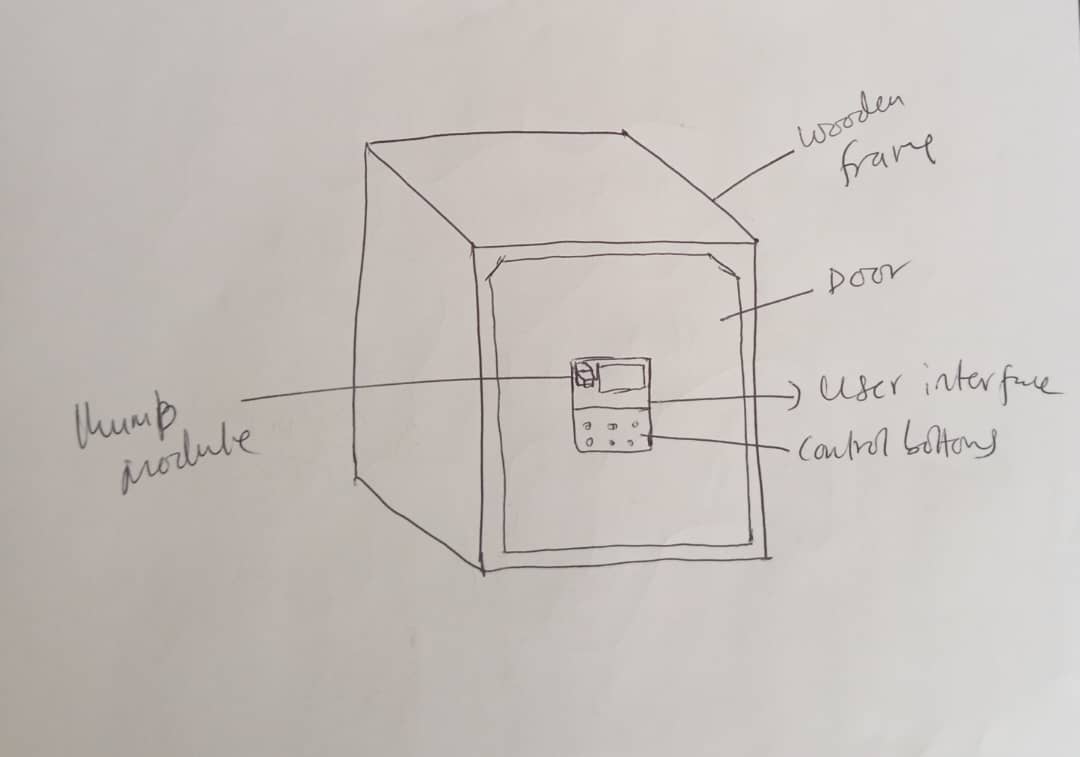
A locker or small cupboard is often used to keep/store posessions. In various lab a locker is used to keep some useful files or components for saftey. Most at times key to the locker is shared between few selected individuals for accessing it. However Two problem arises from such situation:
To solve these issues a digitalise locking system can be made with a thumb print sensor that can only allow registered users access to contents and also solve the issue of missing keys or cylinder replacements The locker will be made of wooden frame, and will have the following functions:
|
  |
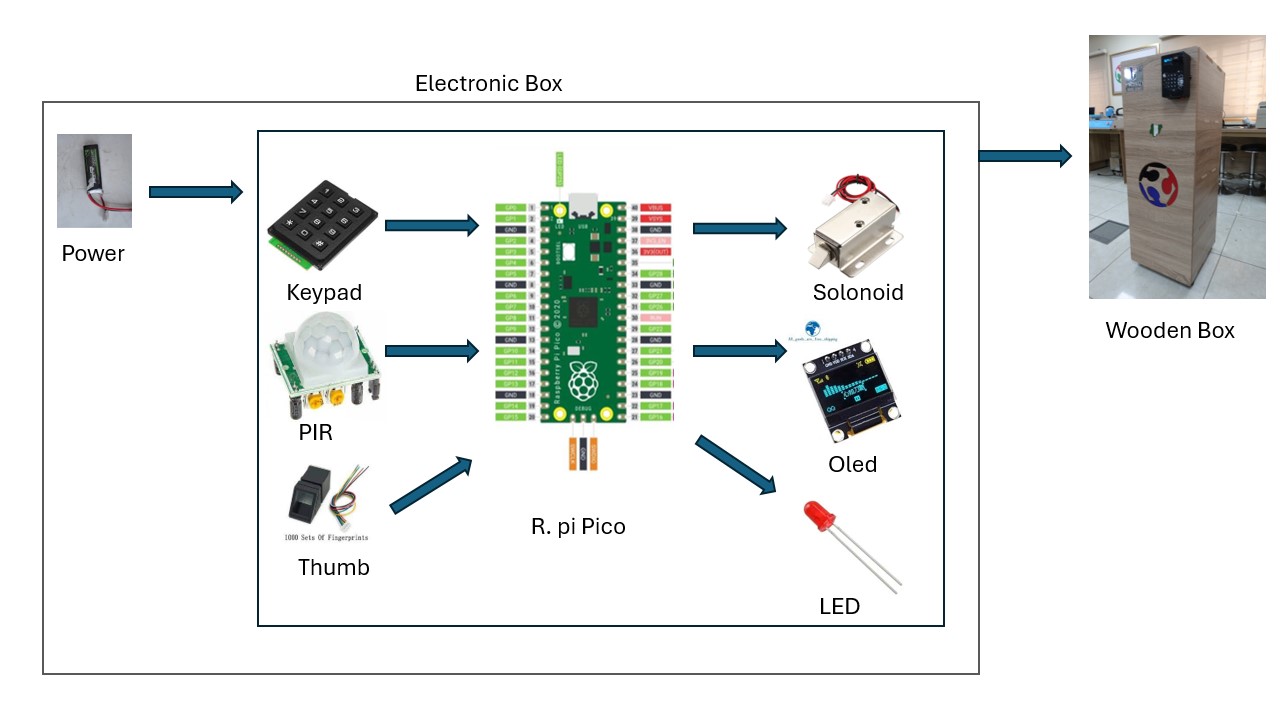
SYSTEM DIAGRAM
I did two versions of my final project, both similar in operation and design but different size. One is to be kept at fablab kannai and the other at Abuja Fablab 1.0, The bigger version can be found by visiting Final Project
Version 1
I will be discussing the different aspect of this project under the following headings:
- Box (body) design
- Control box design
- Electronic design and programming
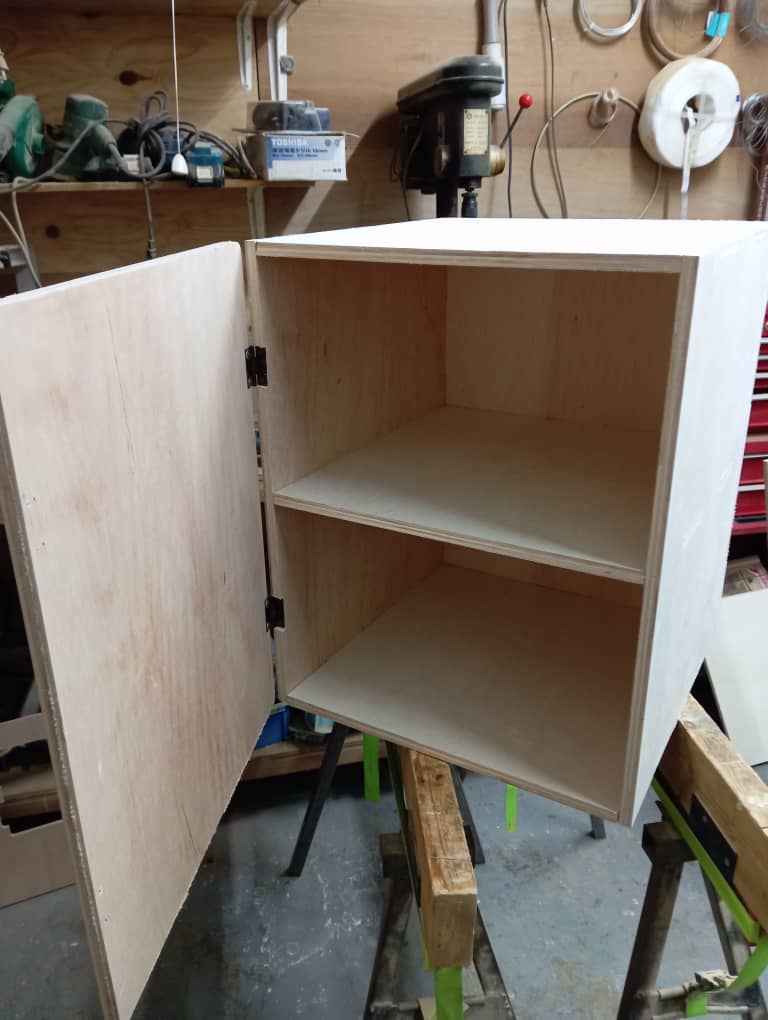
Box (Body) Design
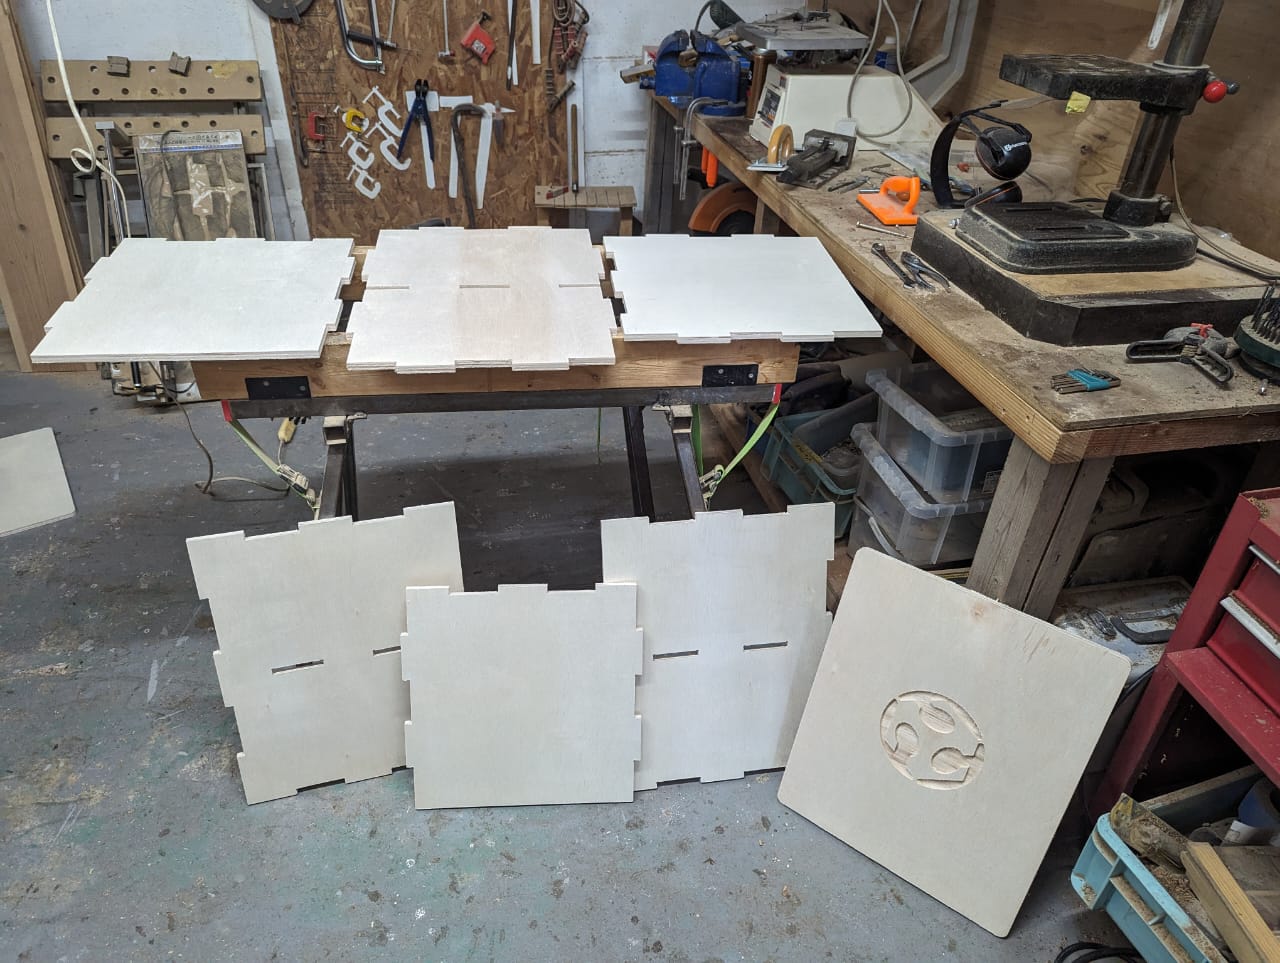
The body of my final project is made of wood hence i used a large CNC for cutting out the different parts before assembly. For details on how the processes were carried out, you can consult my Computer controlled machining assignment. The box is of the following dimensions:
- Height = 500mm
- width = 400mm
- Breadth = 400mm
- material Thickness = 12mm
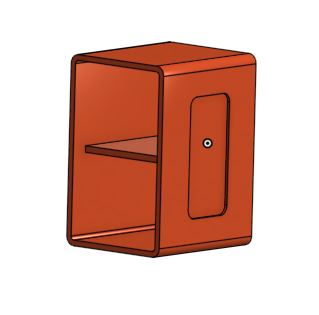
Control box design
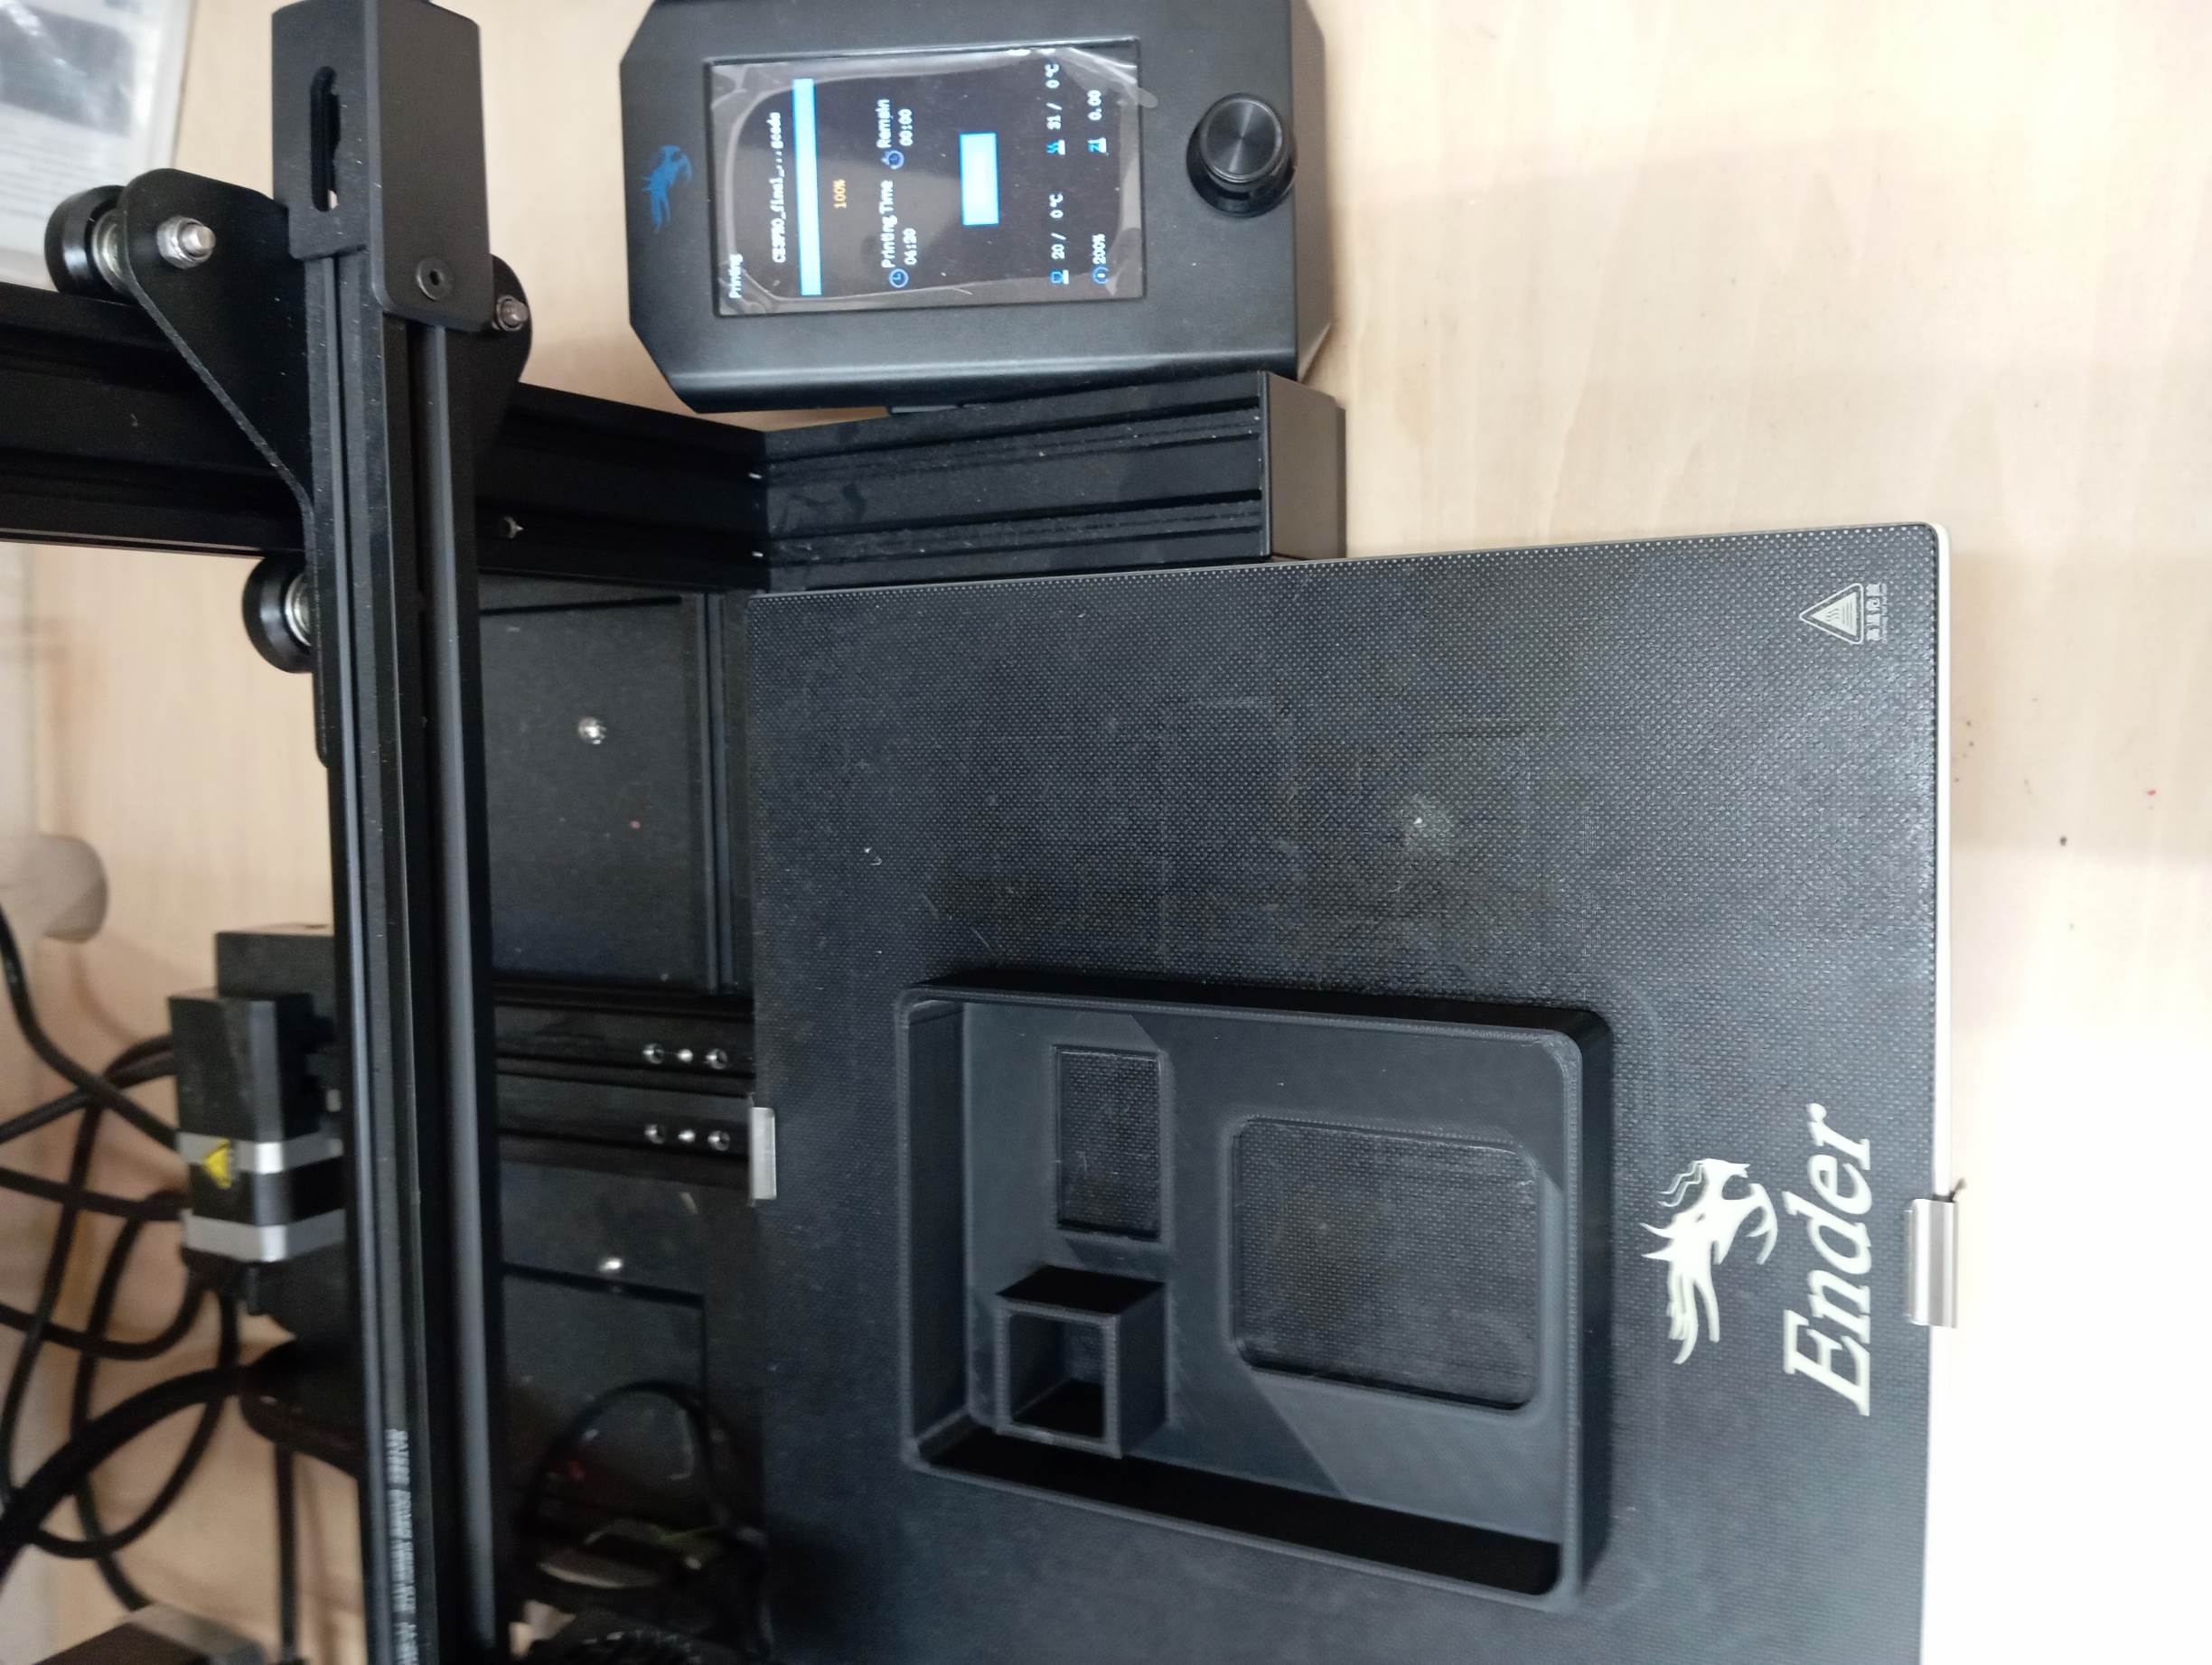
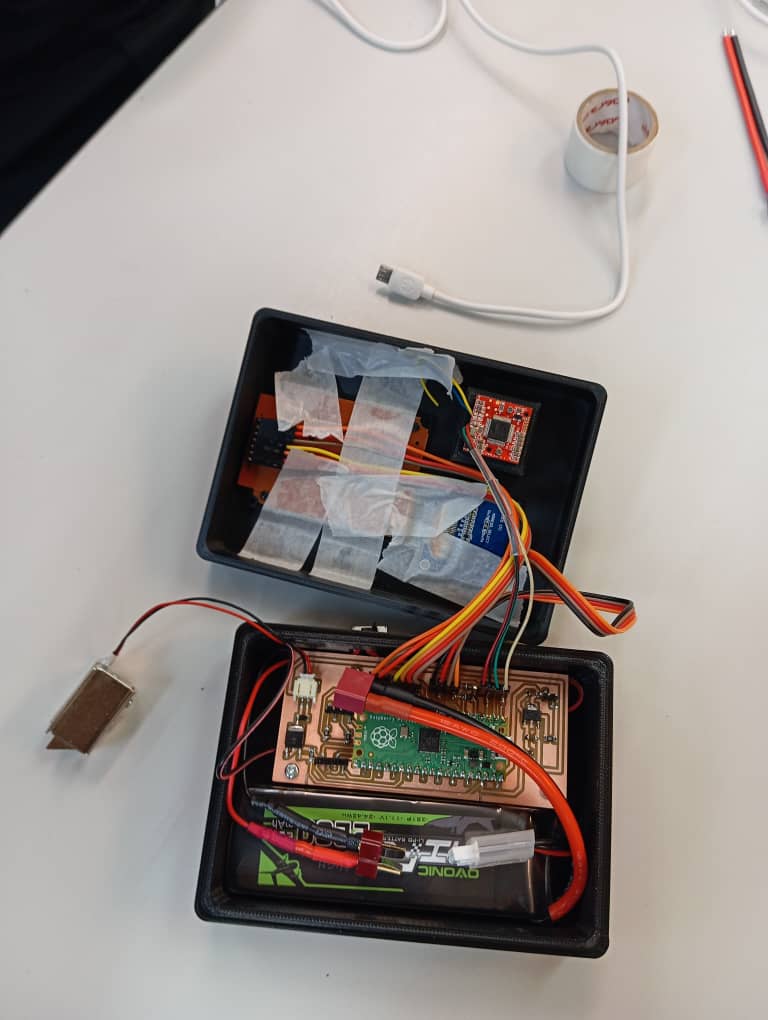
The control box for electronics is 3D printed. Details about the process can be found on my 3D printing assignment week
Electronic design and programming
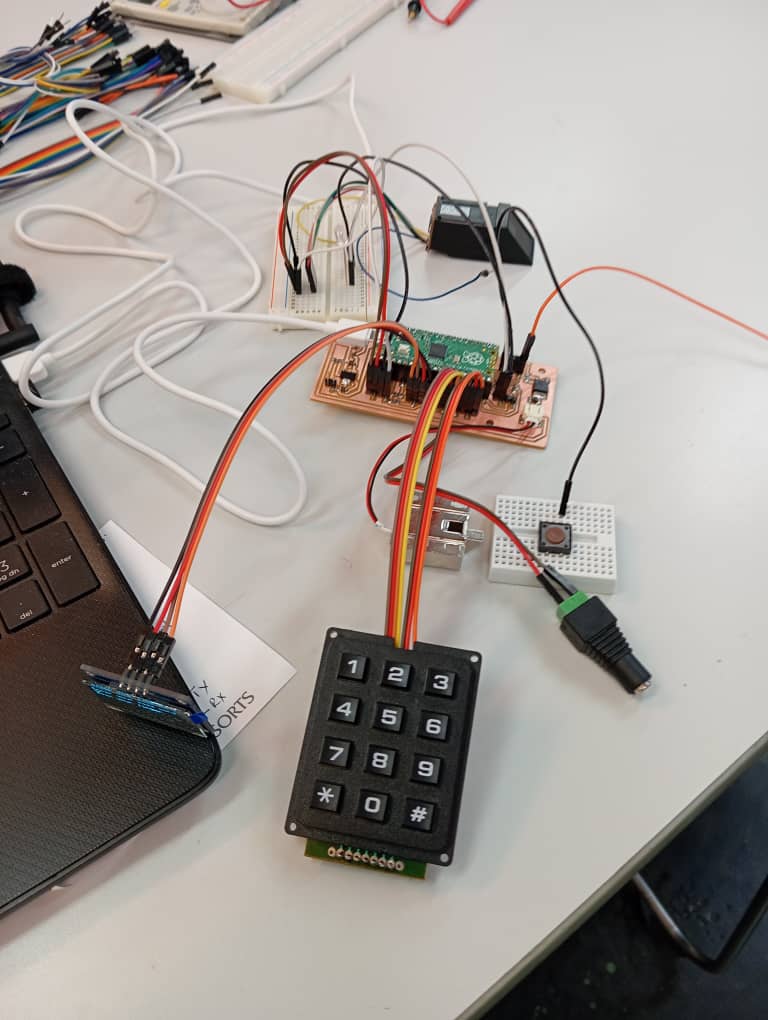
For my electronic circuit board. I made a board that includes pin connections for all the input and output devices i needed for my final project. These are:
- Keypad
- Fingerprint sensor
- Oled display
- pico board
- Power supply
- required resistors and capacitors
The following references shows details on how the electronic production and programming is done
I connected all the input and output devices together on the board and then write a general code for the whole system using the arduino IDE.
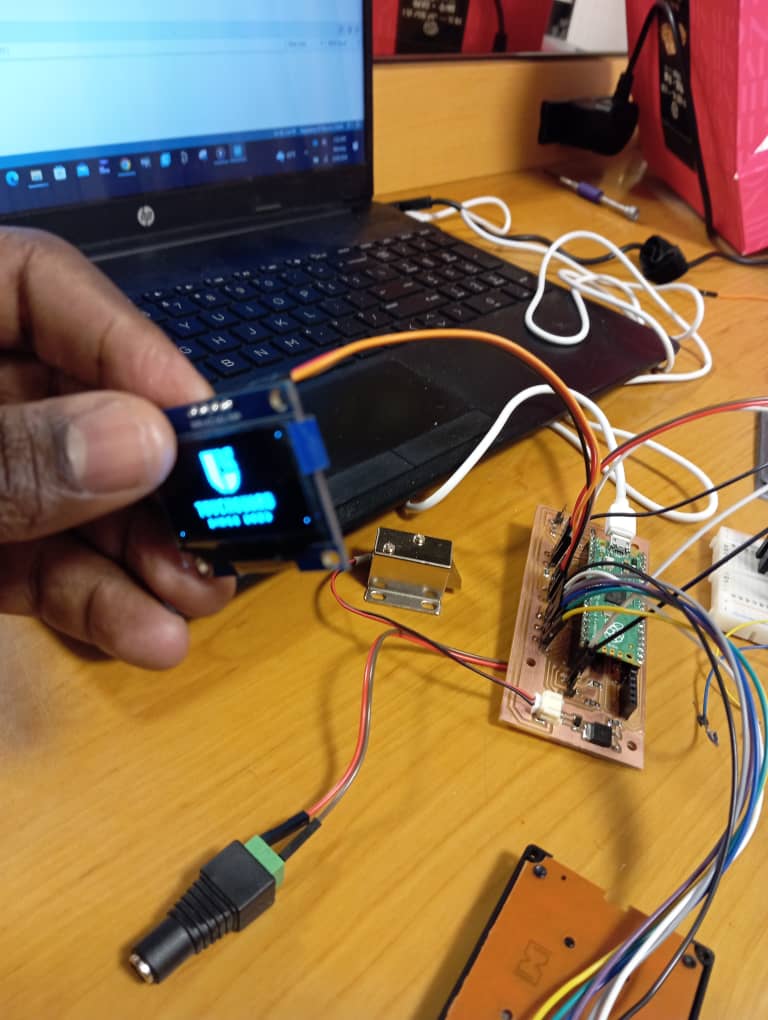
I assembled the components in the electronic box that was 3D printed and attached it to my wooden box
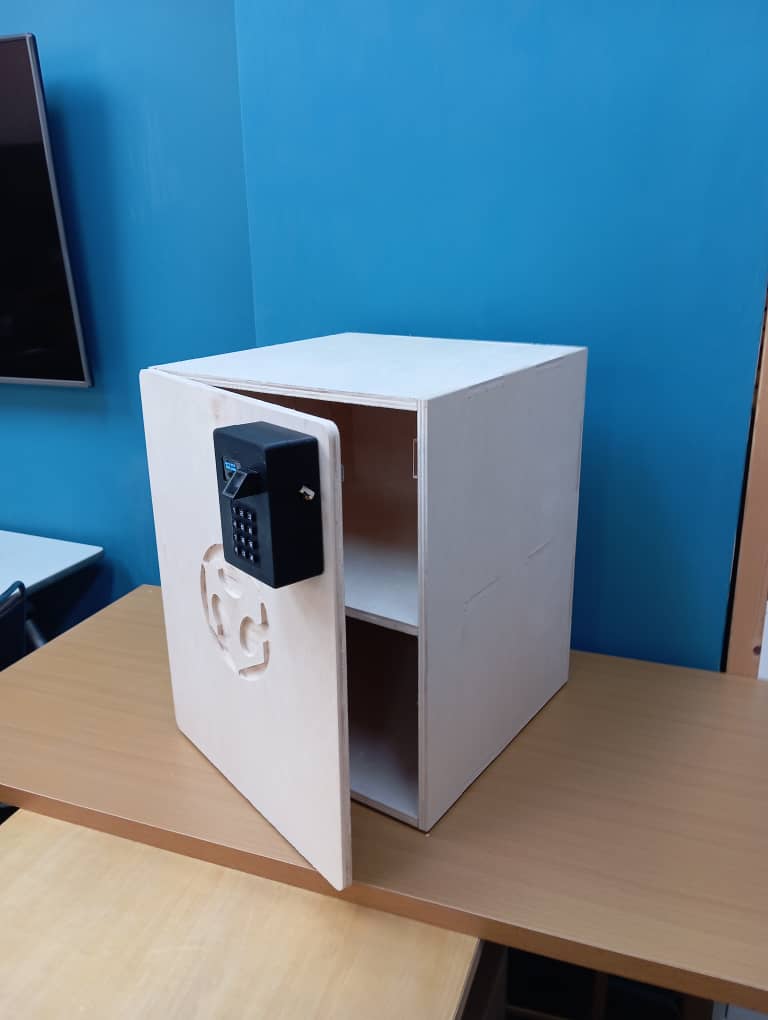
The system is finally tested and was working well as shown in the video below.