Group Assignment
Access our group assignment here
Introduction
This week featured our first group assignment of the year, where we had to characterize our local laser cutters properties, and document the process. Before we started experimenting, our local instructor gave us a brief lesson on how the laser cutter works, as well as the mechanics that it uses to function.
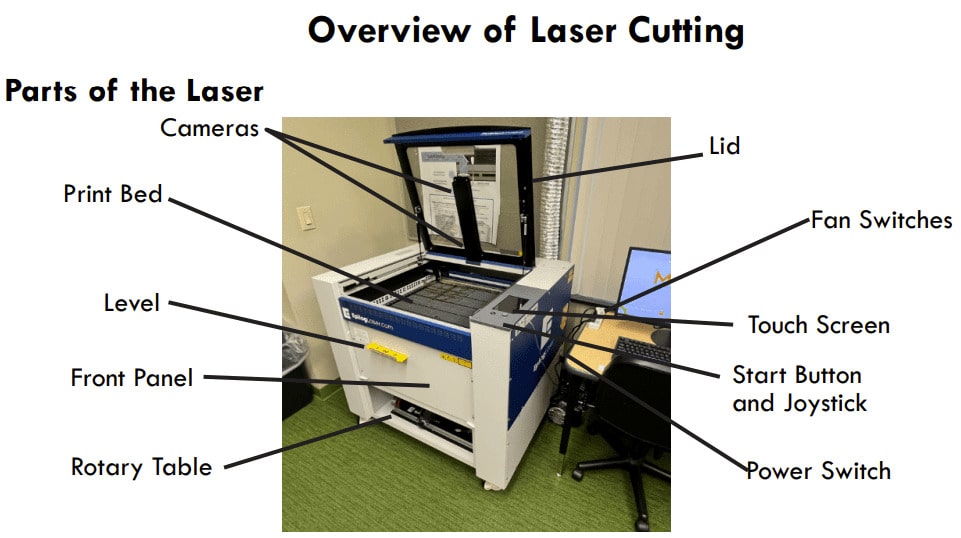
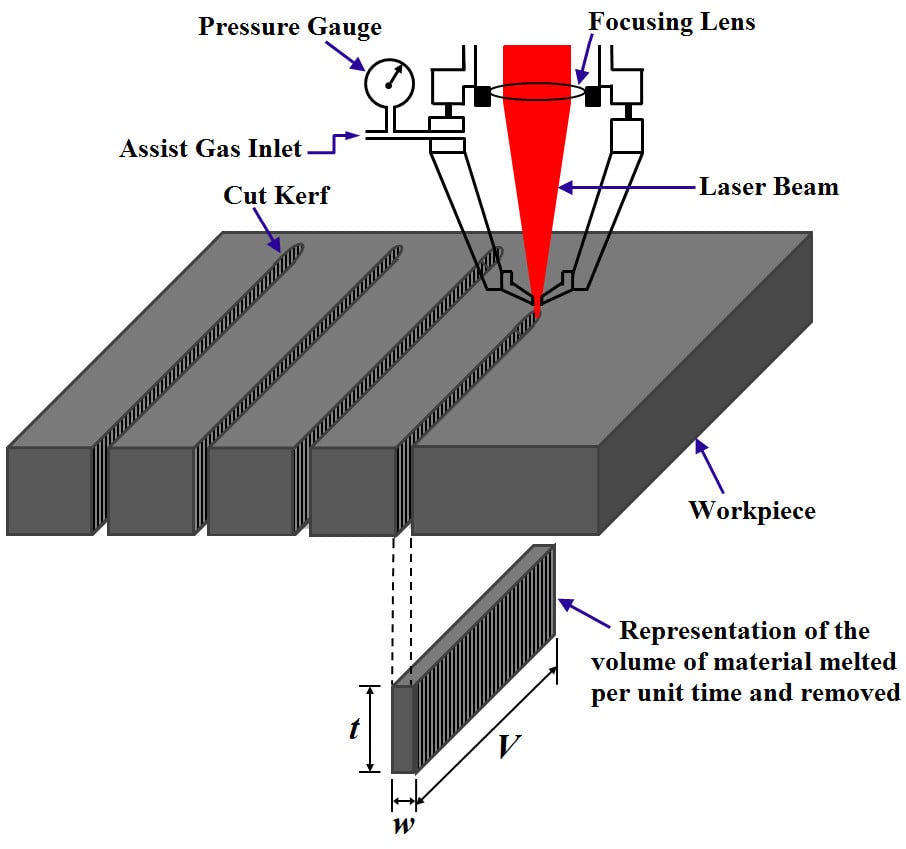
Before we started, we went through the different parts of a laser cutting machine, and I found this one quite useful.
 note; click on the images to be redirected to the original
Safety Measures
Read the Manual
Familiarize yourself thoroughly with the manufacturer’s instructions and safety guidelines provided in the user manual before operating the laser cutter.
Protective Gear
Always wear appropriate personal protective equipment (PPE), including safety glasses to protect your eyes from laser radiation and debris, and gloves to protect your hands from sharp edges and hot materials.
Ventilation
Ensure proper ventilation in the working area to remove fumes and smoke generated during cutting or engraving. Use an exhaust system or ensure that the workspace is well-ventilated with fresh air.
Fire Safety
Keep a fire extinguisher rated for the types of fires that can occur (e.g., Class A, B, C) nearby and ensure that it is regularly inspected and maintained. Never leave the laser cutter unattended during operation, especially when cutting flammable materials.
Material Compatibility
Only use materials approved for laser cutting and engraving. Some materials can release toxic fumes or produce harmful by-products when cut with a laser. Avoid materials containing chlorine, such as PVC, as they can release chlorine gas when cut.
Machine Setup
Ensure that the laser cutter is set up on a stable and level surface to prevent it from tipping over during operation. Check that all components are properly installed and secured, including the laser tube, mirrors, and lenses.
Emergency Stop
Know the location of the emergency stop button and how to use it in case of an emergency. Test the emergency stop function regularly to ensure it is working correctly.
Prevent Access
Restrict access to the laser cutter to authorized personnel only. Keep the work area clear of unnecessary items and ensure that bystanders are kept at a safe distance from the machine during operation.
Maintenance
Perform regular maintenance and inspection of the laser cutter according to the manufacturer’s recommendations. This includes cleaning the optics, checking for loose or damaged parts, and replacing worn components as needed.
Speed & Power
Then, we got started on experimenting how the “speed” and “power” settings could change the outcome of the cut.
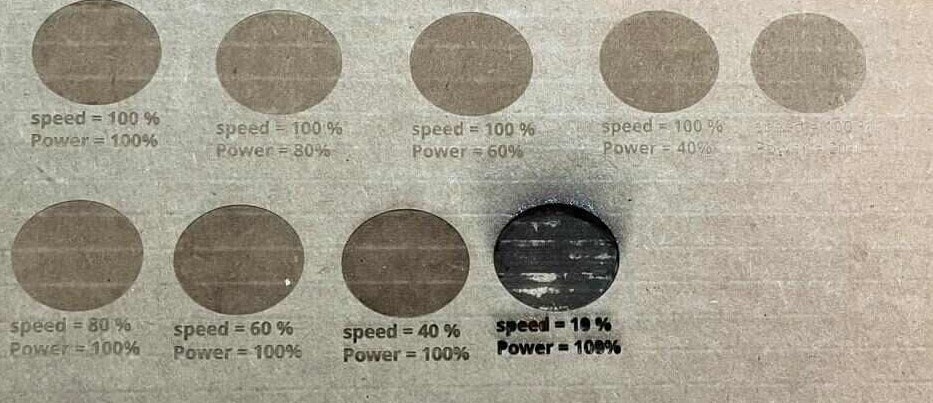
We made sure to note down what settings were used, so that we could compare the results.
Kerf
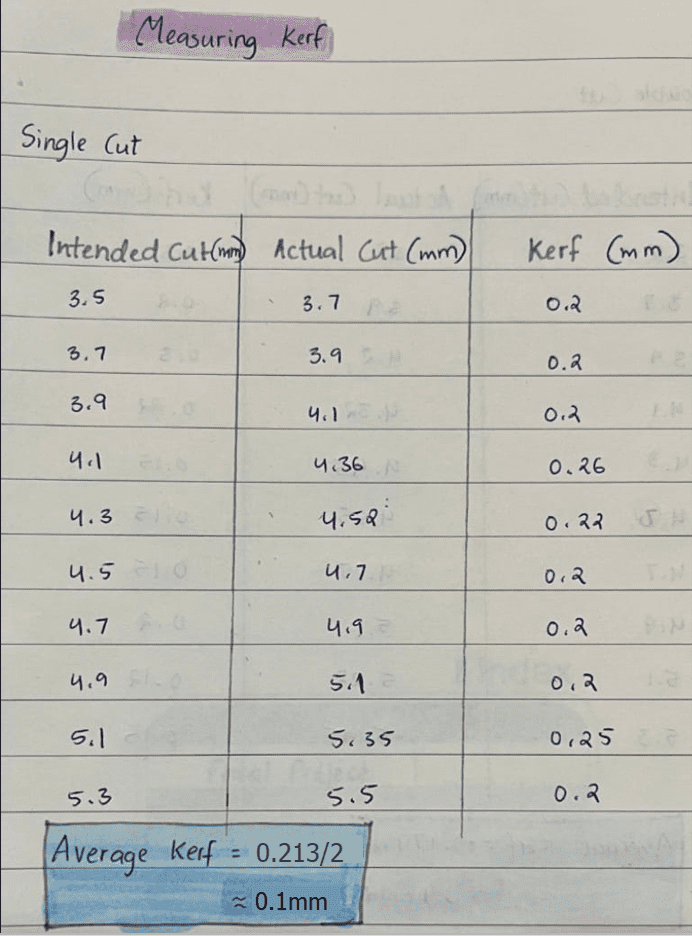
After that, we started to find out the kerf of our laser cutter. But before that, I think it’s important to understand what kerf is.
Kerf is basically how much material is taken out of your final product when you cut something. This material loss happens because the laser also has a certain mass, and this means that the laser itself unintentionally cuts off some of the material that you’re cutting. This is important because it helps pieces fit together just right after they’re cut, so they’re not too loose or too tight (which will be important in this weeks individual assignment) <link the individual assignment page.
Our regional instructor introduced us to a kerf comb, which was designed by >find out who designed it<. We used this to measure find our kerf.
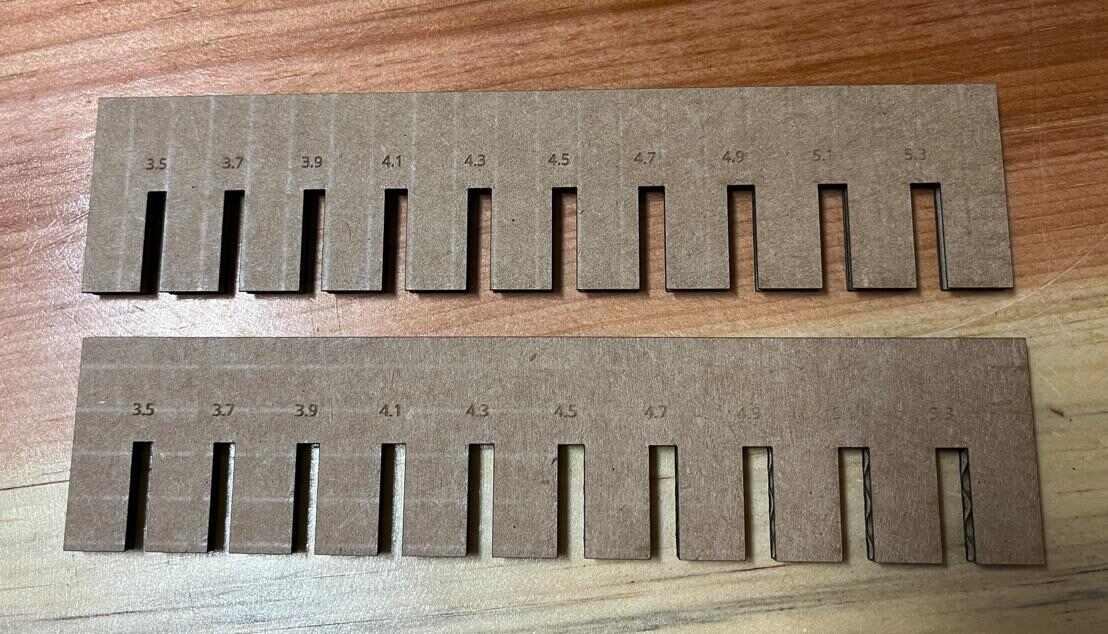
The 4.1 slots assembled into a perfect press fit, so I subtracted the material thickness (4mm) from the 4.1mm that we got earlier, and came to the conclusion that our laser cutter had a kerf value of about 1mm.
But just to make sure, we tried a different method, and got the same answer.
General Information
After our research, here is the information that we collected:
-
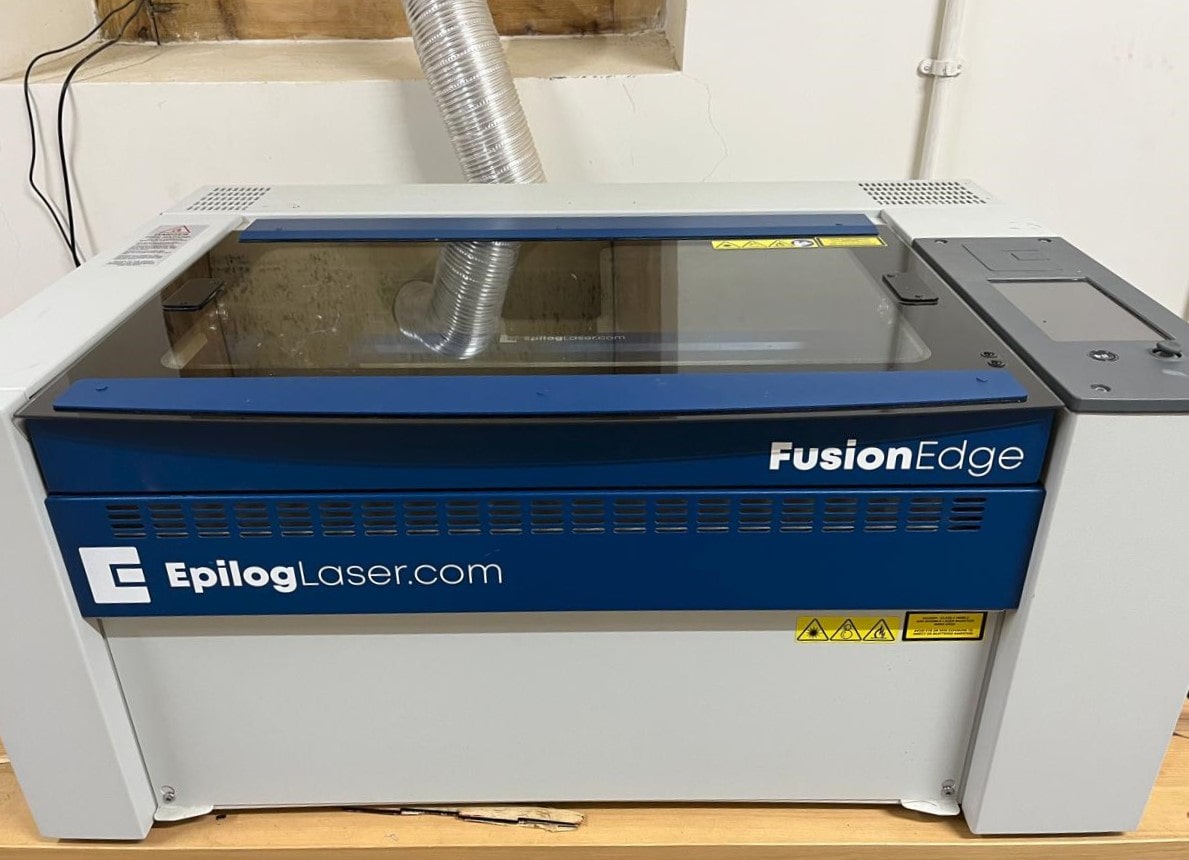
Model: Fusion Edge 12
-
Type: CO2
-
Capabilities
-
- Wood:
-
-
- Plywood: Up to 25mm (1 inch)
-
-
-
- MDF (Medium Density Fiberboard): Up to 25mm (1 inch)
-
-
-
- Hardwood (e.g., maple, cherry, oak): Up to 12mm (0.5 inch)
-
-
- Acrylic (PMMA):
-
-
- Cast acrylic: Up to 25mm (1 inch)
-
-
-
- Extruded acrylic: Up to 12mm (0.5 inch)
-
-
- Paper/Cardboard:
-
-
- Paper: Up to 6mm (0.25 inch)
-
-
-
- Cardboard: Up to 6mm (0.25 inch)
-
-
- Fabric/Textiles:
-
-
- Cotton: Up to 6mm (0.25 inch)
-
-
-
- Polyester: Up to 6mm (0.25 inch)
-
-
-
- Leather: Up to 6mm (0.25 inch)
-
-
- Foam:
-
-
- Foam board: Up to 50mm (2 inches)
-
-
-
- Foam rubber: Up to 50mm (2 inches)
-
-
- Plastics:
-
-
- PVC (Polyvinyl Chloride): Up to 6mm (0.25 inch)
-
-
-
- PETG (Polyethylene Terephthalate Glycol): Up to 6mm (0.25 inch)
-
-
-
- Polycarbonate: Up to 6mm (0.25 inch)
-
-
- Rubber:
-
- Neoprene: Up to 6mm (0.25 inch)
-
- Silicone: Up to 6mm (0.25 inch)
-
- Cork: Up to 12mm (0.5 inch)
-
- Thinner Metals (with specialized CO2 lasers):
-
-
- Stainless steel: Up to 3mm (0.125 inch)
-
-
-
- Mild steel: Up to 6mm (0.25 inch)
-
-
-
- Aluminum: Up to 3mm (0.125 inch)
-
-
- Others:
-
-
- Glass (etching): Thickness is not applicable for cutting but can be etched.
-
-
-
- Stone (engraving): Thickness is not applicable for cutting but can be engraved.
-
-
Software: Inkscape
- Work area: 609 mm x 305 mm (24” x 12”)
- Maximum material thickness: typically 6-9 mm (1/4” to 3/8”)
- Minimum material thickness: 0.25 mm (0.01”)