15. Wildcard week
Hero shot
1. Setting up and first tests
1.1. Setting up
Agrilab’s digital embroidery machine is a Brother VR. Initially, I used the tutorial on the Agrilab website. To set up the machine, we first choose the right frame, depending on the size of the project. Then we choose the right fabric, thick enough. As my fabric was thin, I decided to reinforce it with embroidery paper.
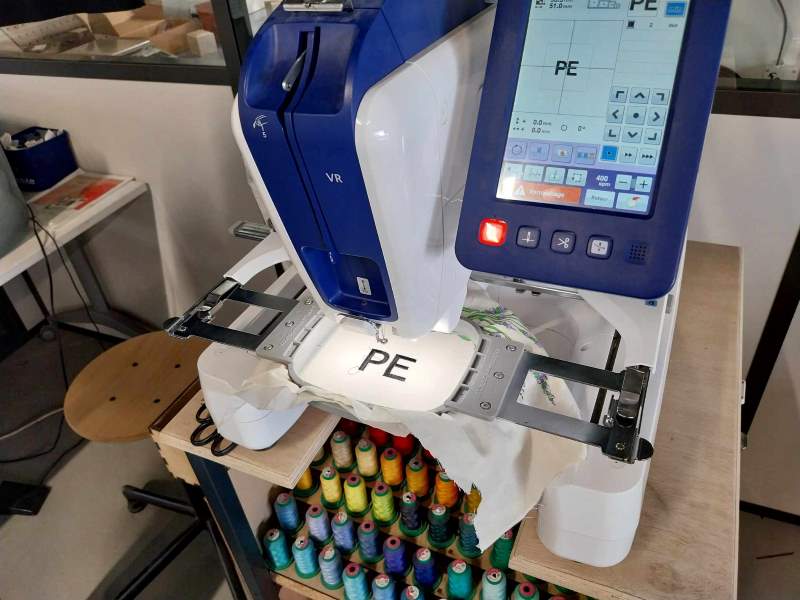
Before starting the machine, I check that there’s enough sewing thread in the box. Then I replace the main sewing thread with black sewing thread. To do this, I simply run the numbers through the machine, like a sewing machine. Next, I select the letters to be made, my initials. I select the type of front, then click on set up.

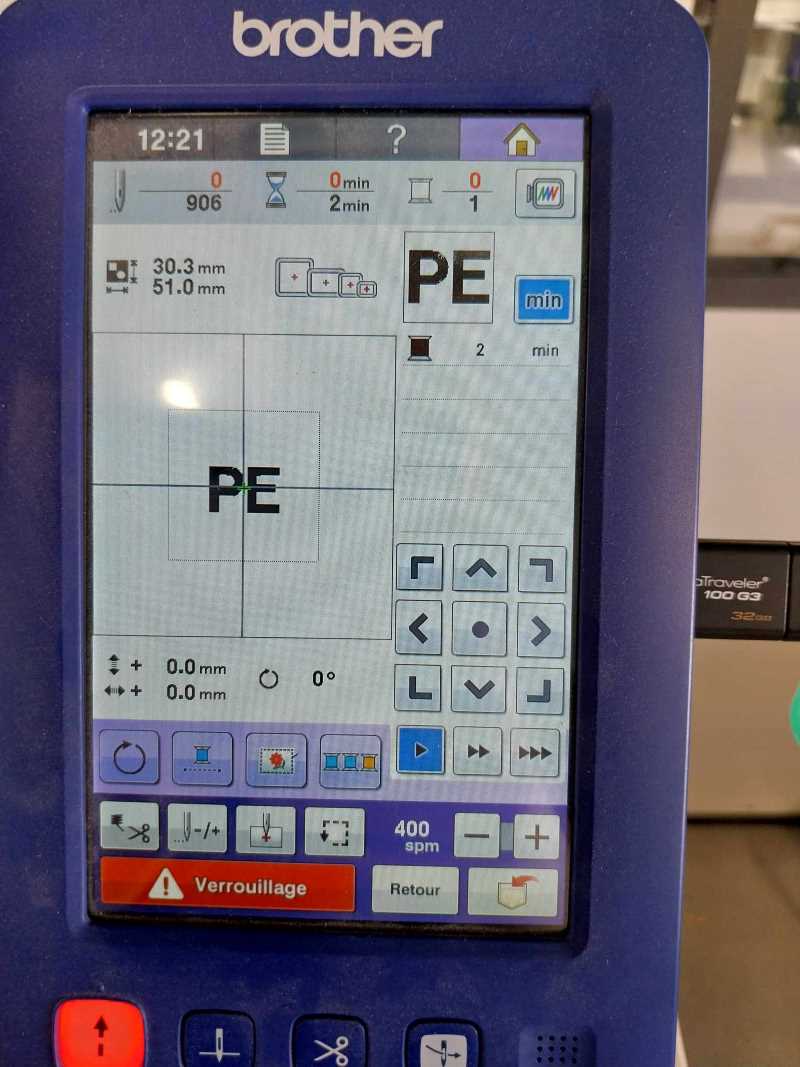
I center the letters and click on embroidery.
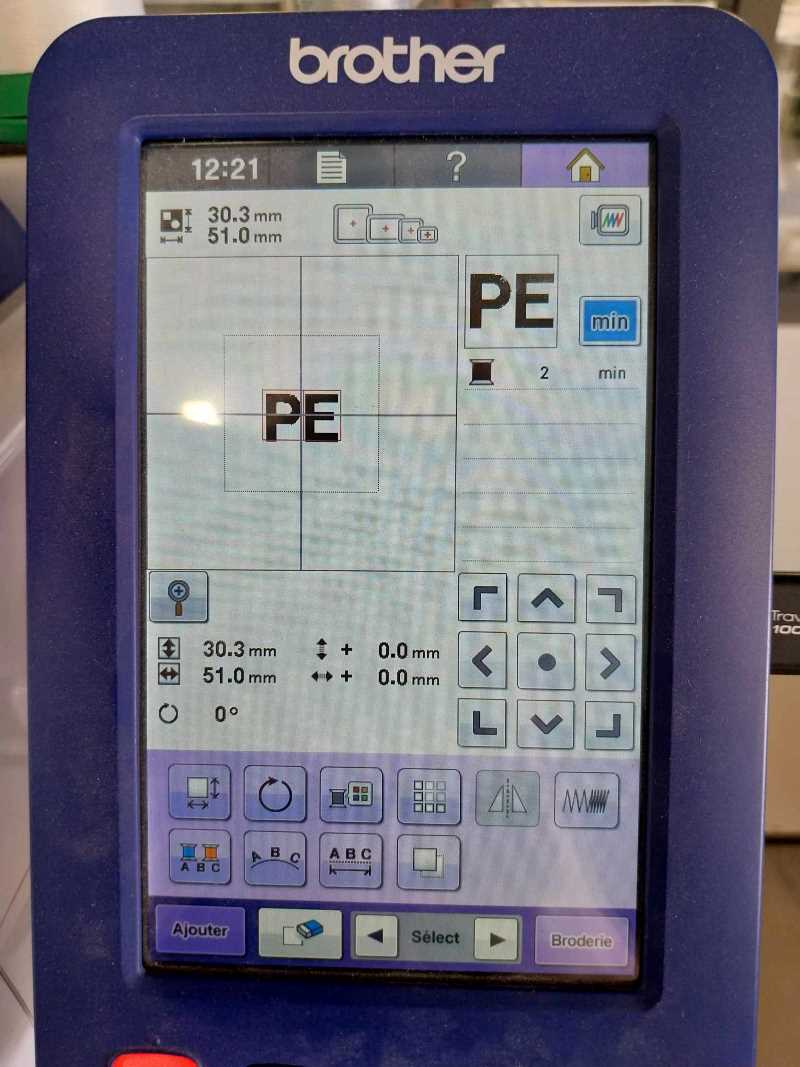
If all the parameters are correct, which is my case, I click on Lock.
The result is very good:
1.2. Tests
After this test, I want to do another test, but with one of my drawings. First, I draw some very basic shapes with InkScape. I had to install the InkStitch extension . When my shapes are finished, I click on Extension -> Ink/Stitch -> parameters. A new window opens after a few calculations.
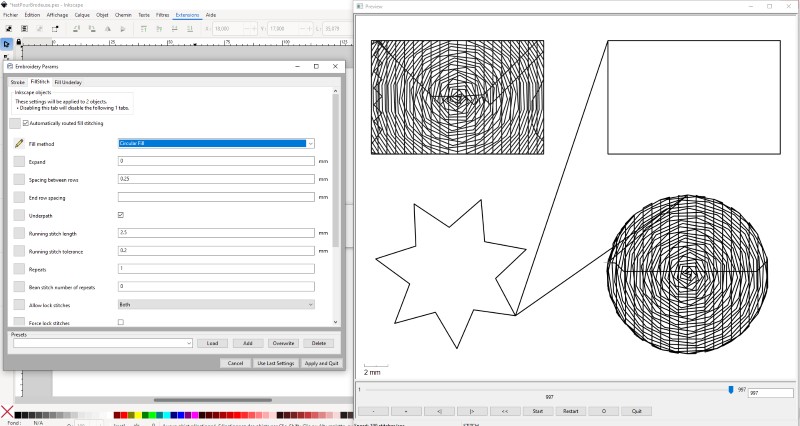
Here, I can set my embroidery parameters. After checking all the parameters, I save the file as .pes, so that the embroidery machine can read it. I start the machine as before, but instead of clicking on the letters at the beginning, I choose the SD card. The result is correct.

But there’s something I hadn’t anticipated. When a shape is made in Inkscape, it has an outer contour. If this outline is not removed, it will be embroidered, creating unsightly edges. I also make some tests with the parameters in inkstitch, I change the type of filling :

The denser ones (less space between rows: 0.2 instead of 0.25mm) have a better result, while the circular filling is too thick, and is not visually pleasing to the eye.
1.3. A few problems
My main problem with the machine occurs when I need to change the bobbin. I don’t know exactly why, but my bobbin keeps breaking when I start embroidering. There’s an accumulation of thread around the bobbin, and this ends up taking the bobbin sideways and breaking it. After several attempts and the help of my colleague, I guess there are two things I did wrong:
- I didn’t tie the wire into the spool properly.
- I didn’t push the spool all the way in (to do this, I have to pull on the tab when it’s in, and it will sink in a few millimeters).

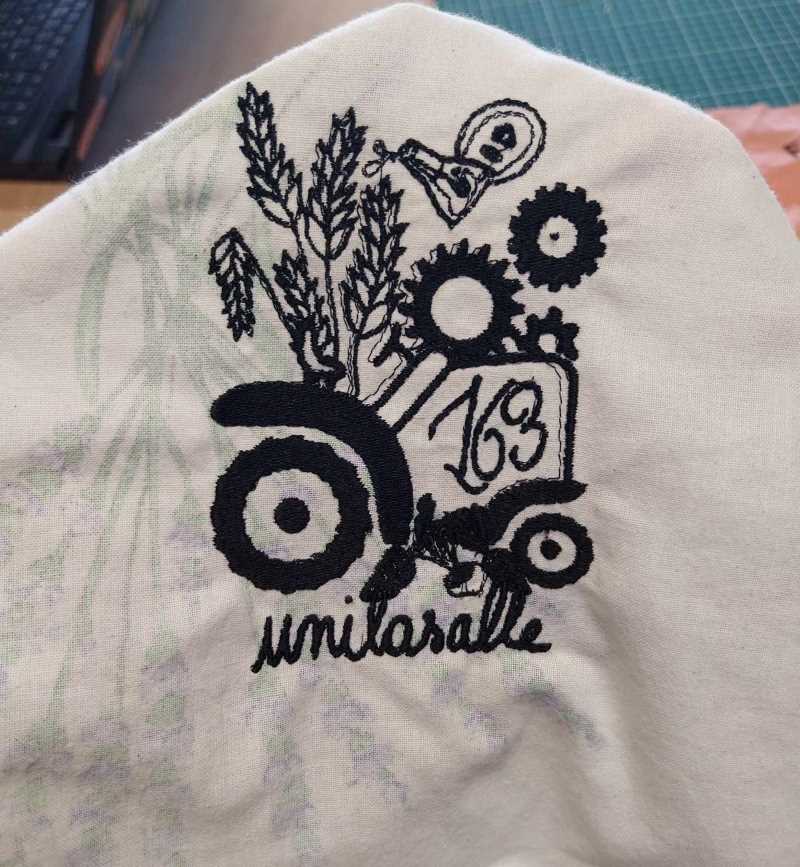
2. A complex shape
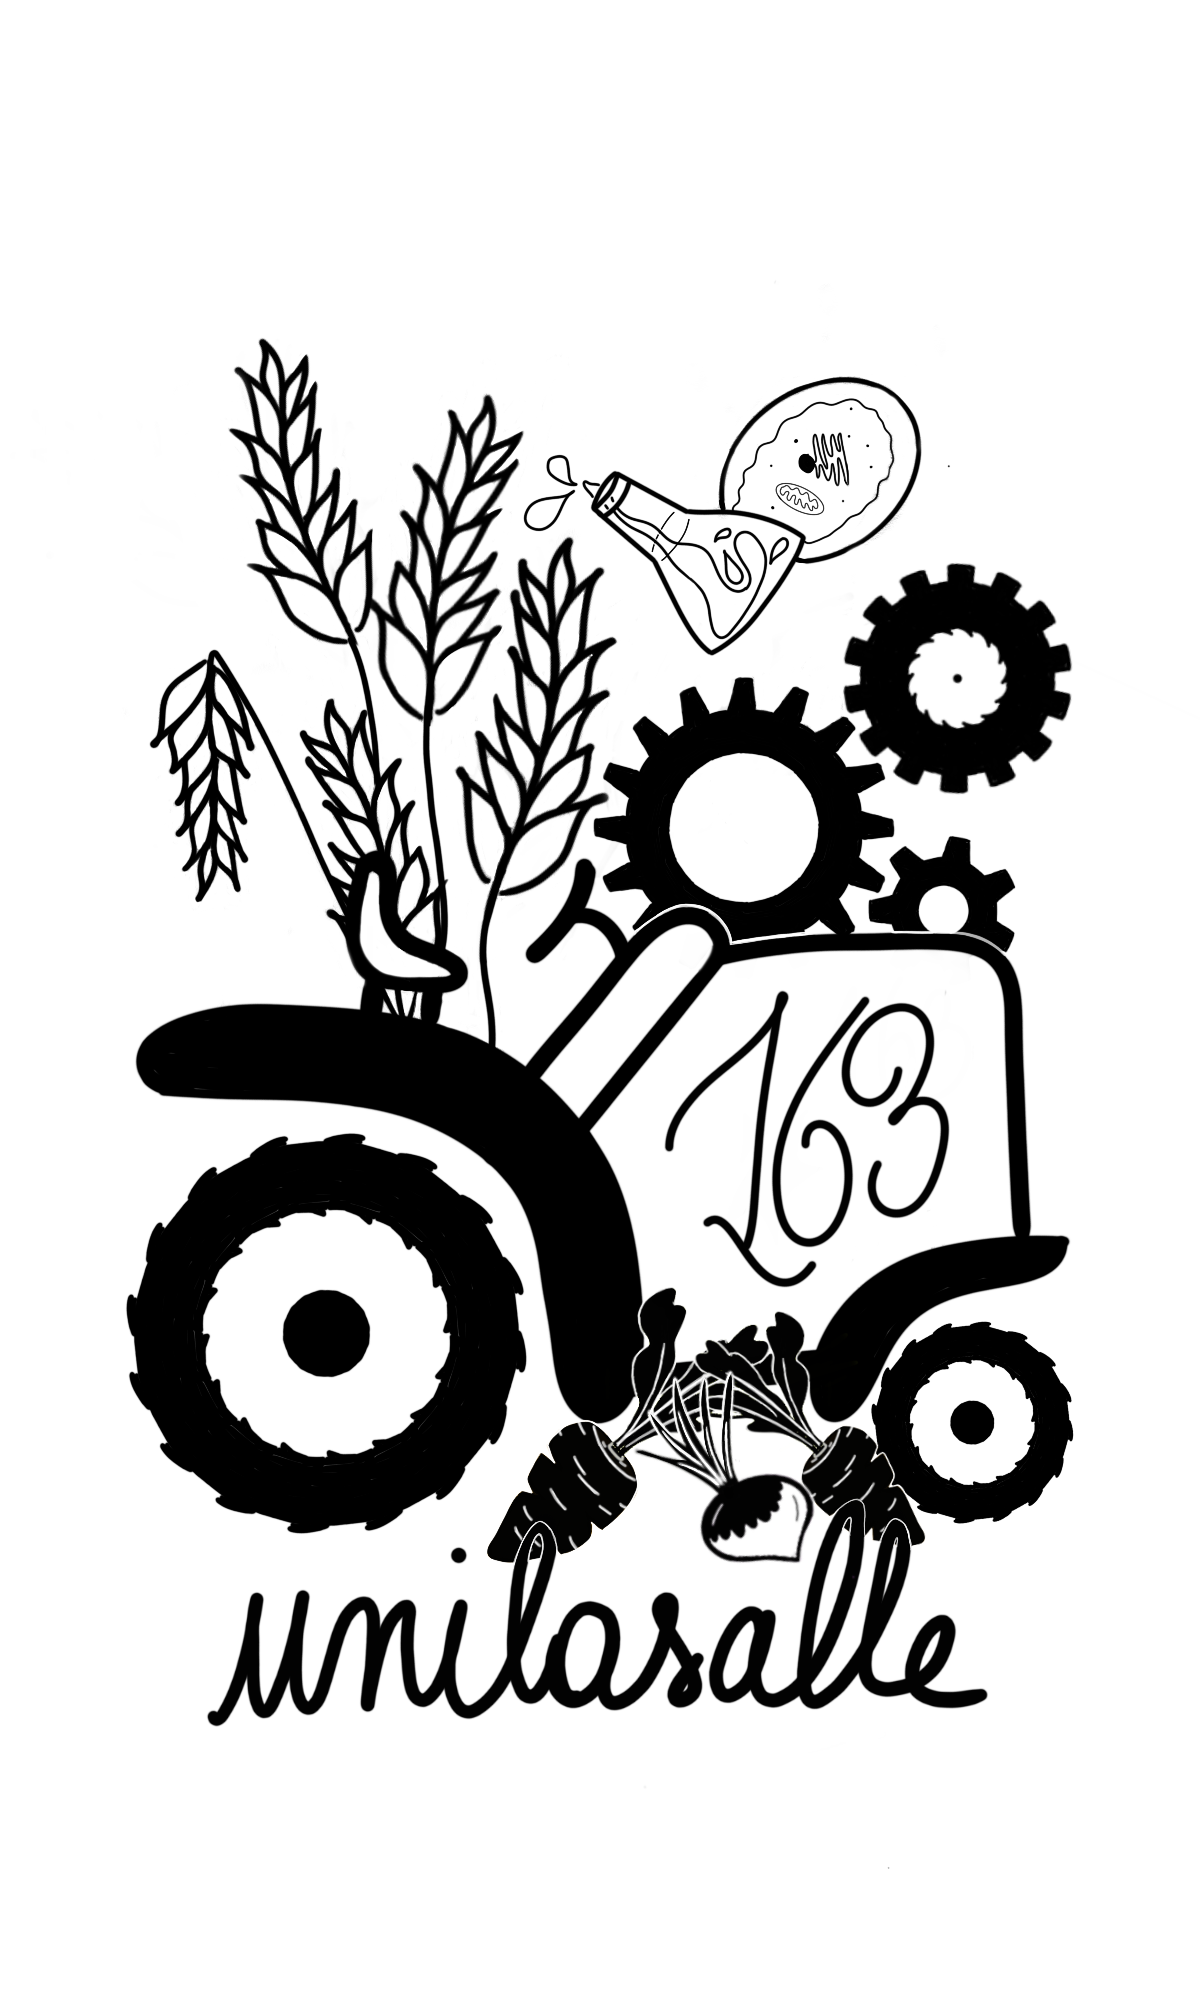
Since I don’t have the skills to make a beautiful drawing, I ask a friend Claire V.. With her drawing, I convert it to vector using the “vectorize a raster object” option. I try different fills:
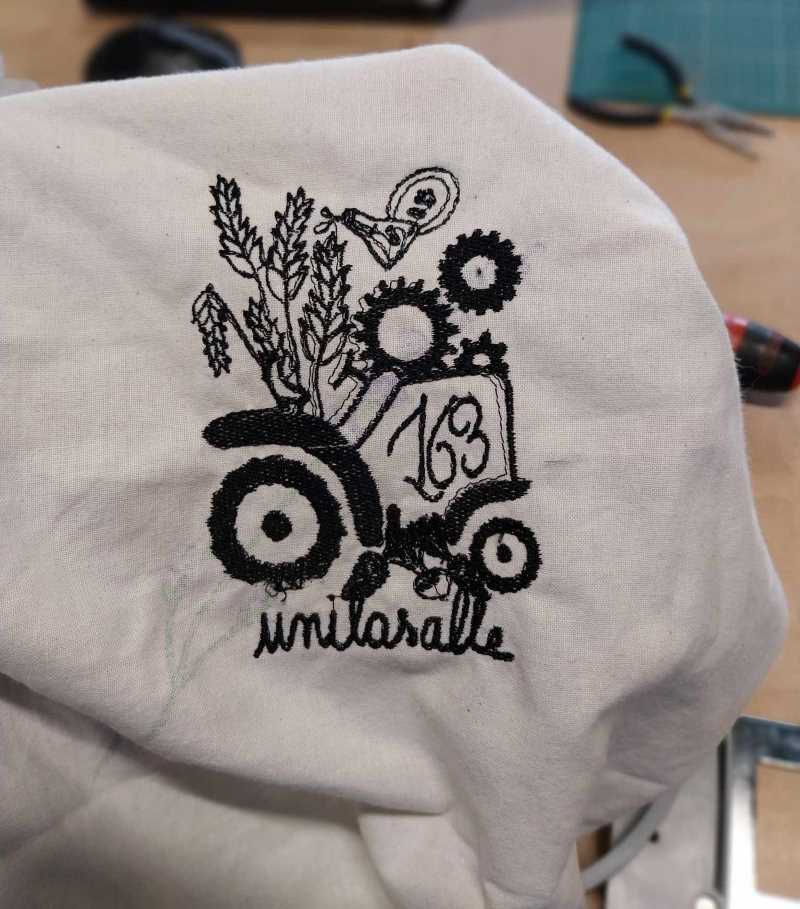
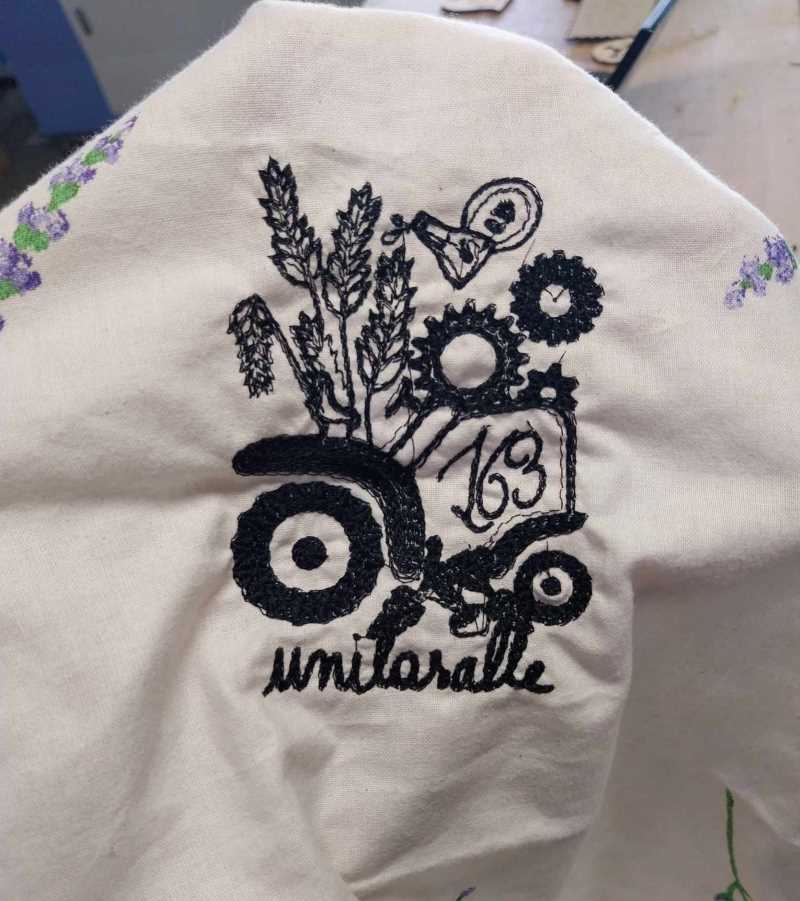
With the original settings, I notice that there are a lot of holes. I then try the circular fill, with less space between the lines (0.175mm), but the result isn’t good enough. Finally, I try again with the original settings, but with 0.15mm line spacing. This is by far the best result. During this phase, I also tested the speed from 400 ppm to 800 ppm, and didn’t notice any significant difference.
3. The files
Here you can find the inkscape test file
Here you can find the inkscape draw file