Mechanical design, machine design
Group Assignment:
-
Design a machine that includes mechanism + actuation + automation + application
-
Build the mechanical parts and operate it manually
-
Actuate and automate your machine.
For this week, we decided to make a smartphone-connected turntable for automatic photo-taking and 3D scanning of objects.
Video
Why do we need it?
The machine we’ve designed is indispensable for good 3D scanning of objects, as it has the option of automatically taking photos of the object while it’s being rotated, and is compatible with all photo-based 3D scanning applications. Our machine is also compatible with a wide range of smartphones.
How does it work?
Once the machine is powered up and connected to your smartphone via a jack connector. You can open the 3D scan application you wish to place the object on the turntable and launch the scan on your phone. The photo will be taken automatically.
Who made it?
Jean-Nicaise Akaffou, Amany Williams Kouassi, Oholo Kraidy Salomon Moulo and Zié Souleymane Koné. The links to everyone’s individual documentation pages can be found here:
Process
For the realization of our machine we followed the following steps:
Design
To design our machine, we used two software packages, Fusion360 and SolidWorks. For details of the design please refer to Amany Williams Kouassi’s Week 10 web page.
Below is an image of the final design results.
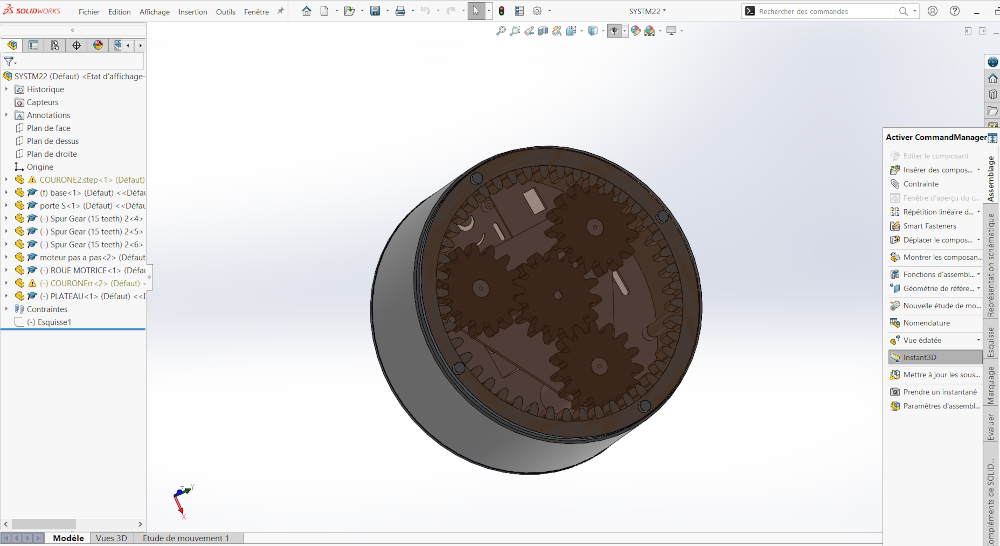
After completing the design, we moved on to cutting and 3D printing the various parts of our machine.
Cutting and 3D printing
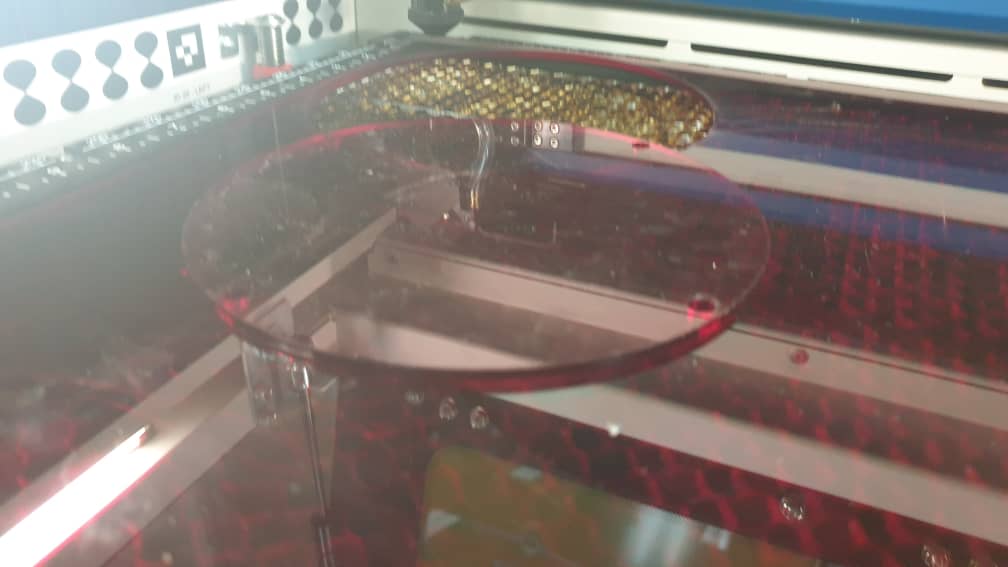
To cut and 3D print the various parts of our machine we used the Prusa i3 MK3S+ 3D printer and the Epilog Edge 36 laser cutter. For more details please refer to Oholo Kraidy Salomon Moulo’s Week 10 web page.
here are some images of the cut-outs and 3D printing.
- cutting
- 3D printing
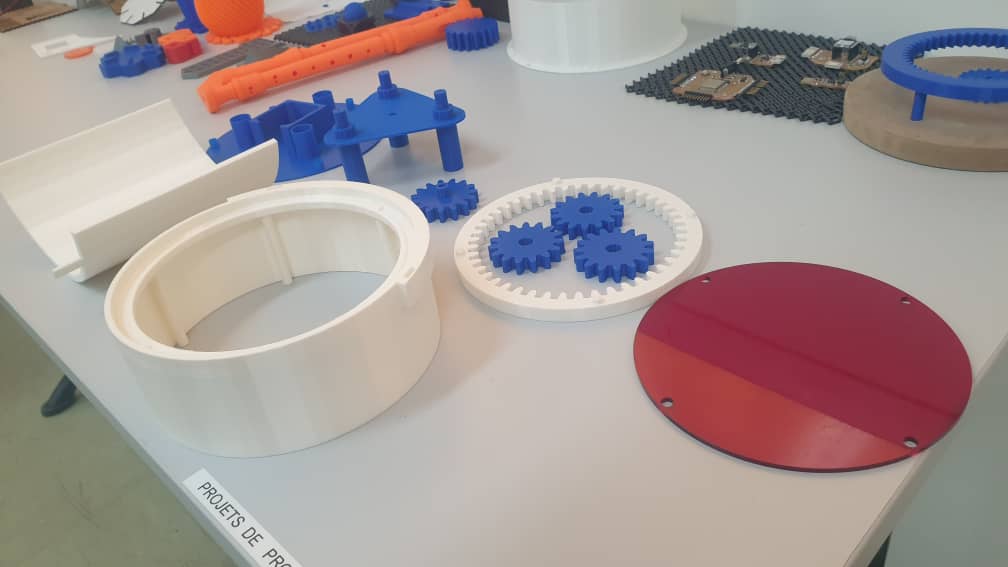
Once the 3D printing and cutting were complete, we moved on to assembling the turntable. here’s the result.
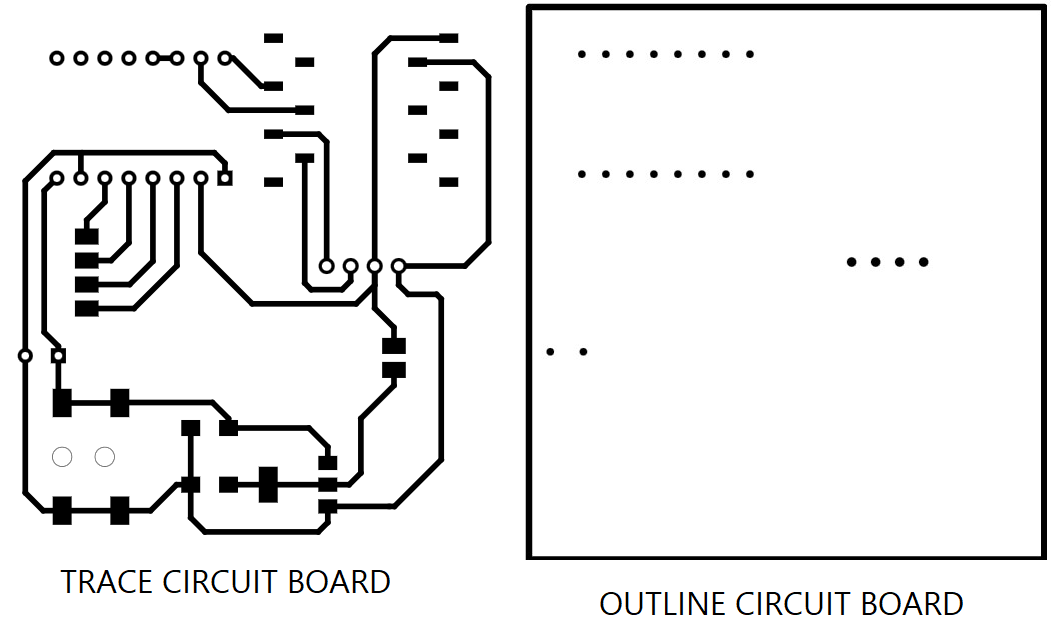
Electronic design of our machine
For the electronic design of our machine, we used Kicad software. For more details please refer to Zié Souleymane Koné’s Week 10 web page.
Here are the final results of the electronic design.
- Schematic and PCB
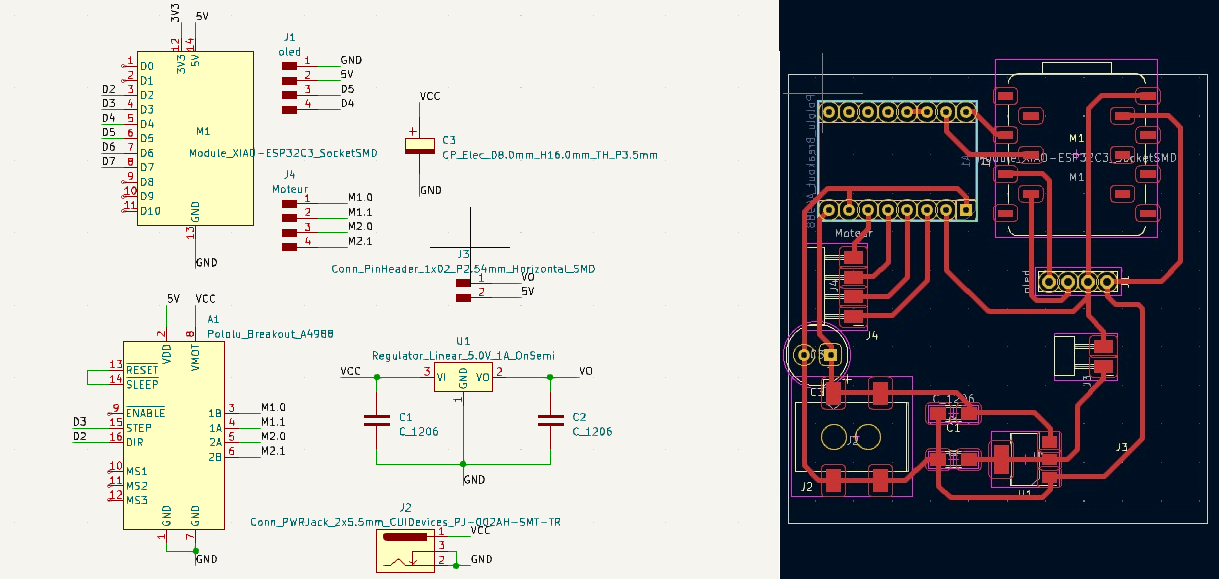
- Circuit outline and trace
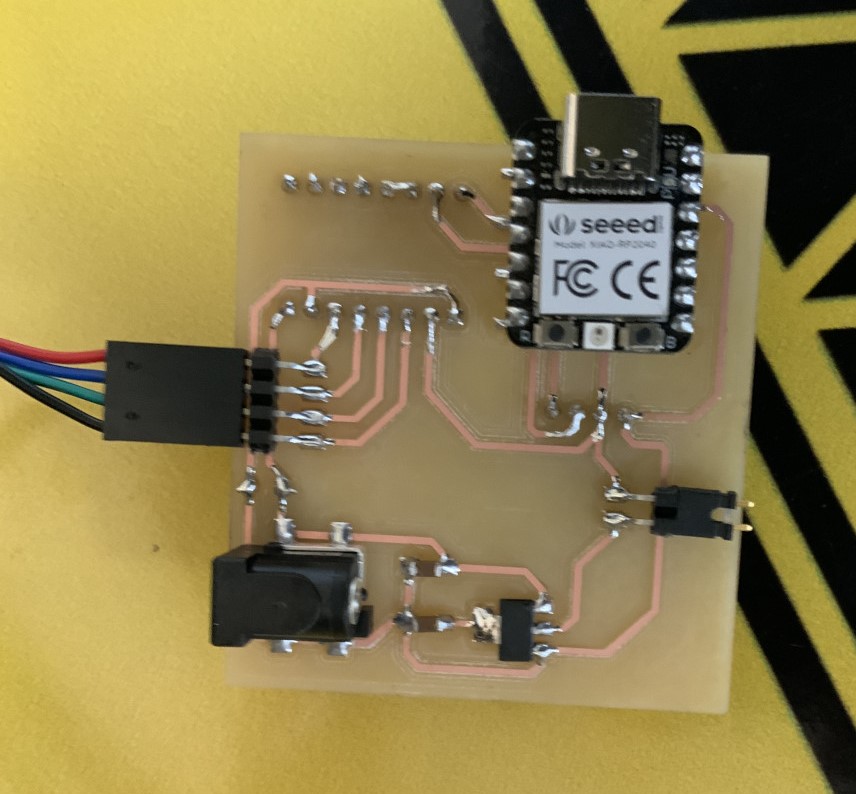
Electronic production of our machine
For the electronic production of our machine, we used the Roland SRM-20 milling machine. For more details please refer to Oholo Kraidy Salomon Moulo’s Week 10 web page.
Here are the final results of the electronic production.
Programming our machine
To program our machine, we used the Arduino IDE. For more details please refer to Jean-Nicaise Akaffou’s Week 10 web page.