Week 9. Molding and Casting
Before the Start
Introduction 🖊
This week relates to molding and casting. Niel warned us during the lecture that this is a very surprising technique. In fact, even if compared to the other fablab possibilities, with this method it is possible to obtain very good and quality results.
I already have experience working with molds. Due to my personal project Chichifree me and a friend worked on molds made of silicon.
To create them, firstly we 3d printed a Venus of Willendorf’s statue. Then we did a 2 parts mold using silicone, and then we try both polyurethane resin and plaster mixed with sand.
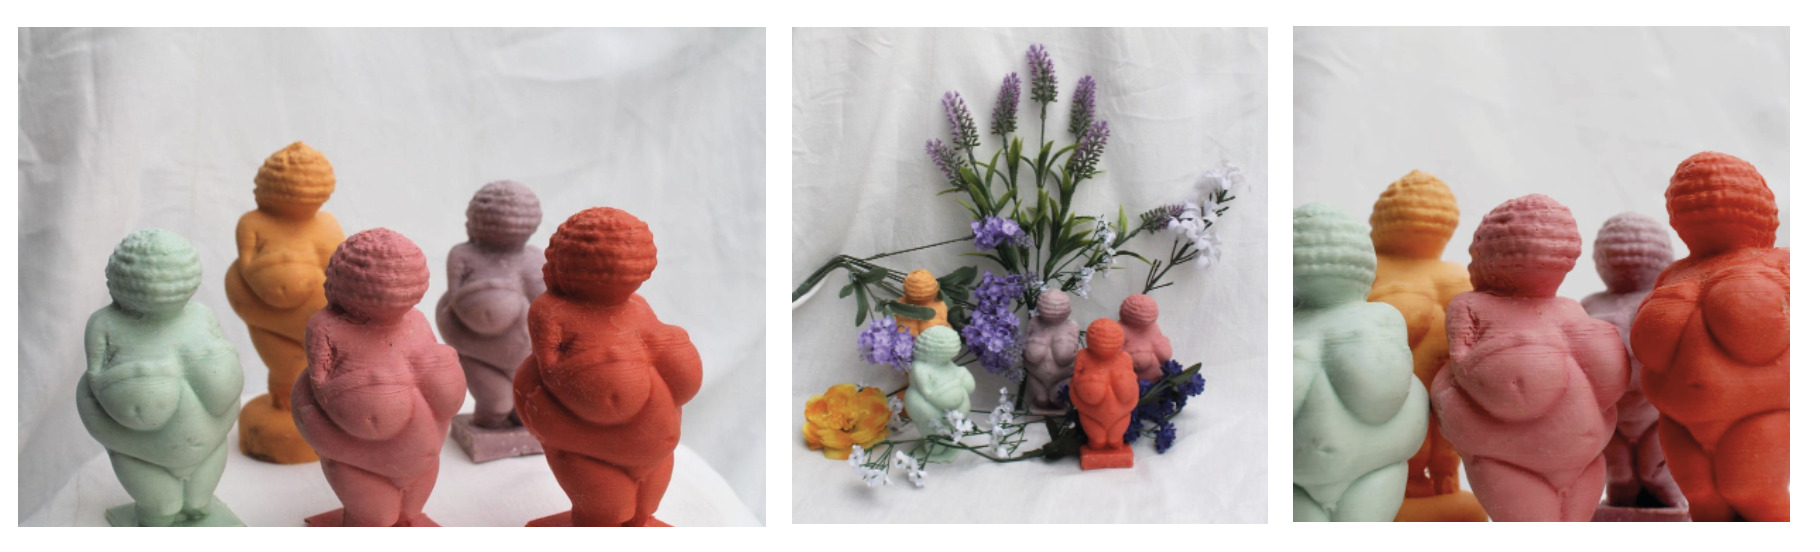
But before that experience, I get directly to know about molding a casting during my internship period within Estudio Disolvente. Here I followed the development process of SALVADOR: a silicone trivet made by casting 2 colored layers of silicone in a 3d printed mold.
This is a project which I love, since then, I added to my design to-do list 3d printed molds to cast using another kind of recycled materials.
During the start of the Fab Academy, I had the idea of making 3d molds where to cast recycled cardboard from the laser cutter week. This is the perfect week to try out this idea and have lots of fun!
Fab Assignments 📚
-
Group assignment:
- Review the safety data sheets for each of your molding and casting materials.
- Make and compare test casts with each of them.
-
Individual assignment:
- Design a 3D mould around the stock and tooling that you’ll be using, mill it (rough cut + (at least) three-axis finish cut), and use it to cast parts.
My Goals 🎯
- What I think I already know
- I already have experience working with molds because of personal projects. I did molds made of silicone, polyurethane resin, and plaster mixed with sand.
- What I want to learn
- Try different materials to cast in the mold. Avoid plastic materials.
- Look for mixes in Materiom’s material library.
Project Management
How I’m going to organize my work during the week.
| Task | Time | Day |
|---|---|---|
| Research | 3h | 23, March |
| Group Assignment | 6h | 24, March |
| Design for the Mold | 5h | 24, March |
| Milling the Mold | 2h | 25, March |
| Post-processing Mold | 1h | 25, March |
| Casting the mold | 4h | 28, March |
| Casting material 1 | 2h | 28, March |
| Casting material 2 | 2h | 29, March |
| Documentation | 8h | 23 / 24 / 25 / 28 / 29, March |
Files 📂
| Name | Description | Link |
|---|---|---|
| File 0 | Venus Mold | Link |
Research
3d printed molds projects
- Recycle Cardboard Into Anything With 3D Printing
- How To: Use 3D Printing To Make Open-Face Silicone Molds
- Pulp It! - 3D Printable Recycled Cardboard Molds
- Agustín Arroyo’s work
- Sofía Perales’s work
My fellow student Jonathan showed me Agustine Arroyo’s work, which was a sourve of inspiration when developing my project.
Materiom Recipes
Recipes which I could try to do this week:
- Eggshell biocomposite
- Coffee Composite Co02
- Coffee | agar - alginate Co01
- Calcium carbonate | alginate CC01
- Making Soap from Used Cooking Oil
Cool materials which I can try for future experiments:
- Beer spent grain biocomposite
- Orange peel | Chitosan | Hemp
- Wood ashes biocomposite
- Sawdust | dextrin Saw05
FabAcademy Student’s inspo:
During the Process
Results 🖖
Group Assignment Process 🏊♀️ 🏊🏾 🏊🏽♀️
This week started dressing up like a real scientist! Working with materials can be very messy, so it is needed to properly dress up for ensuring that our skin and clothes don’t get dirty/damaged.
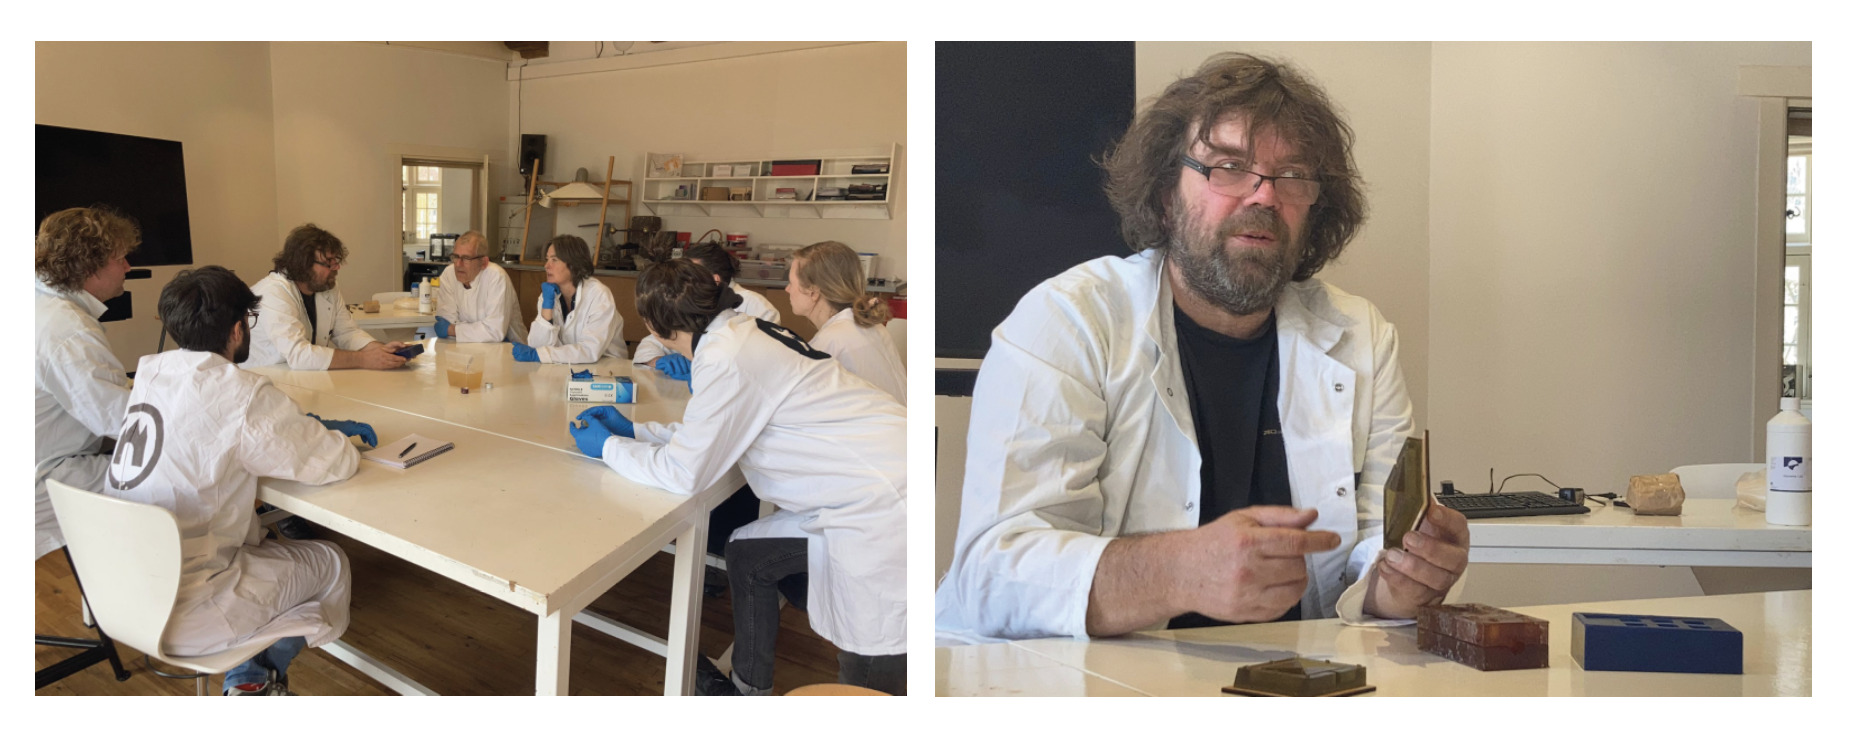
During the group assignment, firstly we learned how to prepare and mill molds made of recycled Wax. Then, we have read the different materials datasheets that can be used for both molding and casting. Finally, we casted a few materials and compared them.
Prepare file for molding
When preparing the molding file, we had some troubles because of the kind of file which we were using. We imported the design’s negative file, so V-CARVE was milling the full block to obtain the positive design.

We fixed this problem by making a new Fusion 360 design: a block with the same measures as the WAX mold had, where the negative was replicated 6 times.
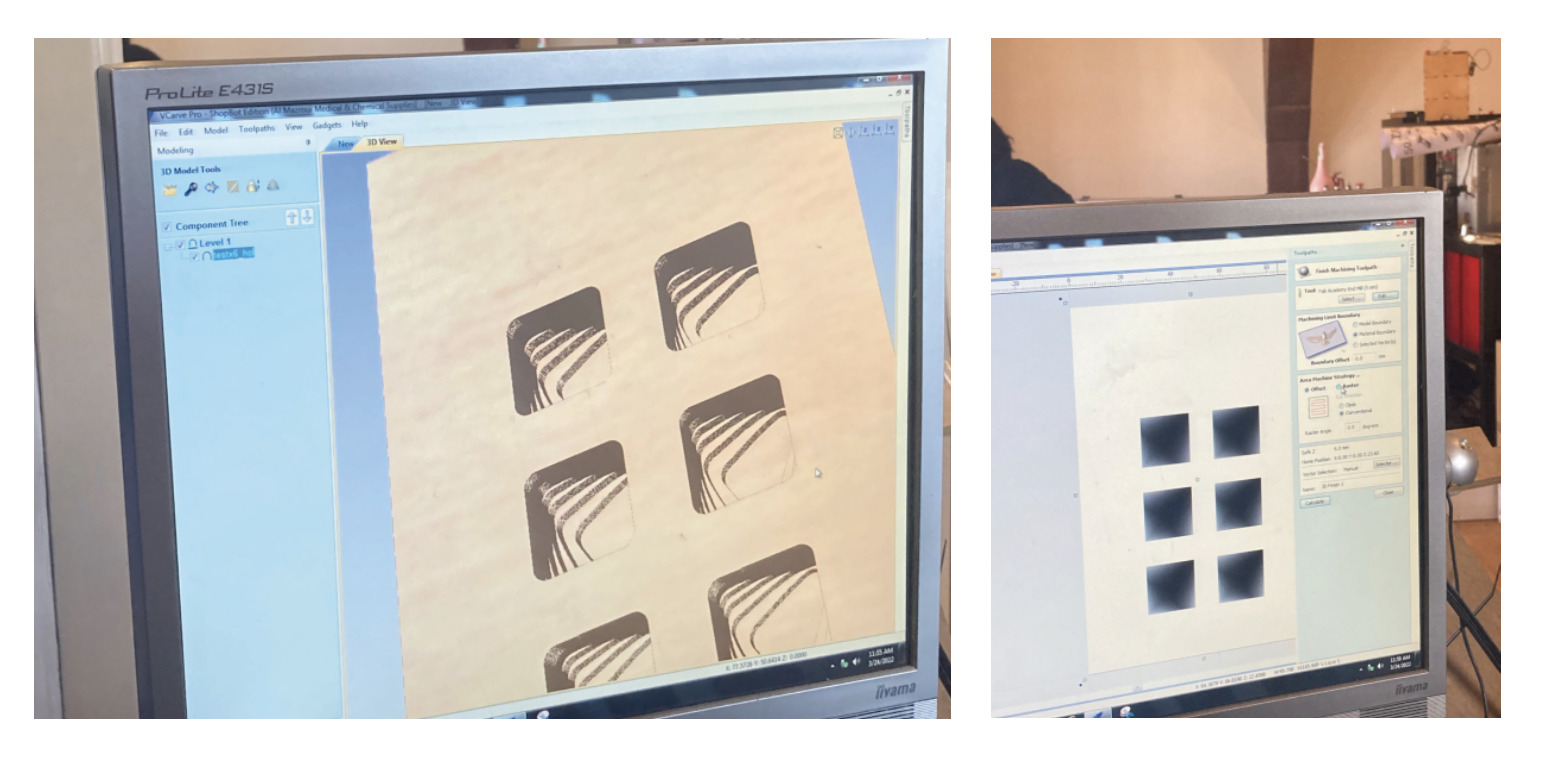
V-CARVE
In order to mill the WAX mold and obtain a polished surface of our design, it will be needed to use two different toolpath setting.
In the attached photo, it is visible the result of the two results obtained when milling.
Firstly, it will be needed to use the 3D Roughing Toolpath, in this way, the design and mold perimeter will be visible with a lower definition like in the left side of the mold’s face.
Secondly, it will be needed to add a Finish Machining Toolpath, in order to obtain a finished surface.
Import Design
When importing a 3D model file - in this case we used a .stl -, it will be needed firstly to add the Material’s features: side x width x height.
Tip 🛎️: Make the block of your model a bit bigger than the Material¡s features set up in V-CARVE, otherwise the CNC machine will mill the perimeter of the mold as well.
Afterwards, V-CARVE will ask to Orientate 3D Model. Here we used the following parameters:
-
Initial Orientation:
- Top
- Rotation About Z Axis: 0
-
Interactive Rotation:
- XYZ
-
Model Size:
- Center Model
-
Zero Plane Position In Model:
- Uncheck: Discard Data Below Zero Plane
3D Roughing Toolpath
After importing out design file, it is necessary to select it, and then set up the 3D Roughing Toolpath.
When setting up the toolpath parameters, firstly it will be needed to add the Tool features:
-
Tool info
- Name: End Mill 2 flute (5 mm)
- Tool Type: End Mill
-
Geometry
- Diameter: 5 mm
-
Cutting Parameters:
- Pass Depth: 2.5 mm
- Stepover: 60%
-
Feeds and Speeds
- Spindle Speed: 6.000 r.p.m.
- Feed Rate: 50 mm/sec
- Plunge Rate: 20 mm/sec
-
Tool Number
- 1
Afterwards, it is needed to select the following settings in the 3D Roughing Toolpath panel:
-
Machining Limit Boundary
- Tap: Material Boundary
-
Machining Allowance
- 0,5 mm
-
Roughing Startegy
- Z level
Once everything is selected, it is needed to press: CALCULATE
Finish Machining Toolpath
This are the parameters needed to set up in the Finish machining Toolpath
-
Tool - Select the same 5 mm milling bit used in the previous step
-
Machining Limit Boundary
- Tap: Material Boundary
-
Area Machine Startegy:
- Offset
- Climb
Once everything is selected, it is needed to press: CALCULATE
Milling with the CNC machine
In order to mill the mold, we followed the same steps explained for theComputer Controlled Machining.
Locate the Mold to the Surface
Before locating the mold on top of the CNC sacrificial layer, be sure the surface is clean. If not, clean it using a vacuum cleaner.
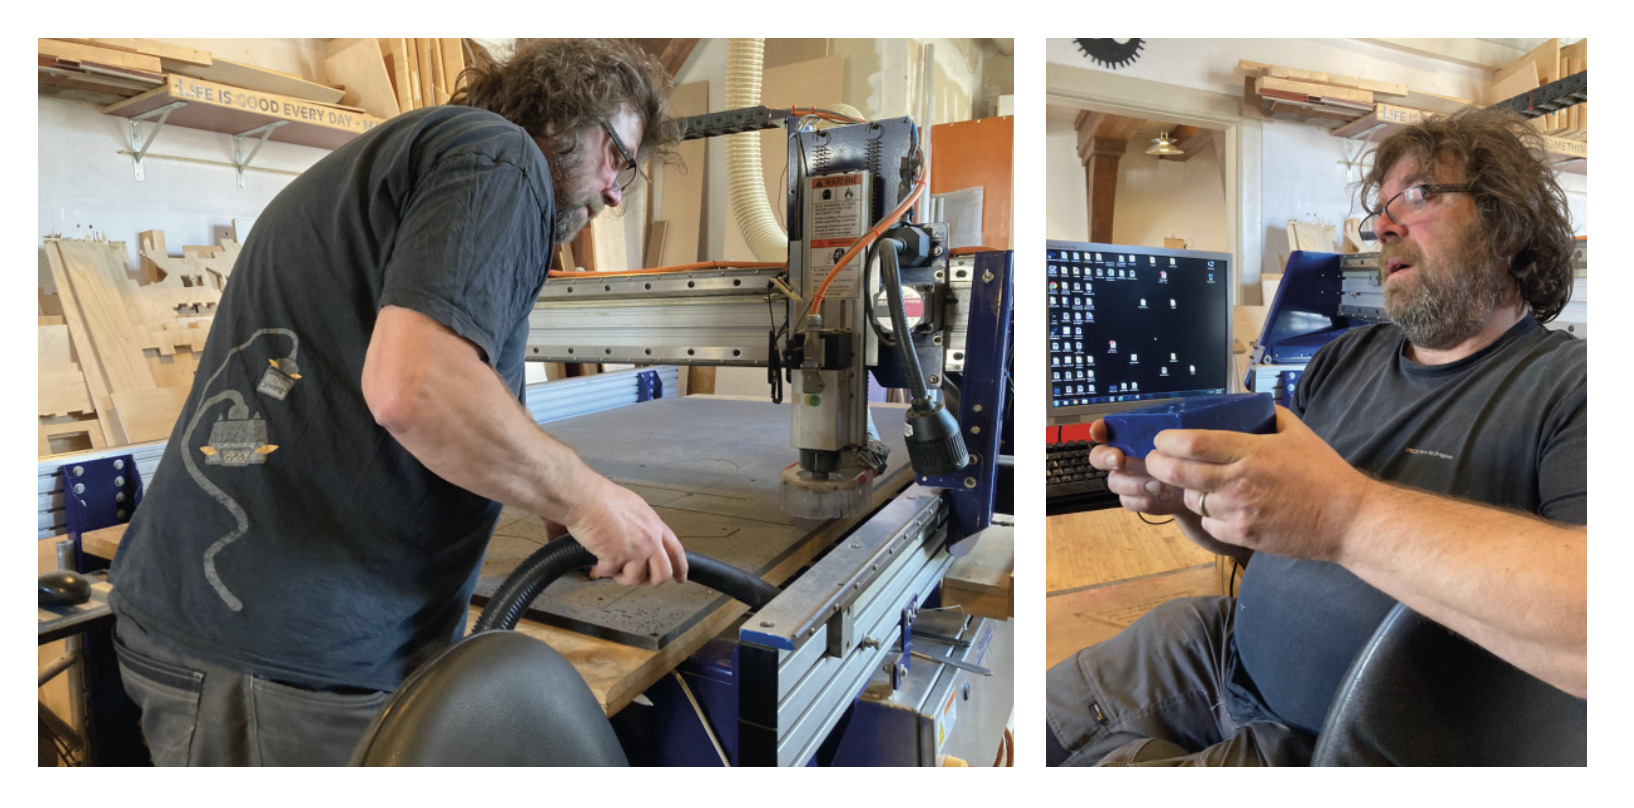
The locate the mold in the center of the sacrificial layer, where the WAX chips will not fall from it, and due will be able to recycle.
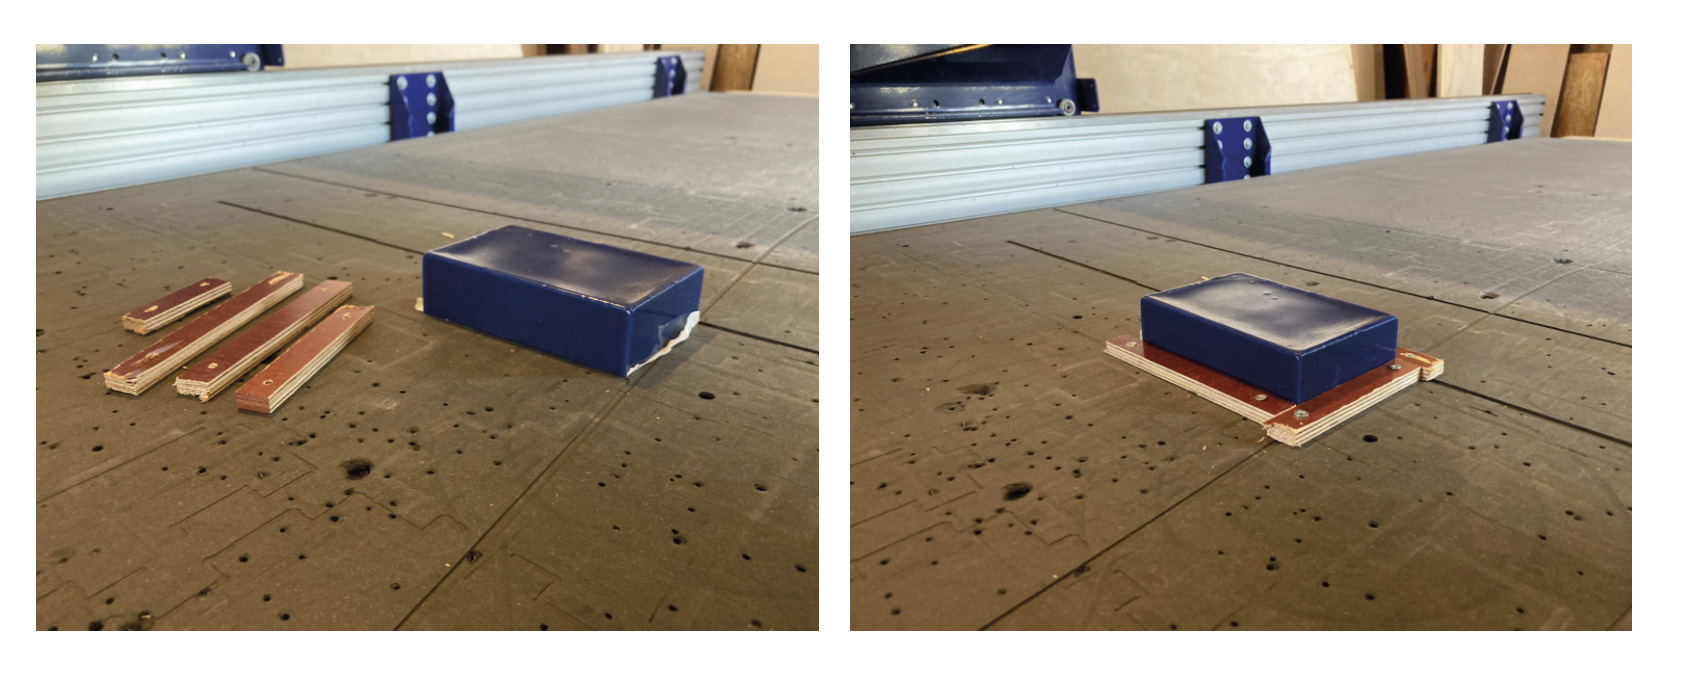
Stick the Mold to the Surface
Instead of previously milling circles to screwing the material to the sacrificial layer, we will stick it to it using a double face tape.
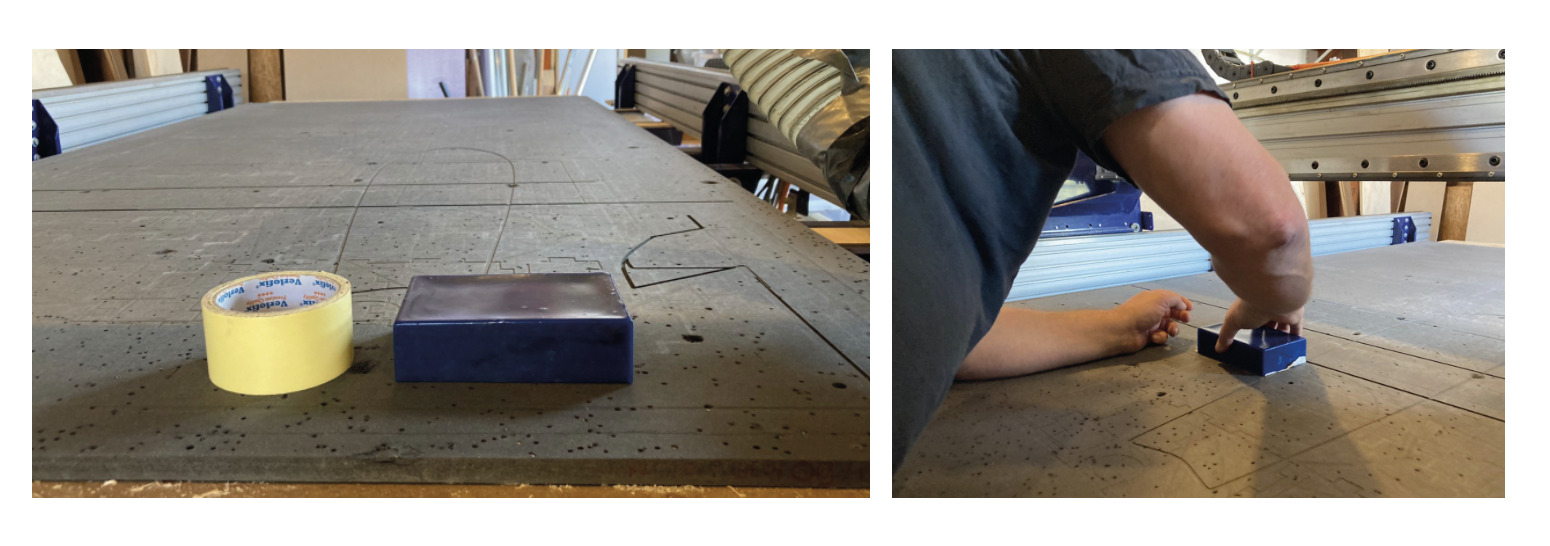
Using double face tape will not be enough to prevent the movement of the mold when milling. It will be needed to screw in the mold’s laterals wood pieces to ensure that the WAX’s mold is correctly stuck to the surface.
Milling
When milling, it is important to have in consideration this steps:
-
Calibrating the Z-Axe
When calibrating the Z-axe, instead of doing it from the bottom surface, it is important to do it locating the metal sheet on the the middle point of the top material surface.
This is because the material’s top surface is not uniformly leveled.
-
Don’t Turn On the Air Extractor
Another important point is to not turn on the Air Extractor. We don’t want to mix WAX chips with the plywood leftovers, otherwise it will be difficult to recycle.
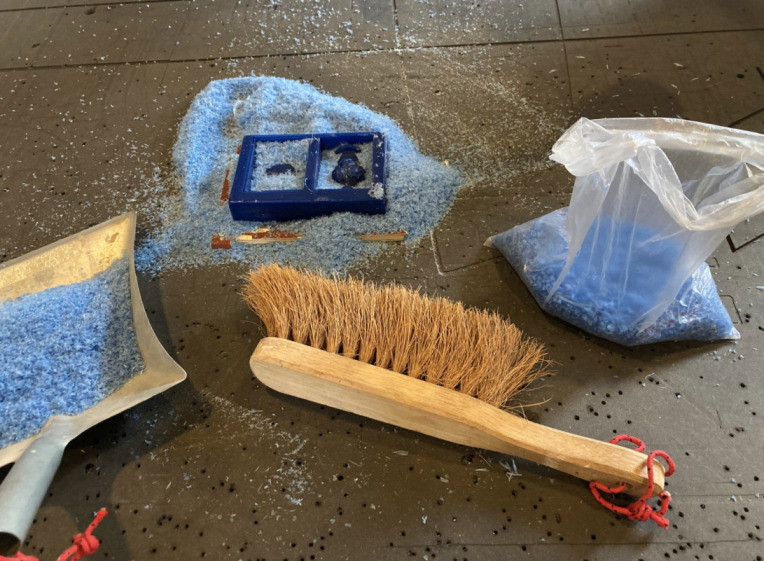
Cleaning the Sacrificial Layer
When the work is done, is important to clean the Sacrificial Layer, putting apart the WAX’s chips, in order to be able to recycle in the future to make new molds.
When putting these leftovers apart, separate them by color, so when they will be melted again the mold’s color will stay uniform.
Casting
Once the mold was milled, I did an experiment with my fellow student Bas, analyzing the material’s behavior of different bio-based mixes of Gelatine, Glycerine, and Water.
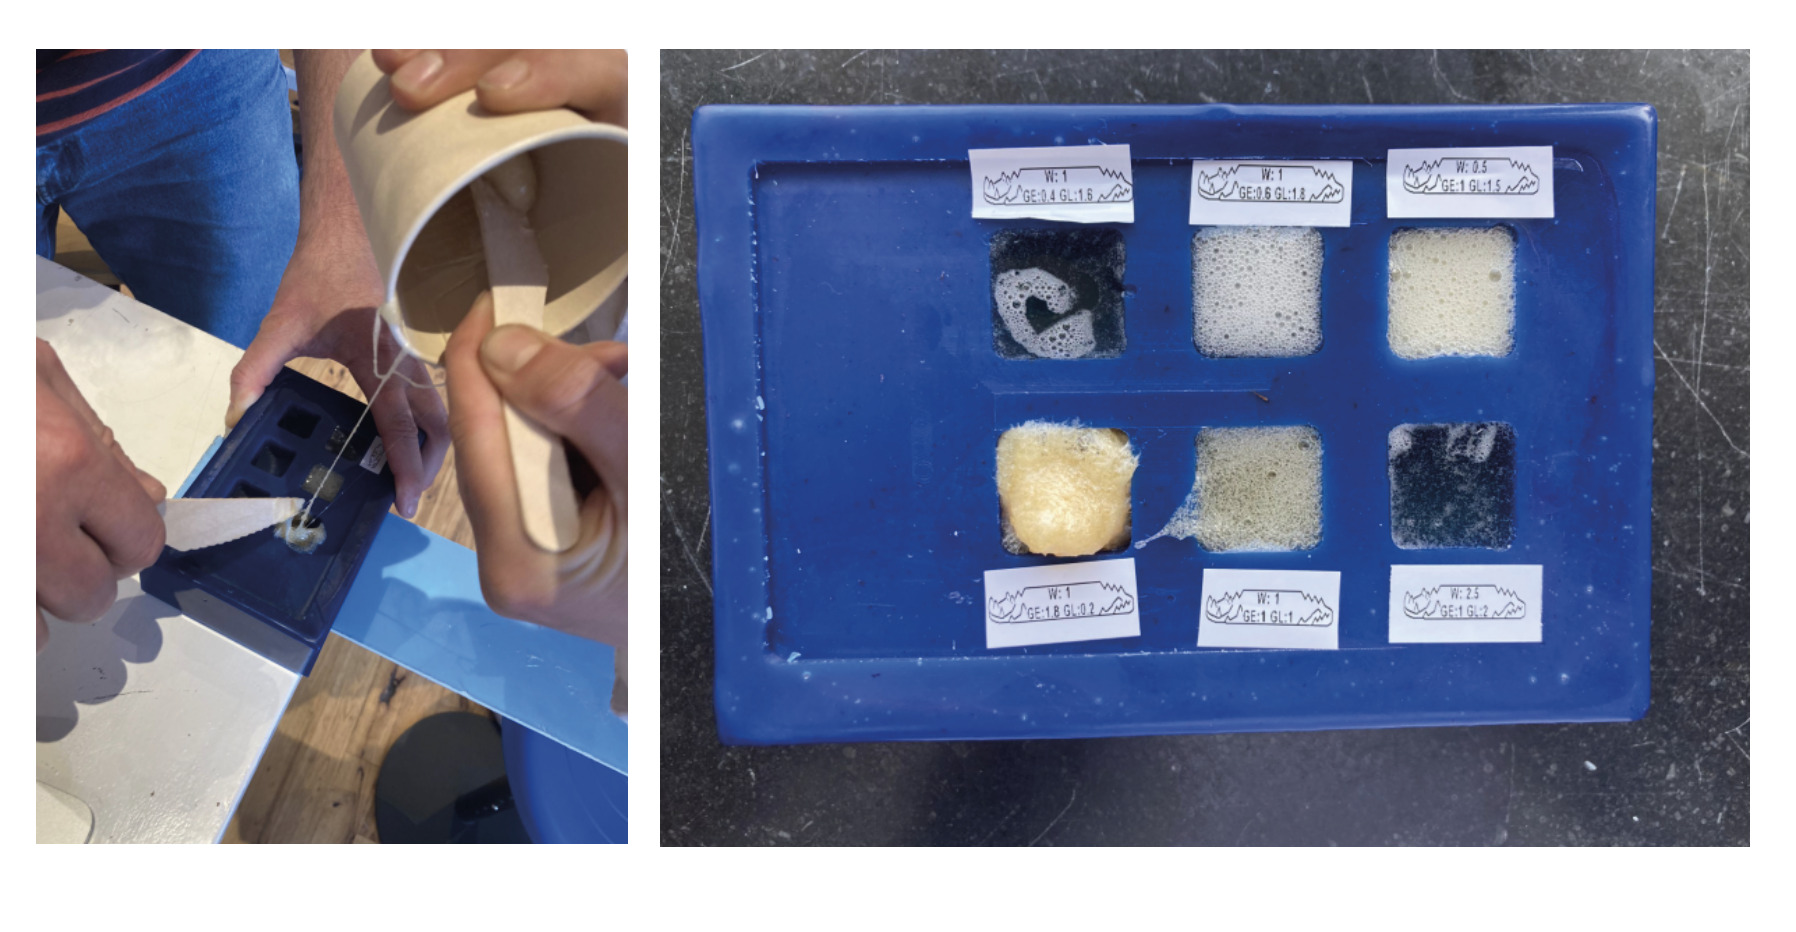
We did try different biomaterials compositions, leaving the Water as a constant, and modifying the amount of Gelatine and Glycerine in the mix.
| Test | Gelatine | Glycerine | Water |
|---|---|---|---|
| Test 1 | 1 | 1 | 1 |
| Test 2 | 1.8 | 0.2 | 1 |
| Test 3 | 0.4 | 1.6 | 1 |
| Test 4 | 0.6 | 1.8 | 1 |
The mix where the amount of Gelatine was higher, was denser rather than the ones with a bigger amount of glycerine. The Test 1 resulted in being a good mix to cast a mold. The Test 2 resulted in not being an optimal material to cast since it was very sticky and not easy to pour into the mold - even if heated up.
Test 3 resulted in being too liquid, and not very optimal to cast a mold because of missing Gelatine as a structure for the material.
Test 4 could be a better mix to pour and cast, but not as optimal as the Test 1 since the water will dry off after a few days.
It is needed to have a bigger amount of gelatine and a lower amount of water to ensure that the material will be thicker.
Considering the results from the previous tests, we also tried a mix which Henk showed us, and a new mix where we reduced the ammount of water, and added some more gelatine.
| Test | Gelatine | Glycerine | Water |
|---|---|---|---|
| Henk test | 1 | 2 | 2.5 |
| Test 5 | 1 | 1.5 | 0.5 |
The Test 5 seams to be a good mix to pour in the mold.
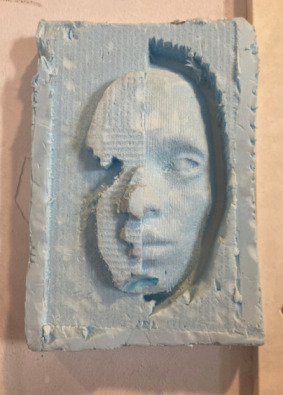
Individual Assignment Process 🏊♀️
I decided to do adapt the Venus of Venus de Willendorf .stl file which I already used in the past for my personal projects, as a starting point for this week’s individual assignment.
I choose to make again this sculpture, also to be able to check the differences between the sculptures made with the two parts silicone mold which I did, and the new one.
I really love what this sculpture symbolizes, as this article explainssays : It has been suggested that she is a fertility figure, a good-luck totem, a mother goddess symbol, or an aphrodisiac made by men for the appreciation of men. What has been seen as evidence of obesity or adiposity is actually the foreshortening effect of self-inspection.

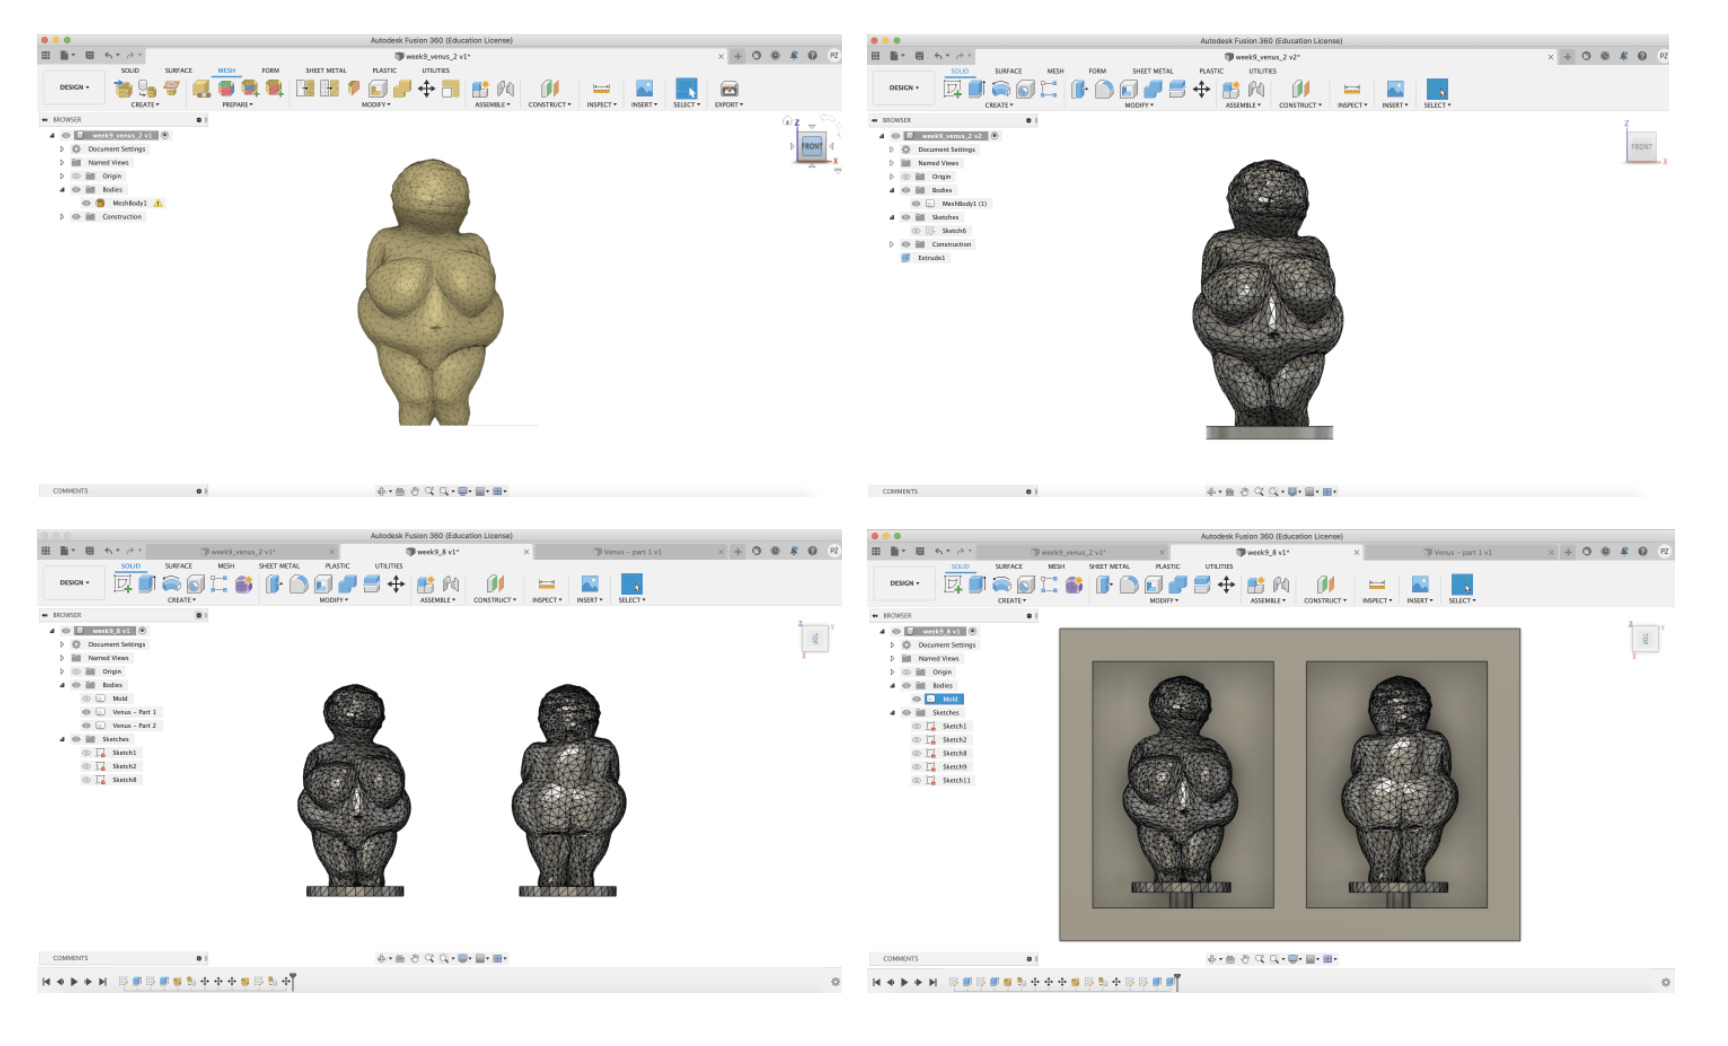
Designing with Fusion 360
During this process I did not had much dificulties. I did the mold using a parametric design, in this way I was able to adapt the design, joins, measures, if needed.
V-CARVE
When preparing the file for milling, I used the following Milling Bits Features for each Toolpath. The other Toolpath settings were the same as for the group assignment.
3D Roughing Toolpath - Tool
-
Tool info
- Name: End Mill 2 flute (4 mm)
- Tool Type: End Mill
-
Geometry
- Diameter: 4 mm
-
Cutting Parameters:
- Pass Depth: 2 mm
- Stepover: 50%
-
Feeds and Speeds
- Spindle Speed: 6.000 r.p.m.
- Feed Rate: 40 mm/sec
- Plunge Rate: 20 mm/sec
-
Tool Number
- 1
Finish Machining Toolpath
-
Tool info
- Name: End Mill 2 flute (4 mm)
- Tool Type: End Mill
-
Geometry
- Diameter: 4 mm
-
Cutting Parameters:
- Pass Depth: 2 mm
- Stepover: 10%
-
Feeds and Speeds
- Spindle Speed: 6.000 r.p.m.
- Feed Rate: 20 mm/sec
- Plunge Rate: 15 mm/sec
-
Tool Number
- 2
Milling the Mold
Preparing the Mold on the Sacrificial Layer
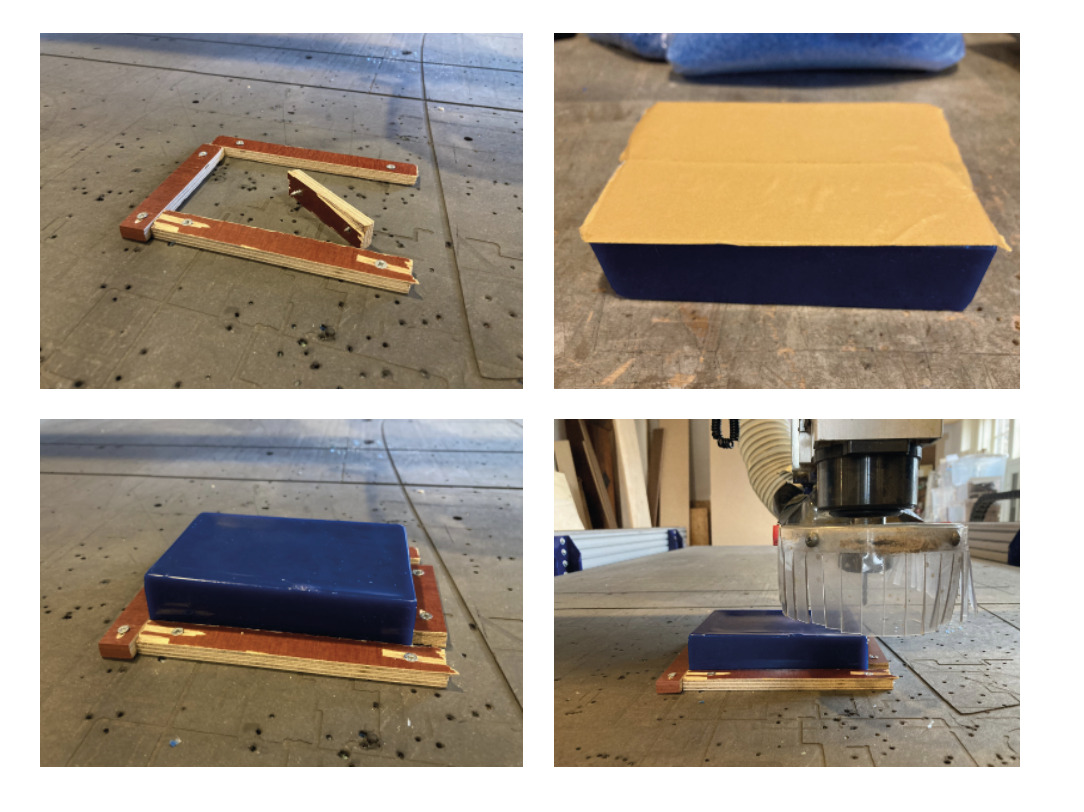
Milling process
I did have a problem during this step. The milling bit suddenly break. Instead of using a 2-flute bit end mill, I did use a 4-flute mill, which broke almost at the end of the job.
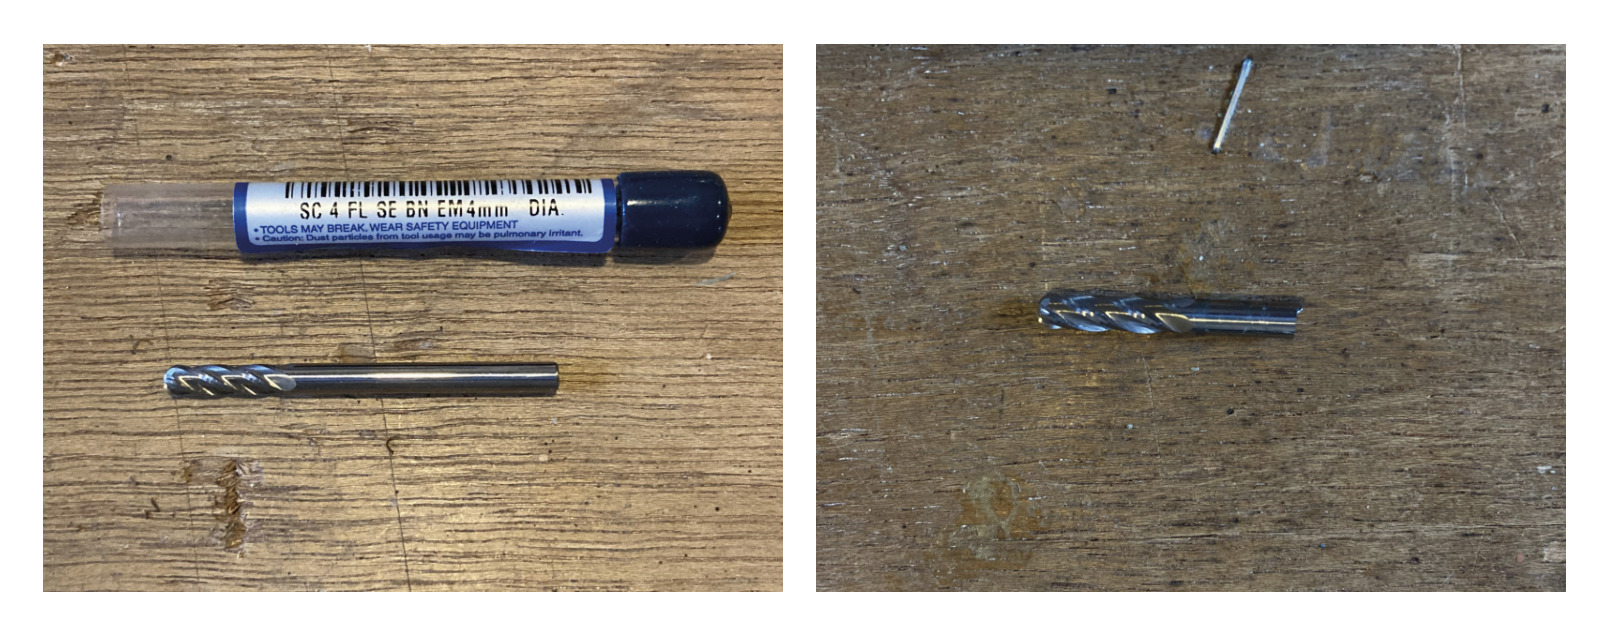
It happened when milling the mold’s perimeter, probably because the settings were not the proper ones for this kind bit.
Since I had to change the bit and level again the Z-axis before being able to continue with the work, I had to hack the Finish Machining Toolpath G-Code in order to be able to continue with the work.
In order to do that, I opened the G-Code text with Visual Studio, deleted all the lines previous to the milling bit brake, and saved the new G-Code lines.
This solution work out, and I could end the work.
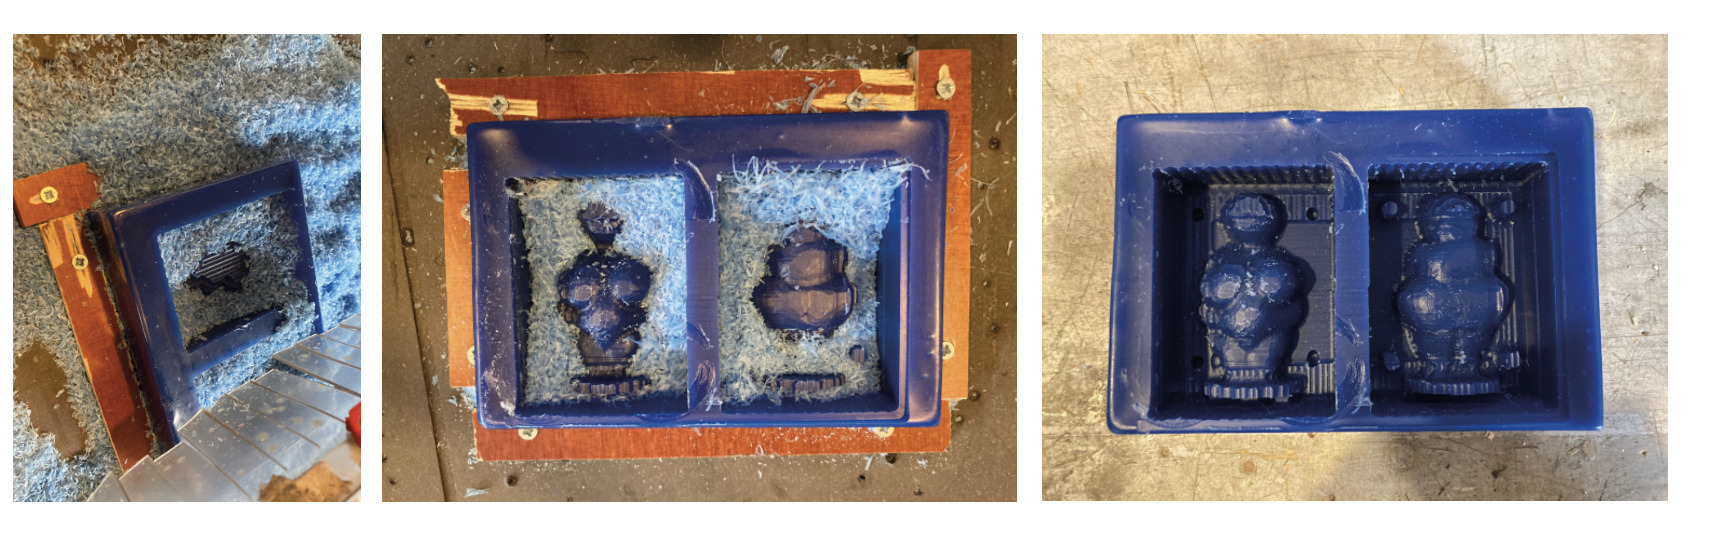
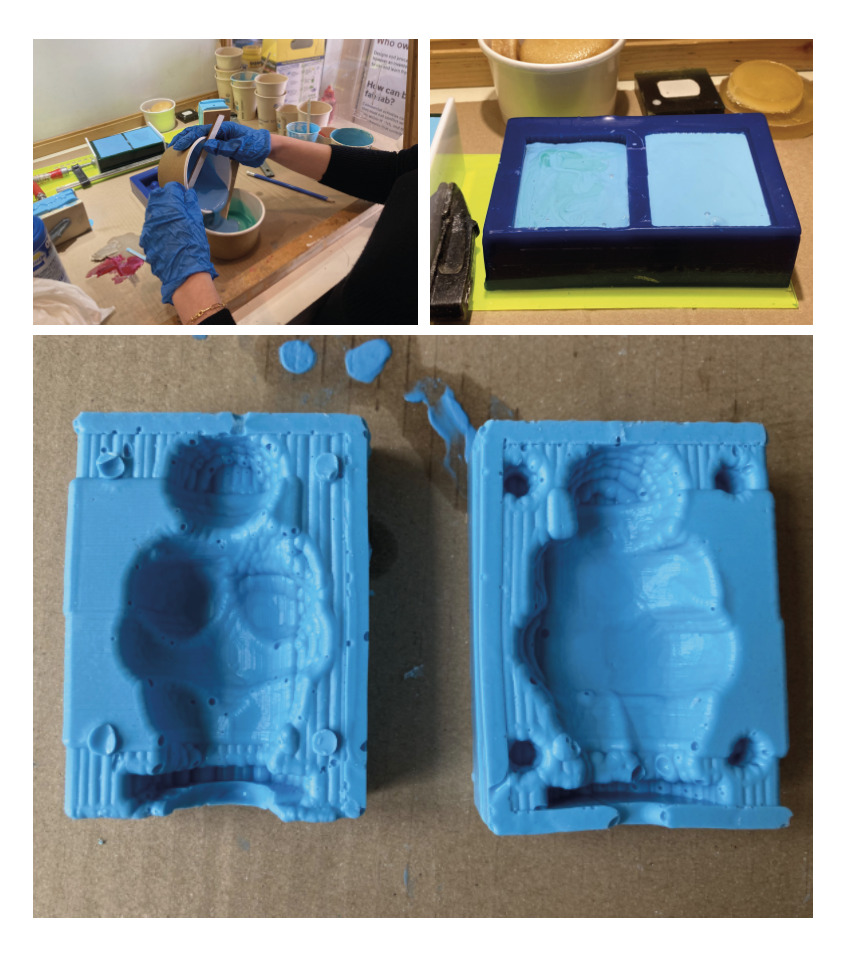
Mold Casting
I used Oomoo 25 to cast my Venus mold.
This material is easier to work with rather than others because it does not make many bubbles on the surface and it is also cast in a fast way.
Read Data-Sheet
I did read the Oomoo’s data-sheet before using it. Attached is a photo with the Safety steps needed to follow in order to properly workd with the material:
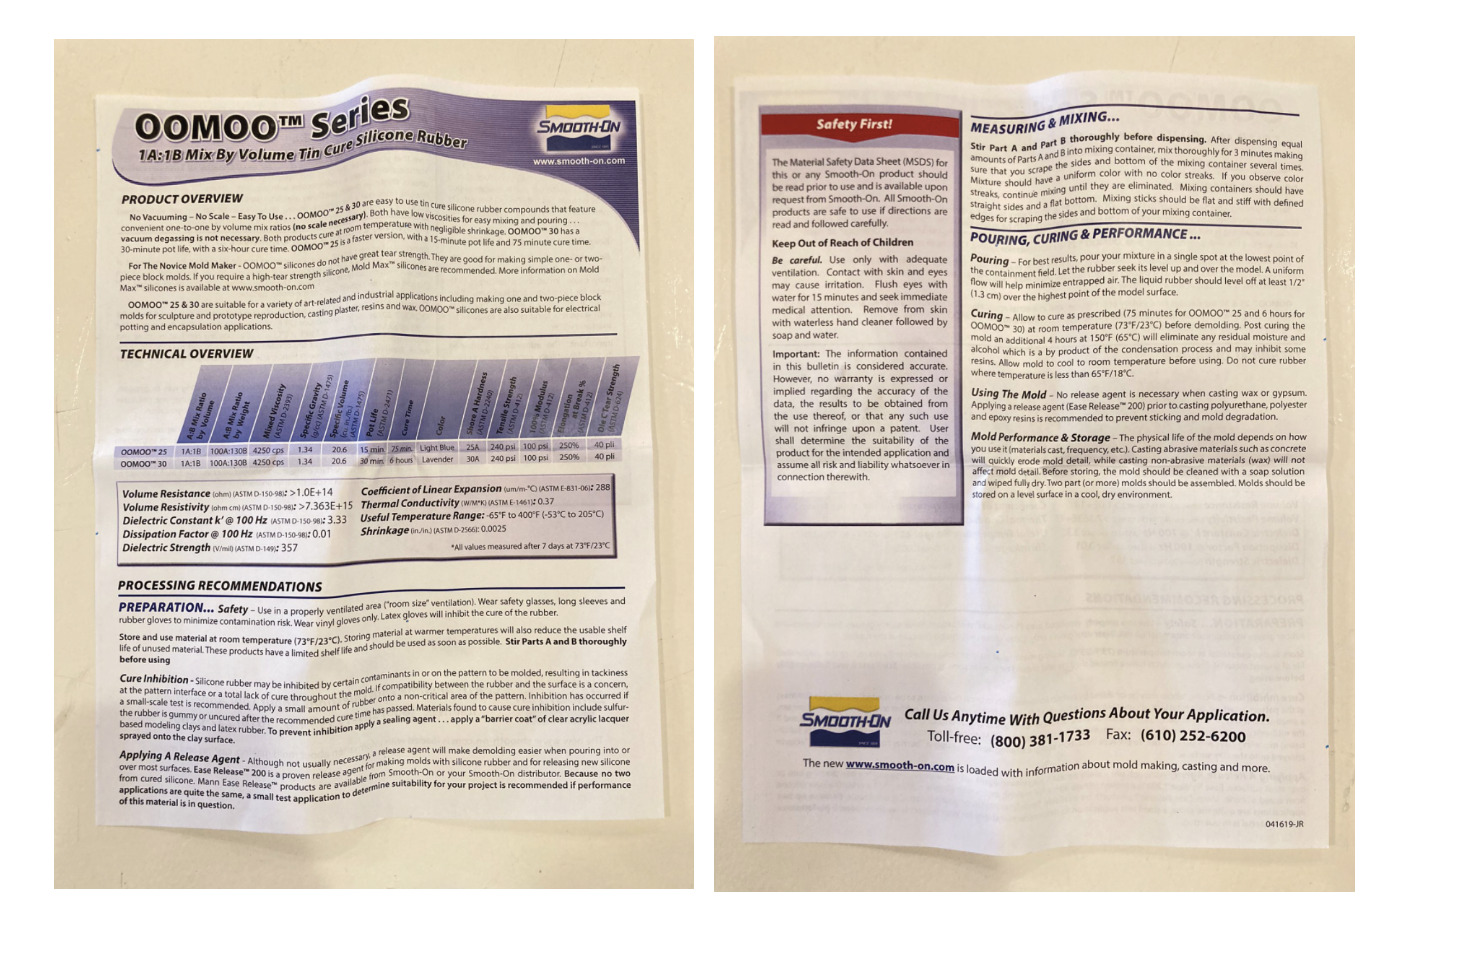
Pouring Oomoo
Most of the molding and casting materials come in a pack of two bottles, parts A and B which need to be mixed in the same proportion - this is the case of Oomoo.
Before mixing the material, I did calculate the amount needed to mold both parts, adding water to my wax block. I did make a mistake when doing so because I added the exact quantity and did not consider adding a bit more material. In fact, since the material is very dense, is not possible to pour all of the mixes into the mold, so I miss a bit of material when pouring the second part of the mold.
Tip 🛎️: When casting a mold, calculate the quantity needed in advance, and count with a + 5% more material to ensure that it is enough.
After waiting aproximatly 1.5h the mold was still casting. I did have to wait for more than 3 hours before being able to pour the casting material into my mold. This is because I probably did not properly mix parts A and B.
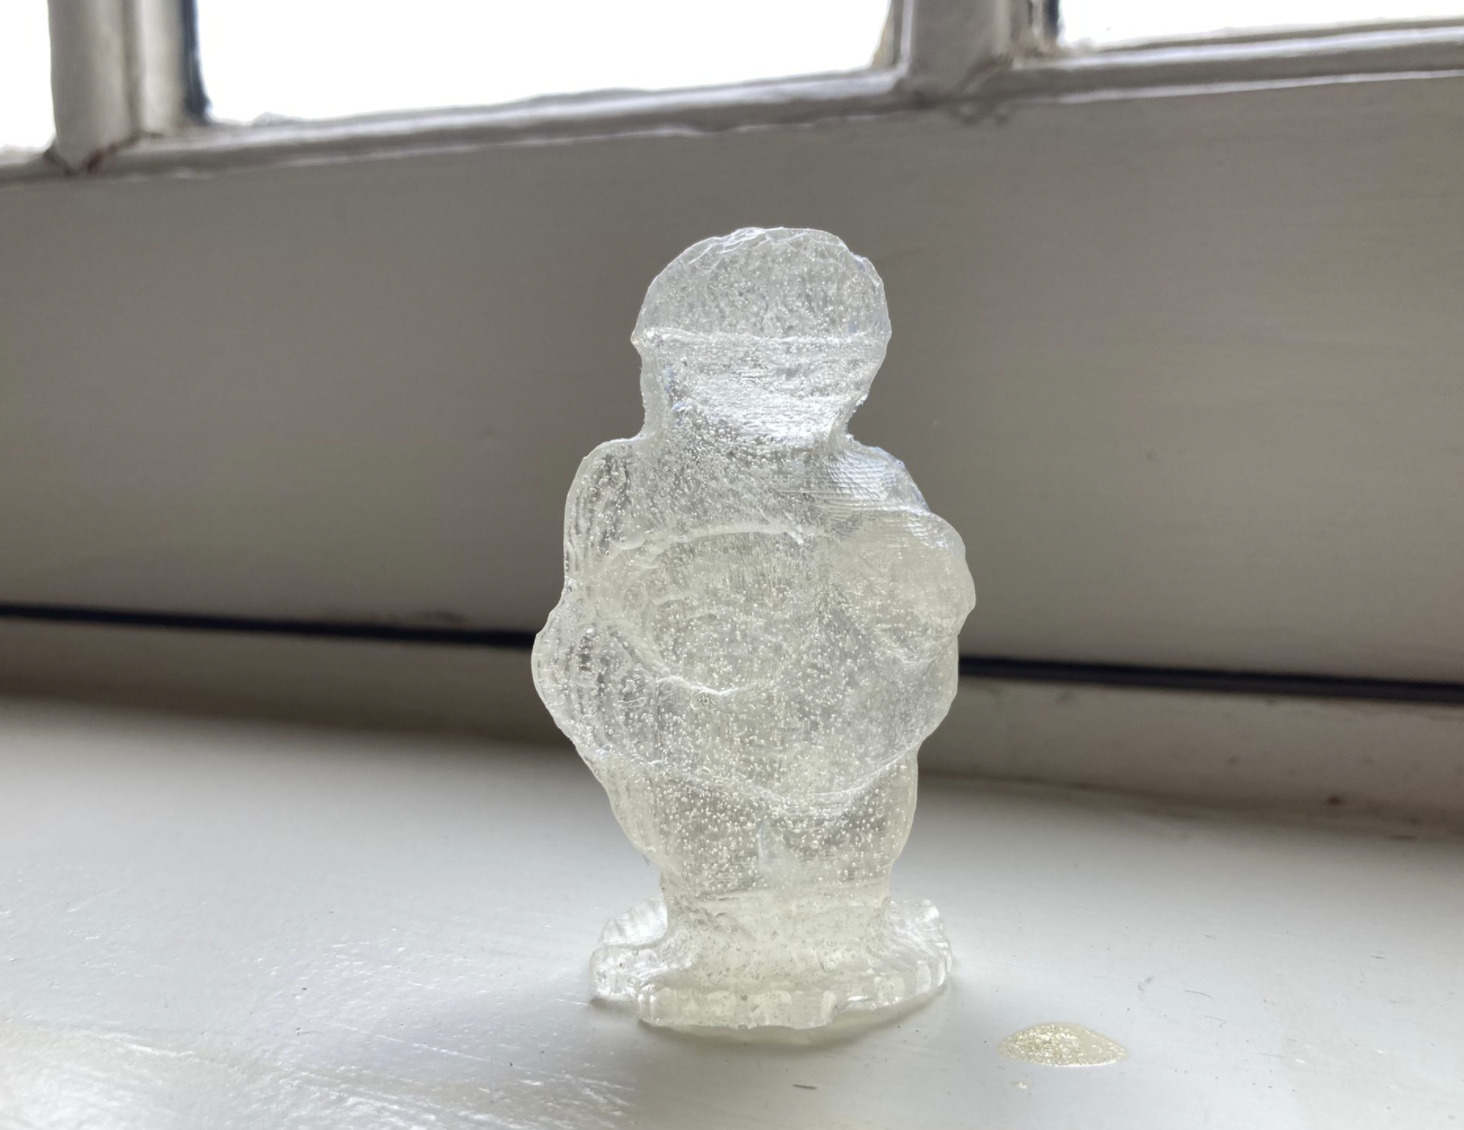
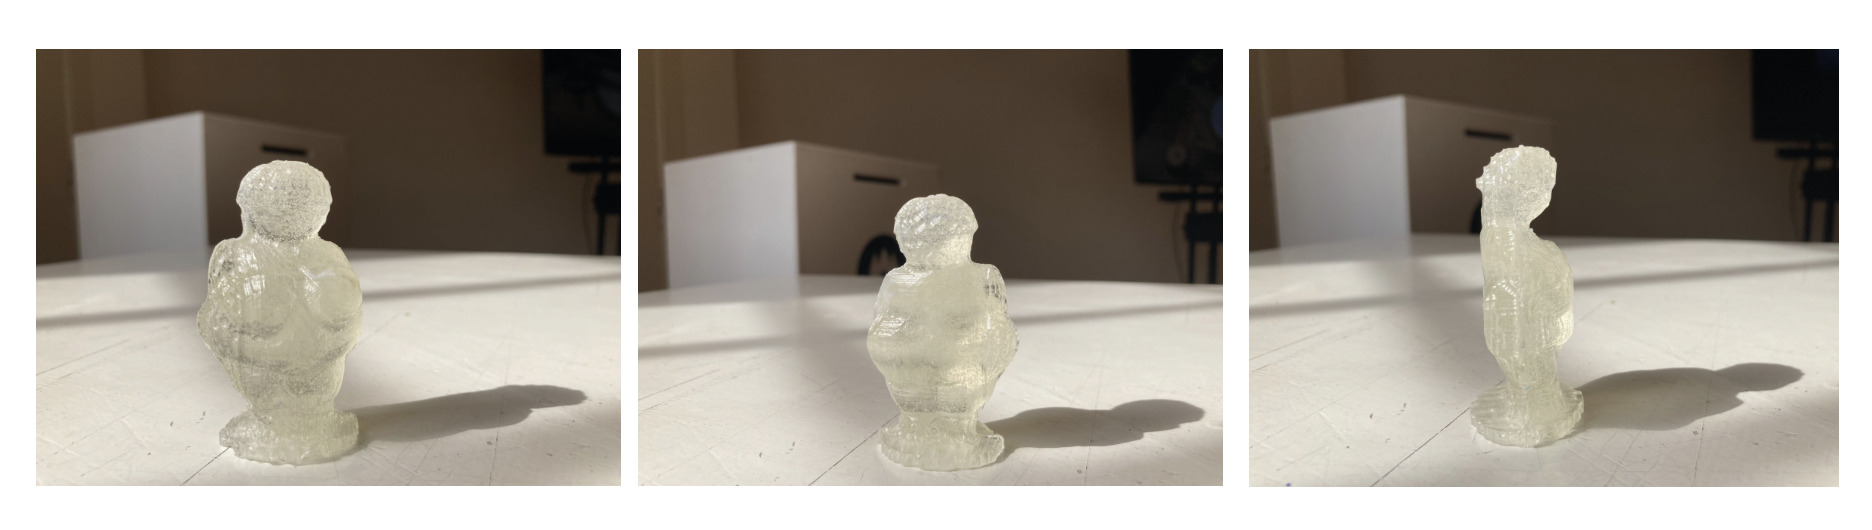
Pouring Smooth Cast 325
Since I did not have too much time left before the end of the week, I decided to cast the “Smooth-Cast 325” material in order to have a few first samples of my Venus to compare each other.
I did read the material’s Data-Sheet and followed the instructions carefully. In fact, this material is quite more toxic rather than the Oomoo.
It is important to mix both parts A and B for a minute, and then pour it instantly because this material takes 10 minutes to cast.
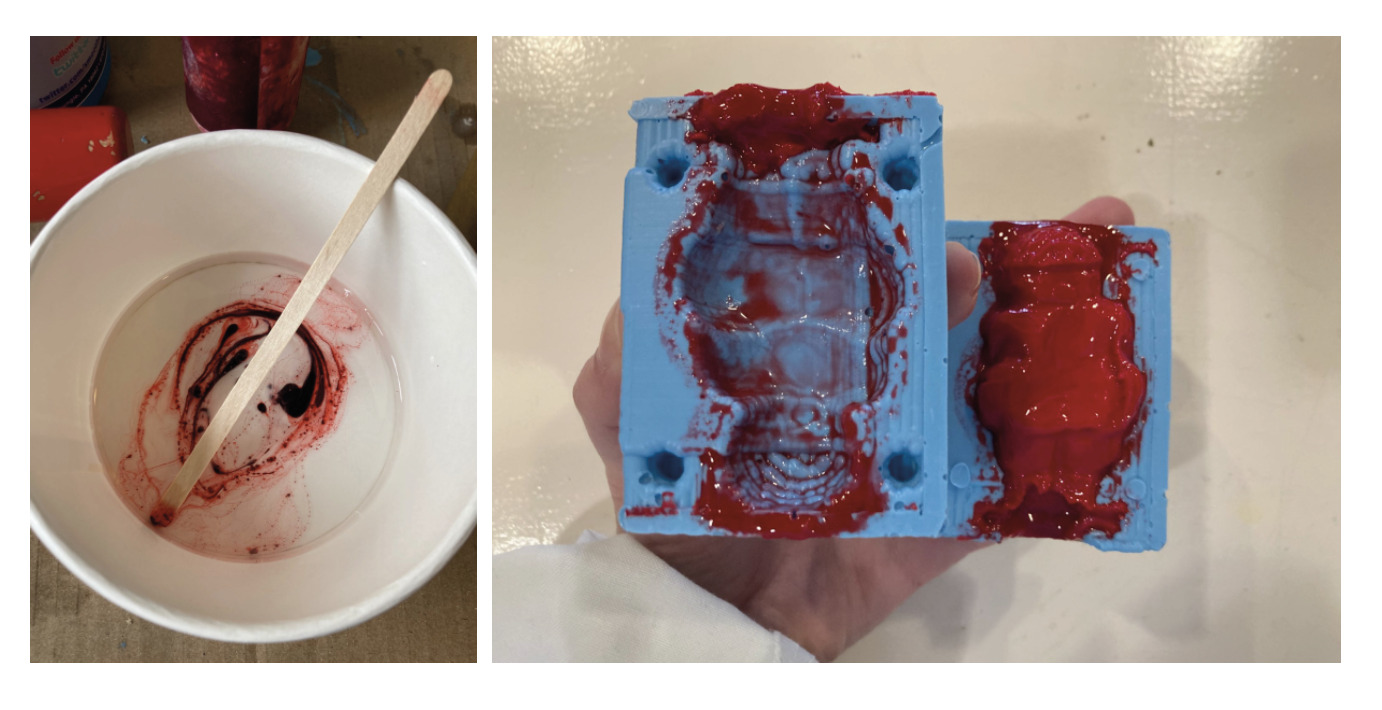
Then I decided to make some new tries, adding pigments to the mix of the same material. I did mix the pigment with the B part - as the instructions say, and then did the final mix with part A.
The result was not as expected, after 30 minutes the material was not completely cast, and the mold was very messy. The problem may be because these pigments were not compatible with the cast material.
Retrospective 🤔
This week resulted on being messy and longer than expected.
I thought I would enjoy it much more the subject, but I think there are probably more efficient ways to make molds rather than what we tried during the week. Due to the long time needed to mill the mold - especially when being a big group and just having one milling machine - and the time needed to prepare and cast the materials, I did not have enough time to try everything that I wanted.
I did all the Fab Academy assignments, but I did not reach my personal goals. So, I am project managing my time for the next weeks, in order to be able to try out other molding options.