Input Devices
In this assigment I used the Fabduino PCB Board, designed in past assignments. A sensor DHT22 is connected to the board. This sensor has 3 pins: +5VDC, out and GND. to read temperature and humidity.
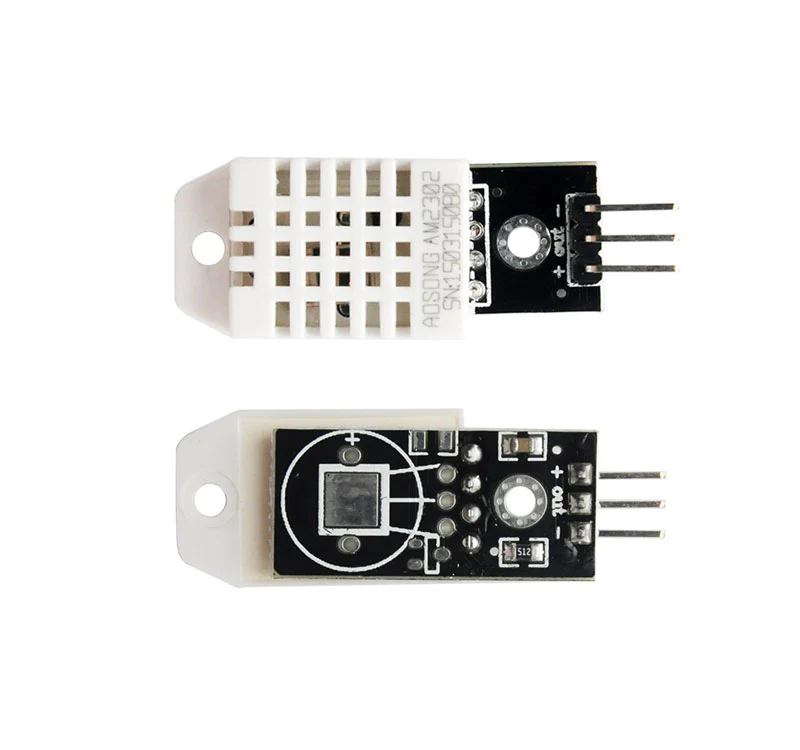
DHT22 Sensor
DHT22 digital temperature and humidity sensor is a calibrated digital signal output temperature and humidity combined sensor, which application-specific modules capture technology and digital temperature and humidity sensor technology to ensure that products with high reliability and excellent long-term stability.
No pullup resistor needed. Just plug right in to Arduino or ESP8266.
Pin Configuration
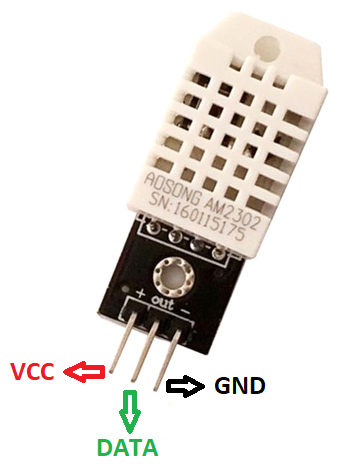
1. VCC: It has a power supply of 3.5V to 5.5V.
2. Data: The temperature and humidity output signals via serial data.
3. Ground: The module usually connects to the ground of a circuit.
Specifications
Main Chip:AM2302
Temperature range: -40 to 80 degree celsius
Temperature measurement accuracy: +/- 0.5℃ degree celsius
Humidity measuring range: 0~100%RH
Humidity measurement accuracy: ±2%RH
Ultra-low power consumption
No additional components
Excellent long-term stability
Single-bus digital signal output, bidirectional serial data
Completely interchangeable
Long distance signal transmission
Size: 28 x 12 x 10 mm (L / W / H)
Screw hole diameter: 2.6mm
Weight: 4g
Fabduino
I used my Fabduino board to do this assignment. Previously designed in other assignment: Assignment 8 Electronics Design.
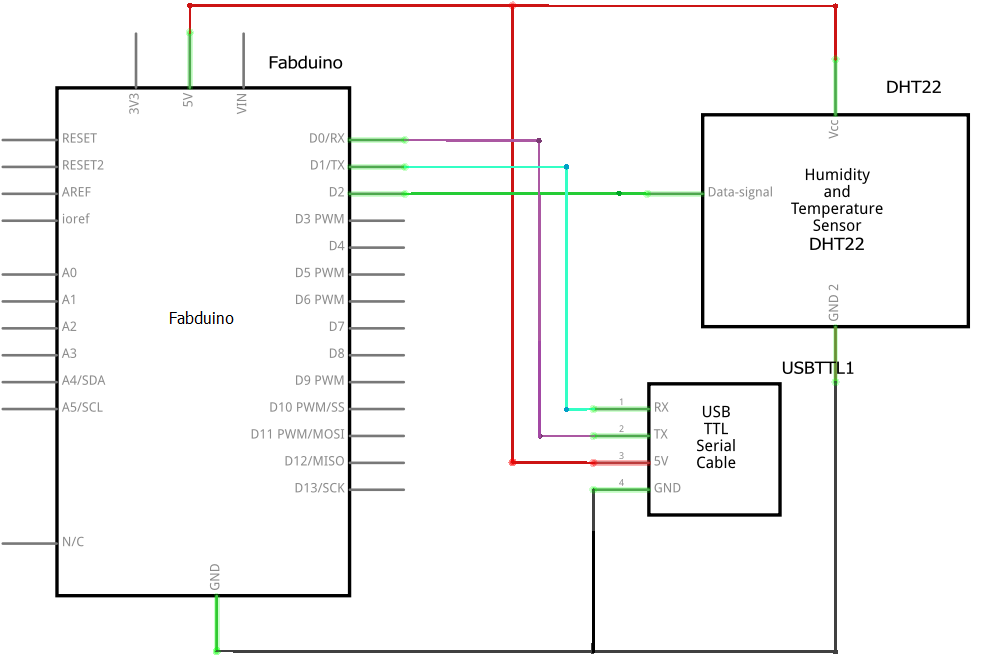
So, I made the next circuit to test the sensor.
Schematic Circuit
I chose the digital pin (pin D2), VCC and GND.

Test signal
As we know, the DHT22 sensor has a single data output pin, which uses SDA for communication and synchronization between the microprocessor and the AM2302, single bus data format, a transmission of 40 bytes of data.

To make these measurements I used an oscilloscope, where I connected to the output pin and ground to the probe. Obtaining the following results.
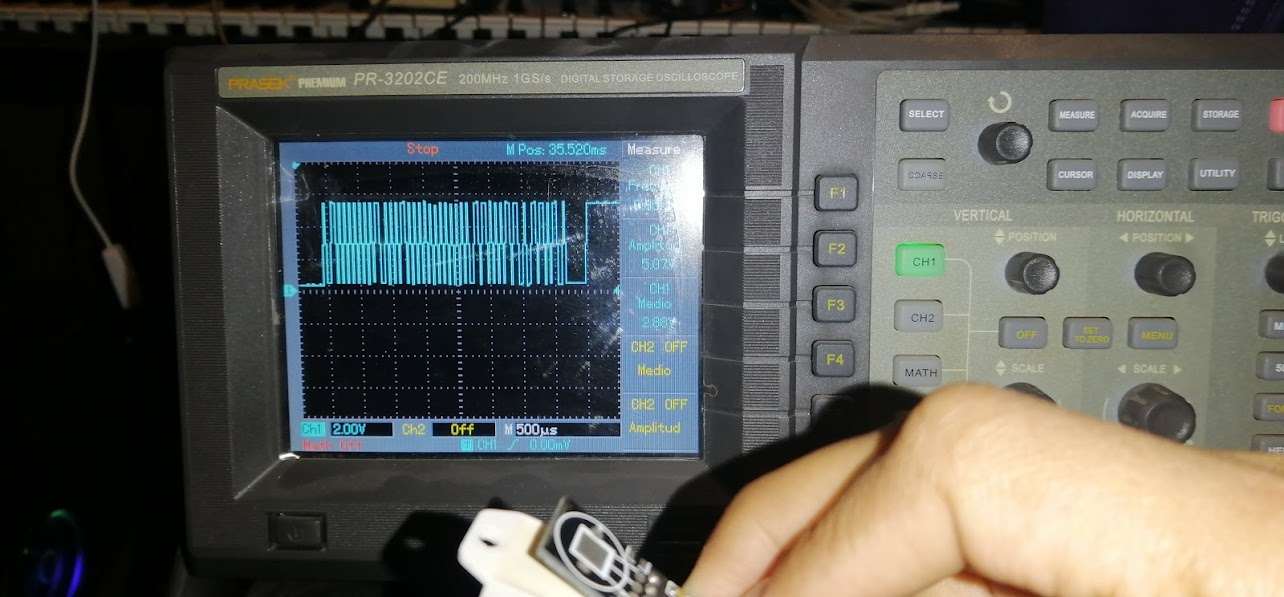
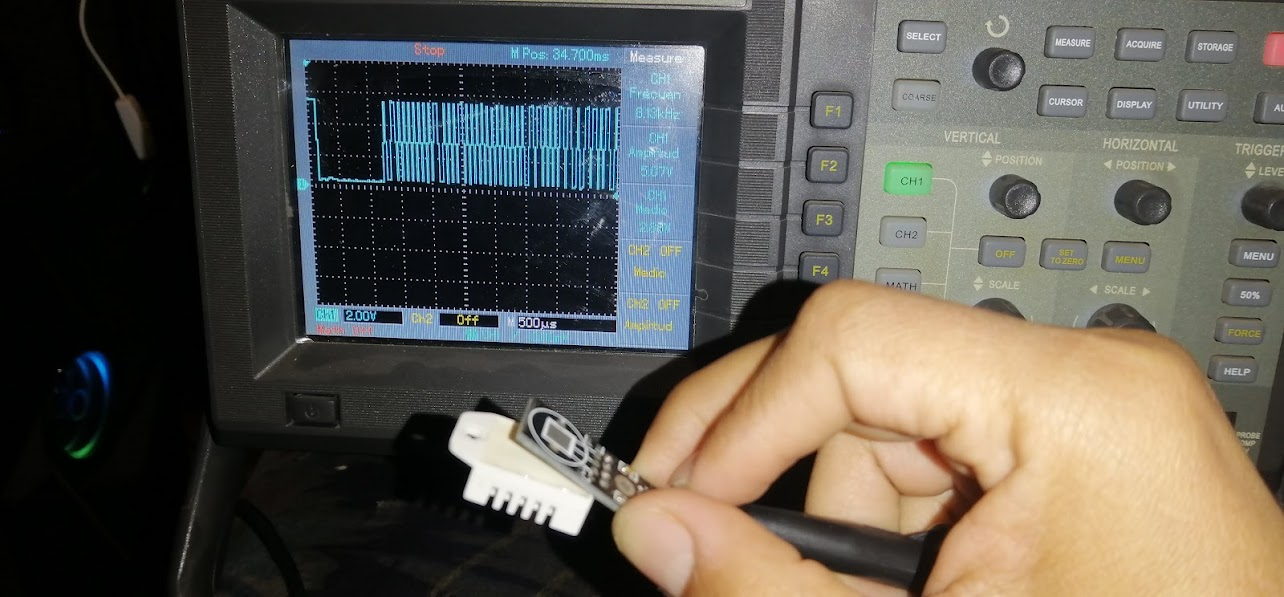
In the signal you can see the levels according to the previous graph. And the voltage of 5.07V
Programming the PCB Boards
In the programming IDE we must select the board Arduino UNO (Fabduino)
Using the FabISP to program the board in Assignment 4: Electronics Production.
The connection is shown below: 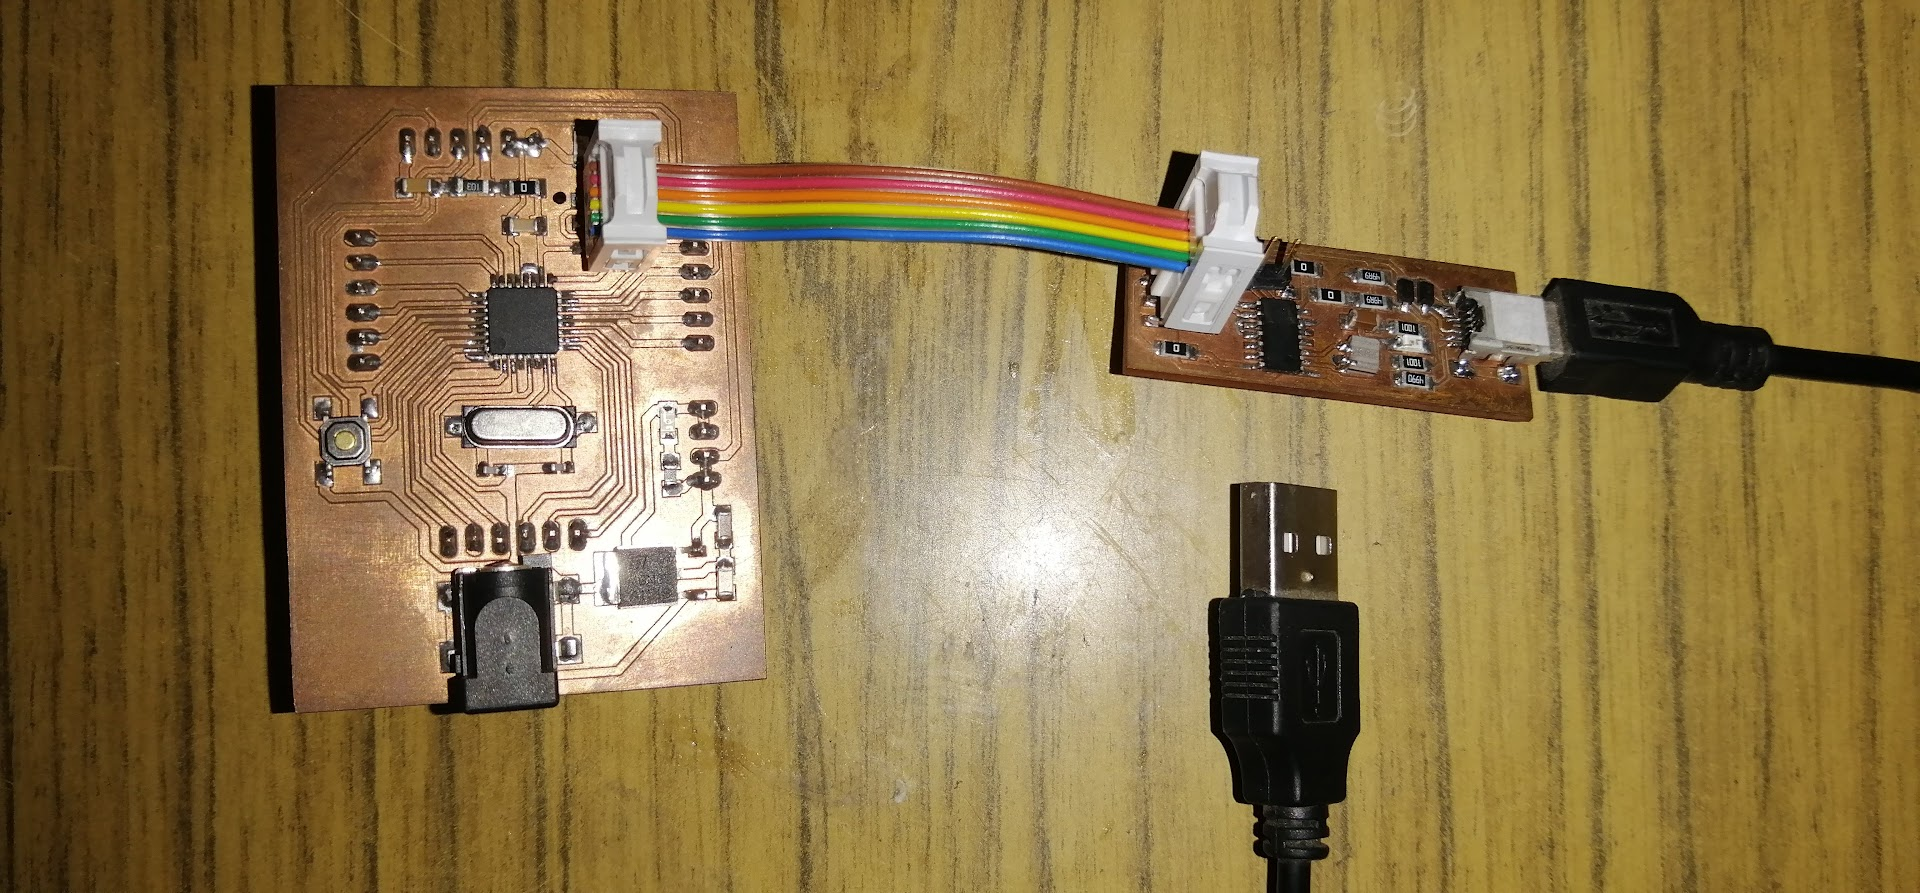
I need to install the DHT sensor library, lastest version. Go to Manage Libraries.
Code / Firmware
//Code was taken from adafruit github repository
// DHT Temperature & Humidity Sensor
// Unified Sensor Library Example
// Written by Tony DiCola for Adafruit Industries
// Released under an MIT license.
// REQUIRES the following Arduino libraries:
// - DHT Sensor Library: https://github.com/adafruit/DHT-sensor-library
// - Adafruit Unified Sensor Lib: https://github.com/adafruit/Adafruit_Sensor
#include <Adafruit_Sensor.h>
#include <DHT.h>
#include <DHT_U.h>
#define DHTPIN D2 // Digital pin connected to the DHT sensor
// Feather HUZZAH ESP8266 note: use pins 3, 4, 5, 12, 13 or 14 --
// Pin 15 can work but DHT must be disconnected during program upload.
// Uncomment the type of sensor in use:
//#define DHTTYPE DHT11 // DHT 11
#define DHTTYPE DHT22 // DHT 22 (AM2302)
//#define DHTTYPE DHT21 // DHT 21 (AM2301)
// See guide for details on sensor wiring and usage:
// https://learn.adafruit.com/dht/overview
DHT_Unified dht(DHTPIN, DHTTYPE);
uint32_t delayMS;
void setup() {
Serial.begin(9600);
// Initialize device.
dht.begin();
Serial.println(F("DHTxx Unified Sensor Example"));
// Print temperature sensor details.
sensor_t sensor;
dht.temperature().getSensor(&sensor);
Serial.println(F("------------------------------------"));
Serial.println(F("Temperature Sensor"));
Serial.print (F("Sensor Type: ")); Serial.println(sensor.name);
Serial.print (F("Driver Ver: ")); Serial.println(sensor.version);
Serial.print (F("Unique ID: ")); Serial.println(sensor.sensor_id);
Serial.print (F("Max Value: ")); Serial.print(sensor.max_value); Serial.println(F("°C"));
Serial.print (F("Min Value: ")); Serial.print(sensor.min_value); Serial.println(F("°C"));
Serial.print (F("Resolution: ")); Serial.print(sensor.resolution); Serial.println(F("°C"));
Serial.println(F("------------------------------------"));
// Print humidity sensor details.
dht.humidity().getSensor(&sensor);
Serial.println(F("Humidity Sensor"));
Serial.print (F("Sensor Type: ")); Serial.println(sensor.name);
Serial.print (F("Driver Ver: ")); Serial.println(sensor.version);
Serial.print (F("Unique ID: ")); Serial.println(sensor.sensor_id);
Serial.print (F("Max Value: ")); Serial.print(sensor.max_value); Serial.println(F("%"));
Serial.print (F("Min Value: ")); Serial.print(sensor.min_value); Serial.println(F("%"));
Serial.print (F("Resolution: ")); Serial.print(sensor.resolution); Serial.println(F("%"));
Serial.println(F("------------------------------------"));
// Set delay between sensor readings based on sensor details.
delayMS = sensor.min_delay / 1000;
}
void loop() {
// Delay between measurements.
delay(delayMS);
// Get temperature event and print its value.
sensors_event_t event;
dht.temperature().getEvent(&event);
if (isnan(event.temperature)) {
Serial.println(F("Error reading temperature!"));
}
else {
Serial.print(F("Temperature: "));
Serial.print(event.temperature);
Serial.println(F("°C"));
}
// Get humidity event and print its value.
dht.humidity().getEvent(&event);
if (isnan(event.relative_humidity)) {
Serial.println(F("Error reading humidity!"));
}
else {
Serial.print(F("Humidity: "));
Serial.print(event.relative_humidity);
Serial.println(F("%"));
}
}
Testing

Serial Monitor console showing the temperature and humidity values
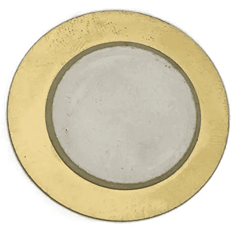
Piezoelectric sensor
A piezoelectric sensor is a device that uses the piezoelectric effect to measure changes in pressure, acceleration, temperature, strain, or force by converting them to an electrical charge.
Piezoelectricity is the charge created across certain materials when a mechanical stress is applied. Piezoelectric pressure sensors exploit this effect by measuring the voltage across a piezoelectric element generated by the applied pressure. They are very robust and are used in a wide range of industrial applications.
Pinout
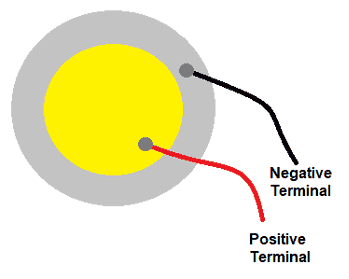
1. Center: Positive terminal
2. Edge: Negative terminal
Specifications:
- A piezoelectric accelerometer has a charge frequency response capacity ranging from 20 Hz to 10 KHz.
- A piezoelectric accelerometer can have electromagnetic sensitivity of 0.0009 equiv.gm/gm and base strain sensitivity of 0.008 equiv.gm/micro strain.
- Piezoelectric force sensors should display a 5-volt full display signal.
- Piezoelectric force sensors should have an operating temperature range from -50 to 350 ºC and should have sensitivity of approximately 105 pC/N.
- Piezoelectric pressure sensors should have rise time less than 2.0 micro seconds.
- The maximum pressure applied by piezoelectric sensors can be 1,000 psi and the voltage measurement range can be up to 5 volts.
- Piezoelectric sensors are designed and manufactured to meet most industry specifications.
Applications:
- Piezoelectric sensors are used for shock detection.
- Active piezoelectric sensors are used for thickness gauge, flow sensor.
- Passive piezoelectric sensors are used microphones, accelerometer, musical pickups, etc.
- Piezoelectric sensors are also used for ultrasound imaging.
- These sensors are used for optic measurements, micro moving measurements, electro acoustics, etc.
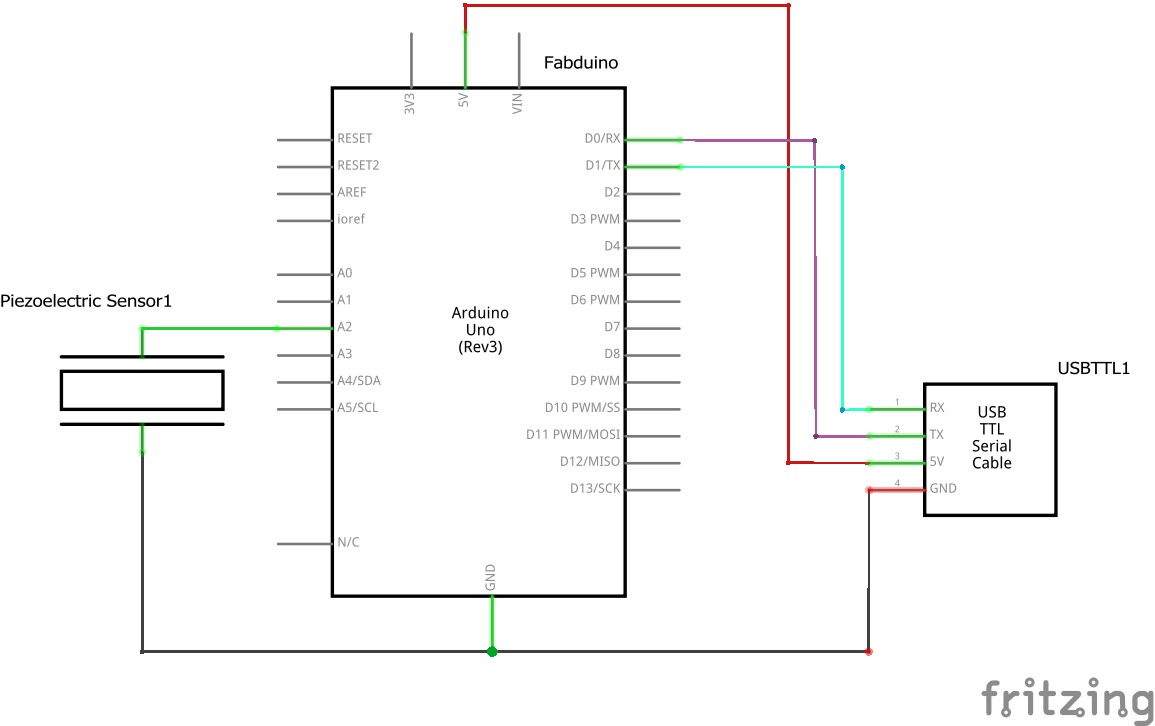
Circuit:
Code:
//The code is located in arduino github repository
//https://github.com/arduino/arduino-examples/blob/main/examples/01.Basics/AnalogReadSerial/AnalogReadSerial.ino
//I've modified for input pullup type pin and the time for reading serial data
const int Sensor = A2; // Sensor connected to analog pin A2
void setup()
{
pinMode(Sensor, INPUT_PULLUP);
Serial.begin(9600);
}
void loop()
{
// read the sensor and store it in the variable sensorReading:
int sensorReading = analogRead(Sensor);
delay(100);
Serial.println(sensorReading);
}
Test:
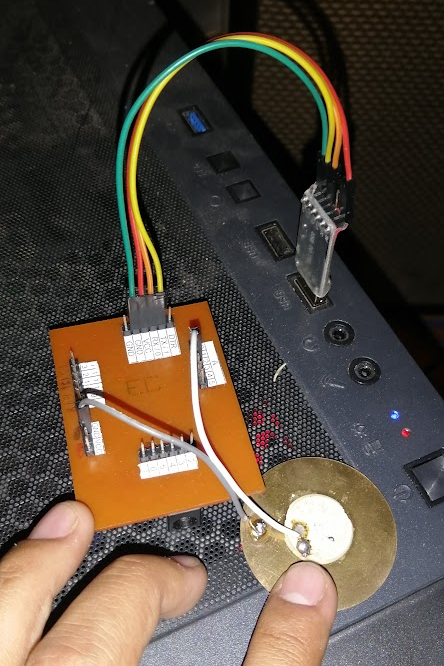
Testing Fabduino with piezo electric connected
When I press the electric piezo, a variation occurs in the analog port A2

Serial plotter ADC value vs tieme (100msec)