Molding and Casting
I worked this assignment in an individual way.
Next I will describe the inputs used in this assignment,
1. File A Wax
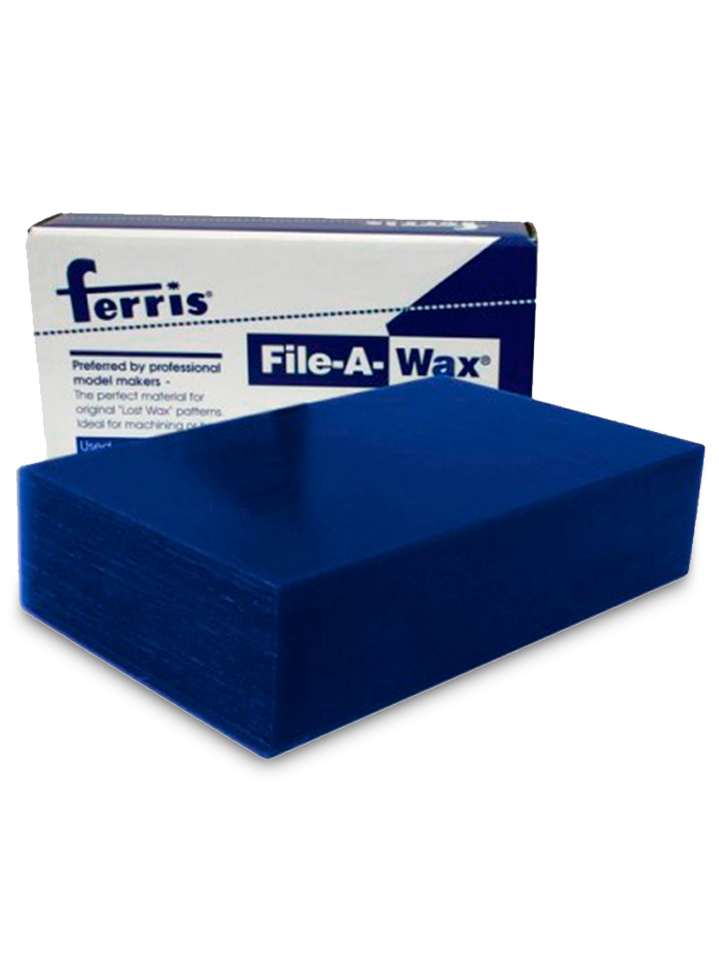
Ferris File-A-Wax Blue is a softer wax formulated for excellent flexibility and strength. The blue colored wax can be carved into the finest of Sections, still retaining excellent detail. Good for rounded corners and less intricate designs. Due to the low ash content, this product is ideal for the investment casting process. Special wax to make original models of jewelry, dental sector, etc. very flexible It can be carved in very thin sections while preserving excellent detail. Perfect for rounded models and with fewer details Ideal for lost wax casting, thanks to the little residue it leaves
3. Silikast Epoxy Resin
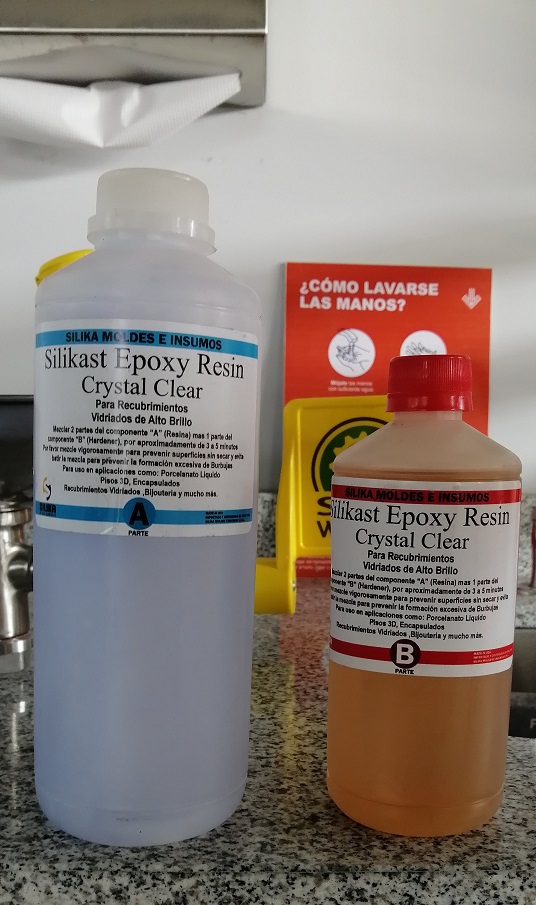
Silikast Epoxy Crystal Resin Low Viscosity Bubble Free Ultra Fast Drying 1500 ml
Silikast Epoxy Crystal Resin A + B Liquid Glass Set for 1500 ml LOW VISCOCITY
Bi-Component Crystal Epoxy Resin. (1000 ml Component A + 500 ml Component B
Gives a Glazed, Resistant, High Gloss and very Durable finish, in a Short Time
Mix ratio 2:1
ULTRA FAST DRYING
Working time: up to 10 minutes
Mixing Time: 2-3min
Curing time up to 4 to 8 hours pieces greater than 5 ctms (according to the Climate).
MSDS page
The supplier did not provide us with the respective safety sheet (MSDS), however it is compatible with other types of silicones. The link is here.
4. Liquid Release Agent

It is applied to silicone molds for easy and quick disassembly of your pieces and creations, it prolongs the useful life of silicone molds, a very small amount is used. Apply a spray in the mold spread with your finger and then remove the excess with paper, only a minimum amount is necessary if you apply more than necessary the pieces may remain opaque or oily. Remember after using your molds to clean or wash them with soap and water, if you leave excess release agent you can damage your molds and pieces.
MSDS page
The supplier did not provide us with the respective safety sheet (MSDS), however it is compatible with other types of silicones. The link is here
Piece Design
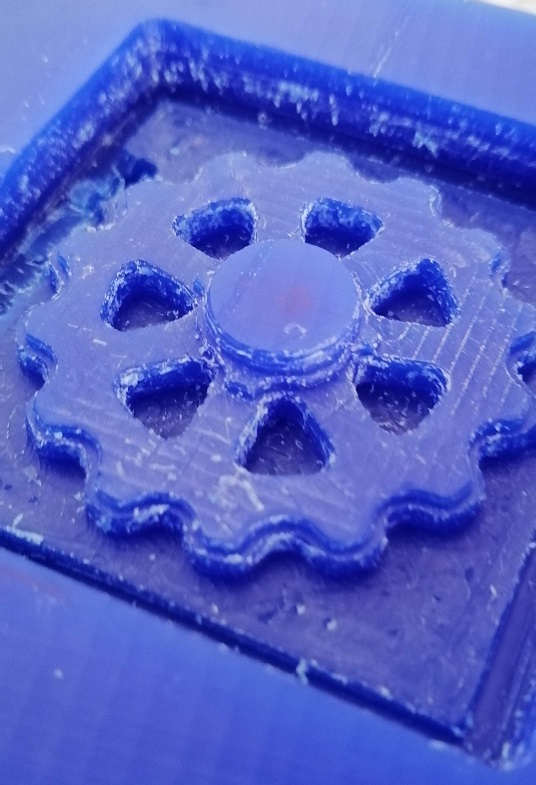
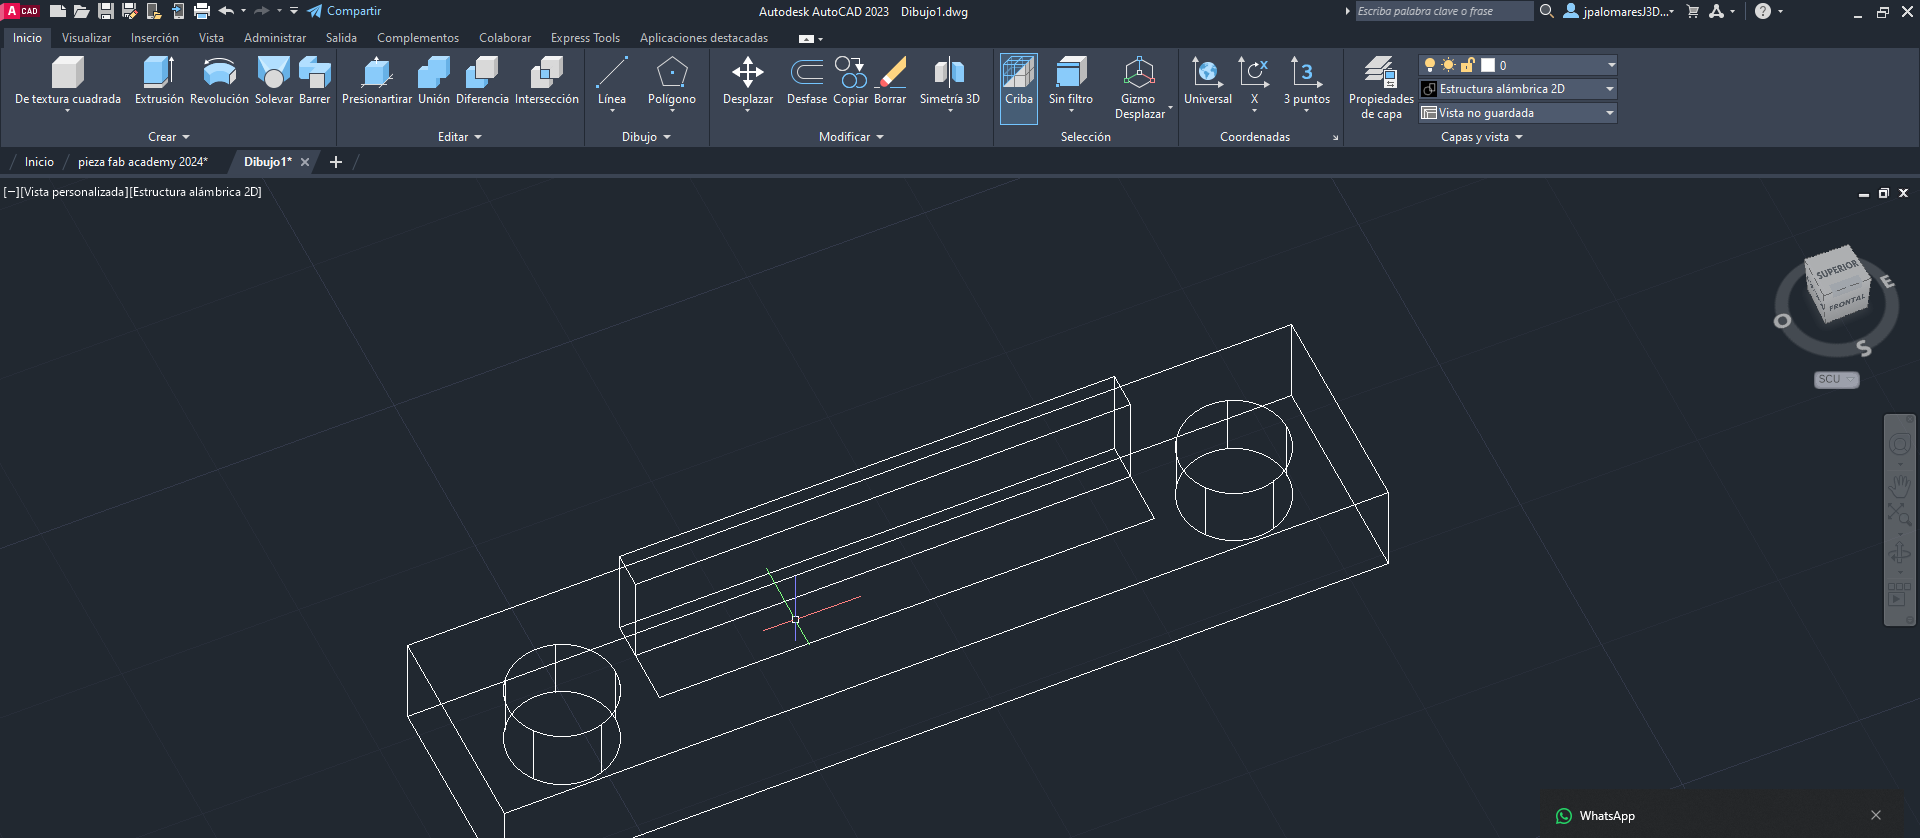
In this activity a gear for a 3D printer was designed and replicated.
The gear was designed in Autocad .
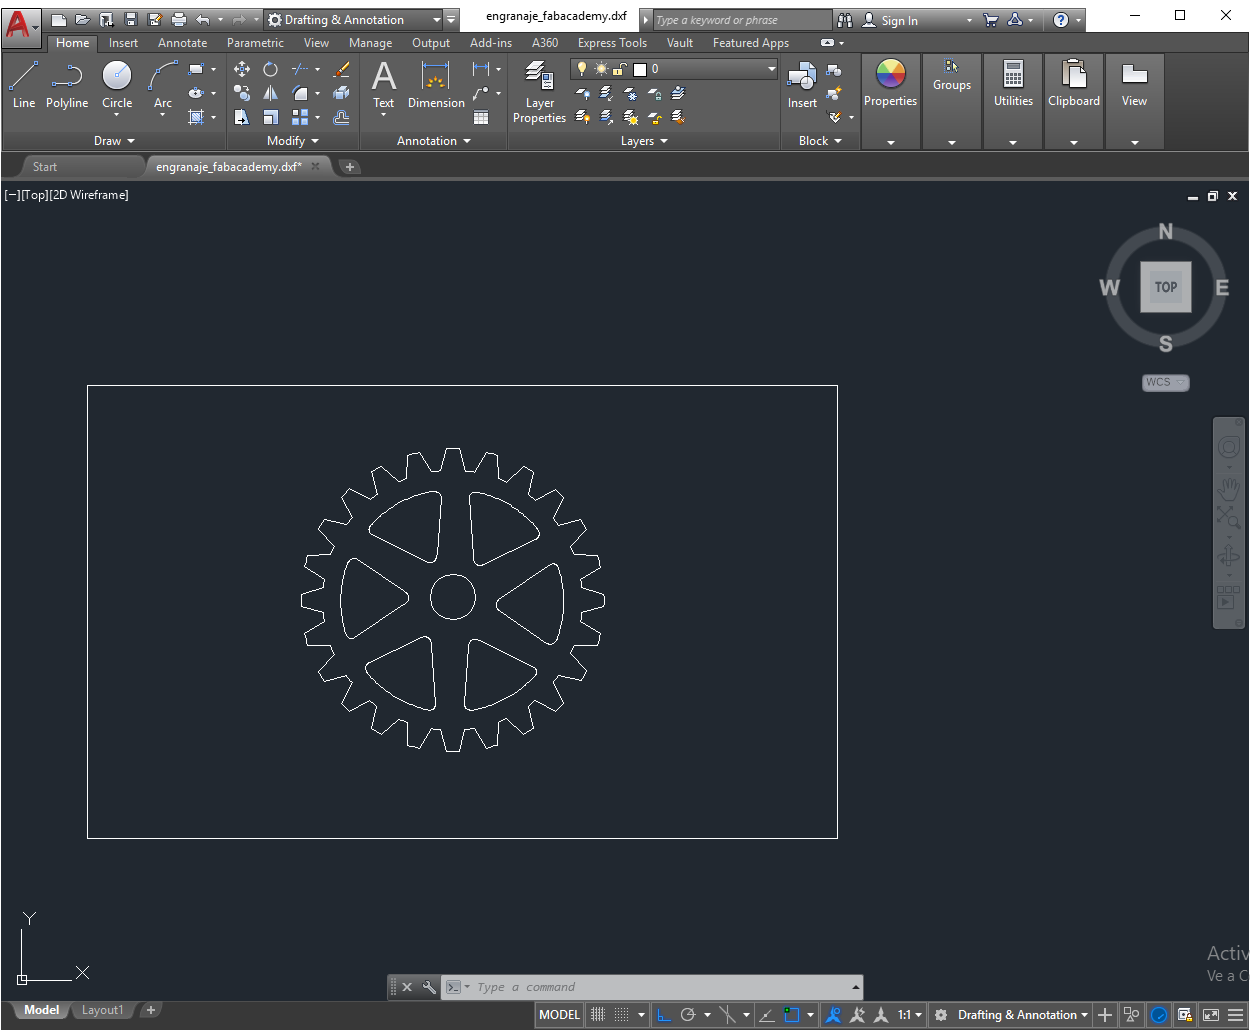
Then it was exported to STL.

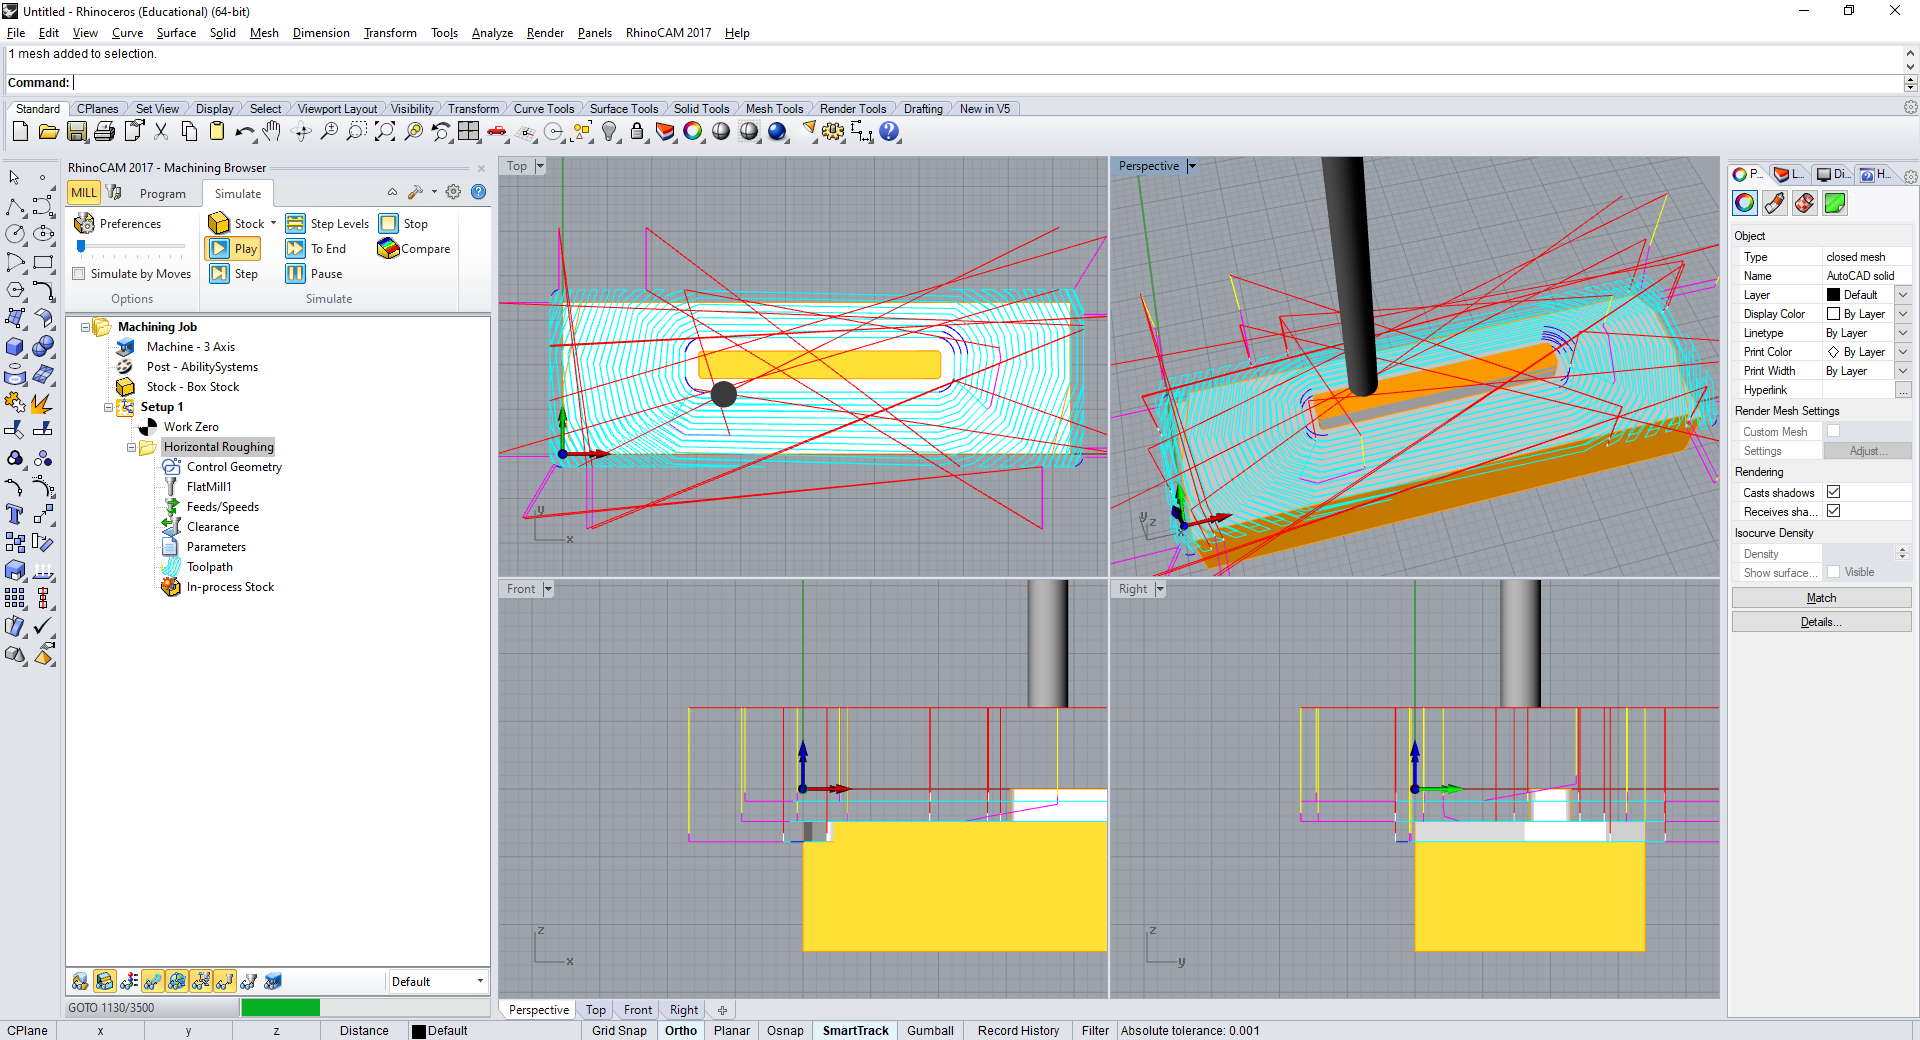
Next, I've imported the STL file in software Rhinoceros.

I did the configuration of stock box and Work Zero parameters.

I've chosen the Horizontal Roughing options tu mill the exterior of the gear. A flat mill of 1/8 inches was used.
A simulation was performed.


Milling process
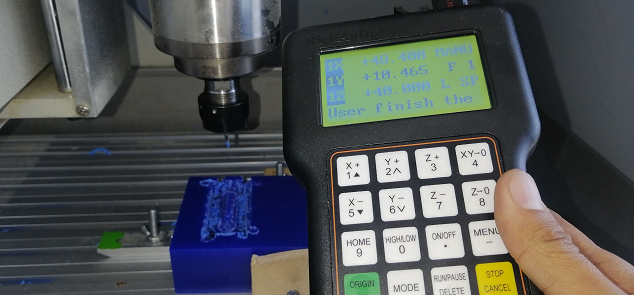
Then I've decided to mill the mold in 24mm MDF to test if it works. A CNC was used to mill.


The results was successful. Next I've tried to make the mold using machining wax.
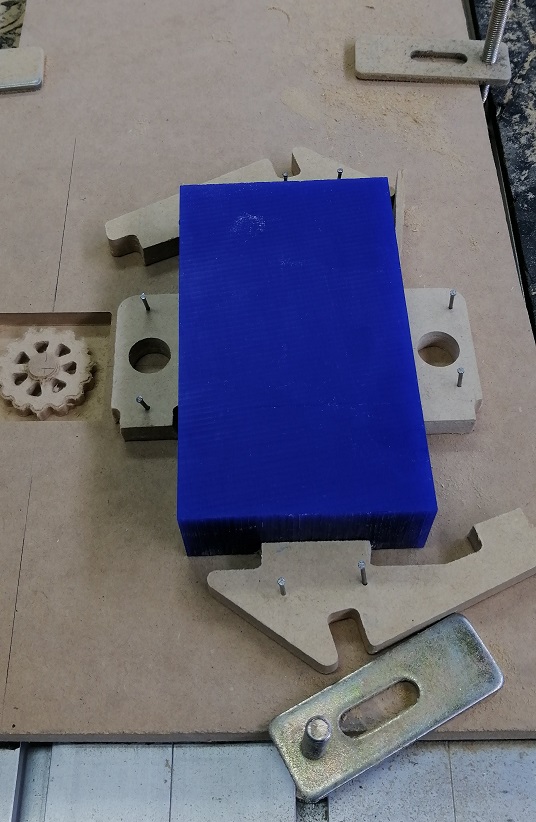
First, the wax was adjust

Next, Calibrate X, Y and Z to start the milling process.
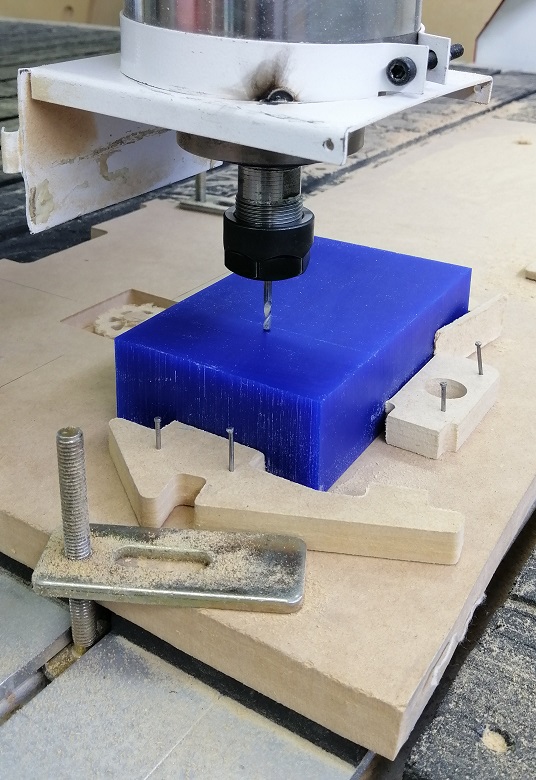


The results was good at this point.

The gear was completed.
Safety recommendations
Before starting to work with chemical compounds we have to take into account that it can be harmful to health when having direct contact with them. I will quote some recommendations from Personal Protective Equipment.
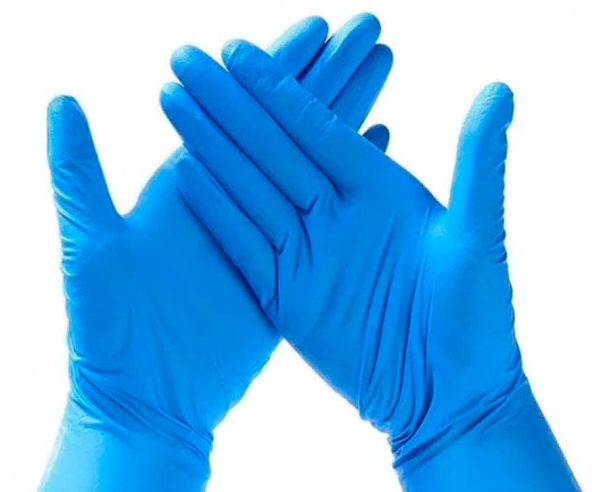
Rubber gloves are recommended to reduce the risk of contamination. I only used nitrile gloves. Make sure to use gloves where the chemicals cannot come into contact with the skin. Avoid any direct contact with chemicals.
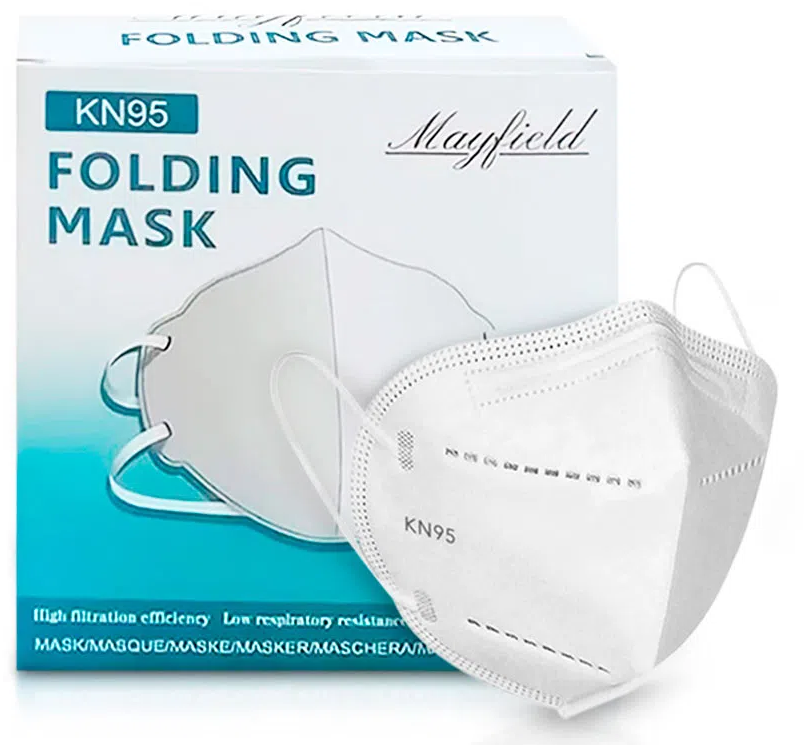
I used a KN95 mask to protect myself from the gases emanating from chemicals. Also, if possible, work in an open or clear environment.
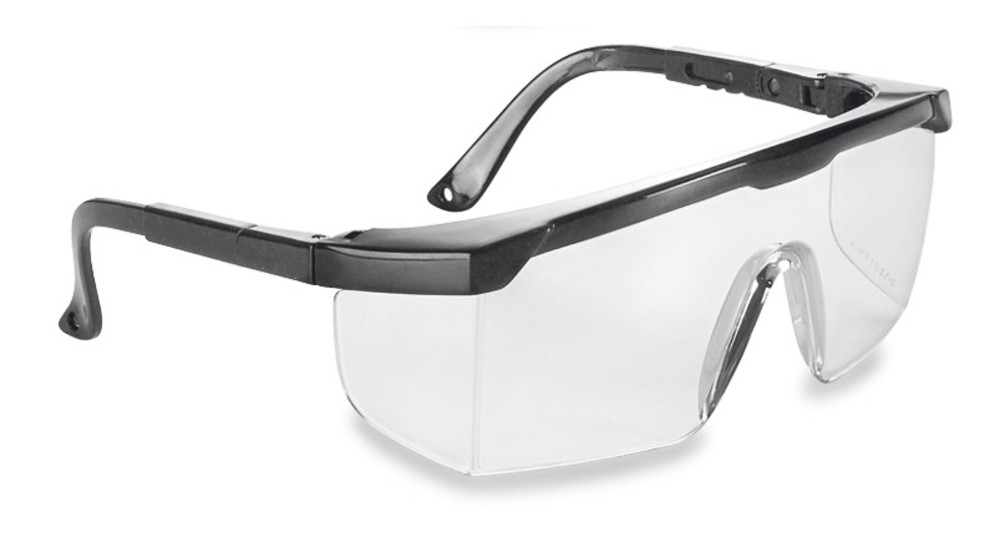
Aditionally, I used Safety glasses to avoid eye splashes during mixing and pouring of chemicals.
Always have paper or wet towels on hand in case of spills.
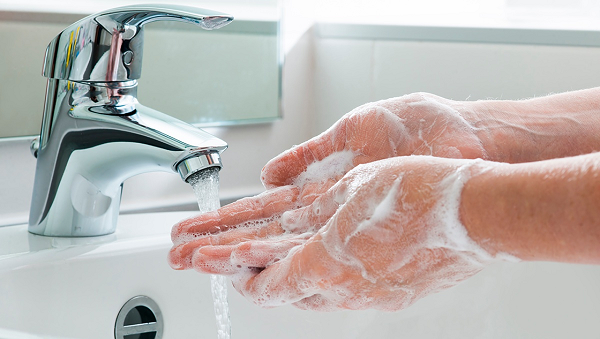
In case of contact with any chemical, what you have to do is wash the area with plenty of soap and water.
Working with chemicals
I've used this brand of silicone

I used a Silicone A and Silicone B.

I used Silikast Epoxy Resin A and B.
I used this release agent for easy removing the silicone
Next, I prepared the silicone, mixing 1 part A and 1 part B.
A little of release agent was used.

Finally, the silicone mixture was poured in to the mold
Then I waited for 24 hours to silicone become dry
Then, I removed the silicone

Next, I mixed the Epoxy resin, 2 parts A and 1 part B.

So, I poured the mixture in to the mold and wait for 4 hours.

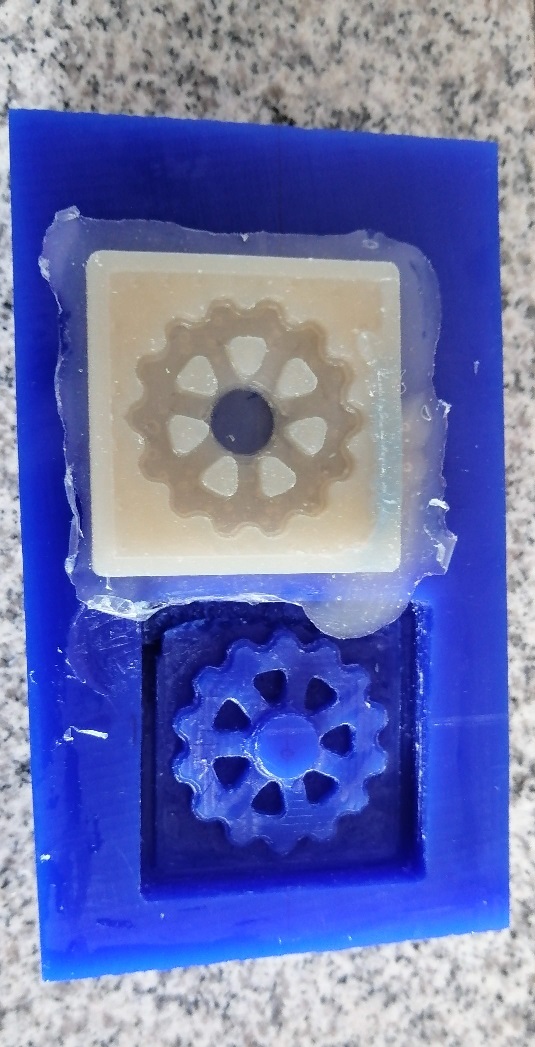
Finally, this is the result.
Download section:
3D Wheel STL here
Rhinocam Wheel here
Another test...
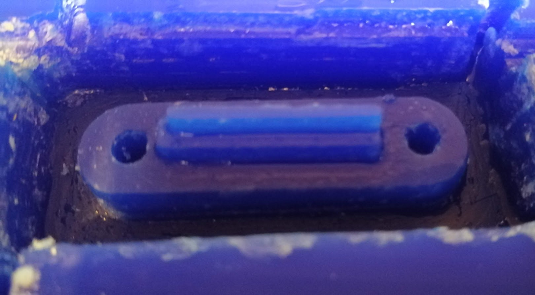
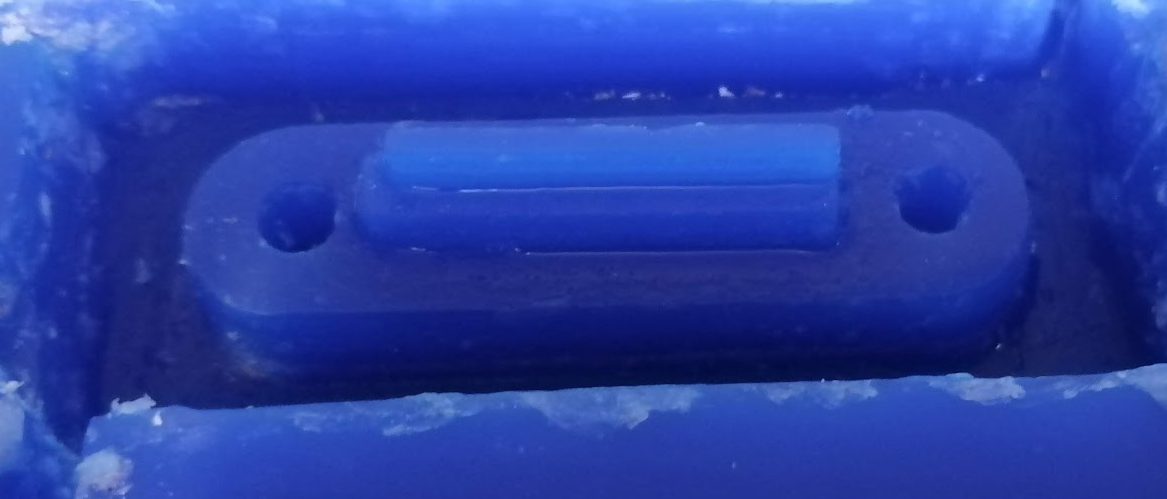
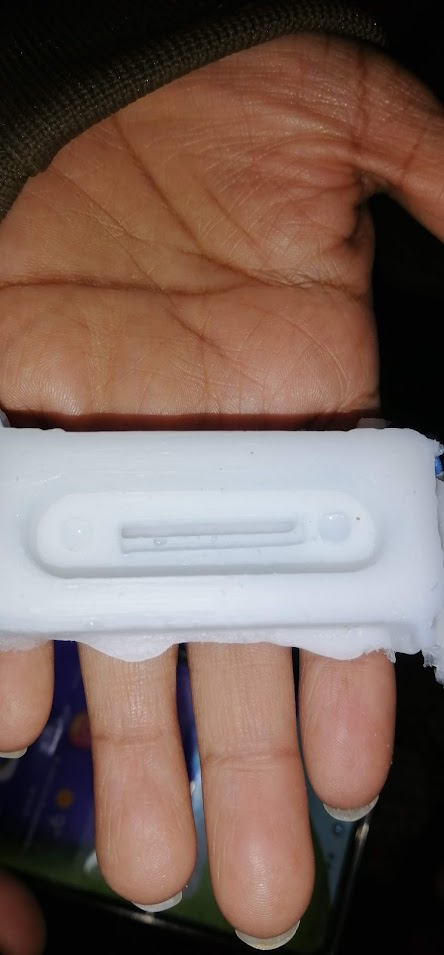
Another wax mold test was carried out. A piece was designed with some detail (holes, unevenness, curves and different heights), to test the silicone in the mold.
The part was designed in 3D using Autocad software.

Then, using the same Rhinoceros software, we imported the STL file generated in AutoCAD.

We expanded the work area by 7mm on all four sides, so that the mold has a space to fill with silicone. We align the 3D object to the origin,
We added the process called "Horizontal Roughing" to carve the object in 3D. We can see the milling routes.

We start the simulation to verify that the milling will be executed correctly.


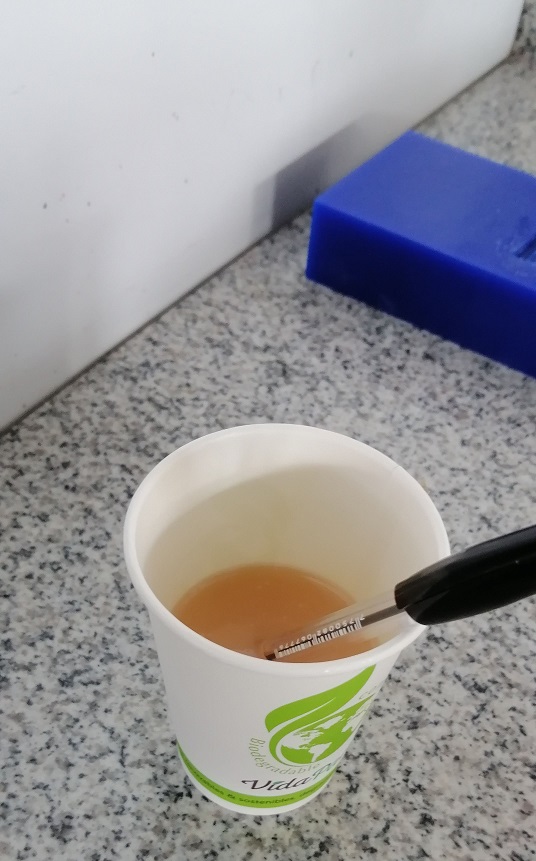
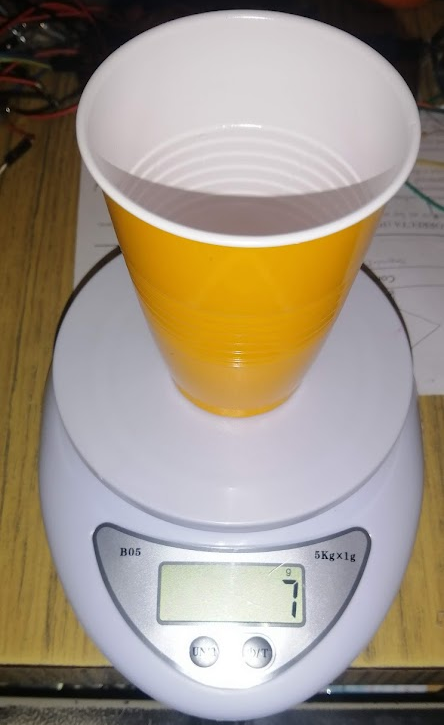
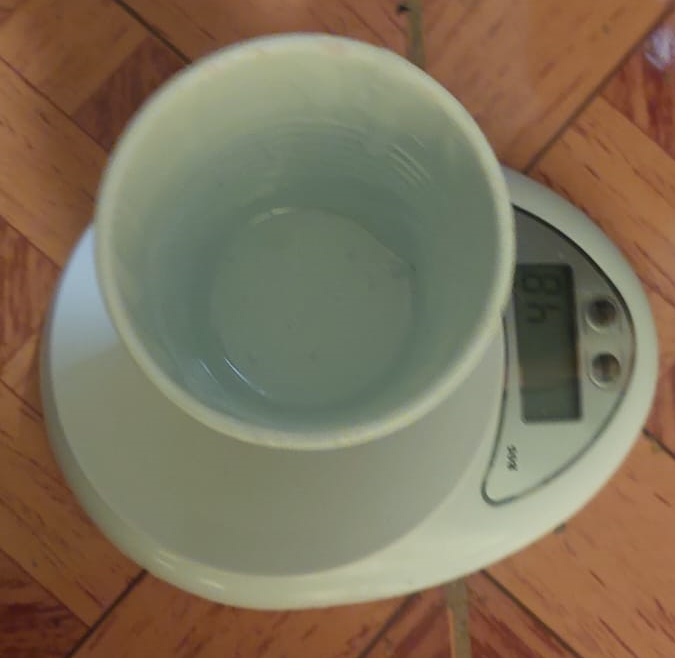
To calculate the amount of silicone material to mix, we must first measure the weight of the empty plastic cup. In this case it is 7 grams.
Then I added 40 grams of silicone (47 grams total)

Then I added 3% catalyst, which is 3 grams. (total 10 grams)

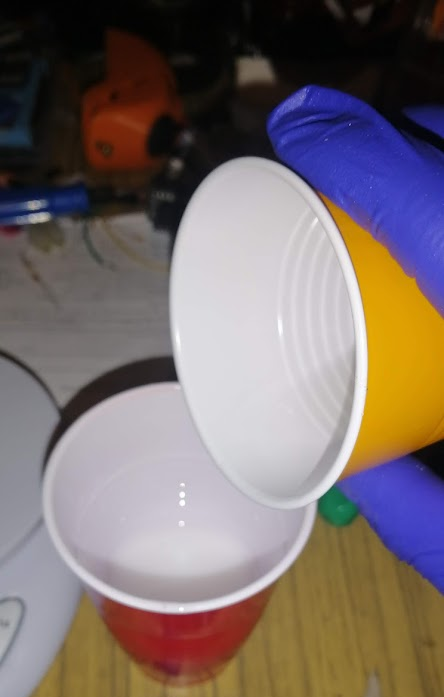
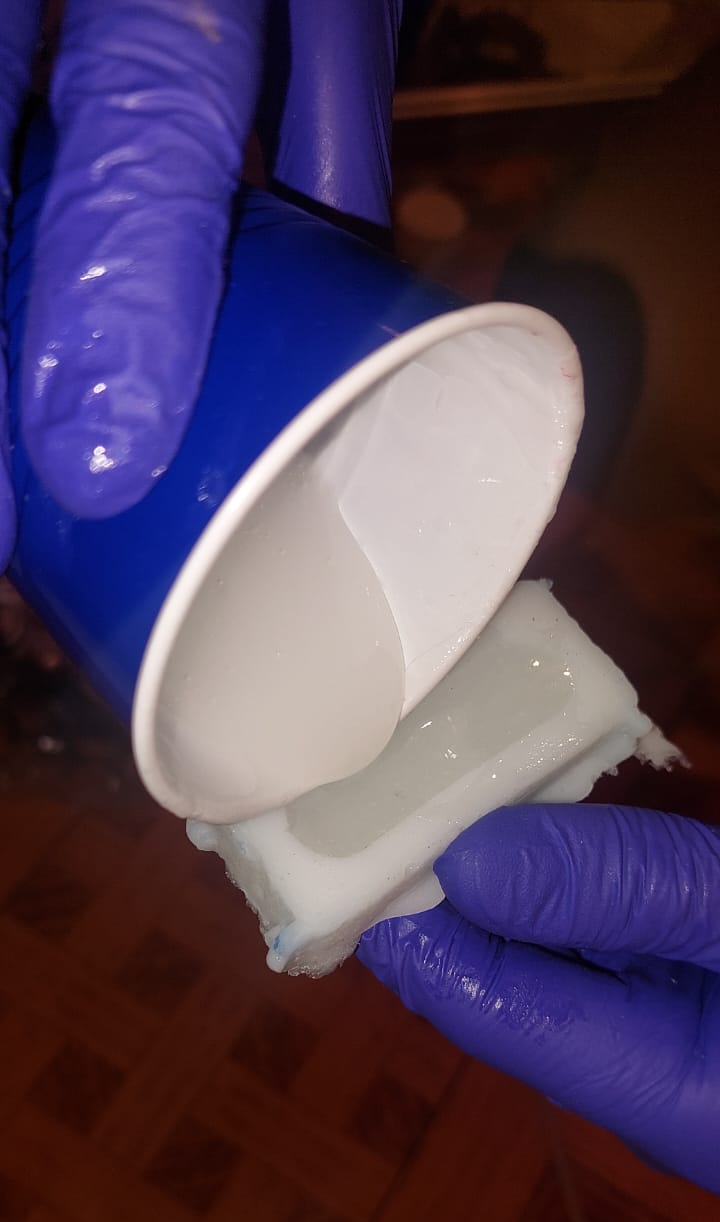
I proceeded to mix both components until obtaining a homogeneous mixture.

Next, I poured the mixture into a single glass.
Then, I poured the new mixture into the wax mold immediately.

Then I waited between 6 and 8 hours for the silicone to harden and dry, being able to see that the process was carried out correctly.
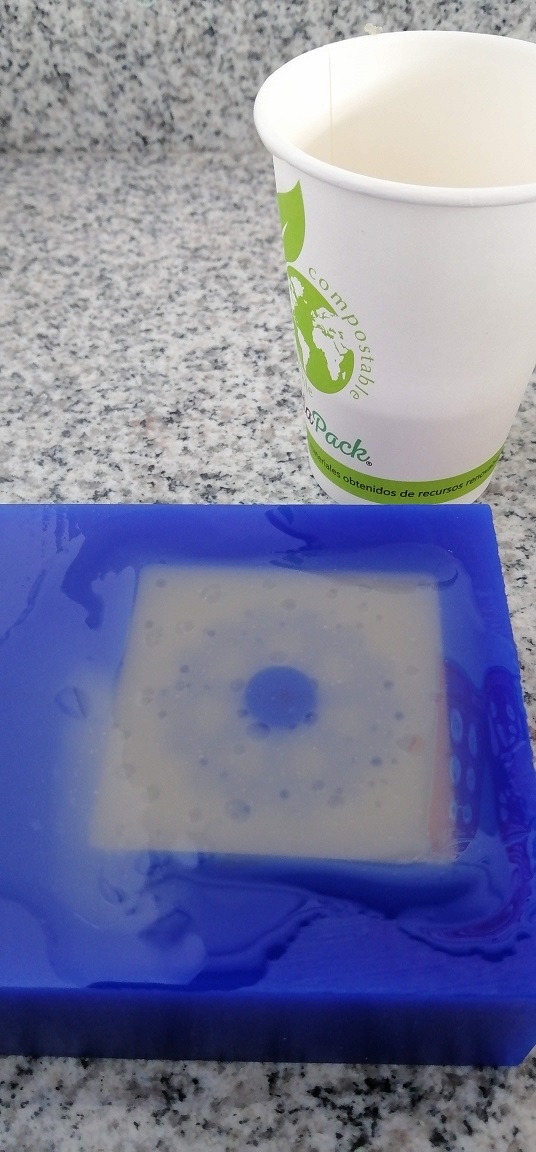
Next, I prepared the resin. In a glass I placed type A resin in an amount of 40 grams.
I placed resin B in a 1:1 ratio, I mean, also 40 grams.

I put the two resin components together in a single glass and mixed until obtaining a homogeneous mixture and poured
We verify that the resin is at the level of the mold and we wait 24 hours for it to harden and dry.
it into the silicone mold.
We verify that the resin is at the level of the mold and we wait 24 hours for it to harden and dry.

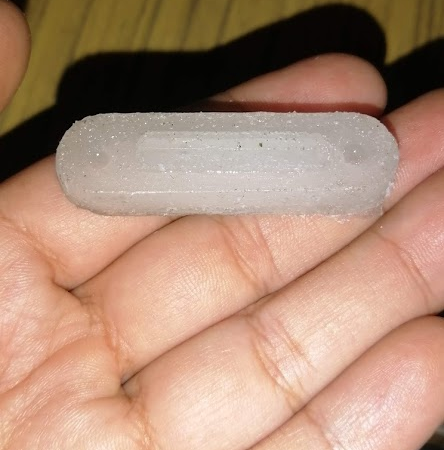
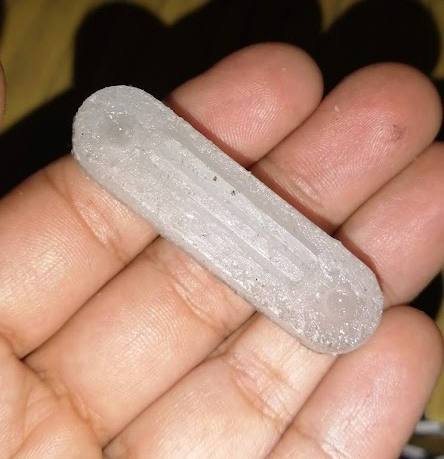
This way we obtain a replica copy of the piece
Download Section
STL Piece here
RhinoCAM project here
Problems and solutions
- In this activity I had some problems, mainly in the design, I realized that when using a very large cutter I lost quality/resolution in the part. To solve it, I used the thinnest strawberry I could to improve it.
- Initially I tried to do it on MDF but didn't get good results. Then I did it in the moldable wax which improved a lot.
- The first few times I tried not to use the liquid release agent, causing me problems to remove the mold. I immediately did another test where I added that element and the piece came out easily.
Takeaways Assignment
- The molding process, which consists of making the negative of the piece using digital manufacturing, seemed very efficient to me, especially in the details. So I used a thin milling tool.
- I tried another material like MDF, but I realized that moldable wax produces better results.
- I have used the amounts of silicone and resin in proportions as indicated by the manufacturer. However, it is possible to speed up the curing process by varying these proportions.