Leen Nijim
Assignment 4
Computer-controlled cutting
Task
For this week, we had to do three main tasks: first characterize our laser cutter as a group assignment, then cut something on the vinyl cutter and build a parametric construction kit as individual assignments. For the group assignment, my contribution was to design a raster grid and test the engraving parameters of our laser cutter. For the individual assignments, I decided to build a laser-cut wooden Ludo boardgame and the use the vinyl cutter to add simple annotations on the playing board.
What You Need
- Access to a laser cutter.
- Access to a vinyl cutter.
- A minimum of 620 cm2 6mm-thick plywood.
- Some vinyl.
Files to Download
Hero Shot
Group Project
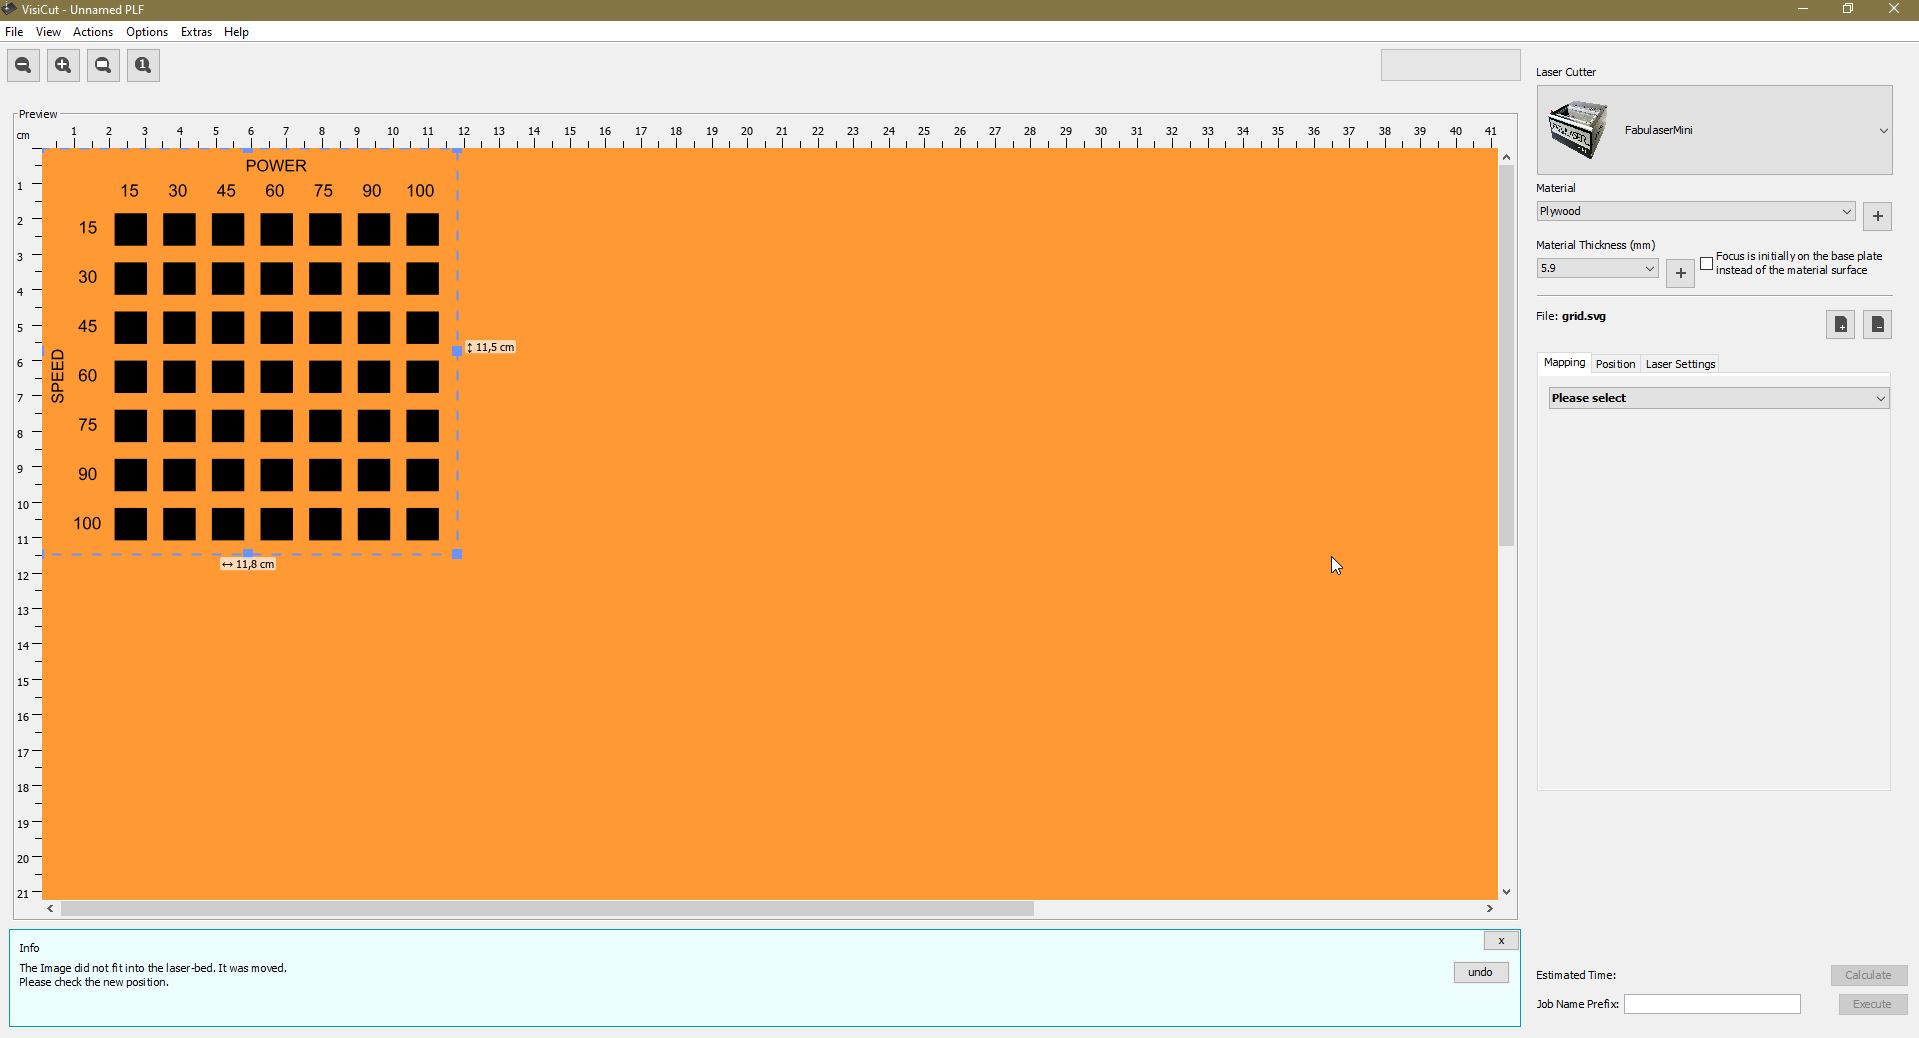
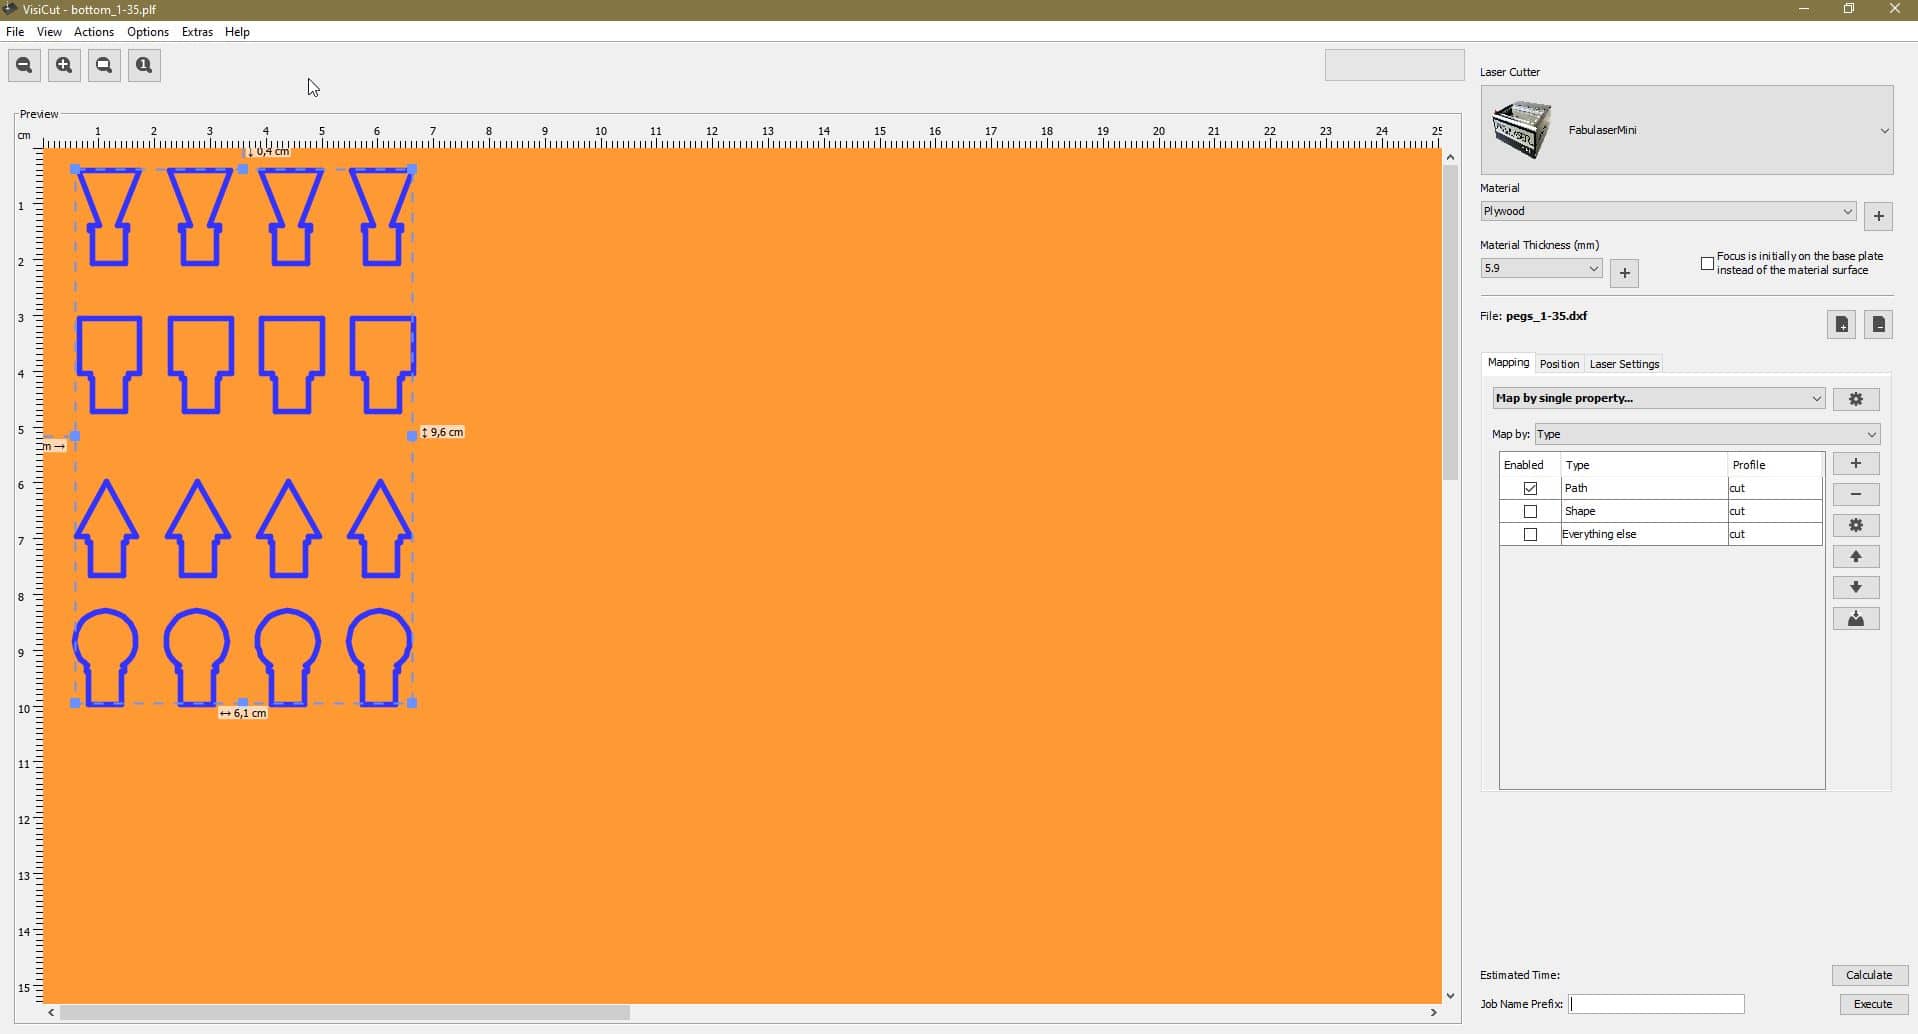
For our group assignment, please click here. My part in this assignment was text out the Kerf with my fabmate Roland, work on the cut parameters, and test out different laser cutting speeds and laser power combinations for engraving materials. To work on the last part, I started by drawing a grid of solid squares in Inkscape and then added the different speed and power settings each square would be engraved with.
After that I saved my drawing as a DXF image and imported it into Visicut. I chose the corresponding profile for the material I’m using and the material thickness.
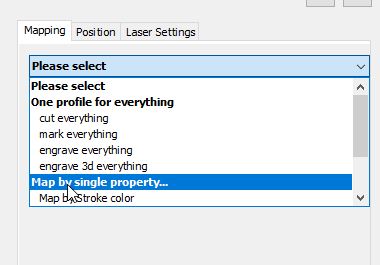
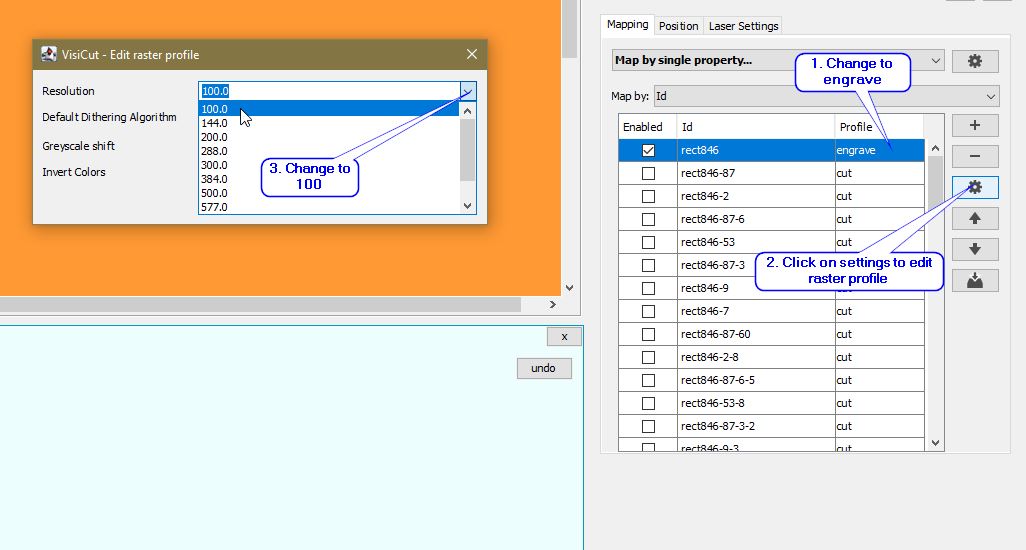
I then instructed the software to map the different items into either a cutting, a marking, or an engraving function by their feature ID (For example, a text feature or a rectangle).
After that, it was just a tedious task of going through each square and changing the raster resolution to the minimum value. This is however an important step as keeping the default resolution will make the engraving jobs last for hours instead of minutes.
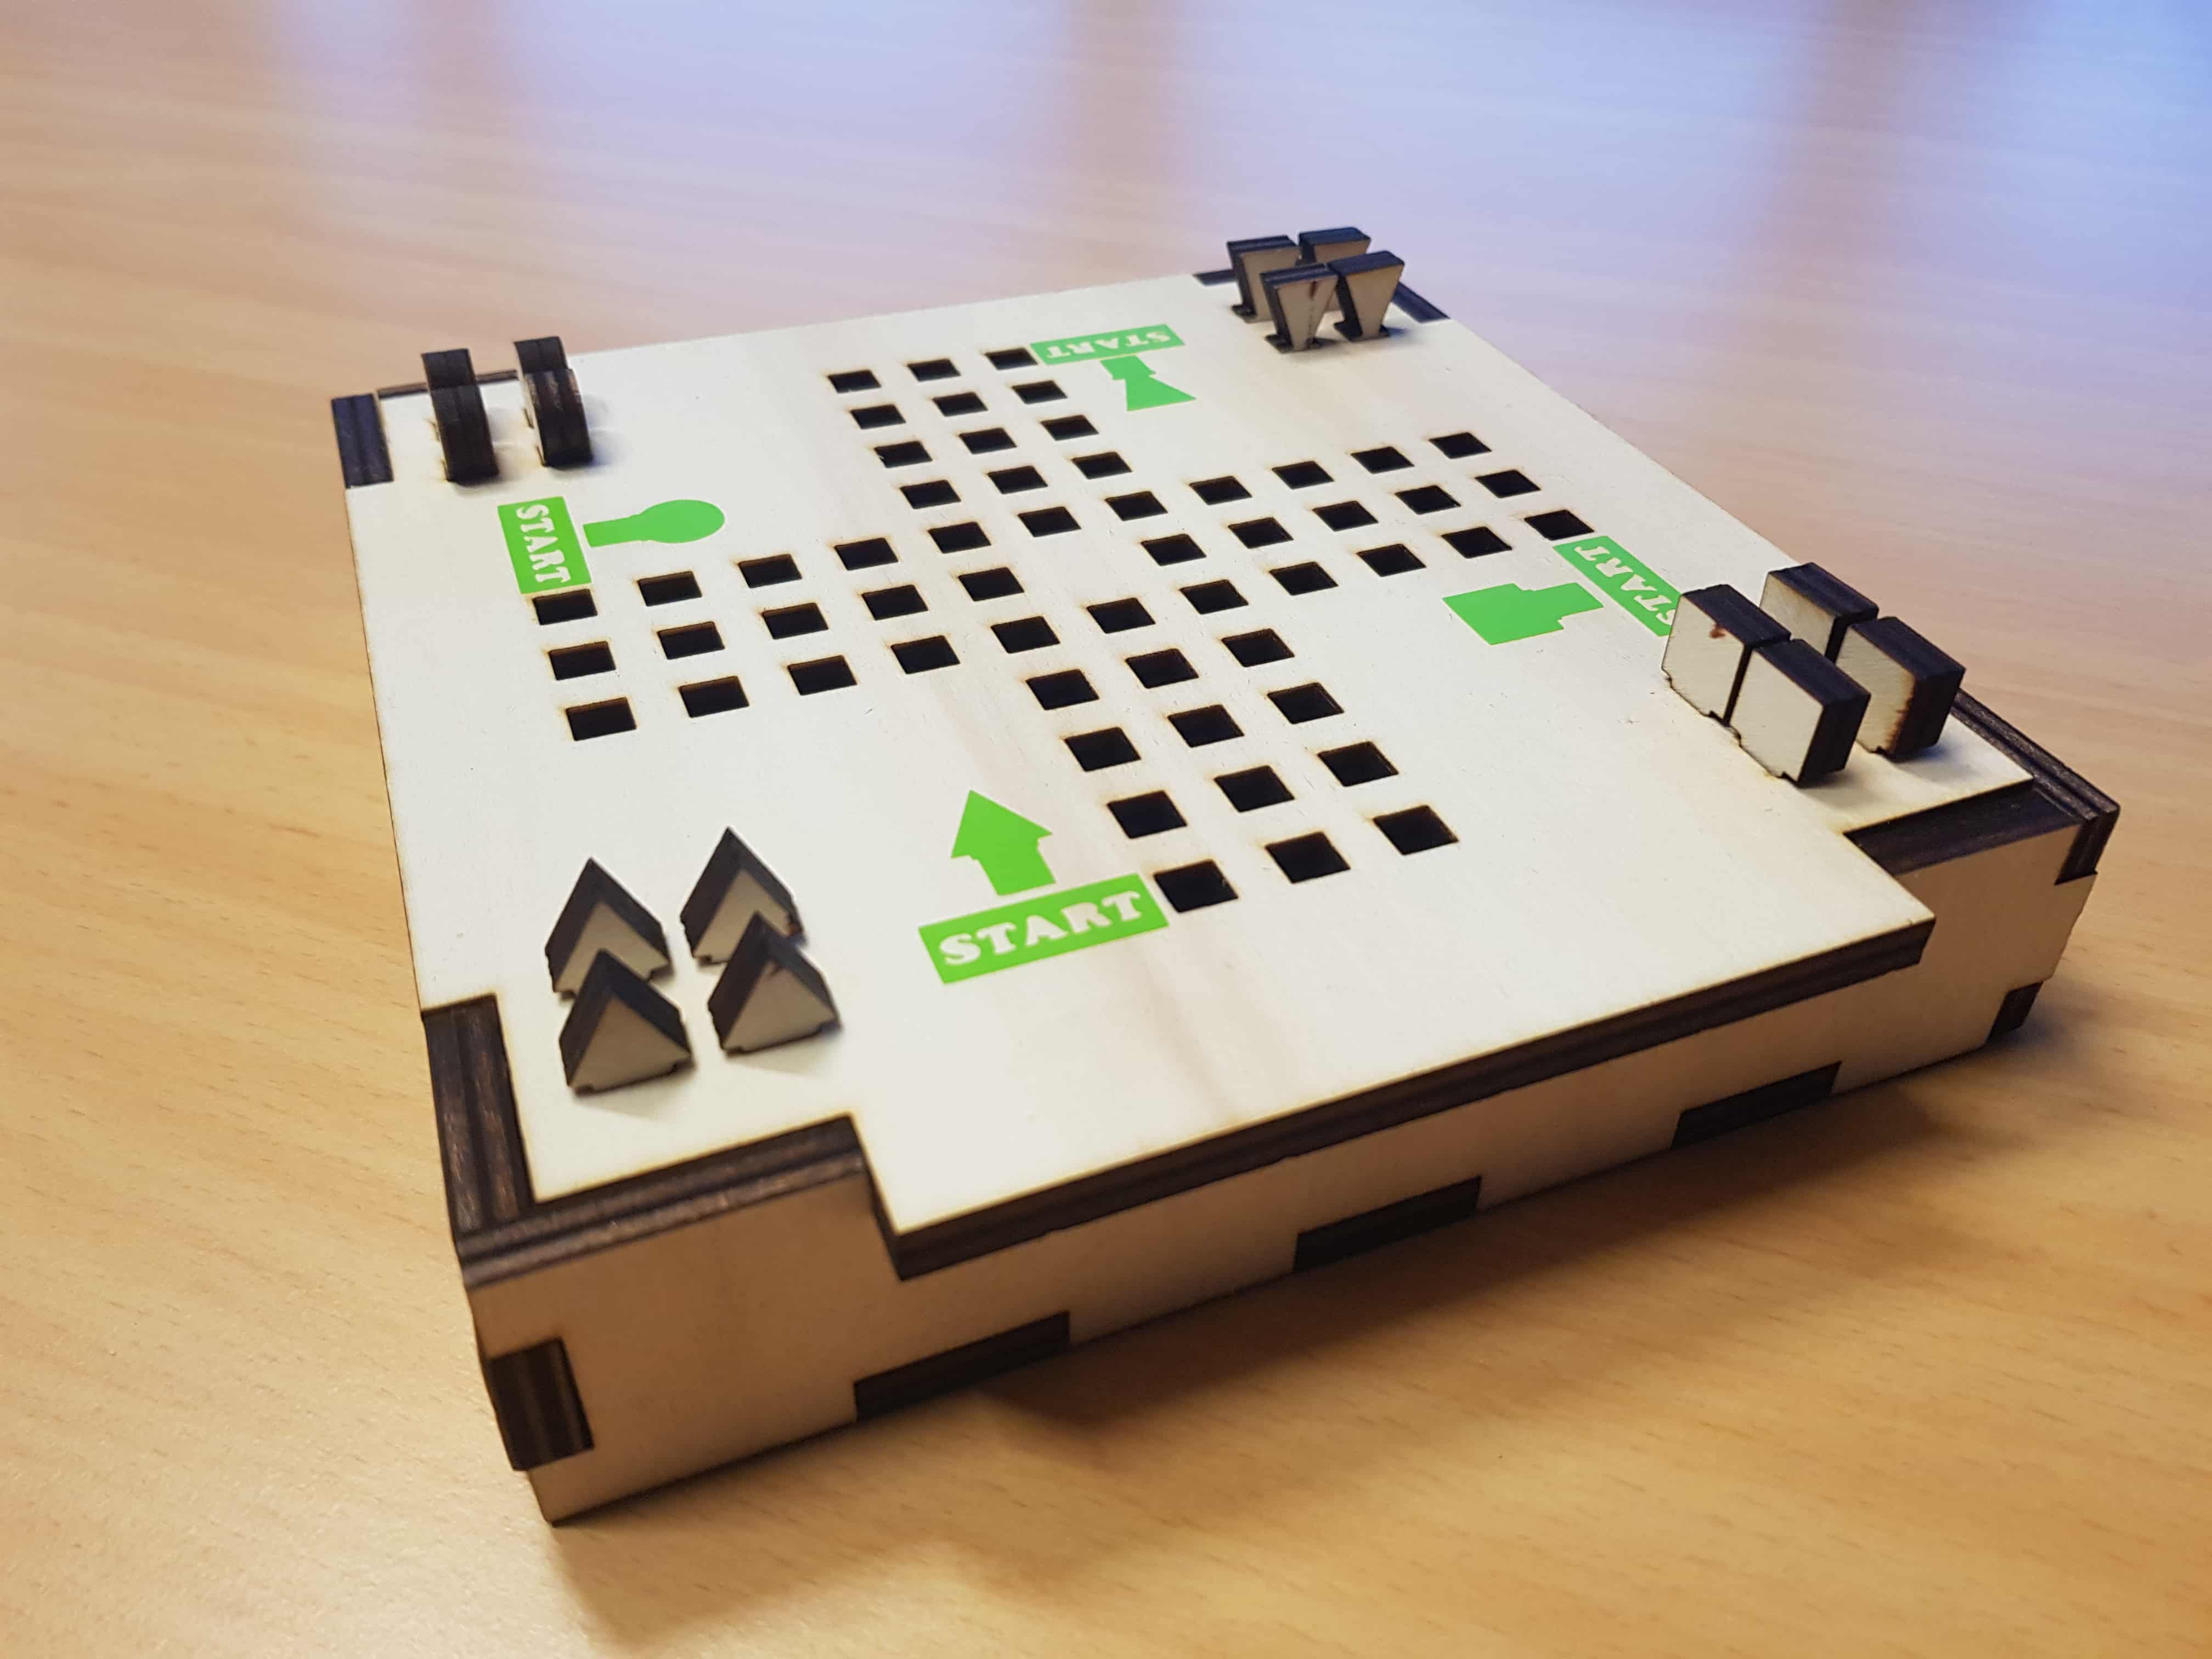
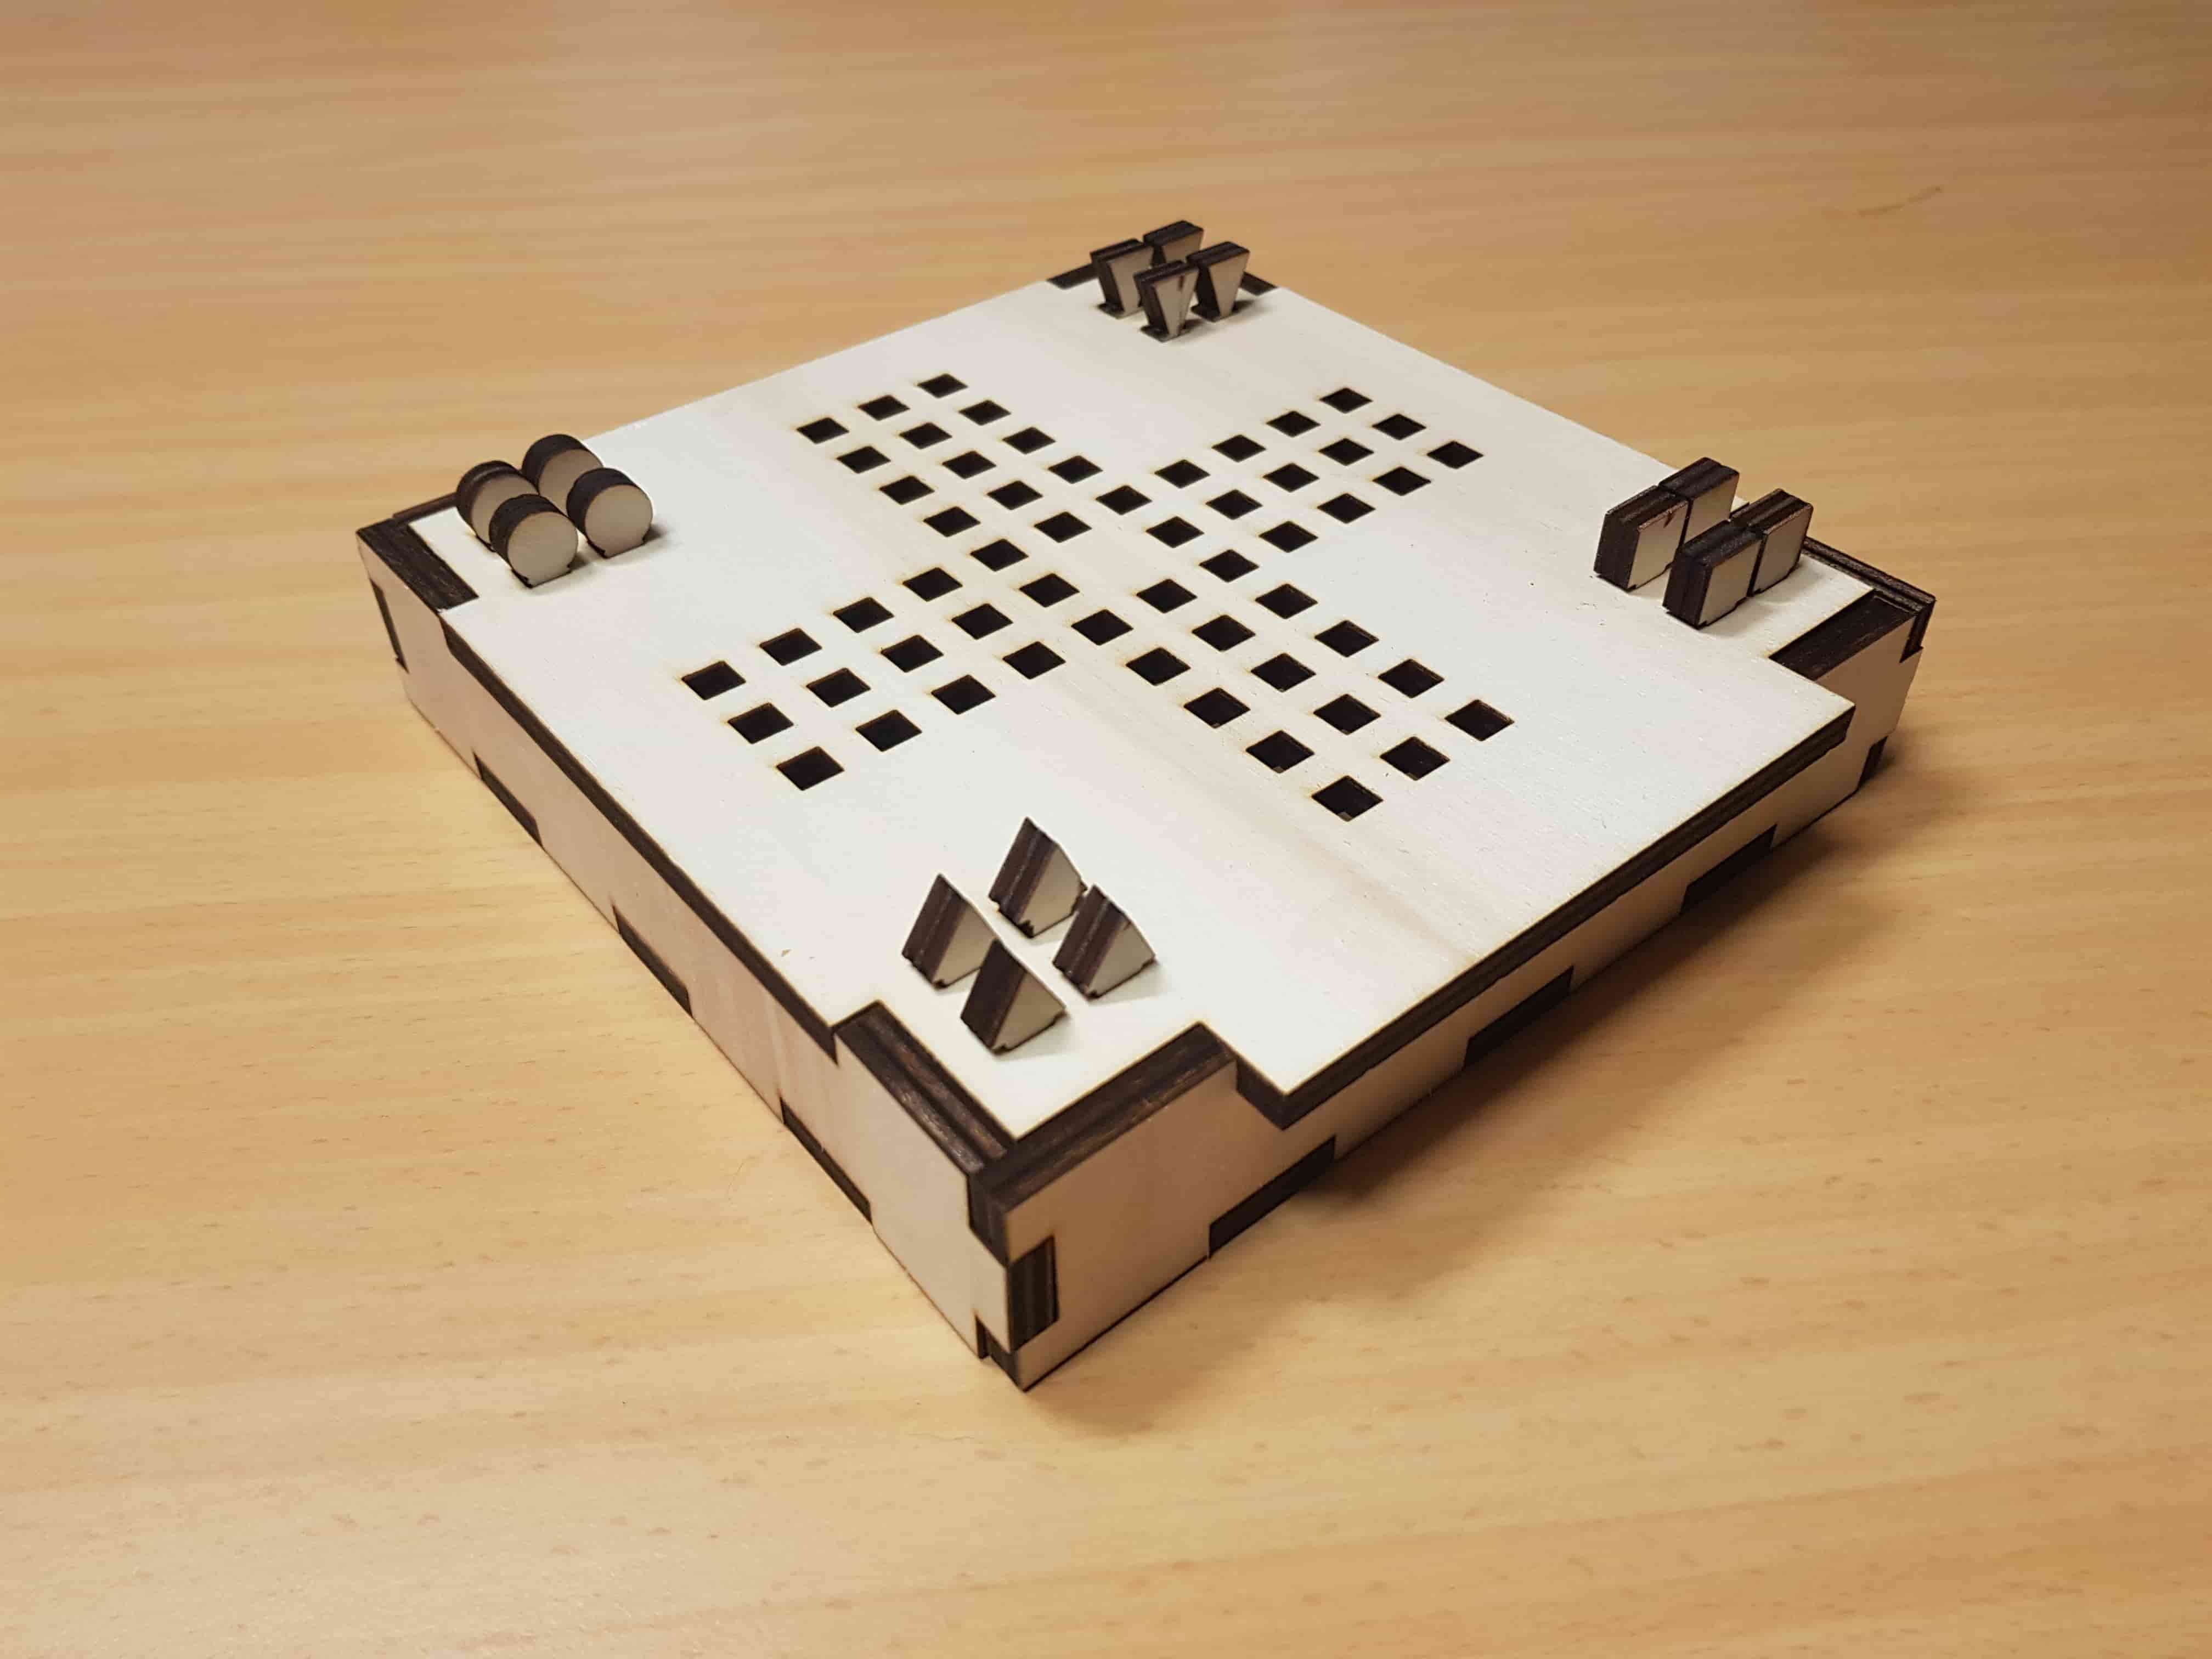
Ludo Boardgame
To start with I opened my Fusion 360 and went to the Design environment.
.jpg)
I then started entering the main parameters I needed to begin with my modeling. The rest of those parameters were added as I was developing the design.
.jpg)
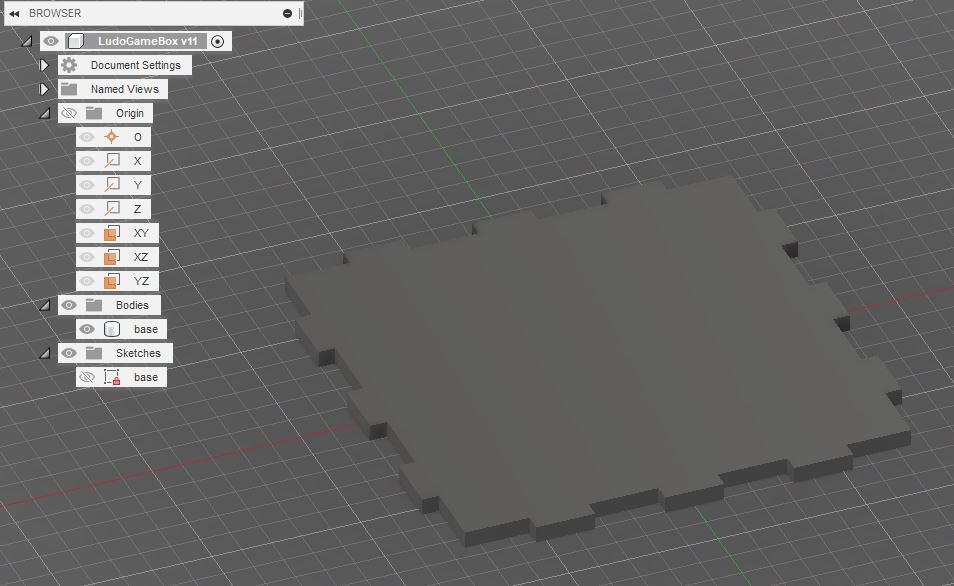
The first part was the bottom plate. I added the fingers using the Rectangular Pattern function.
.jpg)
.jpg)
Then, I extruded the sketch.
Next comes designing the side panels. I decided to have multiple finger joints to the bottom plate and one wide “finger” for the top cover.
.jpg)
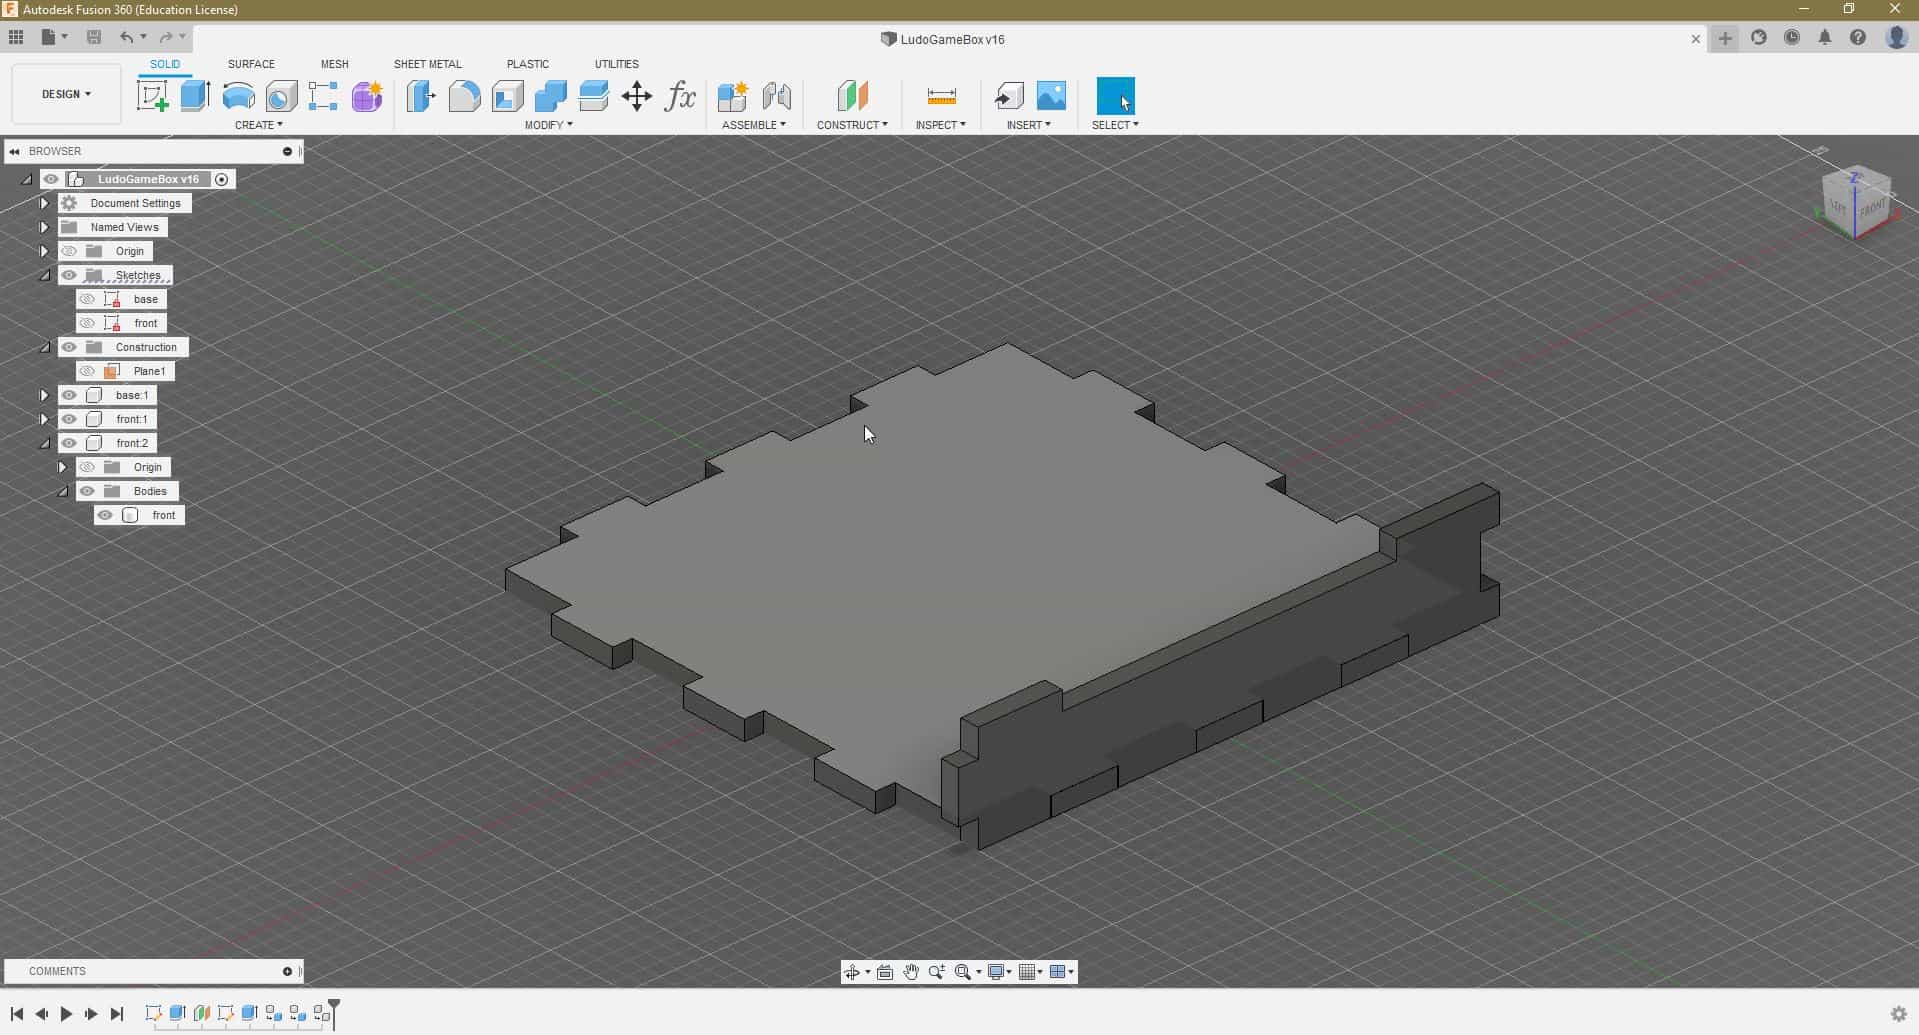
Then to create the remaining side panels, I decided to use the Circular Pattern function.
-min.jpg)
When that was done, I went on to draw the top cover.
.jpg)
After that part got extruded, I started a new sketch on its upped face and added the peg slots with the Rectangular Pattern and Mirror functions.
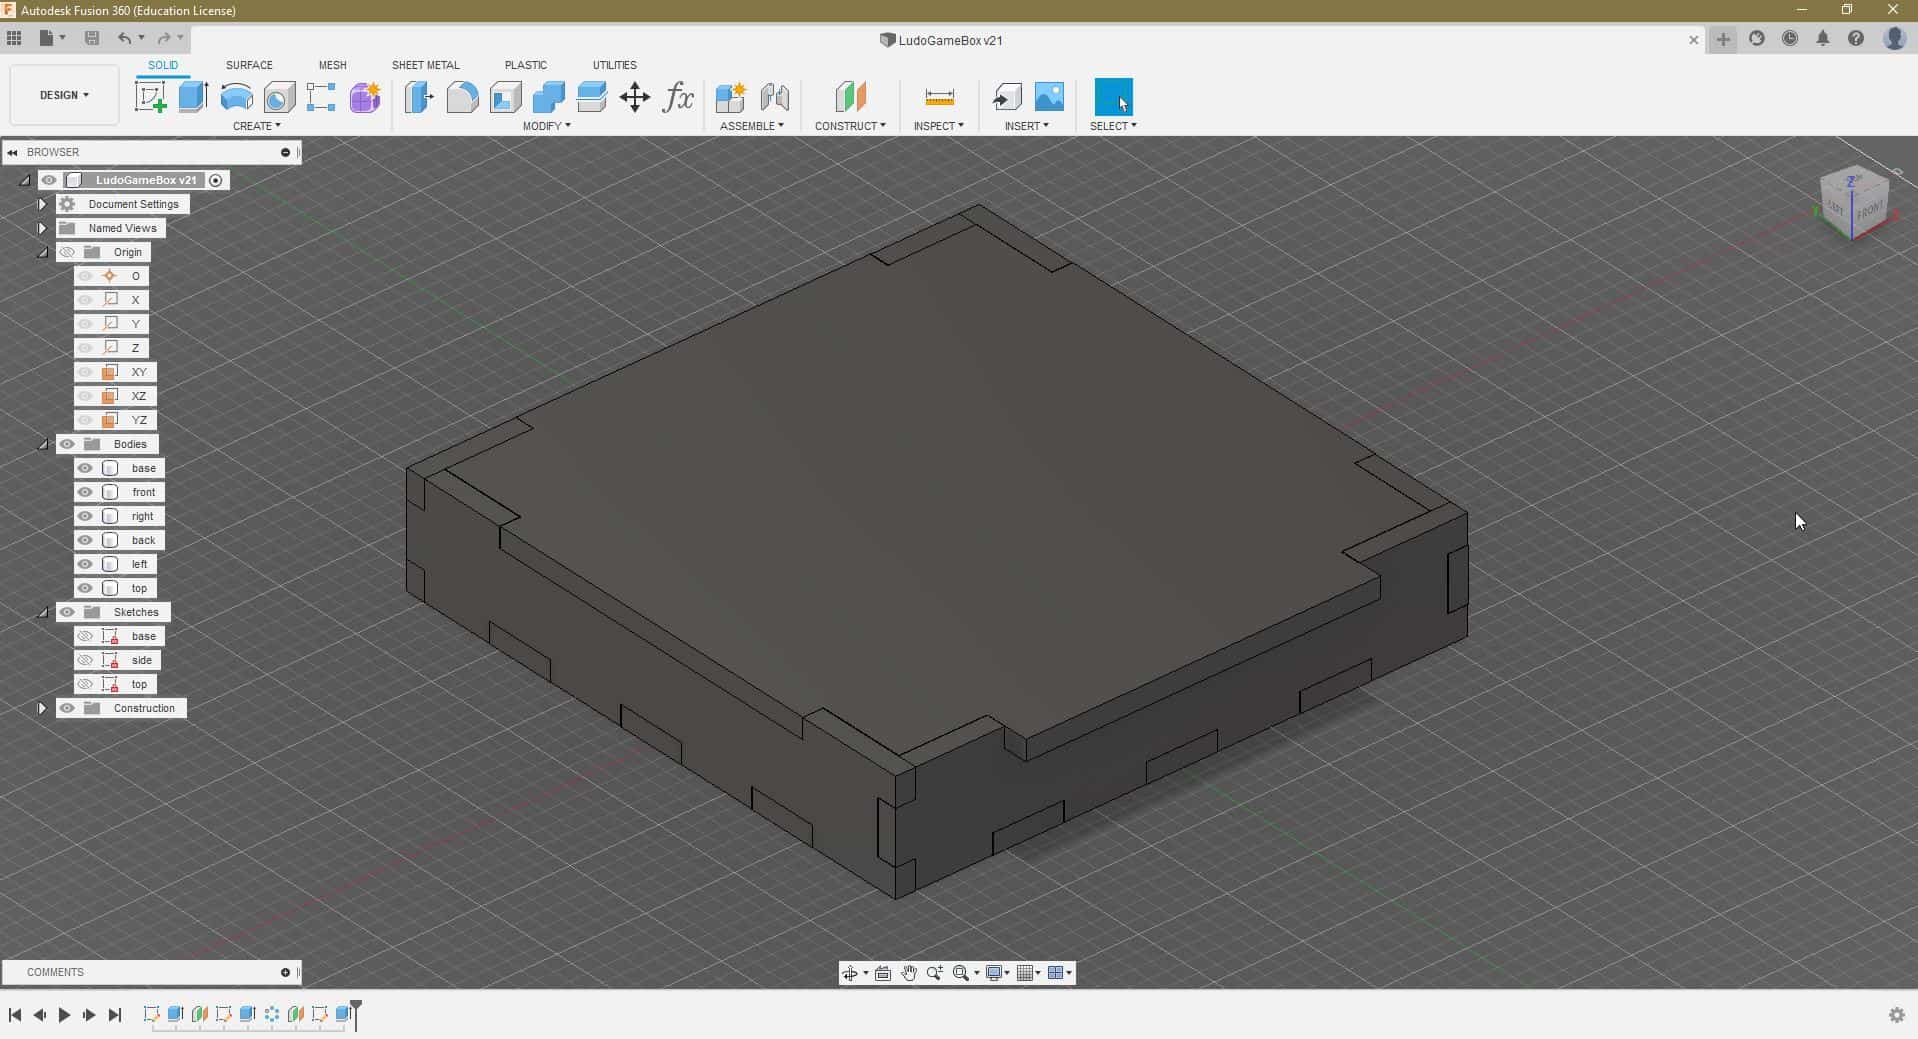
.jpg)
Lastly, all I had left to make are the playing pegs. These ones I sketched away from my box assembly and gave them square bases so that I can insert them in whichever direction into the slots.
-min.jpg)
And here is the parametric model of my self-made Ludo Boardgame!
-min.jpg)
Preparing to cut
The first thing I did was exporting the to-be-cut faces as DXF files. For that I only had to right-click the appropriate sketch and save it locally on my machine.
-min.jpg)
For the top cover, since I didn’t have everything in one sketch, I had to “project” the face of the body onto a new sketch, and then export that one.
.jpg)
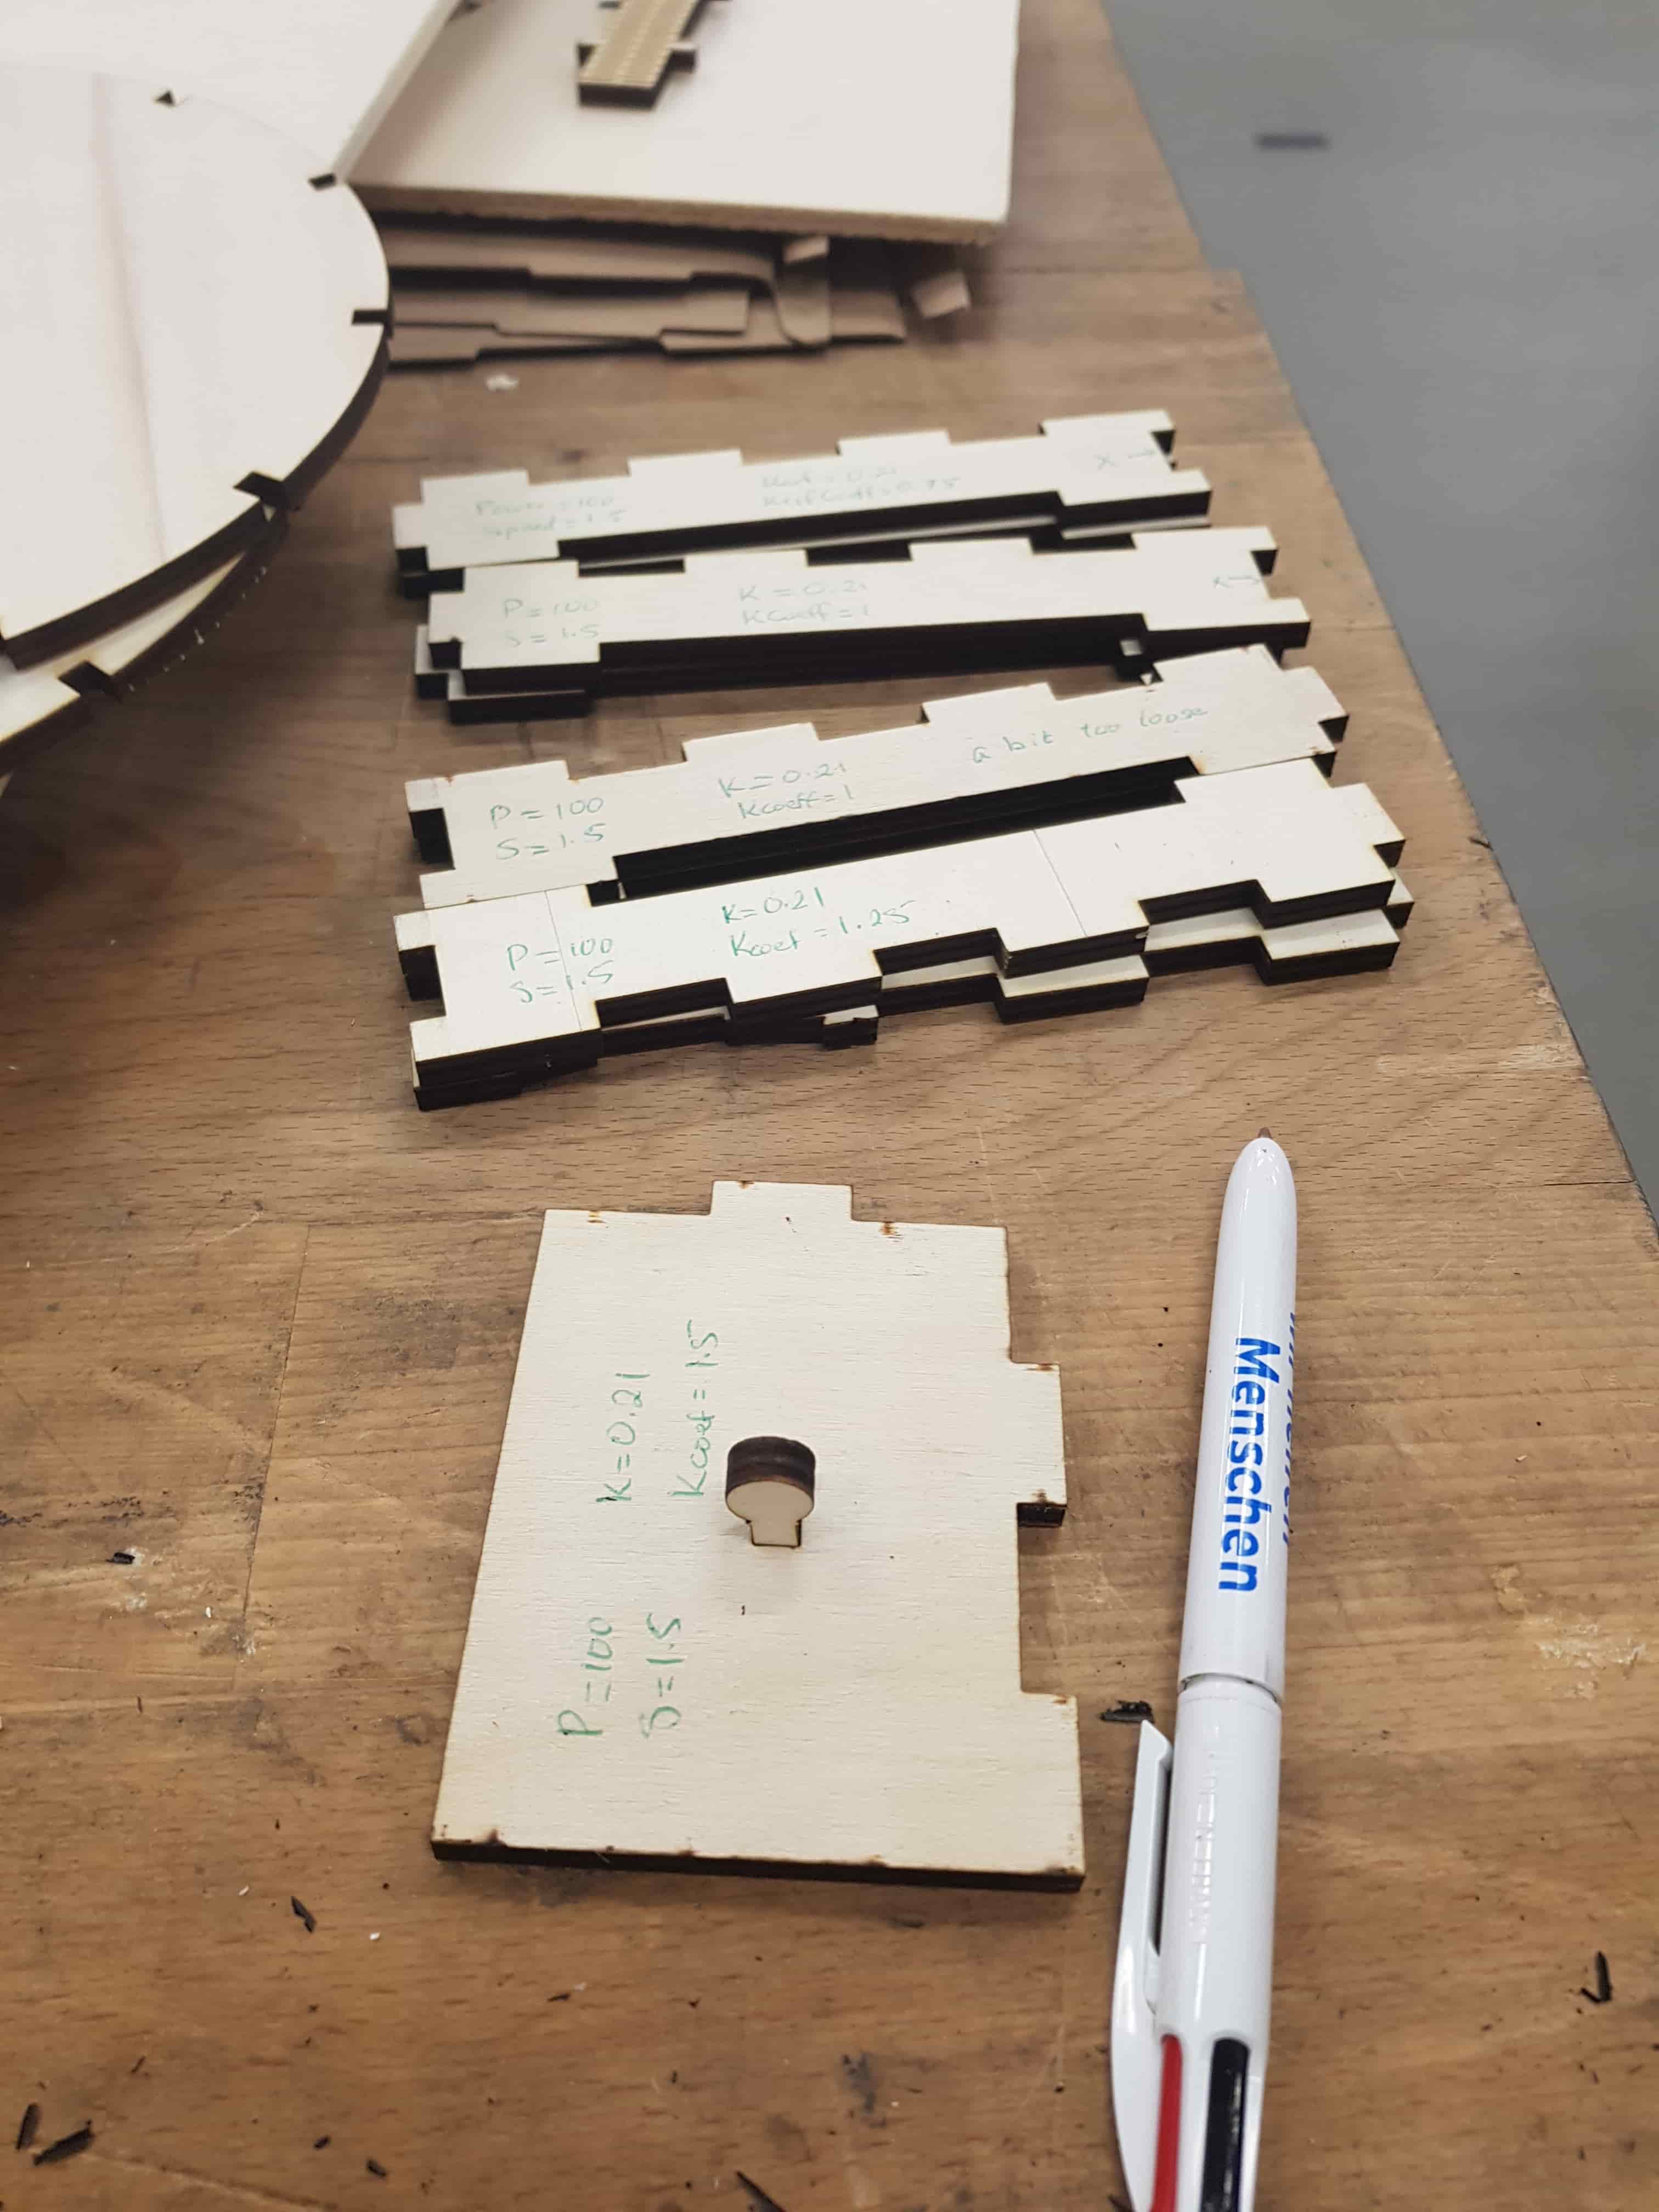
Another important step was to test the interference fit of my box joints. For that, I created a small sketch from the bottom plate and added a slot for peg testing.
.jpg)
I also had to cut multiple iterations of the side panels because the joints were too loose.
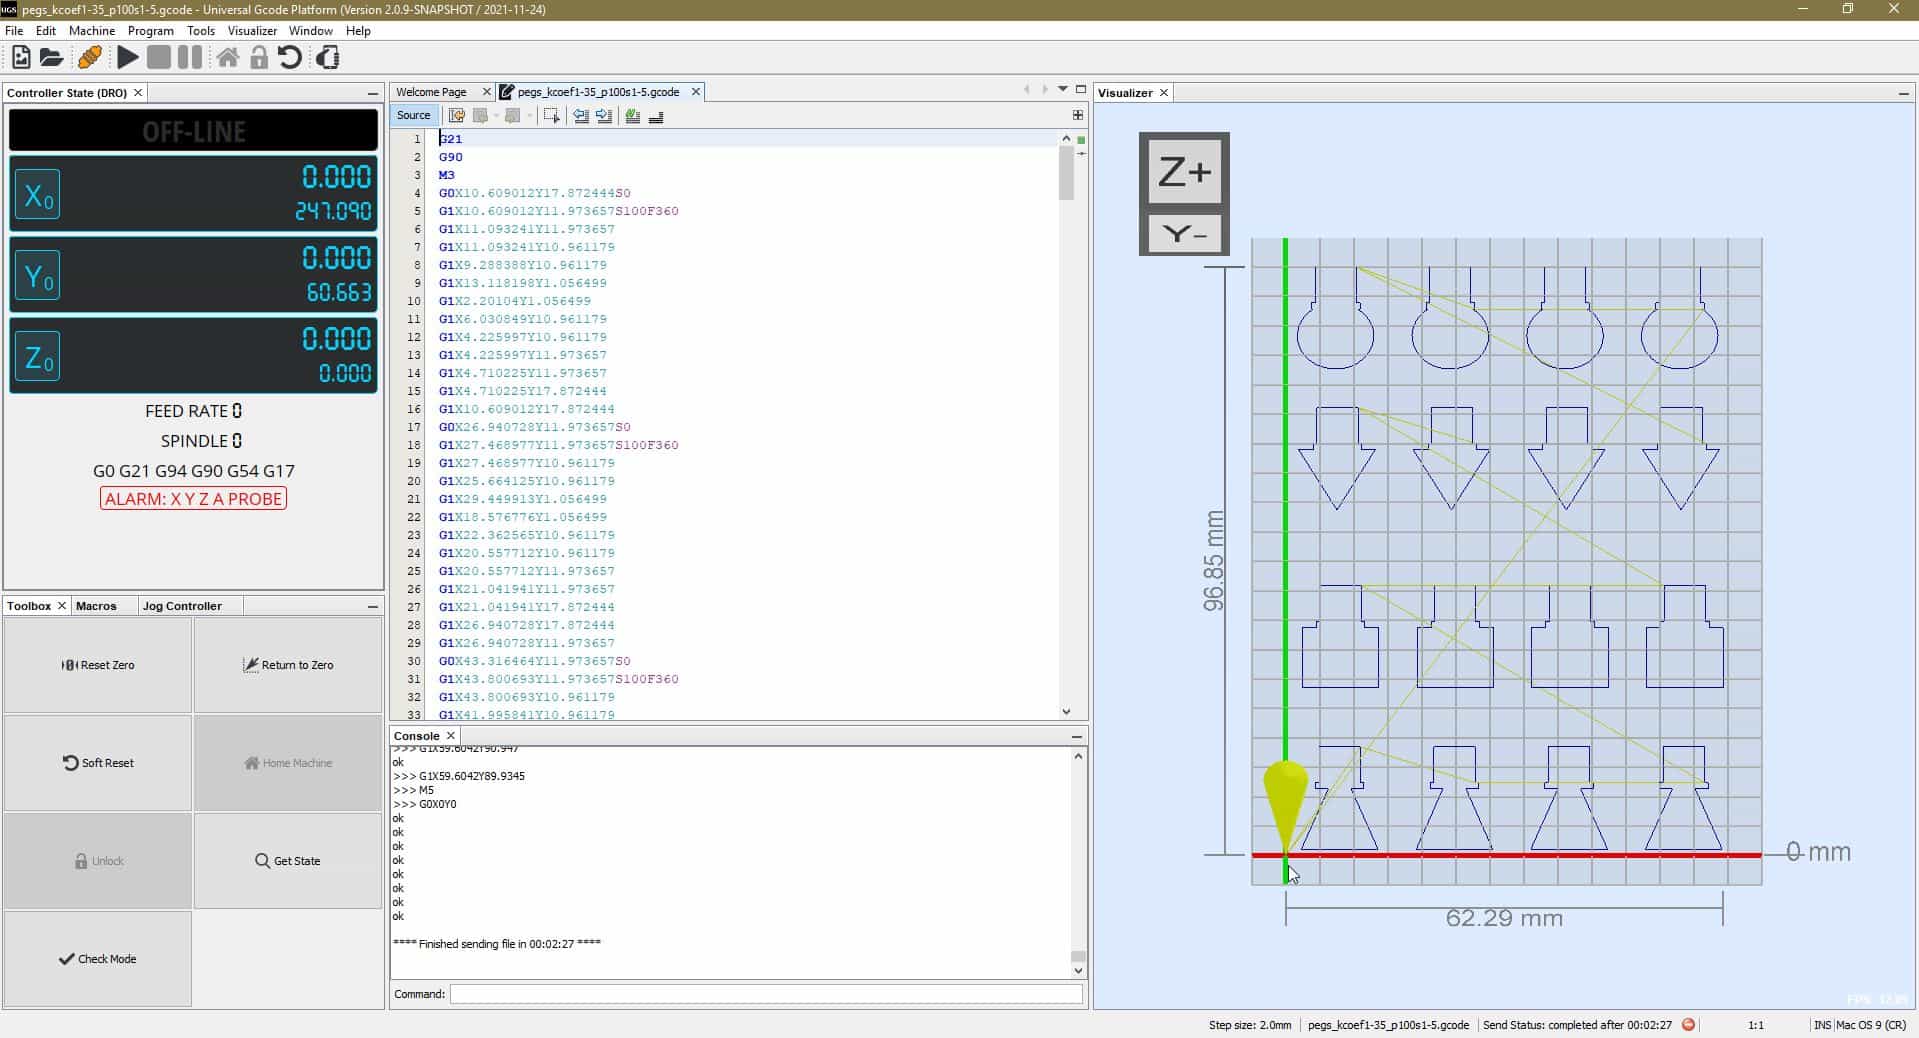
After I was satisfied with the results, I went ahead and created gcodes from Visicut and fed them into the Universal Gcode Sender.
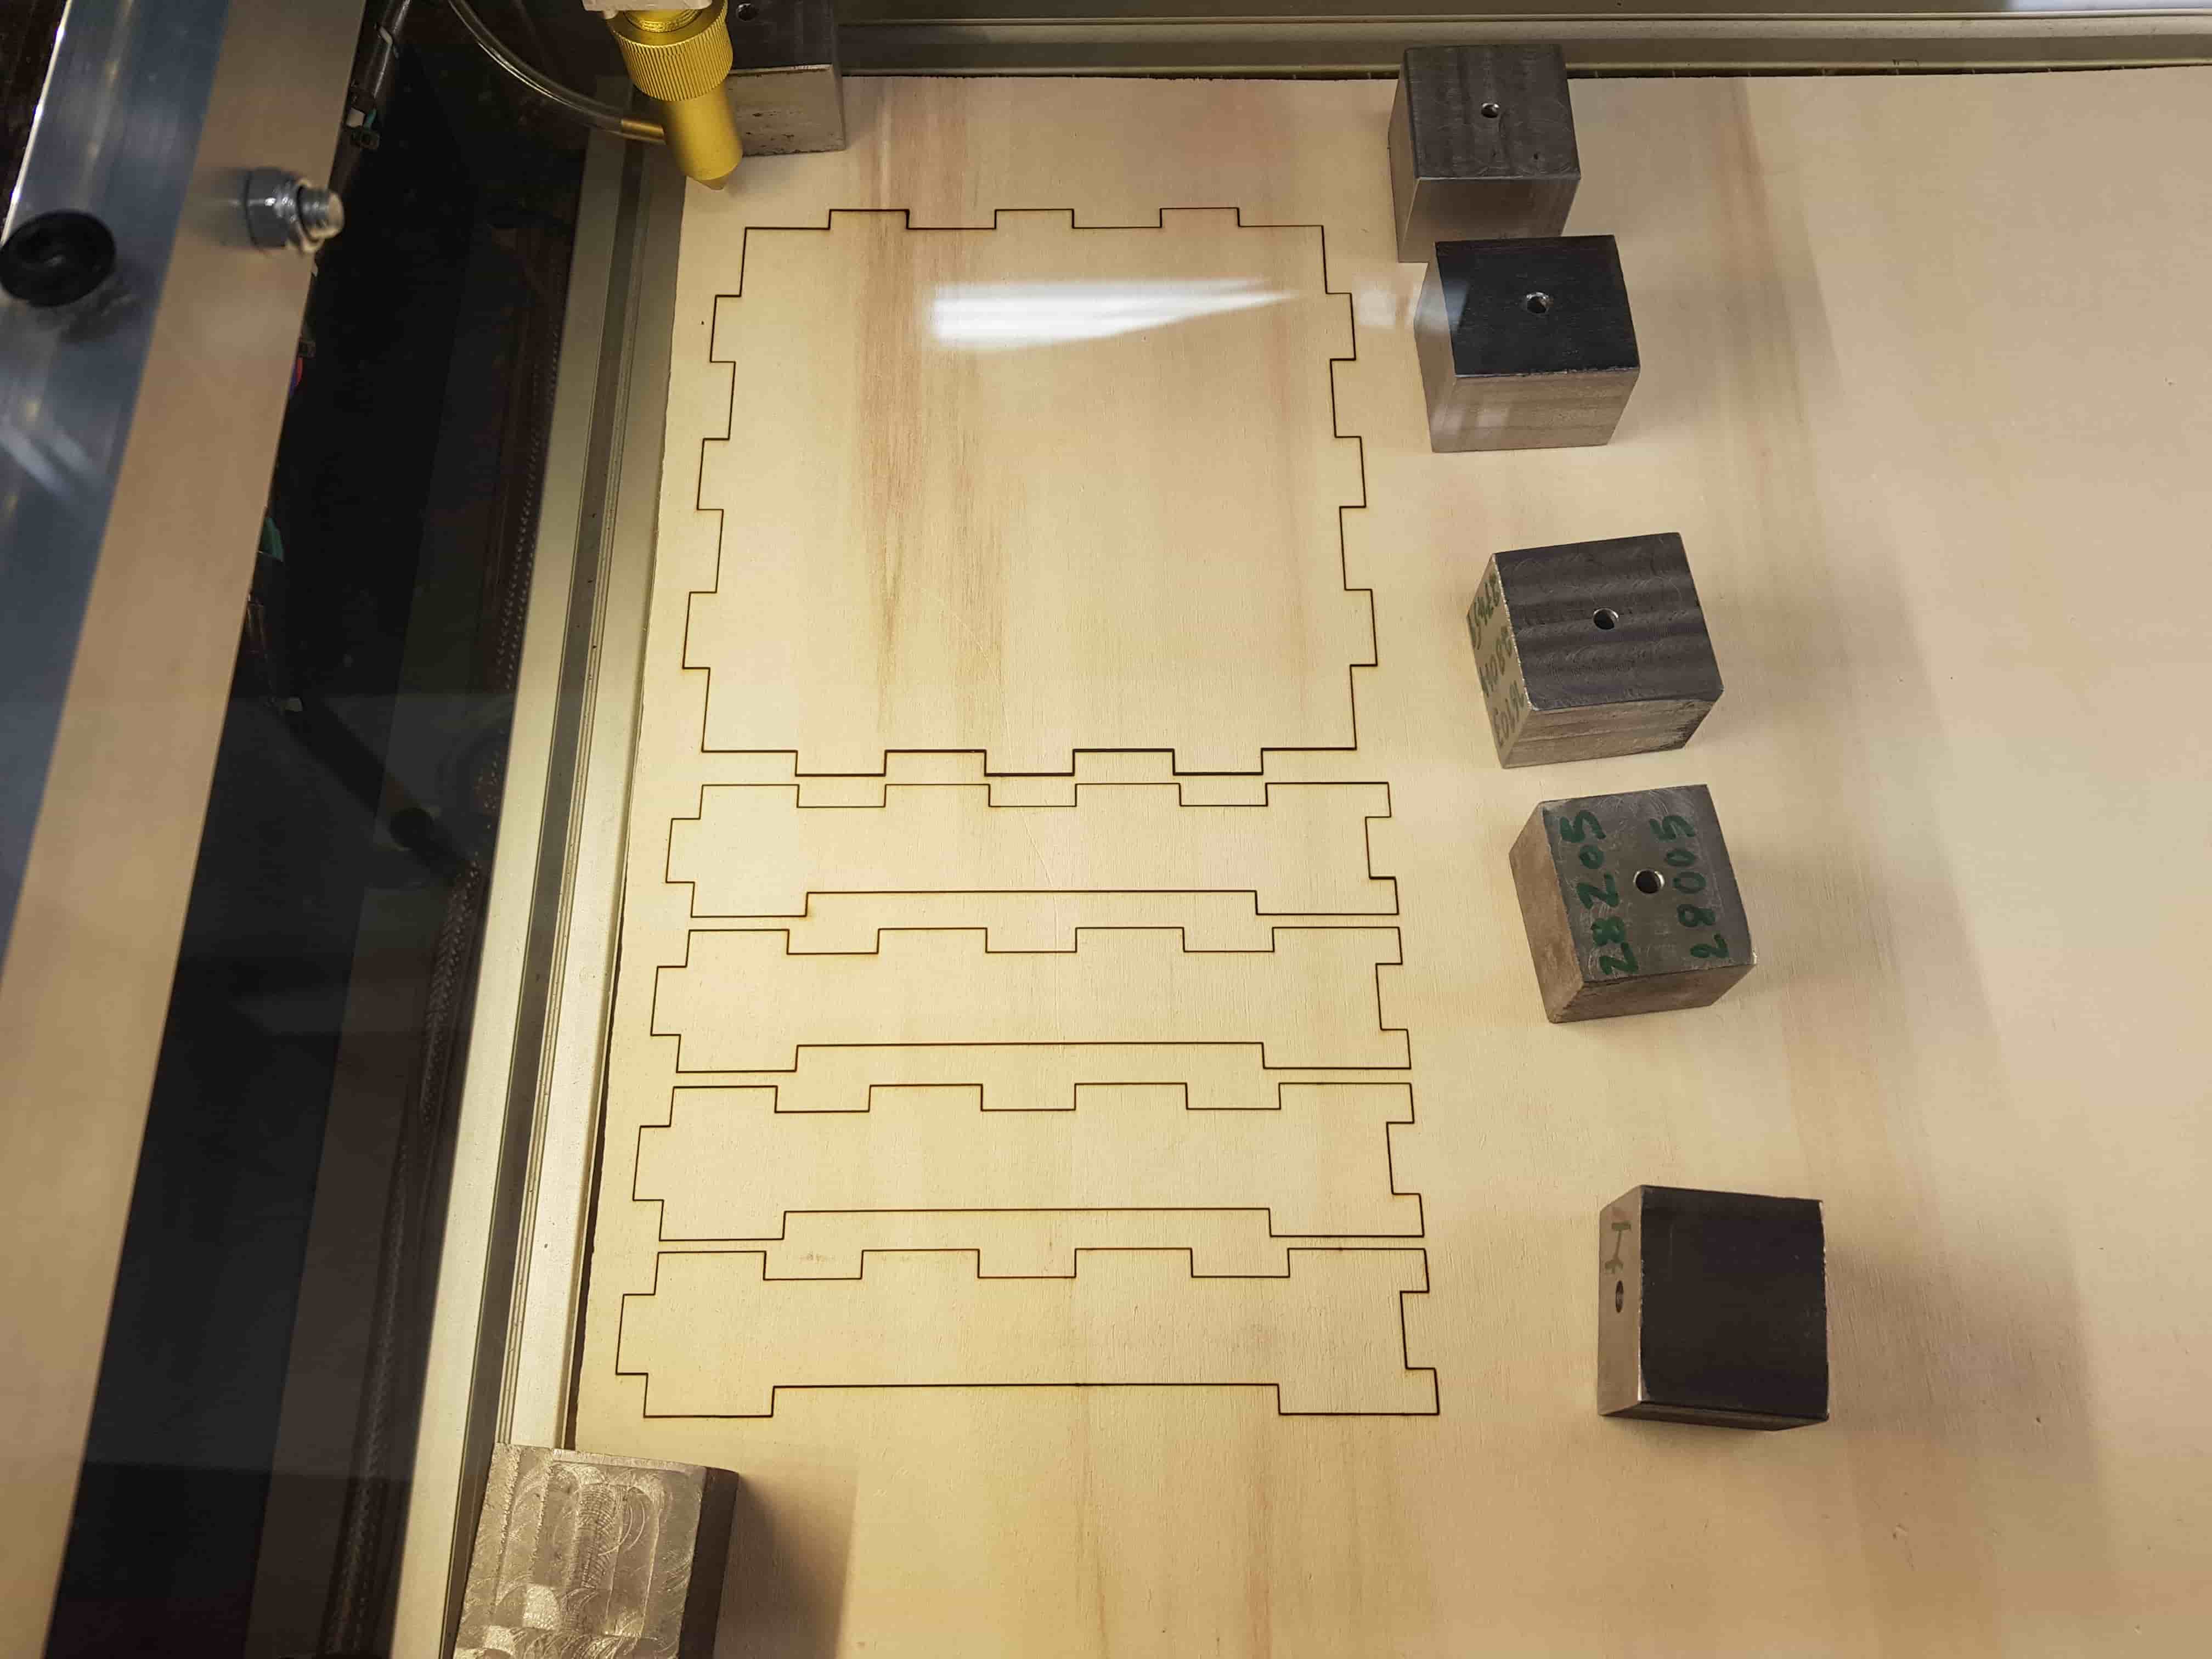
Here are some cut parts.
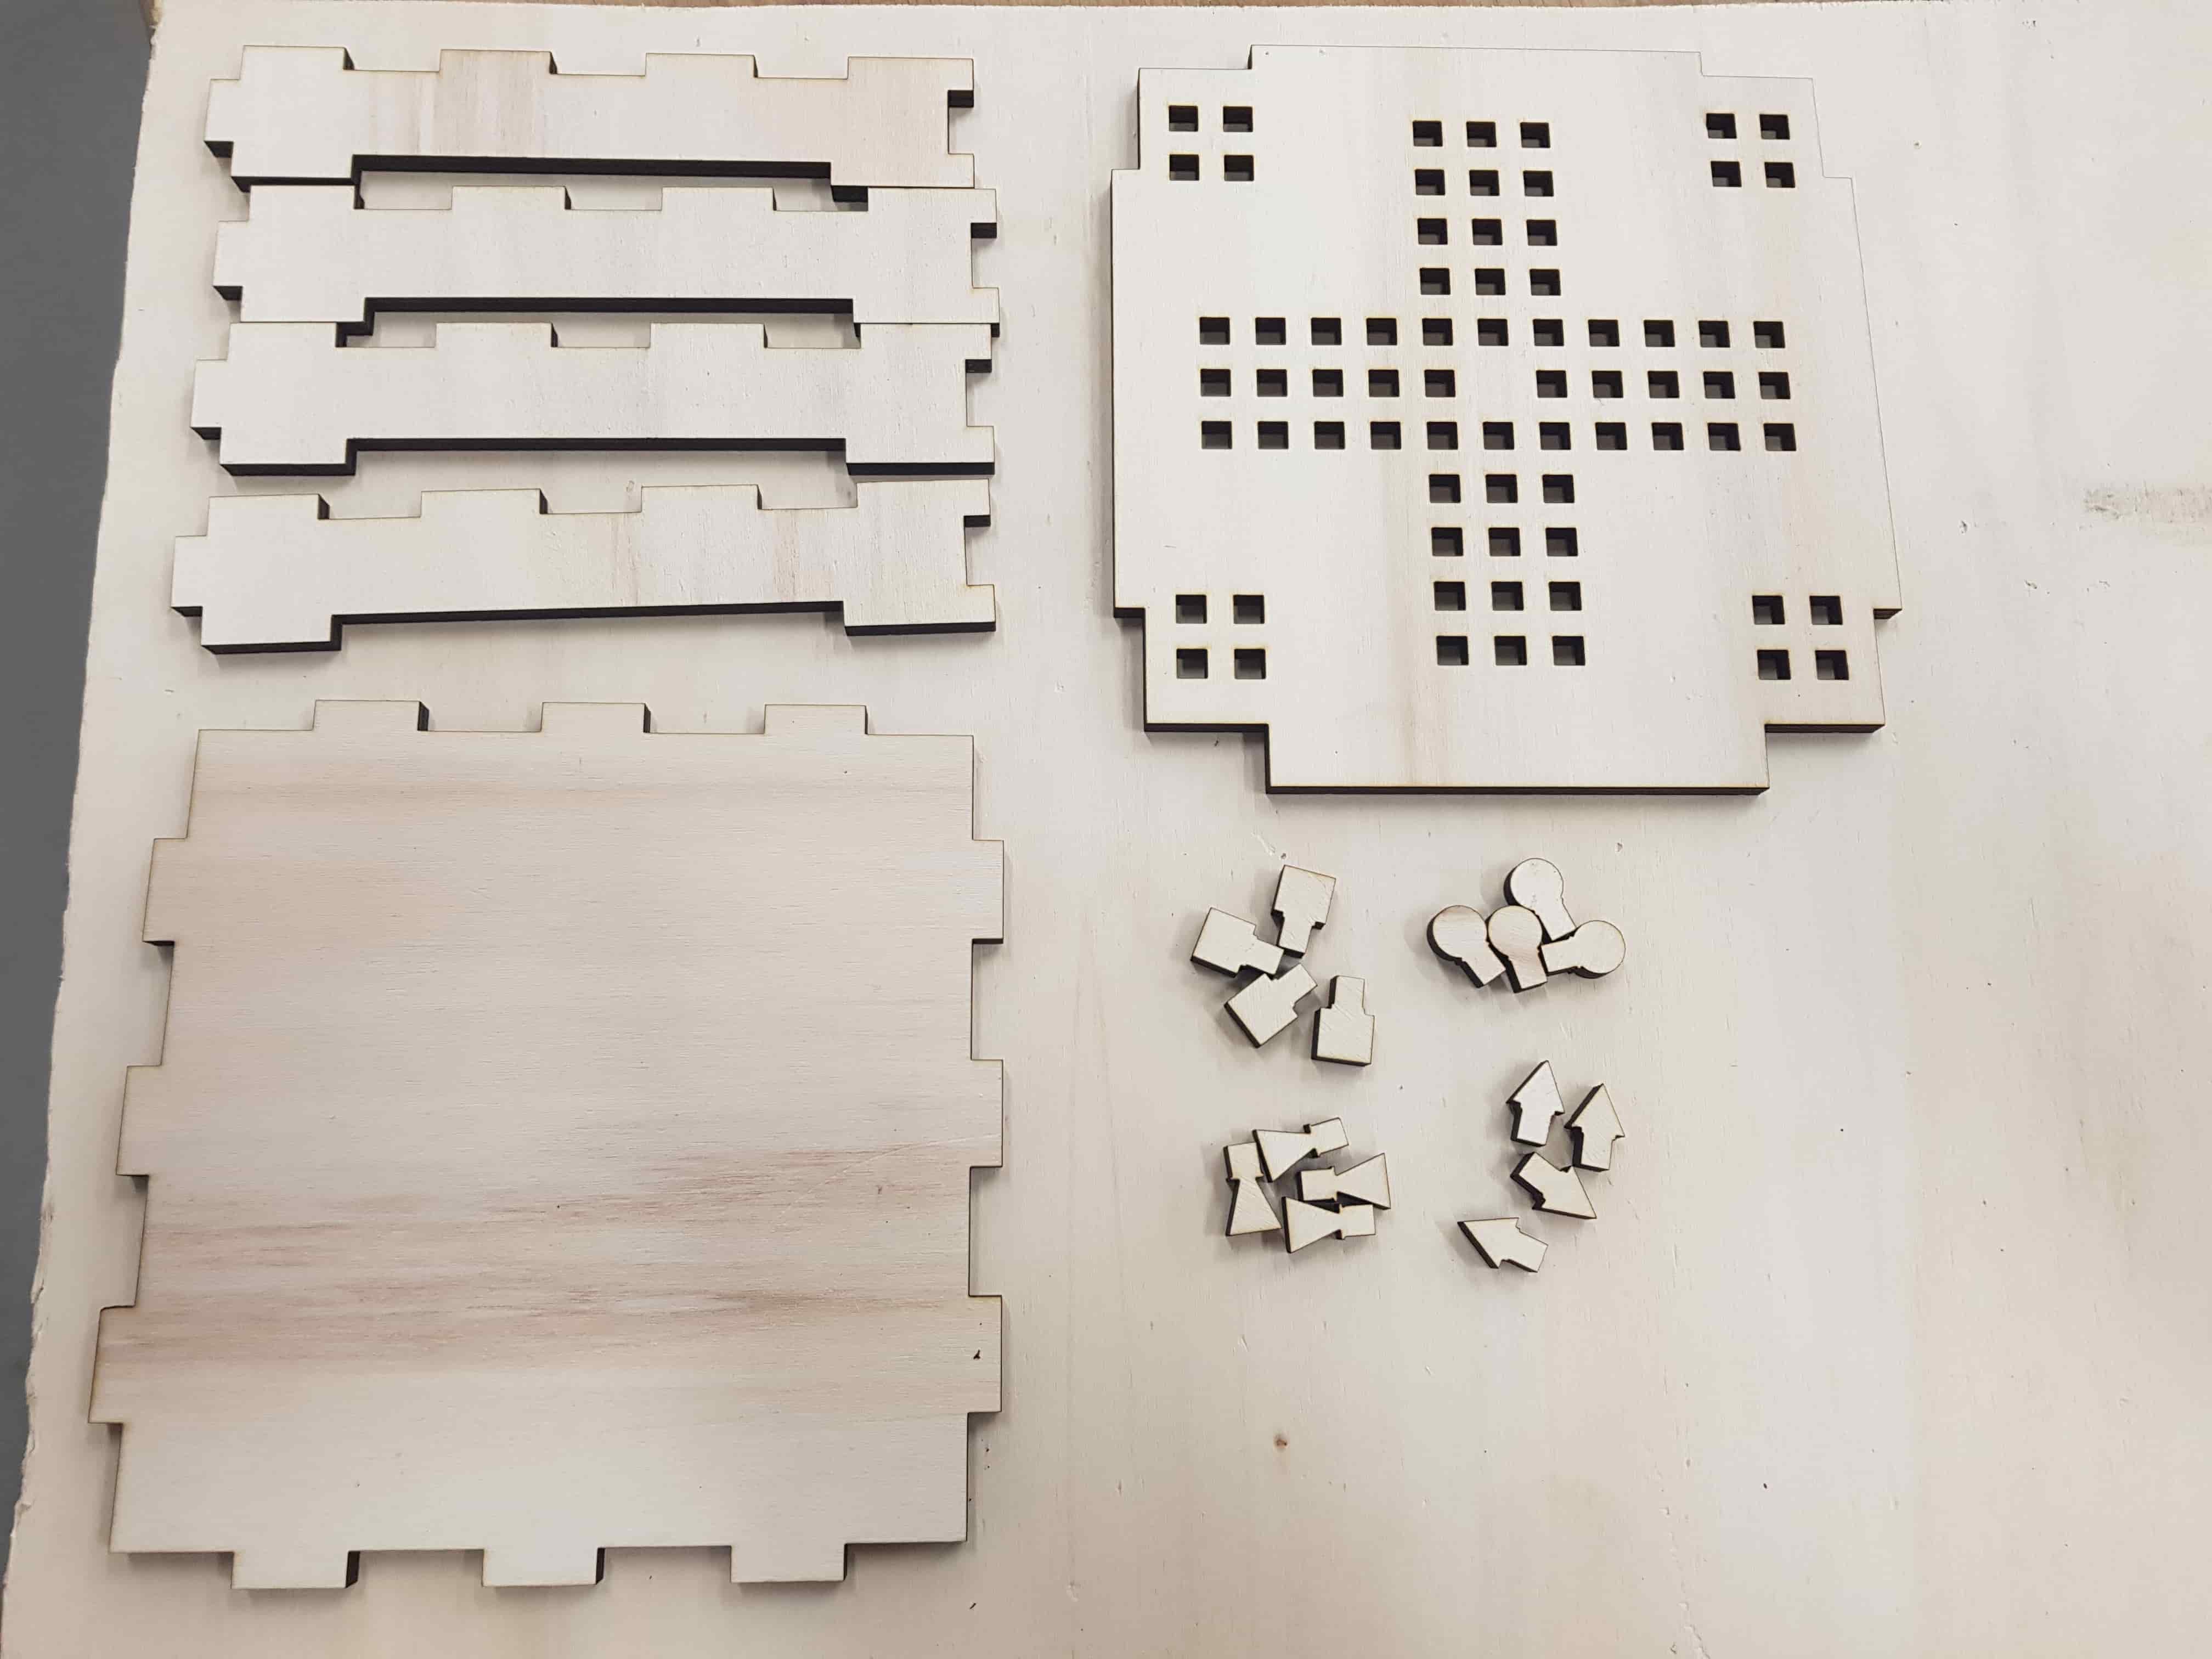
And here are all of them.
It’s assembled!
Cutting Vinyl
For this part, I was working with the Silhouette Portrait 2 plotter and its software Silhouette Studio.

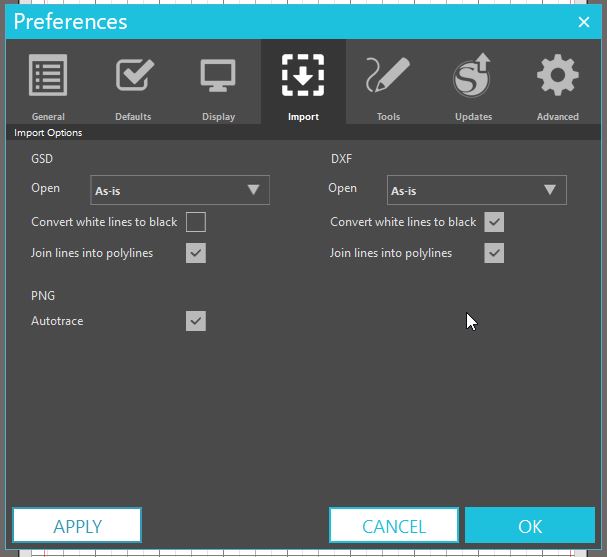
First thing to set up, though, are the import settings in the software which need to be set to open as-is and join lines into polylines.
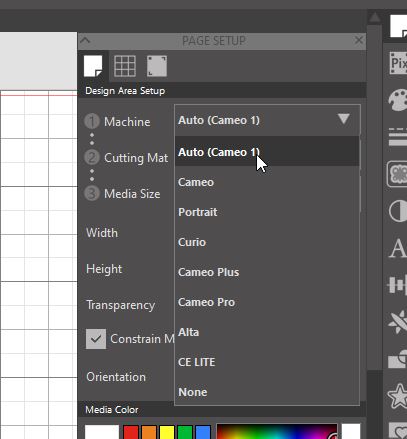
Next step is to specify the cutting mat size.
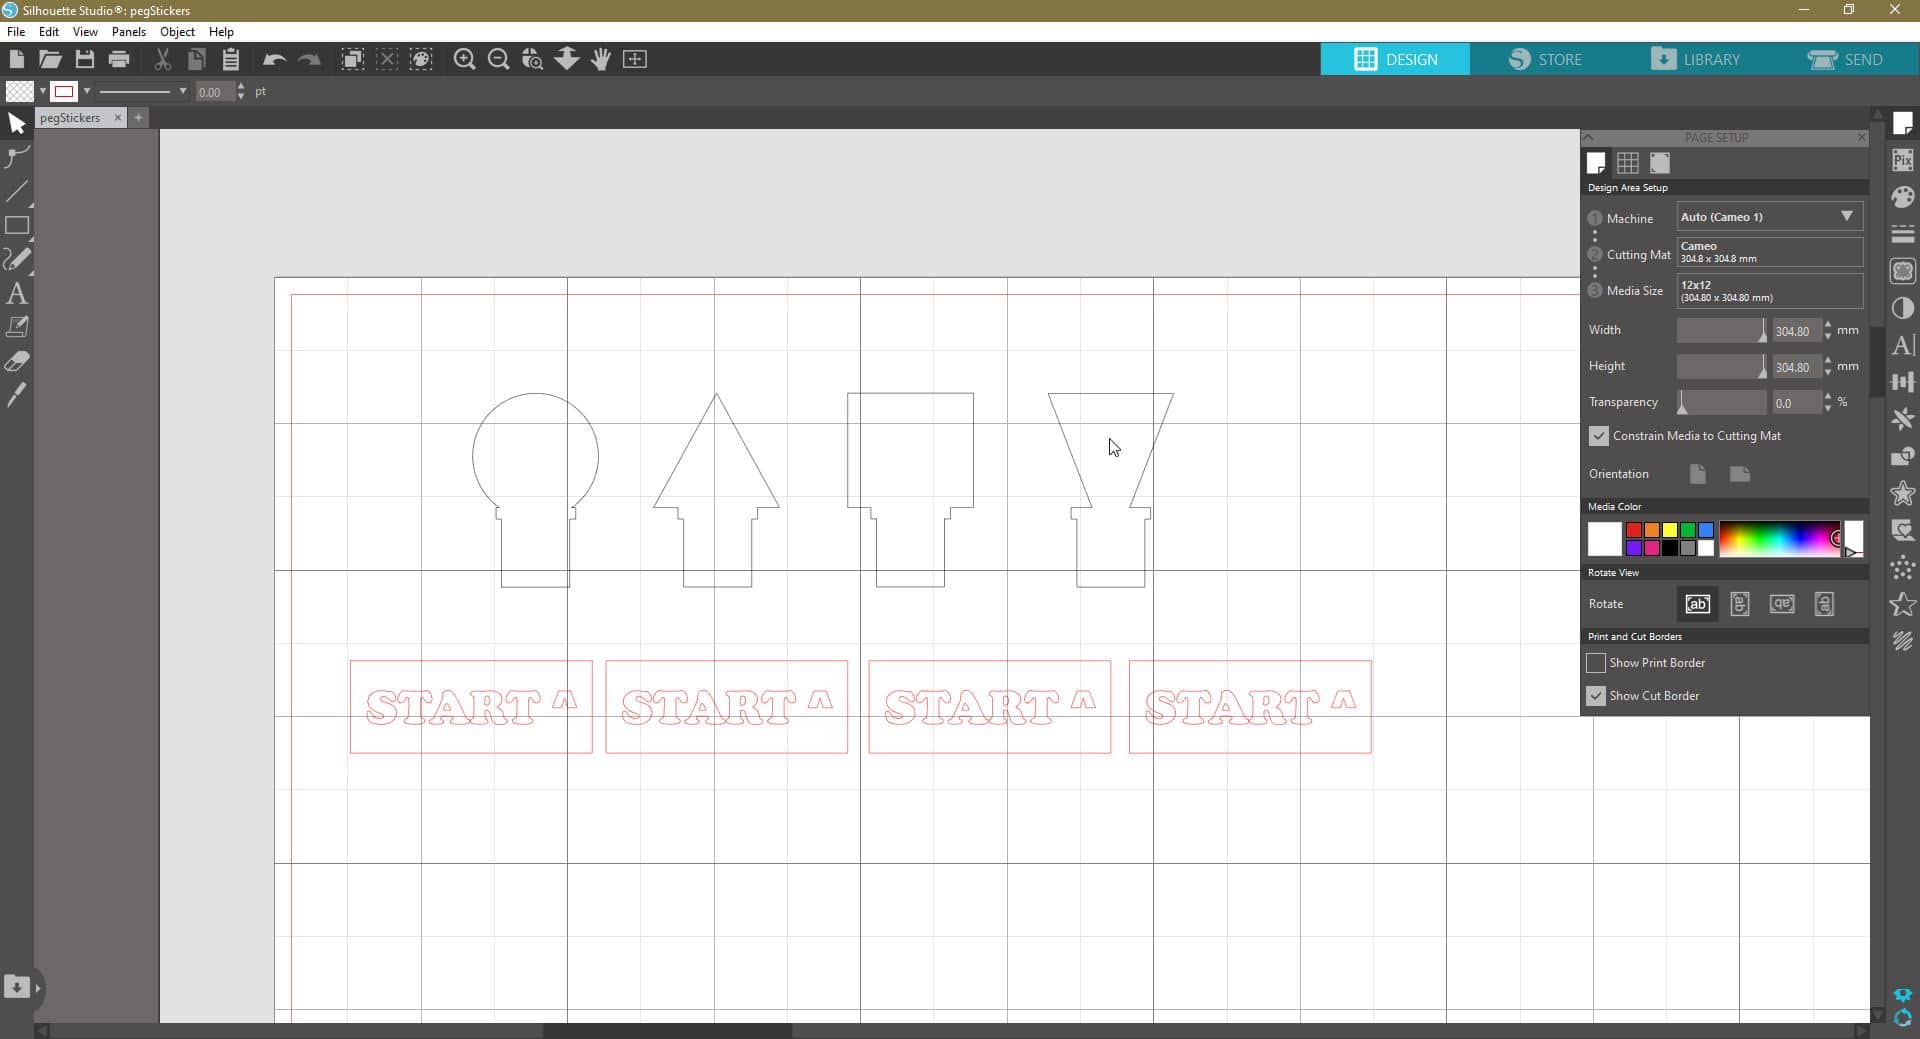
I then imported the playing pegs as DXF files and added some text using the built-in editor.
And then switched to the Send tab and set all lines to be cut.
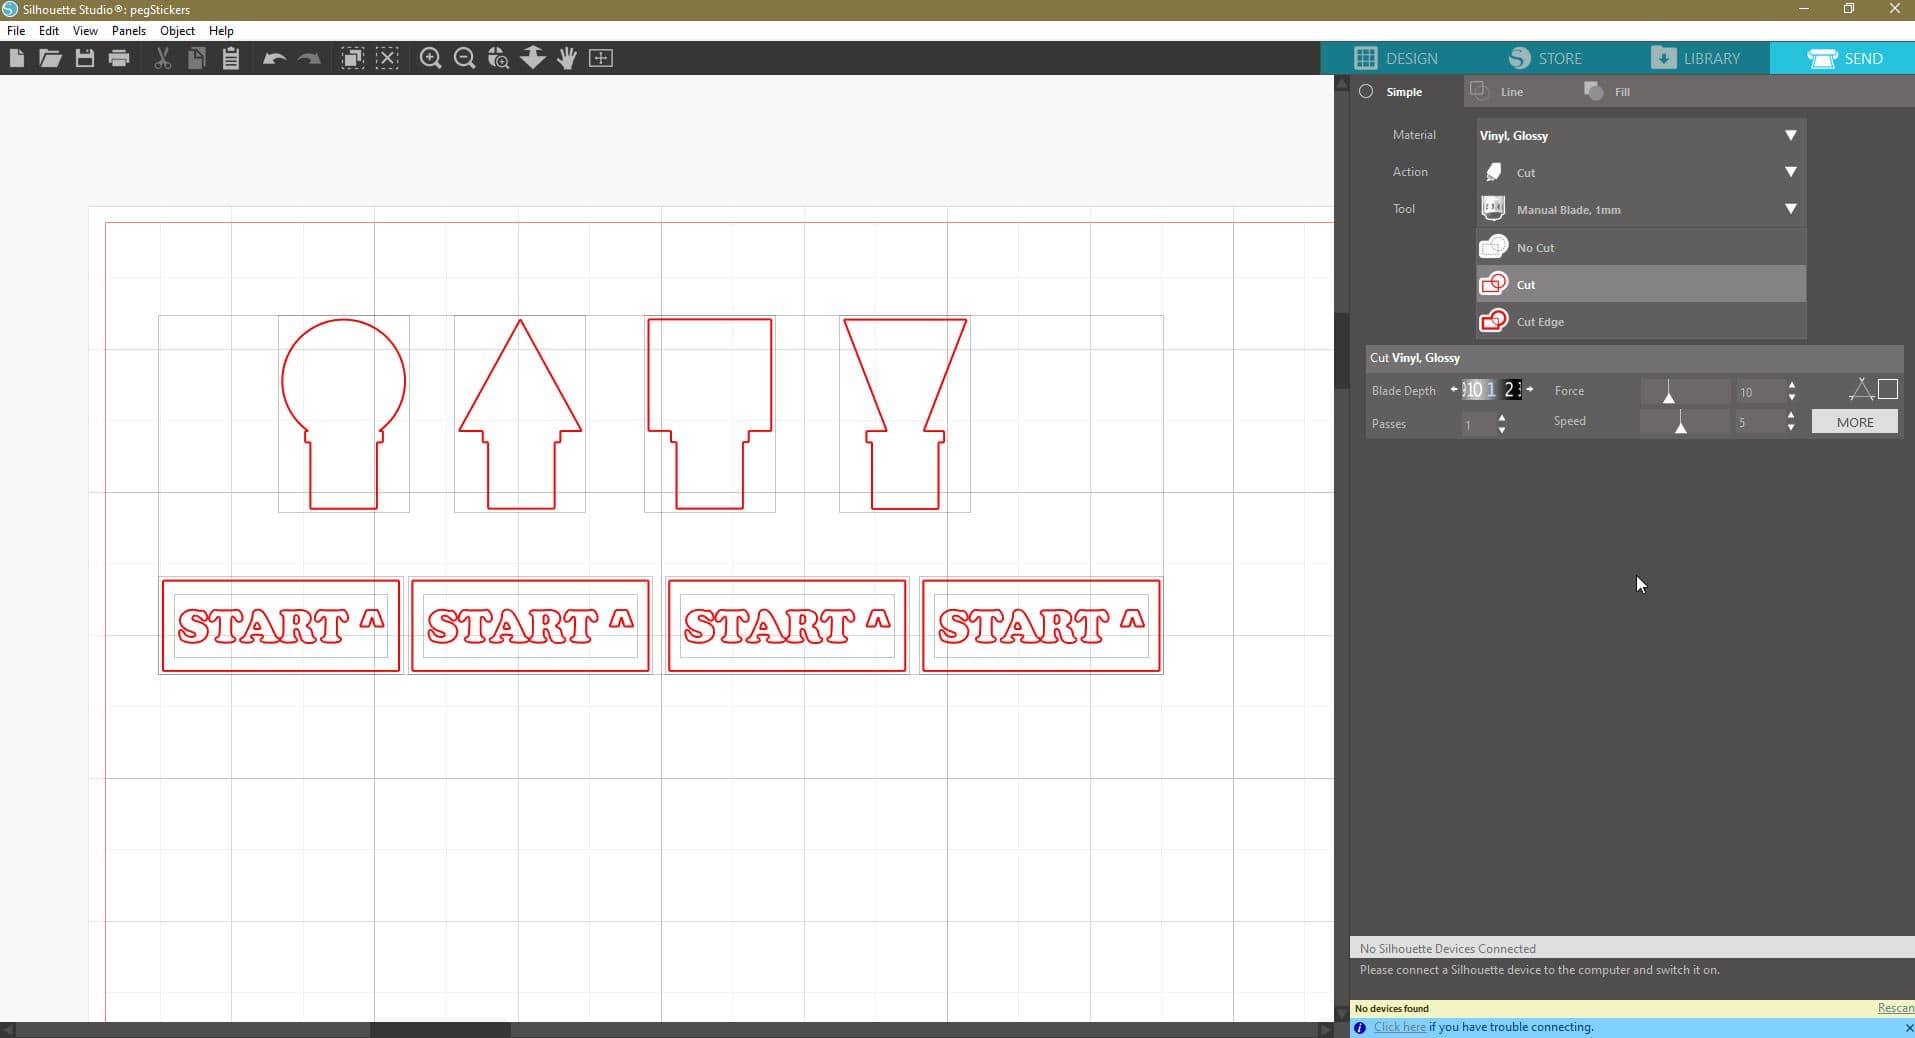
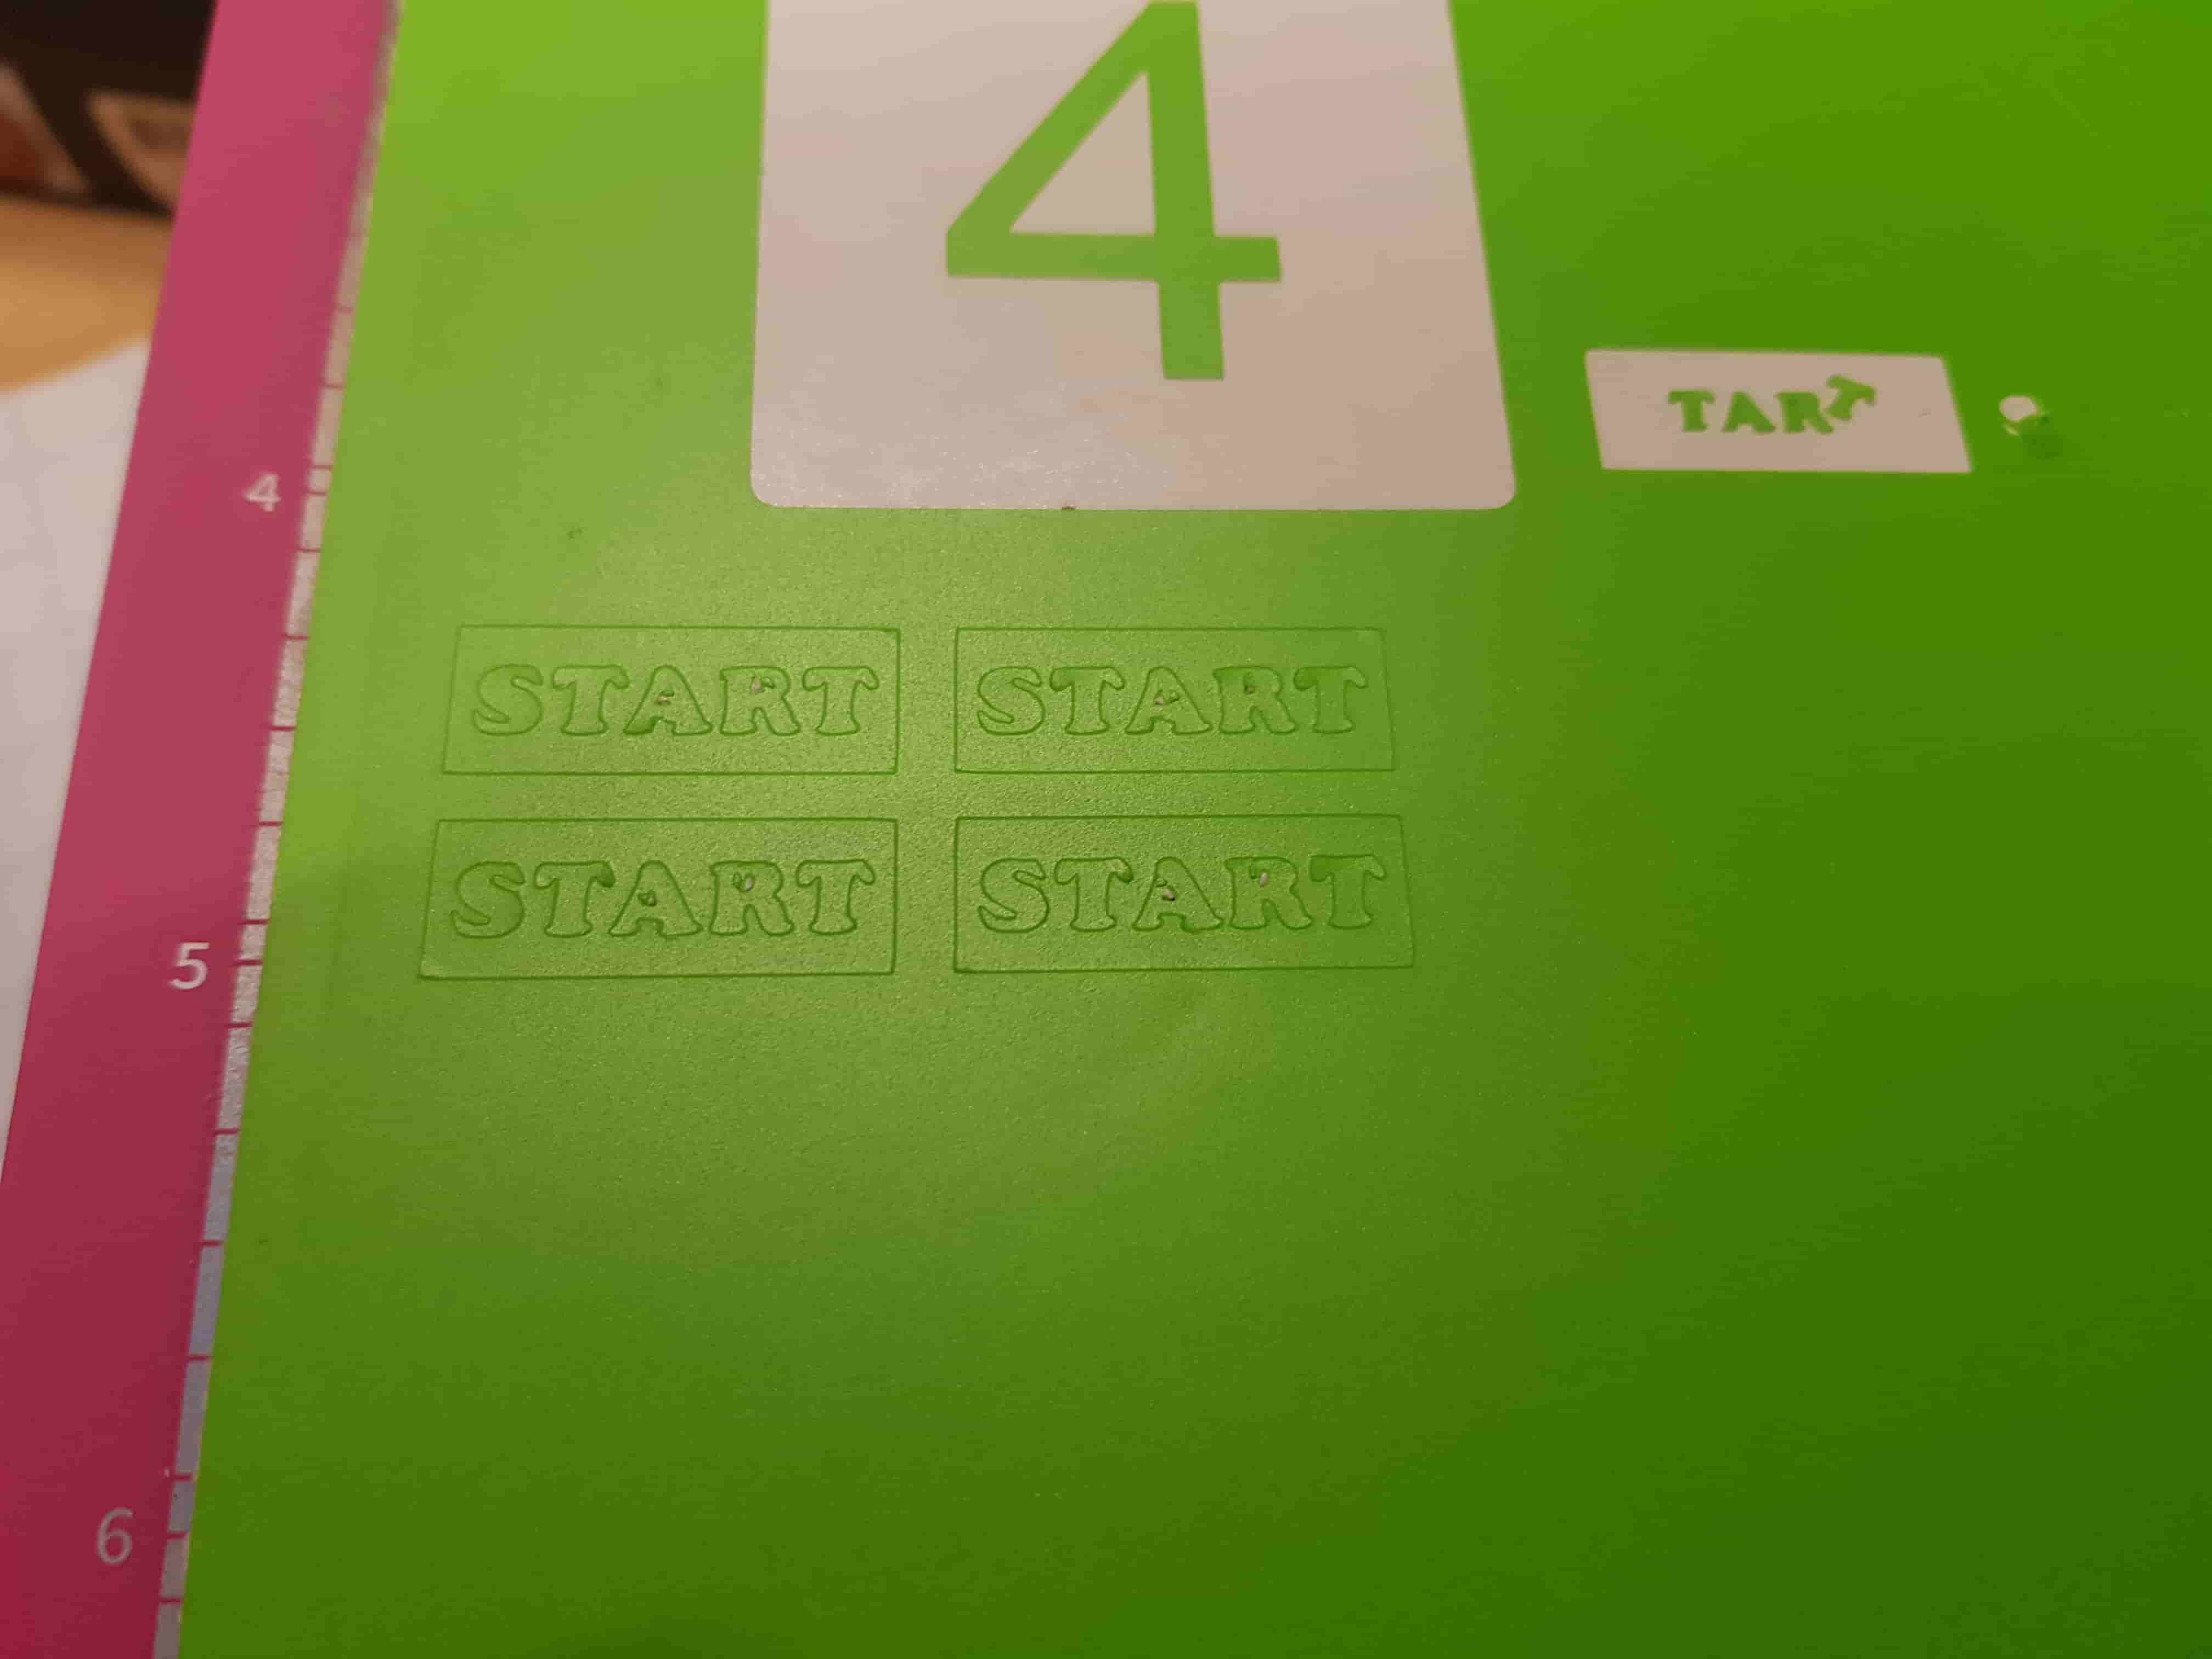
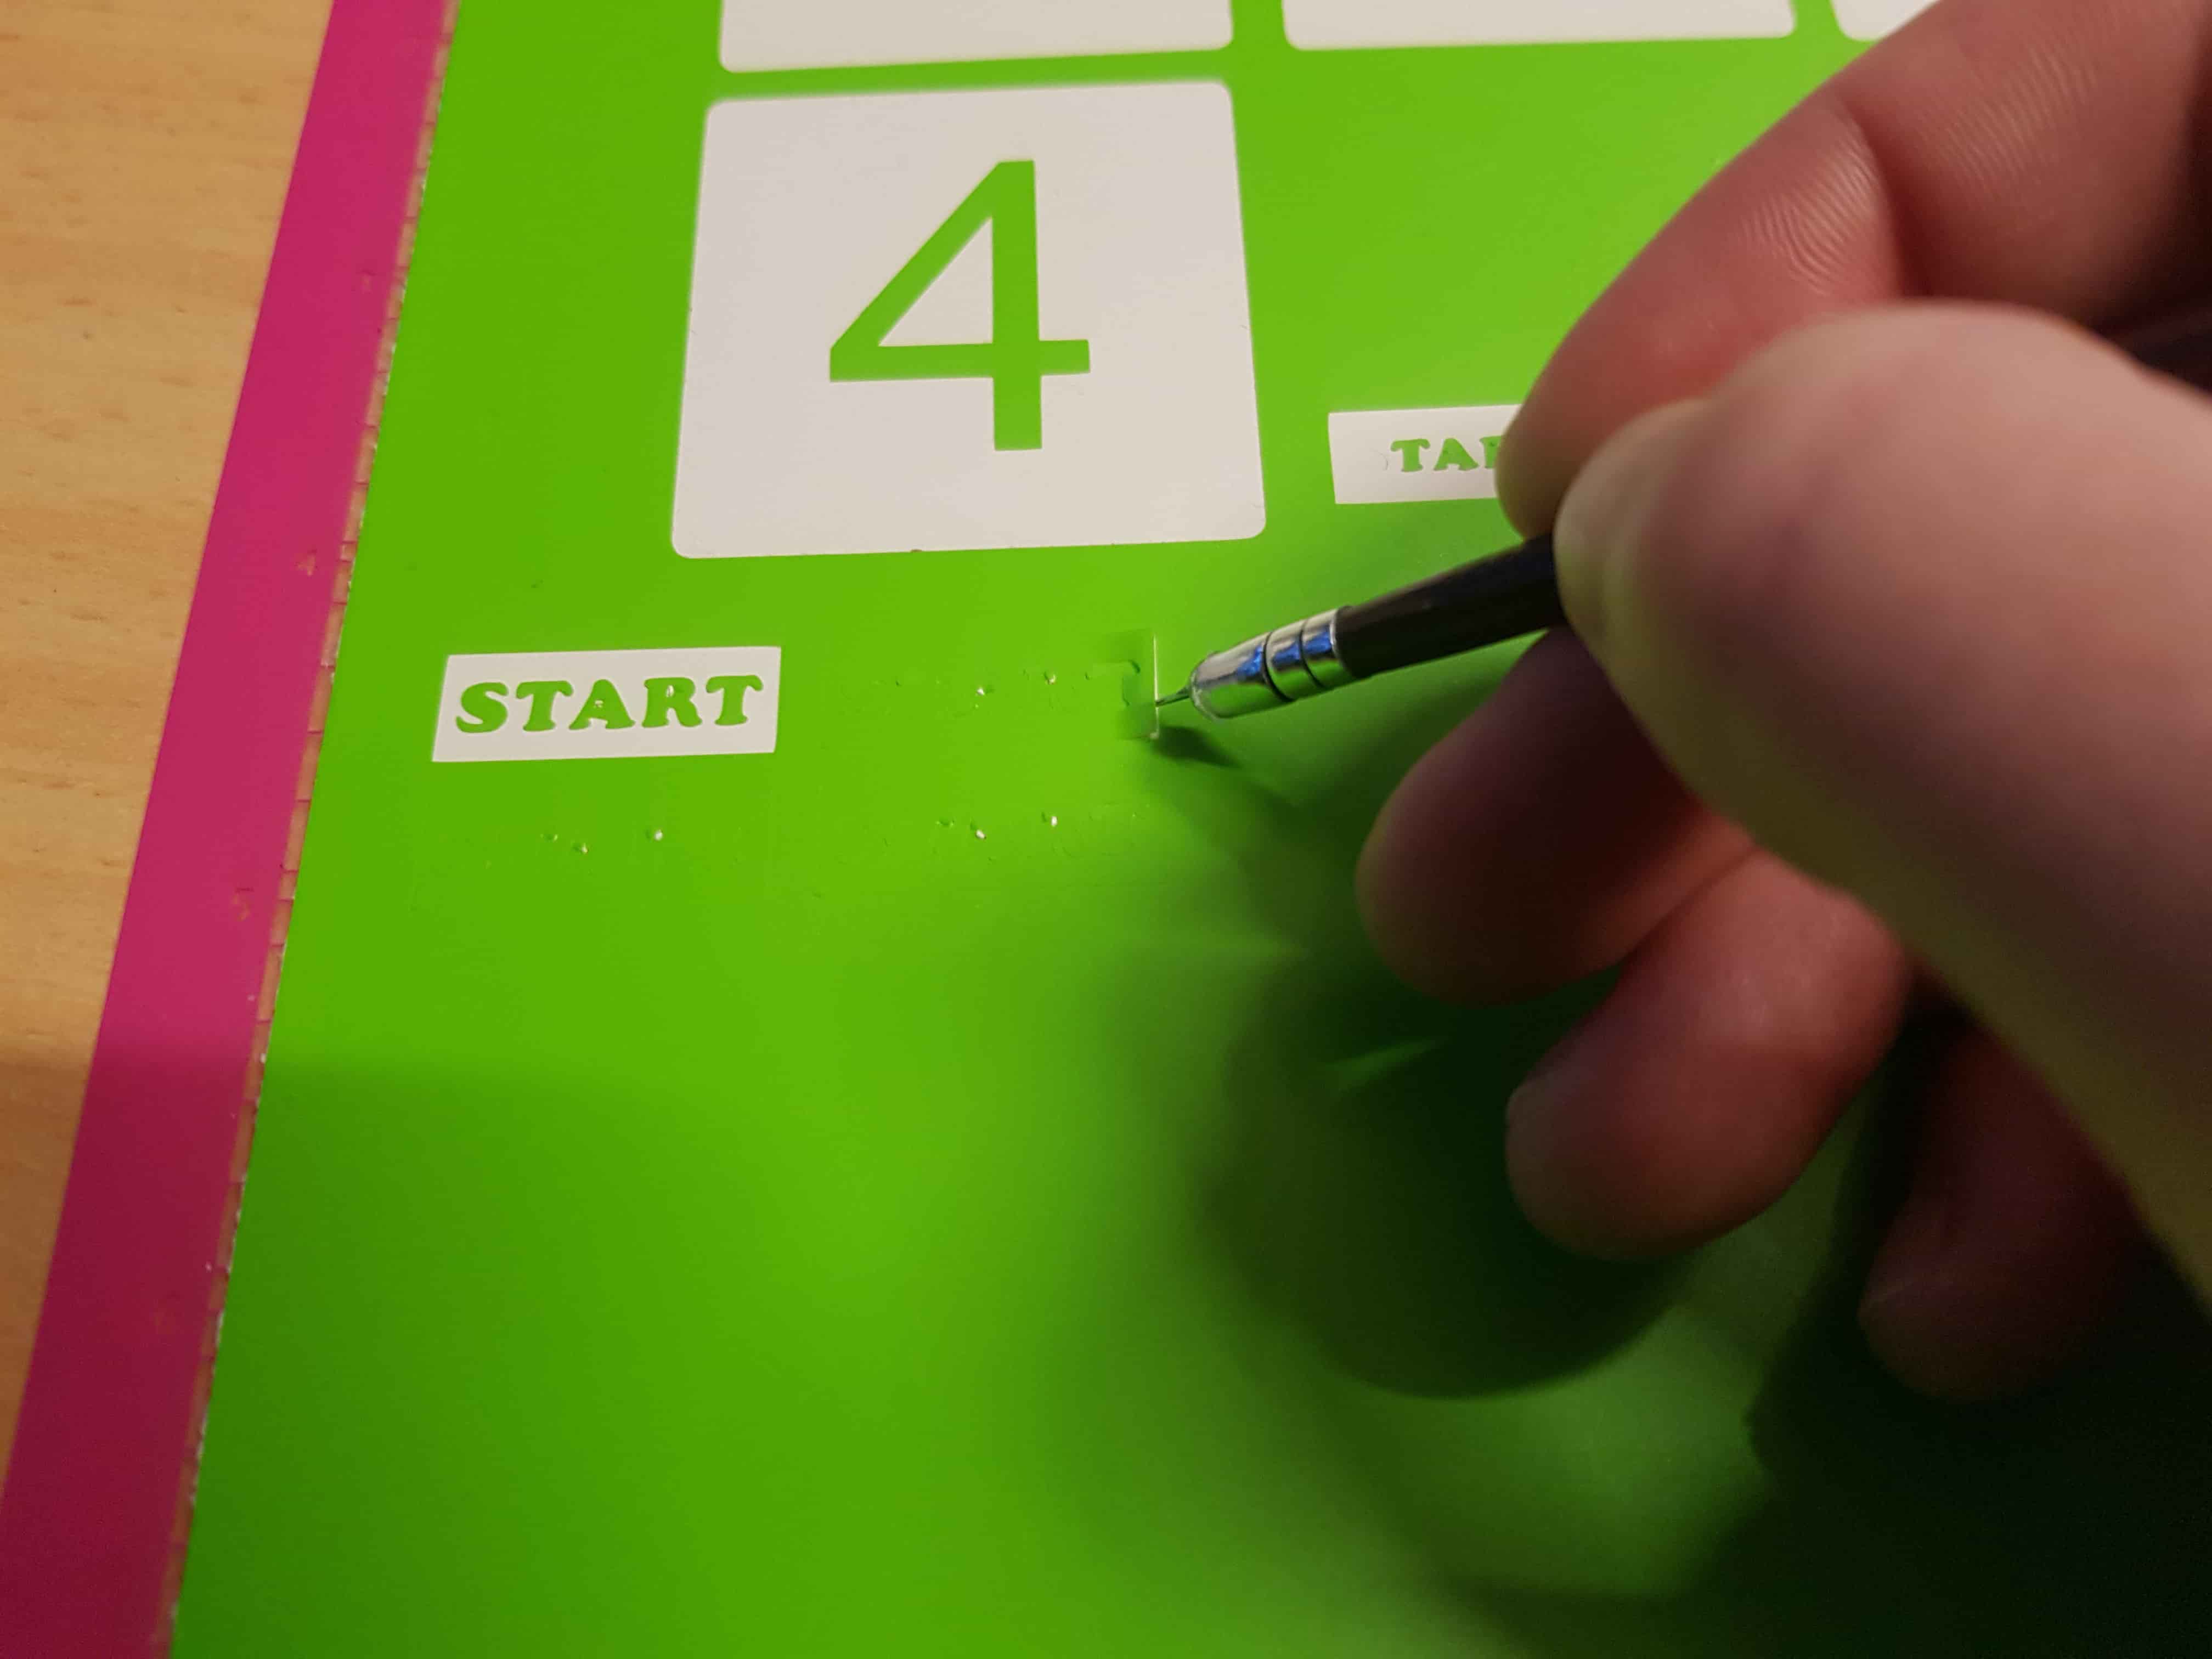
Before I cut my pieces, though, I did multiple test cuts to make sure that my cutting settings are appropriate for the piece of vinyl I’m using.
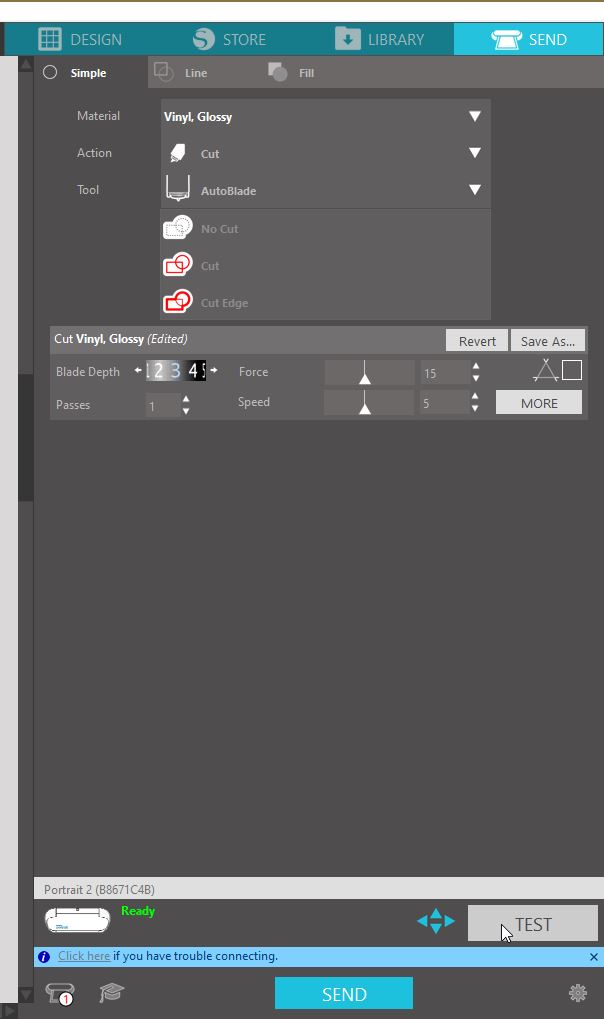
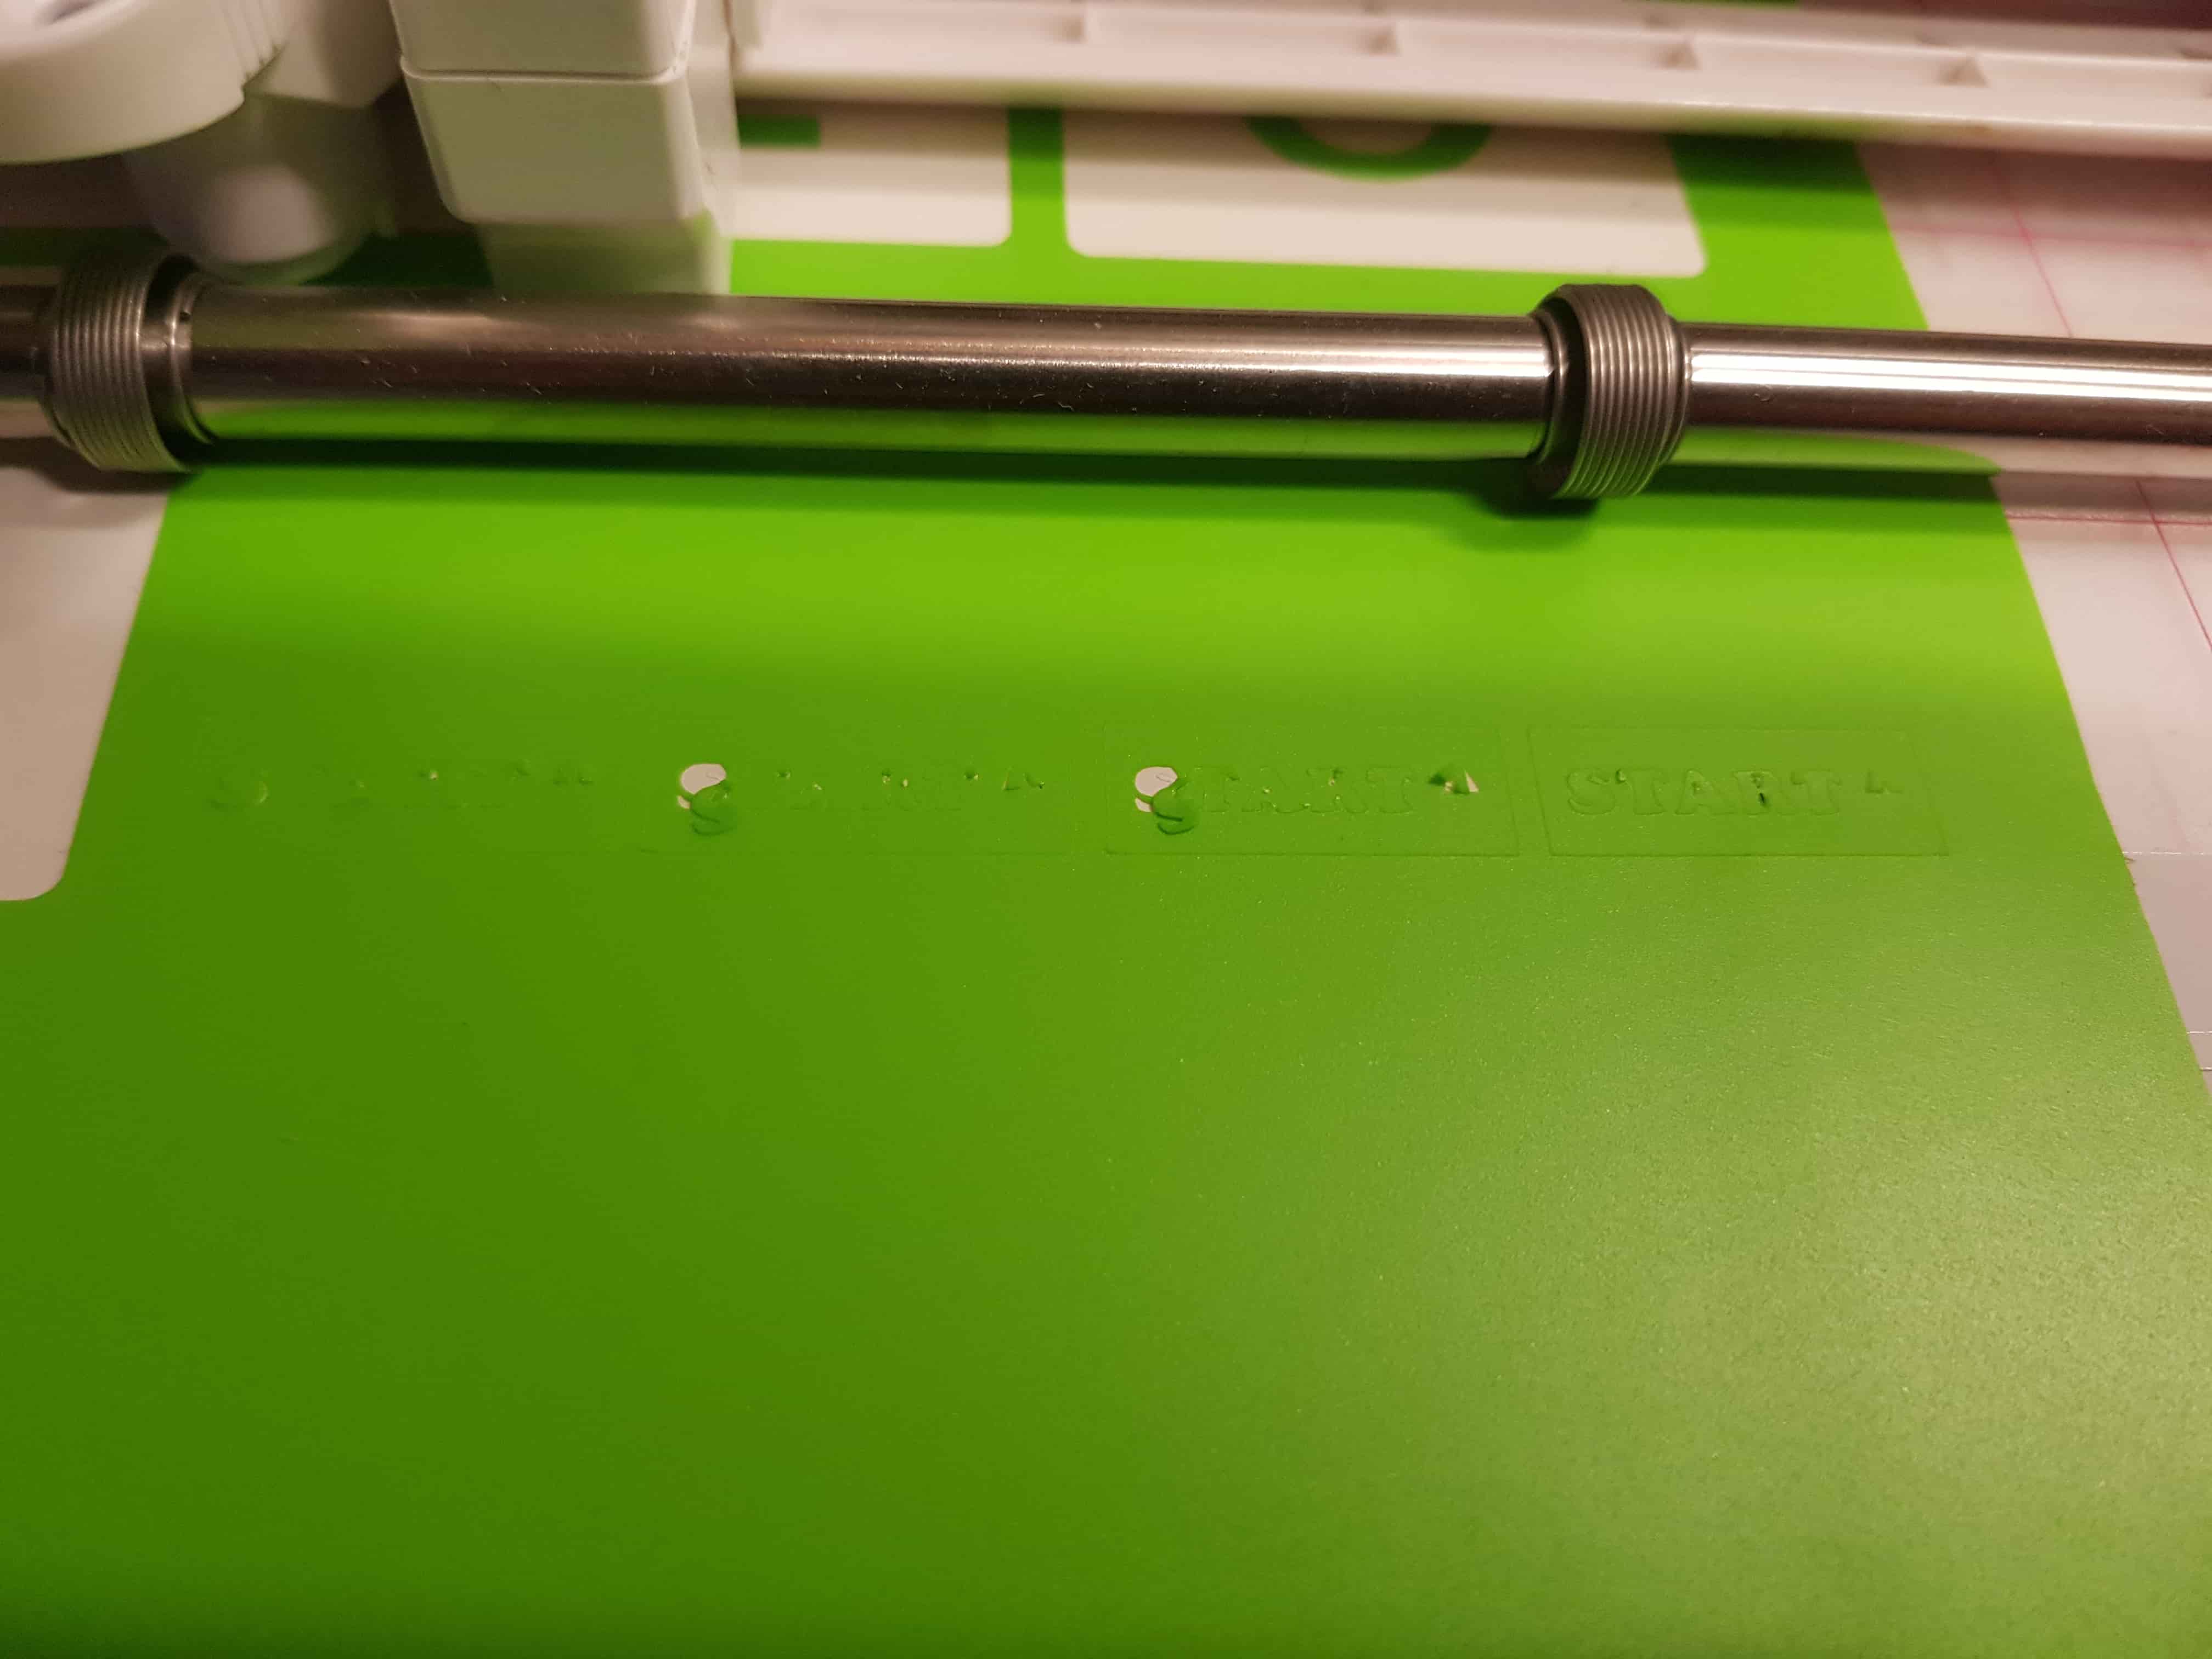
And now that I'm ready, I added my first cut. The peg shapes came out perfectly, but the text turned out to be too small to be cut nicely.
So I re-designed the text part and made it bigger.
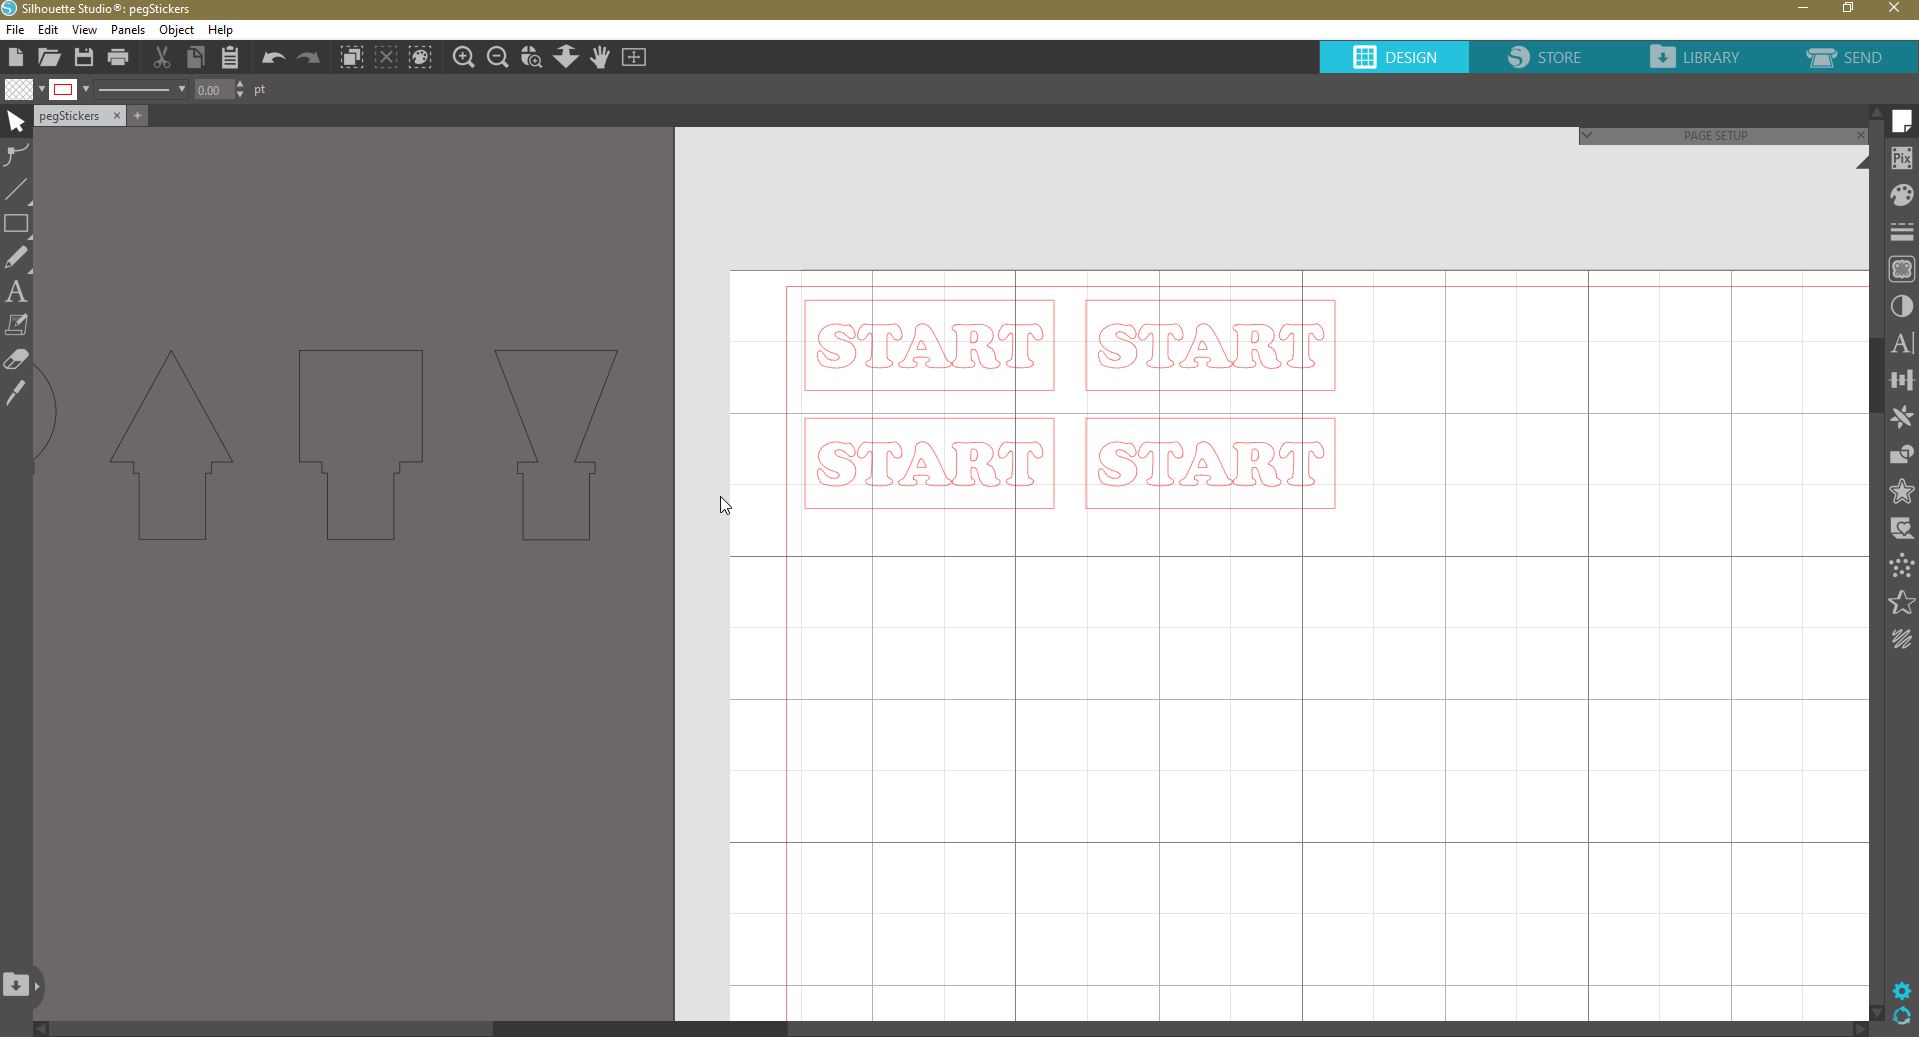
Another cut attempt. Looks like it's the one.
Tadaa!