6. 3D Scanning and printing
This week I worked on defining my final project idea and started to getting used to the documentation process.
Group Assignment
activity in process
Fab Lab in implementation
Individual Assignment
3d design
Ultimaker Cura: software that is designed to perform 3D printing in a simple, dynamic, and safe way when used with our 3D printers, improving the experience.

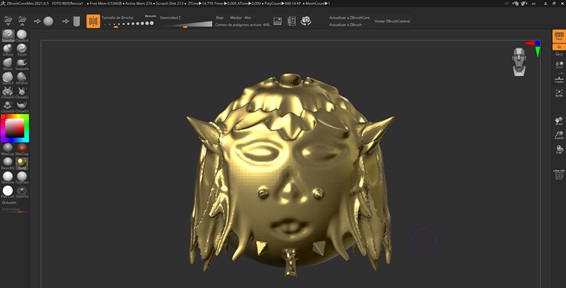
Select my design of an elf made in ZBrushCoreMini software
Useful links
Use tools like:
In ZBrushCoreMini software

For the hair
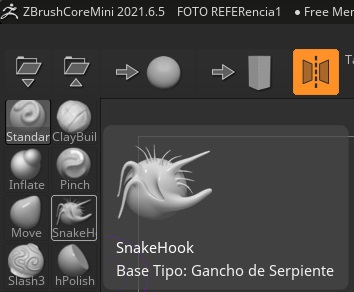
For the ears

Different sizes of brushes were used.
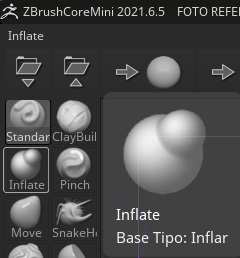
For the nose, eyes, and mouth
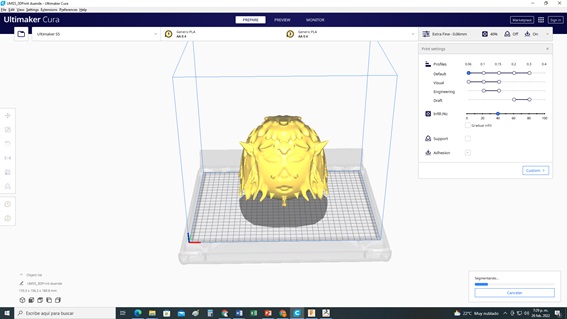
My goblin designed in ZBrushCoreMini was uploaded in Ultimaker Cura in the file folder

It was then inserted into the Ultimaker Cura software

Your impression segmentation time is:
Your impression segmentation time is:


Finally, the padding has been reduced to a minimum and the segmentation time is:

Note: The following software has been used for this procedure:
Git Bash () I visited https://git-scm.com/downloads
Image Resizer: Easily resizes images online for free. You just have to select image. or drag and drop an image here and then specify the parameters and download it. I visited https://imageresizer.com
Visual Studio Code: is a source code editor built on top of the Electron framework. It supports various programming languages and a set of features that may or may not be available for a given language, as shown in the following table. It already has a default previewer. I visited https://code.visualstudio.com
En la web hay archivos en 3D que se pueden descargar para realizar nuestra simulación en impresión 3D, por ejemplo: thingiverse I visited https://www.thingiverse.com
Tiendo en donde se pueden descargar archivos scad en 3D que también se pueden cargar en Ultimaker Cura. Recomiendo ver el tutorial de Ultimaker Cura en YouTube: I visited https://www.youtube.com/watch?v=wnc1LupBcrs
// the setup function runs once when you press reset or power the board
void setup() {
  // initialize digital pin LED_BUILTIN as an output.
  pinMode(LED_BUILTIN, OUTPUT);
}

// the loop function runs over and over again forever
void loop() {
  digitalWrite(LED_BUILTIN, HIGH);   // turn the LED on (HIGH is the voltage level)
  delay(1000);                       // wait for a second
  digitalWrite(LED_BUILTIN, LOW);    // turn the LED off by making the voltage LOW
  delay(1000);                       // wait for a second
}
Gallery

Video
From Vimeo
Sound Waves from George Gally (Radarboy) on Vimeo.