Programming my board
For this assignment I use the board I designed on the electronics design week, as it contains an LDR resistance, an LED, relay connection pins, a push button, and FTDI serial header.

Elements used
Programming processes
Programming with the Arduino IDE
This practice was made with the Arduino IDE, a development environment, as I have used before with the Arduino UNO board, now just by installing the ATtinyCore it can also support ATtiny45 chips.
There is to Arduino cores, I use and test both but the one listed before is the one that has current support and development. Also has more options to configure and supports a lot of ATtiny chips.
Using this environment to develop is pretty straight forward. The main things are to set the appropriate board and clock settings from the tools>board menu, and then tools>chip, is also important to enable the LTO that makes the complied program smaller tools>LTO>enable
Using the ATtiny45
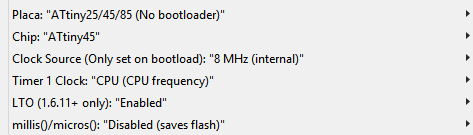
To program the ATtiny45 chip with the Arduino IDE is important to install the core, you can follow this tutorial page to install it. After that you should set the settings as shown on the next image.
Then you write your program as any other Arduino program, be aware that some functions will not work and also you have less flash and RAM memory to work with.
Compile your program and set your programmer inside the tools>programmer>USBtinyISP menu, make sure your programmer and board are connected, and finally upload your sketch to your microcontroller.
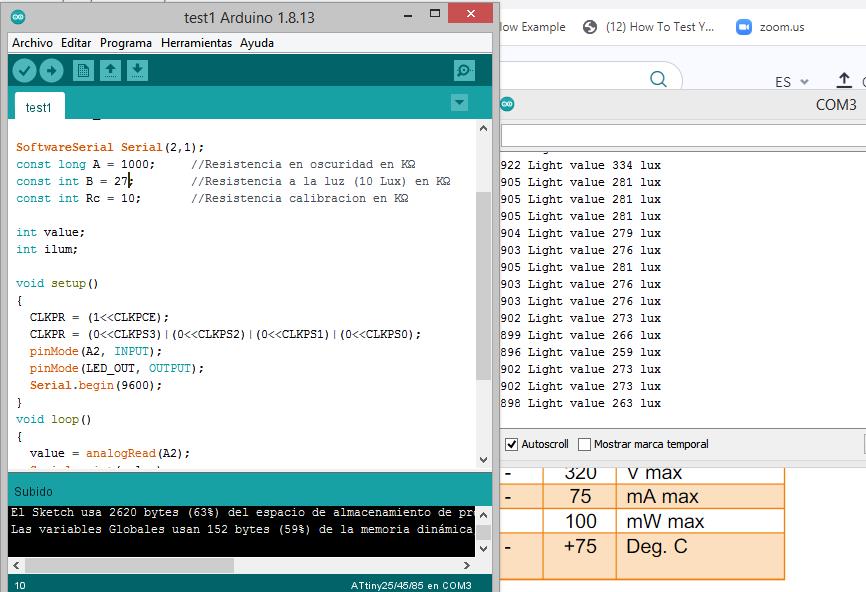
Using the Arduino IDE I created a program that senses the ambient light and turn on the light based on a specific range, it there is low light levels (night) it turn the LED off, if there is hight light level (direct sun shine) it also turn the LED off.
See the .ino file
Download the .ino file
Programming with PlatformIO
When I found that PlatformIO has a VS code extension I was motivated to test it because VS code is my code editor of preference and I already know some shot cuts etc.
Also, as VS code is more powerful you will get intellisense and code auto completion. Which is always nice and handy, to install it you must go to the extension tab and search for PlatformIO click on install.
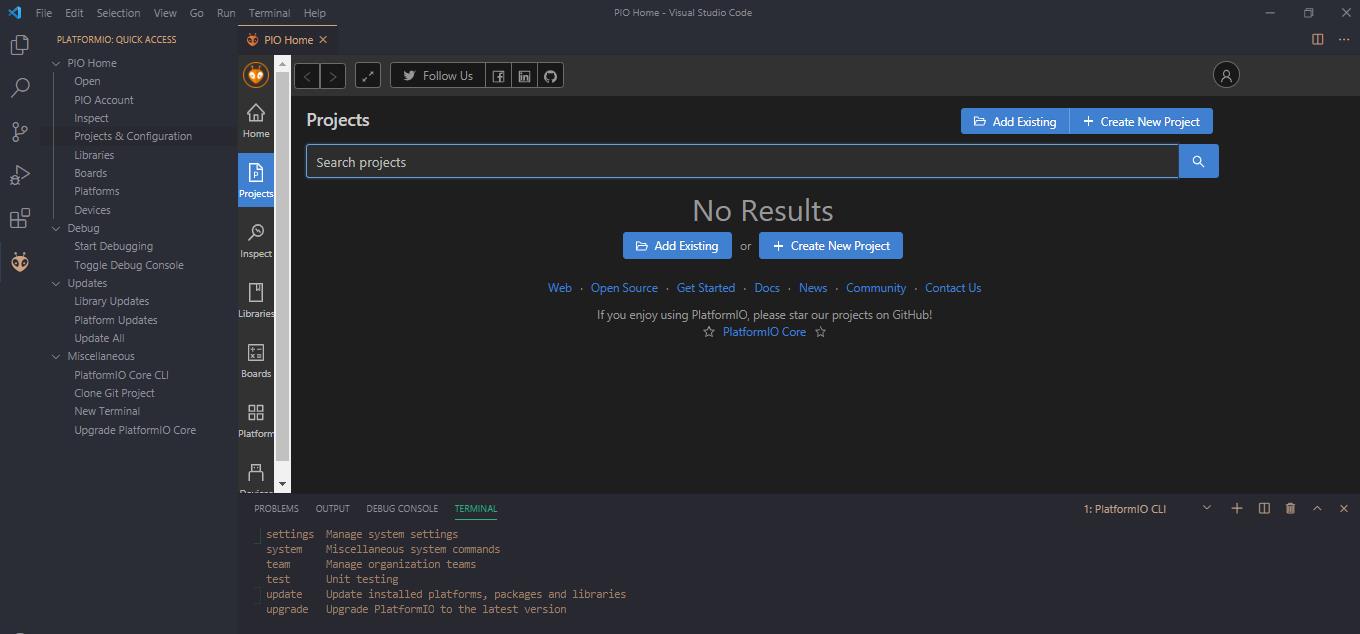
You will have now an icon for the PlatformIO home, where you can create new project or import form the Arduino IDE. When creating the project you should select which chip you will be targeting and a root folder.
On the project a file named main.cpp will be created, there you should put your code. You can write normal Arduino Code and C code. To compile and upload you can use the buttons that will be added to the bottom bar or the following commands:
- ctrl+alt+b / cmd-shift-b Build Project
- ctrl+alt+u Upload Firmware
- ctrl+alt+s Open Serial Port Monitor
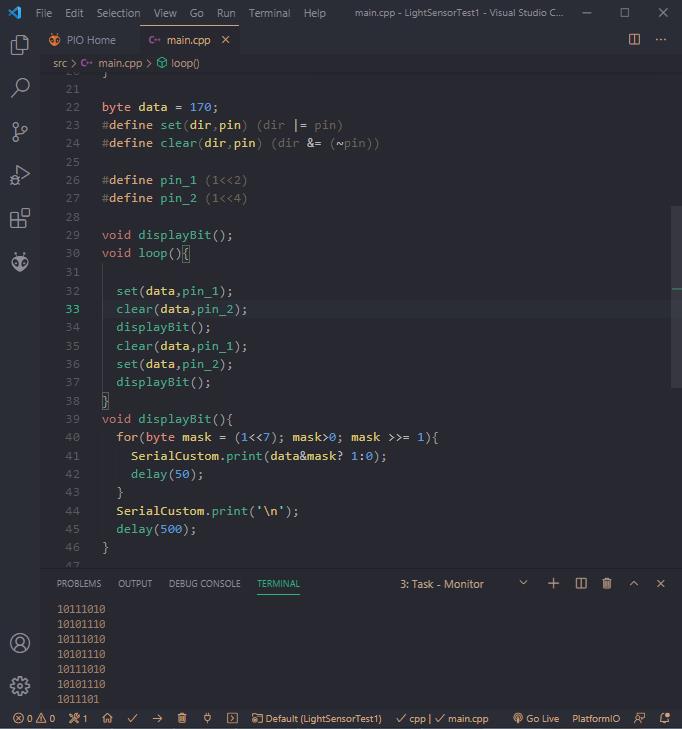
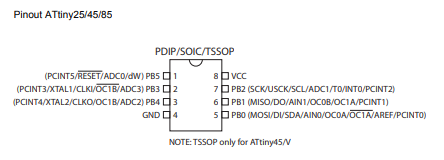
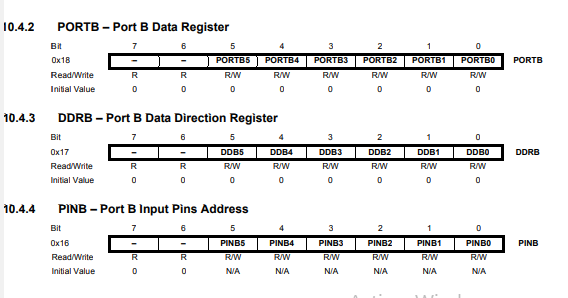
Using PlatformIO I make a practice about bit manipulation, using the serial monitor to 'read' the output and understand what I was doing. Then when I feel that I have a bit more knowledge and understanding of bit manipulation I created the same program that before but using direct port manipulation. To achieve this I have to read the datasheet based on what Neil's program does and what I learn before I manage to replace pinMode(), digitalWrite(), digitalRead(), and analogRead(), functions with bit manipulation. But I keep using the serial communication functions from arduino to debug.
See the .cpp file
Download the .cpp file
Programming with C and Makefile
You can use plain C to program you AVR chip, then use the AVR Toolchain to compile it and generate a .hex file. That you finally upload using avrdude. To edit the code I use VS code, but you can use any editor.
The steps to have intellisense on the C program are easy to follow, you just enable the extension for C/C++ from the extension tab. That will allow you to program on C, to have some AVR headers and utils librares you have to configure the c_cpp_properties.json file to point the intellisense to the desired complier, in this case the avr-gcc, if some libraries doesn't work modify the includePath and browsePath.
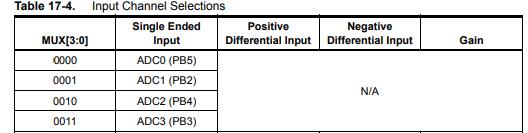
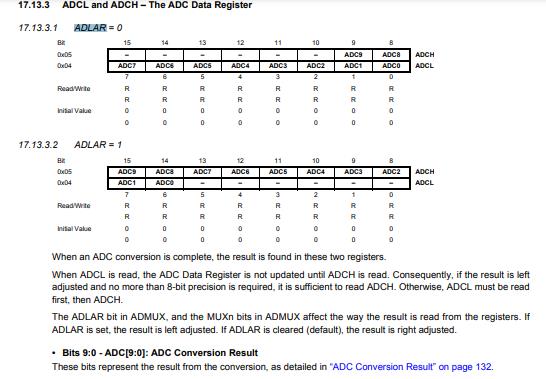
This I wrote a program that emulates the previous programs but without serial communication, as it will add a lot of complexity to the program. The majority of the register manipulation made previously work like a cham, but then the ADC wasn't reading at all. After some digging on th datasheet I fund that the Arduino Core was enabling it by default and I skip that step. Adding that on the setup section of the code and it works, and uses only 17% of the total memory.
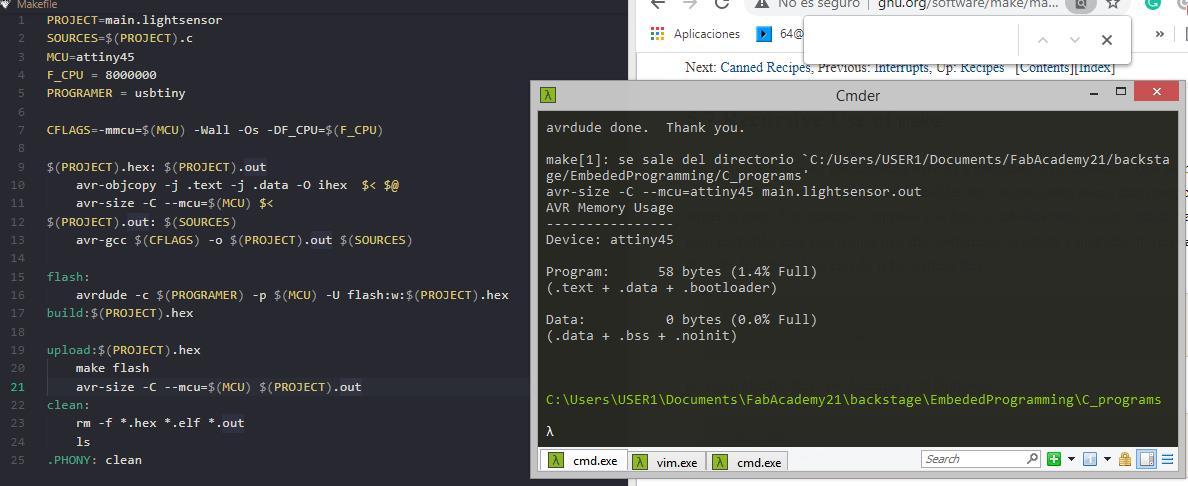
Makefiles!
This type of files when used with the GNU make program you can automate a lot of the compile and uploading tasks of your project. I found this great tutorial that makes a step by step breakdown of the Makefile and how it works.
target: prerequisites recipe
basic format for a make rule, you can chain this based on how to make the prerequisites.
PROJECT=main.lightsensor

          $(PROJECT).hex
You can also declare variables, in this example the project variable is used to name a file .hex with the variable value.
Is also a good practice to make a clean: recipe that will delete all the generated files and leave the directory clean
See the Makefile
See the .c file
Download the .c file