Mechanical / Machine Design

See the final machine!

Group Assignment

This week assignment was all about group work and collaboration, this was a fun experience that join us as a group. To see more detail about how we build the machine and each individual contribution please visit our page.


See our group page!!
Image of one of the group sessions

Making the circuit board

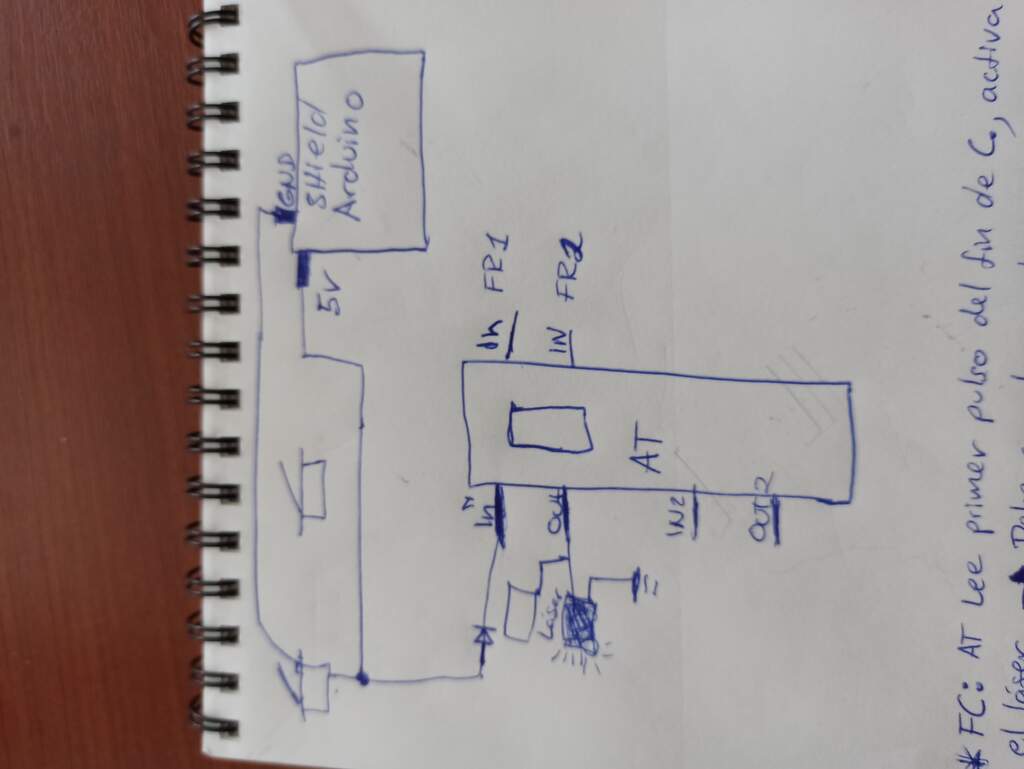
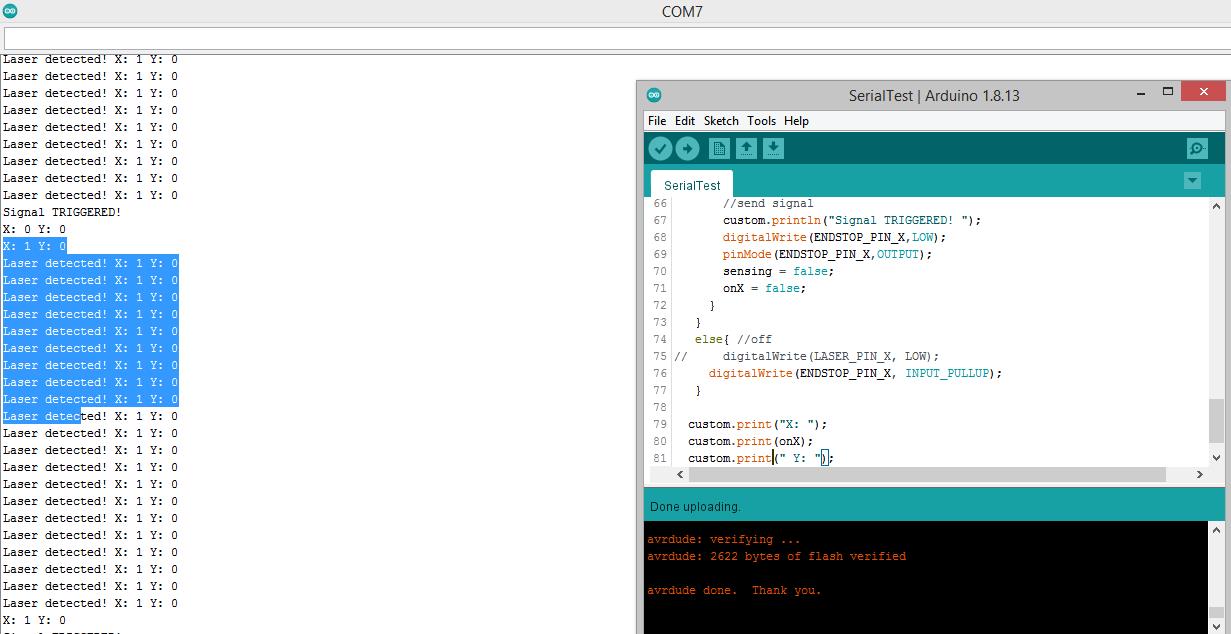
As our machine was centered around laser-zeroing we need to 'hack' the limit switches, as we hope that the laser can add precision on top of the physical switches by eliminating the bounce effect issues.

The board has to be capable of sensing when the limit switch is pressed and turn on the laser and then sense the interruption and act as a limit switch.

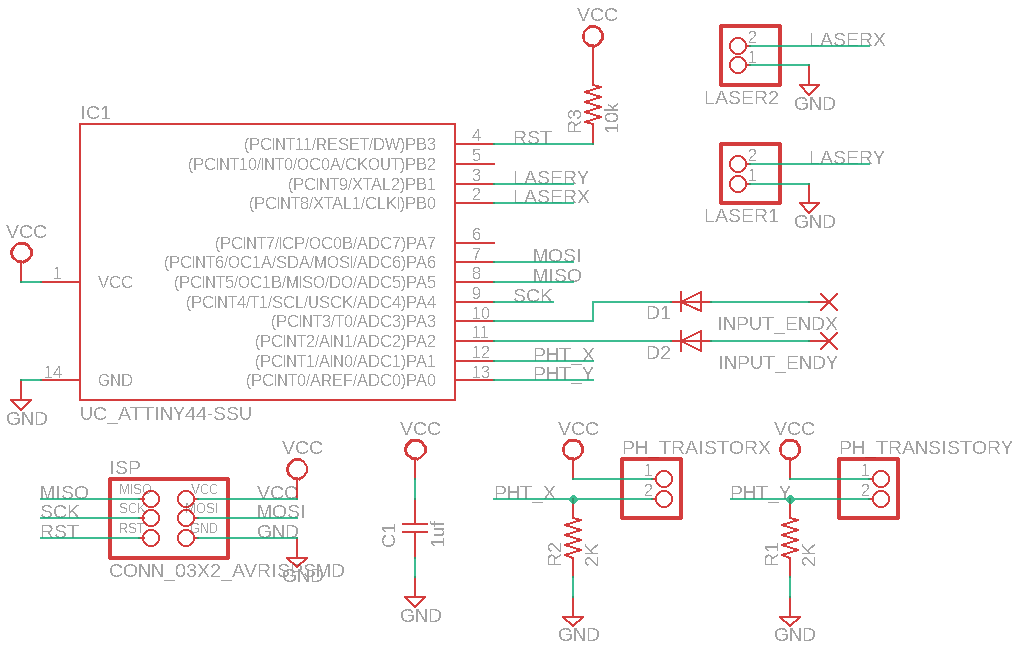
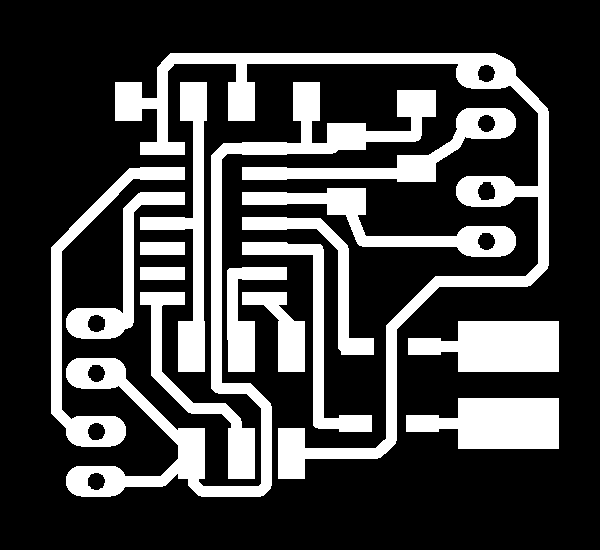
With Camilo we sketch a simple diagram that uses the ATtiny44 as source of logic some pulldown resistors for the phototransistors and some diodes to make sure the board does not interfere too much with the sensing from the Arduino UNO.

Sketch of the board made by Camilo and I Screenshot of the finished schematic on Eagle Screenshot of the finished schematic on Eagle

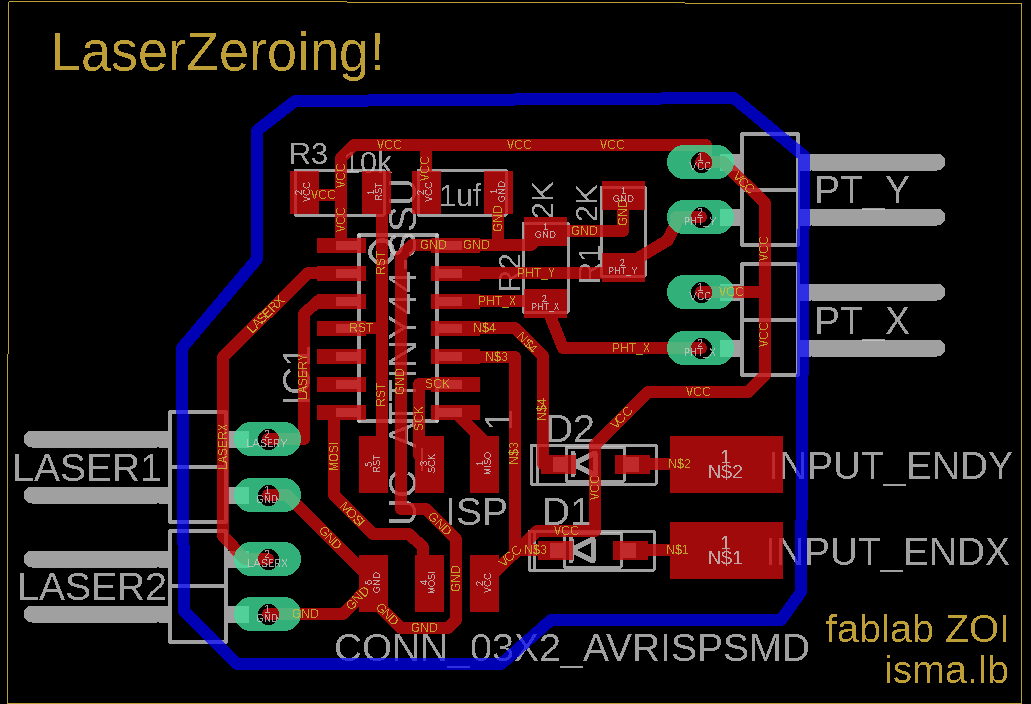
Using Eagle we place the required components and start routing the traces. This process takes me always a while, figuring out the best way to make the traces is difficult.

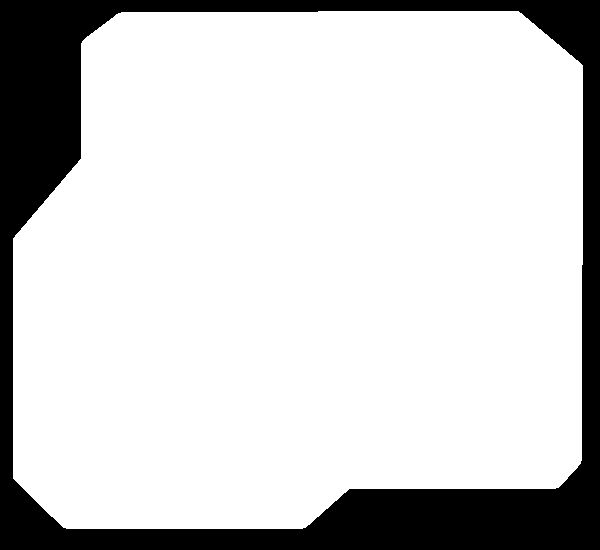
After this was done I exported the outline and the traces as a png image. I use Microsoft Paint to fill the outline shape and fix some details as well as inverting the colors of the traces.
Board outline Board traces

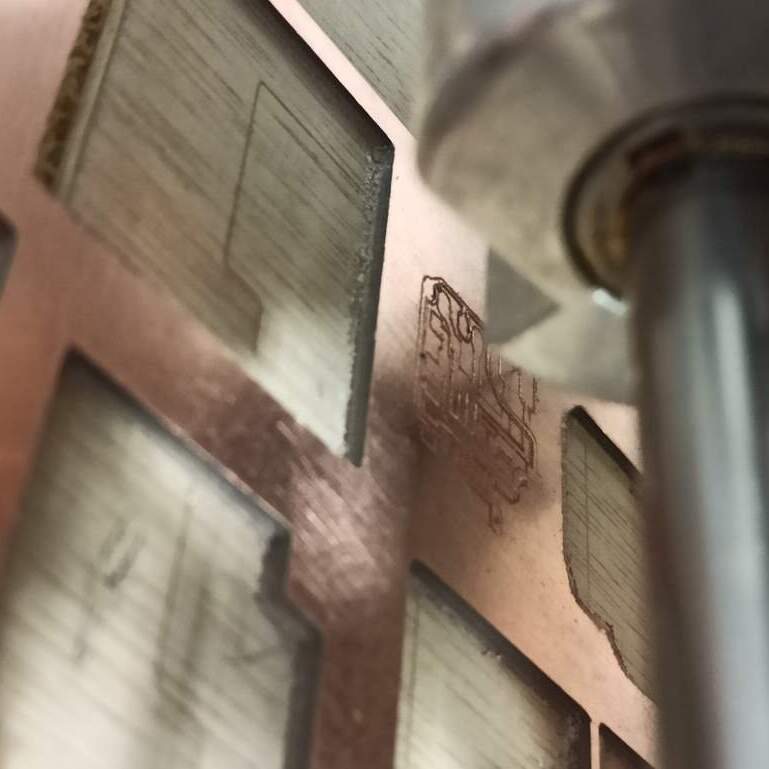
Using Mods we generate the G-code needed for the traces and start milling, our first attempt was a failure because we were using wrong the auto-level on the bCNC (software that controls the CNC milling machine). But after some research on the internet, we manage to use a new workflow and use the auto-level properly. The result was that the mill bit only engrave the surfaces of the copper layer and did not crate the traces.

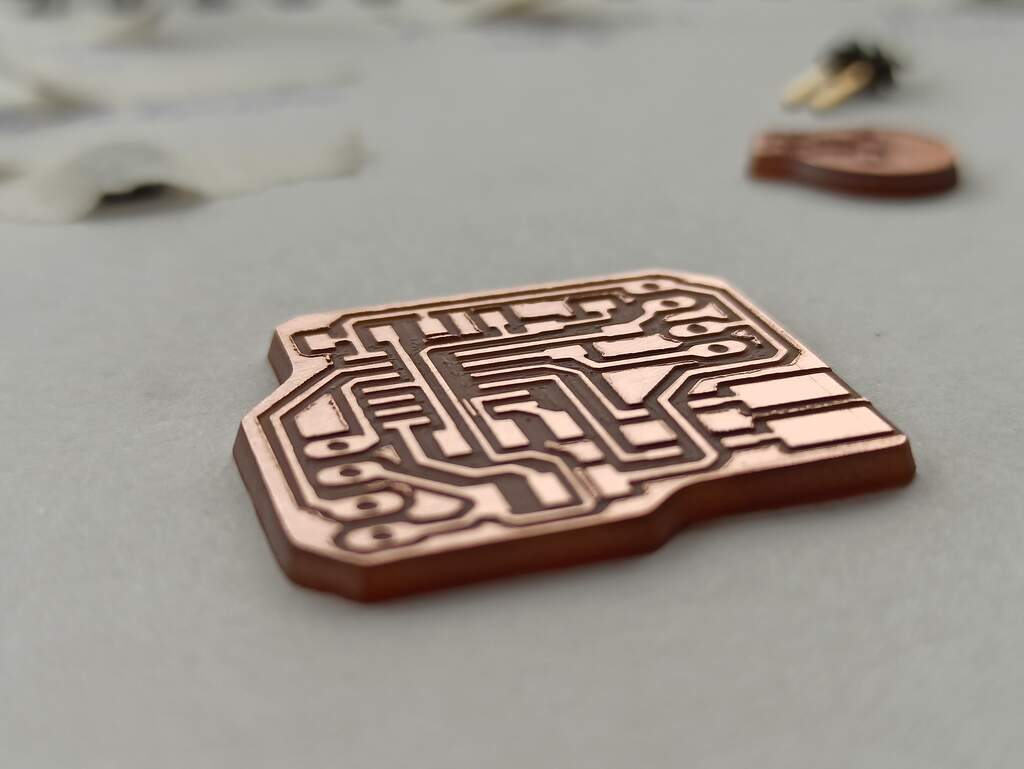
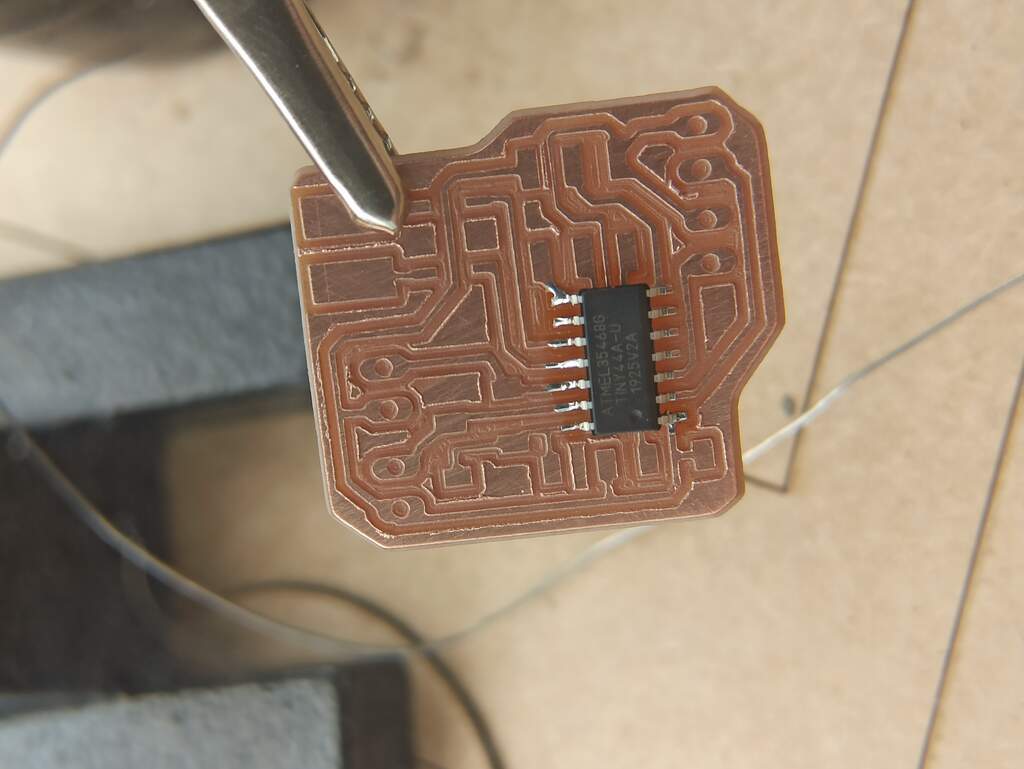
After adjusting the cut depth on the g-code using the same workflow we finally make a good looking circuit board.

CNC machine milling the board Board milled and ready to be stuffed

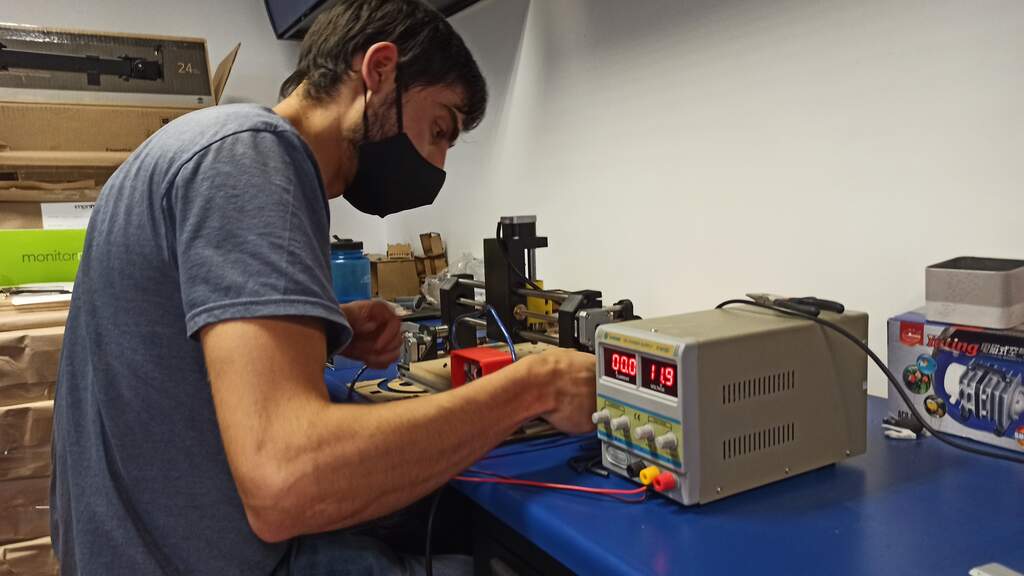
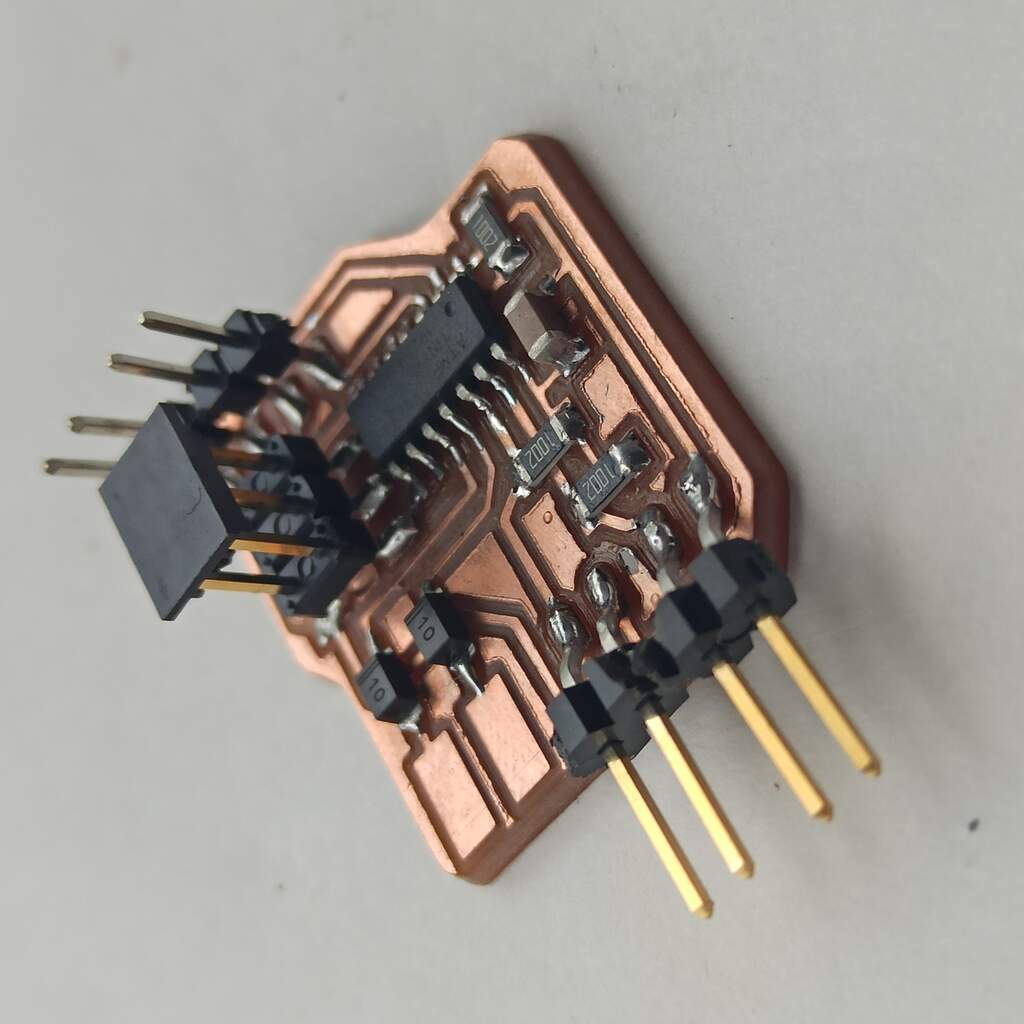
Then the next step was to solder all the components, I started by the micro controller unit, followed by the capacitor, the resistors, diodes and finally the pin headers for the ISP connections.

Soldering the ATtiny44 to the board Finished board after soldering

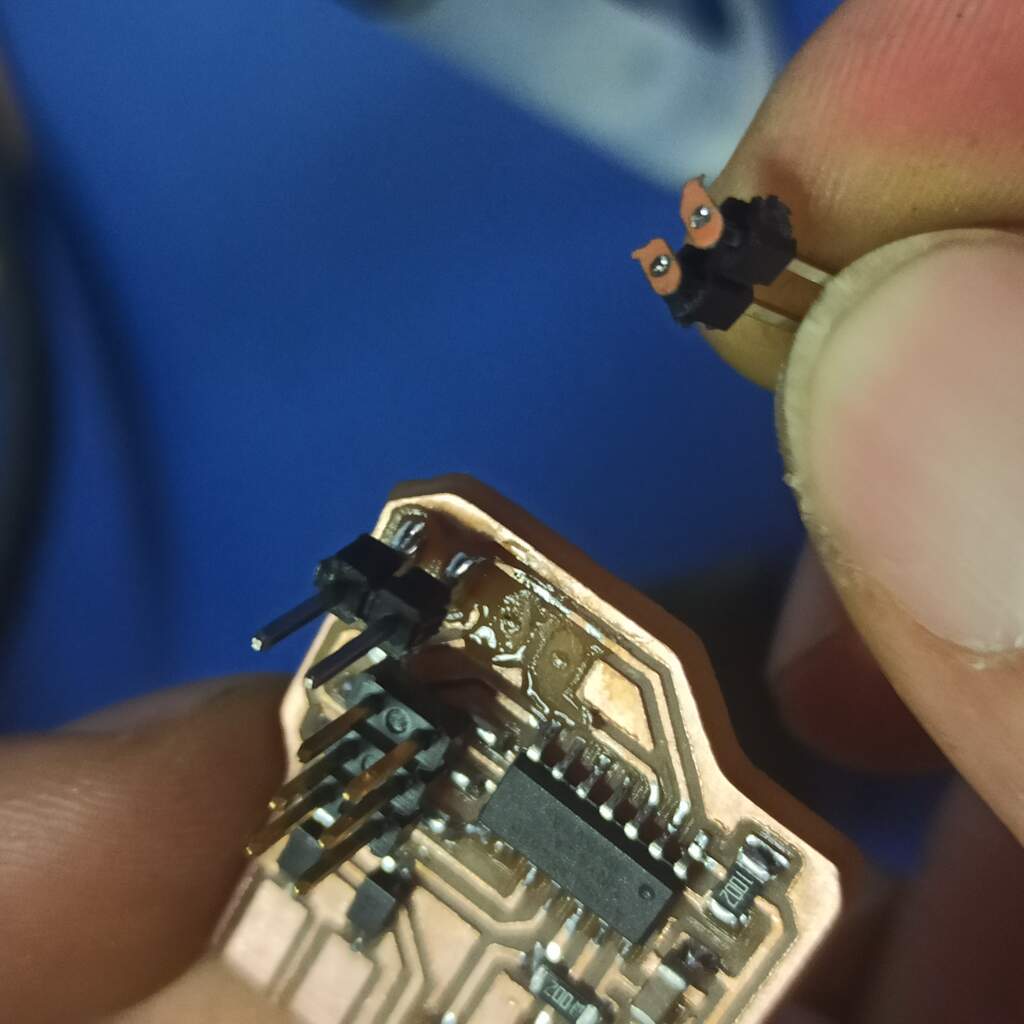
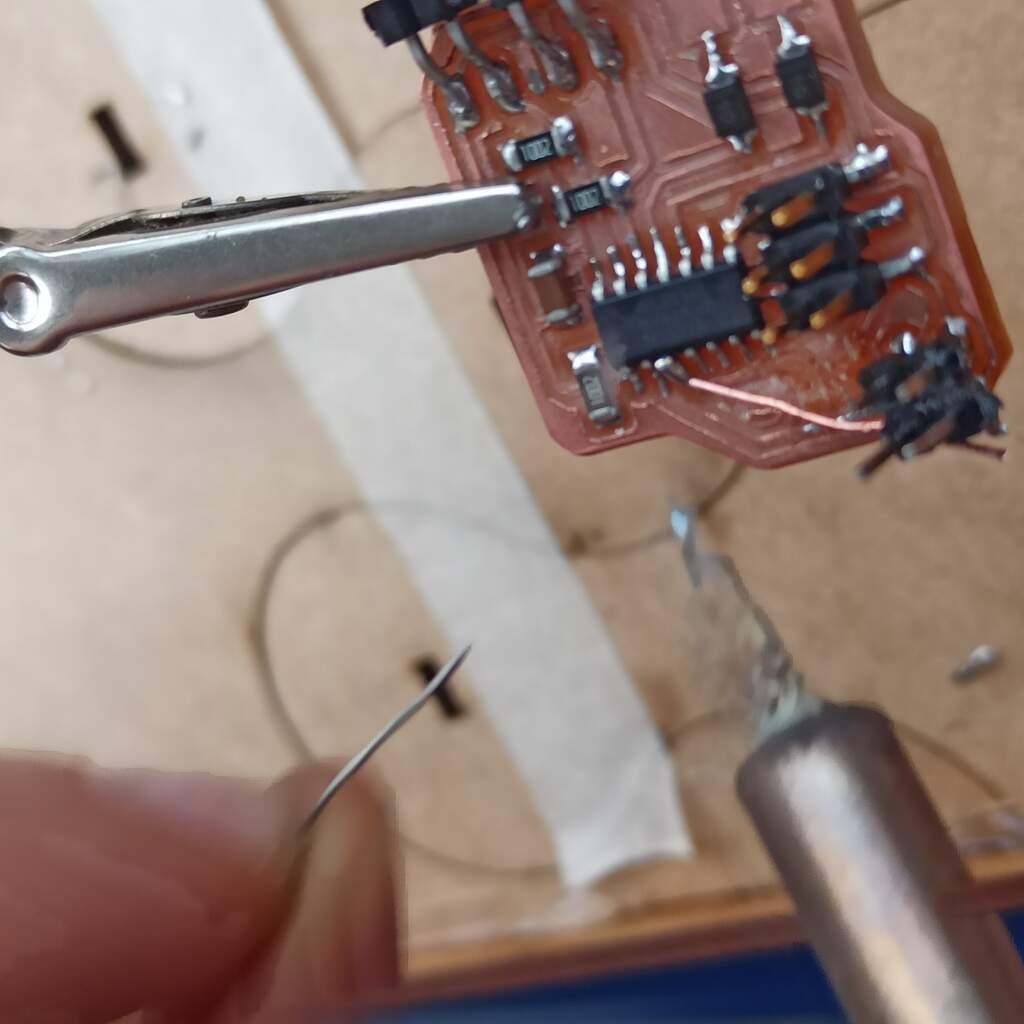
While programming and testing the board we have and inconvenience, one of the pin headers to connect the phototransistor broke, peeling off some traces. Luckily Camilo managed to solder the header again and using super glue we secure everything in places again.

Broken traces Fixing the broken board

Programming

The ATtiny44 used on the board need to be programmed to achieve the laser and end switch sensing and react accordantly. I first start using Platformio to write the program as is easier for me use VS code that writhing inn the ArduinoIDE, but some how the SoftwareSerial.h wasn't working on the ATtiny44 when programing with Platformio. And that force me to move to the ArduinoIDE.

Screenshot of the serial test to debug the code and establish the threshold

The first step was to make and analog read on the phototransistor pin and establish an approximate threshold to discriminate when the laser was pointing to phototransistor.

The complete code was a bit difficult because you have to check both axis on the same time so it can't uses any delay() function.

Programming meme that represents my mistake.

After some test it was working as intended but the program wasn't turning the signal off once it was sended, this bug take me a while to solve. I initially think that the state machine of the code was some how on and infinite loop. But after a lunch brake I finally catch my mistake it was a digitalWrite(ENDSTOP_PIN_X, INPUT) where it should be pinMode(ENDSTOP_PIN_X,INPUT)

Conclusions

Building or modifying a machine helps you to understand how it works and were you should change or add things to make it more functional or easier to use. Also as we try to make a different system to make the homing cycle on the machine more precise is also a great experience to test new things.

Have I?


Prev Next