Computer-Controlled Cutting
"All lasers always try very hard to ignite themselves"
Local
On structure
- Corona is seriously impacting our ability to be in the FabLab. We are going to split the group. On Thursday and on Friday there are going to be different people.
- The Thursday meeting is going to be filmed and streamed live.
- We can book and use machines on Monday and Tuesday. You can book a machine for two hours.
- We have to find a way to book together that sparse time we have for the machines... this is going to be rather hard.
On the stuff we have to learn
- Make a press-fit kit. Press-fit means that it snaps into place without screws.
- For this it is important to know exactly the size of material and of the kerf.
- Kerf is the material you loose when making the cut.
- Here is some inspiration on different press-fits connections
Henk Explains machine.
The BRM Laser
It has a laser
It has three buttons
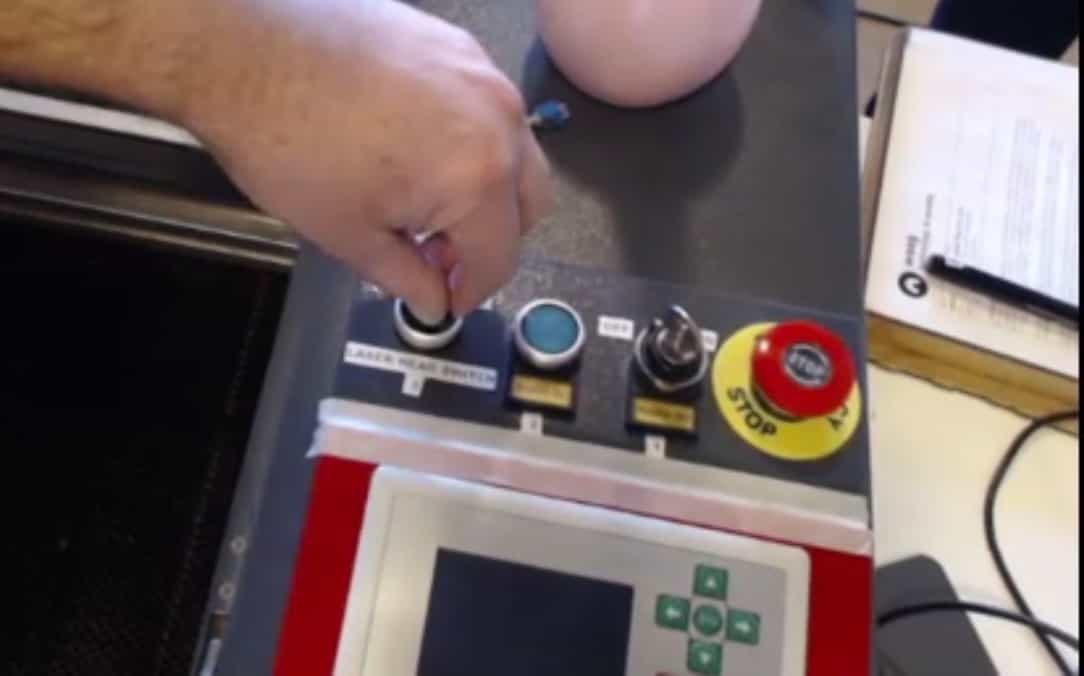
A watercooling system and airflow in.
These are turned on automatically when you operate the laser.
- and a fan/fume extractor. There are a lot of toxic fumes coming from a laser-operation. Especially with acrylic. We do not suck away the fumes and release them in the air. THere are several filters cleaning the air before it is released. NOTE This machine has some issues at the moment.
After you stop, you need the fan on to remove remaining fumes.
The laser is connected to a computer.
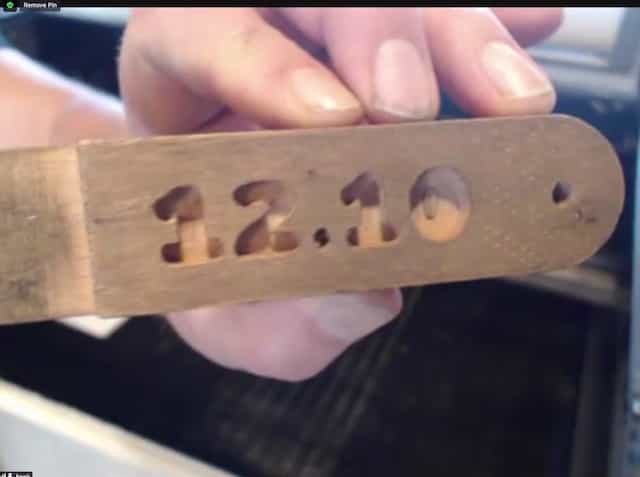
Focus.
We focus by hand. We have a wooden thingie that we place under the laser. There is a fixed focus. So the distance depends on the type and thickness of the material.
We us this thing for it, which is 17mm thick. (it is yet unclear what the digits on the thing stand for...)
Henk shows a lens. This part has a curved, and a flat side. The curved side should be up. This is so that the light is congregated to the middle.
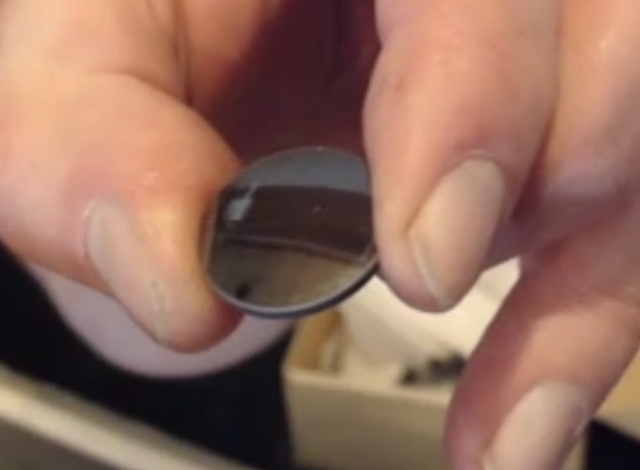
He cleans it and puts it back in the machine.

Laser software.
I made a screen recording to follow what henk is doing in LightBurn: the software to control the Lasercutter.
this is what we see happening
- Henk uses the arrow to move the laserhead around.
- There is a button to focus, but don't use it: we focus by hand!
- the green dot is the origin.
- you can tell the machine to start in the current position.
- You use the 'Frame' button to move the laser to the boundaries of the design.
- So the frame button shows you how large the design is.
- You can also check the power and the speed. These are important parameters.
Operating the laser.
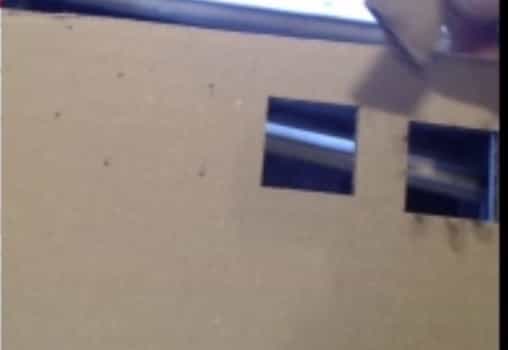
- Henk first cuts out a little square of paper.
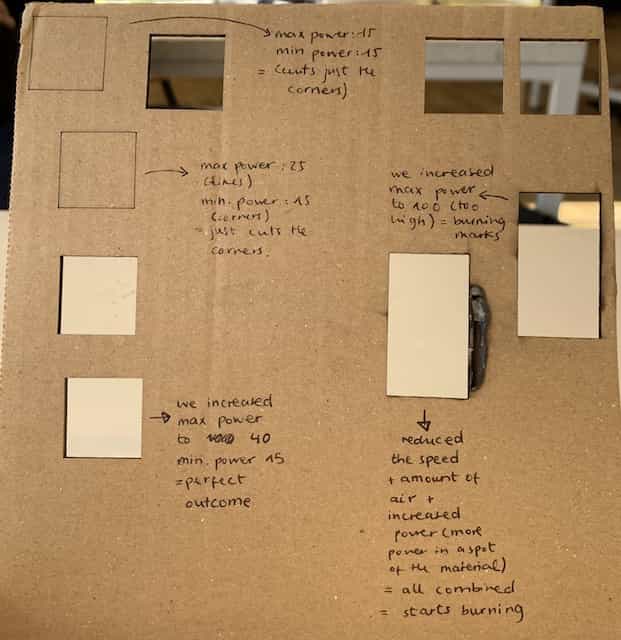
- Then he uses the same settings on cardboard: doesn't work, not enough power.
- You can see that the power on the corners, differ from the lines. This is because the laser slow down there.
- To mitigate for this, you can set the power differently for different parts of the line.
- You can set a power threshhold. The machine know when it slow doen, to lower the power.

If you put the power to high, you get burn marks...
The interesting part is to find the right combination of power and speed.
NOTE there is also an airblower in the device. It blows away small particles and cools the material. You can adjust the airflow, but there is no point to do this; you just leave it on max power.
Here you can see the result of the Henk playing with the different parameters
The Vinyl cutter - Roland GX-24
Henk will explain the machine, but also mods; a way to interface directly with the machine.
Mods
All machines have USB interface, but mostly this is serial over usb. With mods you an talk directly to the machine over serial. This way you can bypass the printer driver and eliminate a layer of nuisance
Henk shows that he can directly login to the machine with his terminal.
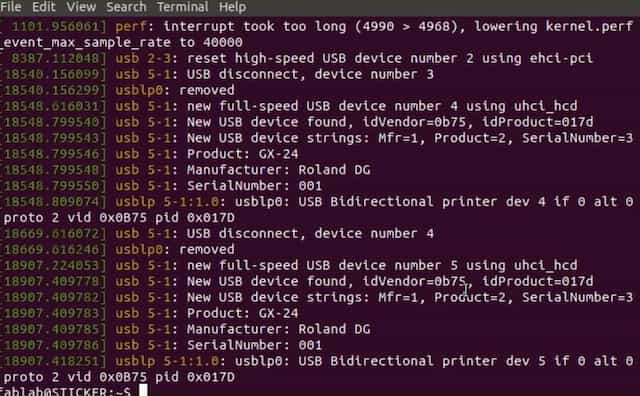
$ echo PD > /dev/usb/lp0 = pin down (or up, when it is already down)
$ echo PD 100,0 /dev/usb/lp0 = Pin down & move 100point along the x-axis = cutting
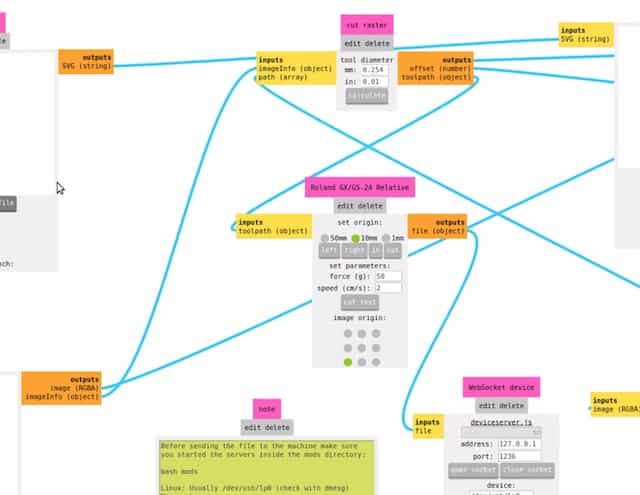
Mods can automate this for you from within any browser. It is JS with HTML5.
It has many pre-made settings that you an use. It has many building blocks. You go through them one by one to get the desired output.
For example:
- input file (PNG, SVG, whatever file)
- Origin
- Settings
- Websocket device: this part is talking directly to lp0 which is the port of the machine.
- then there are many blocks that can convert your image to the desired output.
-
When you start up the Roland GX-24
- it asks you if you put material in
- then asks what size the material is.
Global Learnings
Inspirations
- Litophona; a wat to change colour by cutting out parts of a plastic...?
- Check screenshots. https://itslitho.com/
- Use 2D to make a logo for the final design.
- Follow more Kevin Kelly tutorials for Fusion360
- Wood veneer might be a good way to make the clock of mine beautiful
- https://cloud.dosch.nl/apps/onlyoffice/18985?filePath=%2Ftmp%2FMachineSchedule.xlsxhttps://cloud.dosch.nl/apps/onlyoffice/18985?filePath=%2Ftmp%2FMachineSchedule.xlsx
- This is an insane cause-effect machine
- Add Horizontal lines in my documentation.
Computer Controlled Cutting
Neils explains cuttin and shows some machines.
Knife Vinyl cutting is highly under appreciated. NOTE Ultrasonic cutters seem very exotic and cool - Like this one
With cutting it is really hard o check the right parameters. Settings can vary a lot.
Laser There are also many different laser cutters.
You need to think about:
- Safety: "All lasers always try very hard to ignite themselves"
- Which material and what is it made of?
- Settings: each material has different settings.
- I am curious how raster vs vector works...
Then there are also - Plasma cutters (dangerous, high energy, sloppy) - Waterjet cutters (Supersonic water jet can cut through stone and metal. Very expensive)
Assignment. On cutting
We need to design a parametric construction kit. (check GIK file)
We need to cut something vinyl
We need vector laser cutting
As a group we need to characterize our machines.
First idea:
Build upon playplex.
Want to use
- Deepnest.
- Sandblast glass; can make ferries on glass: vinyl is great for this
- Half-tone mesh map of Amsterdam and the ferries.
- Flextures are nice, but I do not see use of it yet...