12. Moulding and Casting
For this week, I have learnt on [Moulding and Casting]
Safety Data Sheet (SDS)
A safety data sheet (SDS) is an important document for handling any potentially harmful substances in the workplace.
The US Occupational Safety and Health Administration (OSHA) requires employers to make SDS available to employees. A SDS will follow a standard format that is divided into the following sections:
Section 1: Identification
Section 2: Hazard(s) identification
Section 3: Composition/information on ingredients
Section 4: First aid measures
Section 5: Firefighting measures
Section 6: Accidental release measures
Section 7: Handling and storage
Section 8: Exposure controls/personal protection
Section 9: Physical and chemical properties
Section 10: Stability and reactivity
Section 11: Toxicological information
Section 12: Ecological information
Section 13: Disposal considerations
Section 14: Transportation information
Section 15: Regulatory information
Section 16: Other information
For this week, I have worked on:
Group Assignment:
We have reviewed the safety data sheets for each of our molding and casting materials in order to make and compare test casts with each of them. If you have interest, you can CLICK HERE to know more about the details. Some main points are mentioned below.
- We can use the following guide to know how to read SDS:

HAZARD COMMUNICATION
Hazard Classification Guidance
for Manufacturers, Importers, and Employers
-
In this guide, the United Nations The Globally Harmonized System of Classification and Labeling of Chemicals (GHS) was mentioned as a system to:
-
Define health, physical and environmental hazards of chemicals;
-
Create classification processes that use available data on chemicals for comparison with the defined hazard criteria;
-
Communicate hazard information, as well as protective measures, on labels and SDS.
")
-
In our school, we should follow some of the guidelines:
-
Safety in School Workshop (SSW) from Education Bureau Technology Education.
")
")
In our group assignment in this week, I try to test different materials for molding and casting
Mold Putty


-
After the Review of the SDS in the United States, SSW and SSL in Hong Kong, we would concentrate on the following four sections for each of our molding and casting materials.
Section 2: Hazard identification - Do not eat the Amazing Mold Putty.
Section 4: First aid measures - If ingestion does occur, do not induce vomiting and go to see the doctor immediately.
- If eye contact does occur, remove material contacting eye and flush with clean water for 15 minutes. If irritation persists, go to see the doctor immediately. - If skin irritation occurs, remove the putty from the skin and wash iwth warm soapy water.Section 7: Handling and storage
- Keep out of reach of children.
- Product is not recommended without parental supervision for children under the age of 13.
Section 8: Exposure controls/personal protection
- Keep out of eyes. Wear safety glasses to protect your eyes. - Be ware of irritation on your skin. Wear gloves to avoid any irritation. -
After this week, We discussed we should have our school-based SDS in our Lab. We could take the SDS as the reference to be available in a binder that was suggested to be a large, bright yellow for any materials that you might be using in our Lab.

- In the future, if any of us bring any material outside from the Lab eaach time, he or she should first read the school-based SDS for those materials. If that material is new, then print a copy and file it for inclusion in the prepared binder.
Individual assignment:
Step 1: Design a 3D mould
I would like to make a smaller size of toy cat by using the molding and casting techniques.

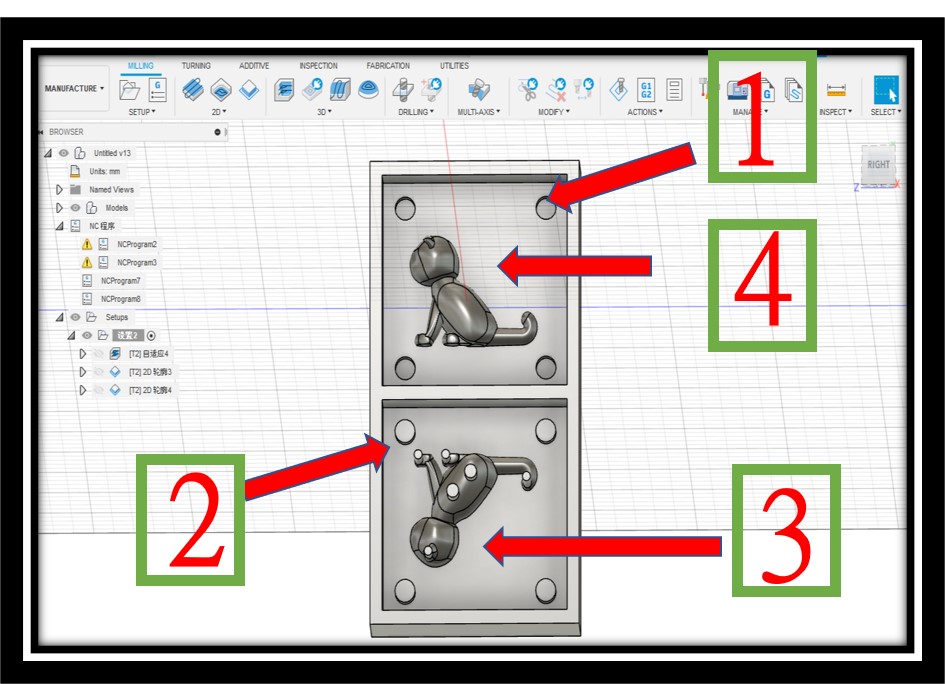
Therefore, I used FUSIOM 360 to design a similar size of cat. Since the limitation for the size of the machinery wax, I had to diminish the size of the new molded cat.
Source File for Machinery Wax for Cat Mould (FUSION360)
I have some considerations on this mould design.
-
Due to the curved shape of the mould, I cannot mill the mould for the whole shape at the same time. The mould should be divided into two parts. Therefore, the square mould shape were designed for combination of left and right hand sides easily.
-
Since the stable environment is one of the successful for molding. In order to provide a fixed space for condensation of any material inside the mold, there are four concave points at one side and four corresponding points were produced. This can ensure that two molds can be combined perfectly and prevent from the sliding of two pieces of moulds to increase the success of casting.
-
At the suface of the figure was added two small columns on it because there will two holes formed for injection of any material easily.
-
The shapes of the figure on the mould should be noticed. They cannot design at the same side. If not, we cannot form the whole shape of the figure.
Step 2: Mill the positive mould
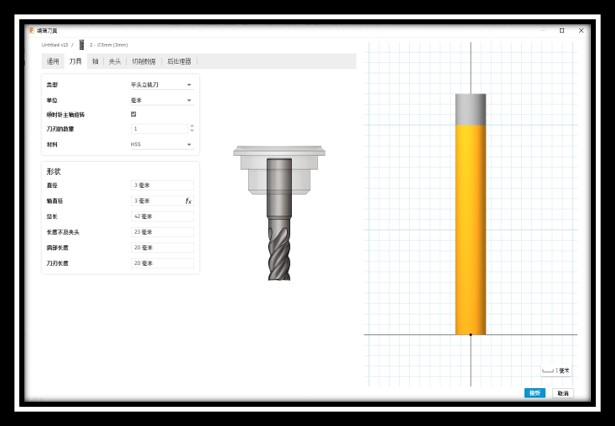
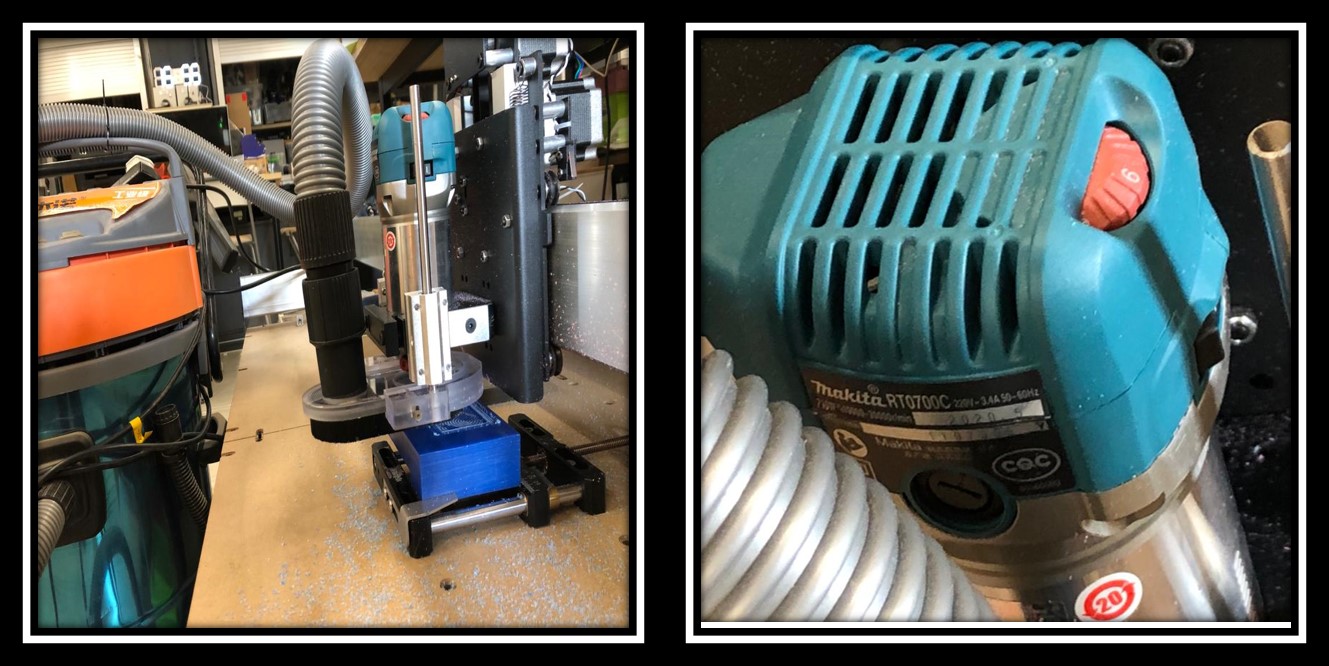
- Milling Machine - [TigerCNC 90120-CNC]
This is a new machine for our Lab. It was chosen because a open source CNC with Makita router could be found and NC code could be generated by FUSION360 and import easily to control the work of the CNC machine.
- Materials used for milling machine
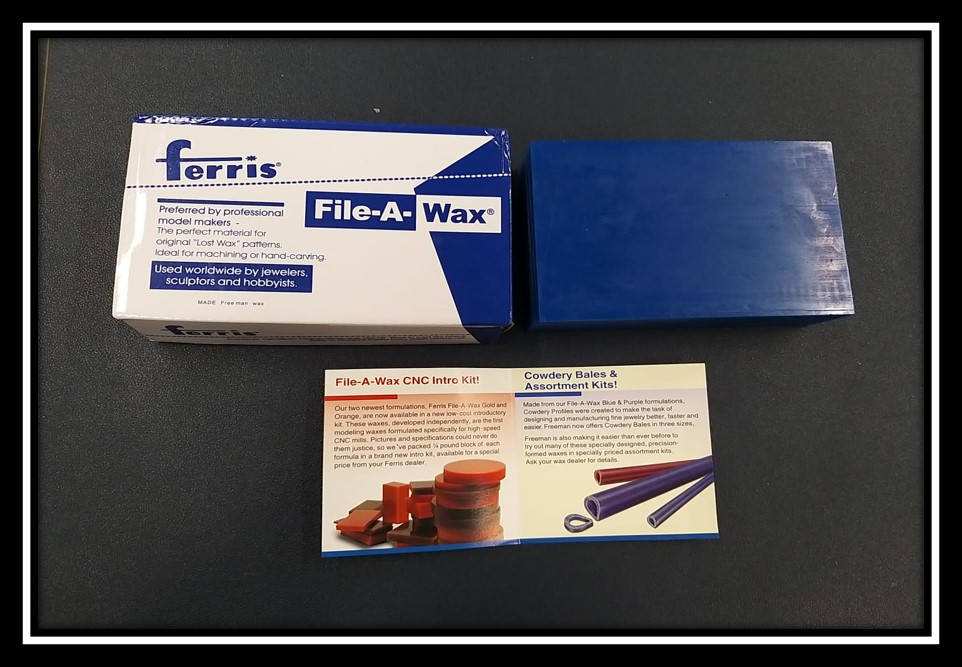
(1) Ferris File-A-Wax was used because it is very hard to keep the shape for moulding in industrial level. This cannot be used to mold something about food.
(2) Rigid Foam
Since we have the new machine, we would like to conduct the pre-test to know the performance of this machine. Rigid foam was used for pre-test. Although a complete mould could mill from this hard foam, it is very dangerous to use foam mould for further casting becuase silicon which was commonly used and safety for food cannot mix with rigid foam. This is because poisonous gases will be produced that is harmful for people immediately.

Before milling, some information such as the dimensions of End Mill (1mm) should be input via FUSION360 to generate NC code for milling.
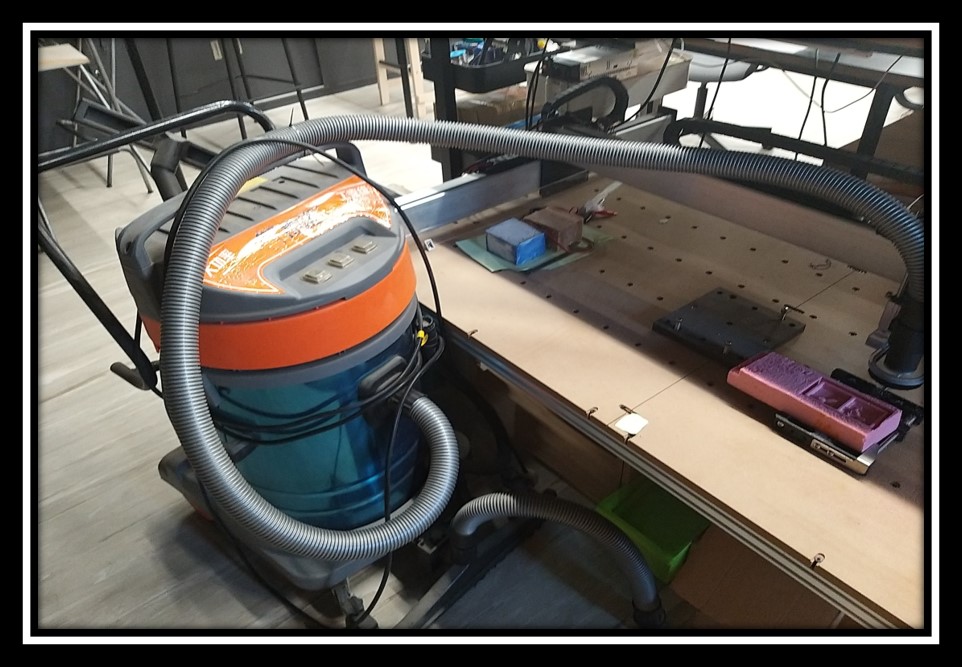
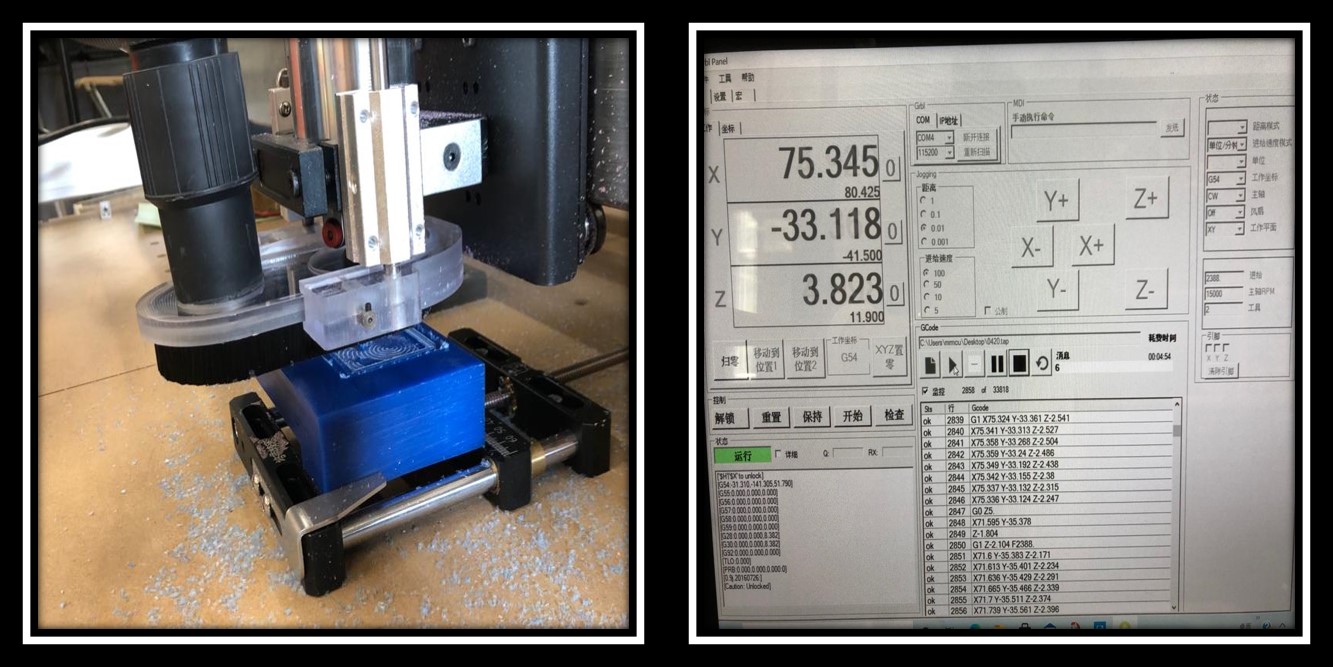
The following pictures showed the processes fo CNC milling and many wastes from milling will be sucked out by the big vacuum cleaner.
You can read the information on our computer in order to check the progress of milling.
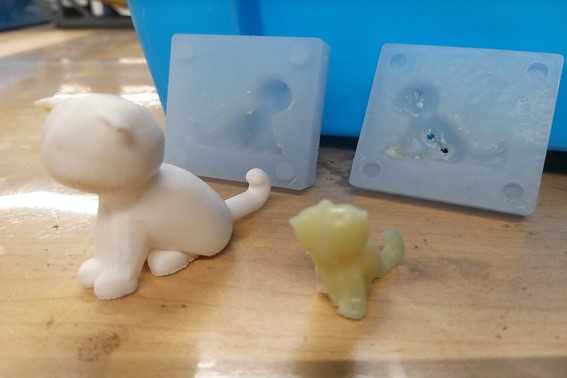
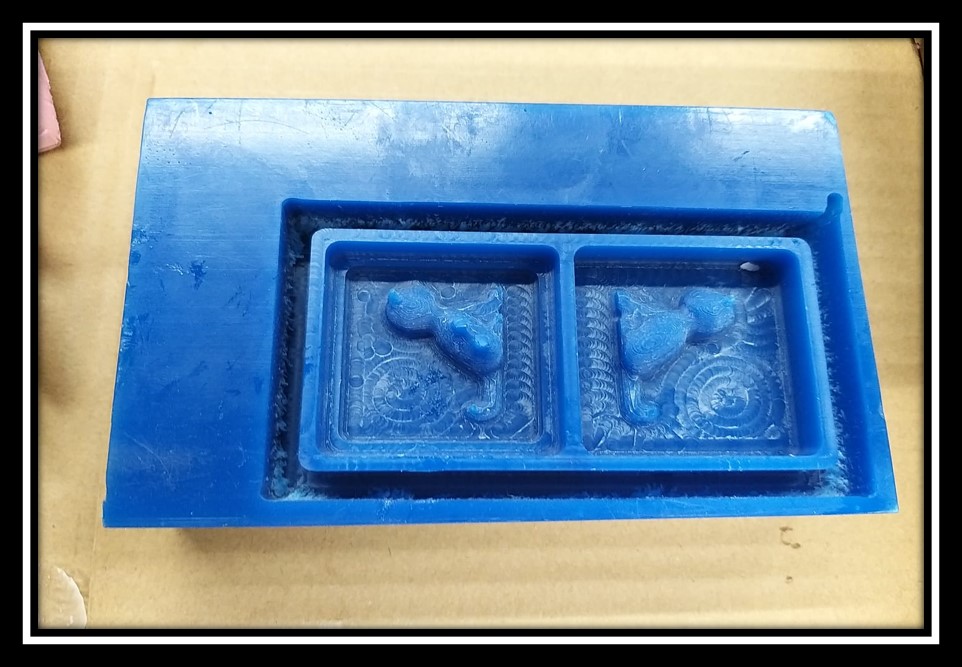
A positive mould was produced
**Step 3 Moulding and Casting
After the formation of positive machinery mould, the negative silicone soft mould will be produced to cast another positive final cat.
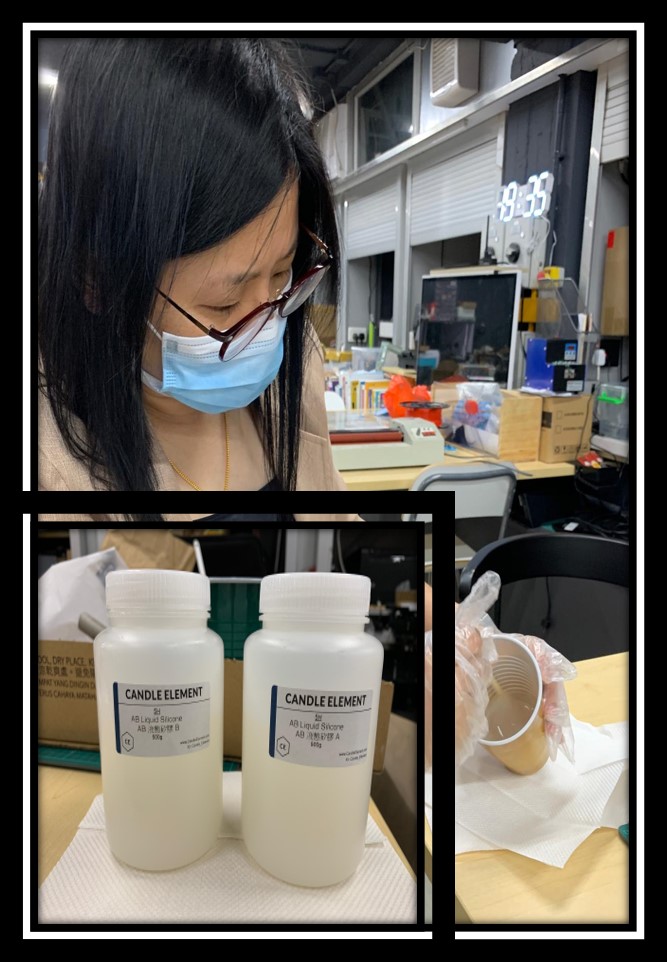
Silicon molding is very common nowadays.The shrinkage of Silicon is very low providing high dimensional stability. Therefore, many people to use silicon widely for any mould formation.
Before moulding, I mix with two types of the silicon A amd Silicon B. Stirring them together gently before use. This time I used the syringe to inject mixed silicon into the positive machinery mould.

Depends on your size of mould, one or two days will be form in shape to get your negative silicon soft mould.
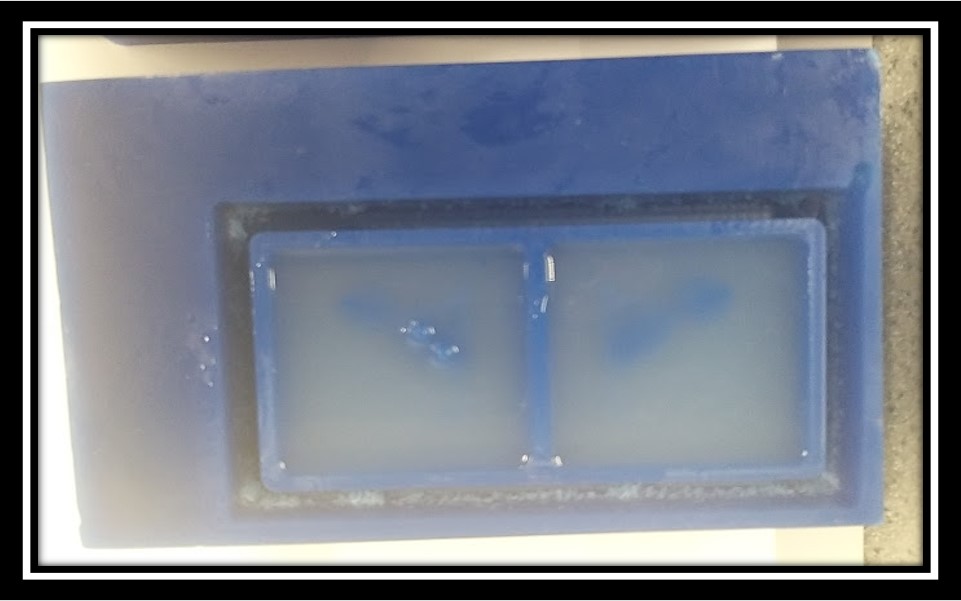
From this experience, there were bubbles inside the mixed silicon during injection. Next time, I would pour the mixed silicon along with the chopstick to decrease the formation of the bubbles.

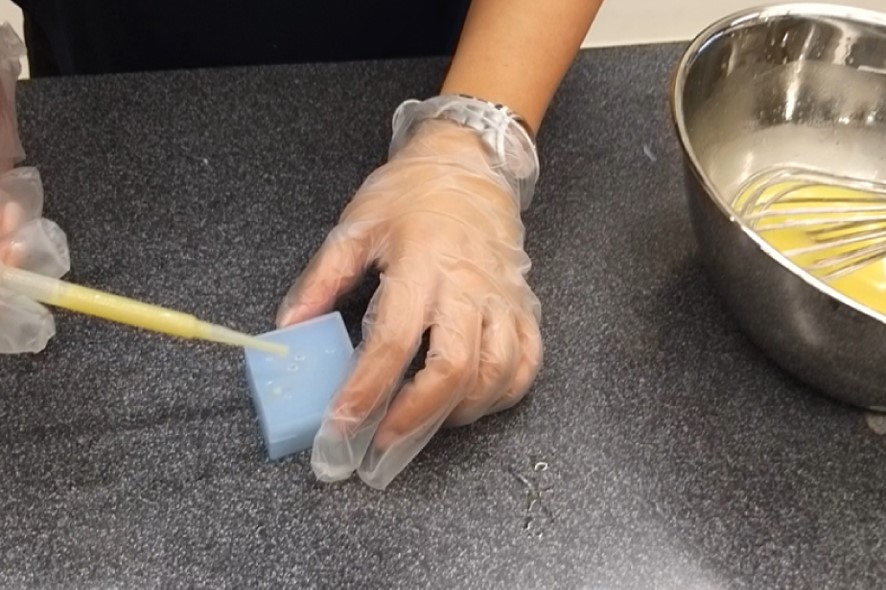
I used the syringe to inject the mixed liquid soap, which was mixed by balsamic oil and concentrated sodium hydroxide, very slowly into the negative silicon mould side by side. When liquid soap was filled at one side of the mould, I put another side of silicon mould on the top at a fixed positin. Then, liquid soap would be injected into the hole until any soap was came out from another small hole. That means all capacity inside the mould was filled with liquid soap.
It should be handled concentrated sodium hydroxide, NaOH, very carefully. There will be a lot of heat produced from the mixture. The gloves and safety glasses should be worn for protection of irritation and hurt.
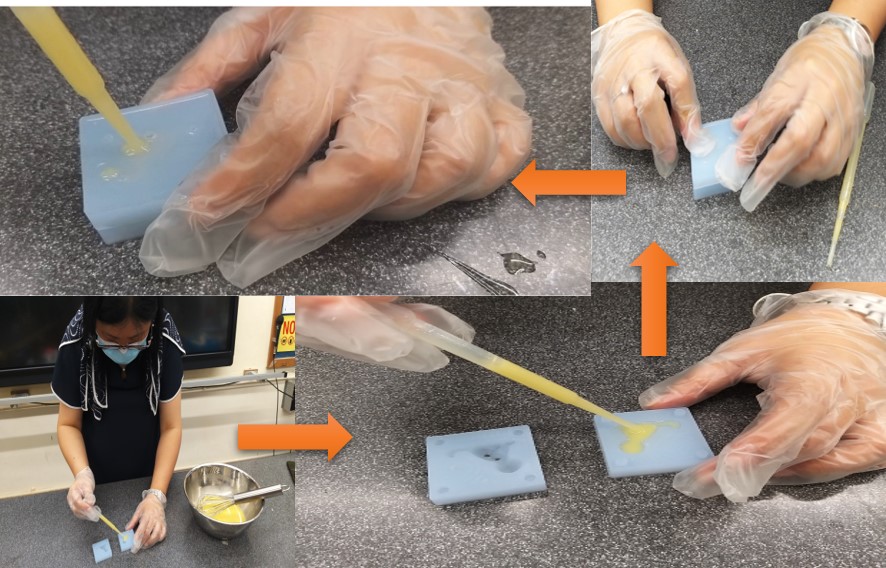
The following video shown how to inject the liquid soap into the mould.
Two days ago, liquid soap were form into solid state as the following picture. This can show a positive soap figure can be formed from the negative silicon mould and positive machinery mould.
Since it is very small, I can enlarge the positive machinery mould to increase the success chance of soap formation and improve its appearance.