3D printing and scanning
The goal of this week assignment was to design rules for your 3D printer.
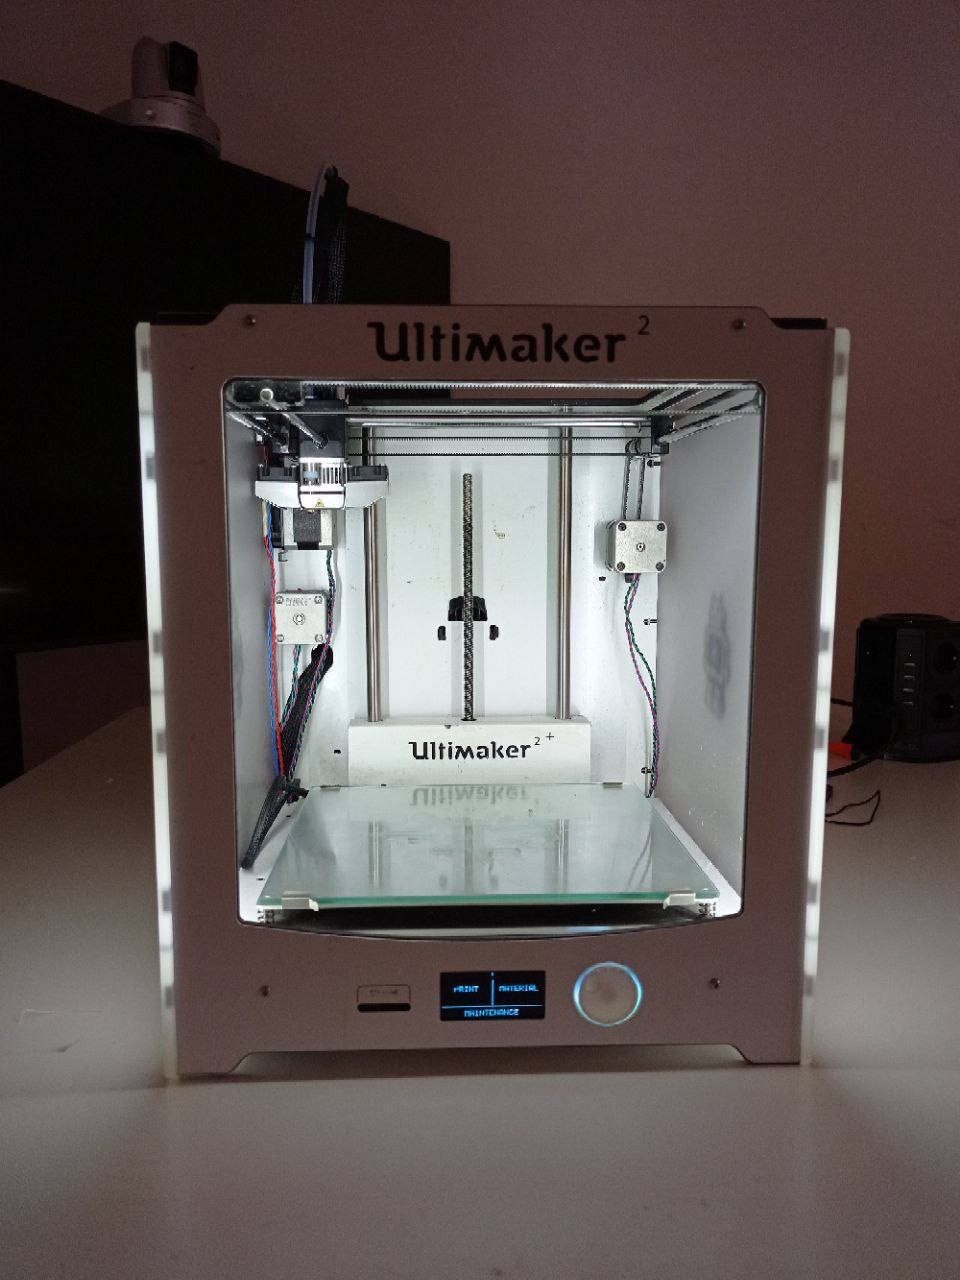
We started the week with a lesson with our Instructor Flavio about 3D Printing, learning more about the different types of machines and techniques inside this field. We also talked about some basics upon the topic and he showed us the machine that we will be using for this week’s assignment. Ours is an Ultimaker2, so we started by introducing it and talking about Cura Software, passing through some of the most important settings and things to know in order to start printing something. Before doing so, we started taking confidence with the machine itself.
You switch it ON, then you insert the material with which you want to work. By doing so, you insert the filament spool at the back of the machine and you have to insert the filament into a tiny little box that will then move it upwards through a tube connected directly with the extruder. We did some checks, one each, of this process of taking off the material and inserting it again, and then we started talking about some cleaning measures in order to work better and have better results from the machine itself. After this lesson, we started checking out the Group Assignments and we decided how to better manage our time and obligations in order to do the work properly. Since we had some time management problems two weeks ago and we found ourselves on Monday Night with the personal assignments yet to get started, we tried to learn from that experience so our goal was to finish the group assignments by Friday night.
We also did some checks about previous documentations, both in our laboratory and in others, trying to take inspiration about how others worked, the problems that they had with the assignments and so on, trying to find our way to better do the job. We really enjoyed some of the other students documentations, in particular this one and we’ll try to do some nice work all together.
We started by downloading and preparing all the files from the schedule and one by one we began to print them, they turned out quite nice. We had to clean a bit some of them because some parts of the filaments tended to remain on the pieces once taken them out from the machine.
We worked together trying to alternate each other with the things to do, and we also made an excel to keep track of all the pieces that we made step by step with all the measurements noted down. Once we found out our best settings to print, we started doing all the remaining pieces as well.
We measured:
We printed every piece with the same settings to see how the machine was able to change the results based on the different model and dimensions. Every piece was printed without supports, in order to test the machine.
- Layer Height: 0,2
- Wall Thickness: 0,8
- Infill Density: 18%
- Infill Pattern: Grid/gyroid
- Material: PLA
- Print Speed: 80/100
- Printing Temperature: 205
- Plate Temperature: 60
We used the PLA so we decided to leave the machine’s setting for the printing temperature and the plate temperature. For the layer height, the thickness of the single layer, we decided to set 0.2 because the printed objects did not require any particular detail and precision processing. This allowed us to decrease the working time of the machine and therefore speed up printing. For wall thickness, the thickness of the outer shell, we multiplied the diameter of the auger (which for our multimaker 2 is 0.4). We have therefore set for each operation the value 0.8. For the infill, we insert 18% for the density, the lowest value, because not printing mechanical objects it would have been useless to increase this percentage and consequently the working time. For the patter we have tried both with Grid and Gyroid finding no difference between the two. For the speed we set at the beginning 80 and later we changed at 100. We didn’t see any difference in the results but we could save some time.
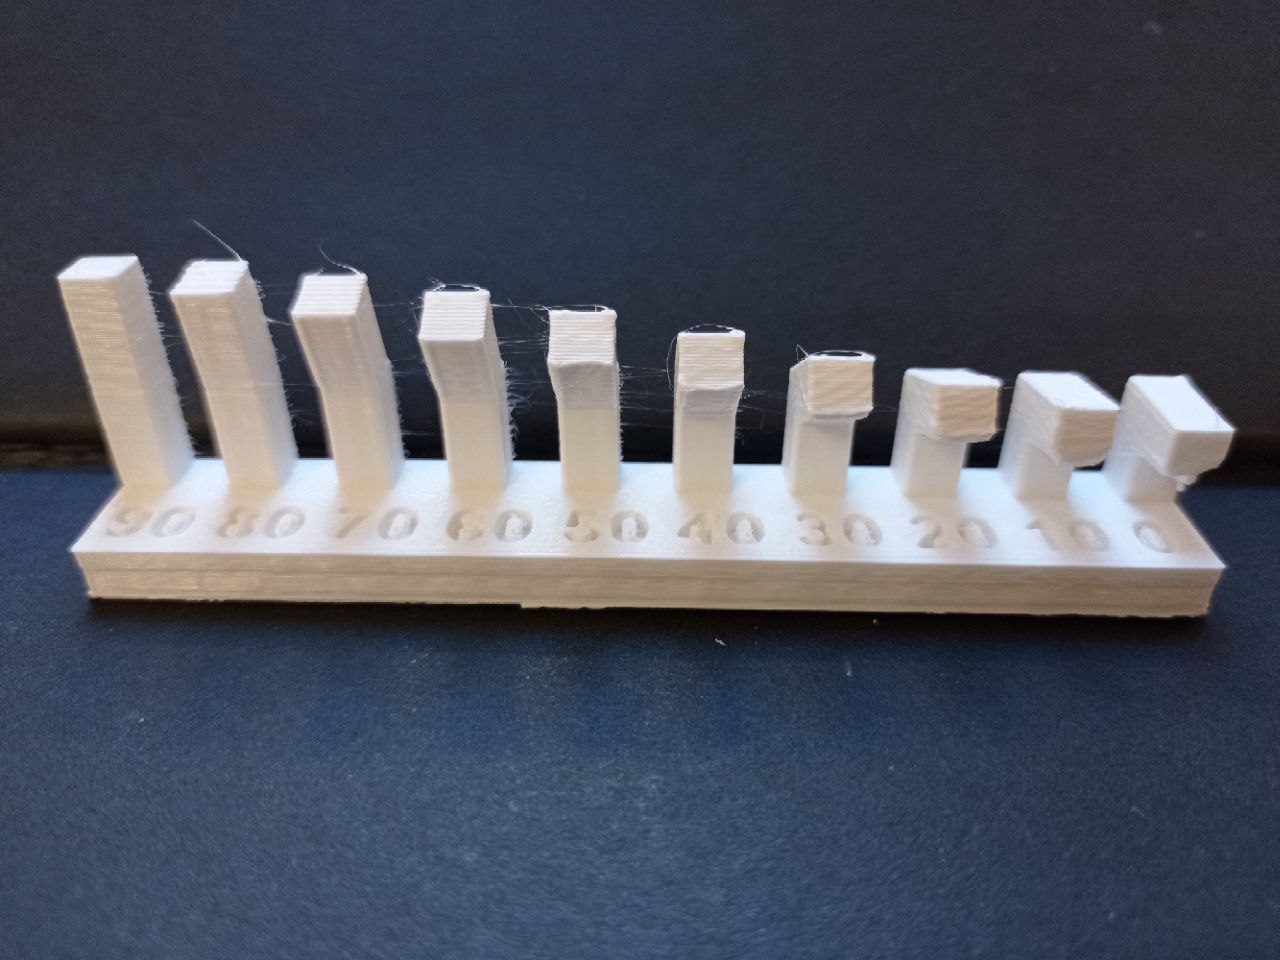
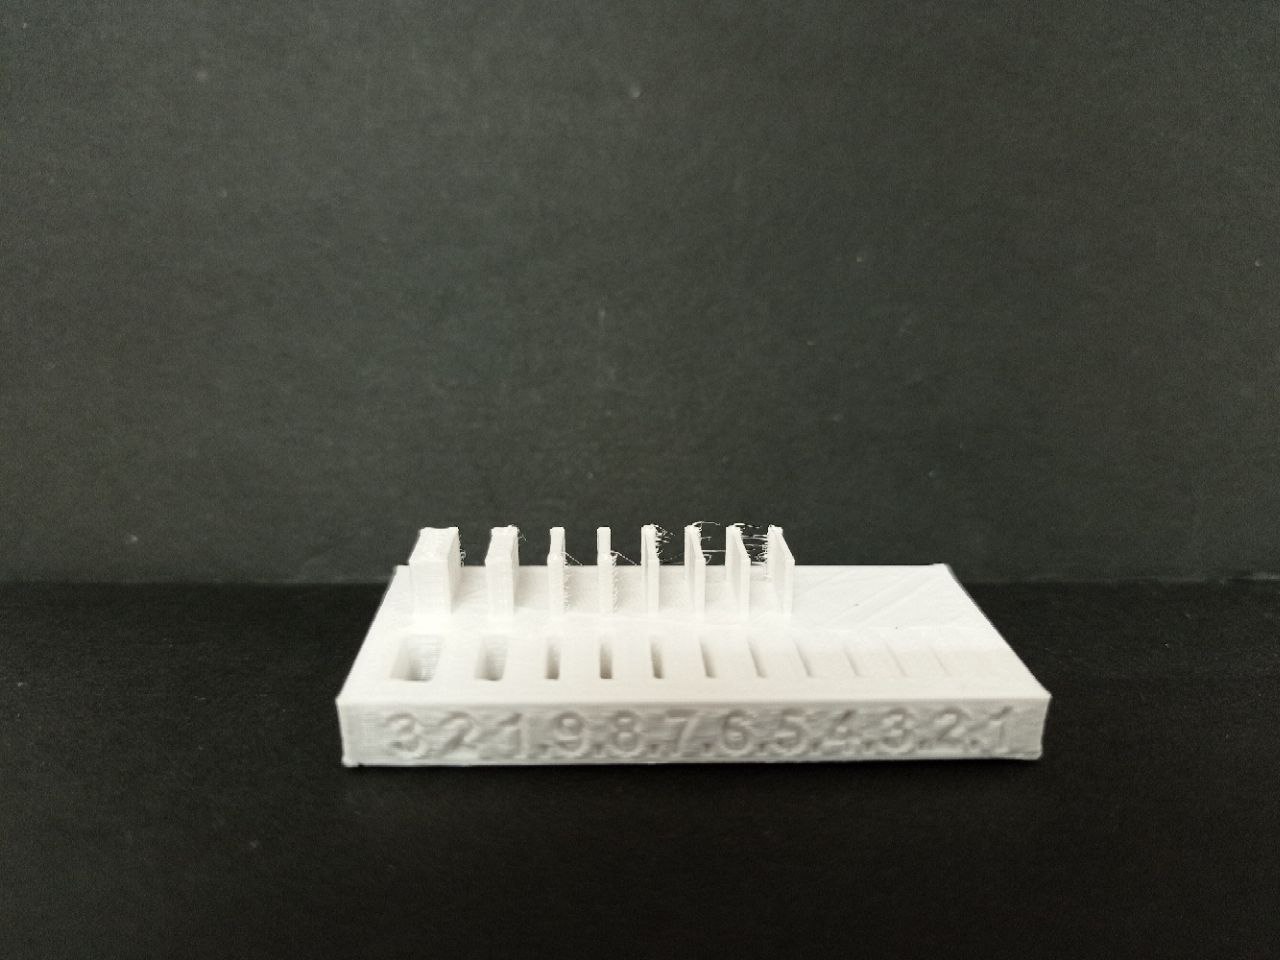
We tested different values. One is the overhang, that consider the amount of supporting material that the machine add in order to print the angle. In our case, with the second smallest overhang, the machine started to add some support, increasing the amount each time.
Going to measure the angle, the machine started to add support material starting from 40° increasing more and more.
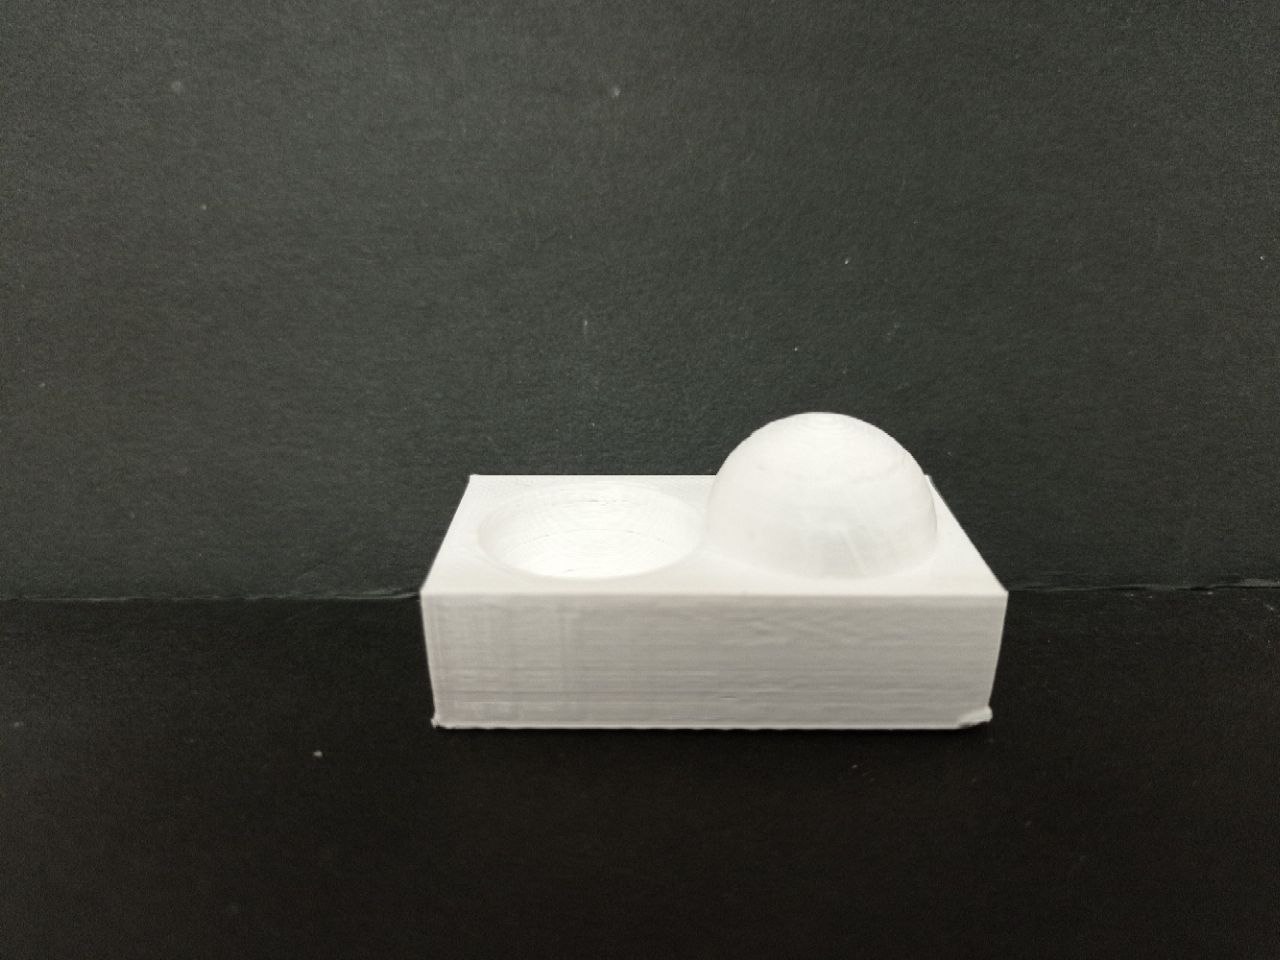
We also evaluated surface finish with a model on the surface of which there was a half sphere on one side and a hole on the other to see the different operations the machine could do and how the surface reacted to them.
The wall thickness test helped us to understand the value and the importance of the thickness of the walls in the model. A higher value decreases the chance of leaks, but increase the printing time; while a lower value can significantly decrease the print time and filament costs but but the work will not be precise and detailed. In our case, the machine was able to print the different thicknesses up to the value between 0.5 and 0.4. This is clearly due to the fact that the machine has an auger of 0.4 so it will not be able to print at a lower thickness.
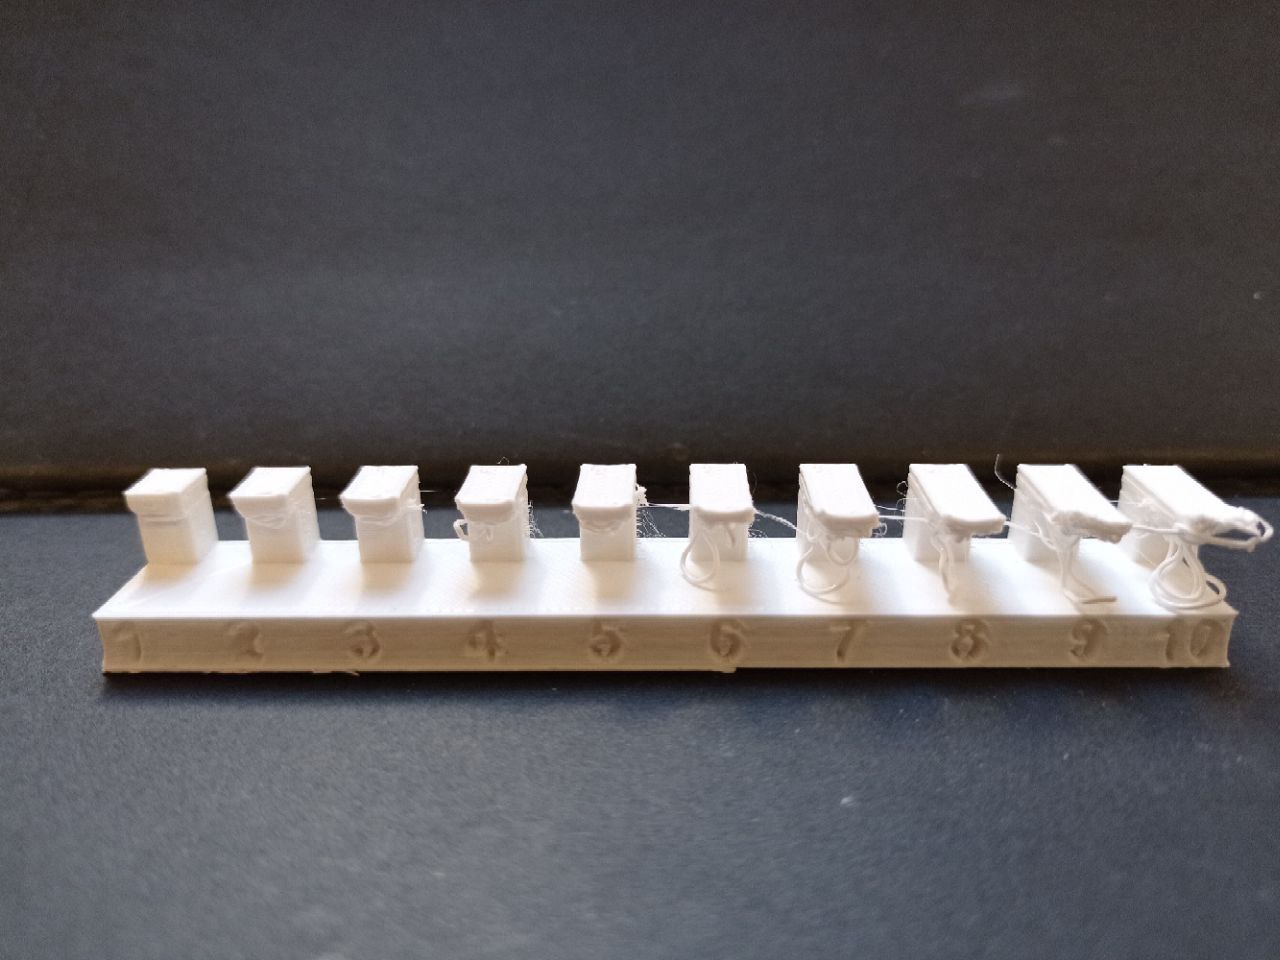
The Bridging Test, tests the printer’s ability to handle bridges. We used a model with a series of “bridges” of varying lengths but resting on the same rectangular base. The test helps both to test the printer and the correct setting of the slicing parameters. In our case, all the bridges were uniform and there was no waste material at the bottom.
Dimensions is used to evaluate the machine’s ability to print objects in the required dimensions. So we printed a 20mm cube with a 10mm cube inside. The aim is to evaluate the accuracy of the dimensions by measuring the cube with a caliper, which in our case confirmed the size of the cube.
The clearance test is used to know how tight parts can be before they brake loose and start spinning or not.
At the end, we did the anisotropy test to see if the machine worked differently in relation to the different axes.
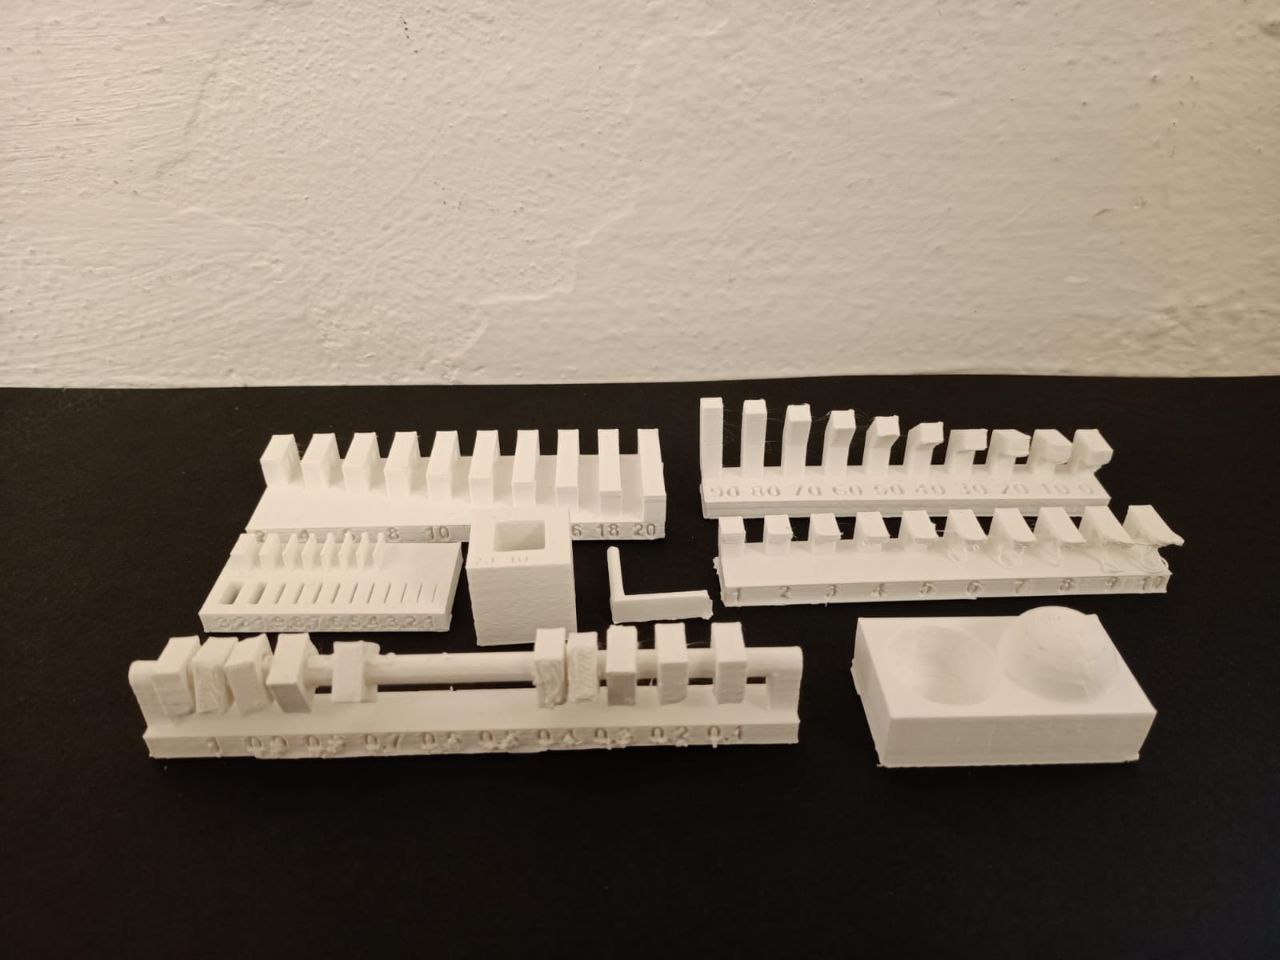
In the picture below you can see all the tests we did this week: