18. Applications and implications⚓︎
There are 3 weeks left for the final presentation of the project. Three weeks. THREE. WEEKS. Panic is a word that pretty much defines reality but let’s focus. This week is the first week dedicated exclusively to the subject of the final project, and although my classmates it is something have been thinking about it throughout the course, in my case it is possibly the first moment of real contact with the project. Through the questions posed by the assignment I intend to obtain a more concise vision of my project, but above all a concrete implementation plan. Here are the Assesment Criteria related to Applications and Implications:
-
Individual assignment
- Propose a final project masterpiece that integrates the range of units covered. Your project should incorporate: 2D and 3D design, Additive and subtractive fabrication processes, Electronics design and production, Microcontroller interfacing and programming and System integration and packaging.
-
Learning outcomes
- Define the scope of a project.
- Develop a project plan.
-
Have you answered these questions?
- What will it do?
- Who has done what beforehand?
- What will you design?
- What materials and components will be used?
- Where will they come from?
- How much will they cost?
- What parts and systems will be made?
- What processes will be used?
- What questions need to be answered?
- How will it be evaluated?
Questions⚓︎
The purpose of the project is already defined, but its exact form has not yet, so for me, answering these questions will allow me to specify important aspects of the final form. Although I have already started testing many of the components that I am going to use, this week is also going to be a process of discovery and analysis of the project.
What will it do?⚓︎
Count down time. It’s a “visual timer”, like a sand clock The idea is that the user defines a desired period of time and the clock will visually represent how much of that time has been completed. The user can interact with the project from the back side to configure the time, leaving the front side only for the visual representation. The time period to be represented can range from minutes to days, although it would be mainly focused on periods of one to several hours, in which a specific task has to be completed. The visual representation thought for the first spiral would be by a ring of neopixels under a translucent wooden surface, which would illuminate the percentage of the circumference corresponding to the time elapsed with respect to the total established. My main personal objective is to be more aware of the passage of time while I am engrossed in a task, in order to avoid dilating the hours of unproductive dedication.
Check Project Proposal page for further info.
Who has done what beforehand?⚓︎
FabAcademy is an inexhaustible source of creativity and innovation, as Neil said in his TED Talk, so it is practically impossible to dismiss the idea that there is another project similar to mine, although I have not really found any other project that shares the same purpose. Even so, there have been other projects that try to address the management of time and it’s representation. These are some of the most representative for me:
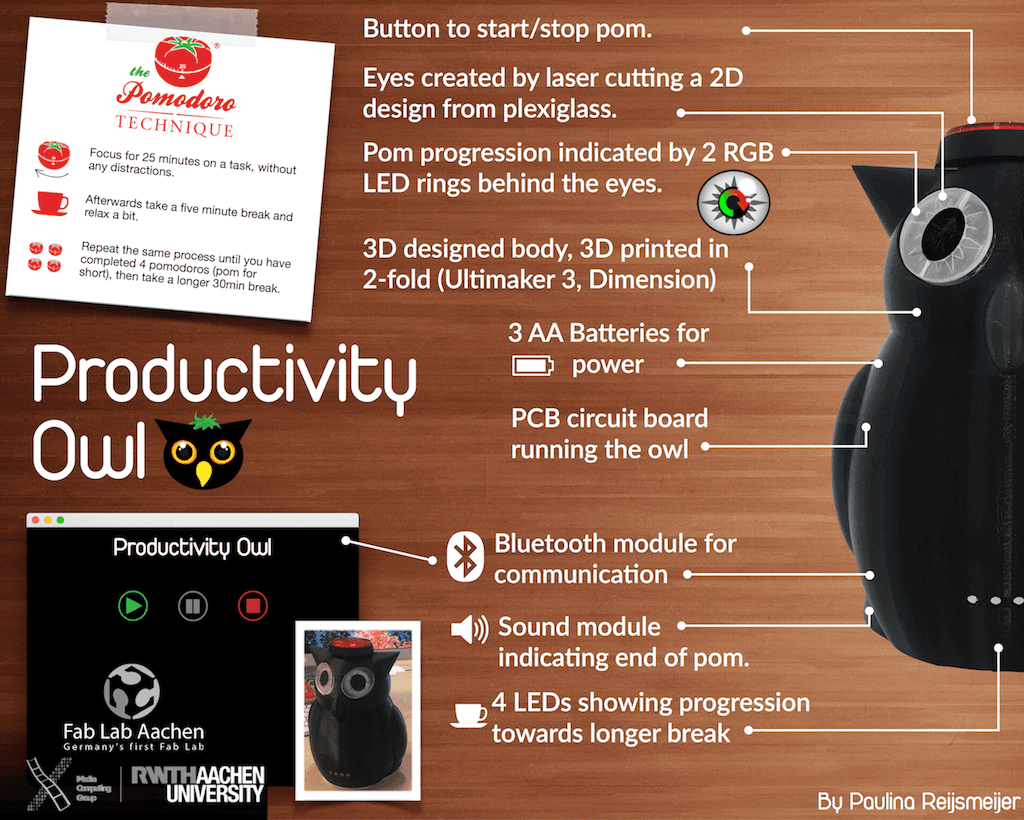
- Pomodoro Productivity Owl by Paulina Reijsmeijer: this is possibly the closest FabAcademy project to my own. Both in terms of its ultimate goal, higher productivity and greater management of time, and in terms of its representation, the percentage of elapsed time out of the total. The difference lies in the fact that the time periods are already defined in advance and cannot be modified by the user, in order to adhere to the Pomodoro technique, and that the representation of time is a practical purpose as a means, and not an end, to visualise the passage of time. Still, it is a project I am studying closely, with the main interest in the implementation of the code that makes it work.
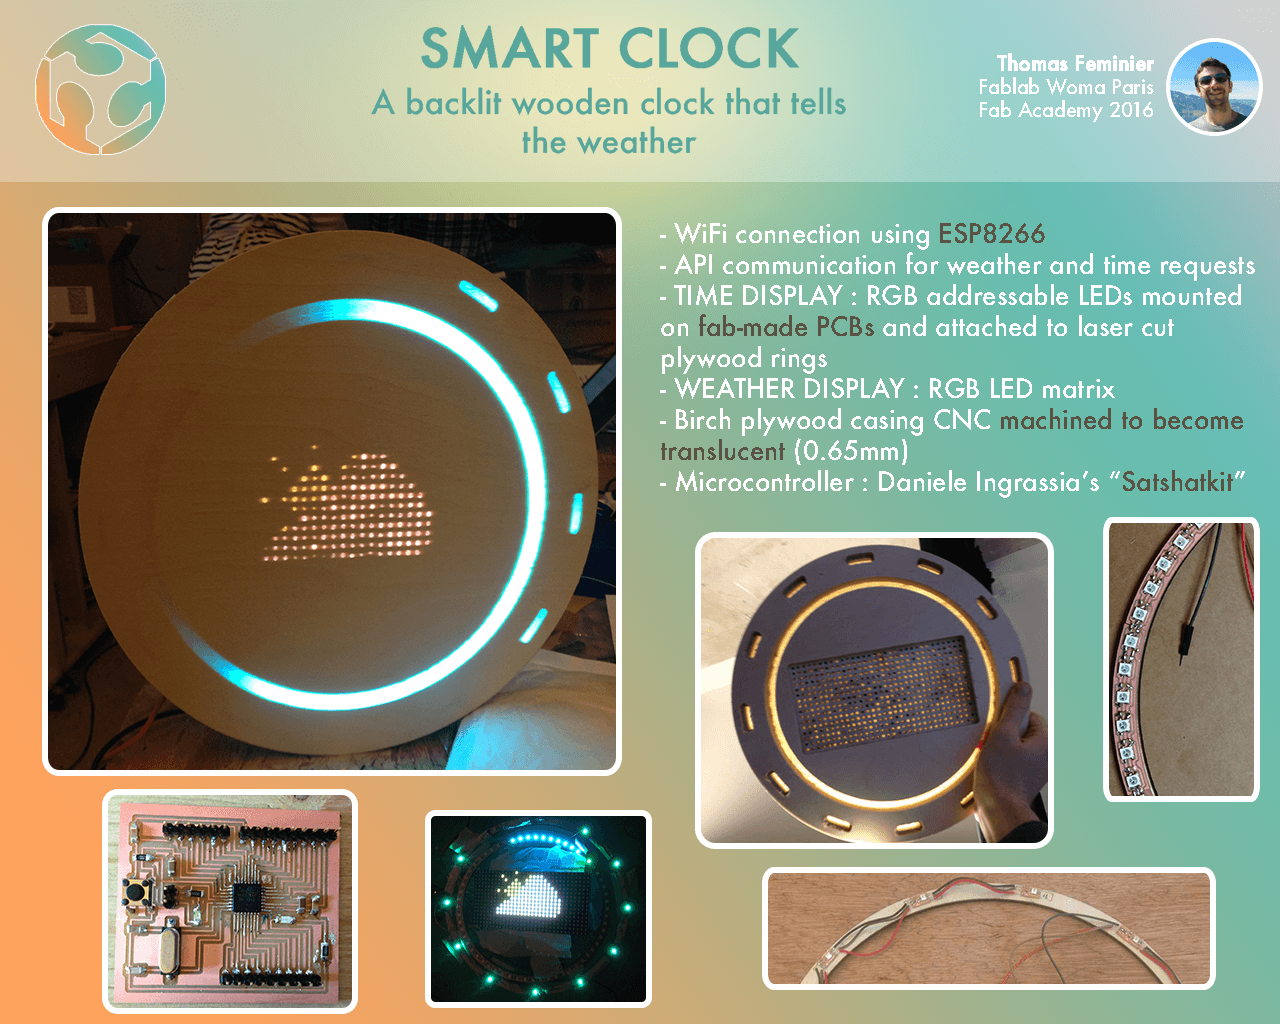
- Smart Clock by Thomas Feminier: my instructor Nuria showed me this project after I told her about some ideas I had for the visual part of my project. It has been a reference in terms of manufacturing processes and the results obtained. I have been using her documentation to get manufacturing ideas that may be useful for my project, such as the manufacturing of the curved plates to create the light ring and the manufacturing of the translucent wood, which I will try to replicate.
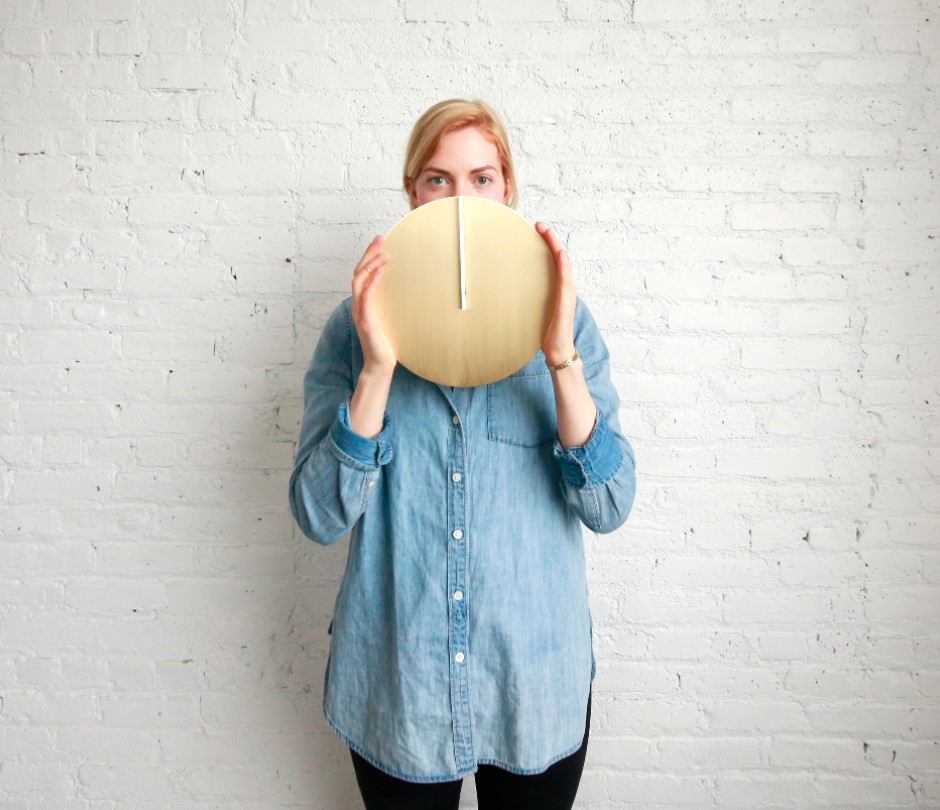
- Daylight clock by Arielle Hein: although this is not a FabAcademy project, it is perhaps the one that has had the greatest impact on me. In her TED Talk, “A new way to measure time”, Arielle talks about how her perception of time changed because of how much dayligth she could see when he moved to NY adn how that make her struggle in daylife, so she decided to make this project to be aware of it. Time issues have been constant in my life, so I’m for the same approach, generate change.
What will you design?⚓︎
- 3D: all the casing and system integration packaging.
- Electronis: main board and circuits.
- Software: main code and interface.
What materials and components will be used?⚓︎
- Materials:
- Birch plywood for the casing.
- FR1 copper plates for the board.
- PLA for the system integration parts.
- Magnets, wires and connectors
- Methacrylate for the watch face
- Electronics:
- AtTiny 3216
- Led SMD
- Capacitor 1 uF
- Resistance: 0(x1), 0.5K(x2), 5K(x2), 10K(x3)
- 6 pin male connector (x2)
- 4 pin male connector (x3)
- 3 pin male connector (x3)
- Inputs: RTC, Potentiometer, Buttons.
- Outputs: OLED display, Neopixels, Bluetooth module.
- Power Supply: PC modified one for testing, Power brick for final product
Where will they come from?⚓︎
I will mainly use materials from the Lab’s inventory and extra products will be bought on local stores to reduce the carbon footprint and support local trade. In case I can’t find the necessary resources, I will use Amazon. About the Lab suppliers, structure materials as plywood and methacrylate come from local shops, the PLA filament from Prusament and the electronic items and gadgets from Digikey and Amazon.
How much will they cost?⚓︎
- 20€: Birch plywood
- 10€: Methacrylate
- 35€: Neopixels
- 25€: Power brick
- 2€: Inputs (RTC, Potentiometer)
- 10€: Outputs (OLED, BT module)
- 5€: Board and electronic components (FR1 board, ATTiny3216, resistances, capacitor)
- 10€: Other consumables (cables, connetors, magnets)
Total cost: 117€ approximately
Costs can be reduced a lot without compromising functionality. If we choose a normal W2812b neopixel strip whitout specific white channel and less leds/m, cheaper wood and our PSU instead of the custom 5V 12A power brick, I think we can cut the cost in half.
What parts and systems will be made?⚓︎
- Magnets mechanism
- Custom electronics board
- Interchangeable watch faces
- Custom birch plywood casing
- 3D printed parts for electronics system integration
What processes will be used?⚓︎
- 2.5D CNC wood machining for the casing.
- Copper milling with the Modela for the boards.
- 3D printing for the inside electronics fittings in the casing.
- Laser cutting for the methacrylate.
What questions need to be answered?⚓︎
- Has it helped me to be more time conscious?
- Has it allowed me to be more productive?
- Has it made me less distracted?
- Does it look like a decorative item?
- Is it scalable and easily replicable?
How will it be evaluated?⚓︎
The main questions to answer is if it works, how well it’s made, and if it fulfills its function. If the user can interact with the interface, start a timer and the leds turn on correctly it should be a successful project! As a second requirement would be a nice integration of it’s parts and in consequence a beautiful project!