8. Computer controlled machining
This week we have to build “something big” mostly by using computer-controlled machining.
Blueprint and prototype
Some weeks ago I presented a terrarium table but I don’t have what’s necessary to build it so I changed my project. I’m still making a table but it will be a coffee table only using wood, and if I have time I will add at the center a RGB LED strip between two way mirrors.
With my idea in mind, the first thing I did was to design it in Fusion360.
But then I didn’t jump and began to manufacture the table itself. For a big project like this one I prefer to do a prototype beforehand.
So I scale my model to be able to cut it using the laser cutter.
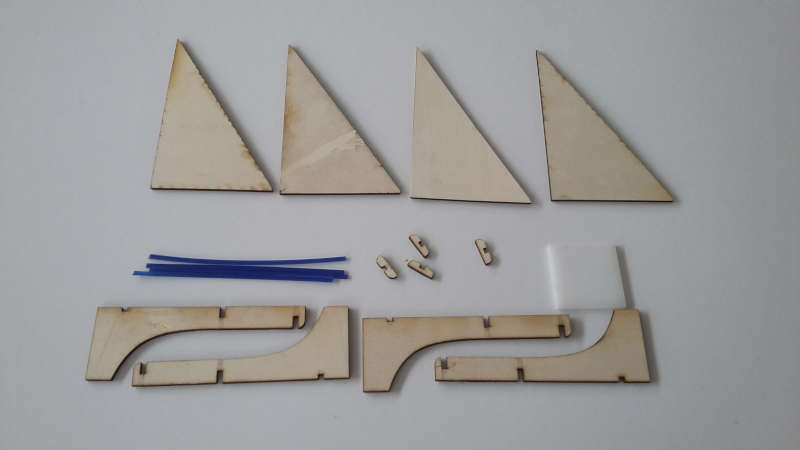

Here are the files : coffee_table_laser.zip
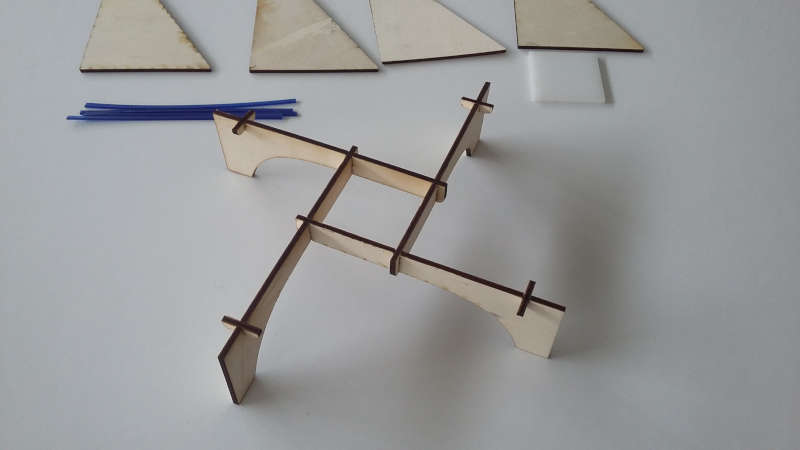
Everything is fine, the legs are correctly holding each other, I can take the next step with peace of mind.
However, I didn’t and it was a big mistake. Something was bugging me, when you are putting the legs together, you need to lean down the last one to be able to fit it in place. Then my mind made a fixation on “ the ground will bother me ” so I inverted the slots thinking it will be easier to lean up the last leg. But by doing that the assembly doesn’t hold itself. Being sure of myself I didn’t make a second test and discovered my mistake when I assembled the real legs.
So note to myself, your first choice is always the best and always test your theories.
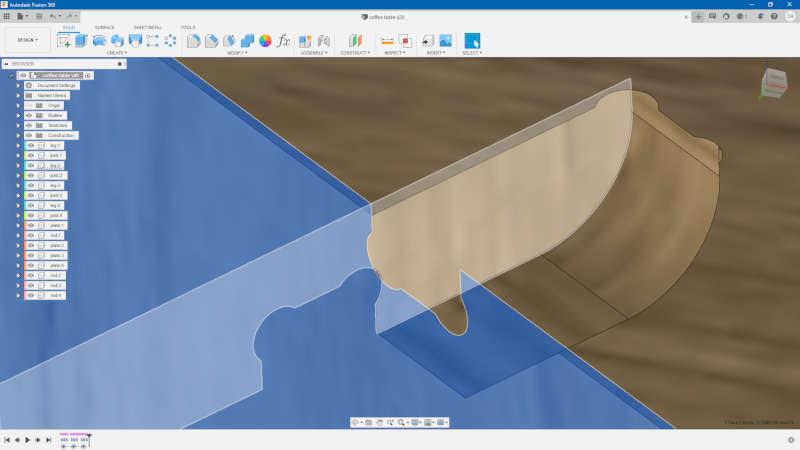
There is also one last important thing to do if you want to be able to assemble the final table. You have to add dog bone to every angle that fits another part.
CAM
Even if the blueprints are finished, we are not done with Fusion. Now we have to generate the code to send to the CNC. First we need to put every part down. Since I still had room I asked my colleague Jules Topart if he needed it and we ended up making two of his parts in my panel.
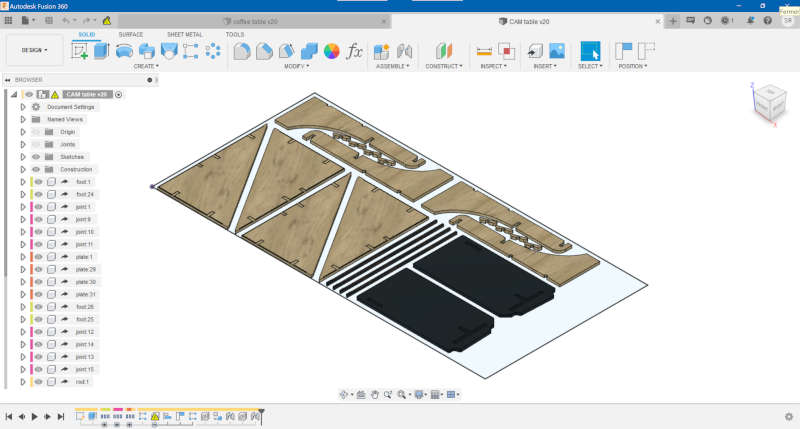
After that, we went to the CAM workspace to set up our operations.
In my case, I managed to do everything shape compatible with a Ø8mm flat mill which will also be used to cut the outline. So I don’t have to change tools and can manufacture it in only one operation.
The settings for this mill and our wood are as follows :
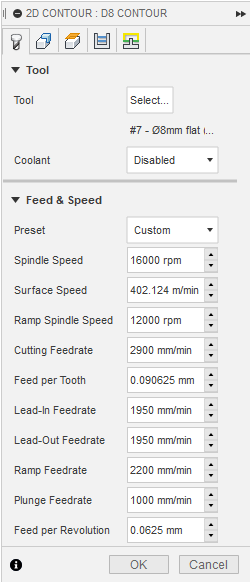
The maximum cutting depth that doesn’t appear in this window is 3mm.
Milling
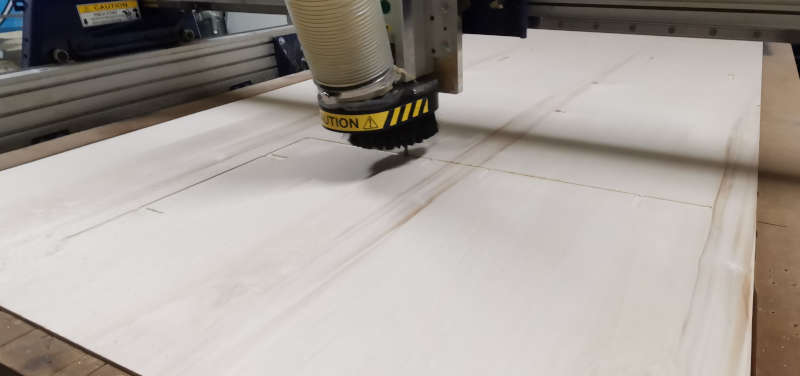
To manufacture this table I used a ShopBot.
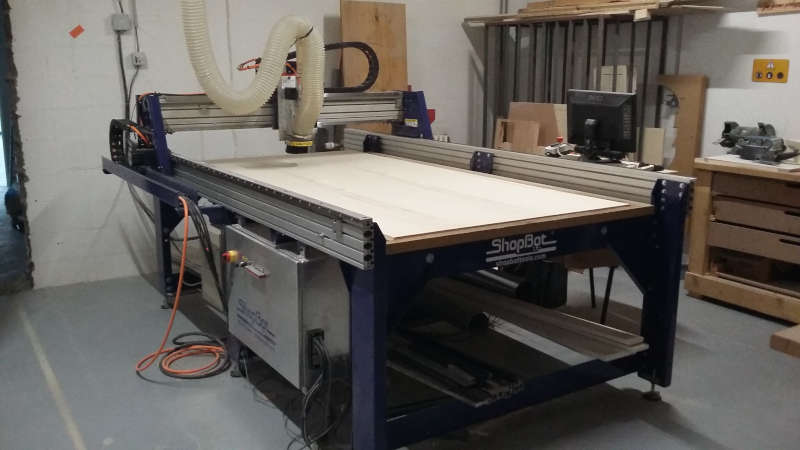
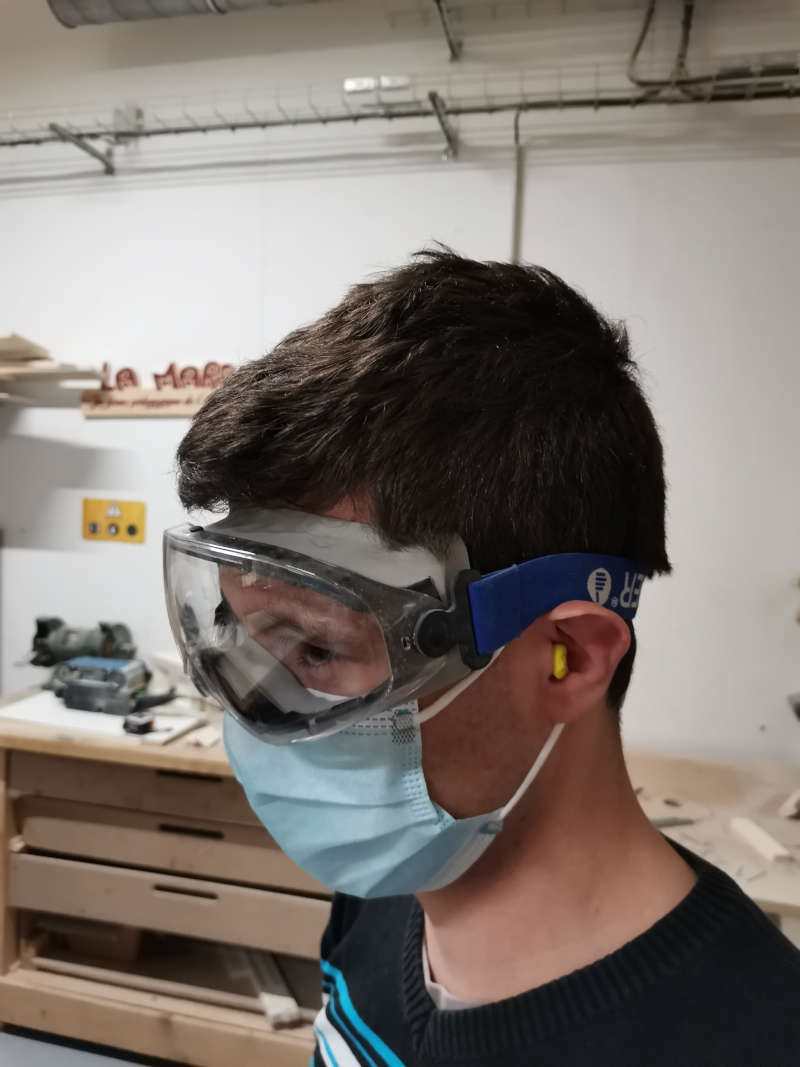
As you can see this CNC starts to be imposing and dangerous so we have to be careful and respect some simple security rules : wear gloves, glasses, earplugs. ( bonus : wear a mask against COVID )
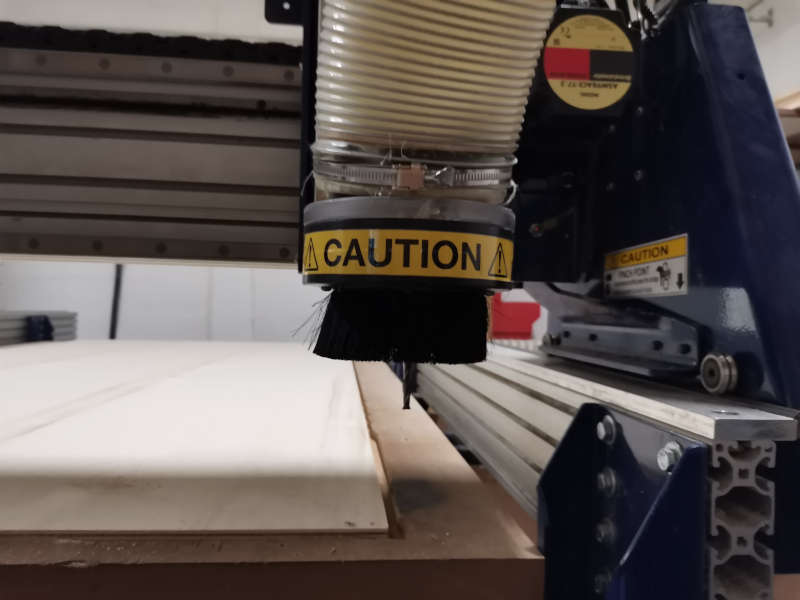
Now we can begin to work. The first thing to do is to install our panel and screw it to the martyr. Of course, check that the screws aren’t on the machine path. As shown below, we push aside some of them that were too risky.
Then we changed the tool.
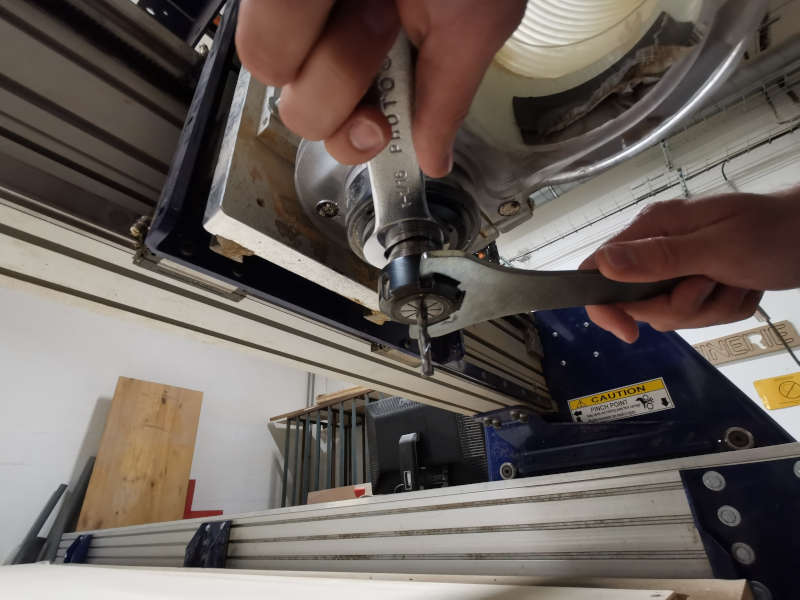
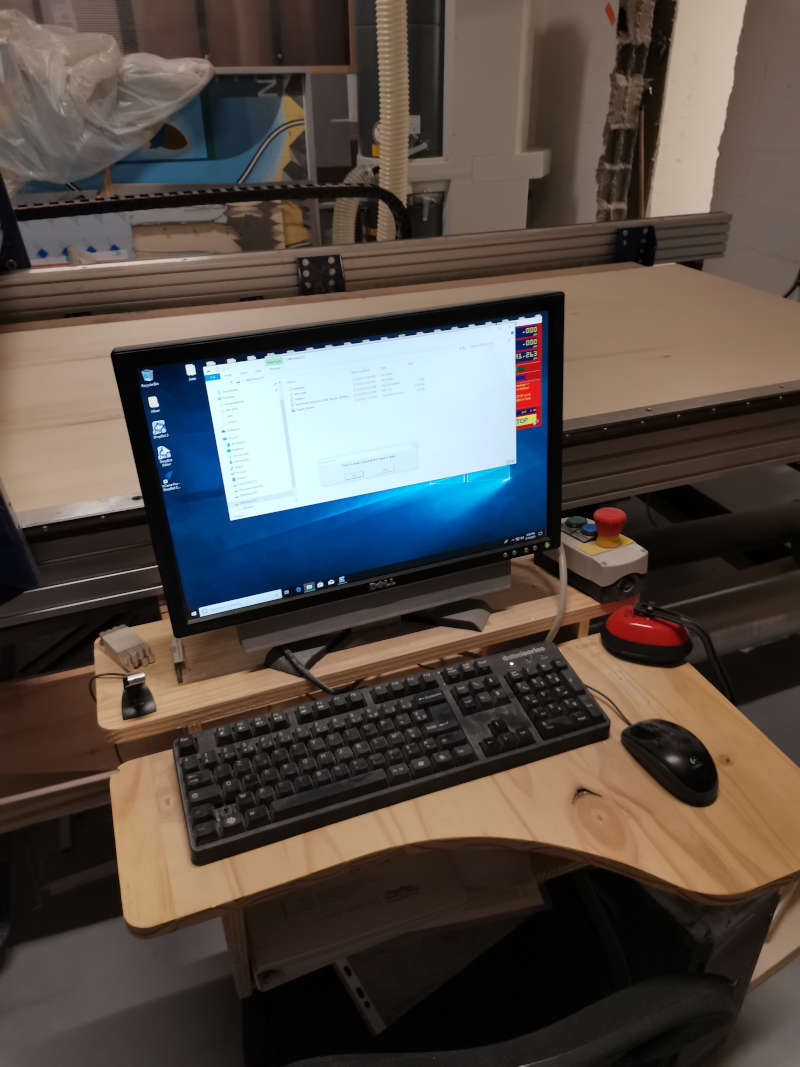
Next we can calibrate the coordinates system. The zero on XY is quite easy since the machine has limit switches and endstop. Moreover, our zero work is the same as our zero machine.
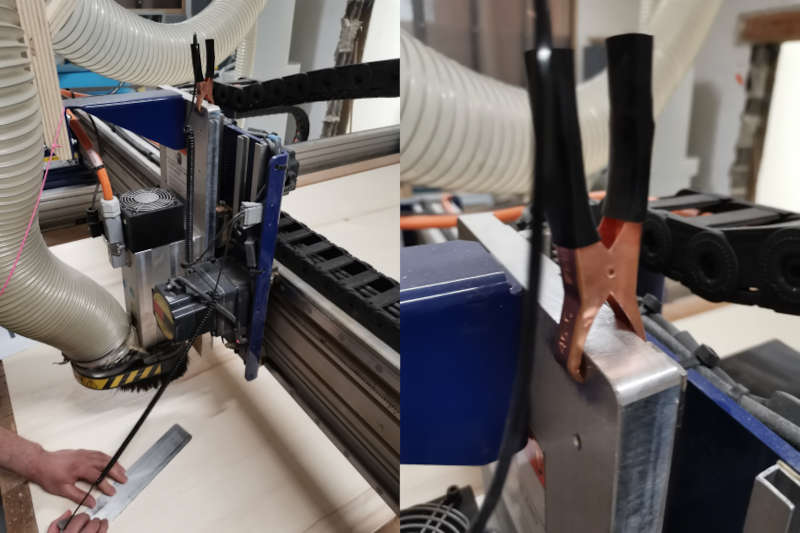
Afterwards, we can proceed to calibrate the zero on Z. To do that, we have to place a conductive plate connected to the frame under the mill. The CNC is equipped with a sensor which detects if electrical current is passing through and so will know when the mill is touching the plate. The operation is done automatically by the computer.
Everything is ready, we can launch our code.
And some time later we got what we call a “epic fail” :
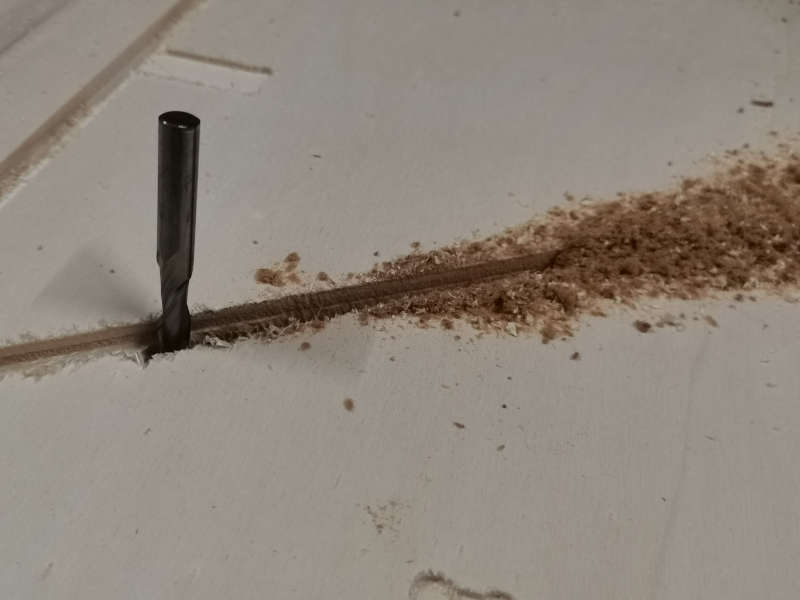
The mill is still intact. Apparently, the holder wasn’t tight enough and so the mill simply fell and started to cut through the martyr. So we put it back in place and launched again at the point where it stopped.
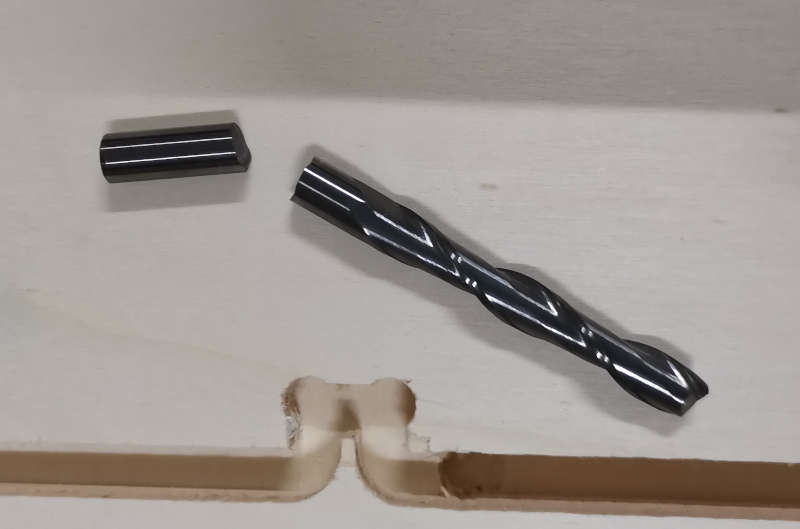
However, some time later (again) we had a new problem or more likely the consequences of the first. It seems that the mill was damaged when it fell. It was able to continue for a moment but eventually break in two.
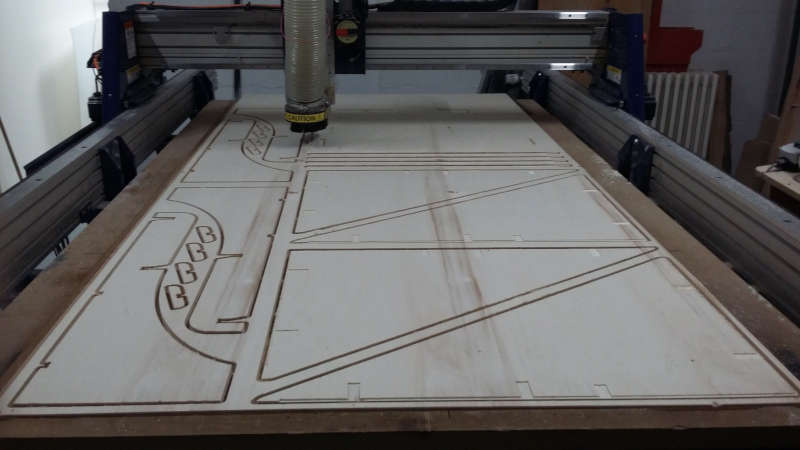
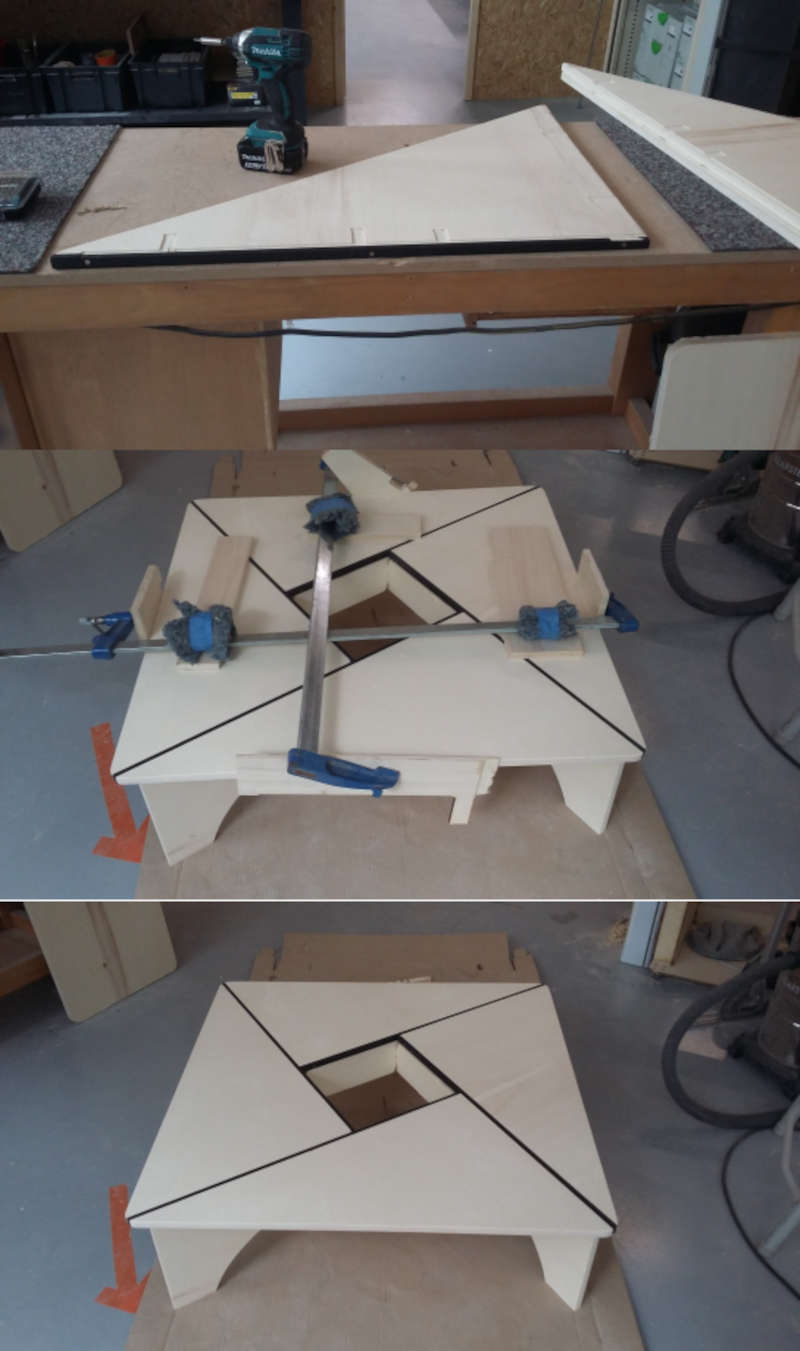
But even with all these troubles, we did it. The parts are all cut.
Assembly
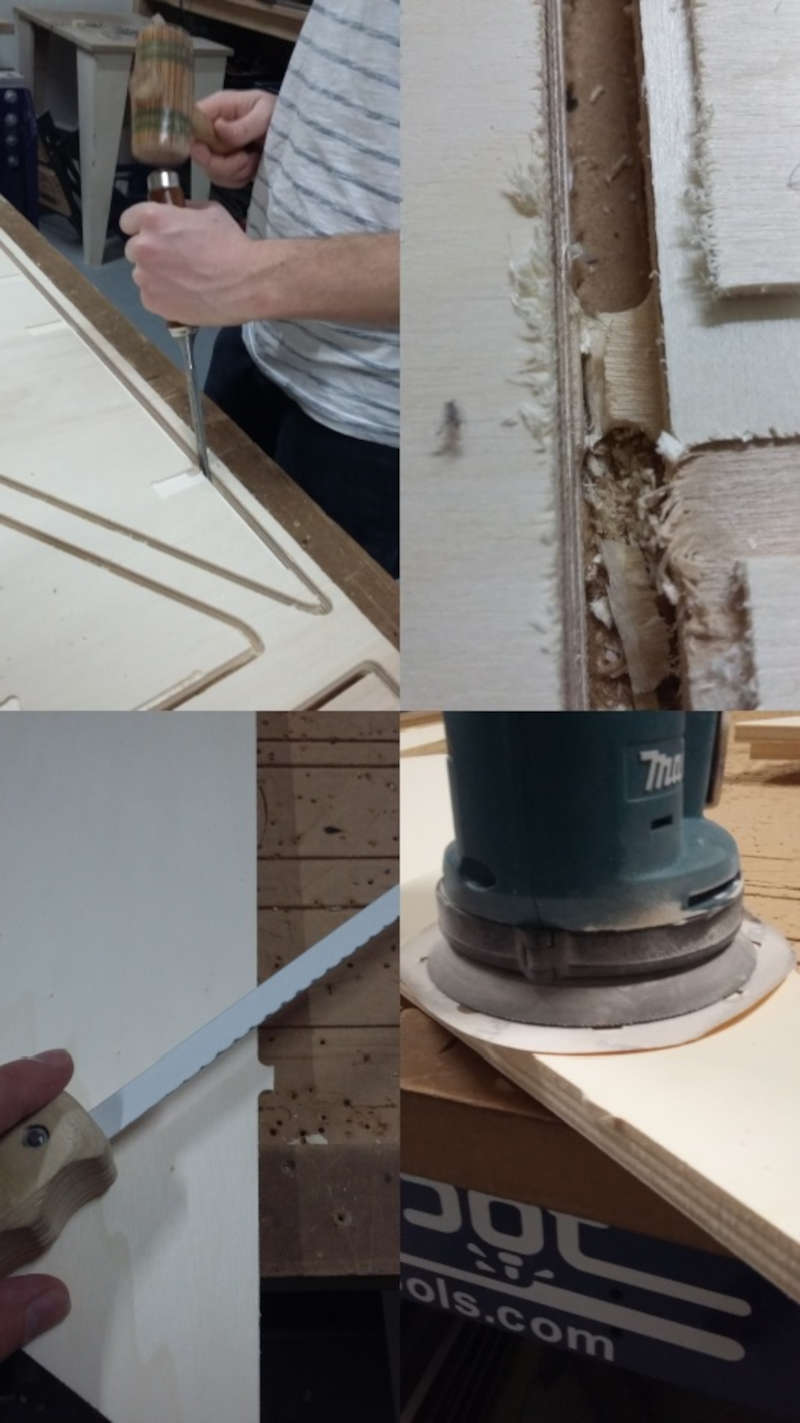
First of all I needed to retrieve all my parts by cutting the tabs maintaining them. I started with a wood chisel but it was a bad idea and rapidly switched to a small saw after noticing that I was damaging the edges. Next I sand the remaining tab to a perfect edge.
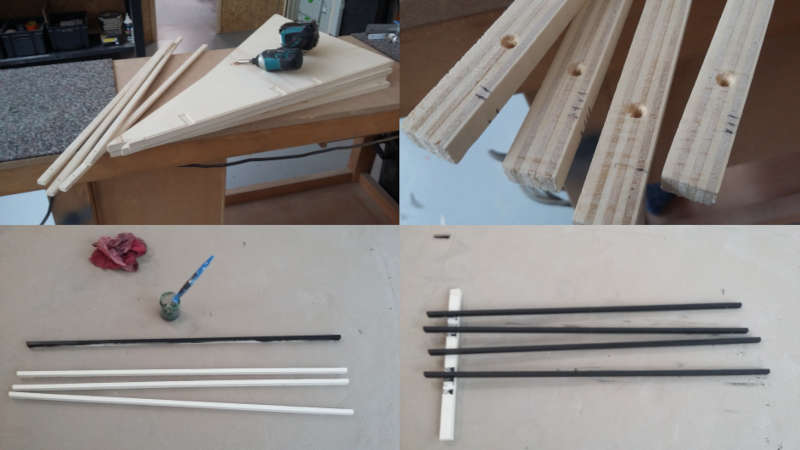
Then I made the first assembly. I also beforehand pre-drill the parts that join everything together and the rods.
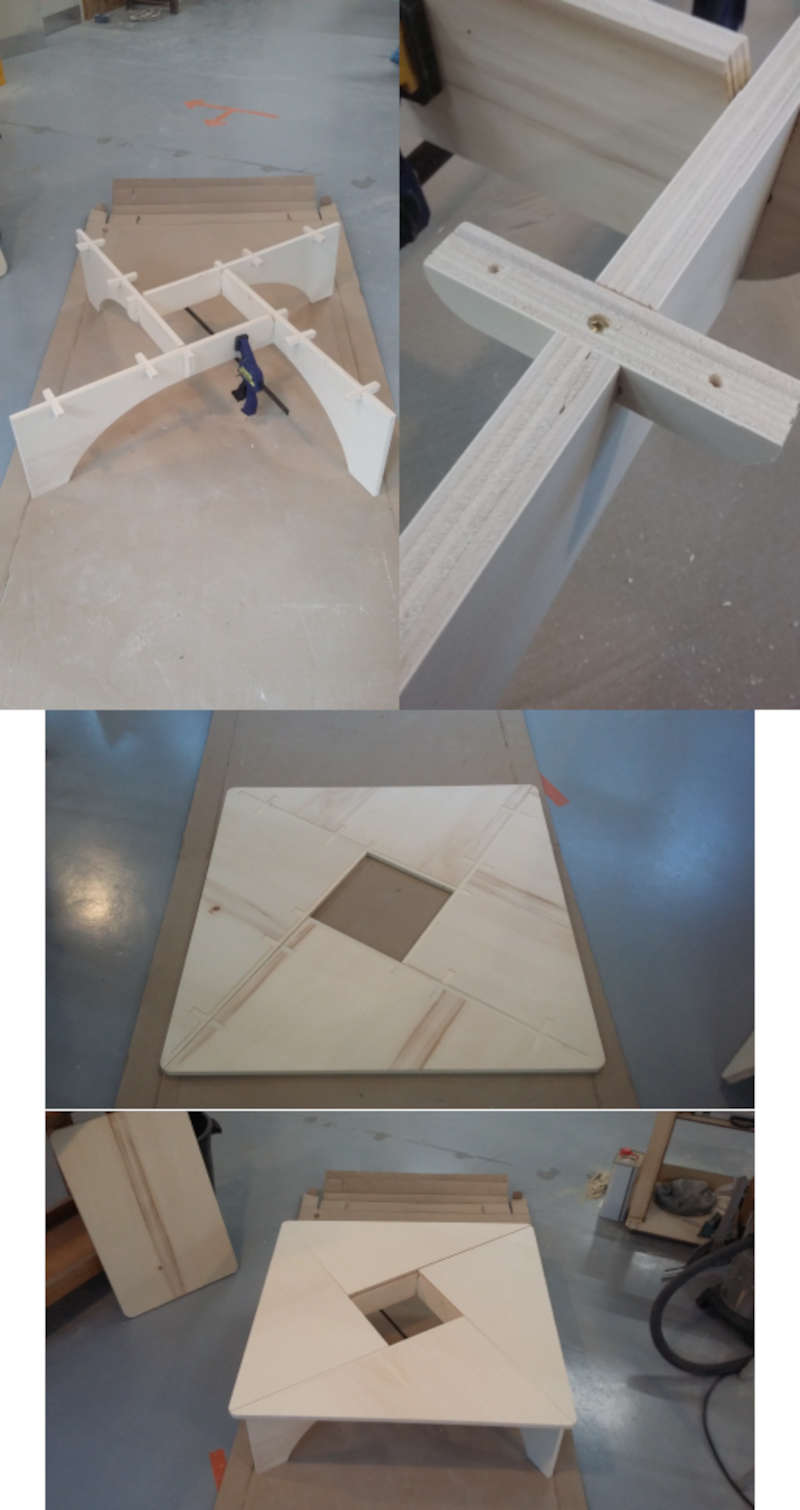
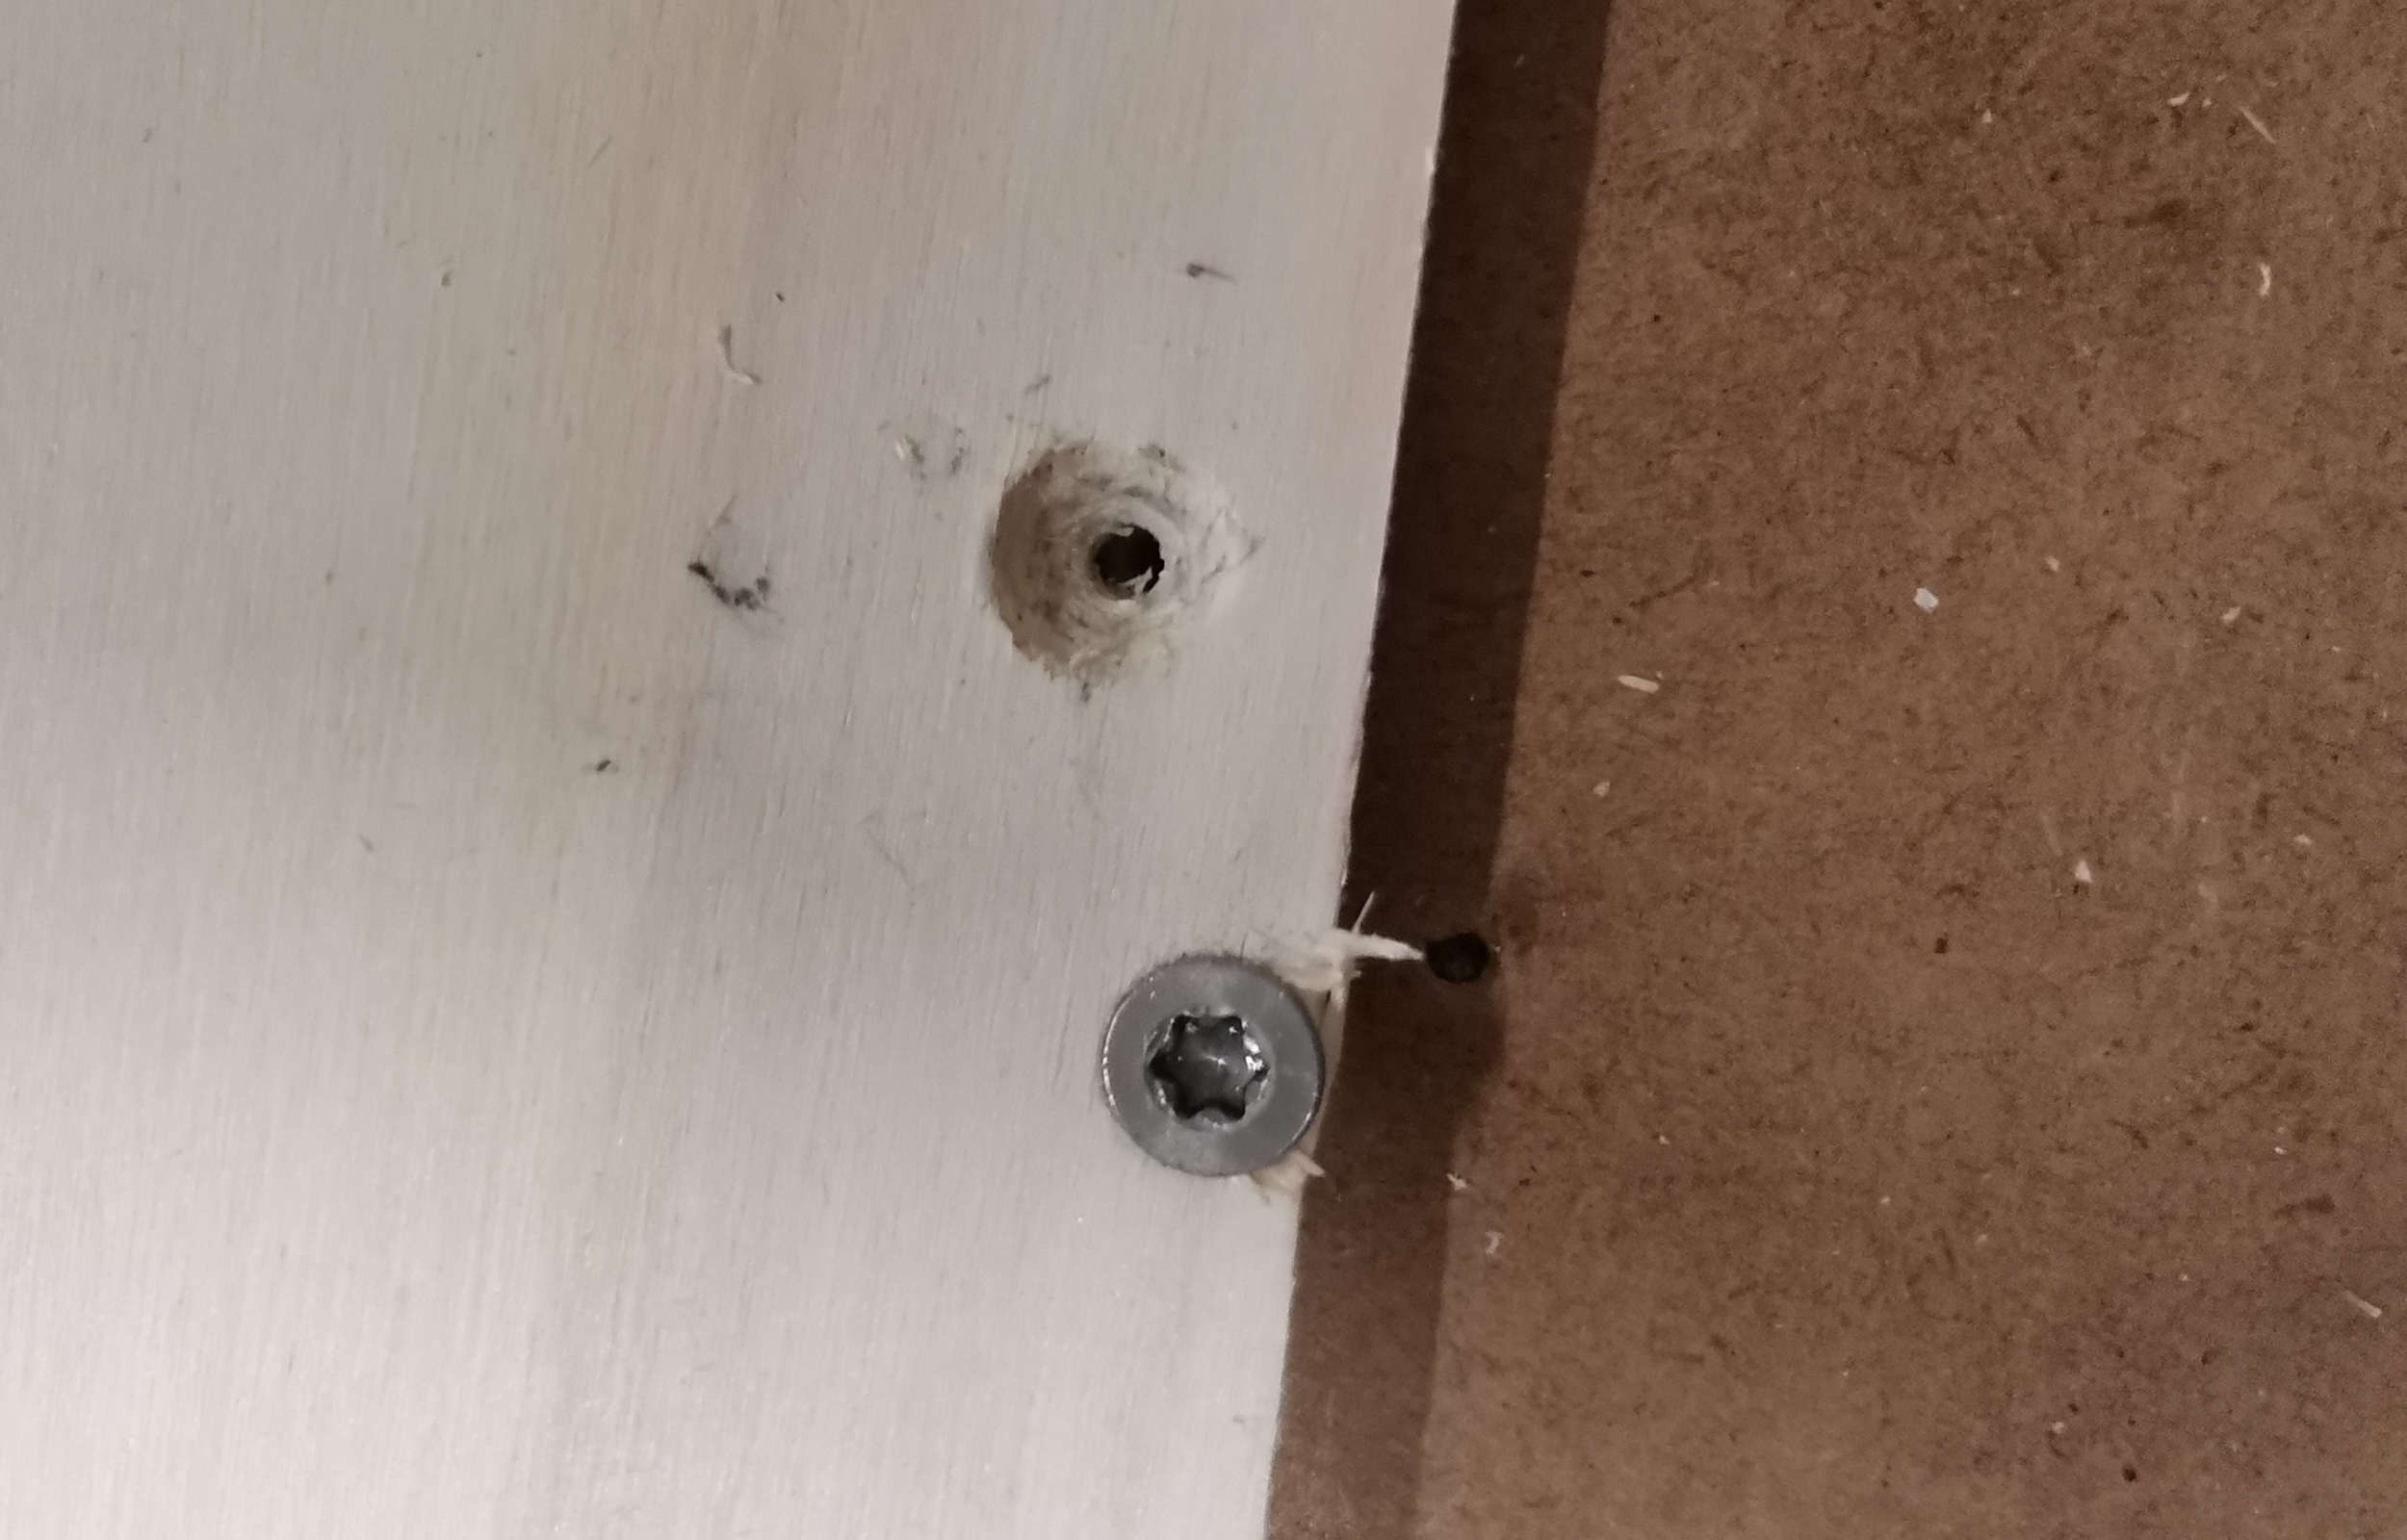
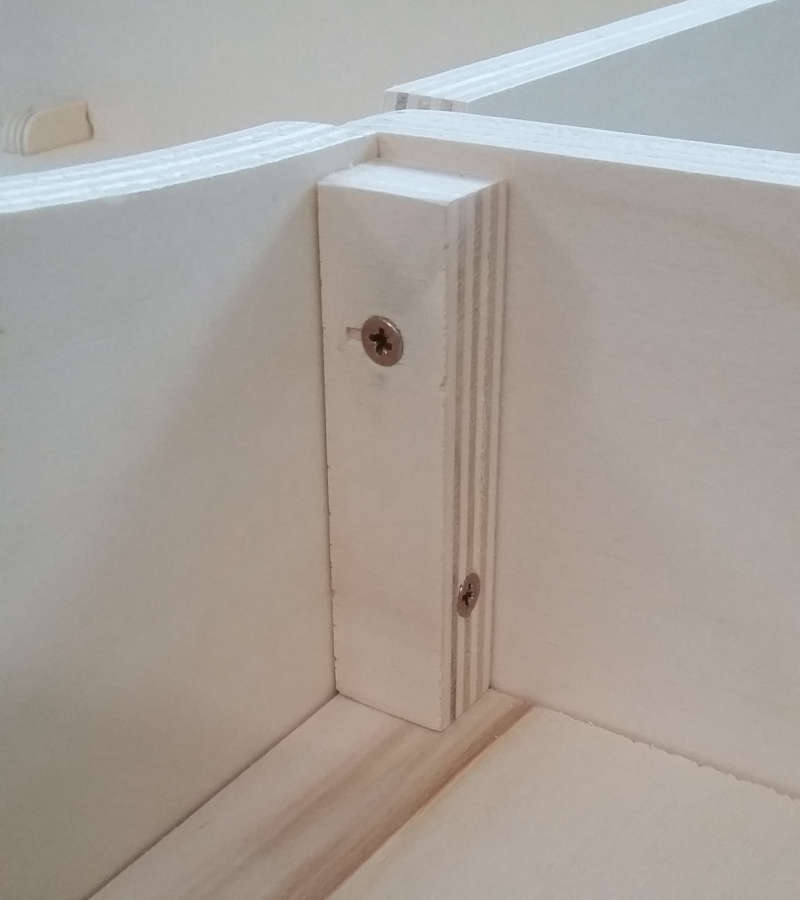
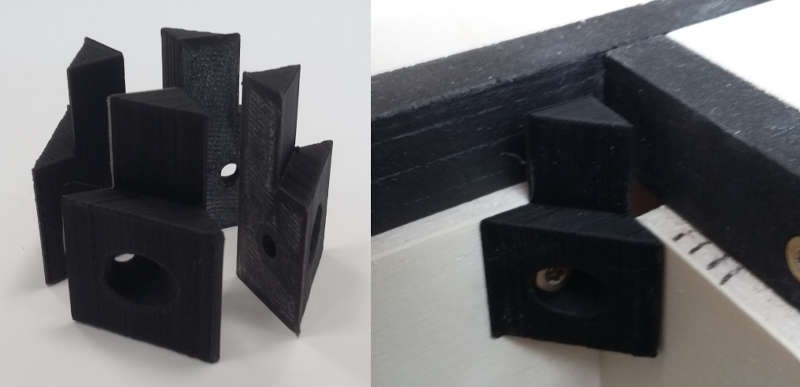
As I mentioned at the beginning, the legs are not holding by themselves thanks to my mistake. During the assembly I had to use a clamp but it’s not a definitive solution so I fixed a reinforcement in each angle.
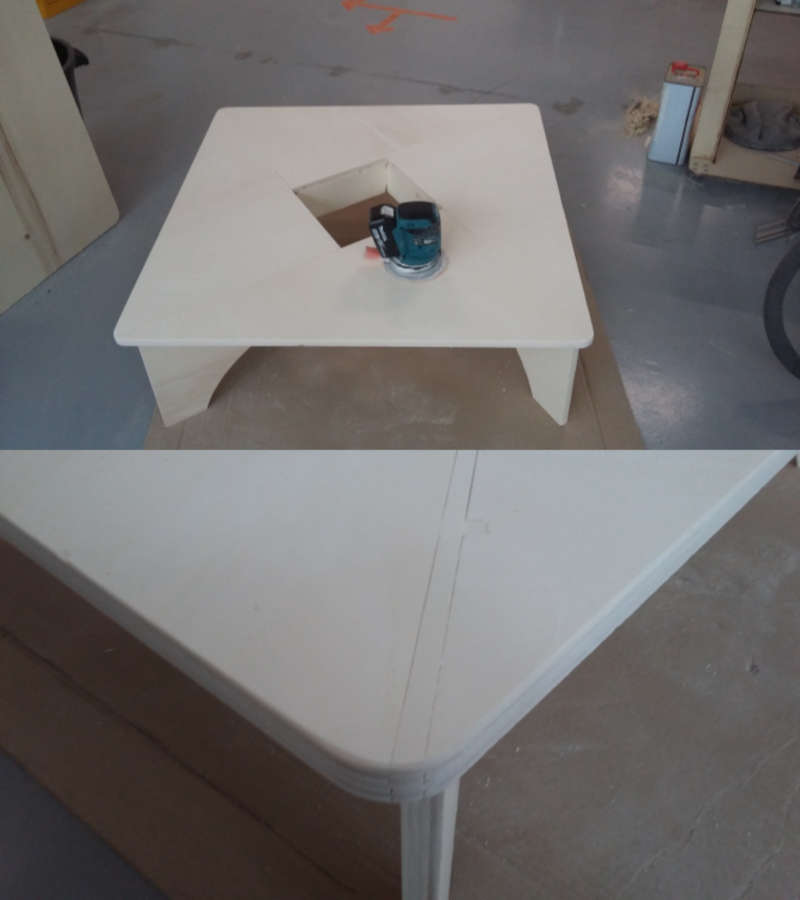
Next I sand everything to have a nice touch and also made some fillet.
After locating and marking each part, I disassembled the table tod and proceeded to paint the rods.
When it’s dry you can reassemble your table definitely.
For the infinity mirror at the center, I planned four 3D printed pieces to hold it.
Infinity mirror
Next week, we will do some electronics and I will take this as an opportunity to finish the table.