16. wildcard week
This week I am making a cover for the CNC spindle I had built in machine week, I am using formech vacuum forming machine, vacuum forming is a useful tool to create multiple identical parts with low cost, such a tool is very helpful in a business incubator FabLab such as ours.
Research
I started with learning about vacuum forming, and how to design molds for it, I found this article very useful for newcomers to vacuum forming.
Theory
vacuum forming is the operation of heating up a sheet of plastic till it’s formable, then pushing a mold against it, applying vacuum, and sucking all the air out until the plastic sheet is shaped like the mold.
The vacuume forming sheets

Vacuum forming construction
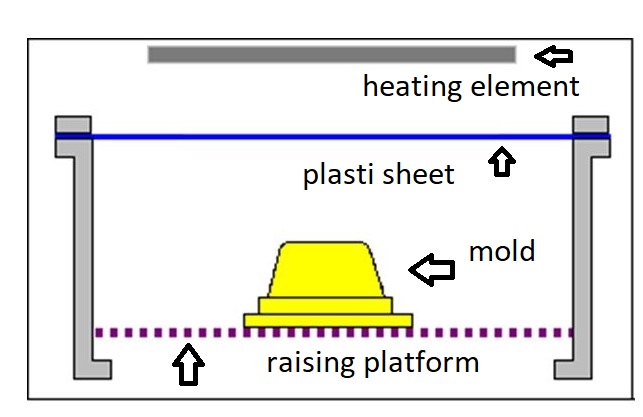
Vacuum forming is useful in creating packing, negative molds, and other parts like products covers like my project.
steps to use vacuum forming
Make a mold
a vacuum-forming mold can be made out of metal, wood, and plastics. In a fablab, a mold can be made out of CNC wood, and 3D printing.
Forming
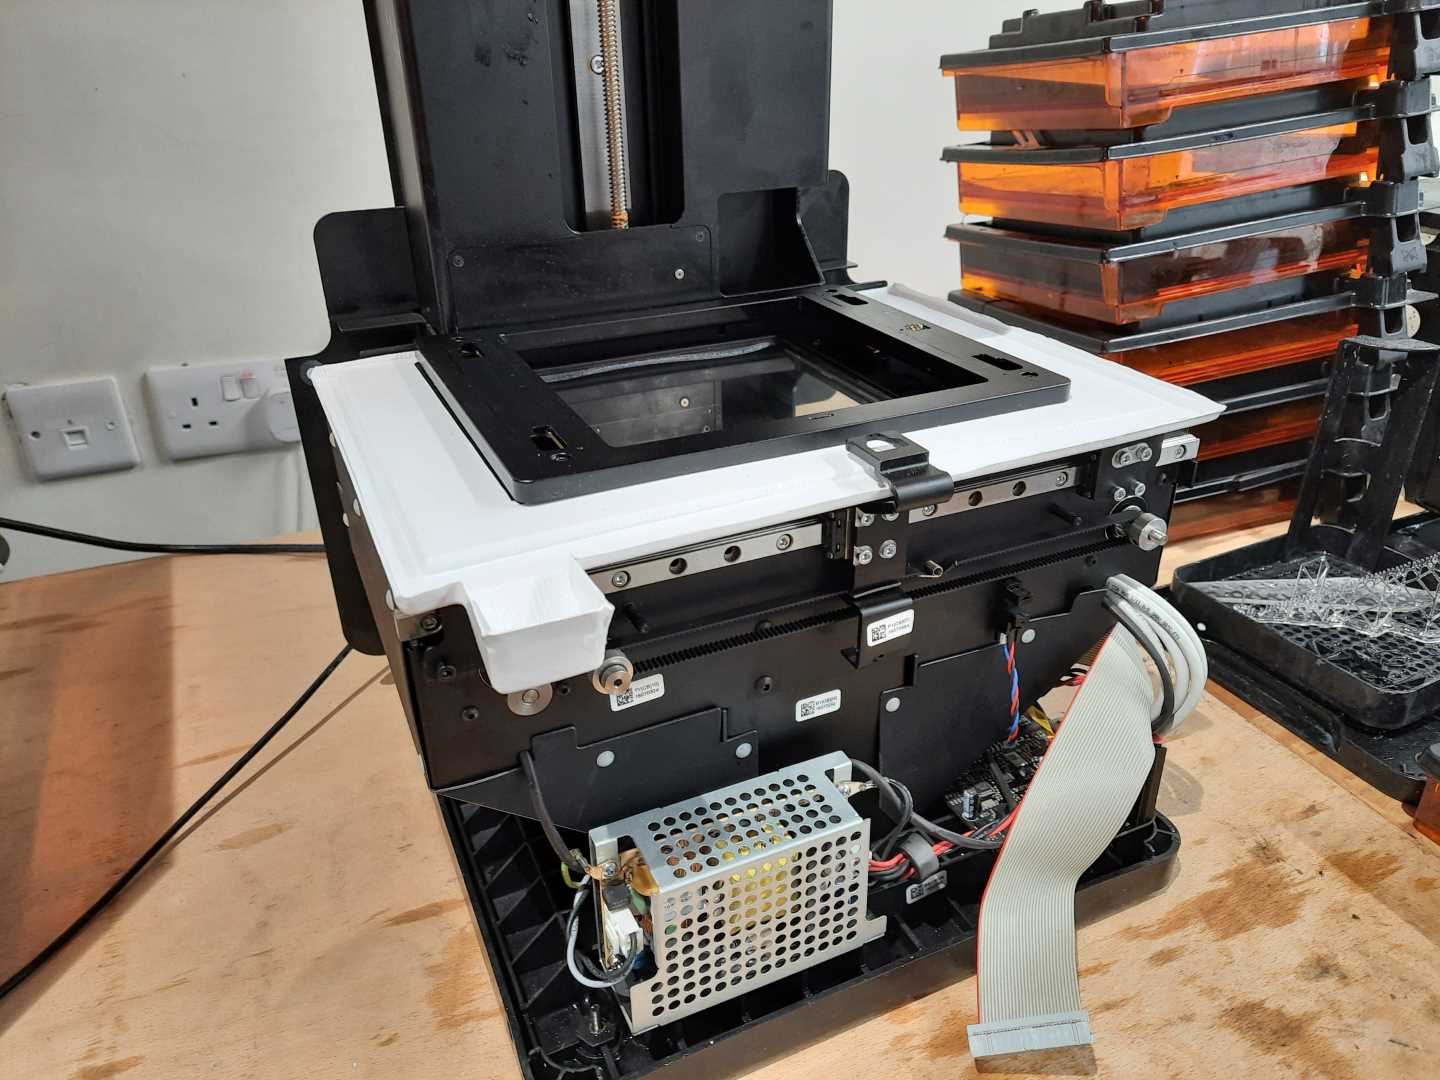
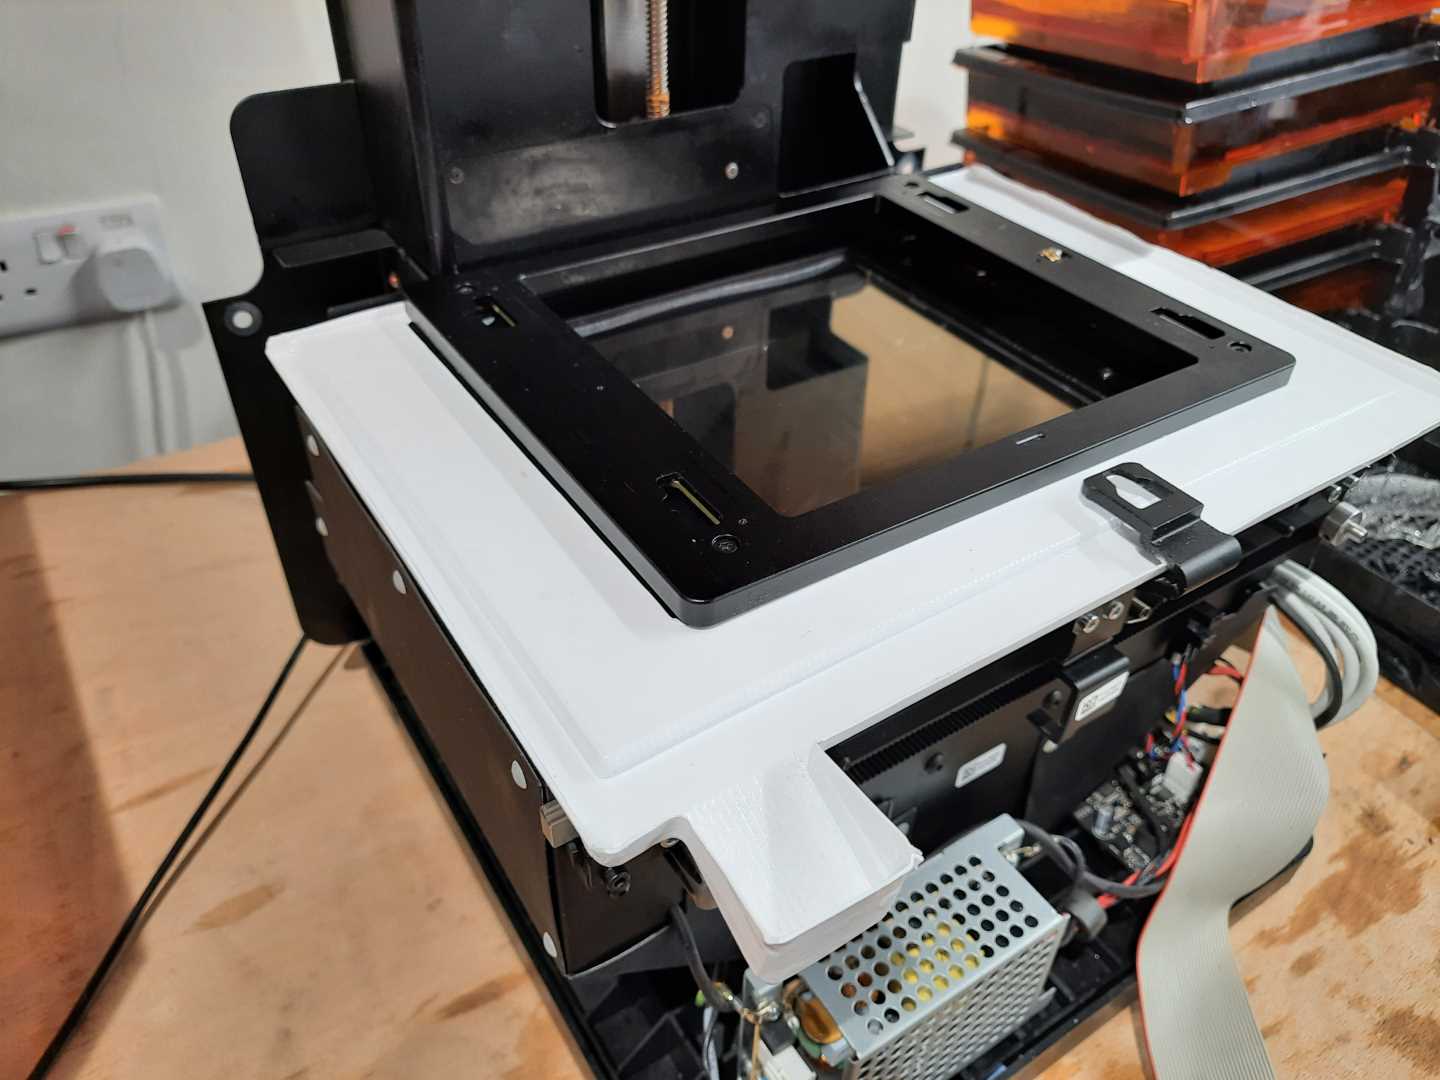
the forming process depends on the machine in hand, here I will be explaining the use of the formech 508DT.
formech components
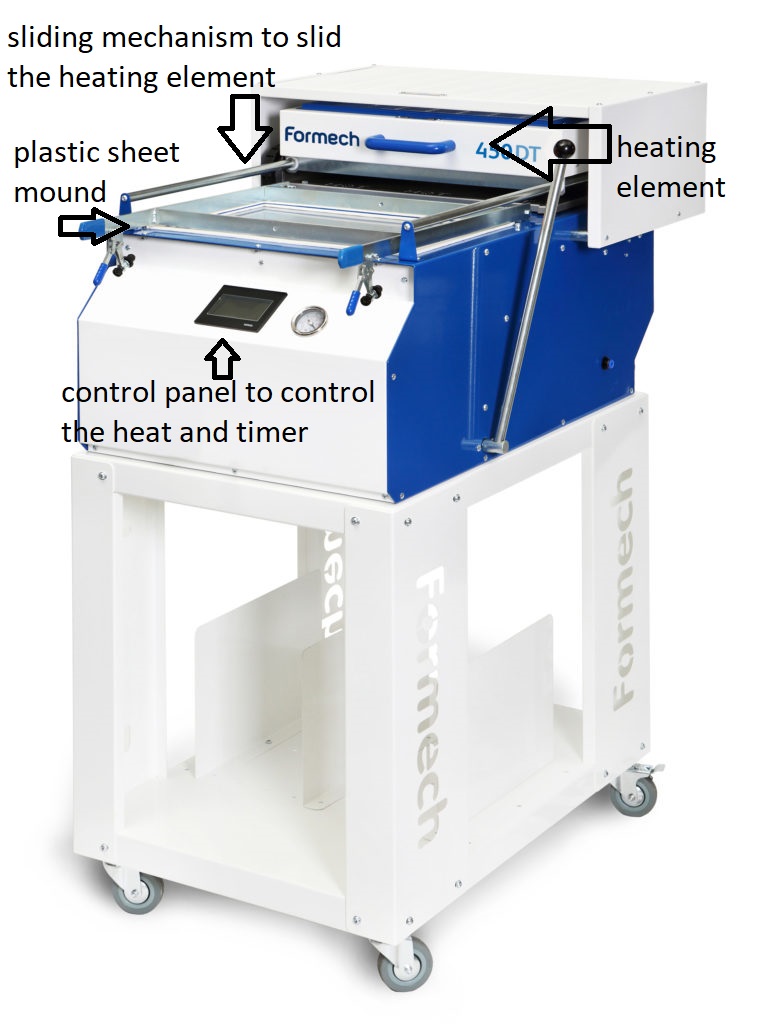
Control panel
the first screen has the option to turn off the heater, it is recommended to turn on the heaters for 15min before using the machine.
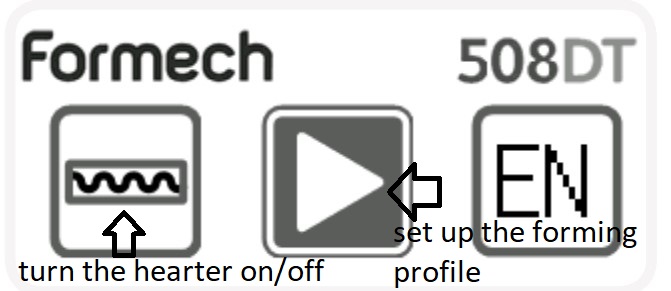
from the main screen, go to the middle screen to set up the vacuum profile, go to manual mode to set it up, and there is to save and access them later.

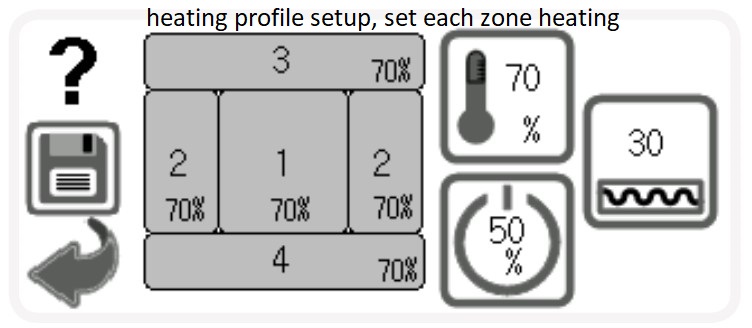
in the setup screen, set up the heating profile, and the timer. these settings are experimental, it is recommended to have 20 seconds for each 0.5mm of material.
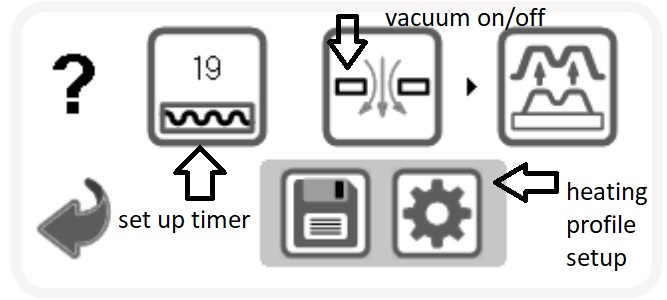
the software allows to set up the heating for multiple zones to have more control on the thickness of the vacuum part after forming.
How to use
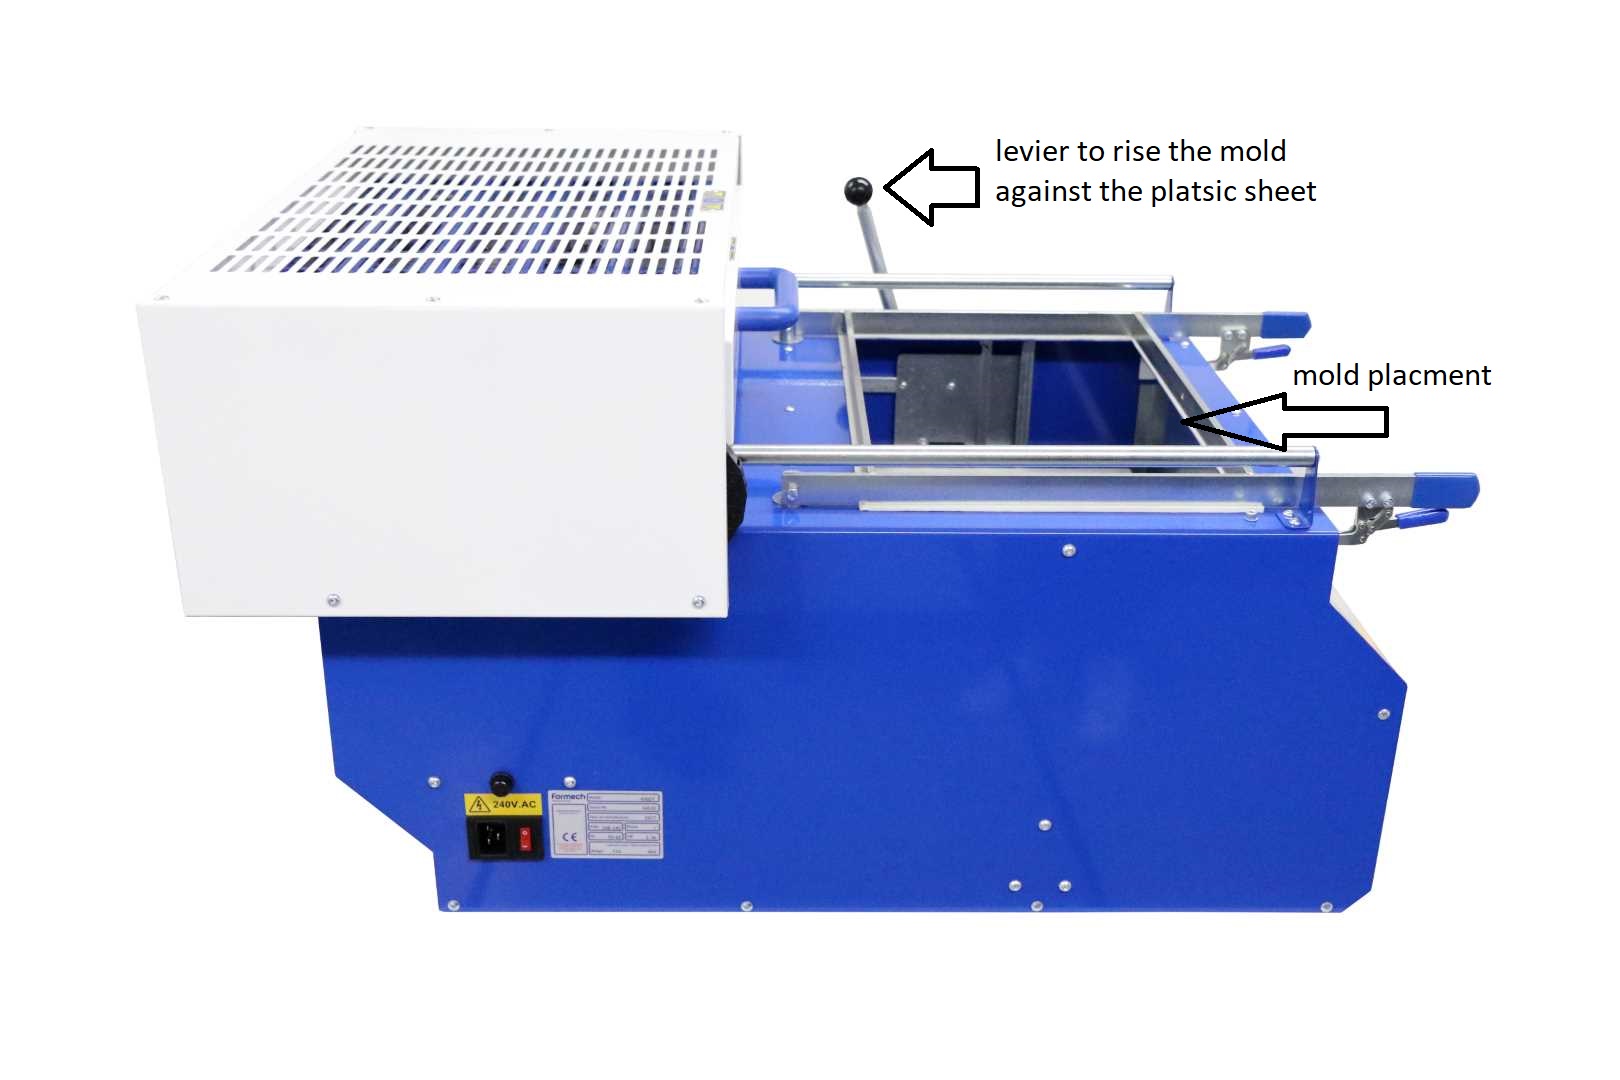
to use the formech 508DT vacuum forming first place the mold in its place making sure that the mold has holes to allow air to pass through. Then, place the desired plastic sheet in its place. After that, choose the desired heat profile that should suit the material installed.
once the plastic material is heated and elastic enough, slide the heating element away. then pull on the levier to raise the mold against the plastic sheet and press, and turn on the vacuum.
Design and manufacturing
Design the cover
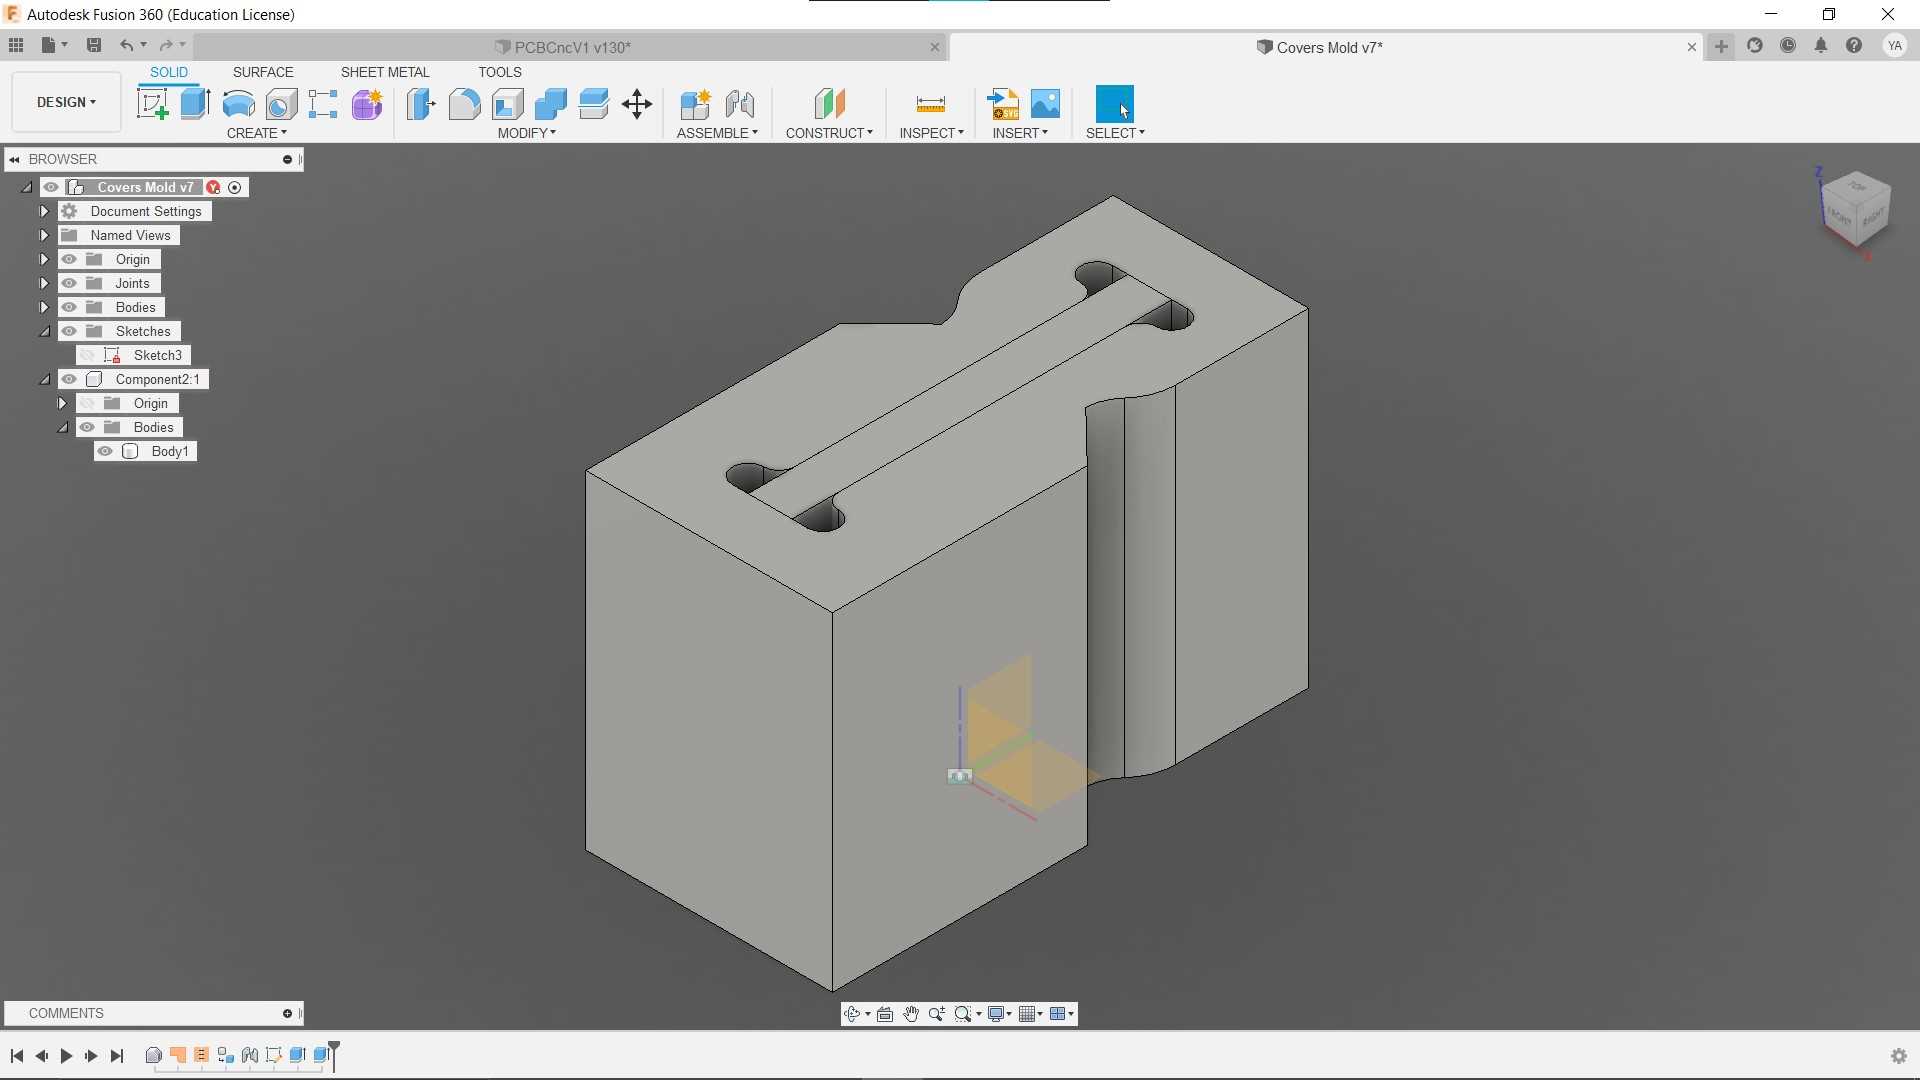
I started with designing a simple case for the spindle, it’s a simple thin wall that would cover the z-axis.
Design a 3d printed male mold
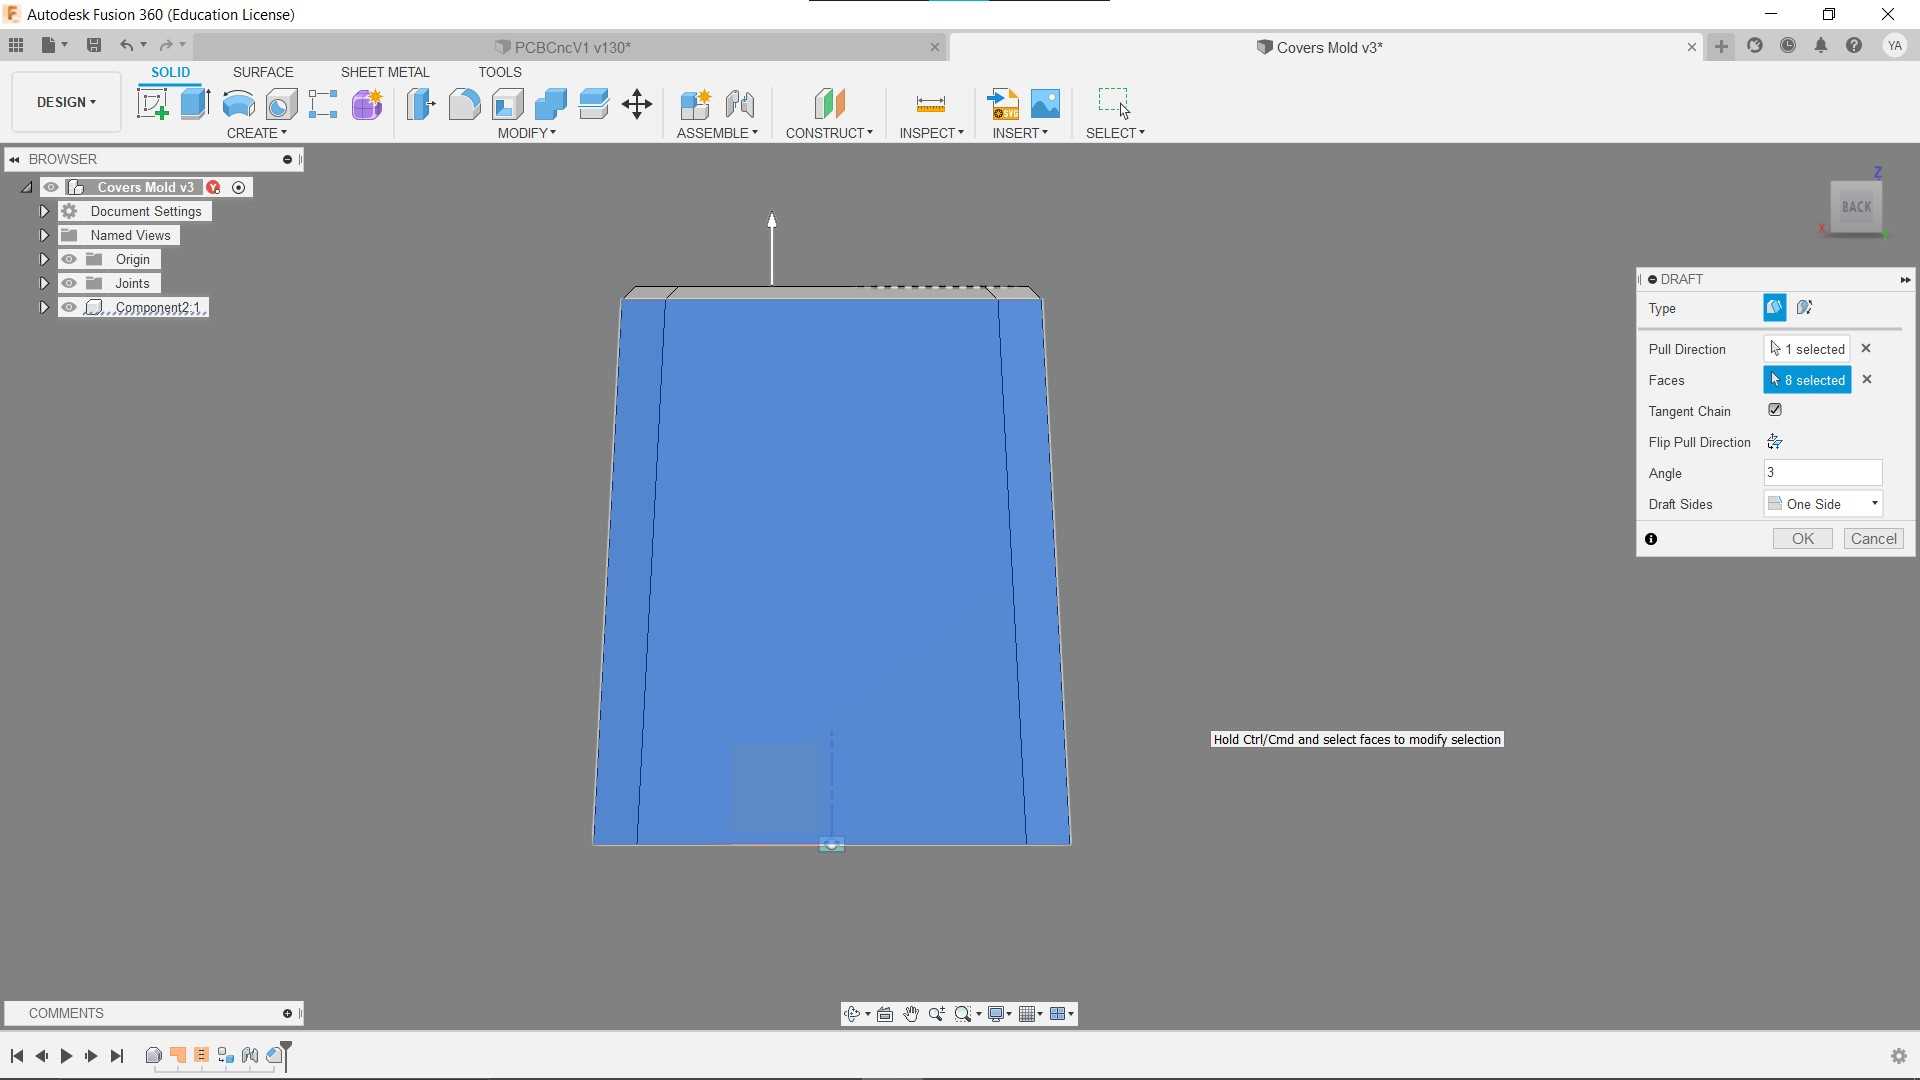
From the case design I design the mold, the target was to 3d print it to test the strength of 3d printed vacuum forming mold, 3d printing will make it easy to add a draft angle to make the mold come off easier.
Once I start with slicing it, it was shown that it would take too much filament to print it, and since I was sure I’m only making one cover I felt it was a waste to 3D printing it and moving to CNC machining.
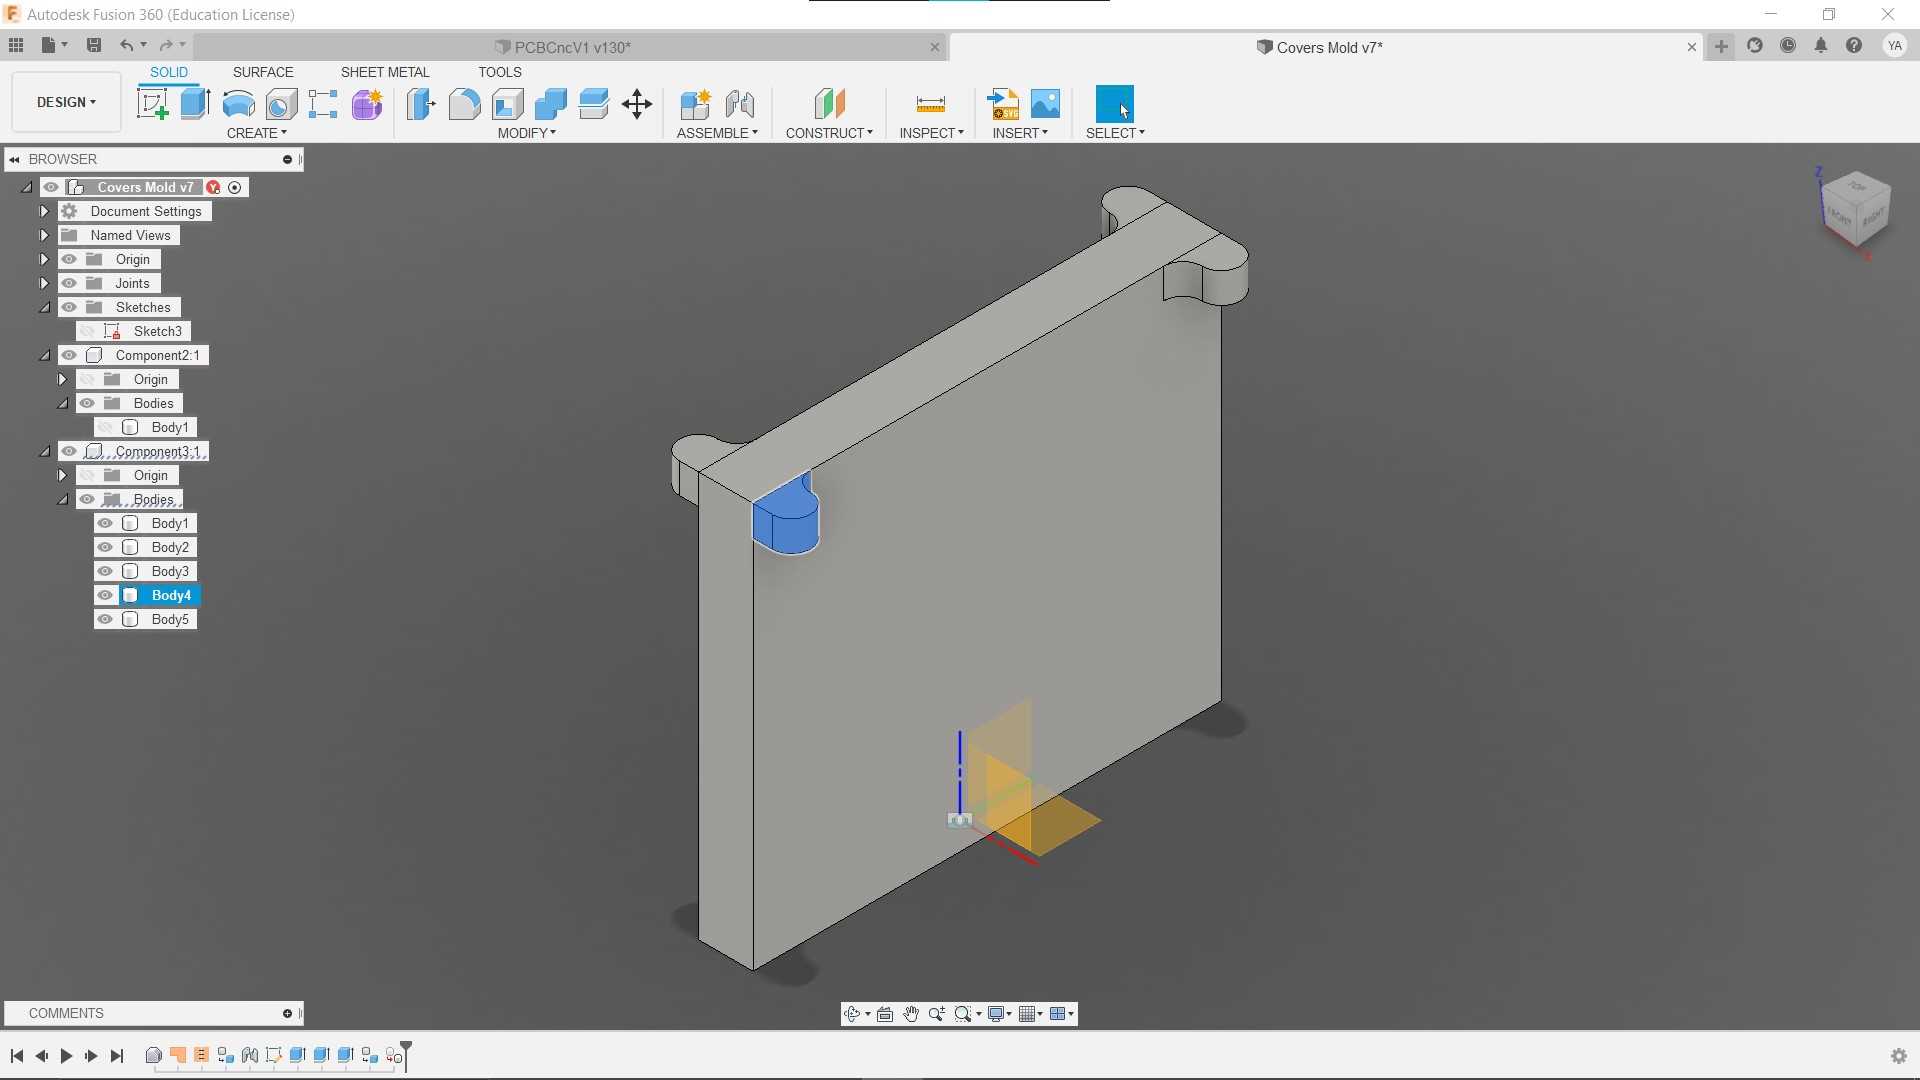
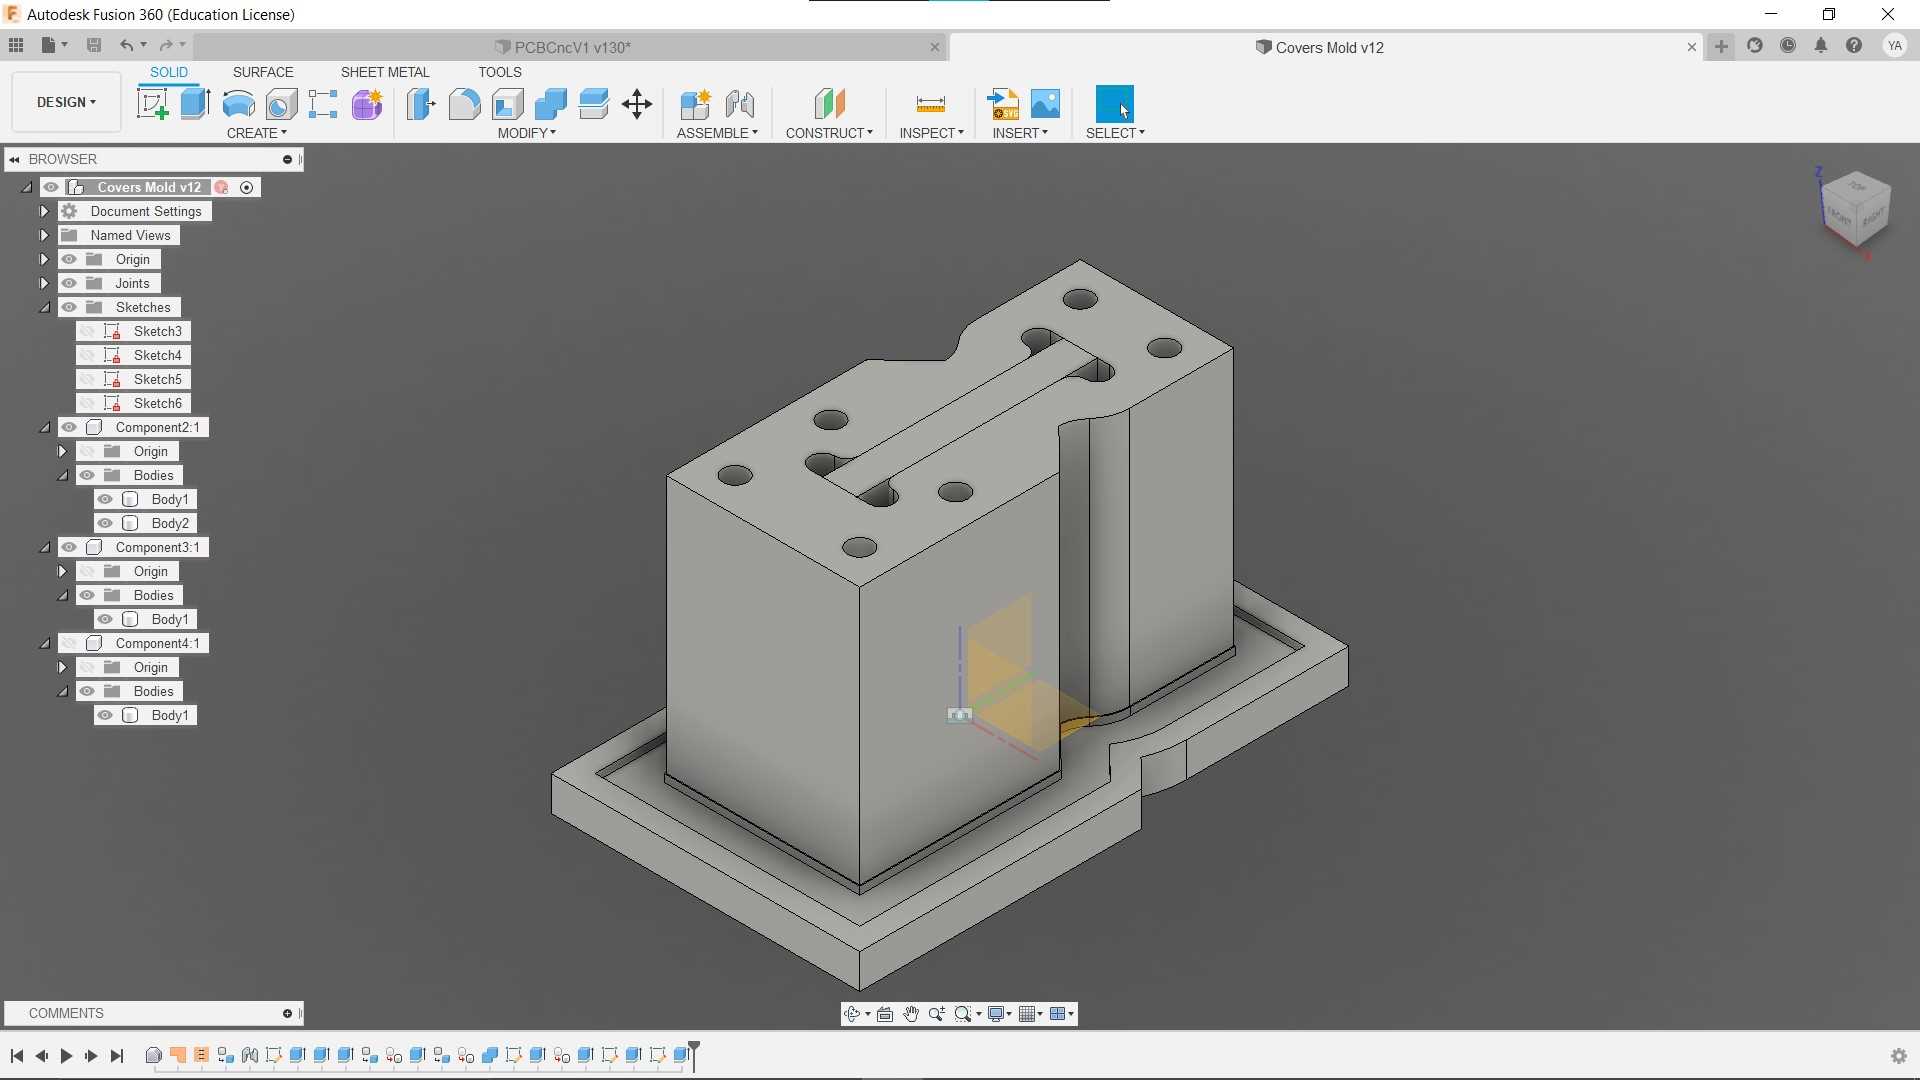
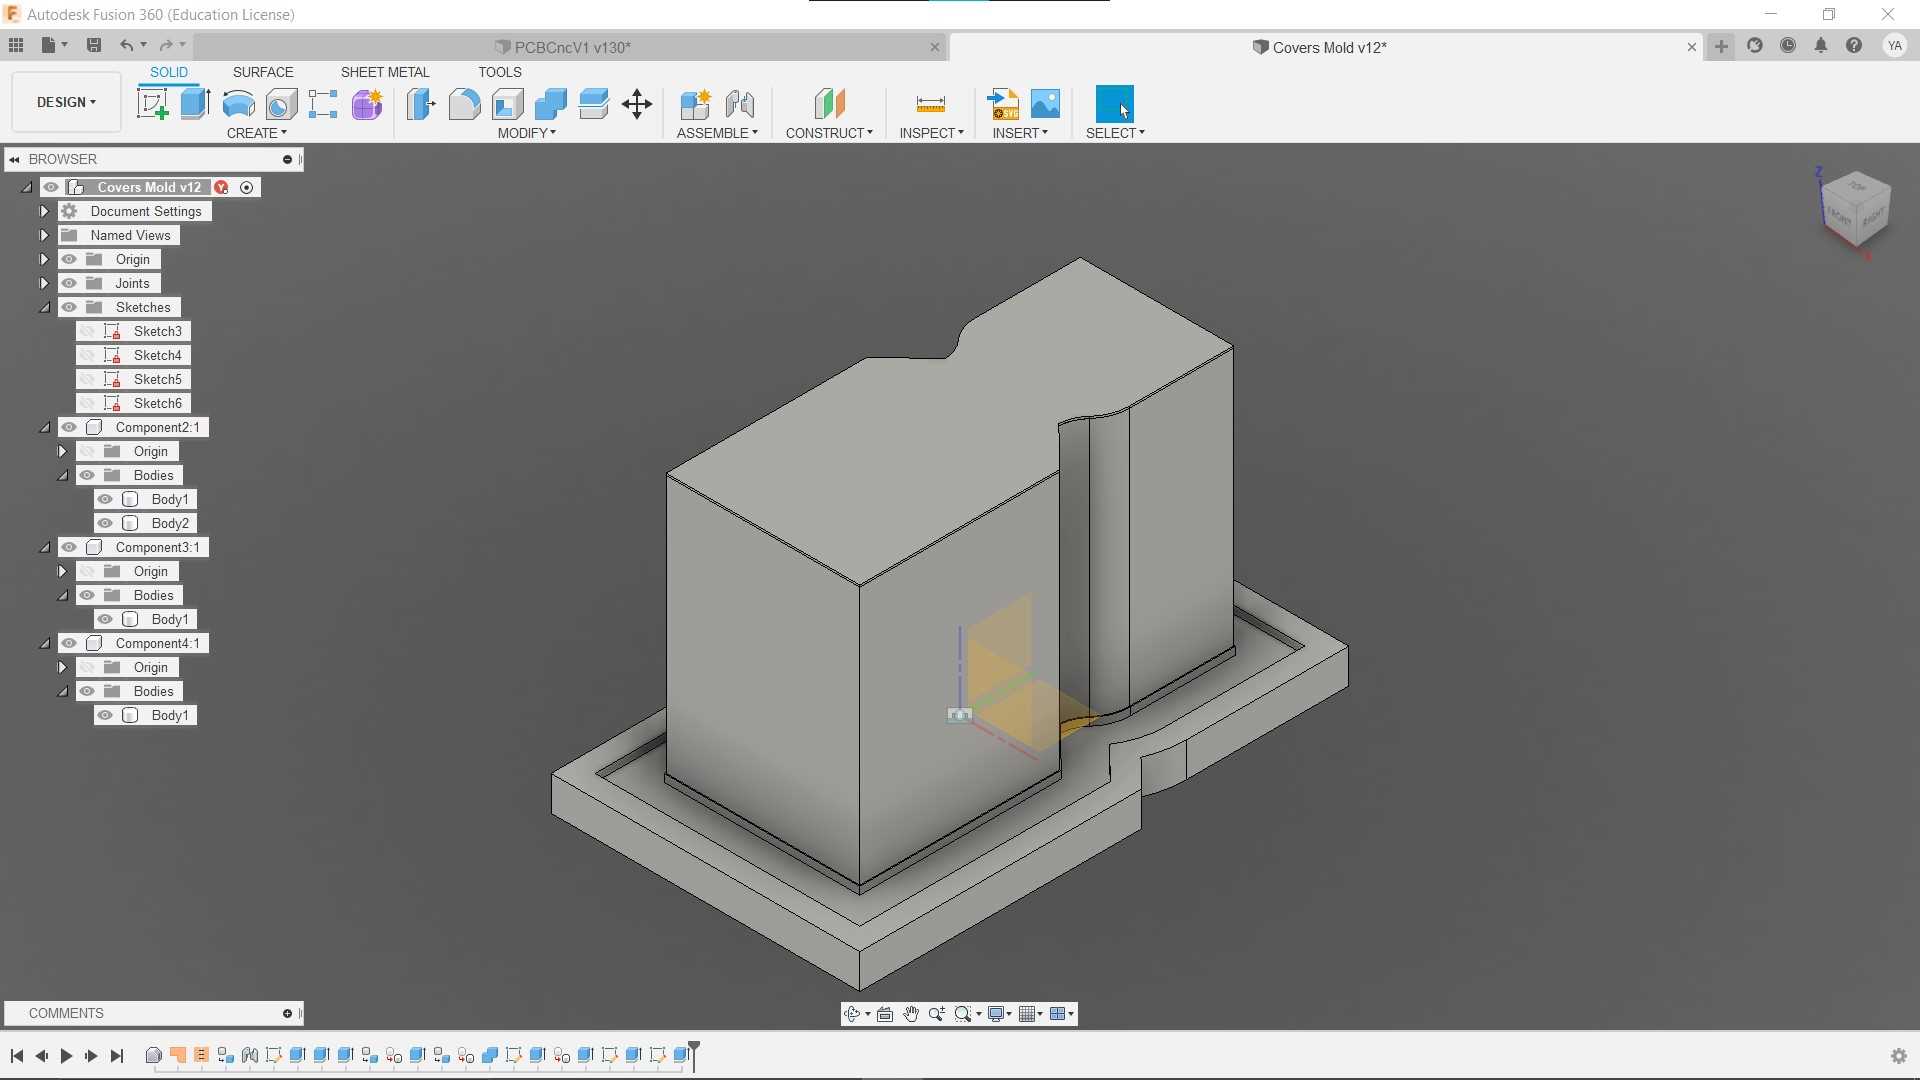
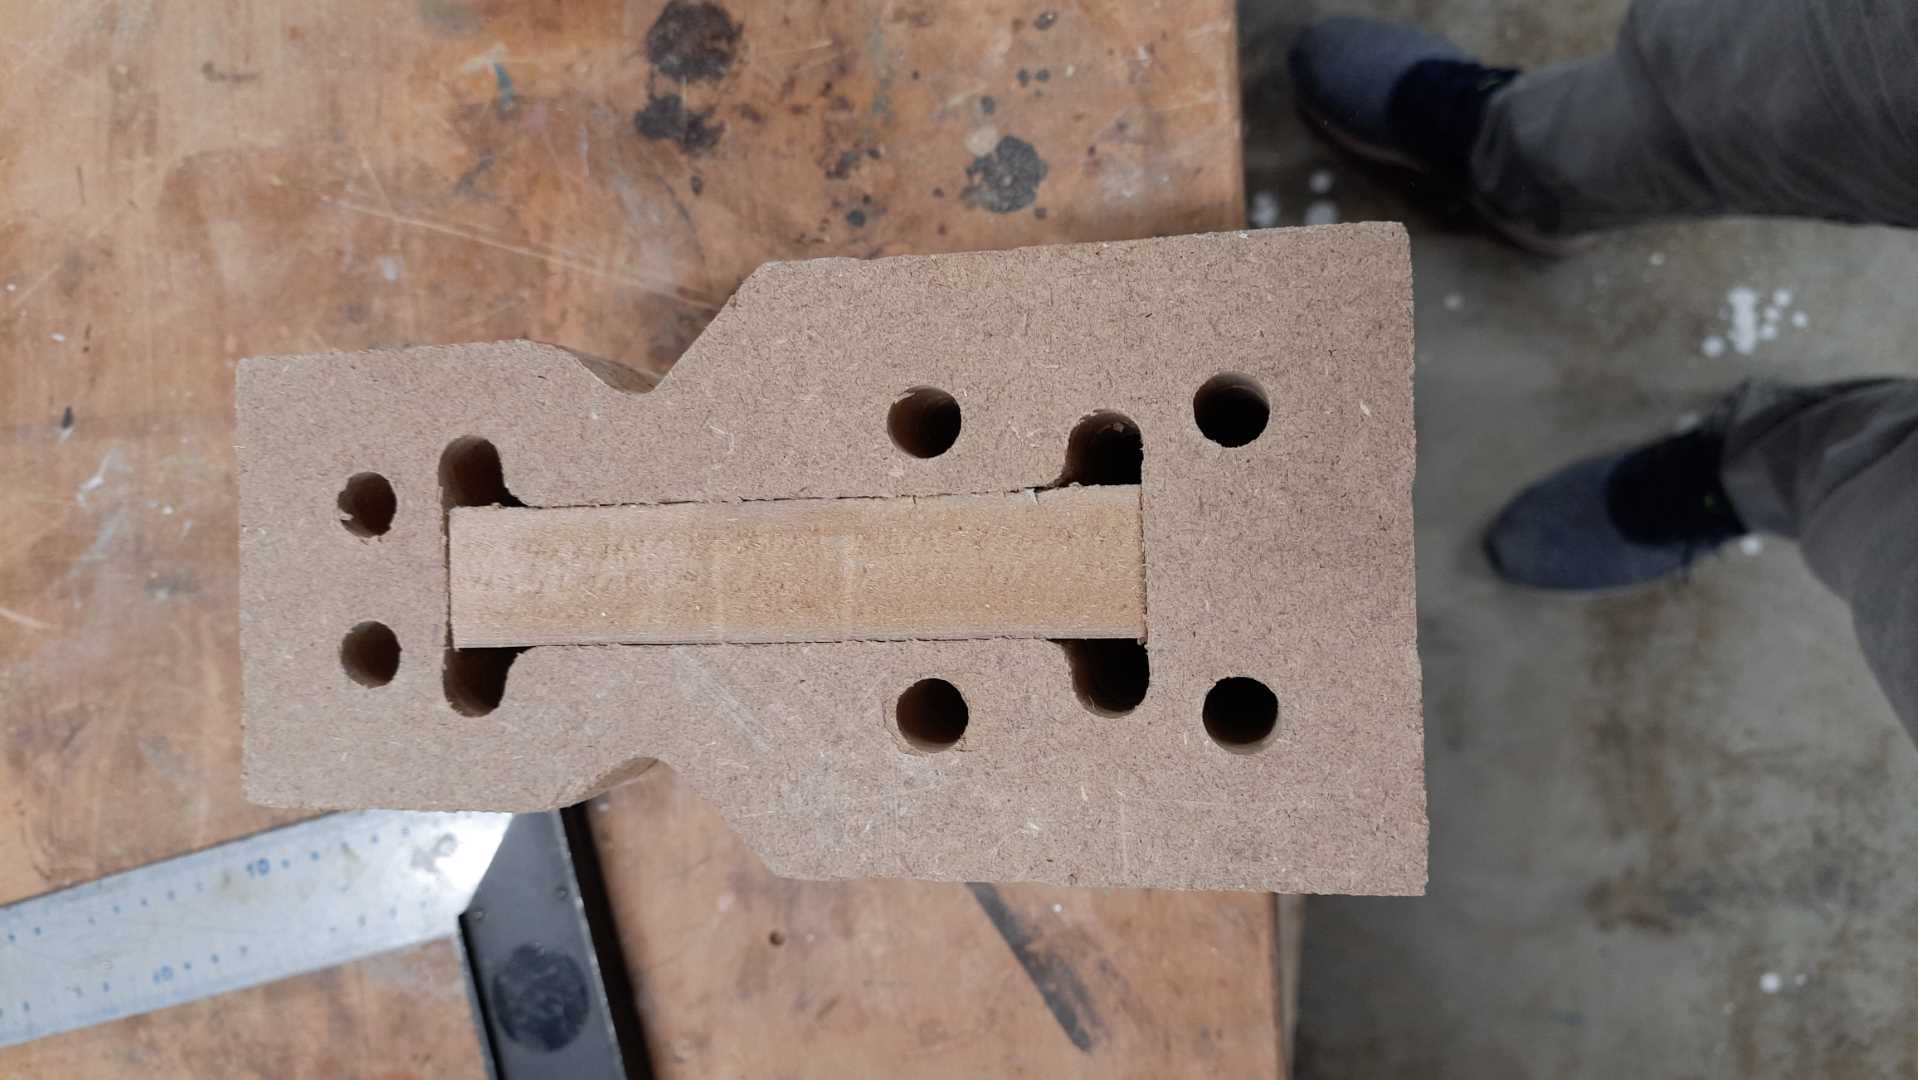
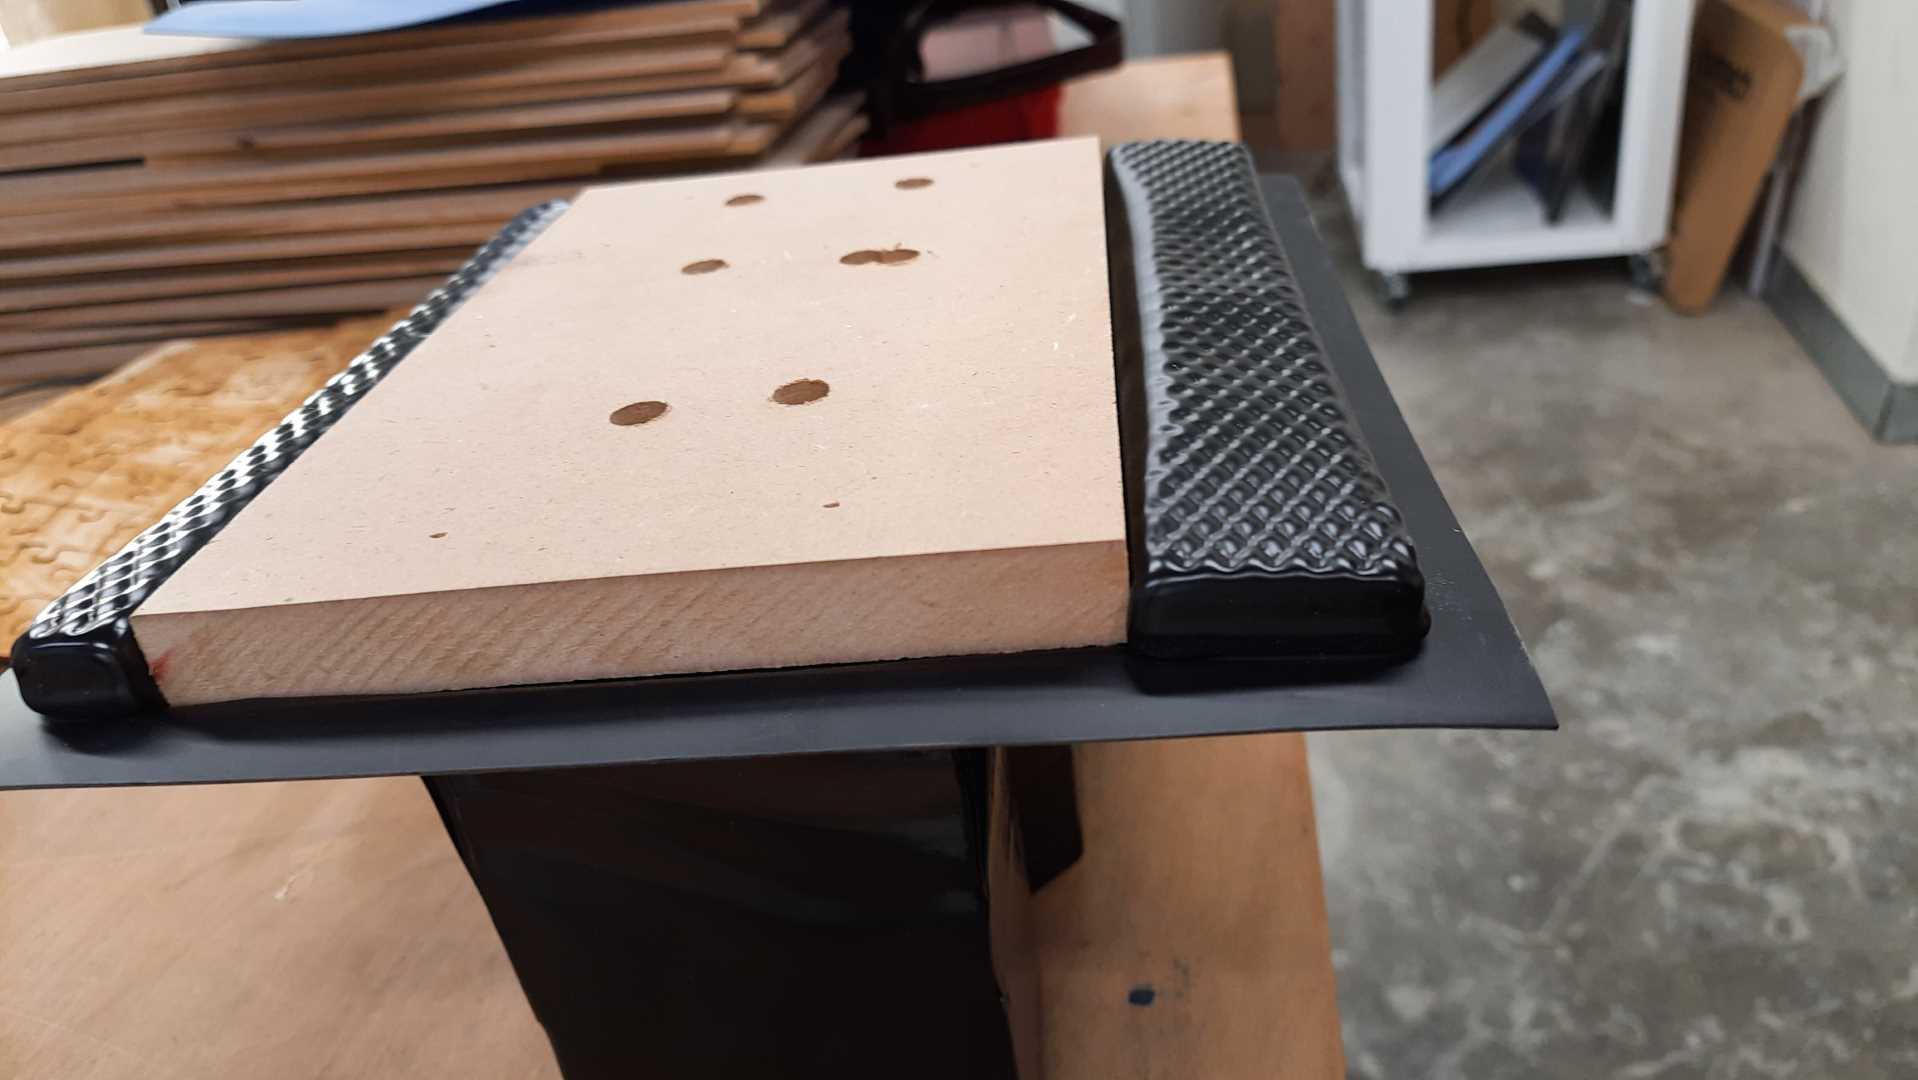
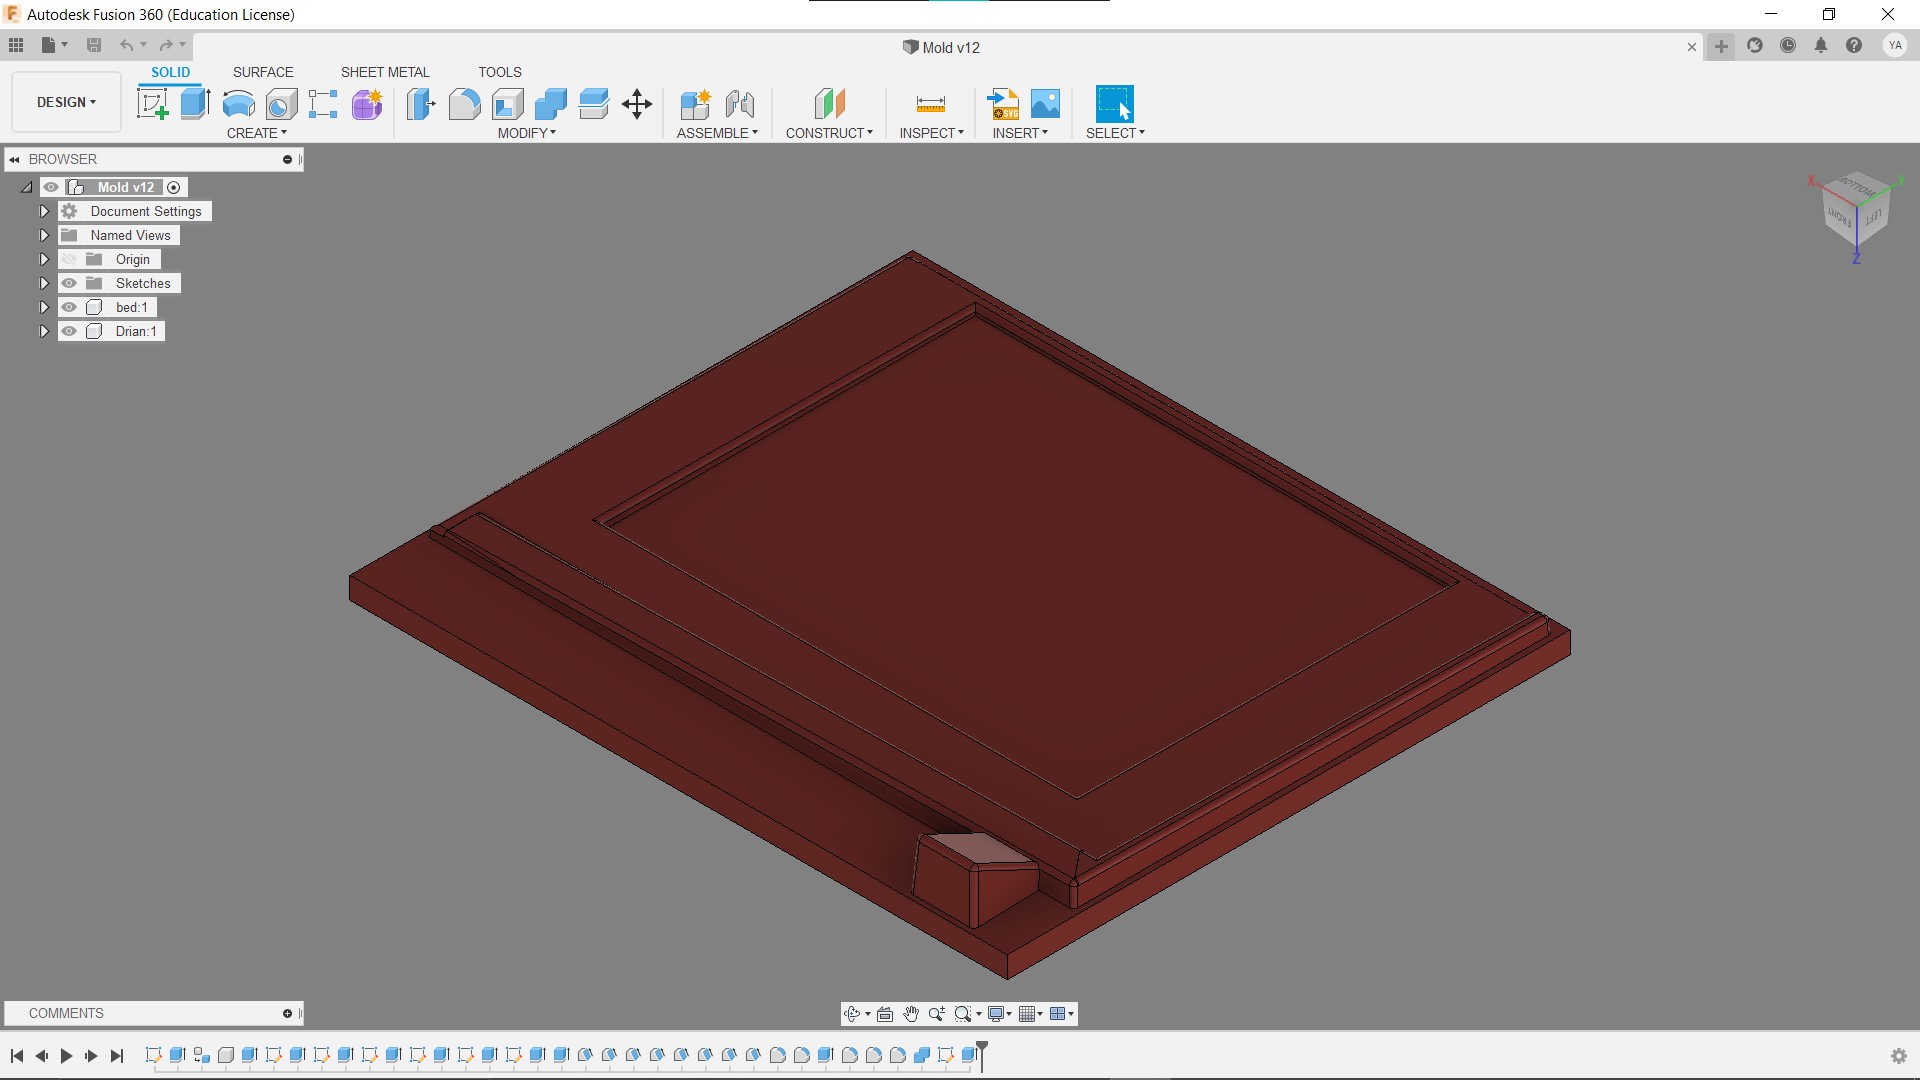
Design an MDF male mold
I started with modifying the design to make it from 20mm thick MDF wood, I removed the draft angle to make manufacturing faster, I added holes to the layers to make it easier to control the airflow once I start forming.
Mold manufacturing
I used Vcarve with a ShopBot CNC machine to manufacture the mold.
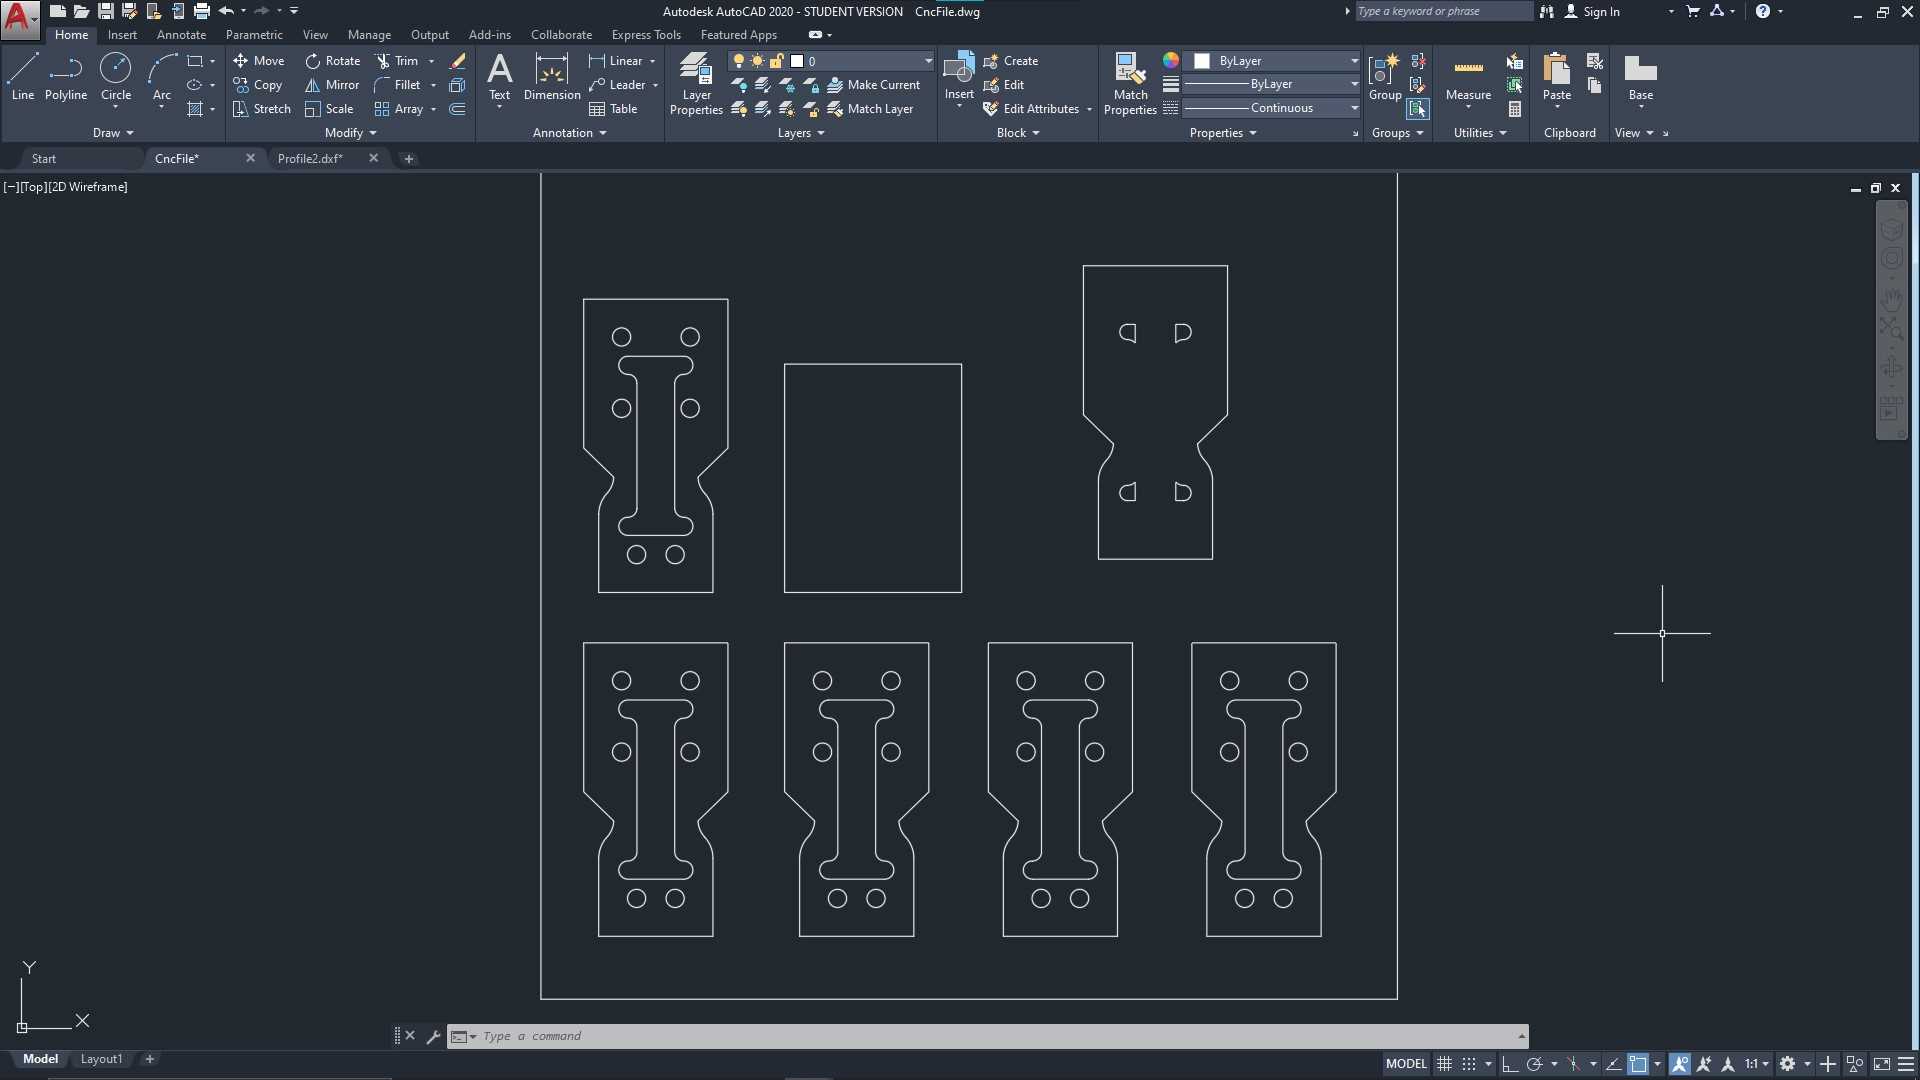
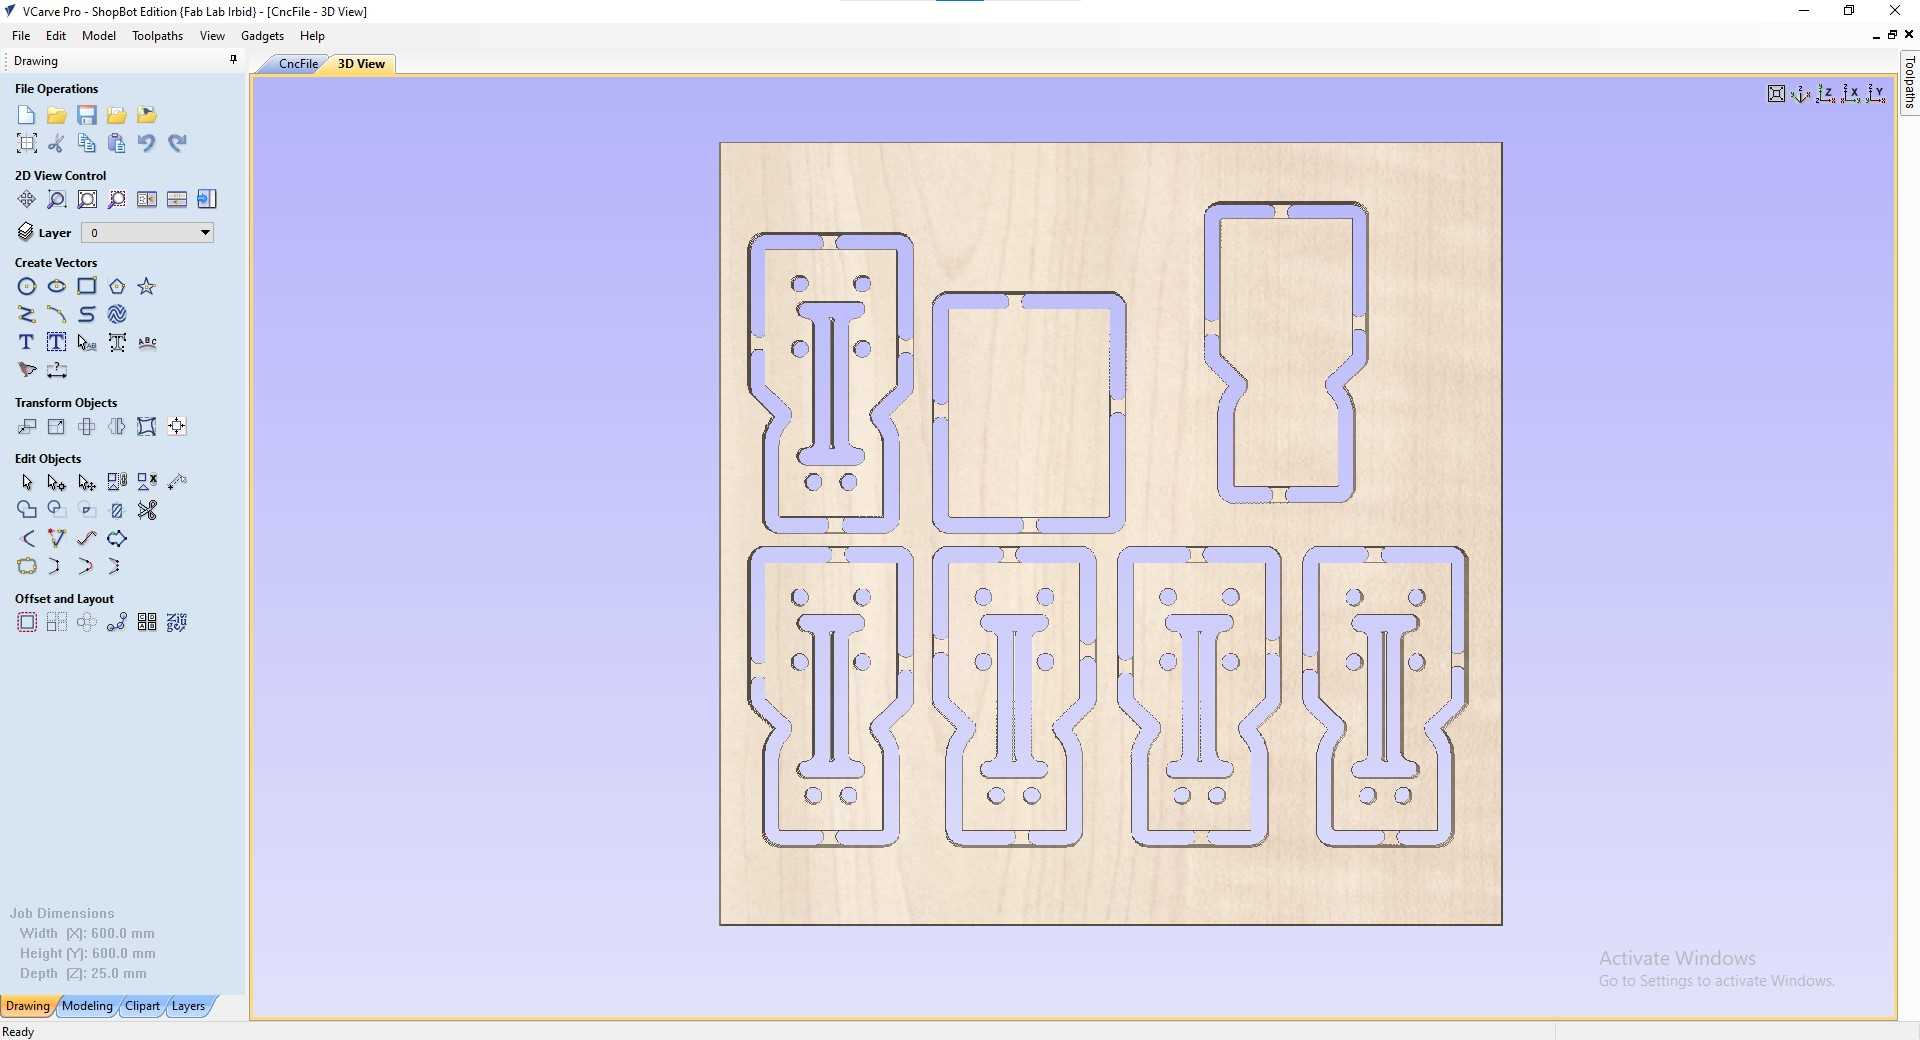
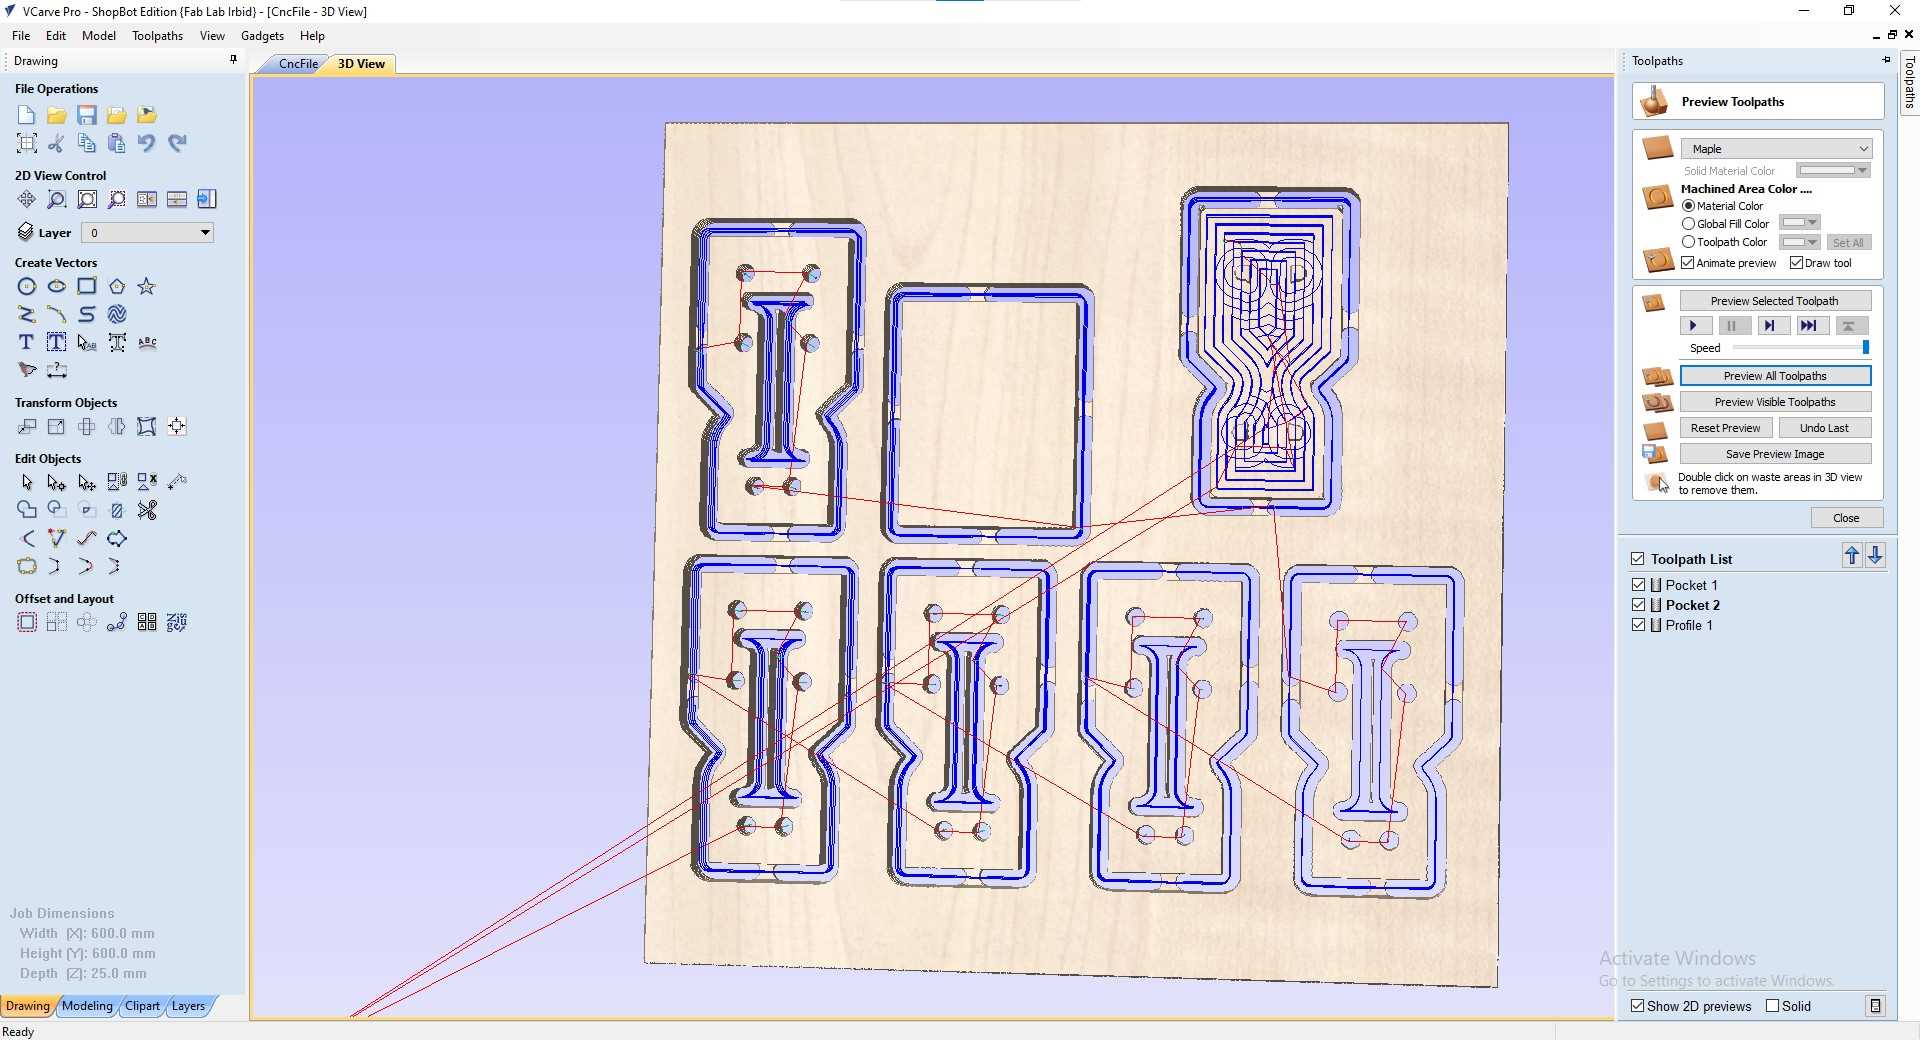
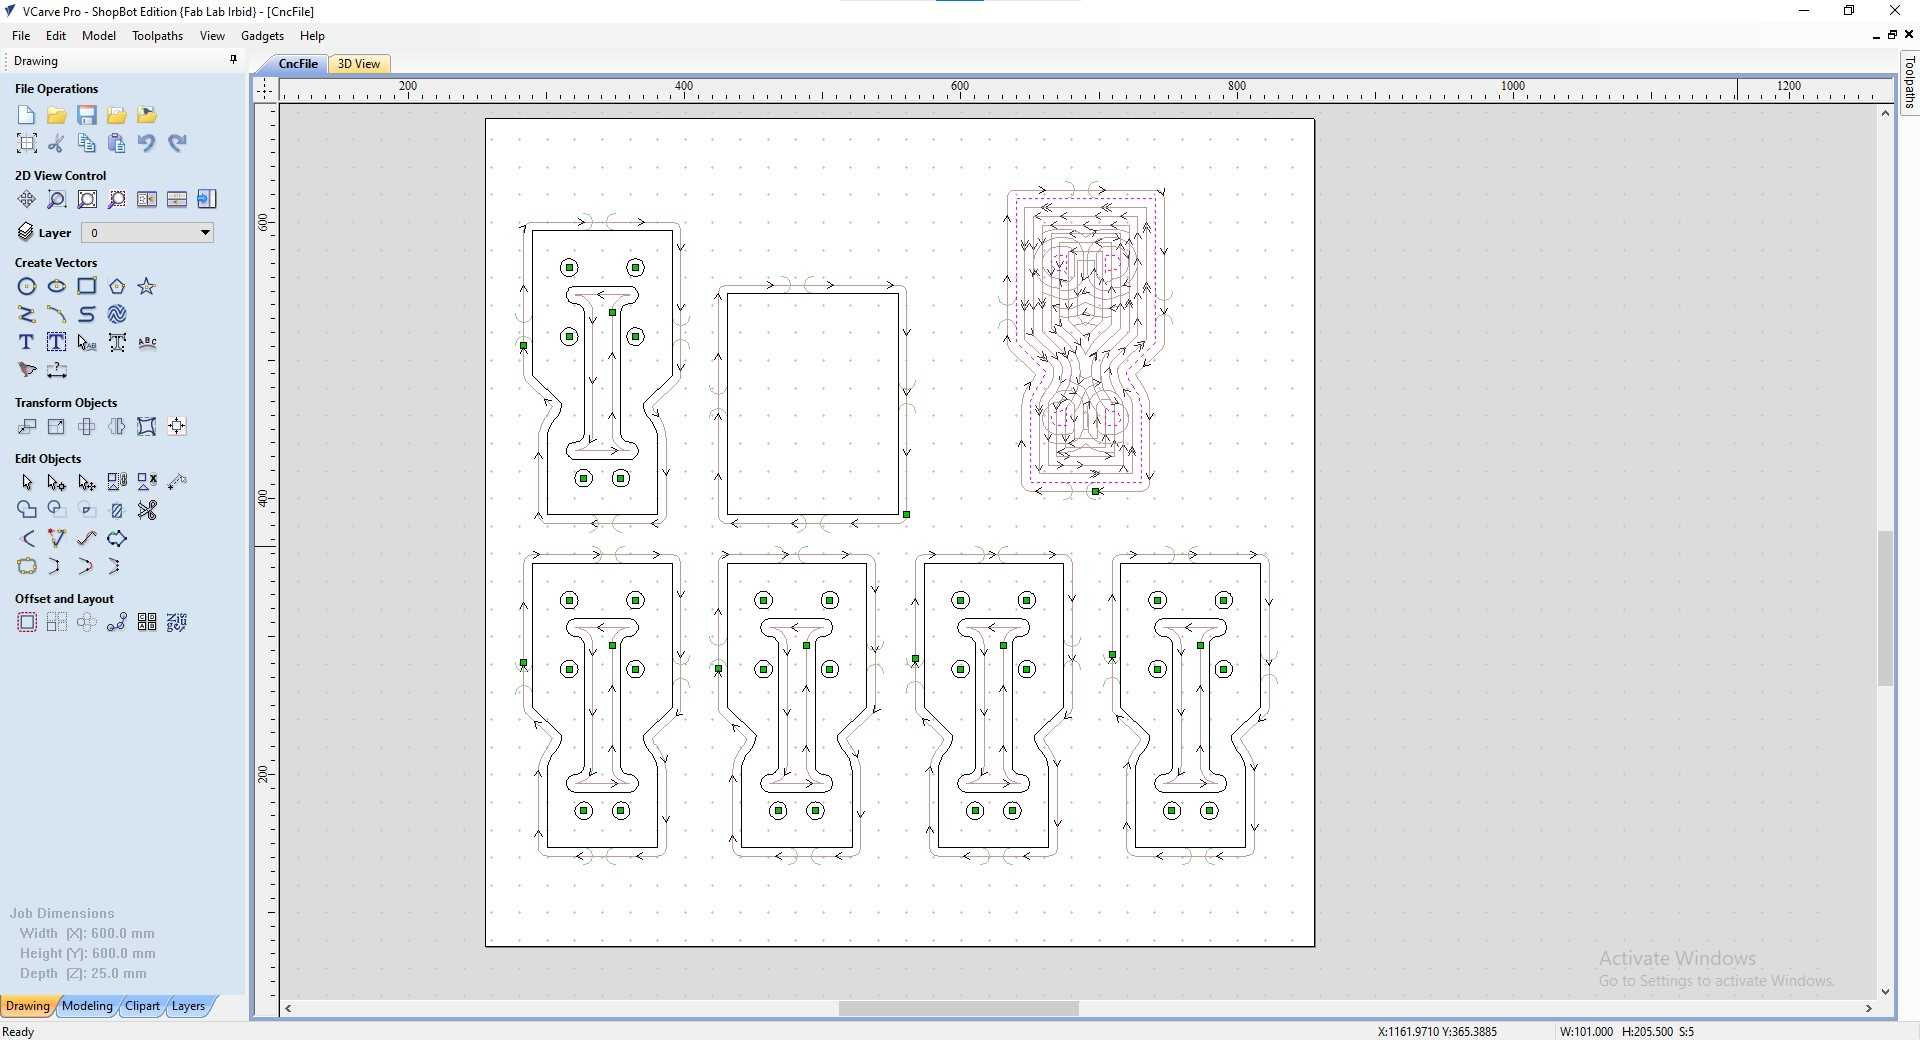
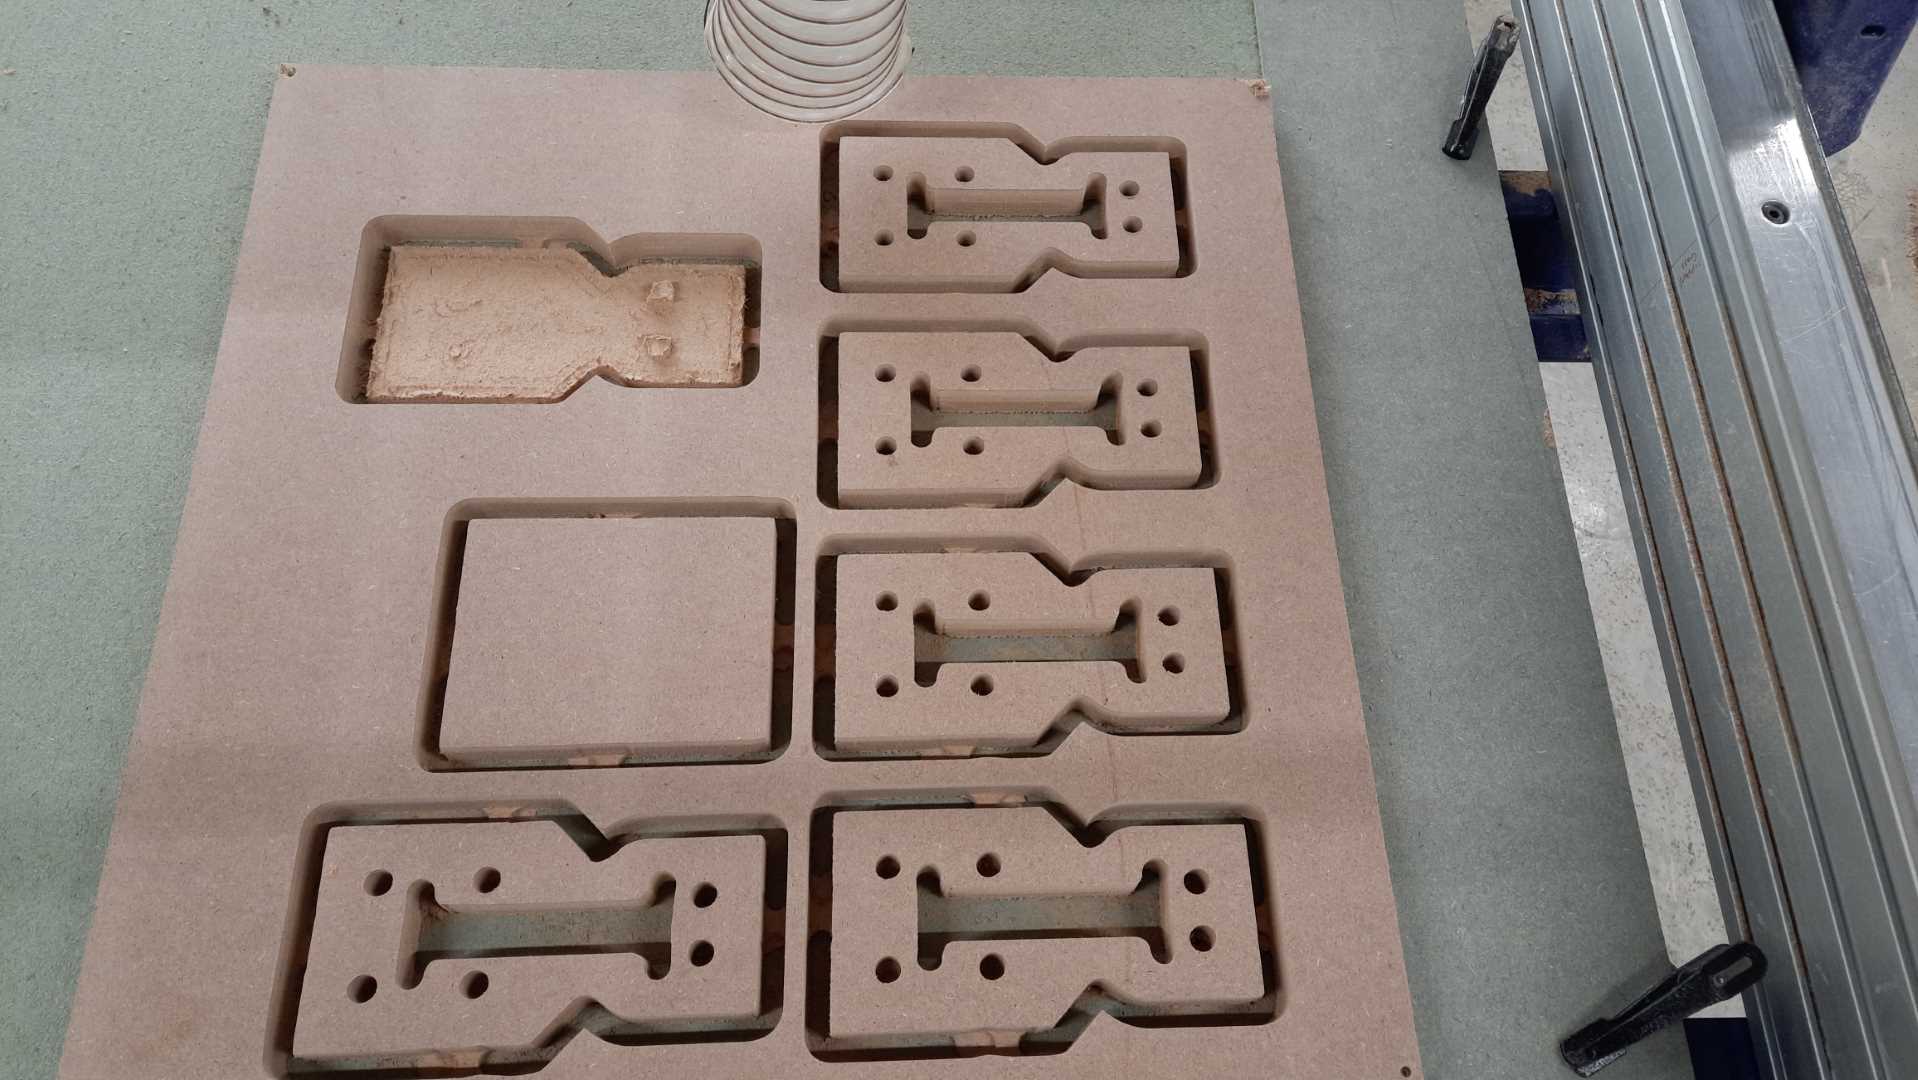
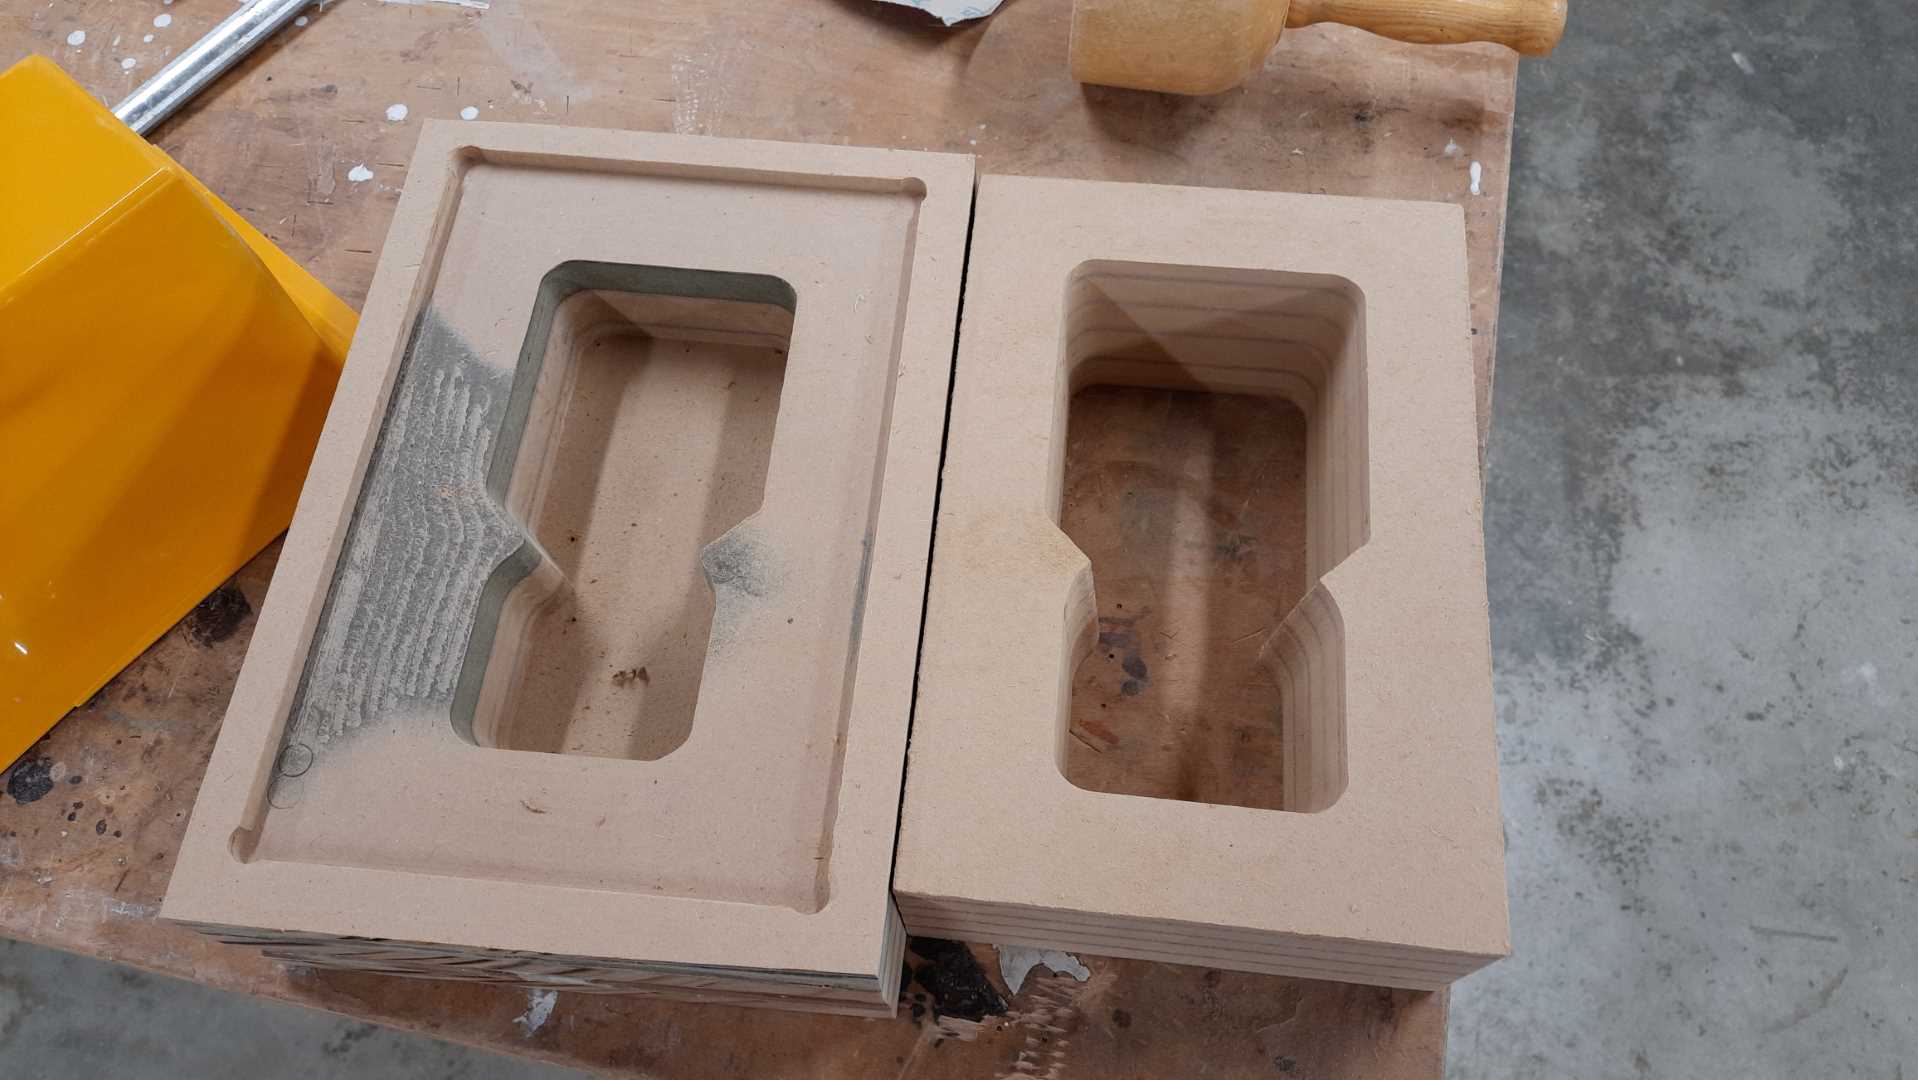
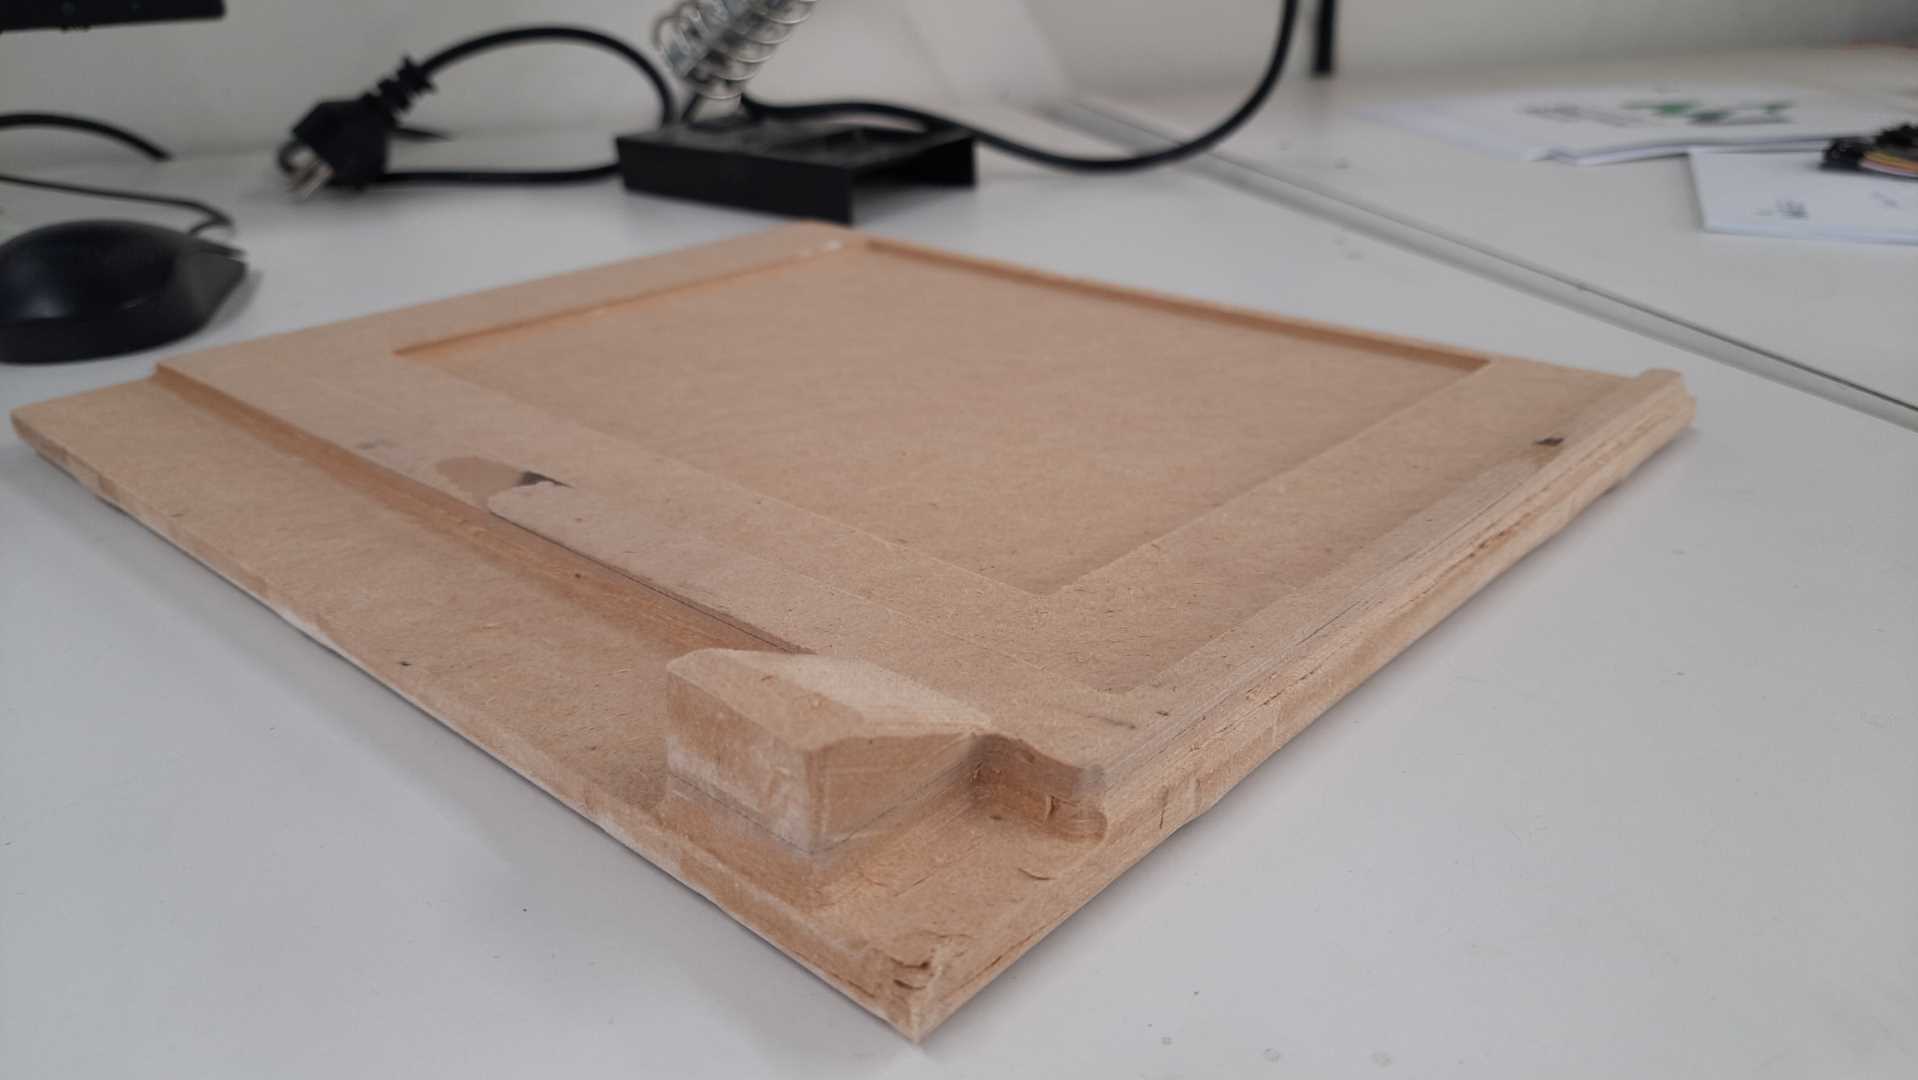
Here are the parts after cutting, milling turned out good, I removed them using a router with a flushing bit, sanded them, and assemble the mold. I only had to glue to the top layer, I think I pushed the CNC feeds too hard and the top layer tapes broke.

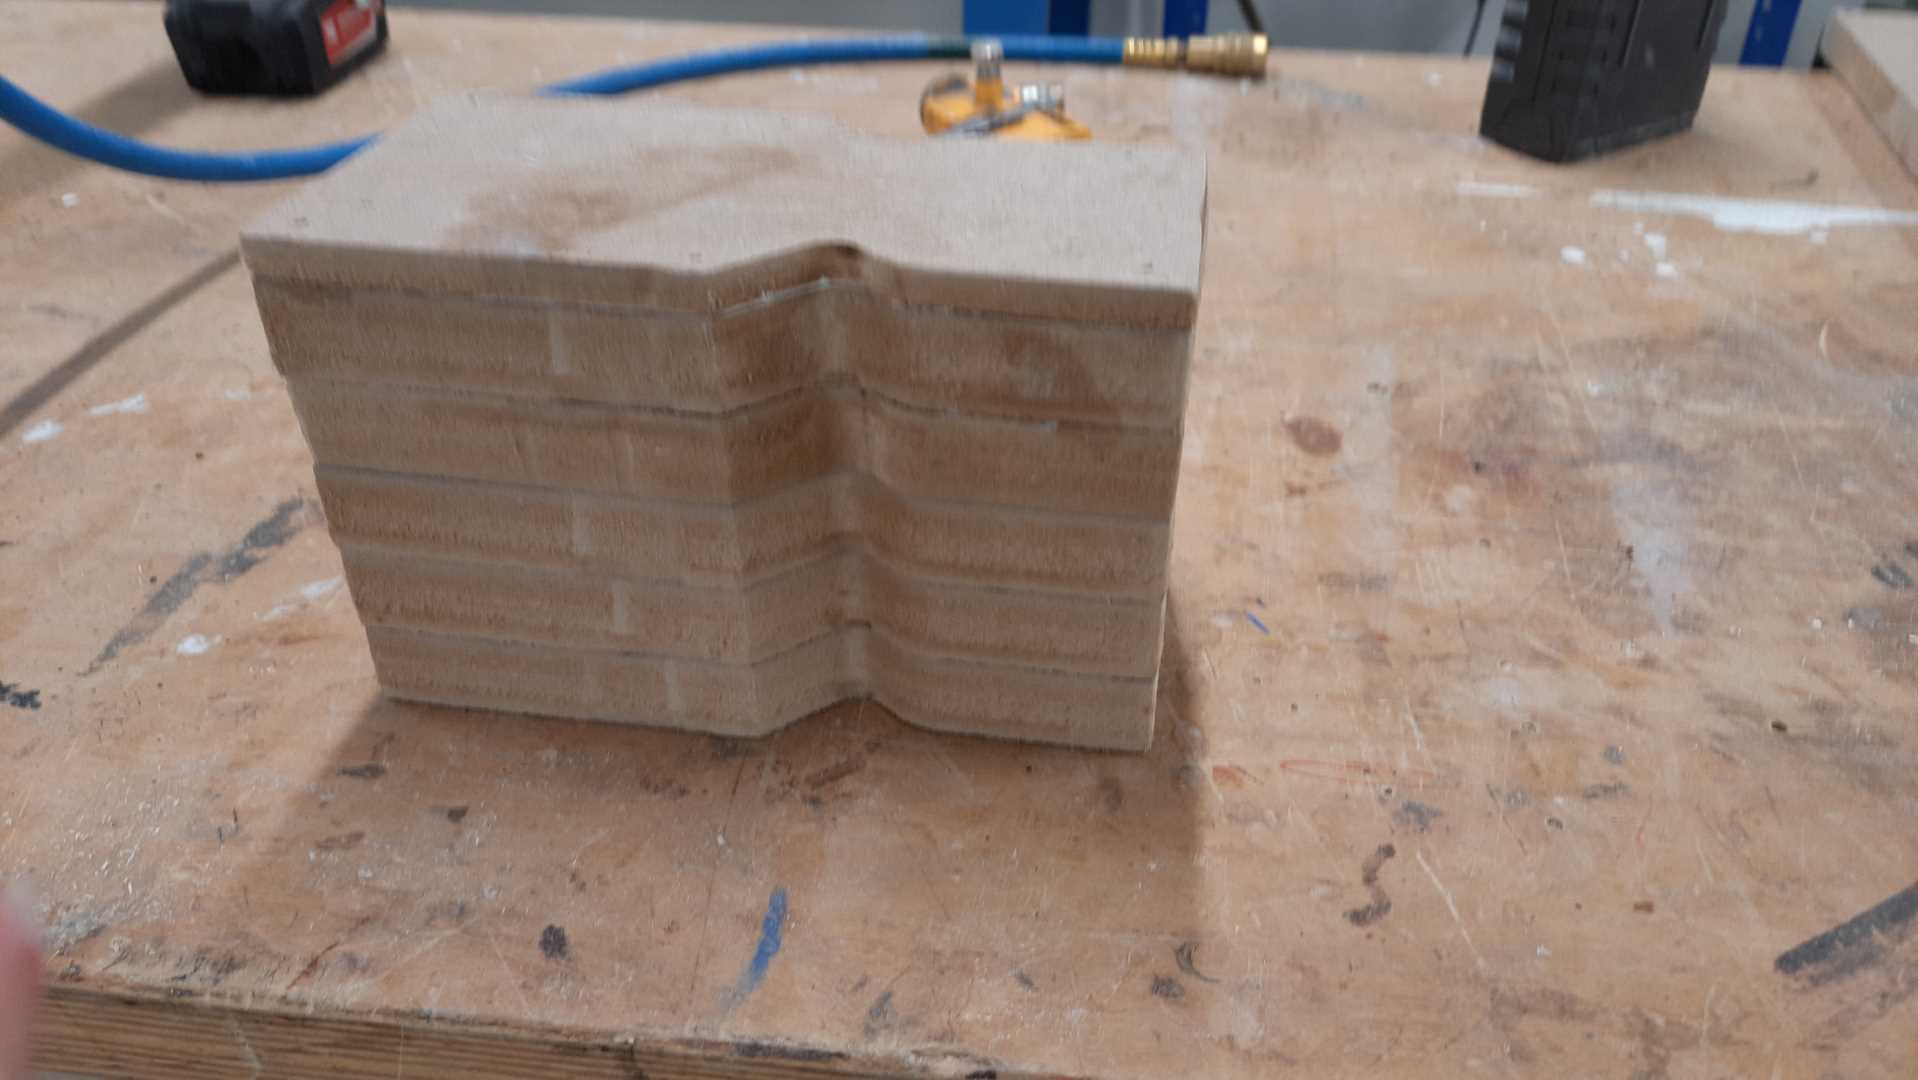

Once the glue had dried out, I drilled small holes passing through the bigger ones in the design to have vacuum get the mold shape well.

Mold testing
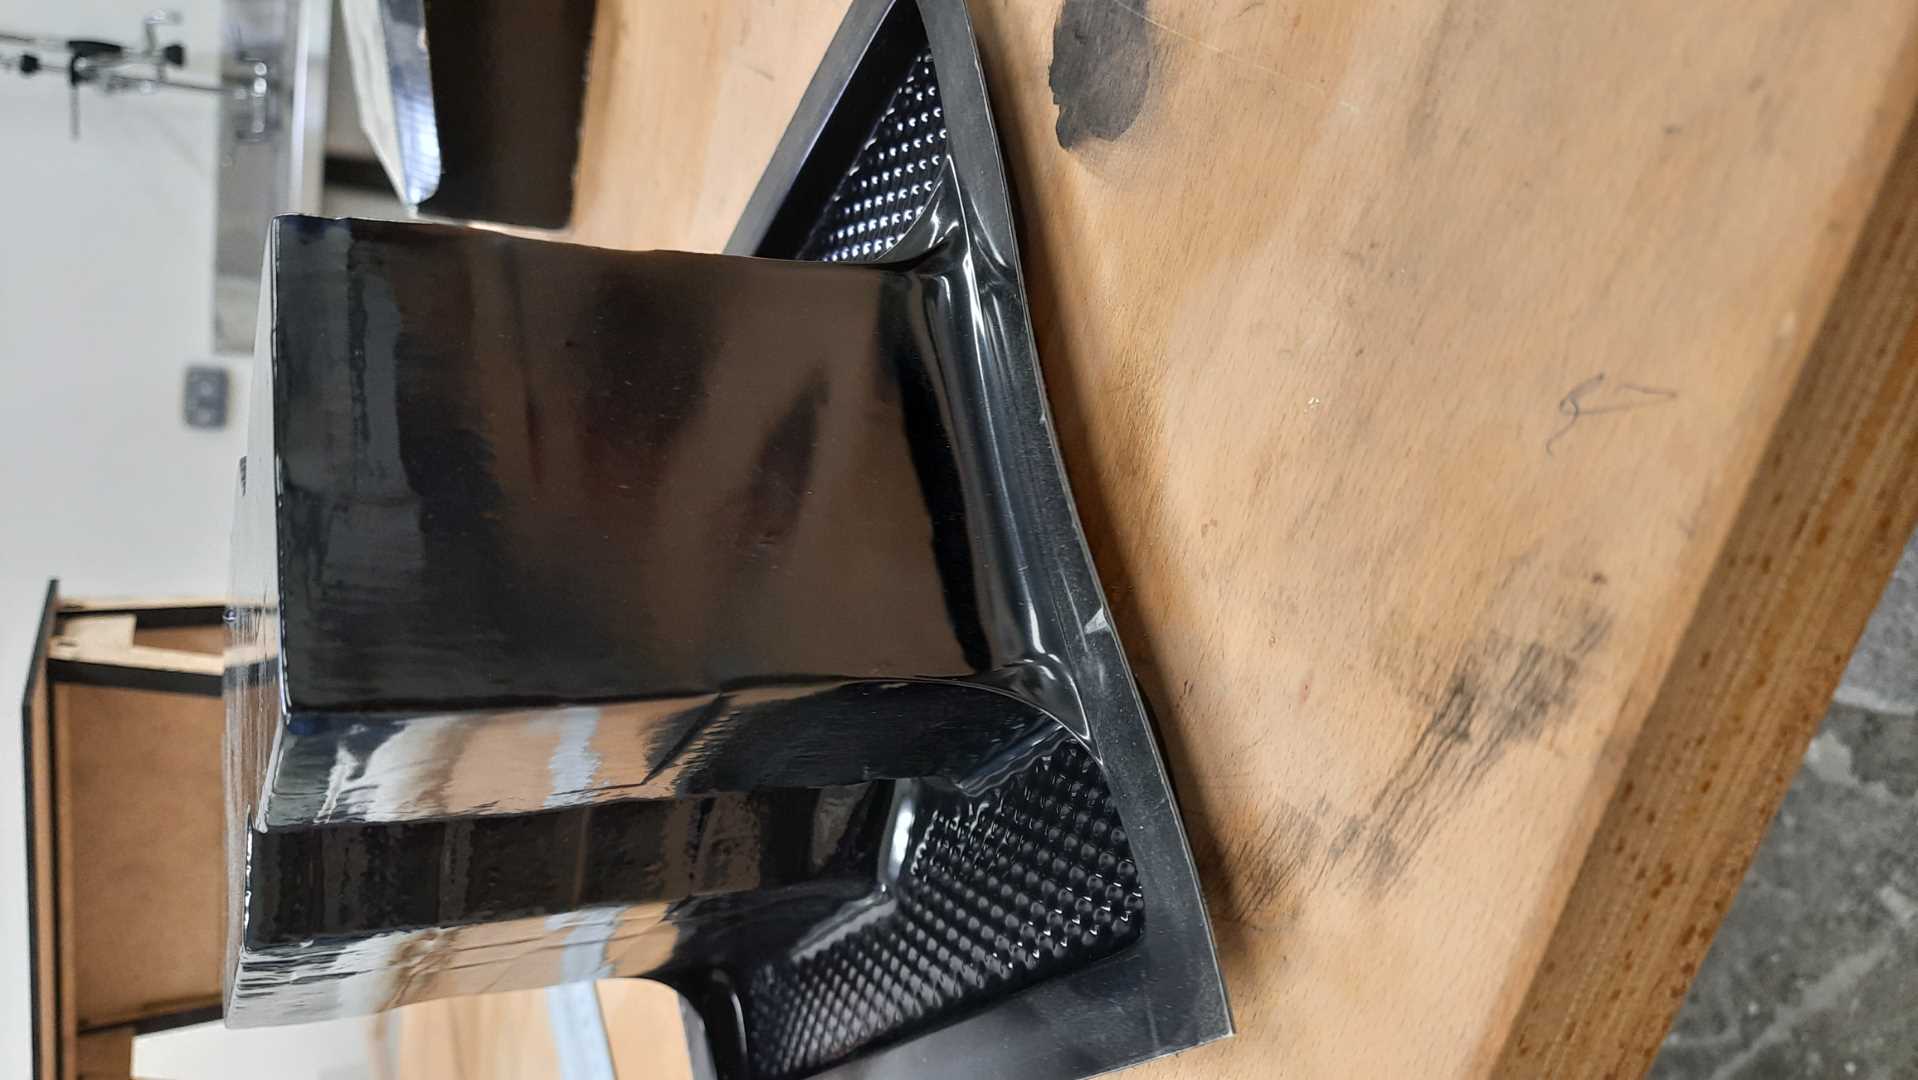
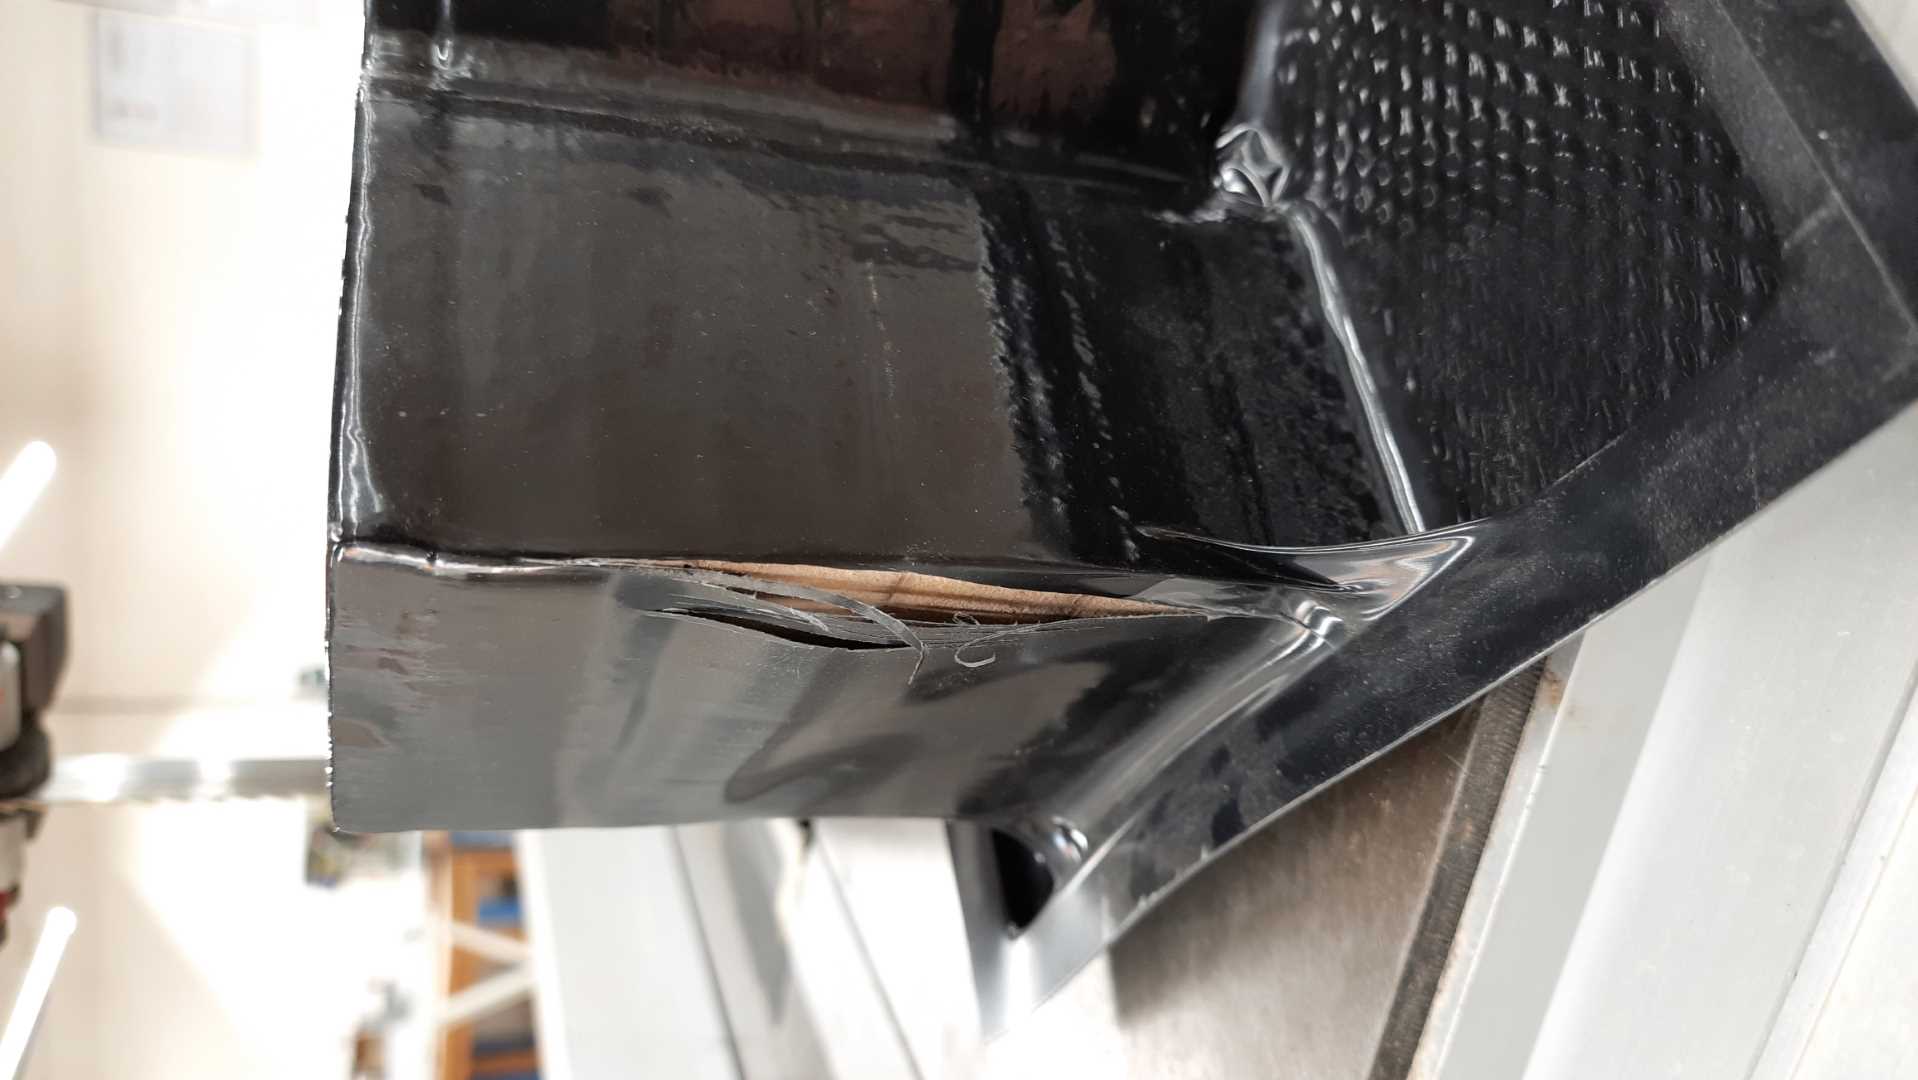
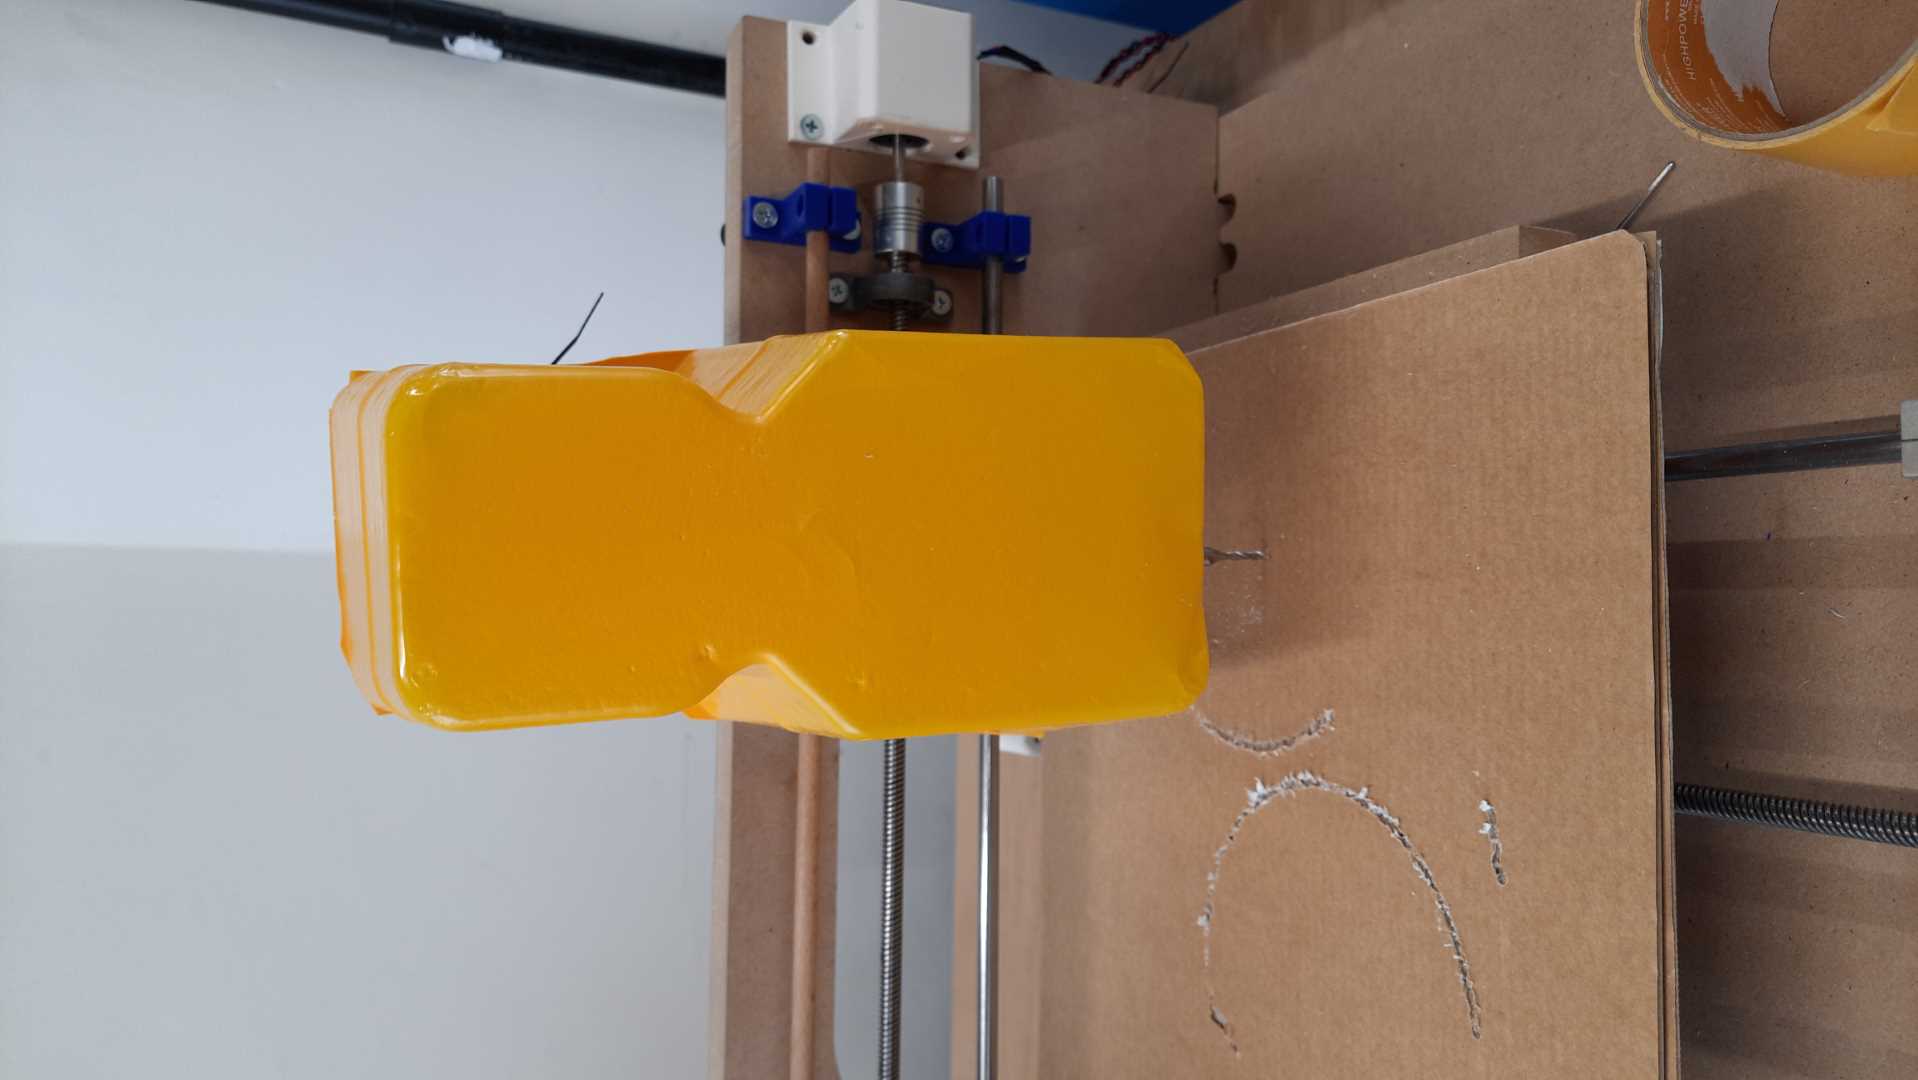
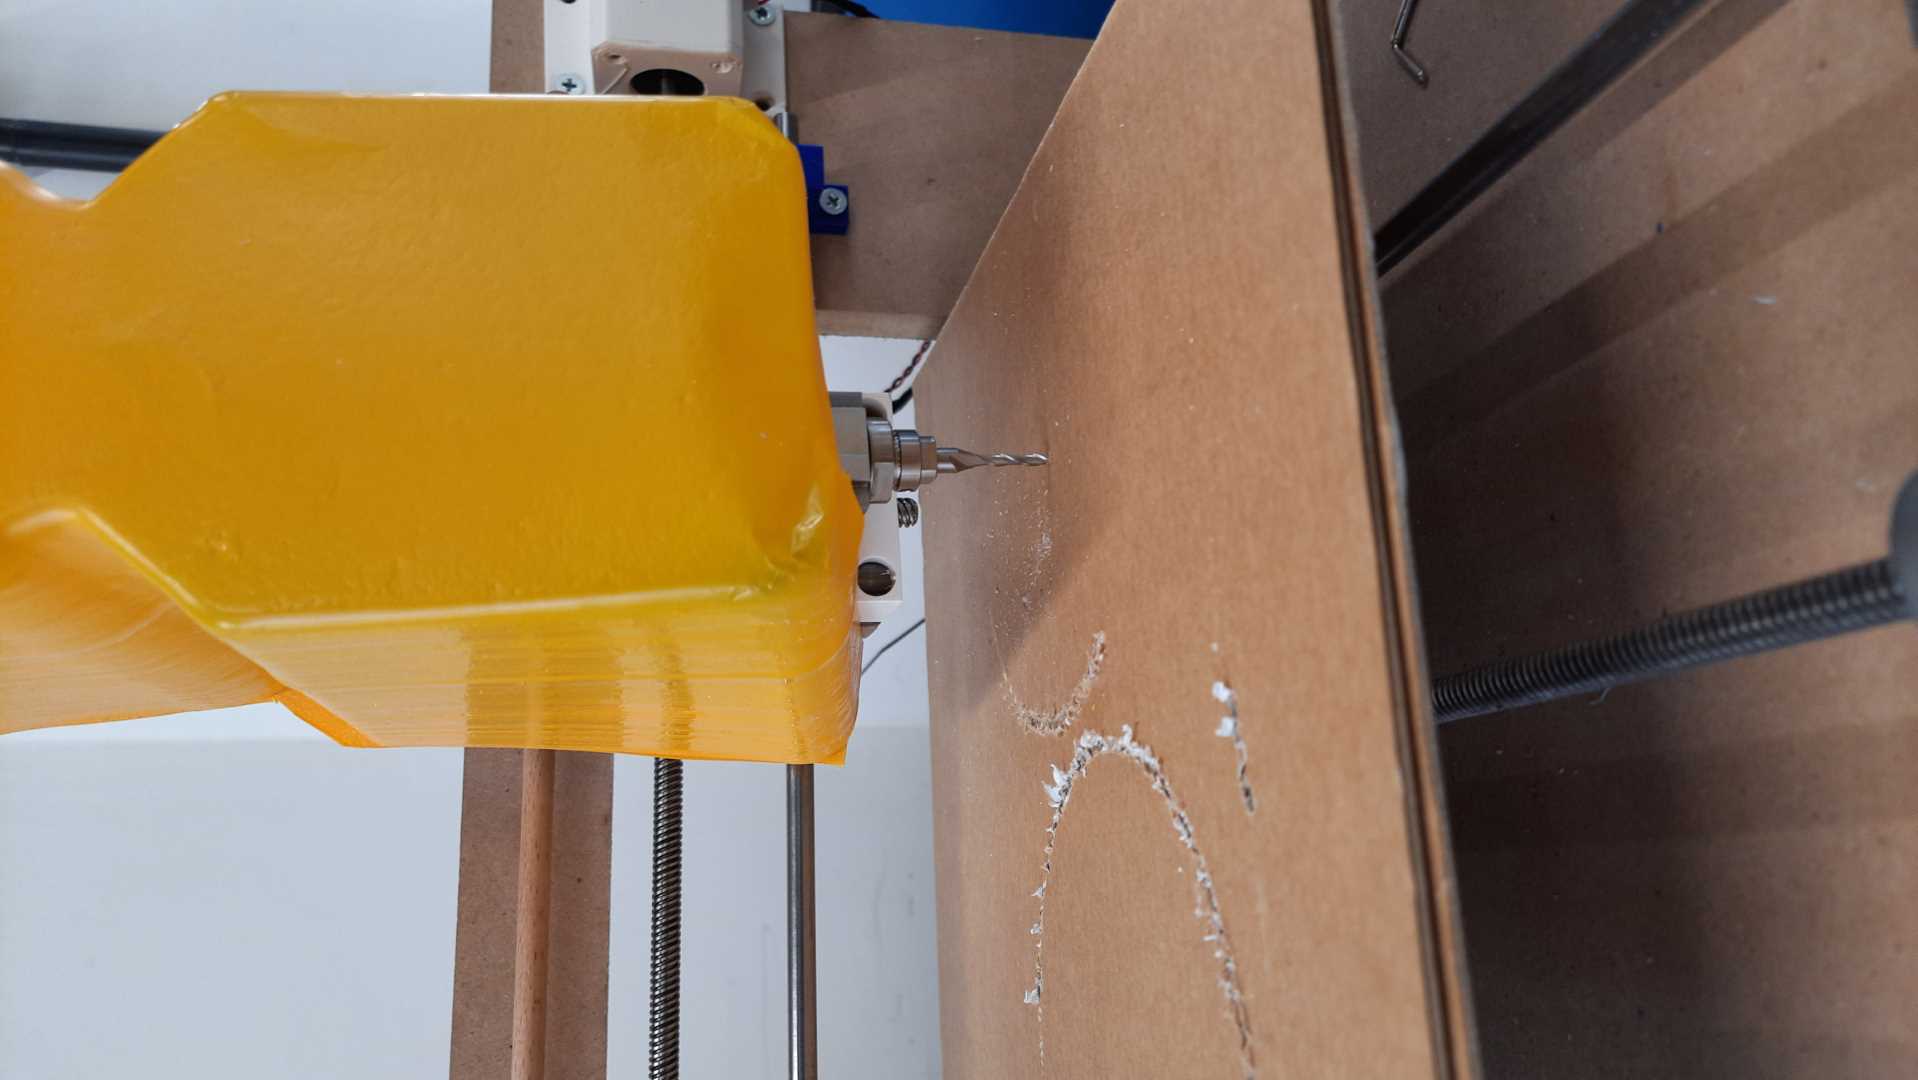
Now that the mold is ready, it’s time to form. the results were not too bad, with some deformities in the corners of the mold, But the biggest issue I had is that no matter what I did I could not get the mold out.
I tried added fillets to the mold, resand the whole thing, because the mold is too long, about 13cm in height, the plastic on top was very thin and broke easily.
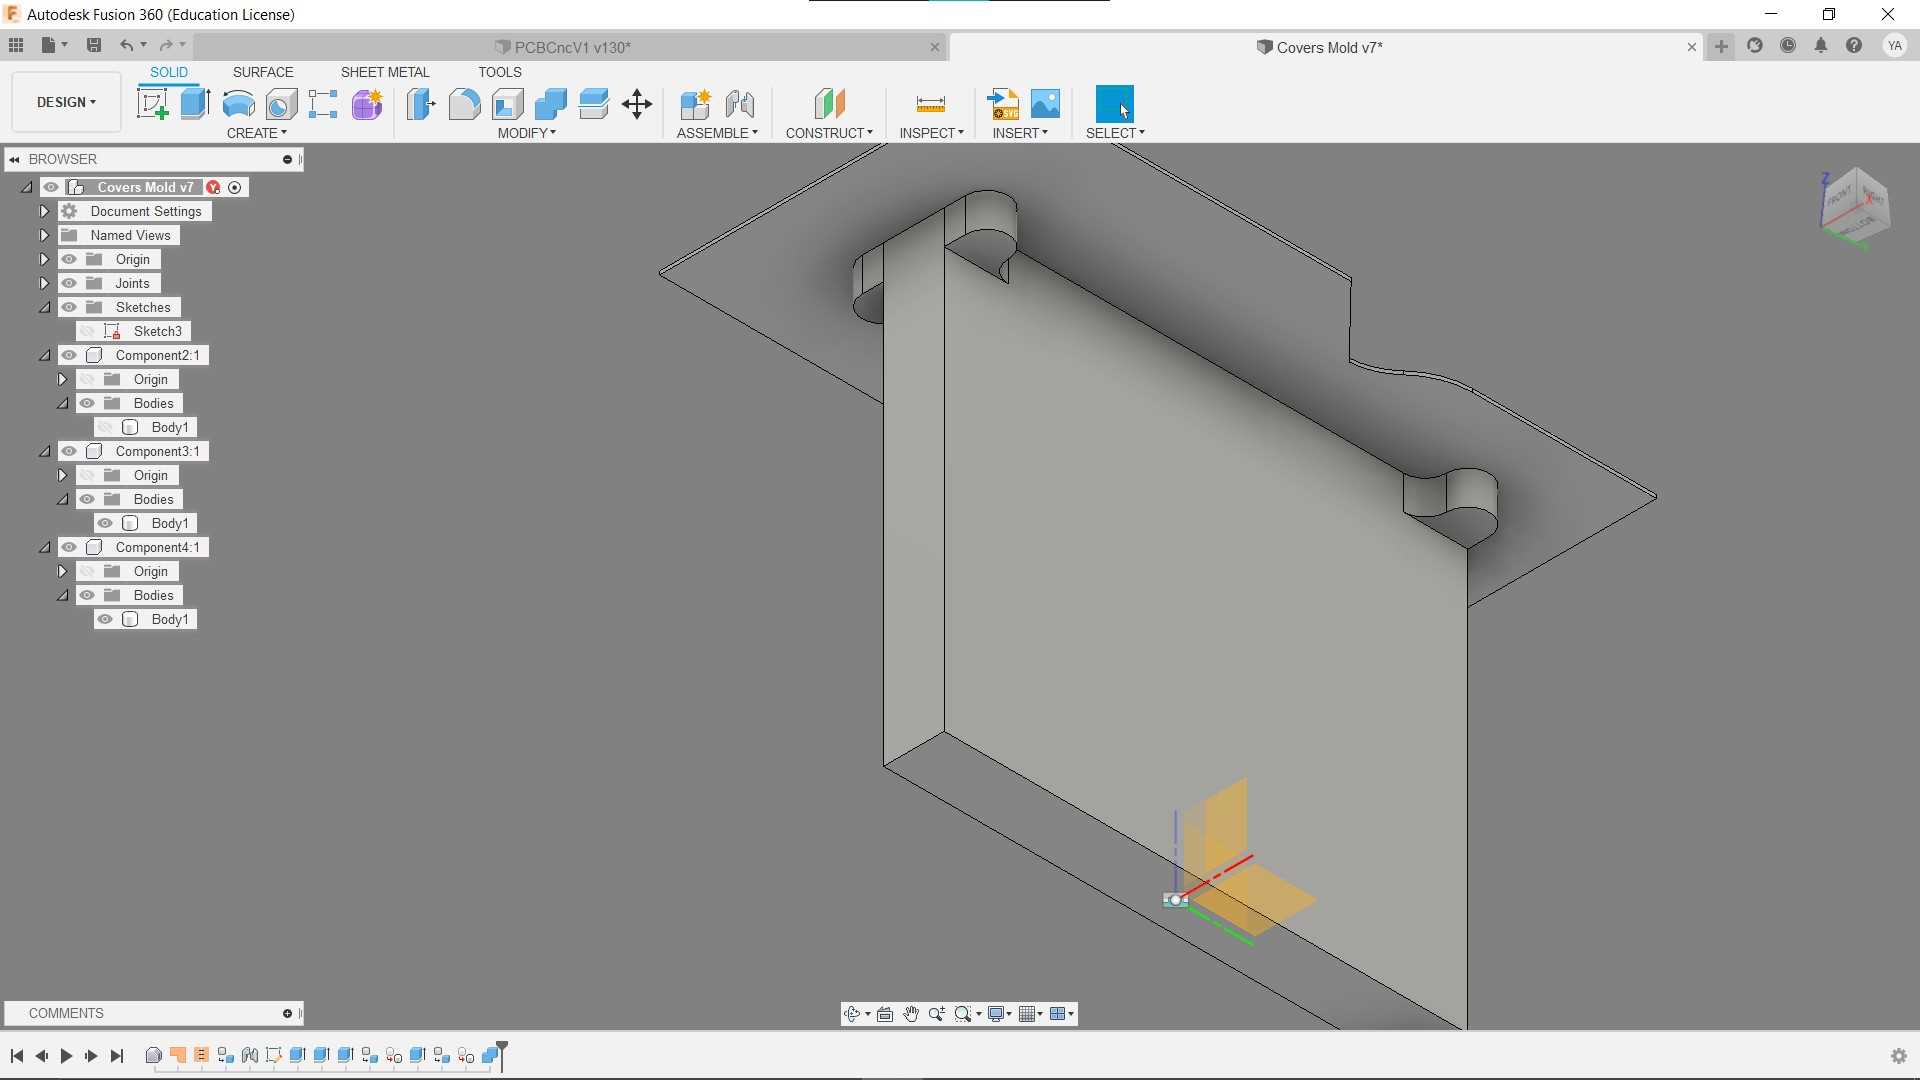
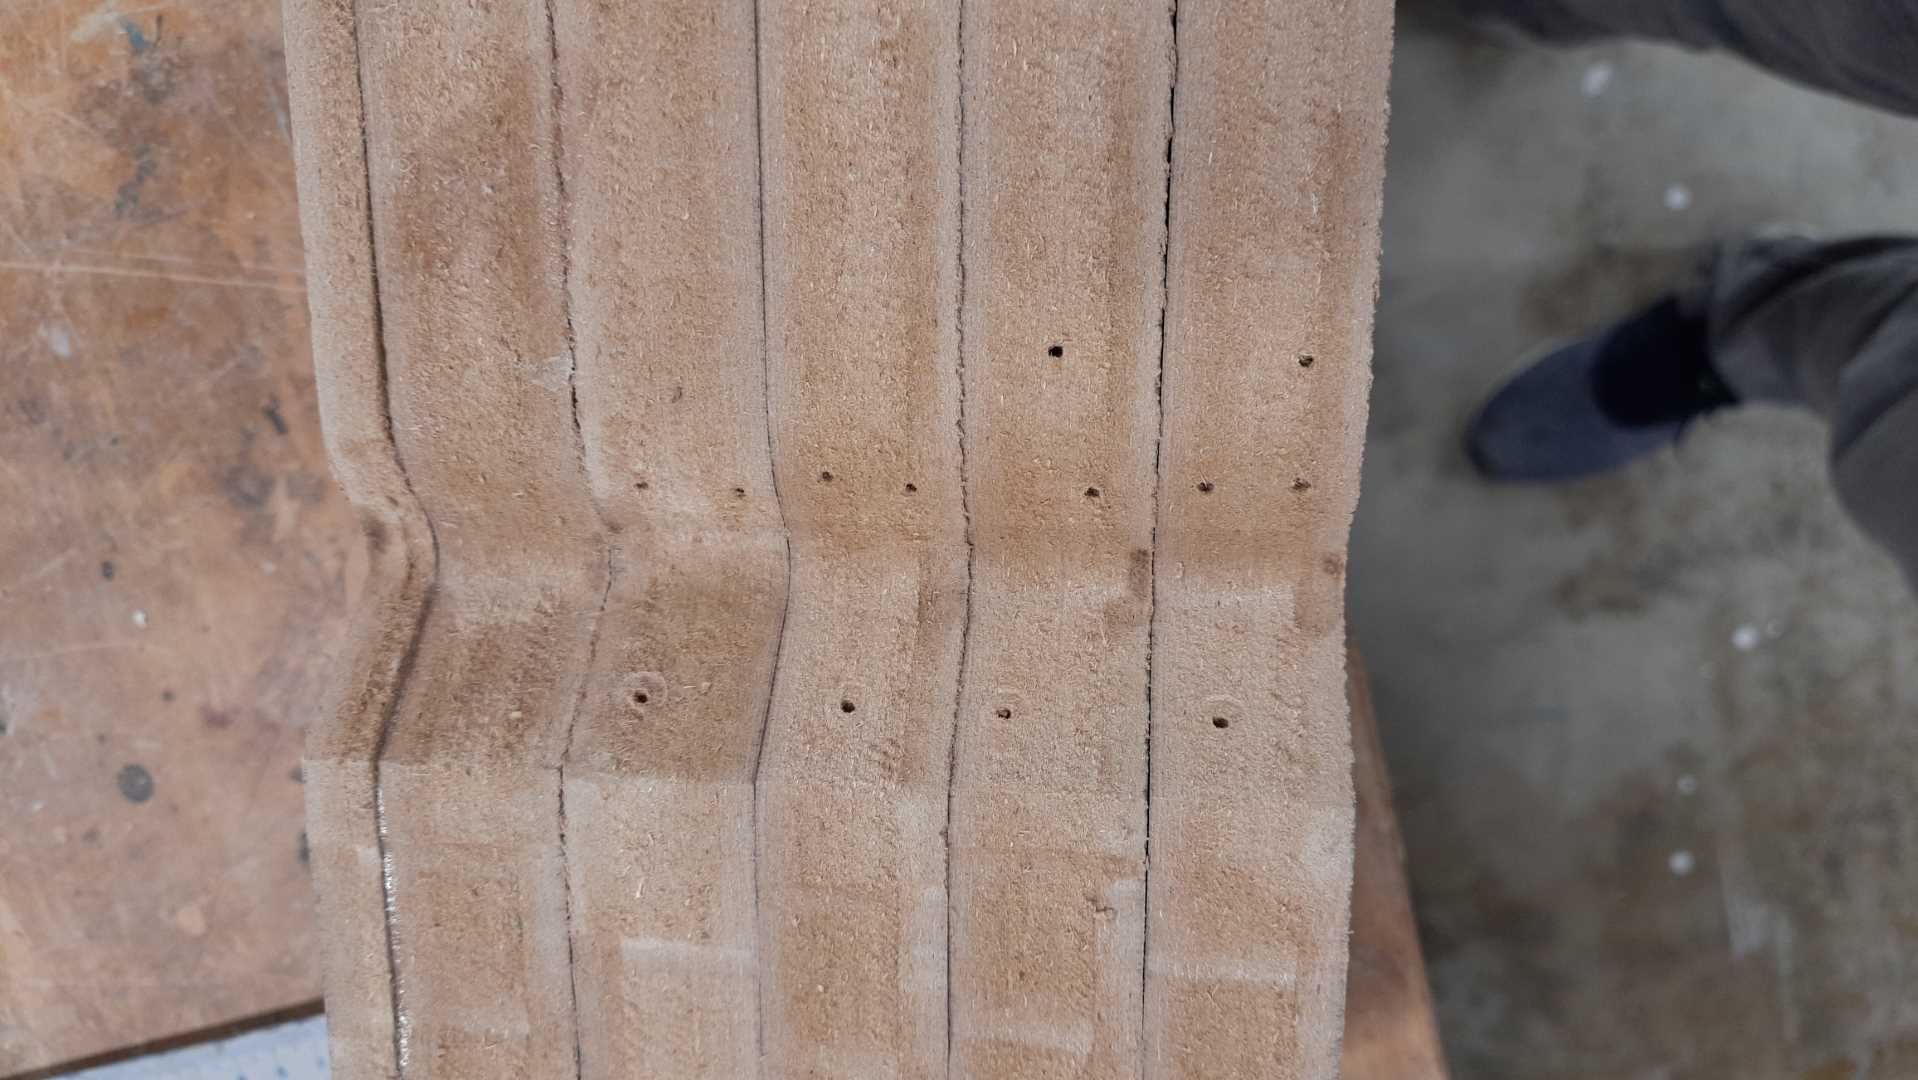
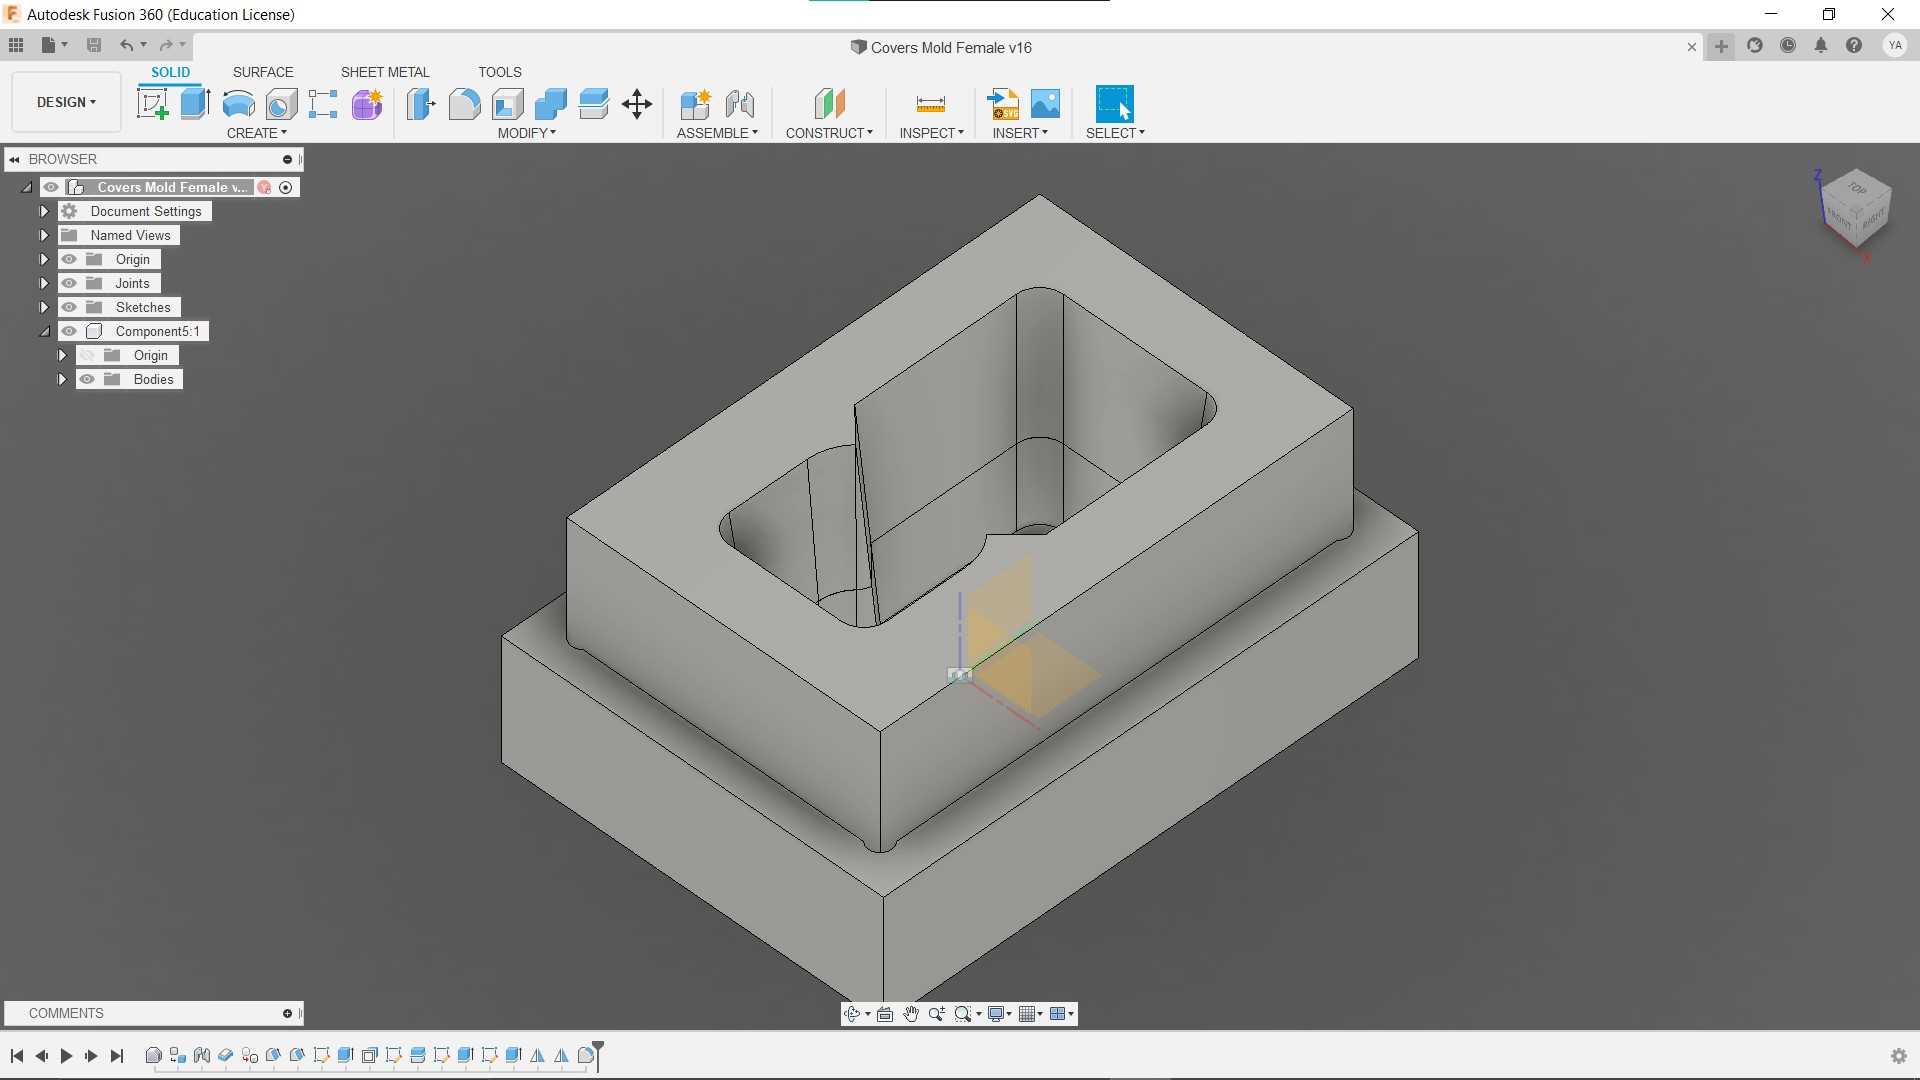
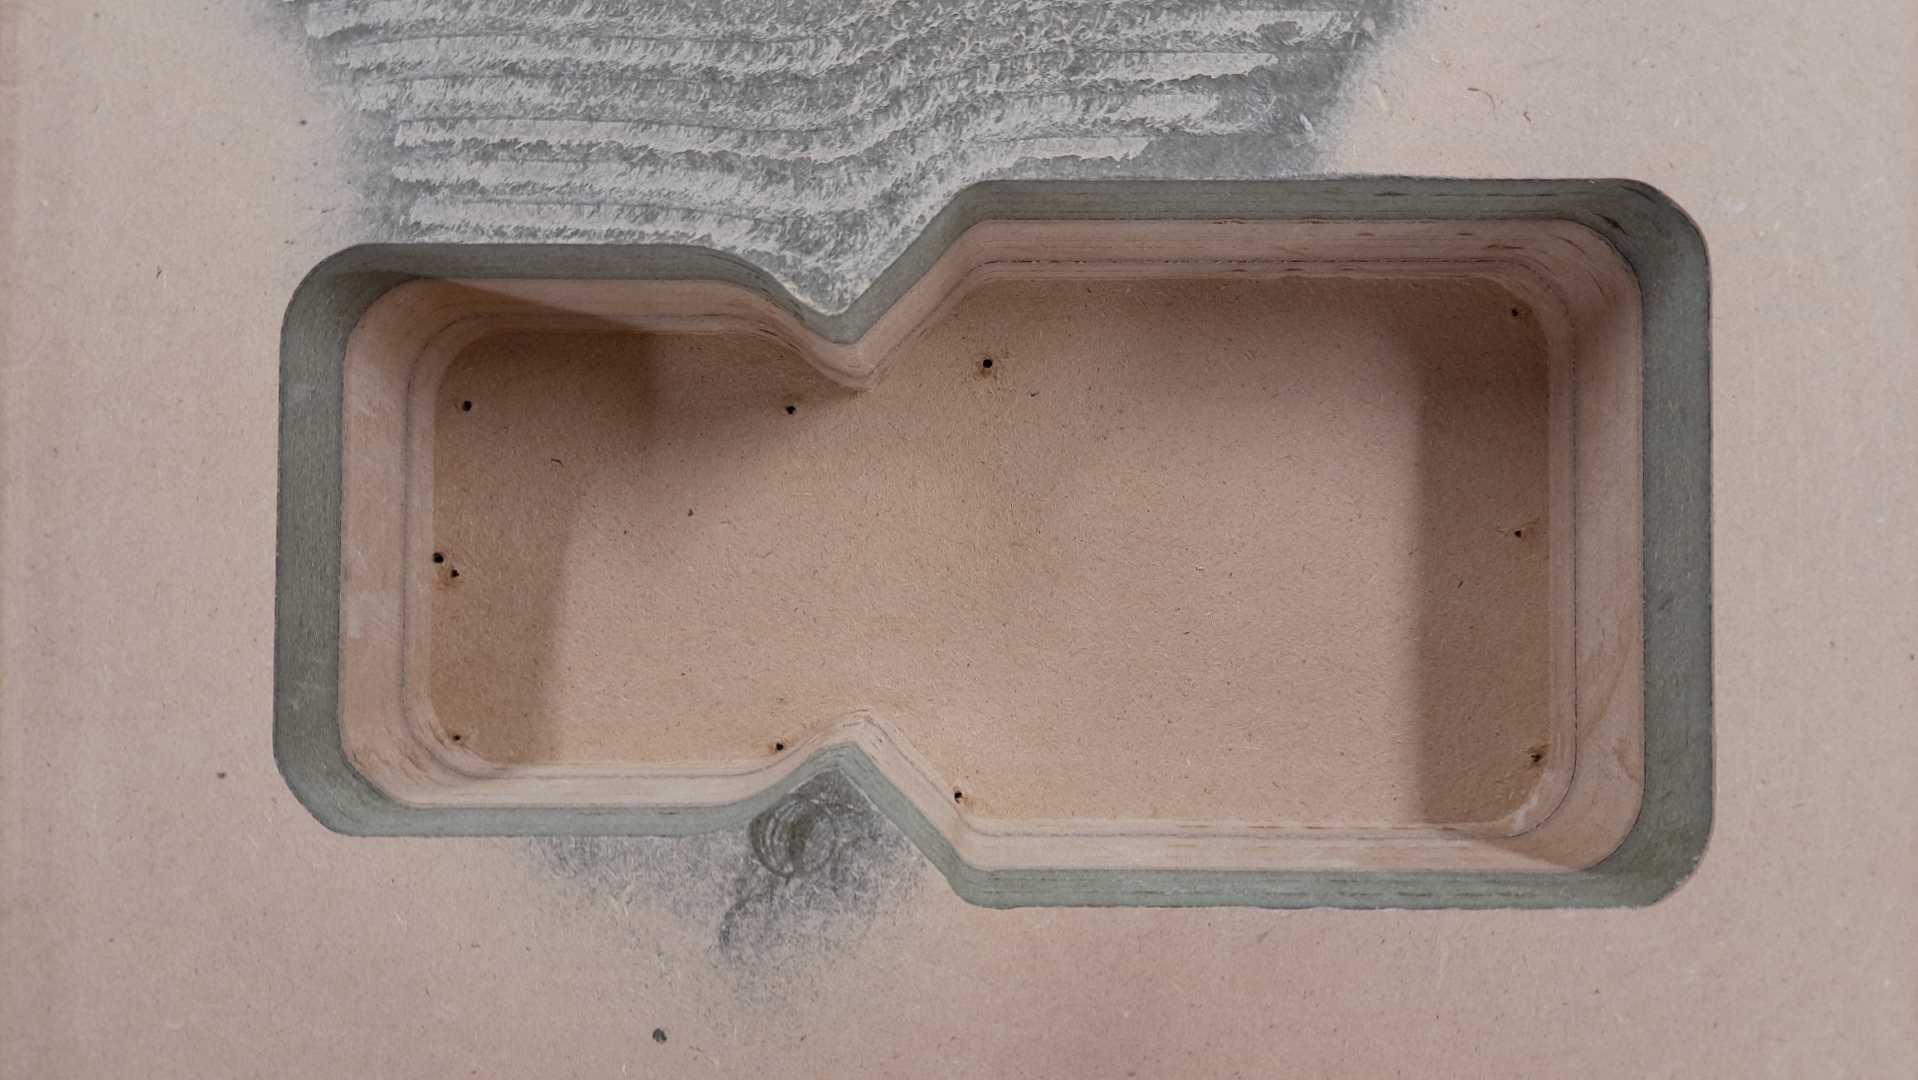
Design an MDF female mold
After reading formech vacuum forming guide I thought of making a female mold it should help on getting rid of the forming deformation and would make removing the part easier.
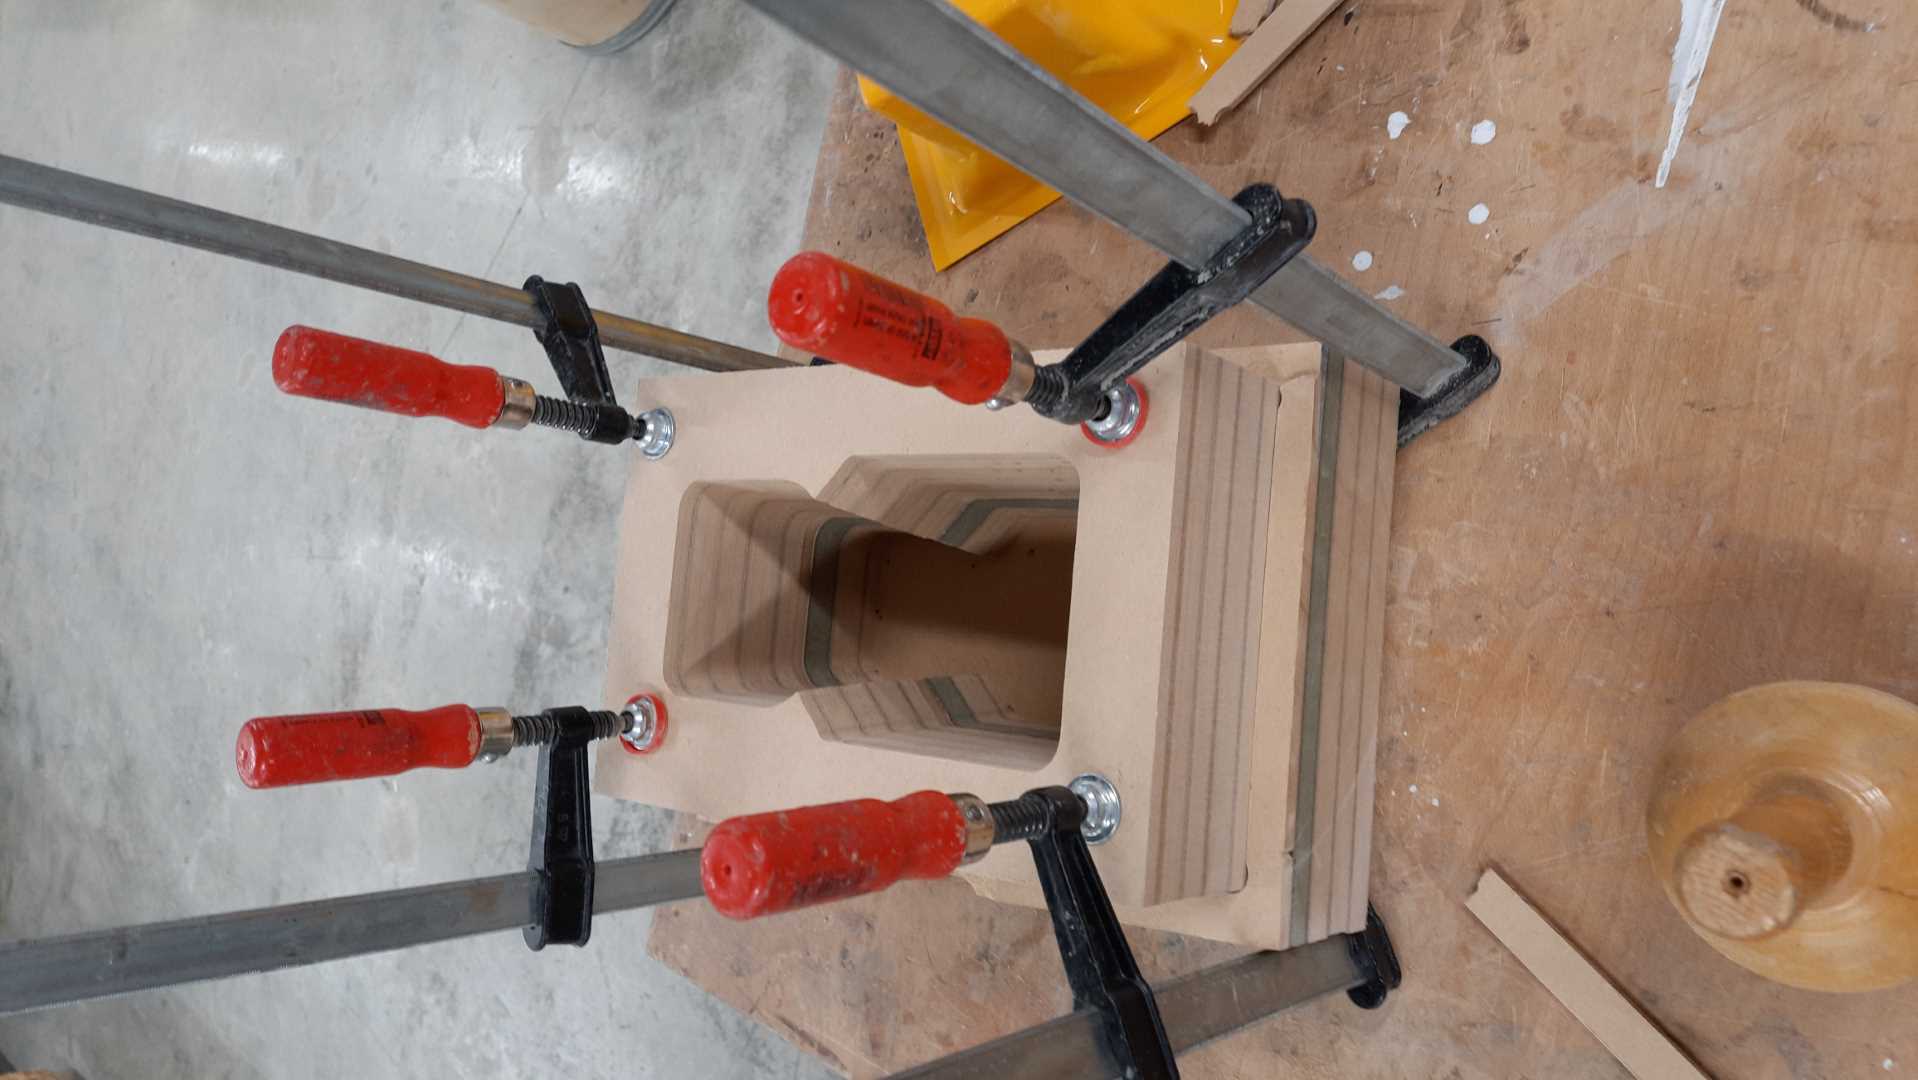
I wanted to avoid gaps between layers so I pre-glued multiple MDF layers, and had to split the model into 2 because the longest milling bit we have in the lab has a cutting length of around 11cm.
Mold manufacturing
I added the draft angle back to make sure the part will go off the mold, So I had to use 3d milling, using fusion 360 manufacturing to create the CNC toolpath.
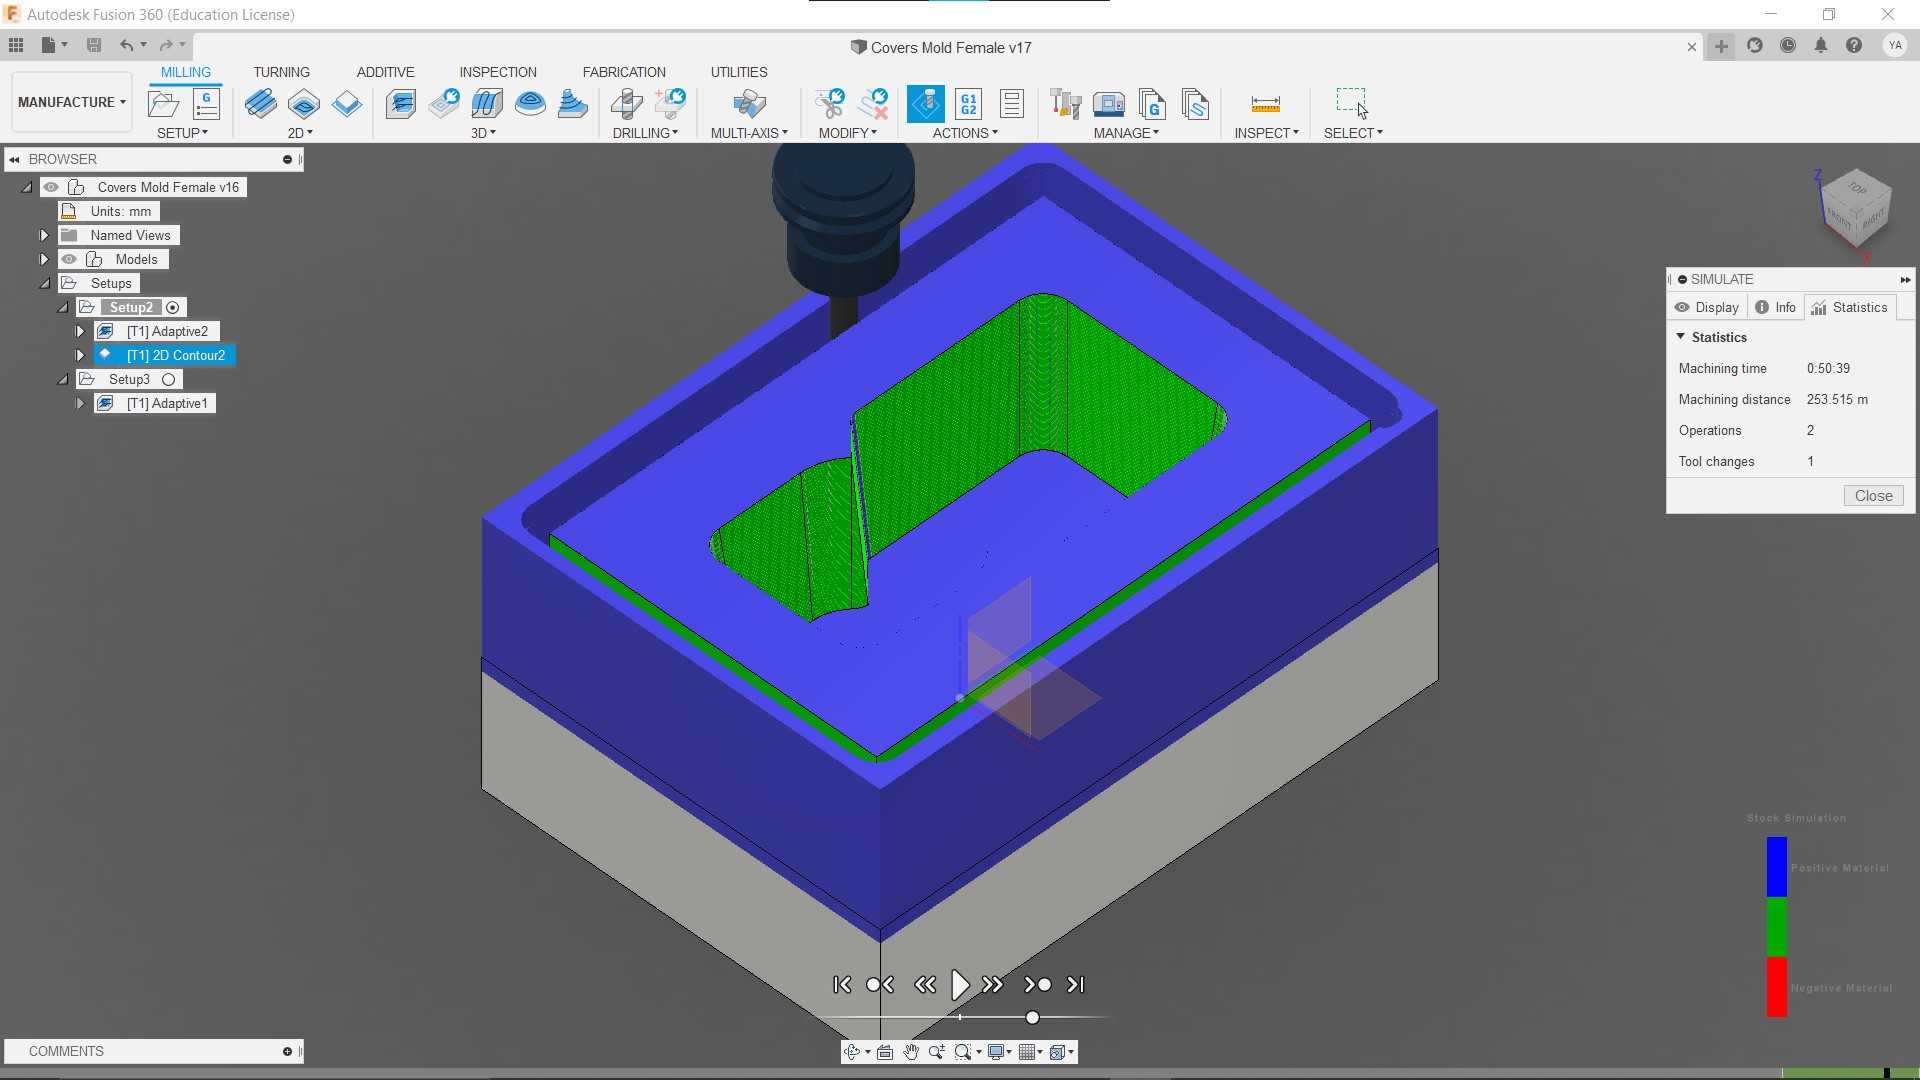
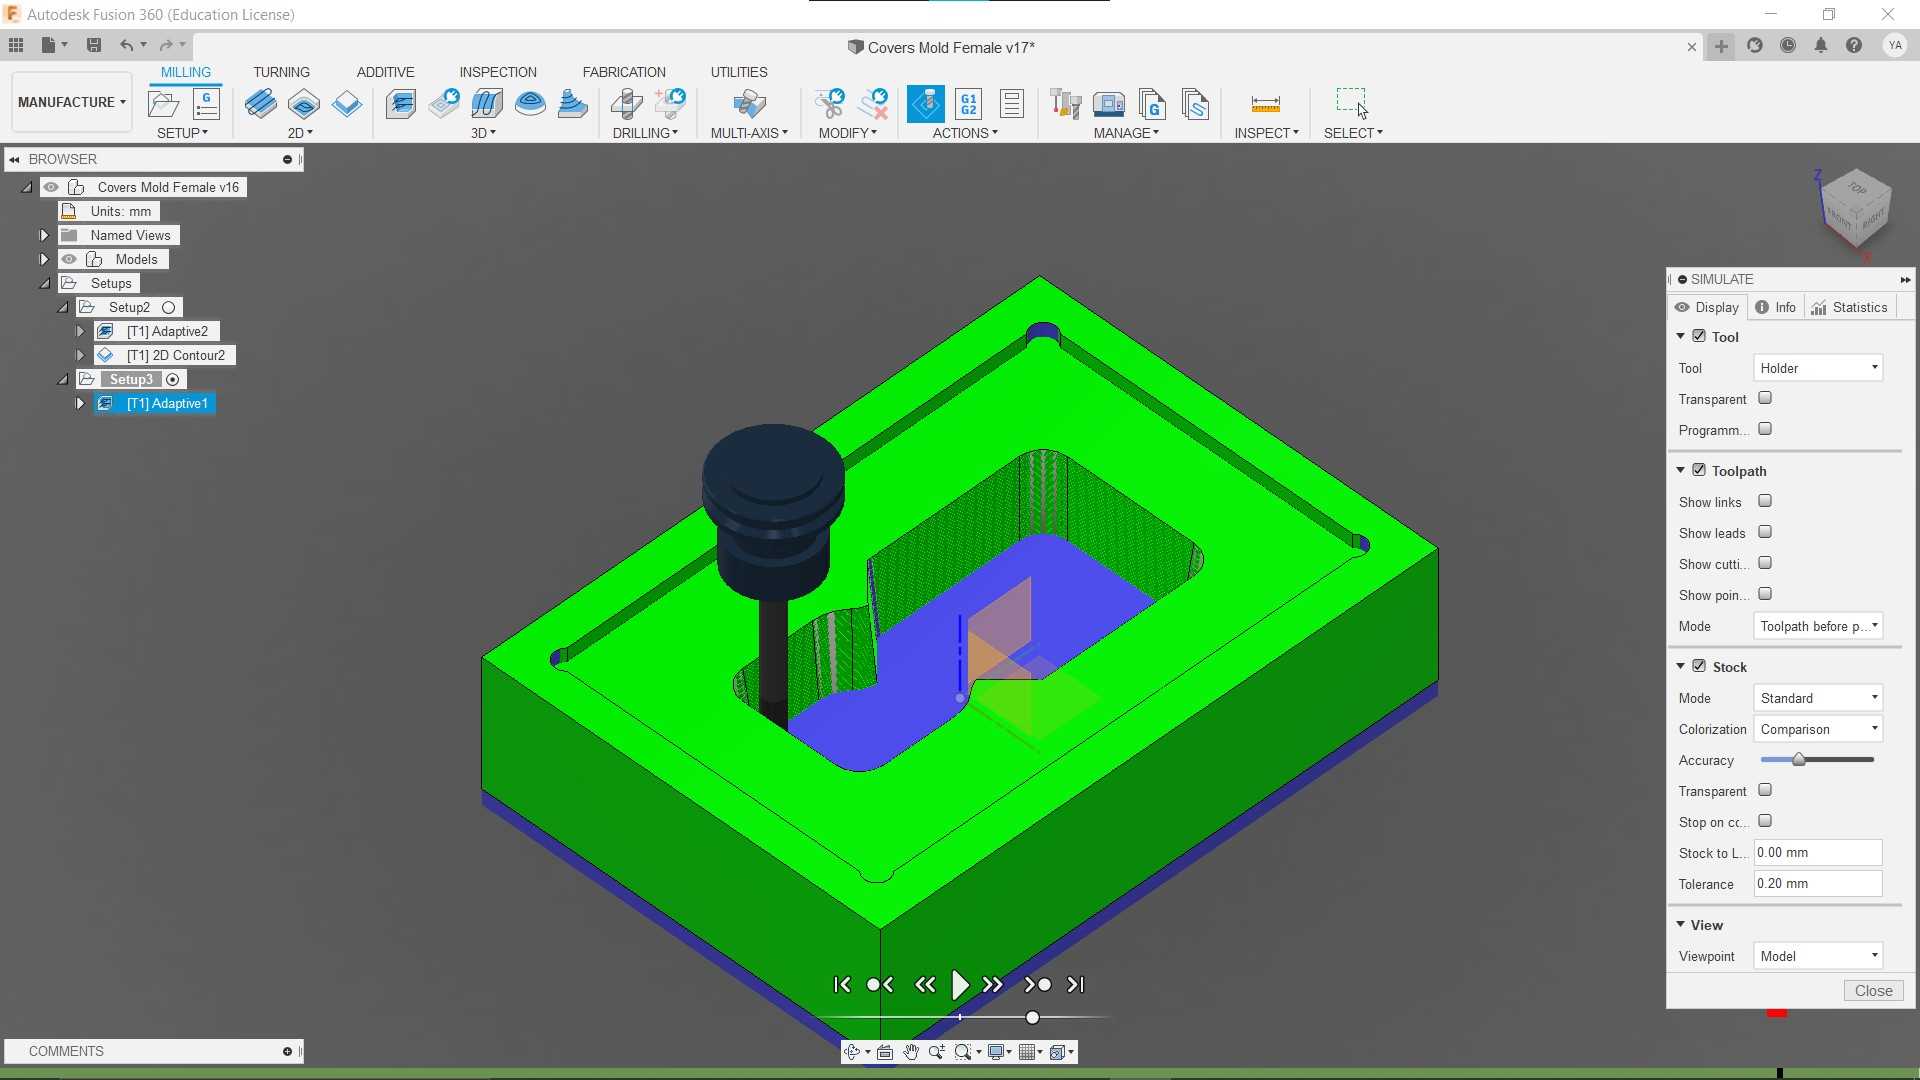
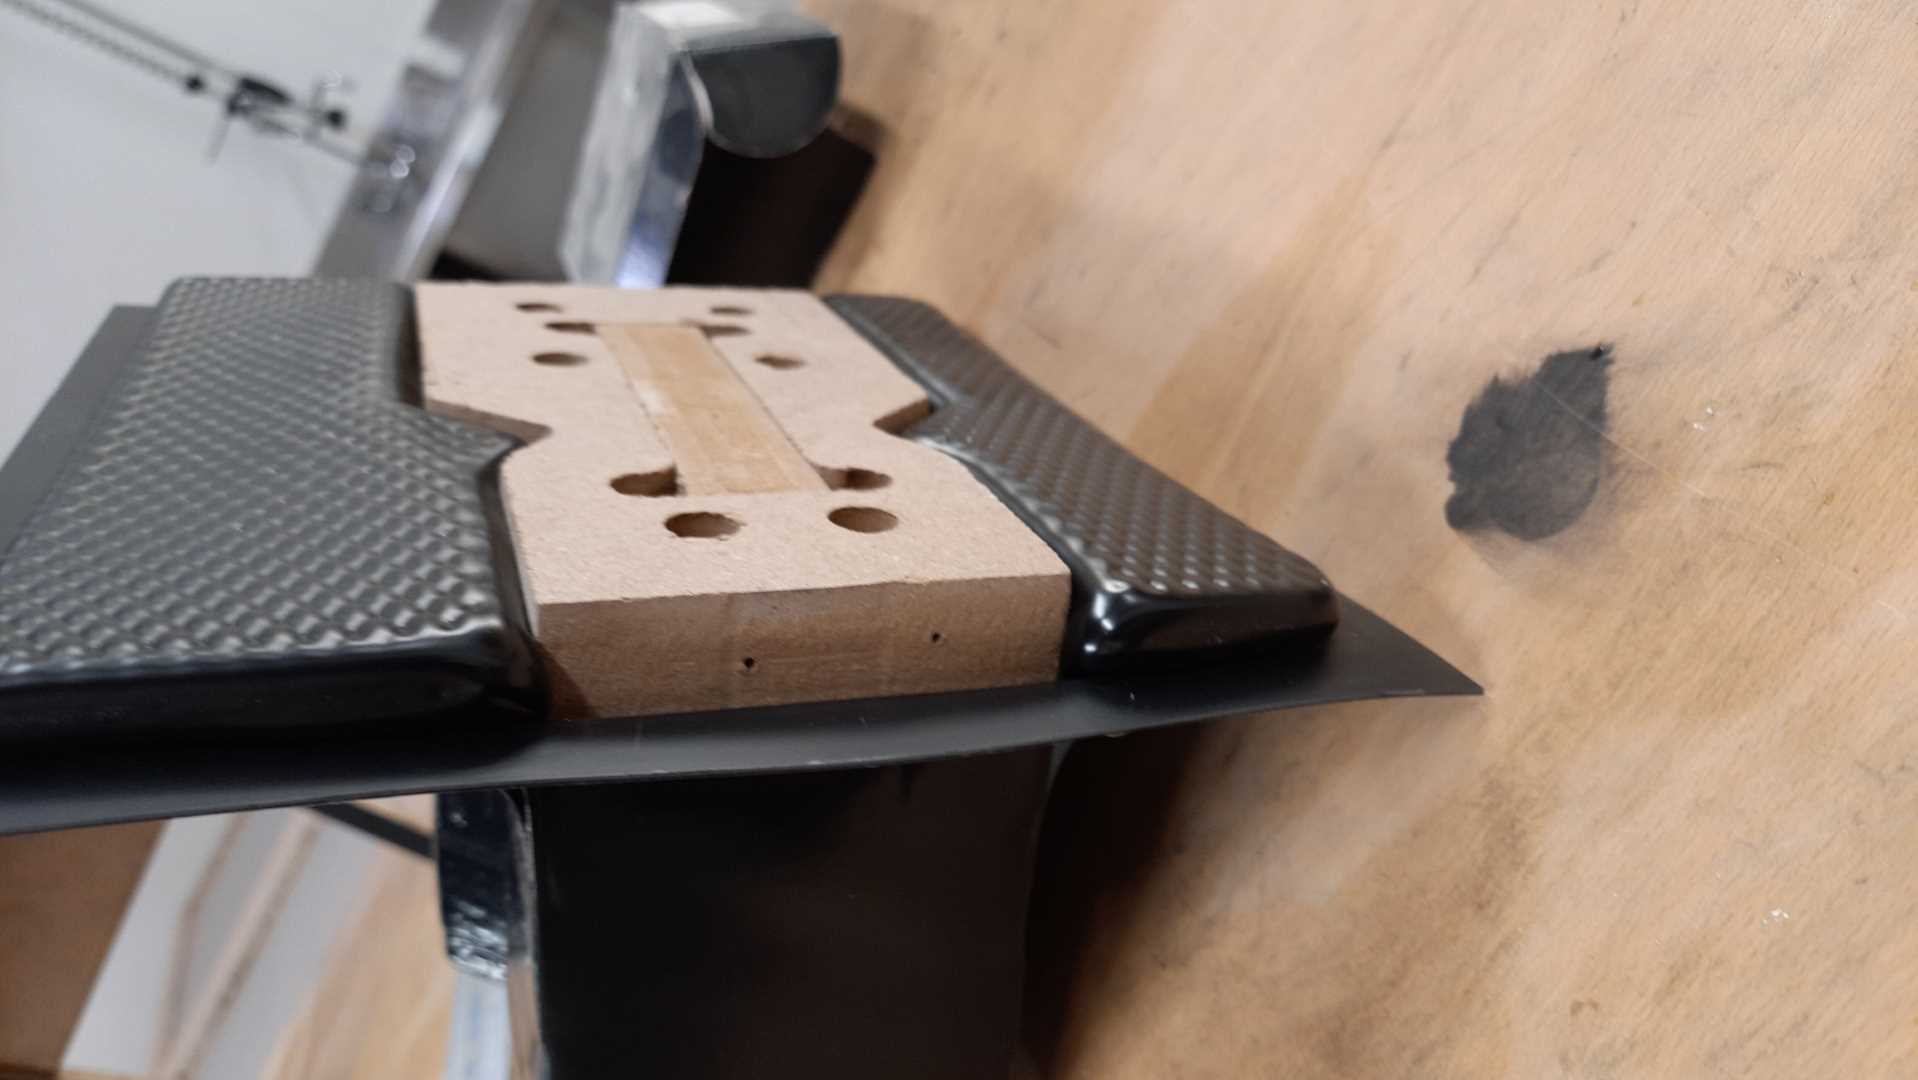
results were very good, but the pocket in the bottom part was too tight and it broke once I had to force it in, So I had to glue them together and wait a day to dry using the vacuum
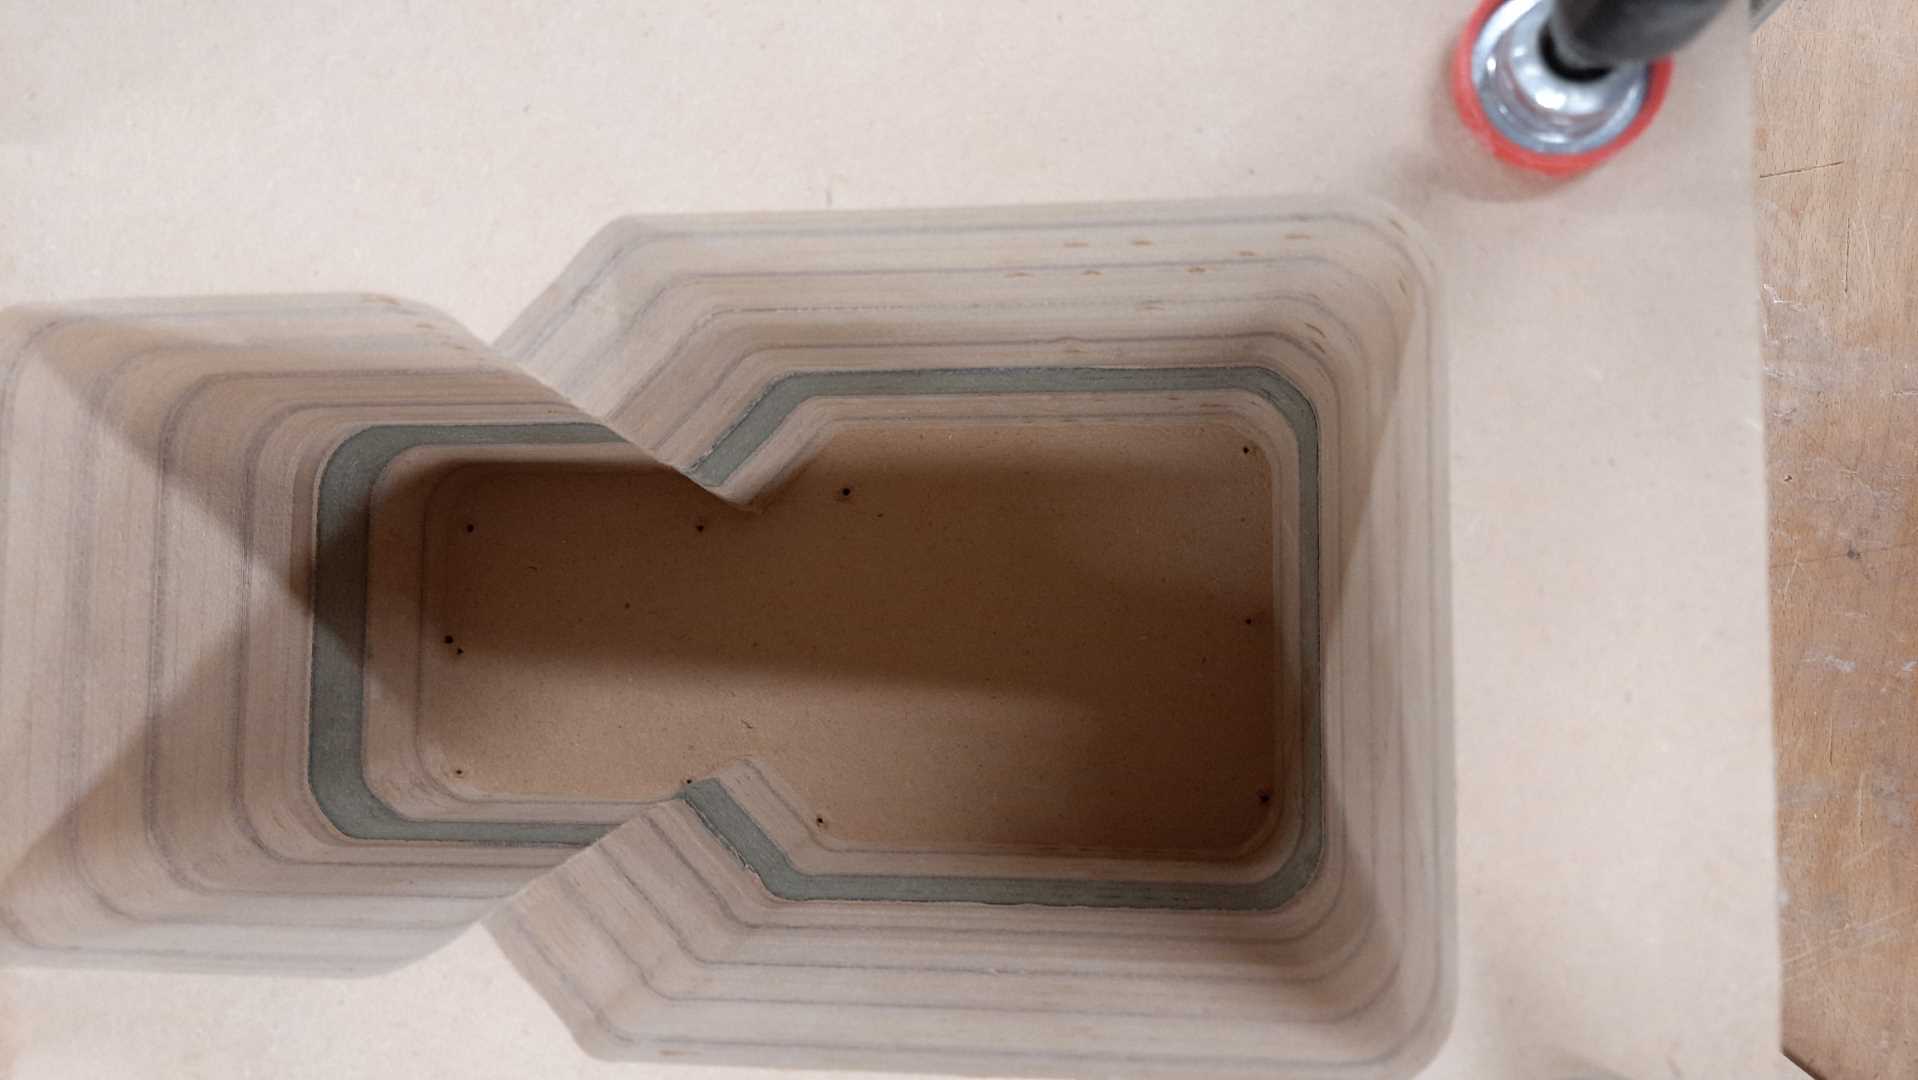
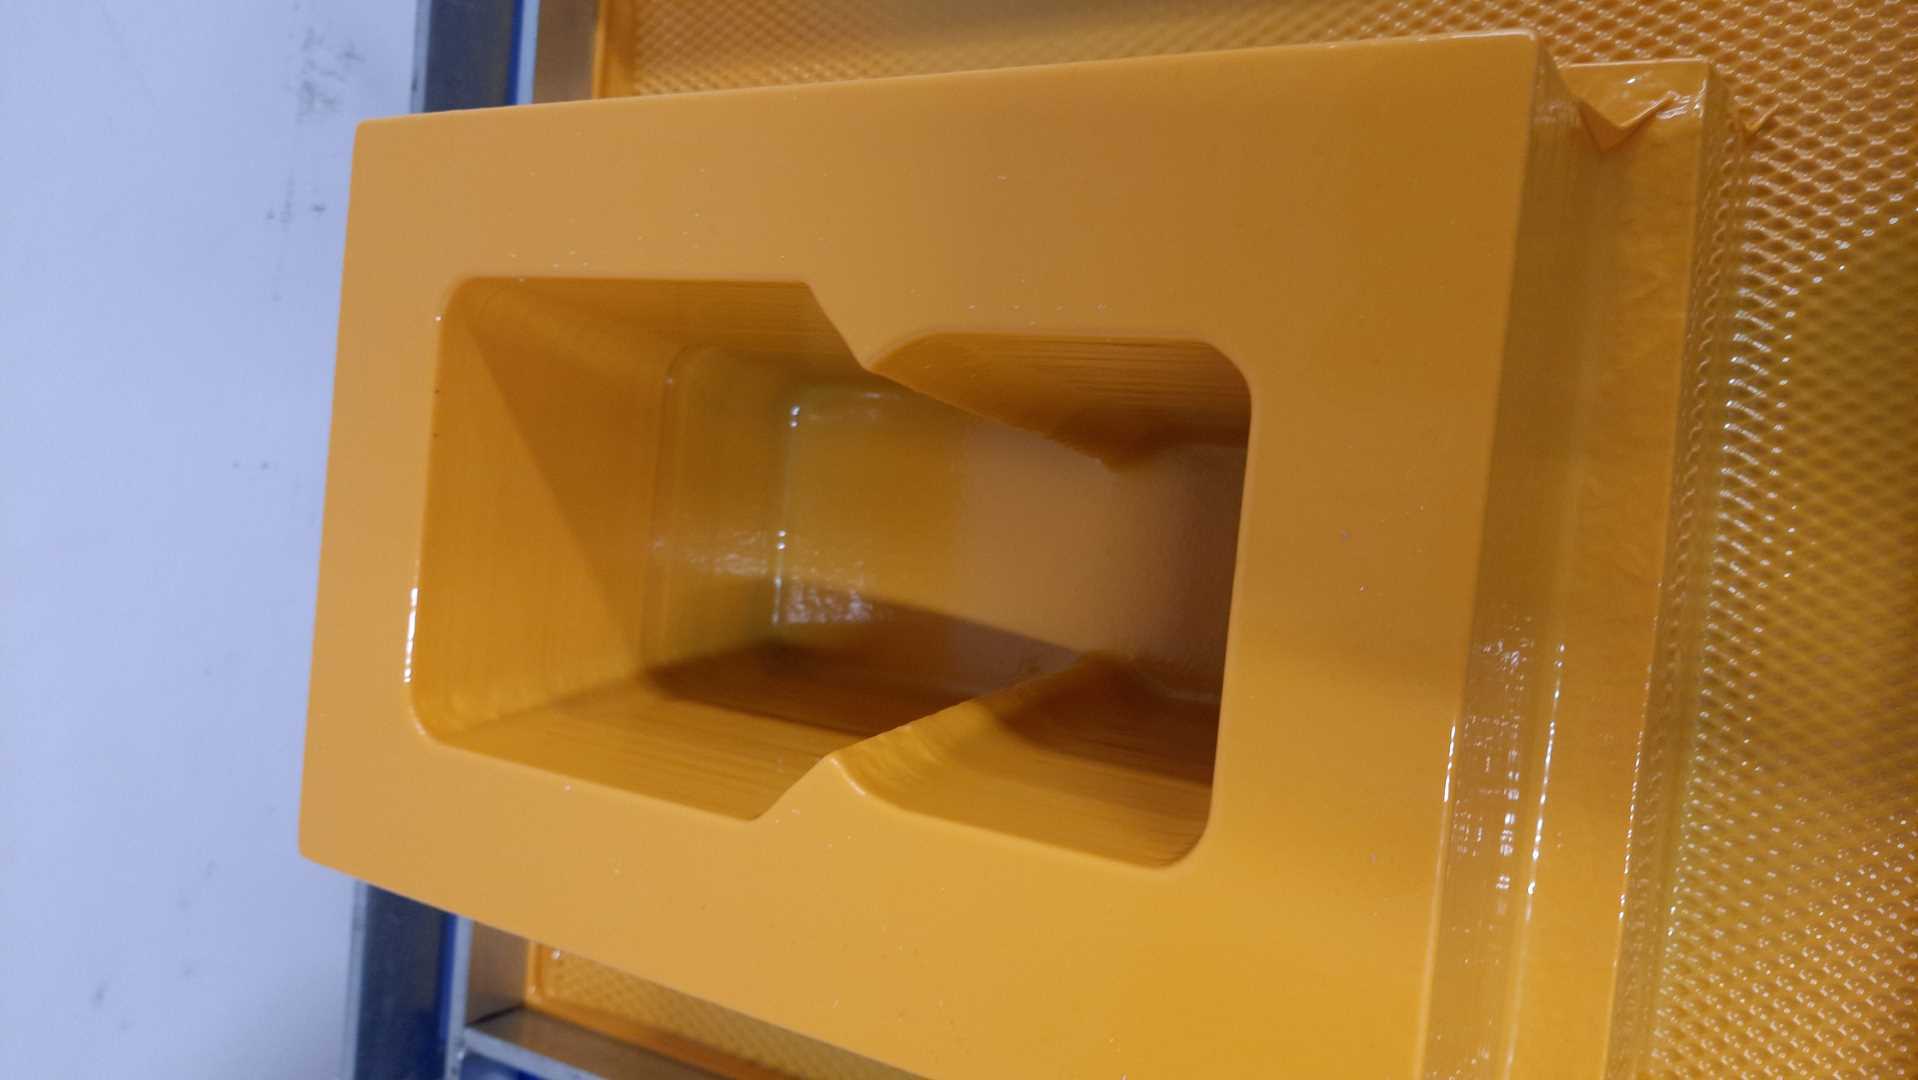
mold testing
this mold was a success!, the part came off easily but the side where the plastic sheet touched the mold had a bad finish, I think once I sand the mold from the inside and apply a finish it would get better results.
Here is a videoof the vacuum forming process
Here is a video of cutting the mold
Second project
Our formlabs 2 SLA 3d printer drain is broken, and sometime resin fall on the PCBS bellow, therefor I thought about copying the design and making a second one using vacuum forming
design
Here is the design.
Results
and the final results, a bit too tight but it works well.
Design Files
Here are the design files of this week.