13. Networking and Communications
This week I worked with Serial and Bluetooth communications.
My final project is an autonomous car that will drive around and get position data from a sensor, and upload that data to a program to display it. In input devices week, I developed a board to use the VL53L1X distance sensor and output data via serial. I also communicated from this board to an Arduino UNO via serial, and I was able to display the sensor data.
This week, I will develop a board to read this data and upload it via Bluetooth. The board will use the ATMega328p chip since it has enough PWM pins for my final project. I will use Software Serial to communicate to the sensor board, and the regular Serial pins to communicate to a Bluetooth chip.
I decided to use the HC-05 Bluetooth chip since it can communicate just by TX/RX pins and it operates at 5V. I will then connect this to my Mac or some other computer and run a processing sketch to display the data.
Serial Communication
To start the week, I designed my board for this week. I used a knock-off Sashakit, with a crystal module, header pins for outputs, Tx/Rx pin headers, headers for software serial input and reset, and header pins for 5V/ground and current smoothing capacitors. I decided to use ISP programming to bootload and upload to my board. The MOSI, MISO, and SCK pins were already connected to output headers, so I just made a reset header and added it to the schematic.

I then milled and soldered my board. Isolating the reset and input serial headers was a bad idea, and I lifted both of the traces up. I also wasn’t careful when soldering, and I lifted a power header as well. I used superglue to secure them.

Problem- Bricked Chips
I used an Arduino UNO to bootload the chip, but it kept giving me an error message. At the same time, my classmate Teddy Warner was having the same problem. As a solution, Teddy soldered a sashakit with everything except the chip and tried to program the chip via ISP by holding it down. He found that the majority of the chips in our box were bricked, but only a few towards the top functioned. He tried to figure out the problem and noticed that there was a box of speakers directly underneath the 328 bin. Our hypothesis is that the speaker’s magnetic fields ruined a lot of the chips. We kept the 8 or so chips that we were able to bootload and continued with the week.

I updated my schematic for the week, moving the header pins for Serial input and reset next to each other and adding the 100nF capacitor required for ISP programming.


Software
I used one of the pre-boot loaded chips while soldering the board. I then programmed it with FTDI protocol with an FTDI chip in our lab. I connected Tx to Rx and Rx to Tx, reset to the reset header, and power and ground.

I then uploaded code to constantly print a ‘1’, and checked Serial Monitor. Sure enough, it was receiving 1s.

Next, I uploaded code to display whatever the board receives from my software serial port. I uploaded this code, and it worked as well:
 #include <SoftwareSerial.h>
SoftwareSerial port2(3, 9);
float rx = 0;
void setup() {
Serial.begin(9600);
while(!Serial)
{
;
}
port2.begin(1200);
}

void loop() {
port2.listen(); //listen to software serial port over main
rx = port2.parseInt();
Serial.println(rx);
}
Bluetooth Communication: HC-05 Module
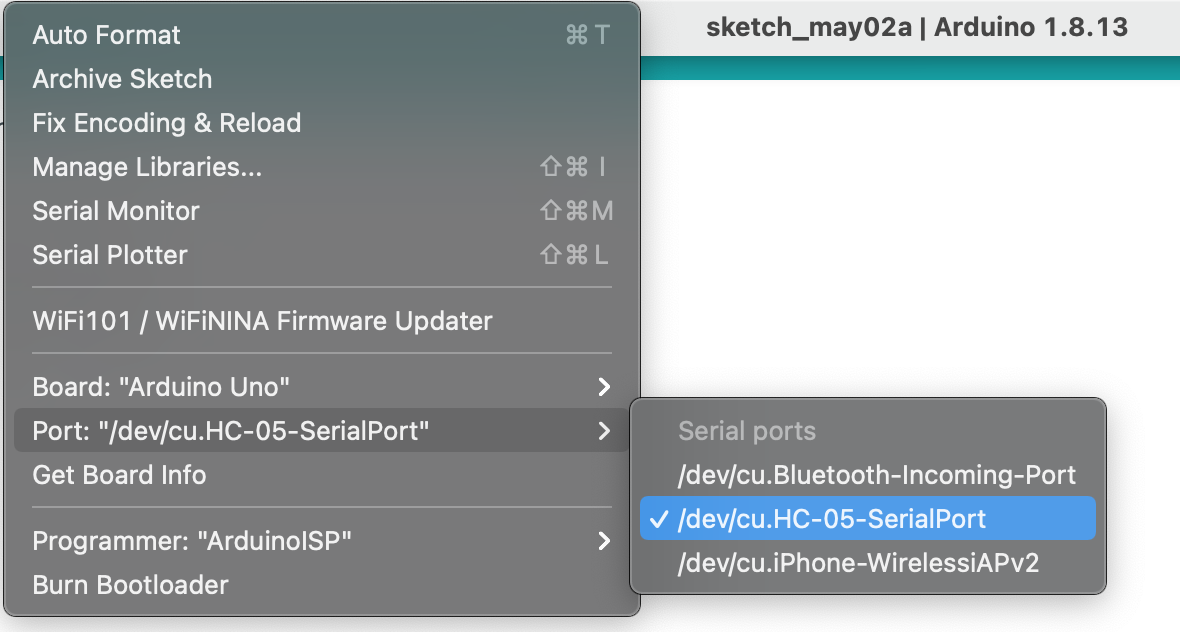
With my board and serial communication working, I started with my Bluetooth connections. I used the HC-05 Bluetooth module and used the same code to Serial print sensor data. I connected the Bluetooth device to my mac and used it as a serial port in Arduino IDE.
Next, I plugged in the board (just using the FTDI chip for power) and ran the program. In serial plotter, I was receiving the data.

The Bluetooth chip sends data in bursts, so I will have to take this into account for my final project.
Group Work
Our group assignment for this week was to communicate between two different projects. Our lab communicated between my final project board and that of Teddy Warner. We sent an incrementing integer from his board to mine via a software serial, then displayed the number on my mac through hardware serial. Our full group work documentation can be found on our group site.

My files for this week can be found in this zip file