Week15 Molding and Casting
Different Materials
silicone rubber paste
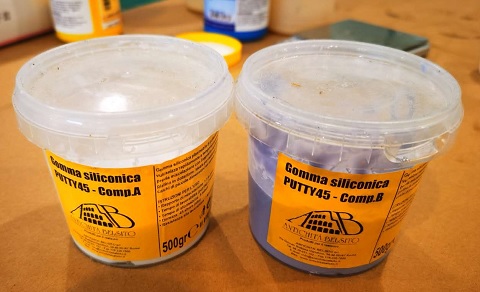 We use putty45 fast to make mold by hand. Safe for skin.
Has two components and should be mixed in 1:1 ratio by weight. In 23℃ 2 minutes processing time; 5 minutes mold release time.
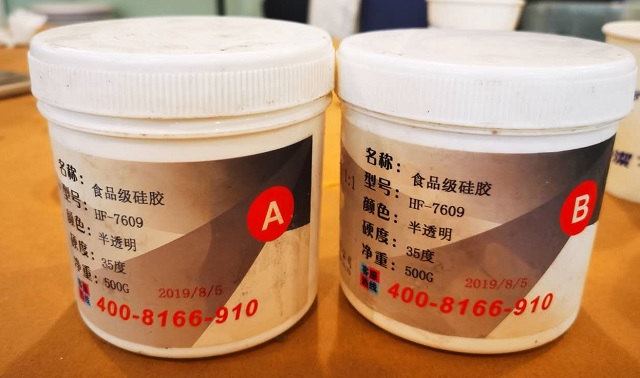 The HF-7609 is a food quality paste. We use this to make mold with machinable wax.
Has two components and should be mixed in 1:1 ratio by weight. In 28℃, 30 minutes processing time, and 4~5 hours mold release time.
Polyurethane Resin
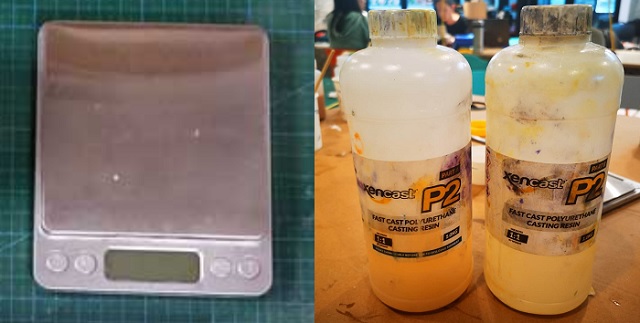
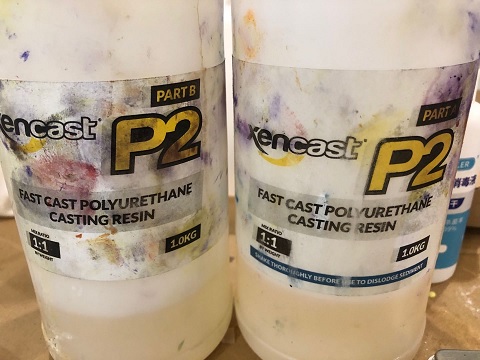 We use P2 polyurethane resin from xencast.
Has two components and should be mixed in 1:1 ratio by weight. 135 seconds processing time, and 10~20 minutes mold release time depends on the mold size. It takes longer for smaller/thinner molds. (Which is contrast to my guess.)
Should wear gloves and goggles and work in a well ventilated area. It release lot of heat while curing, so need be caution of the heat.
Handmade model with silicone rubber paste
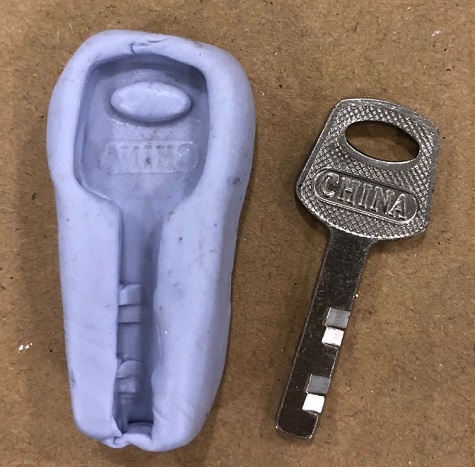
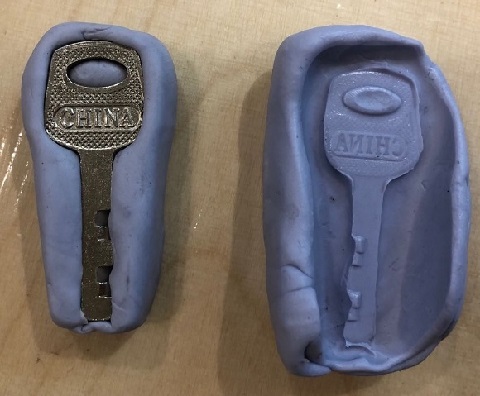
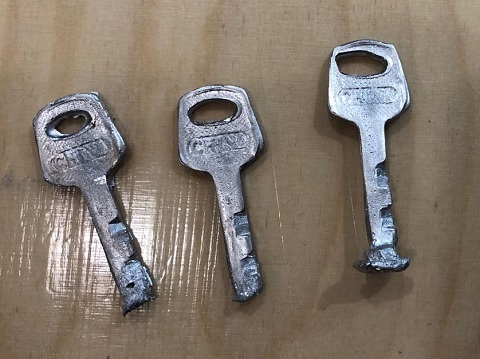
I use the silicone rubber paste to create a model for a key.
Then I heated the bismuth tin alloy lingot. It melted around 100 degree celsius.
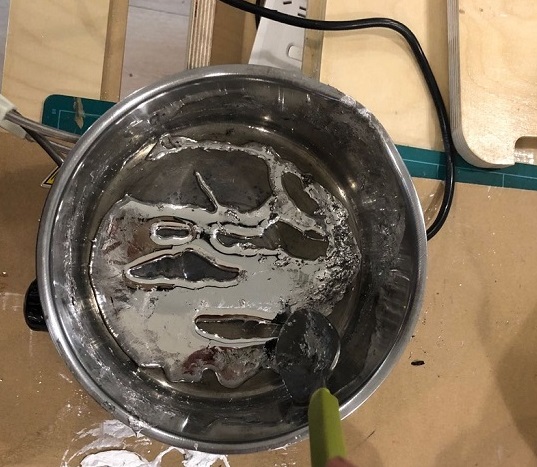
Filled key model with the alloy liquid and got a key with only one face. The otherside is poor.
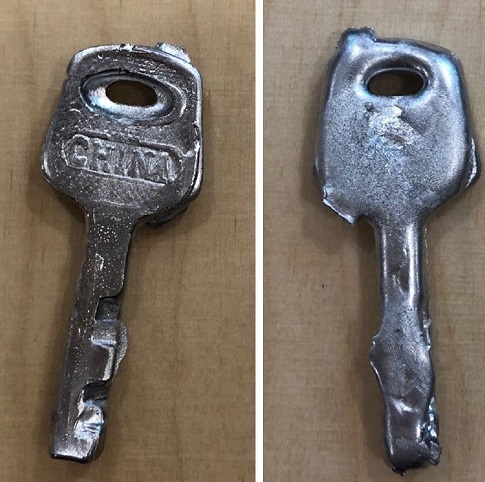
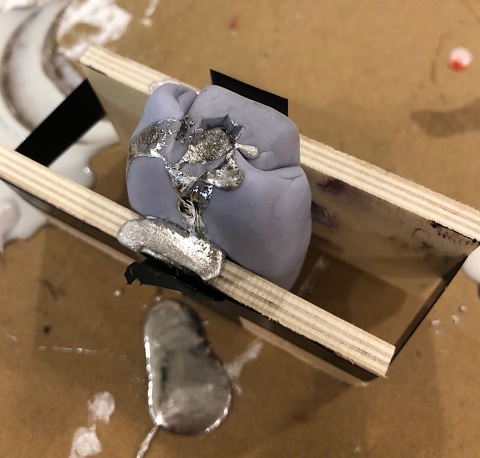
Then I coverred another piece of rubber around the previous model, with the original key inside. Thus I had a two-side model.
Filled the model with alloy liquid, and coverred the up-model. There were too much liquid and it was pushed out. The result was horrible.
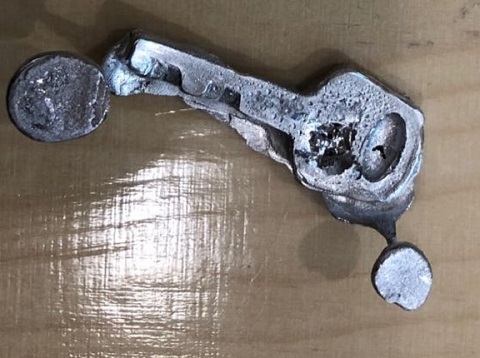
Then I cut a hole, binded the two parts model together, and filled the alloy liquid again.
Unfortuantely I cut the whole in the wrong place. I should have it on the header rather than the tail. I have no chance to make a usable key with the current model :(
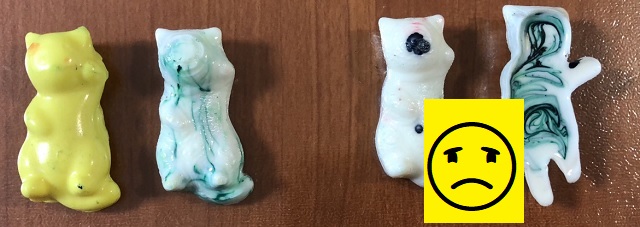
Vacuum molding and Polyurethane Resin
Fix a HDPE plastic sheet into a frame and heat it above a quartz heater.
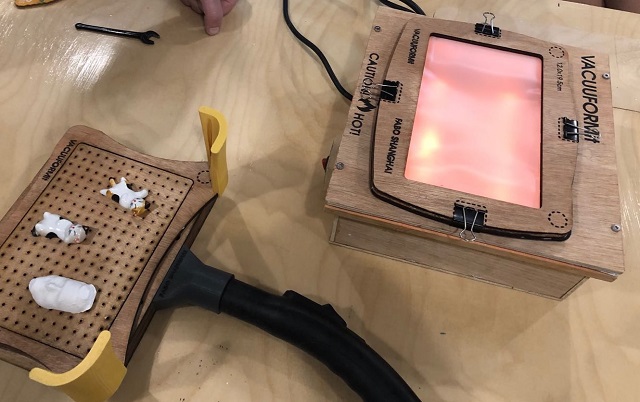
When the plastic became transparent, move it quickly onto the vacuum bed, and turn on the vacuum immediately. The timming is important.
Mix the polyurethane resin’s component A & B with 1:1 weight ratio. Stir it quickly and poured it into the model.
Use a wire to add color. The resin dried quickly and you have less than half a minute to do so. You can either mixed before or after pouring. But remember the surface doesn’t looks the same as the bottom.

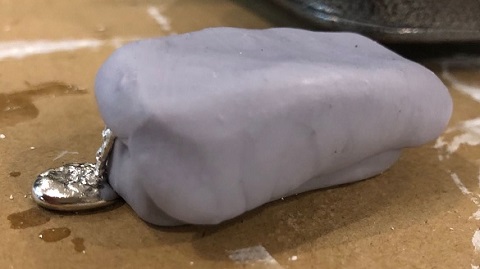
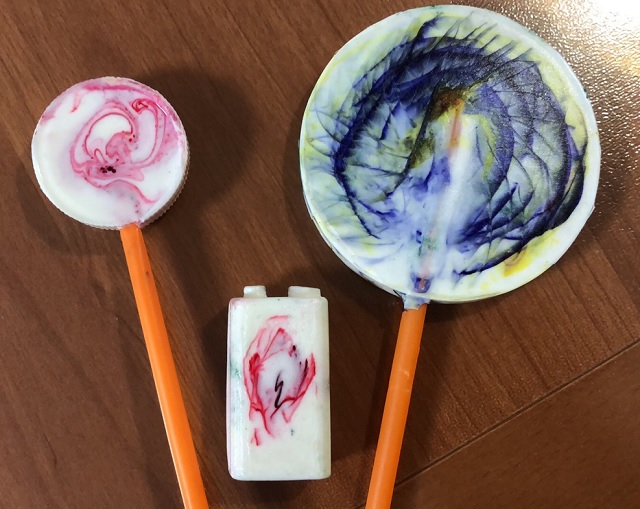
I also made two lollipops and a battery.
Machinable Wax molding
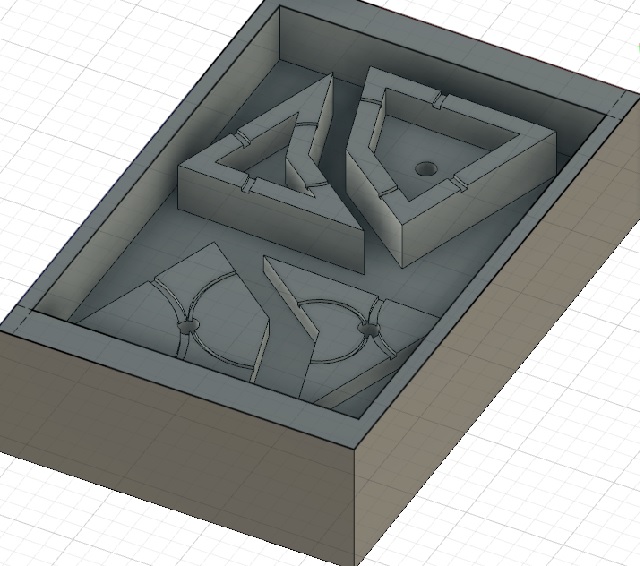
For my final project, I want to have a rewarding wall with Penrose Tiles. Everyday if I achieve my goal, I can add a piece to the wall. Each piece use magnetic to stick on the wall. The puzzle piece also has a GND leg behind it and 4 pins for RGB color on each face, as the circuit shown below.
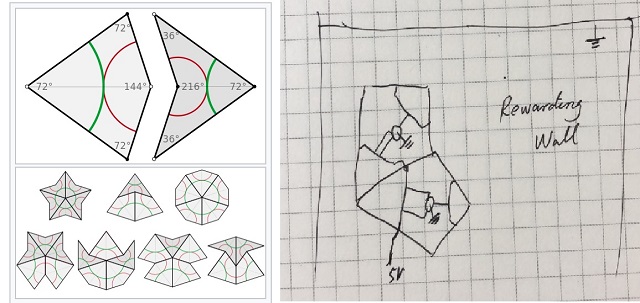
Thus I will make a mold for the two pieces, to create puzzle pieces with LED inside.
At first I made the design as below, planned to cast 2 components for each puzzle, put LED inside and then glue.
Then I think about put the LED inside the model while casting, so I only need one component for each puzzle. I modefied my design into two parts with registration, then I realize there was no need for two parts, as there was no under cutting anymore. Thus, the design was simplified again.
I left holes on each side for pins, which I plan to fill with conduction materials. (This is the negative-mold.)
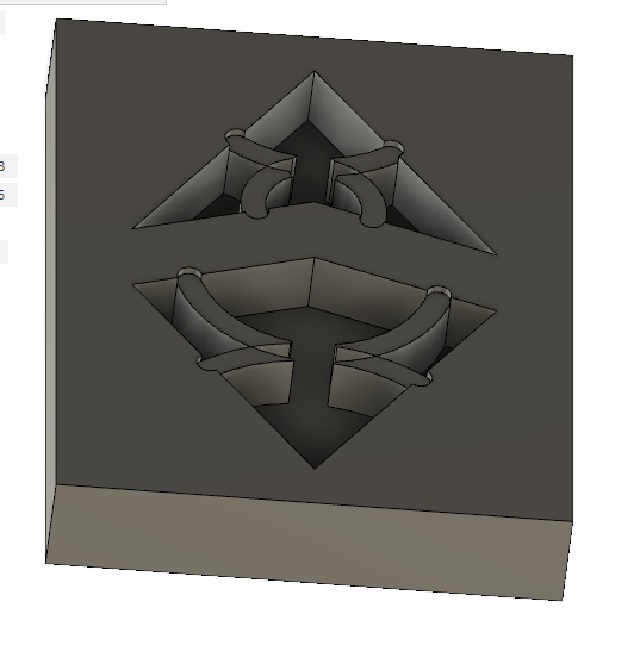
While reviewing the design with Saverio, he suggested me to have the pins all on the buttom, because it would be hard for me to remove the extra materials on the four side, and the connection would be bad. I just need to design the circuil on rewarding wall, to have color changing LEDs.
Thus, I modified my change, removed the four semi-circle holes.
The design looked simple, but there were lots of details need to consider. he edge must be at least 1cm thicker, and the width/depth need to fit the mills we have.

Adjust the parameters for roughing and finishing cut, and got a nice path finally as below. It only took 0.6 estimated hour and the result was nice.
Important parameters for my mold:
* Set “No margin” as I included the margin area in design file already.
* Choose partial and adjust the cutter area
* For Roughing Path
* 6mm square endmill
* Cutting-in amount be 1mm as all the surfaces are in N-mm height with no decimal fraction
* path interval be 5mm to make the process paster
* countour lines topdown
* For Finishing Path
* 3mm square endmill
* path interval be 0.5mm
* Choose Scan Lines + Contour Lines instead of scan only. This is important for a smooth side surface.

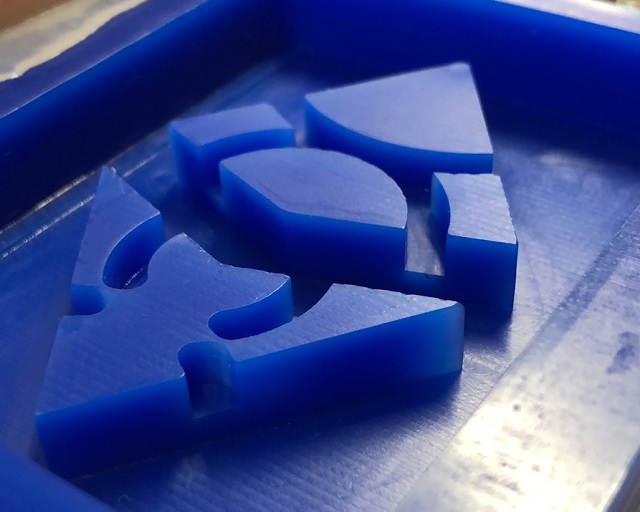
The massive wax crumbs can be reused to make a new block. So we use a dedicated vacuum to collect the crumbs.
Unfortunately, I was so careless that kept fixing one problem and introducing a new one, after modifying several times, my final file had even more mistakes.
I forgot to leave a hole for LED.
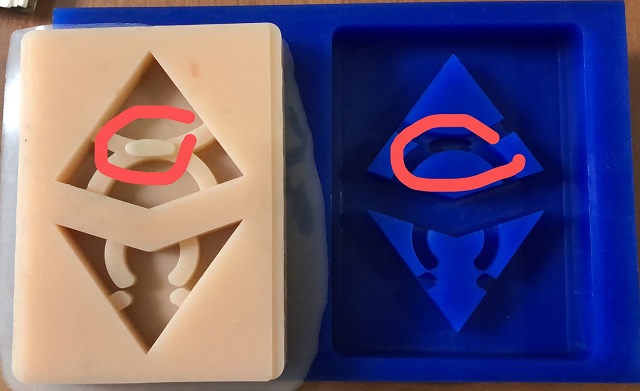
And the depth was too shallow that the LED can hardly fit in.

I’m redo the work and have not finished yet.