Week02. Computer-Aided Design
This week’s assignment: model a possible final project.
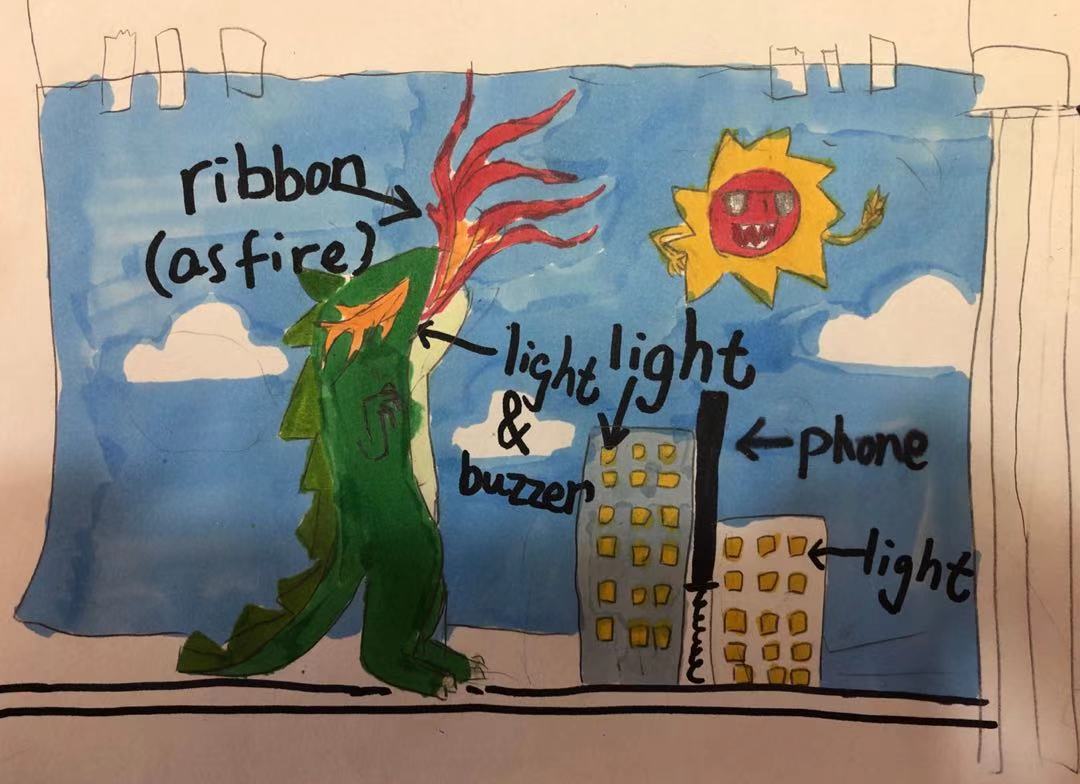
I will create a PUT-OFF-YOUR-PHONE LAMP as my final project. My deaughter drawed her design, which has a dinosaur and two buildings on a stage. I like her idea. However, I’m not quite sure if she will like to see a dinosaur for years. She might like a dog one week later, and also a ship instead of a building…
Hence, I would like to create some basic components, which she can use to build the lamp just like playing Lego. I prefer to cut woods rather than 3D print with plastic, so I decided to make 2D components just like jigsaw puzzle pieces.
the vector 2D Design
I get inspired by Penrose tiling, and decided to use it as my jigsaw pieces.
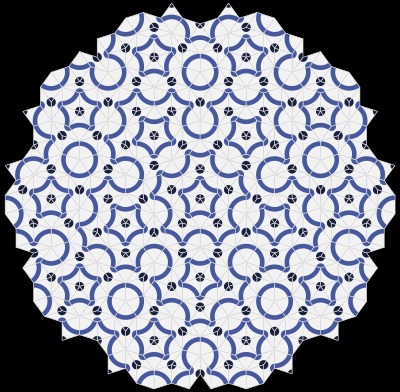
The aperiodic tiling is so beautiful. It’s built with only two shapes of tile pieces. As long as you follow the matching rule, you will get a non-periodic tiling.
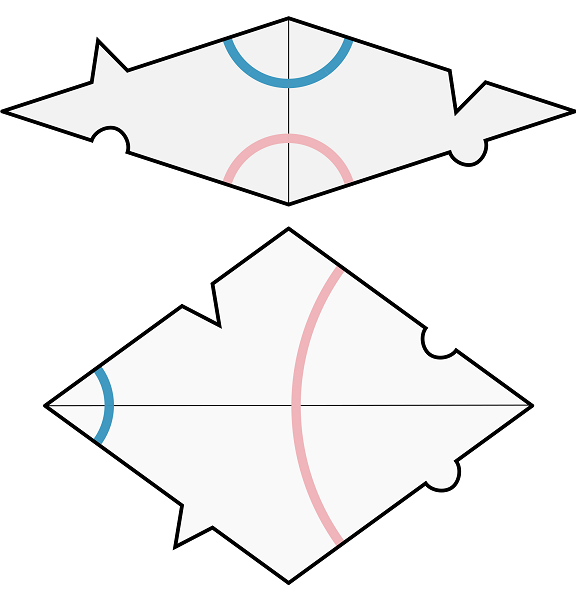
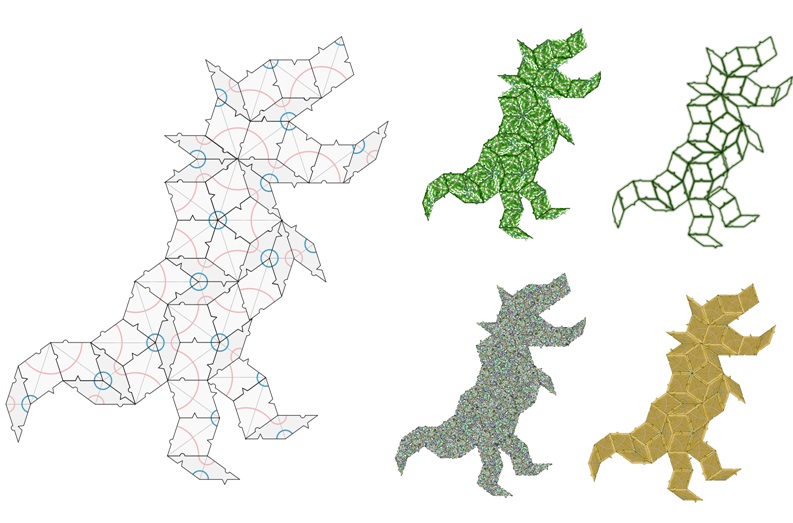
My first question is: may I use these two pieces to create a dinosaur?
I tried with Inkscape, designed a dinosaur with 26 fat pieces and 19 thin pieces.
The 3D design for puzzle pieces with Fusion360
Then I use Fusion360 to make the 3D model for the jigsaw pieces.
This is my first time using Fusion360. I found some tutorials from bilibili and they were very helpful. Navigation the Fusion360 UI Fusion360 for new makers
Evan with these tutorials , it still took me much time to figure out how to make symmetric lines. The pieces need to be connected without glue, so I added tenon-and-mortise work into the design.
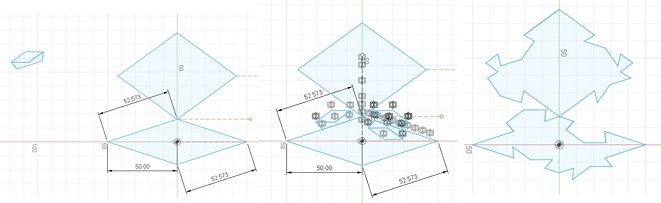
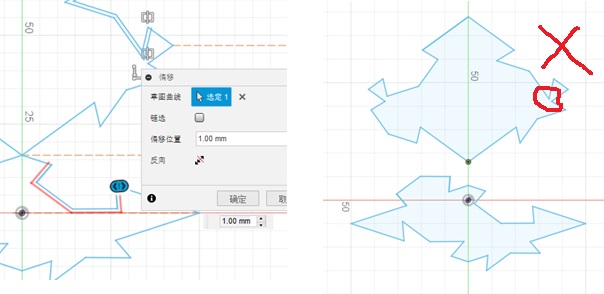
After finish the V1 draft, I realized that the mortise part need to be a little bigger than the tenon part, otherwise it will be too tight. So I used offset function to change the edge. After that, I found the tickness in the red circle part below is less than 2mm, which was too small and would be too fragile.
Then I did the work again, with a new design of the tenon-and-mortise part. This time I did the work much faster. After finishing the draft, I used extrude to make them into 3D pieces.

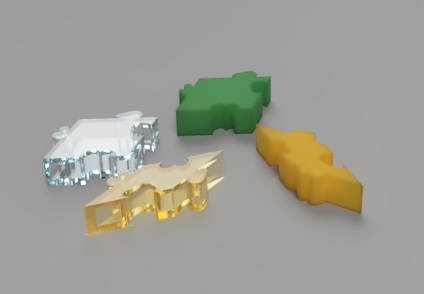
I created two solid pieces and two hollow pieces.
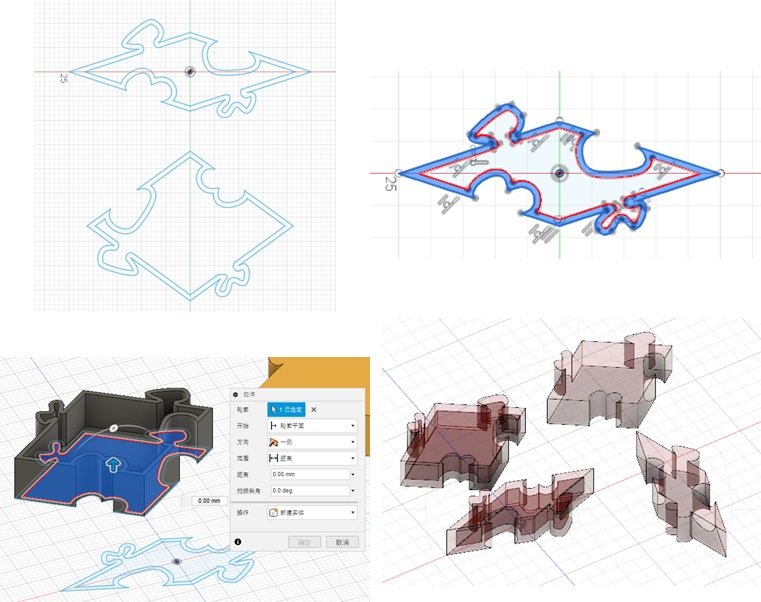
For the final project, I can use wood cutting pieces for the solid ones, and use 3D with transparent plastic material for the hollow ones. Maybe I can put LED into the hollow ones!
My GPU is so poor that the Fusion crashed several times during a easy render task. So I didn’t create the whole dinosaur, but only created its head, to make sure the pieces are designed correctly.
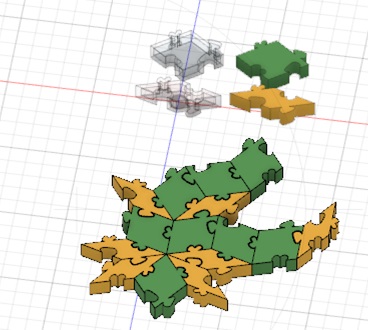
Cann’t wait to use computer-controlled cutting and 3D printer, to make them into real. How long will I be locked in home because of the nCor-virus? :(
Have these two jigsaw pieces, I can create the dinosaur, the building and even the sun/moom in my daughter’s picture.
The 3D design of the phone seesaw with Fusion360
The next item I created with Fusion360 is the seesaw, of which one side is the phone’s slot, and the other side will has a metal hand and works as a swither.
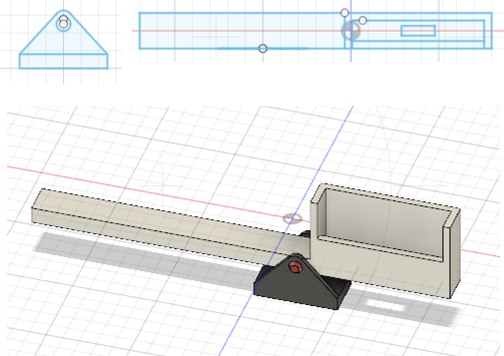
The hole in the slot is for charging battery.
I also created joints to connect the components together.
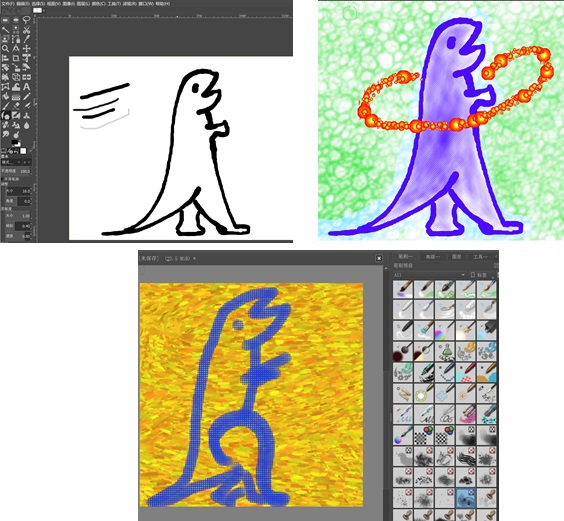
The raster drawings
I also tried several raster design tools. GIMP and Krita are my favorite ones.