3 - Computer-Aided Design
Well That Was Challenging
Tools & Assignment
 Updated for 2019 evaluation standards!
Tasks
- Model (raster, vector, 2D, 3D, render, animate, simulate, …) a possible final project, and post it on your class page.
Learning outcomes
- Evaluate and select 2D and 3D software
- Demonstrate and describe processes used in modelling with 2D and 3D software
Have you?
- Modelled experimental objects/part of a possible project in 2D and 3D software
- Shown how you did it with words/images/screen-shots
- Included your original design files
(Copy of my 2016 website, with spelling corrections :)
Preamble
Before the lecture I had absolutely no knowledge or understanding of CAD software, for this reason I was rather excited about this lecture. [Download links to my files as last paragraph]
Our Second Lecture
Neil Gershenfeld introduced us to a wide variety of software, explaining the strength and weaknesses of each one. He spent a longer time explaining and recommending Antimony, which seemed the most difficult of the entire list
Modelling The Final Project
The Software
I begun by watching videos and reading websites that suggested which software to download (links below), I looked at which matched the one proposed by Neil.
I then searched for the ones that are deemed beginner friendly and easy to use, thus I selected a few to download (Gimp, Inkscape, 123D design, libreOffice, Blender & Antimony) I also subscribed to Onshape.
So I begun testing each one… and with each one I had some kind of problem.
I begun with Inkscape, I attempted to trace over my hand drawn designs with it, to transform them to vector form, needless to say the result was sloppy at best, and time consuming.
Gimp was mostly an advance version of paint, which is quite useless for our purposes, so I dropped it quickly.
123D Design is a free software from Autodesk, which was okay, but I found that the quantity of functions was so vast I had no clue how to do anything (which made it rather counterproductive) and the 3 hours of tutorials was nearly totally useless when it came to practical use (since the key they pressed on the keyboard and mouse by the instructor were often unclear, making it difficult to replicate).
123D Discontinued
123D design is no longer offered by Autodesk in 2019.
LibreOffice did not start up.
I did not have the chance to use Blender, I left that for last since it is mostly needed to animate and colour, and I am also aware from the videos I watched it is deemed to have a very steep learning curve.
Then came Onshape, I watched their tutorials and a few on the web, and I just could not get it to work.
Firstly It was in inches rather then centimetre, even when I had changed the settings.
Secondly it was not straight forward, exactly like 123D Design, except the functions made less sense, and the interface was less friendly.
The only software I was really able to connect and understand was Antimony, its functions are easy and very simple to implement, the only issue is it’s stability and that I was unable to export an .svl file with colour.
Constant saving and outside software is the solution to that problem.
From then on I only worked with Antimony, and the 3D models at the end of the page are the result.
I did not attempt SolidWork or Rhino, simply because they are considered more advanced then the ones I listed above, therefore I assume it would have been even more complicated and erroneous prone, not to mention Rhino isn’t parametric.
The Modelling
As mentioned earlier using Antimony is tricky due to it’s stability issues, but once that is accepted Antimony is actually really simple to use.
Is split into two screen, one to see the model you are working on, while one called the ‘graph window’ holds your parametric input.
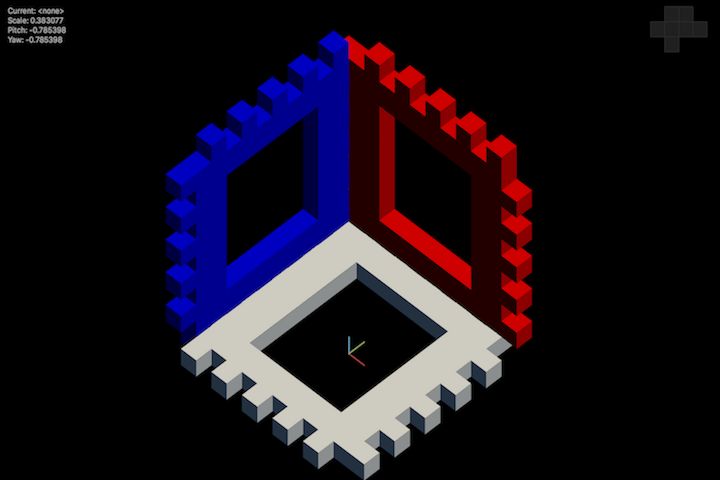
Antimony design full-colour
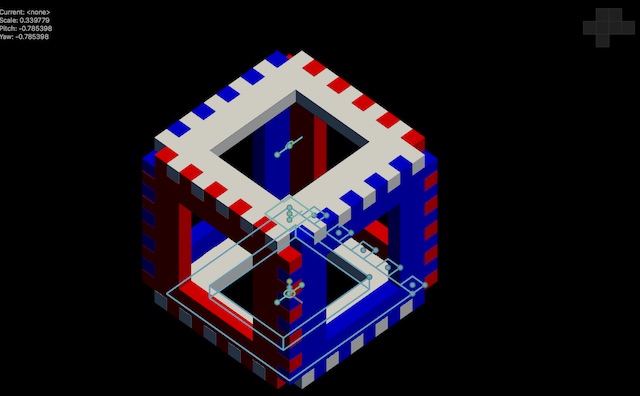
Antimony design full-colour - assembled
Antimony ‘graph window’ preview
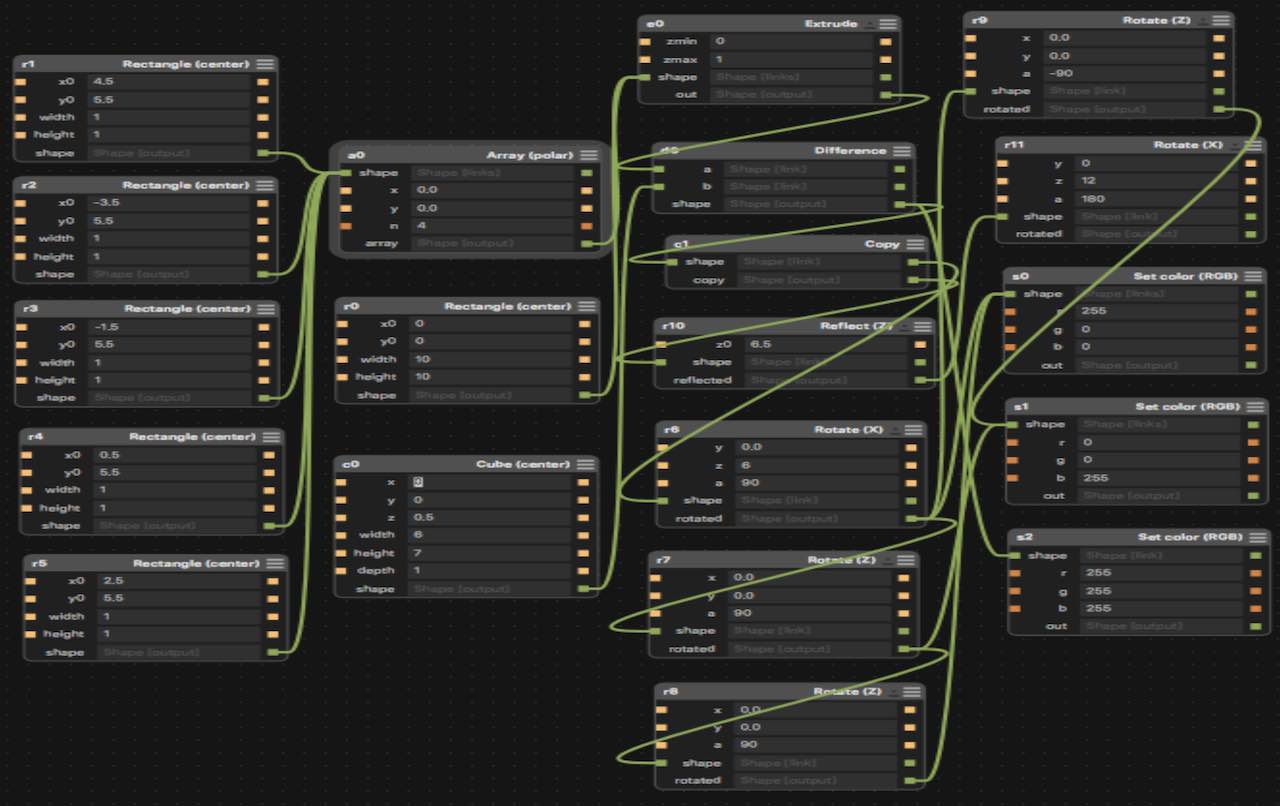
By selecting from a wide but not overwhelming list of 2D and 3D objects one can then apply various CSG effects to create original shapes, for more advanced users Script & Function even allow you to tailor your own objects by the use of Mathematical formulae.
From there it’s just a matter of practice before you are able to create any design; I also realized the more I used it the more I discovered new, faster ways to create the same results.
Useful Links
-> The Best Free CAD Program - DesignSpark Mechanical
-> Best FREE CAD Programs for 3D Printing
-> Best Free CAD Program: Onshape, creating CAD in your browser!
-> Ask Ben Heck - Best Open-source or Free CAD Software
-> CAD Software Reviews
-> Top Engineering CAD Software Products
-> Five Top Free CAD Packages
Gallery 
3D Model of Type-1 Facet
This was my Antimony made 3D model of the interlocking facet of the type-1 satellite module which should house the electromagnet.
3D Model of Type-2 Facet
This was my Antimony made 3D model of the interlocking facet of the type-2 satellite module to house the electro-permanent magnet.
3D Model of Electro-permanent Magnet
This was my 3D model of what the electro-permanent magnet should look like.
3D Model of Electromagnet
This was my 3D model of what the electromagnet should look like.
3D Model of Cube
This was my 3D model of what the electromagnet should look like.
2019
From FabAcademy2016 several things changed, particularly certain CAD programs are no longer available, such as 123D design, or have been bought by AutoDesk, such as Eagle.
However, I haven’t been super involved with CAD in the past 3 years, therefore I haven’t felt much change (or I haven’t paid much attention).
3D Software
As of 2019 my favorite CAD is still Antimony in terms of sheer fun of usage, but I figured it’s serious limitations. The main 3D programs for me are the following:
I make most of my designs using this software, particularly when I want a hybrid between functional & aesthetic (eg. a phone case).
An example of something I made using Antimony : Illy Pressurized-can Hand Tool
Functional parts that are simple to design from a 2D face, (eg. fixings, tool holders).
This is also a hidden gem, and with the proper tutorial you’ll find yourself making useful parts faster then you could in most other CAD software.
One such design I made using it is : Z-Axis Stabilization
For repeatable designs with different parameters (eg. screws)
Complex functions, designs and simulations.
Since I’m a University student I get a free license.
To be totally honest I usually use it to modify/remix, close holes and remove watermarks in designs from thingiverse models.
One such design I made using it is : Remixed Twirl Knob
I use this at work sometimes, mainly to create simulations and animations for synthetic data.
2D Software
My use of 2D software is very limited, beyond the occasional drawing with my wacom tablet using SketchBook or creating graphics for presentations using Inkscape, both of these are free tools, I never had a reason to switch to the expensive Adobe suite.
Gimp is useful for editing photos, but I never used it much.
From Sketch to Model
I’ve already shown my Antimony workflow, so I’ll show how I’d use the other software programs listed to make a part to 3D print.
I’ll take you through a 2 of my typical design cycles and hopefully get two nice 3D models out of it.
2D Raster Programs - SketchBook
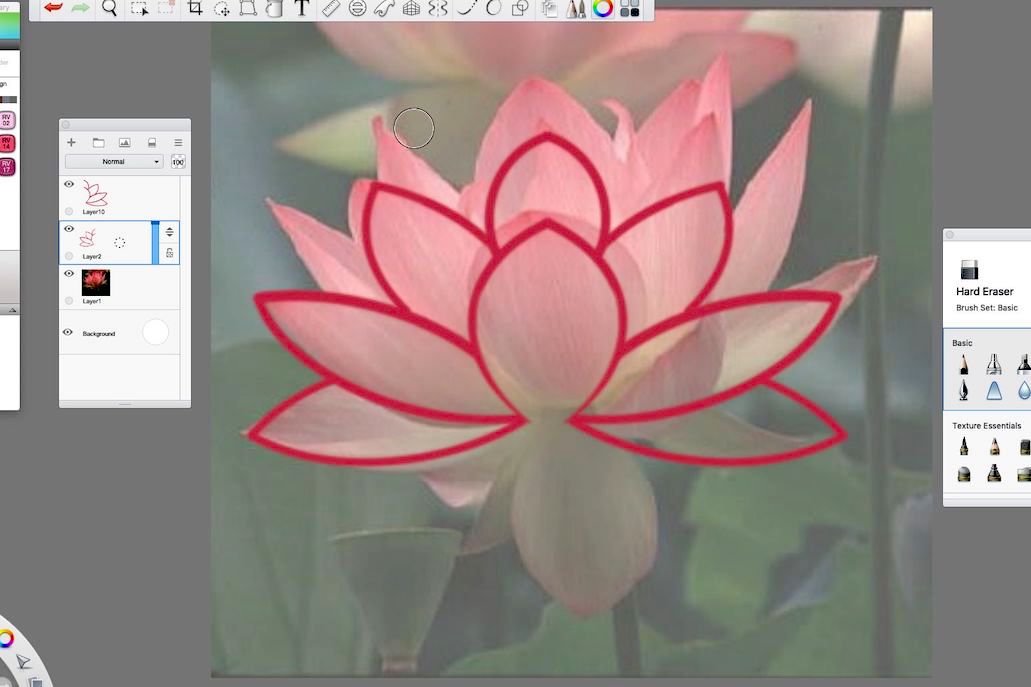
Let’s start by making a digital sketch of a water lily to make a 2.5D logo, many people use pen & paper, but seeing I am very weak in hand drawing SketchBook is more my type.
We can download SketchBook either from the AppStore, or using brew with the following command: brew cask install sketchbook
I used the latter.
I then connect my wacom tablet, a very old CTH-661, which requires special drivers from the wacom drivers pag, under drivers for previous generation products.
Also, make sure that in System Preferences > Security & Privacy > Accessibility you’ve [x] enabled ‘control over computer’ capabilities to the drivers.
We can then start SketchBook and start drawing:
Result - Over Original Photo
At this point we export the result (with white background) as a .png file.
TODO - Finish below this point
2D Vector Program - Inkscape
Inkscape is a very powerful vector program, it’s open source and runs on most common operating systems,
I installed it using brew: brew cask install inkscape
Inkscape is somewhat buggy on Mac Mojave, but since I don’t push it very far it behaves pretty well
(then again I use Antimony so ‘stable’ isn’t really my thing ¯\_(ツ)_/¯ ).
I could have gone threw the tracing process with Inkscape directly, instead I opted for doing it on SketchBook for two reasons:
-
I could show how I use the 2D raster program
-
I can demonstrate one of my favorite features of inkscape features - bitmap tracing
This is cool because transform bitmap images to .svg files which we can load onto CNC machines, I’ll make use of this feature in future weeks.
Open Inkscape:
-> File -> Import... (Ctrl + i) -> Select image to trace
Exporting A Single Object
Guide from here
- Select the object(s) to export.
-
Resize page to drawing or selection
File->Document Properties->Resize page to drawing or selectionorCtrl+Shift+R
-
Invert selection
Edit->Invert selectionor!
-
Delall other objects -
Save AswithCtrl+Shift+S. -
Select
Optimized SVGas the format if you want to use it on the web.
Modelling The Final Project
When I created the model for the final project, I had several design constraints:
-
Since 3D printing is the most convenient form of 3D manufacturing for me, the final design dimensions should be within the size of the printing bed that is:
220 x 220 x 300 mm.