10. Molding and casting
This week, I have to design a form that can be cast into a mold and mold it with another material.
I decide to mill paraffin wax and use a food silicone to create the mold and to cast chocolate. My design is inspired by the usual one used in the several previous week.
I can use some 6mm; 4mm ; 3mm and 1 mm bit to mill.
Group assignement
Test some material and read the specification and security notice. I don’t have many choice of material.
RTV 3428 A and B from : https://espritcomposite.com/rtv-alimentaire/40-silicone-contact-alimentaire-3428.html
Specifications : It’s a silicone for food. White color. Proportion 100g of A for 10g of B Timing for the full curing : 16h at 23°C or 40 minutes at 60°C Maximum timing too pour into the mold : 90 minutes at 23°C
specification document in french : rtv3428_a_b_ft.pdf
I’ve sent several email to obain the security notice but nether get an answer …
Finally I found one on Internet: RTV3428-MSDS.pdf
Those first test give good advices :
-
Don’t mold something that can float, like MDF.
-
Porous material will have a poor texture.
-
Think about unmolding. I decide to create a shaft on the edge.
I mold a MDF laser cut
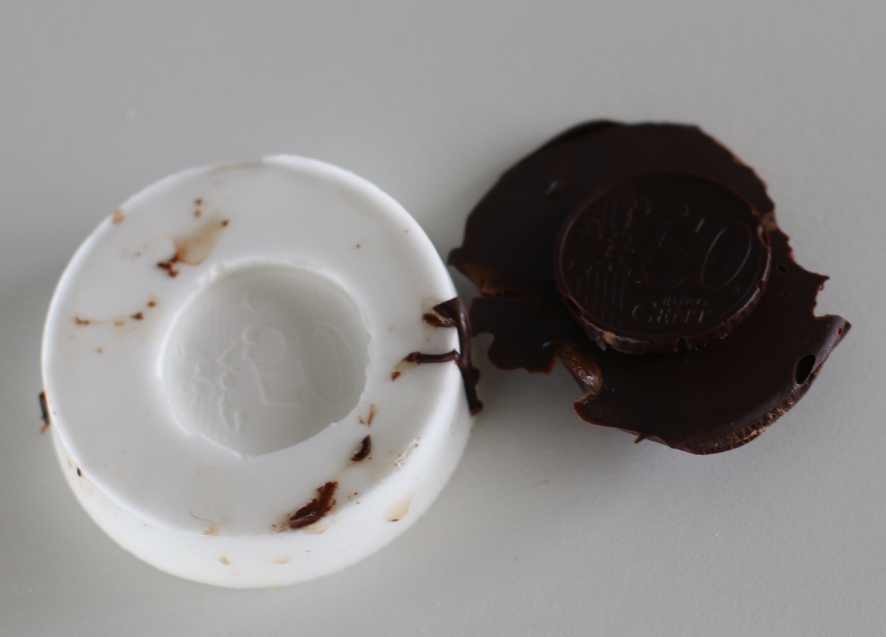
I mold a 0.50€ coin
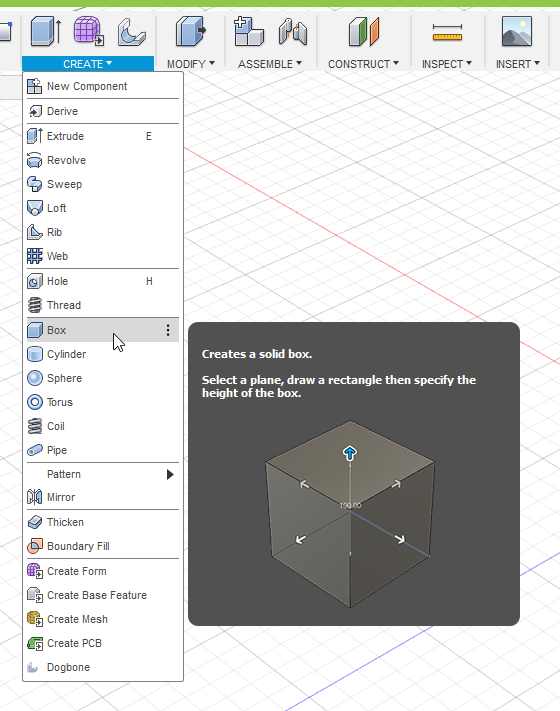
CAD Design.
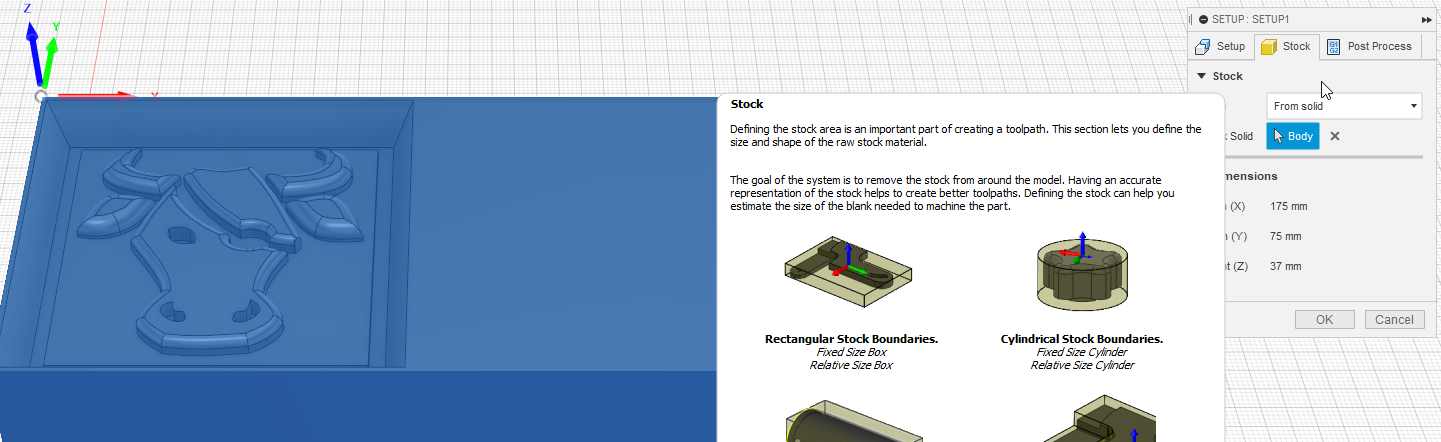
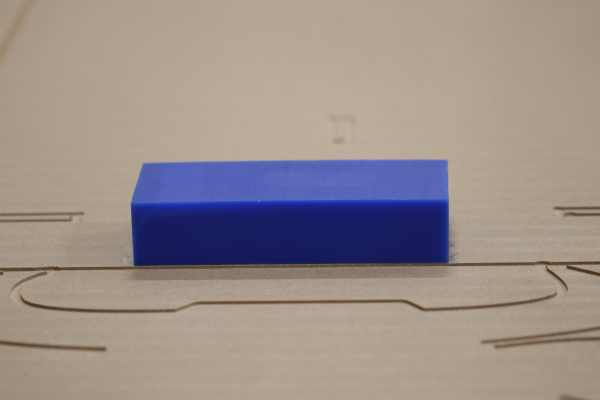
I start to design a cube, the exact size of my stock material.
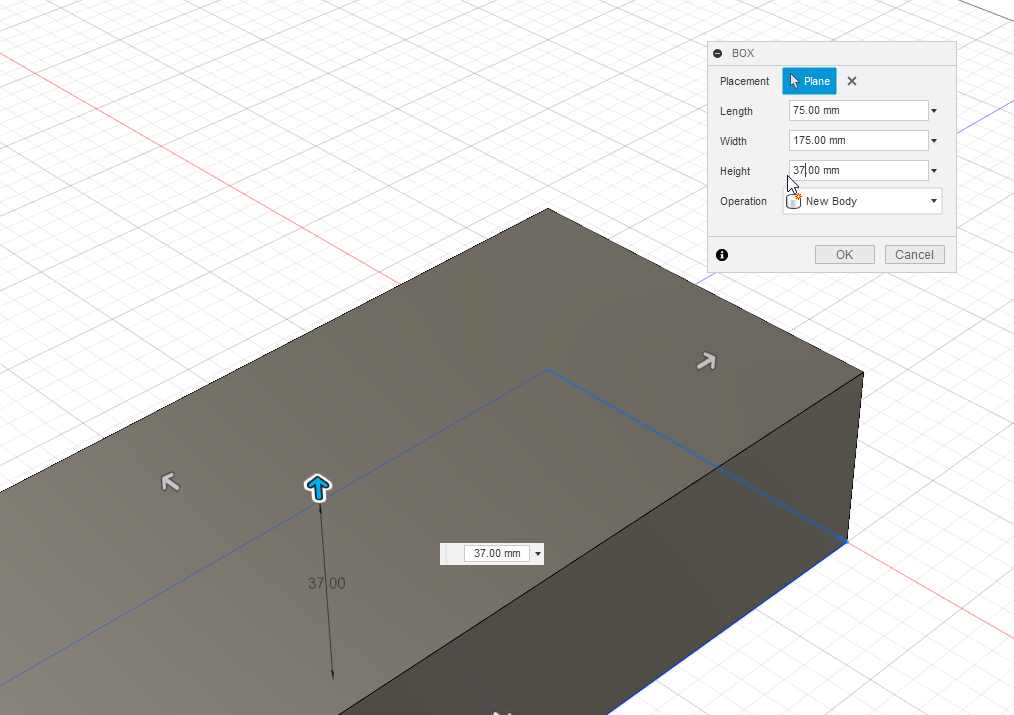
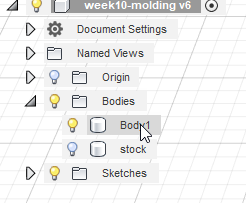
I made a copy of that body to later define it as my stock material.
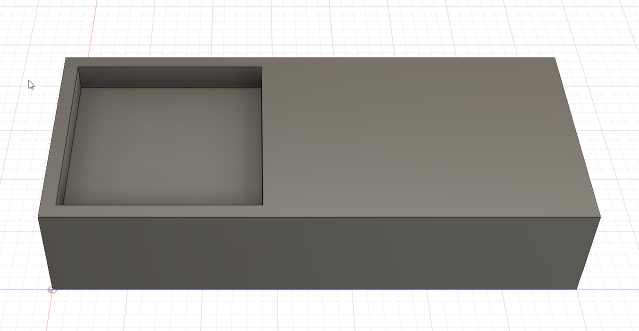
I remove a small cube inside it.
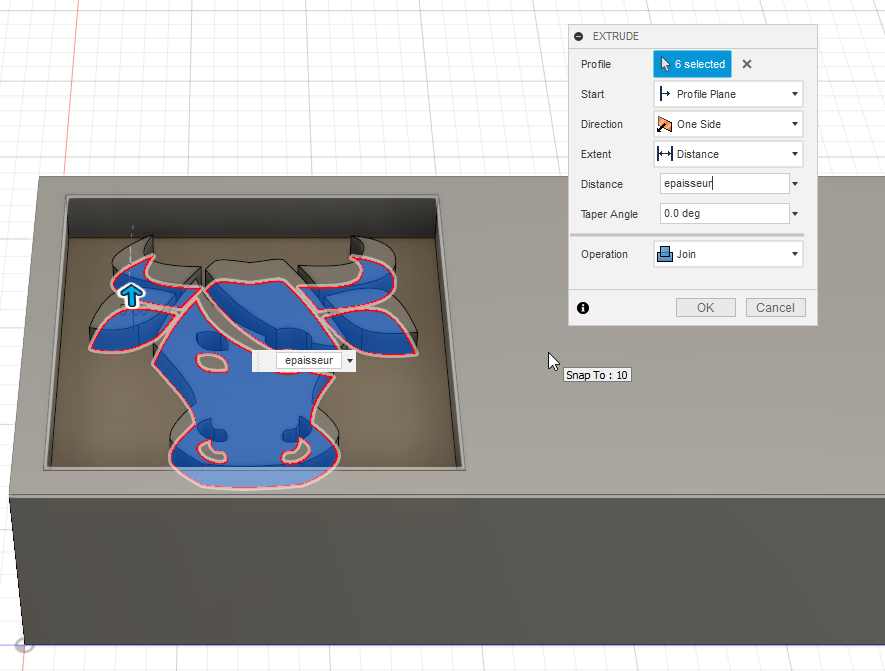
I insert my previous SVG file as a sketch, resize, rotate and center it.
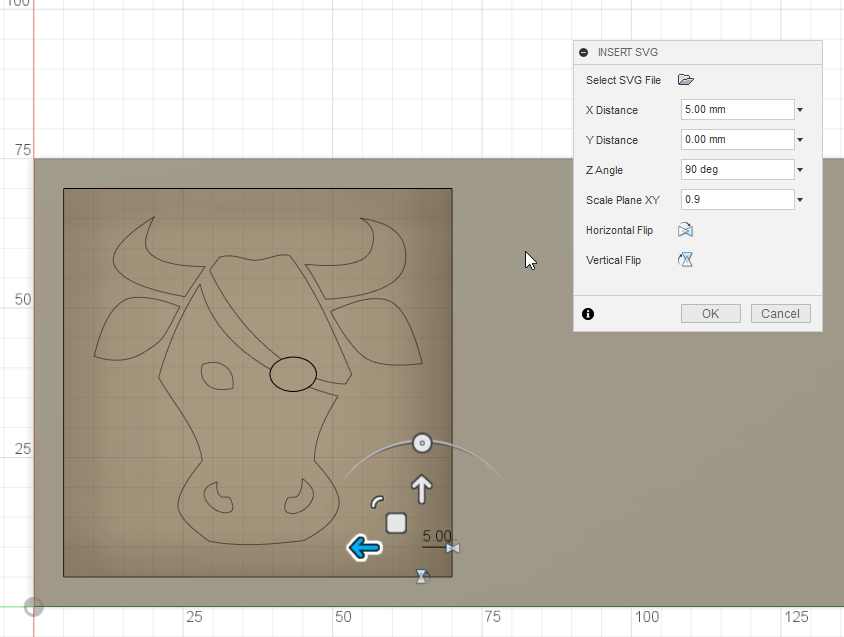
I extrude the sketch with a parametric value, first at 5 mm then later I correct it to 2.5 mm , because the shank of my 1mm drill was at 3 mm and I had collisions.
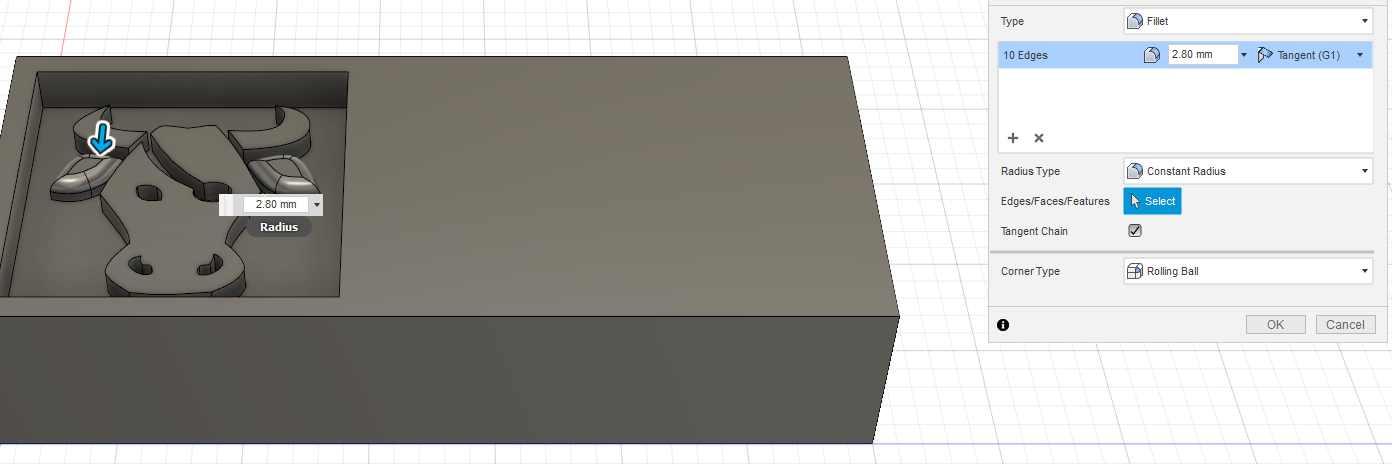
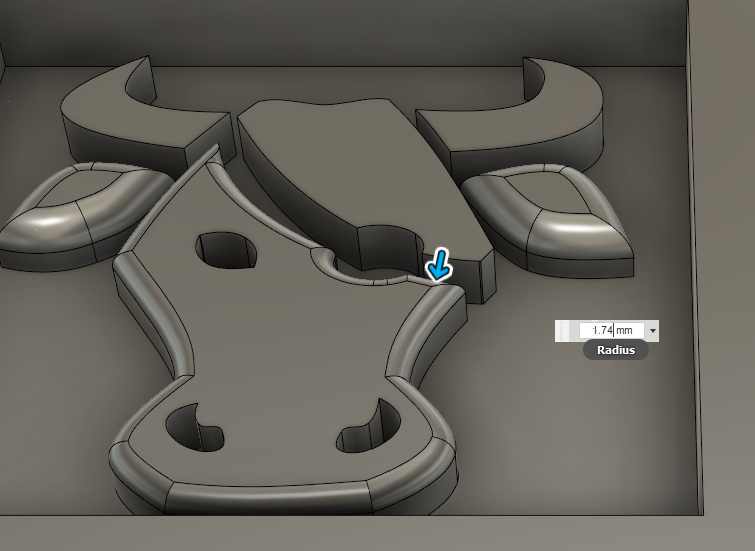
To have a 3D design and not a 2.5D design, I round all the top edge with the fillet modification.
I design another depth to give to chocolate some thickness.
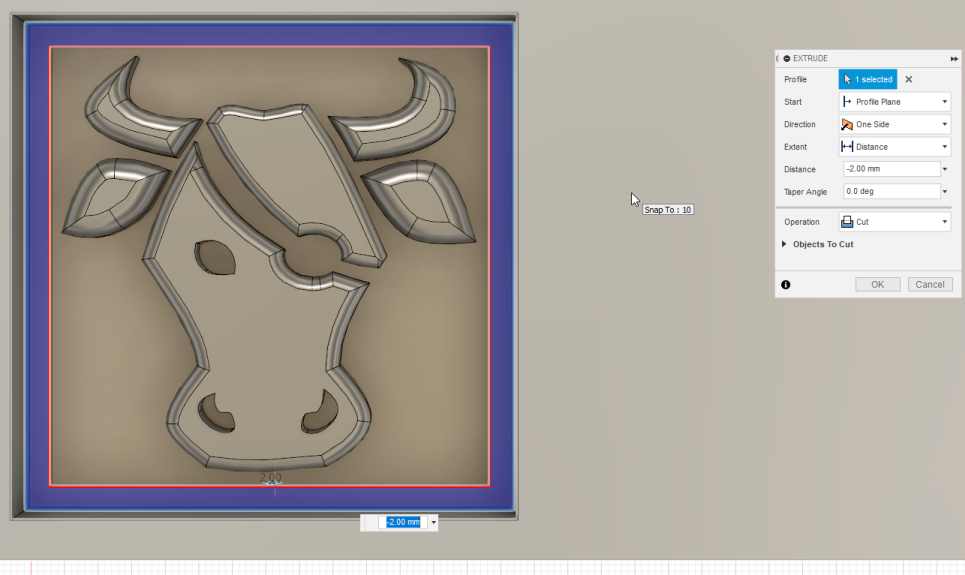
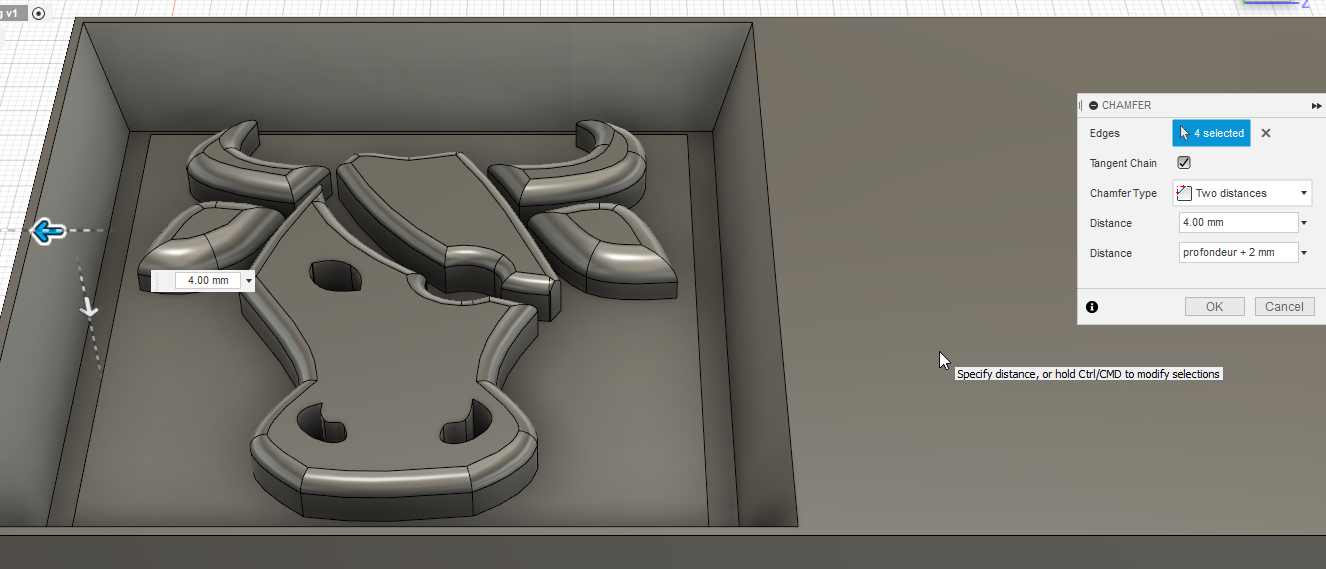
Learning from the previous test and the unmolding. I design a chamfer on the edge of the mold.
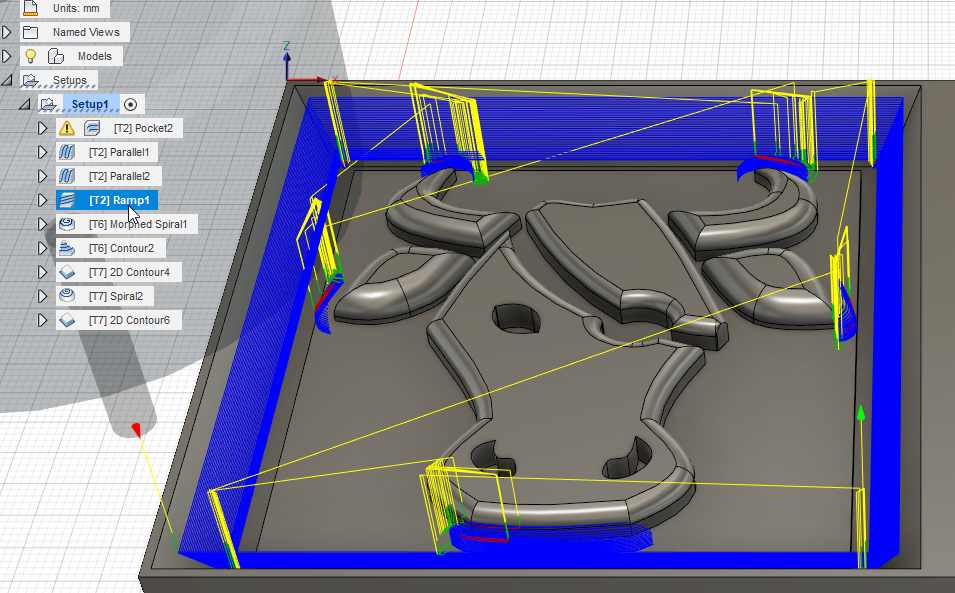
Manufacture
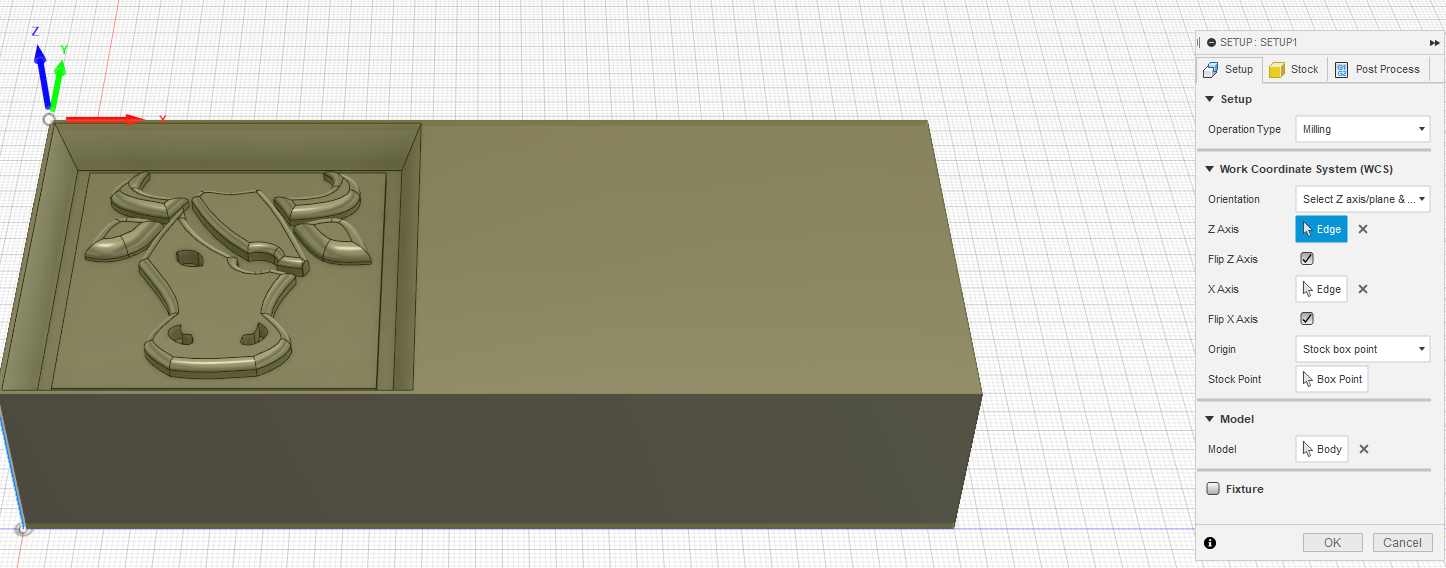
I select the correct parameter in the setup. I use the copied body as stock material.
Choose the correct orientation and the origin point.
I decided to use in first place the 4mm and the 1mm. Later, after breaking the 1mm, I add other strategies with a 3mm bit.
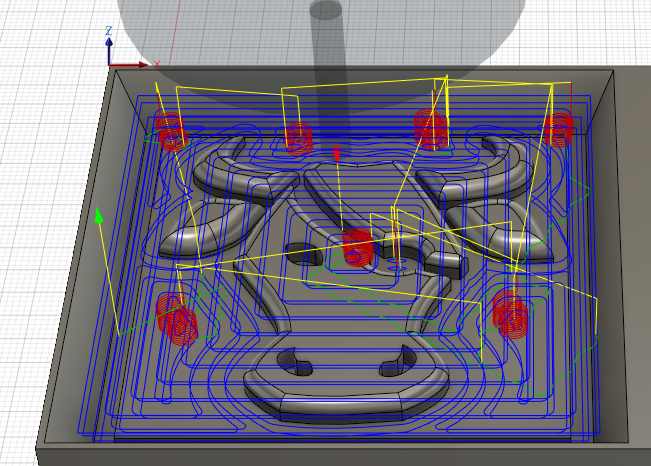
3D pocket clearing
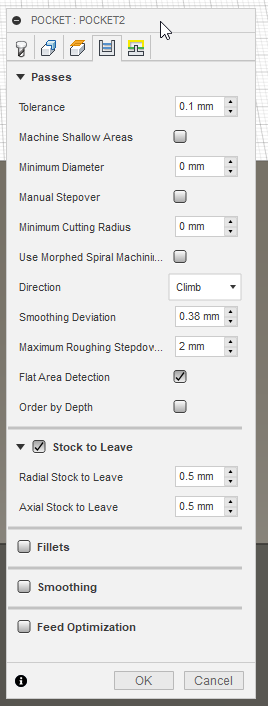
I started with a 3D pocket clearing as a rought.
![]()
I select another stock contour to delimit the machining work.
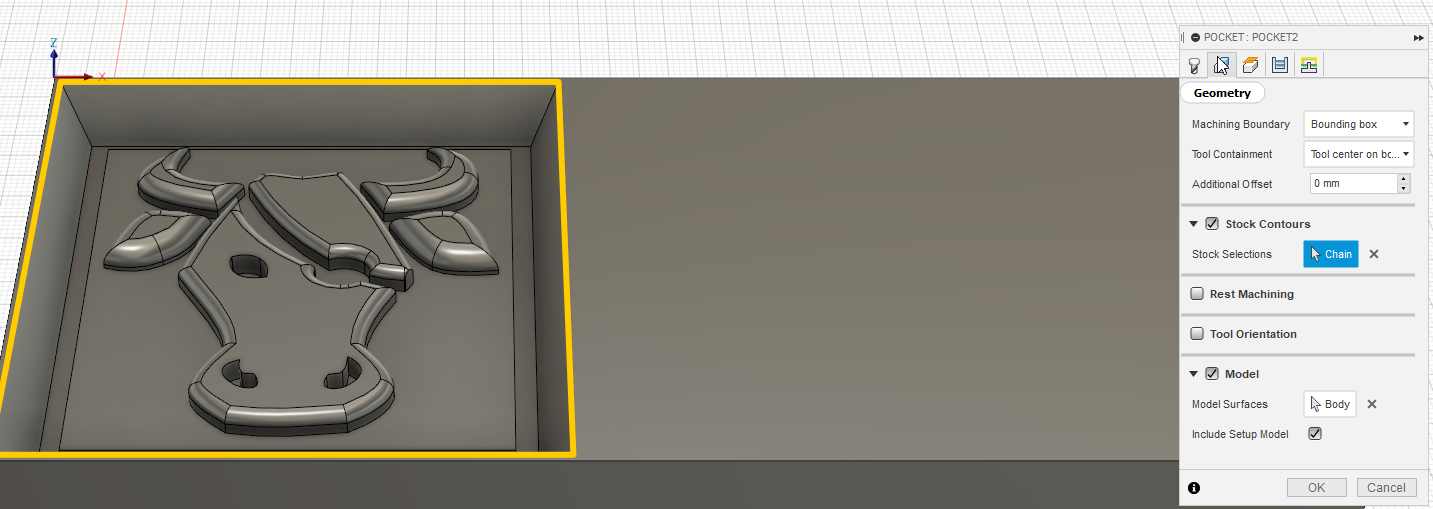
As it is a rought operation, I select the stock to leave of 0.5 mm and use the 4mm tool, I also select a maximum roughint step down of 2 mm.
The result with the simulation tool in the stock, you can clearly see the steps on the border.

The cutting feedrate is really fast : 2000 mm/min
Parallel, exterior
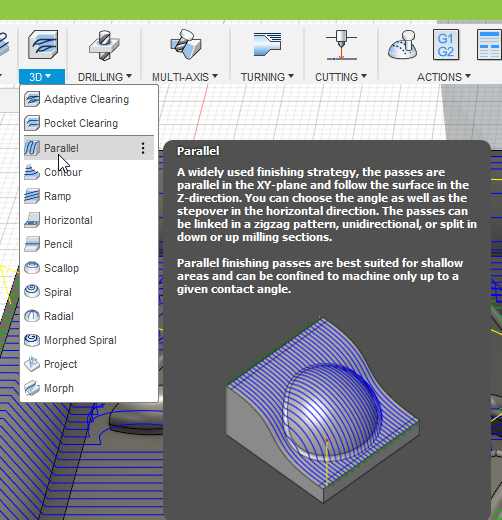
I select 2 differents Parallel strategies, because I want a small stepover for the design and a less precise and quicker one for the part with less fines features and the chamfer.
The cutting feedrate is really fast : 2000 mm/min
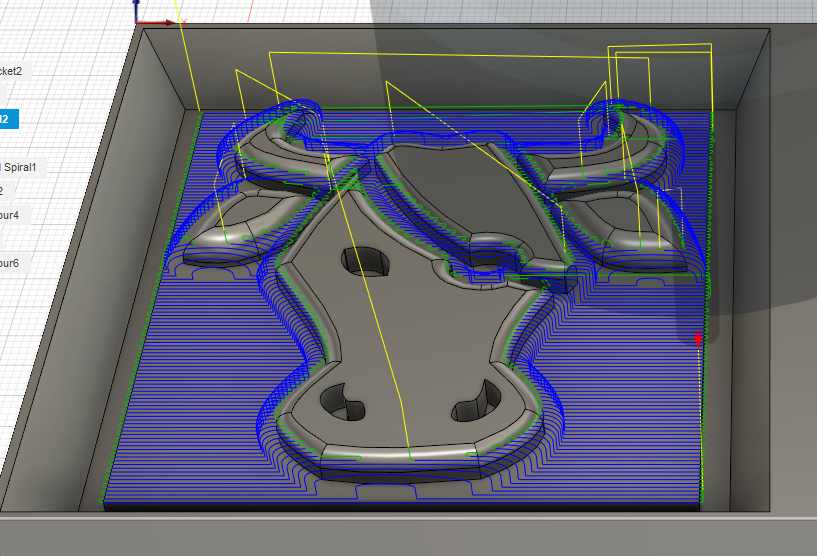
Ramp
I select a ramp operation to have a nice chamfer with the 4mm bit.
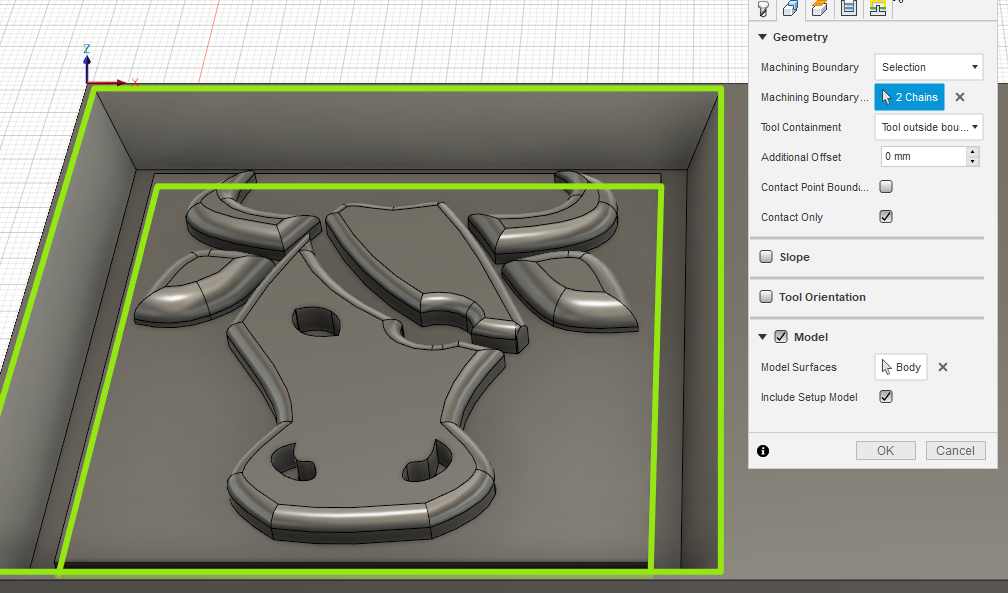
Here also I select the boundaries to limit the milling work.
And select a small stepdown : 0.2 mm , to have a nice and smooth chamfer.
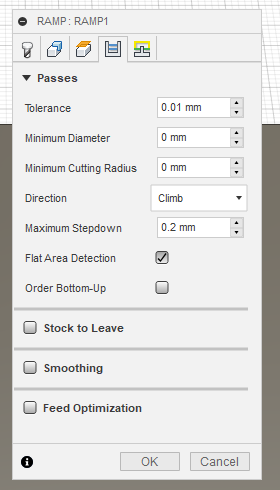
The cutting feedrate is really fast : 2000 mm/min
Too quick is not safe
I want to directly do the fine details with the 1mm bit. But it has break. There was still too much material for the milling speed I want.
I decide to add other operations with a 3mm bit.
The cutting feedrate is really fast : 2000 mm/min
2D contour 3 mm
I add a contour to remove the border part.

The cutting feedrate is really fast : 1500 mm/min
3D spiral 3 mm
I remove more material with a 3D spiral with a 3mm bit.
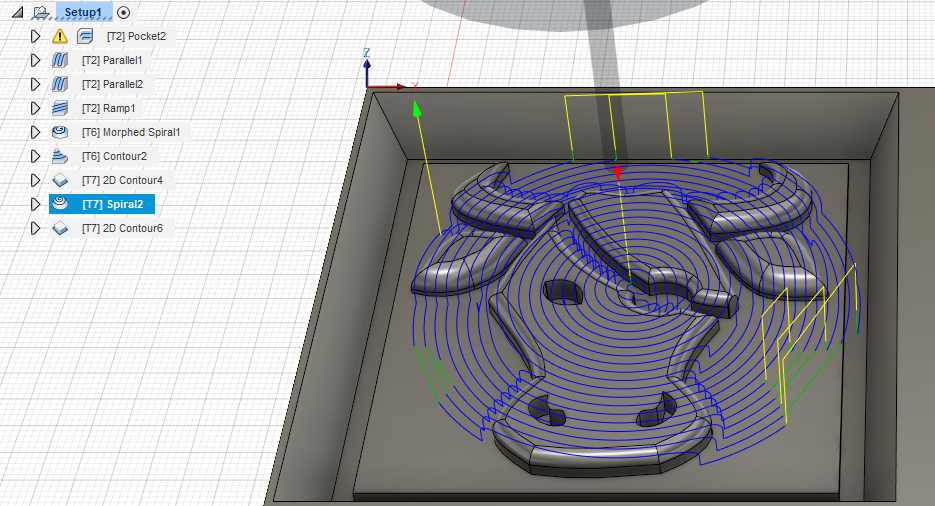
The cutting feedrate is really fast : 1500 mm/min
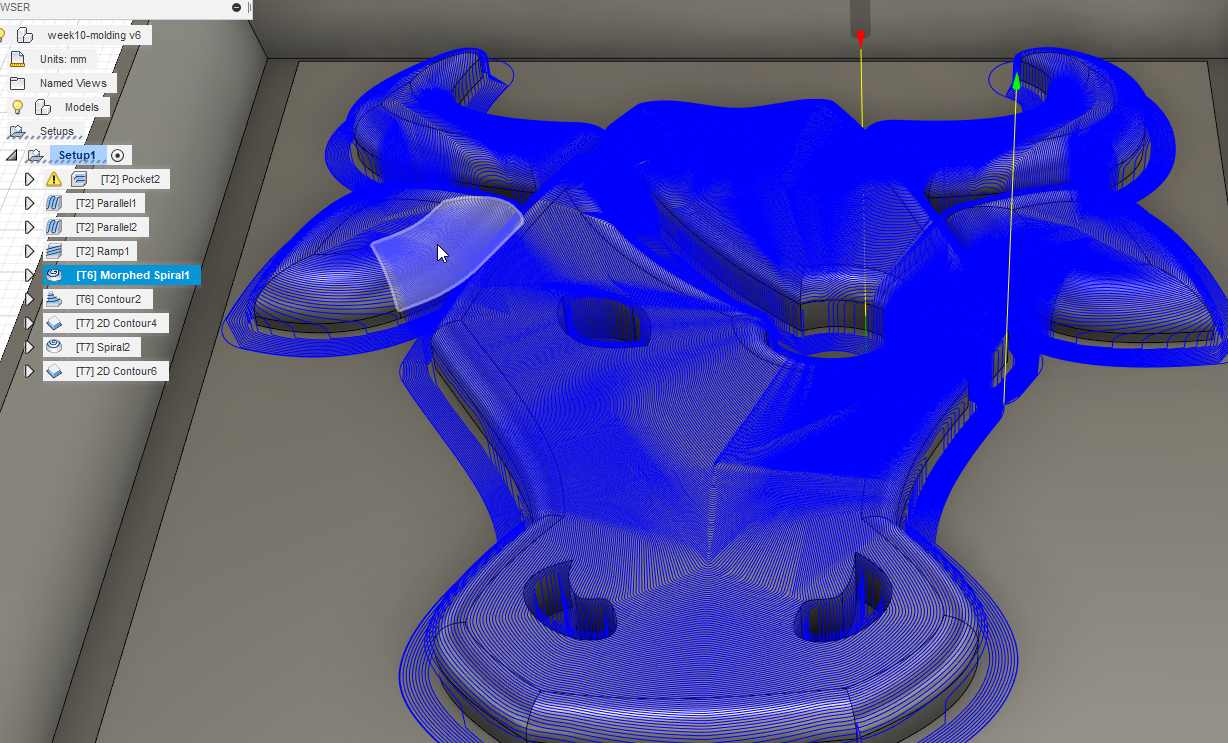
fine 3D spiral 1mm
Finally I can apply the 3D spirall with the 1mm bit and a really small stepover.
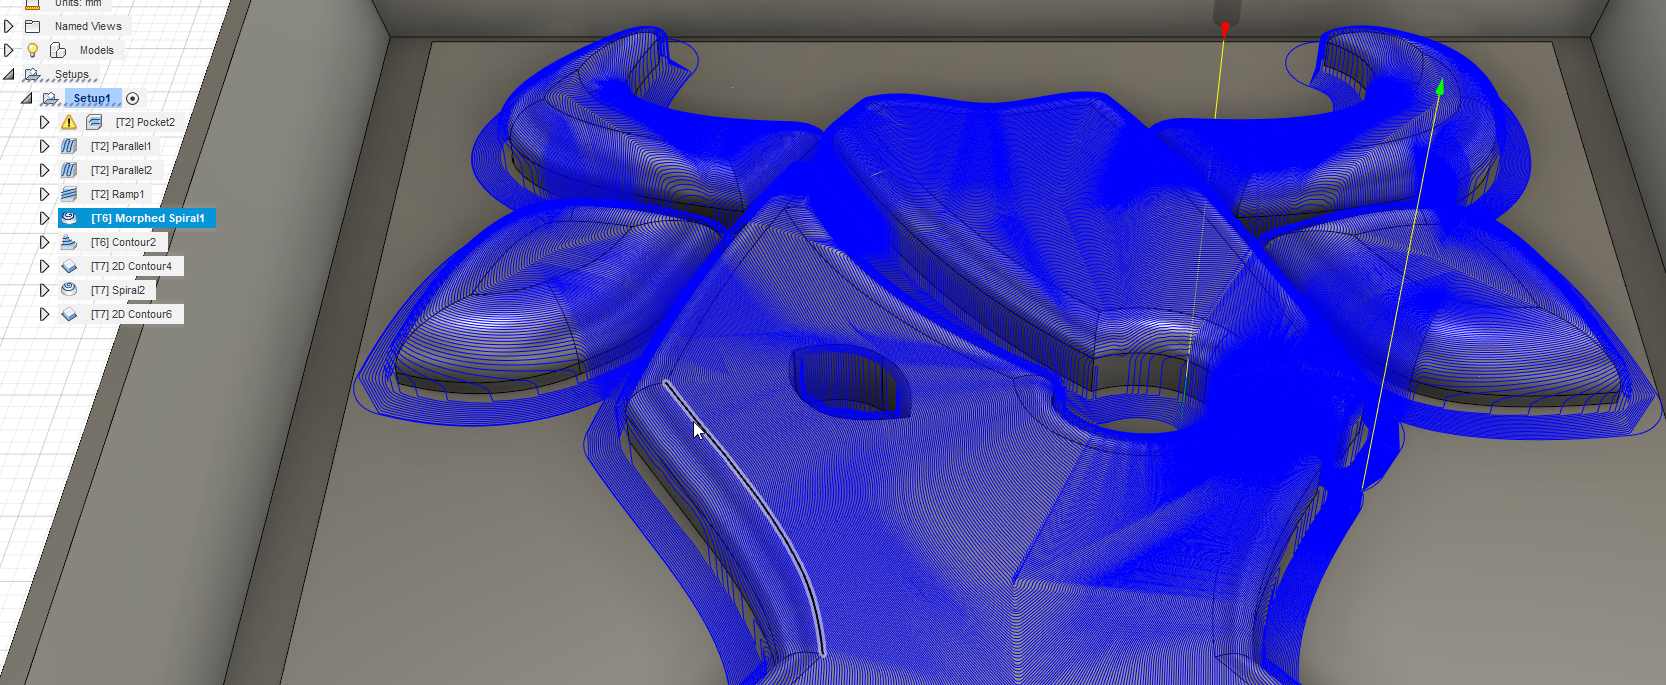
Same again, I limit the part where I want to mill. I add a 2mm offset to have smooth edges.
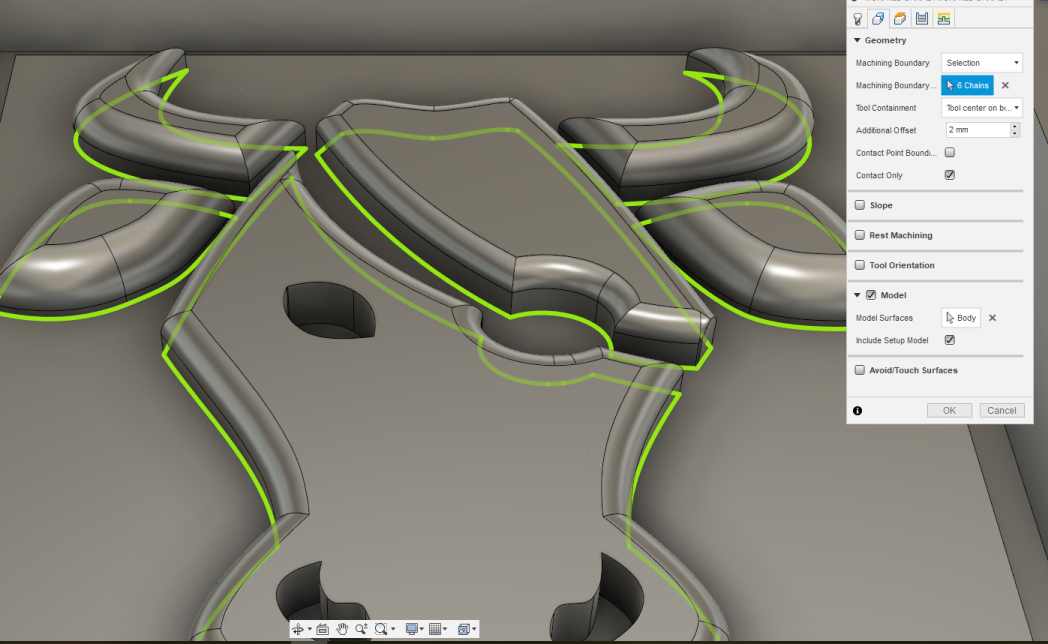
The stepover is really small : 0.2 mm
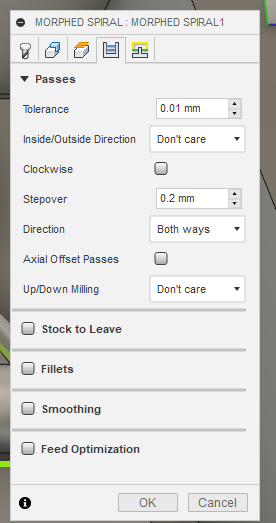
The cutting feedrate is really fast : 1500 mm/min
3D contour
I finish with a 3D contour. To have sharp and clean edges.
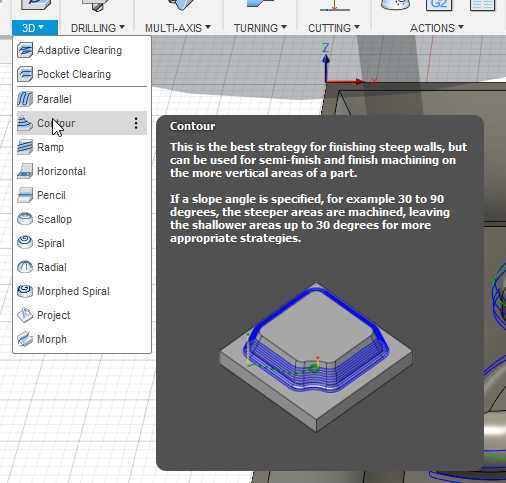
The cutting feedrate is really fast : 1500 mm/min
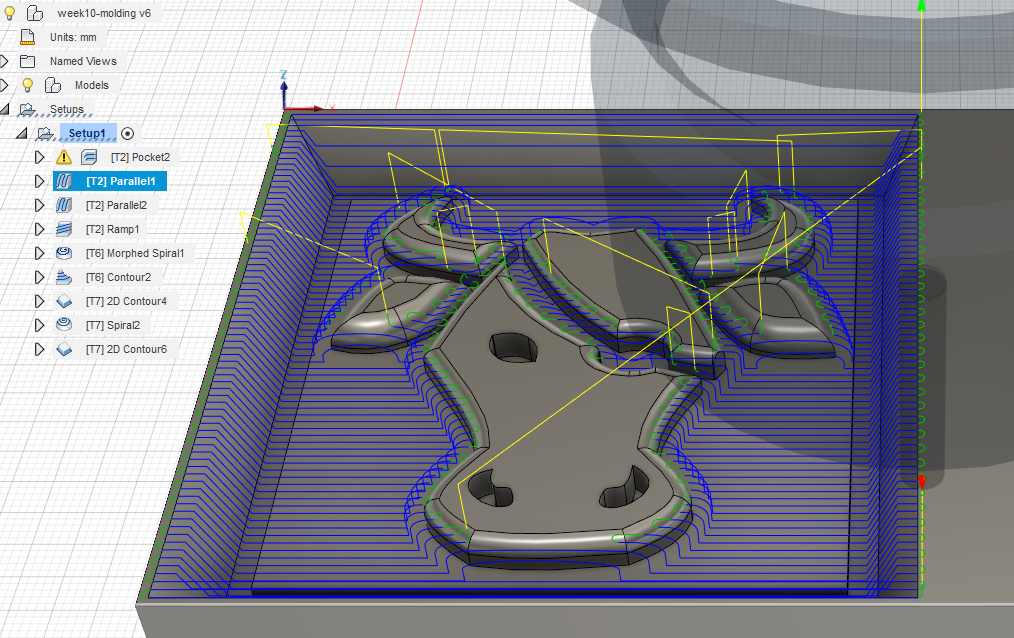
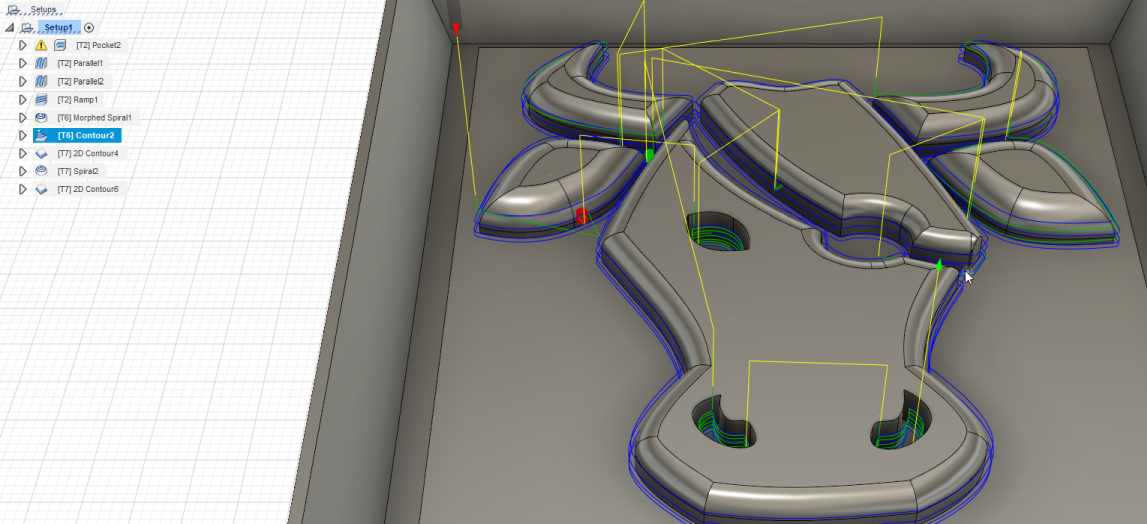
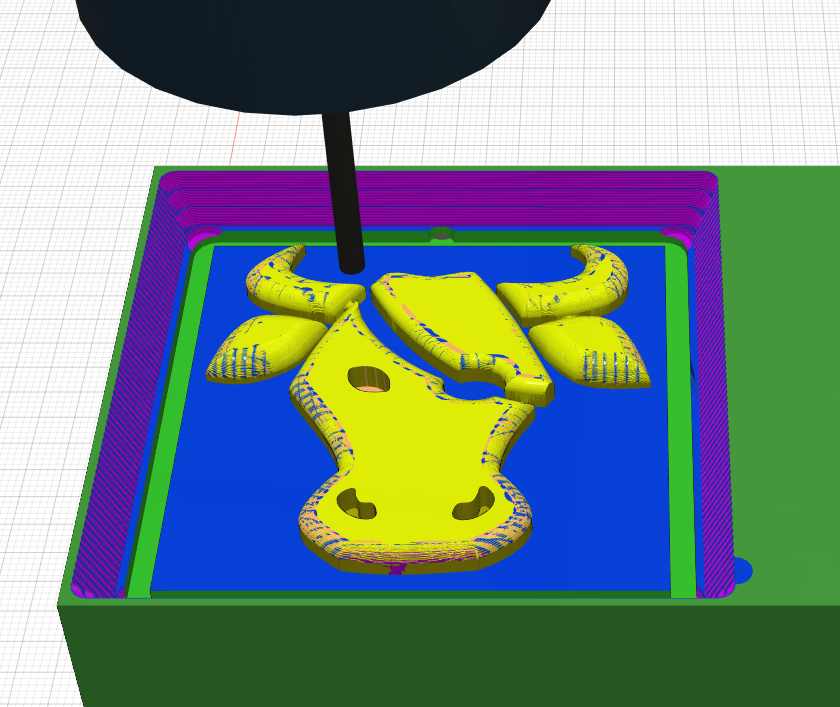
Simulation
I check all my operation with the simulation tool, to avoid collisions.
And check the statistics.
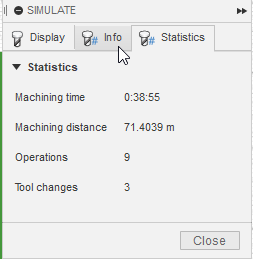
Normally it should take 39 minutes. I have 3 tool changes and 9 differents operations.
It take a longer time because I decide to slow down the operation with the 1mm drill to avoid a breaking of the mill.
Milling
Normally I have a double face tape that I had selected. I take hours to find it back without success. So I had to use another one. Later I discover that it was a really bad idea !
I glue it on the sacrificial material .
I do the origin on the milling.
But sadefully the material move after a few seconds. Clearly the 2 faces tape was not enought.
After that I clamp strongly the material. And It works.
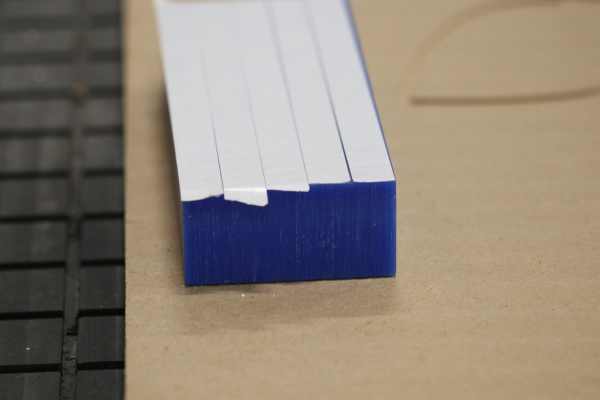
The small stepover in spirall :
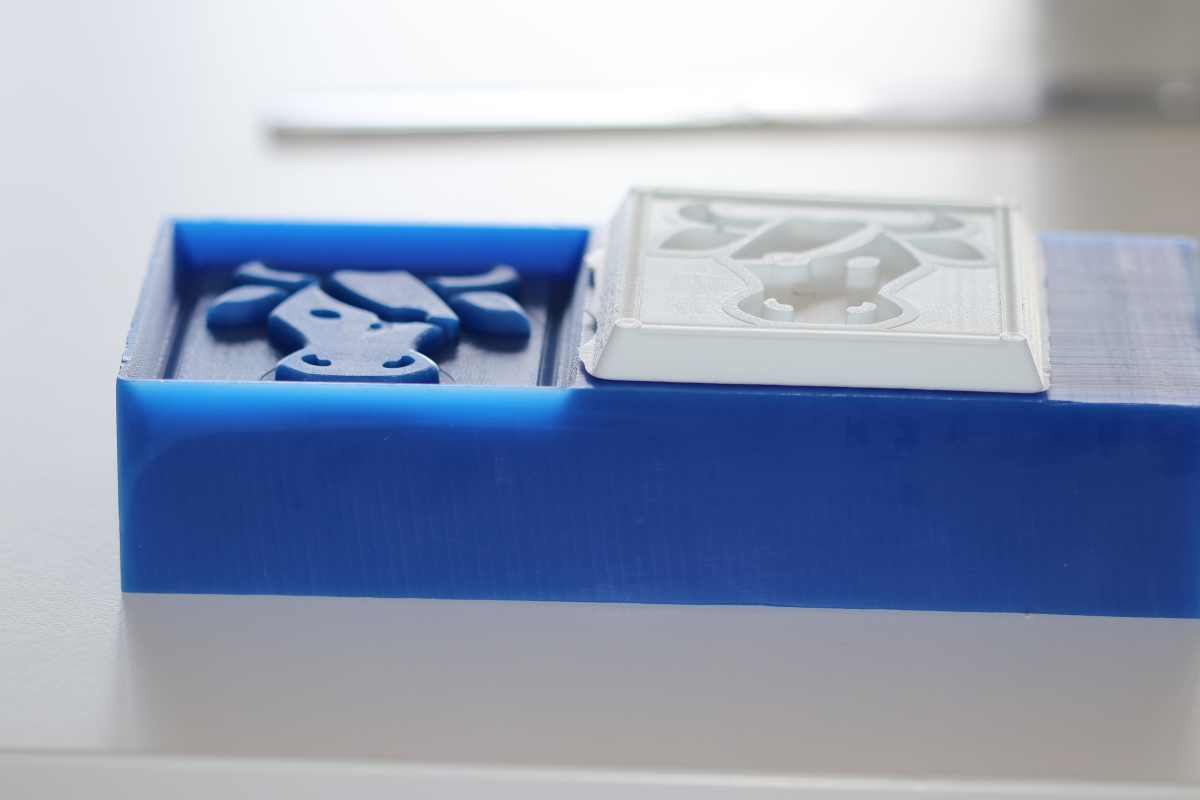
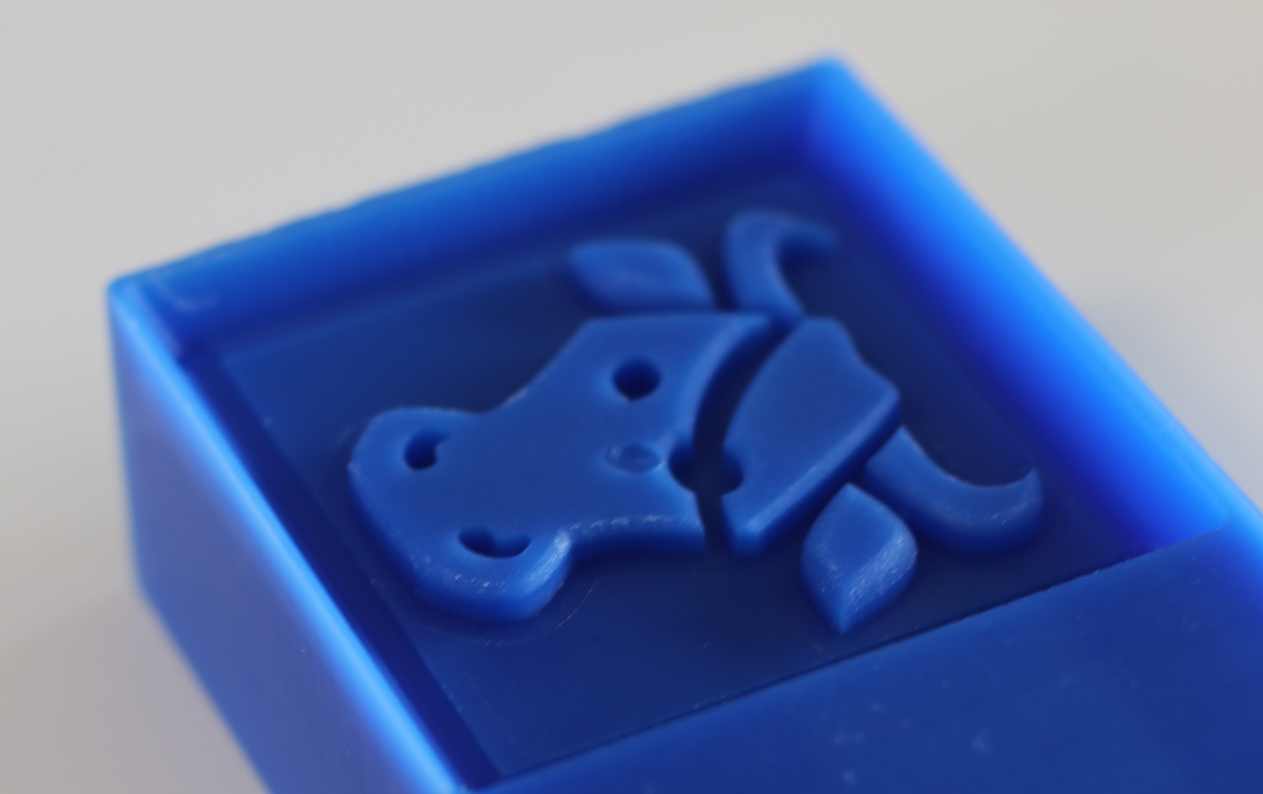
The mold
The definition is really high. It’s sad that their is an accident due to the first bad fixture.
You can see the nice rounded edges.
Silicone Molding
I pour the A and B elements and mix them for a long time
Then I pour it in the mold.
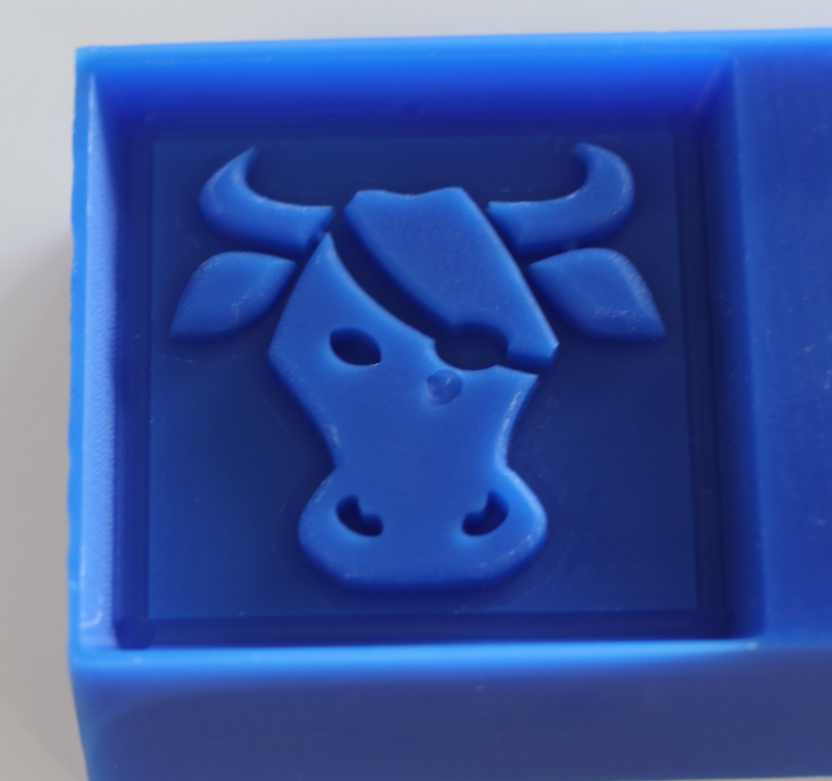
Ather one night I remove the mold.
I see details in the mold that I did not see before !
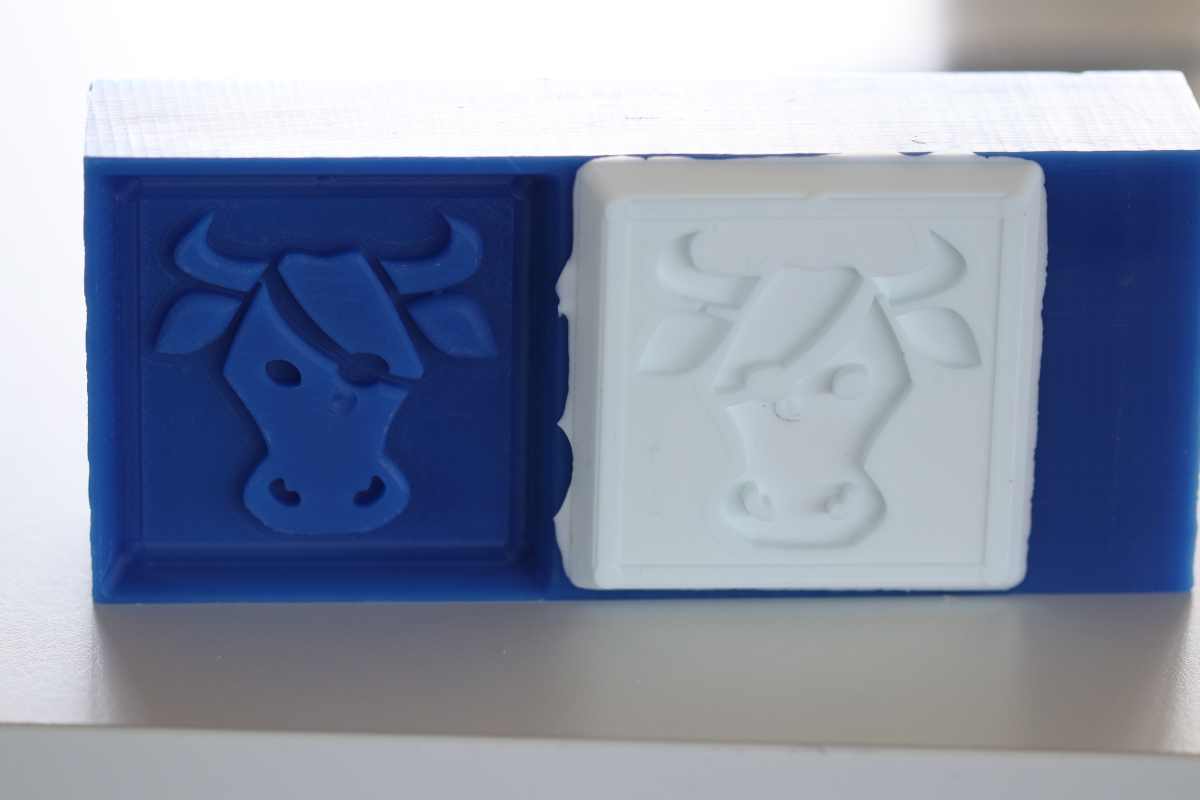
The mold is perfect It did not have any bubbles.
Thanks from the first test I was able to test a good technique.
Better technique
My global reviewer insist that I should warn other students that would reald this documentation :
Usually you start on the side with a thin line with the mold in an angle to avoid trapping bubbles. You can also apply the silicone with a fine brush (in this case a foodsafe one). Then you fill slowly the mold by pouring slowly silicone.
Chocolate casting
I select a high quality chocolate for casting. Callebout 70-30-38 , Belgian chocolate, 70.5% cocoa.

It has several specification to prepare the chocolate and a temperature line to follow.
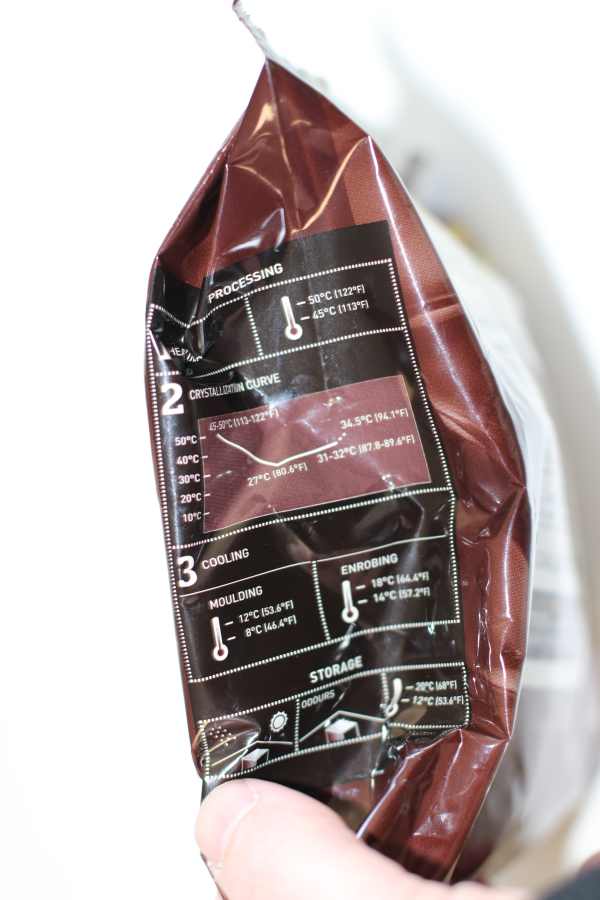
The first heating should be between 45 and 50°C then cooling to 27°C and another heating to 32 to 34°C. The cooling in the mould sould be between 8 and 12°C.
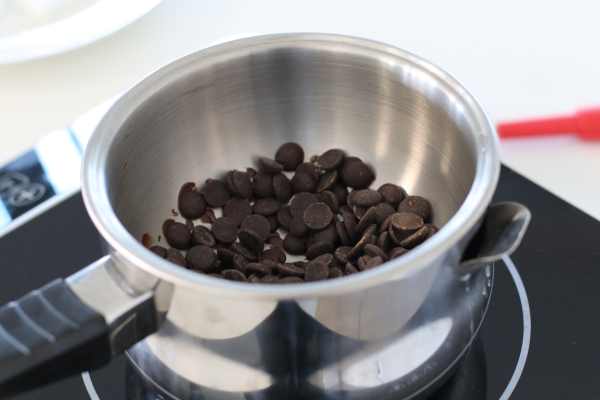
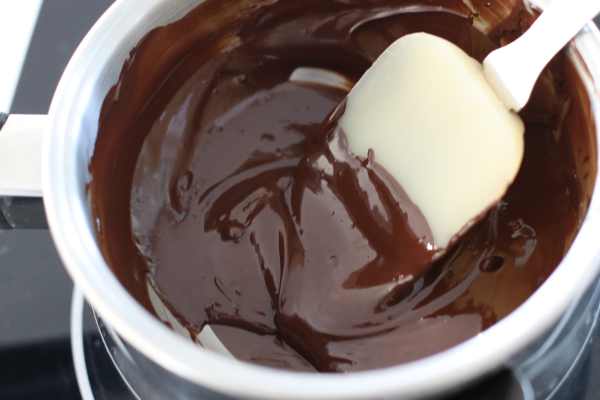
I use a Water bath to have a precise and stabilise temperature.
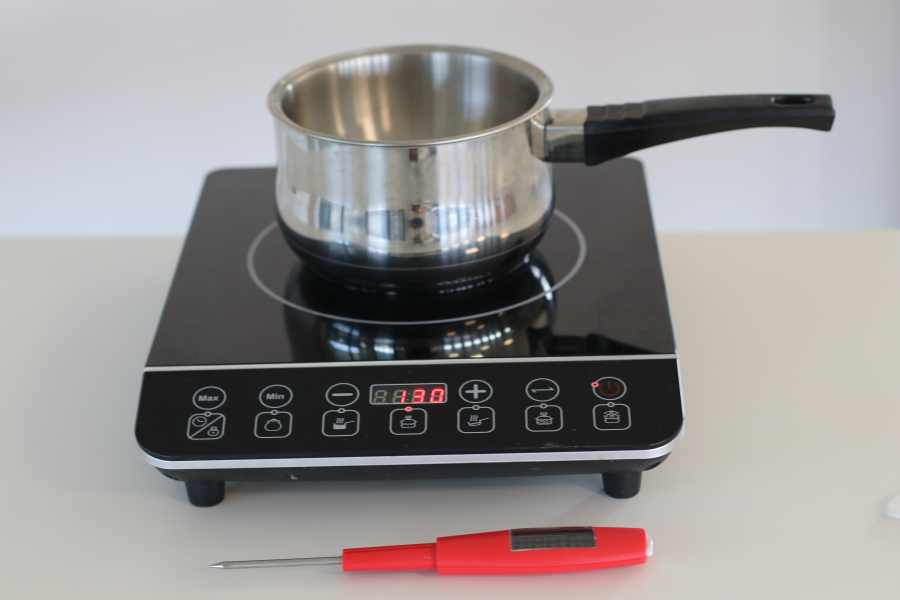
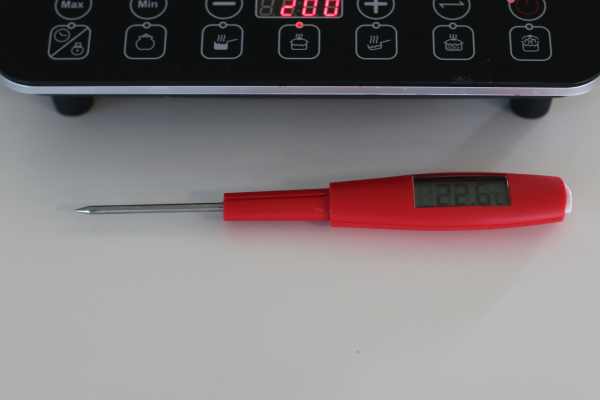
A thermometer allow me to check the temperature.
I pour the chocolate pellet to melt it at 45°C.
And constantly stir it to melt it.
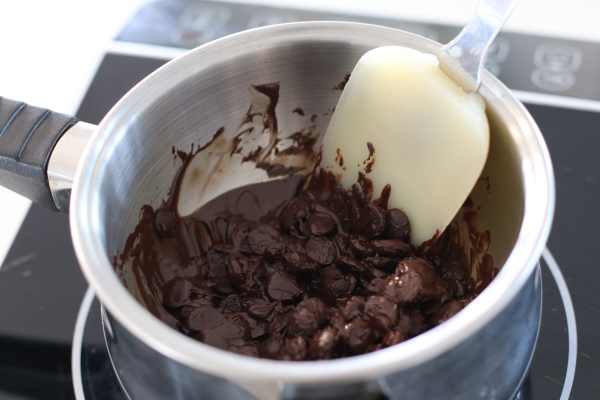
I check often the temperature in the Water bath
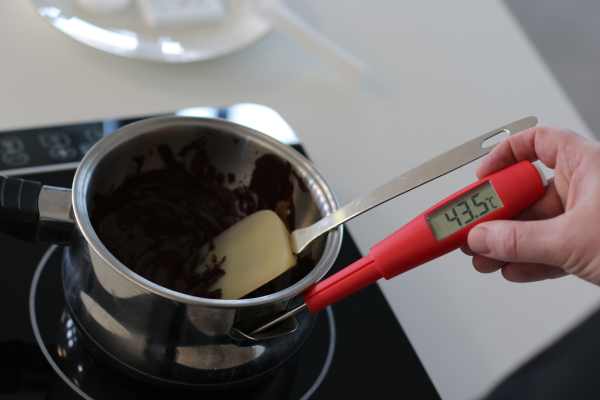
After a few minutes it’s fully melt.
I cool it down to 27°C and reheat to 33°C to cristalise the chocolate.
I pour the hot chocolate in the mold. And cool it in the fridge. Ideally it should be between 8 and 12°C
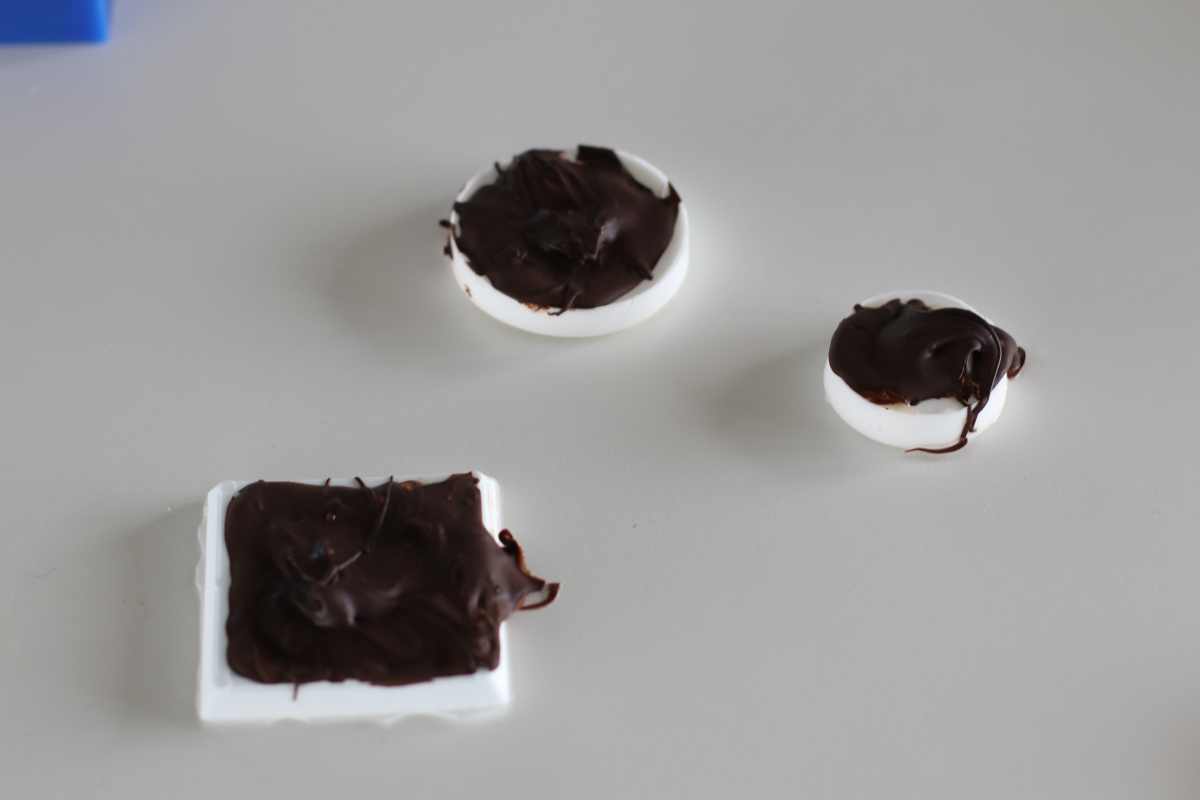
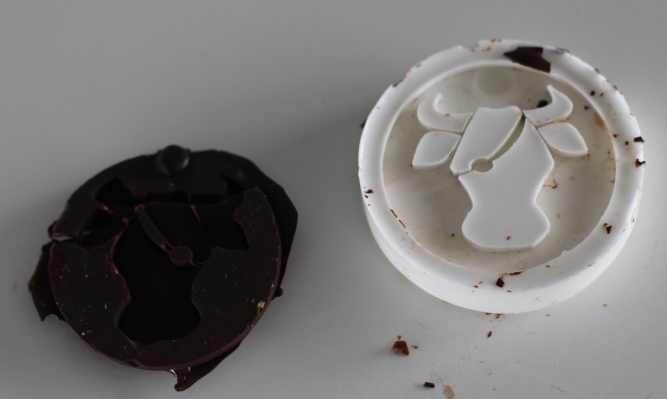
Then I unmold it.
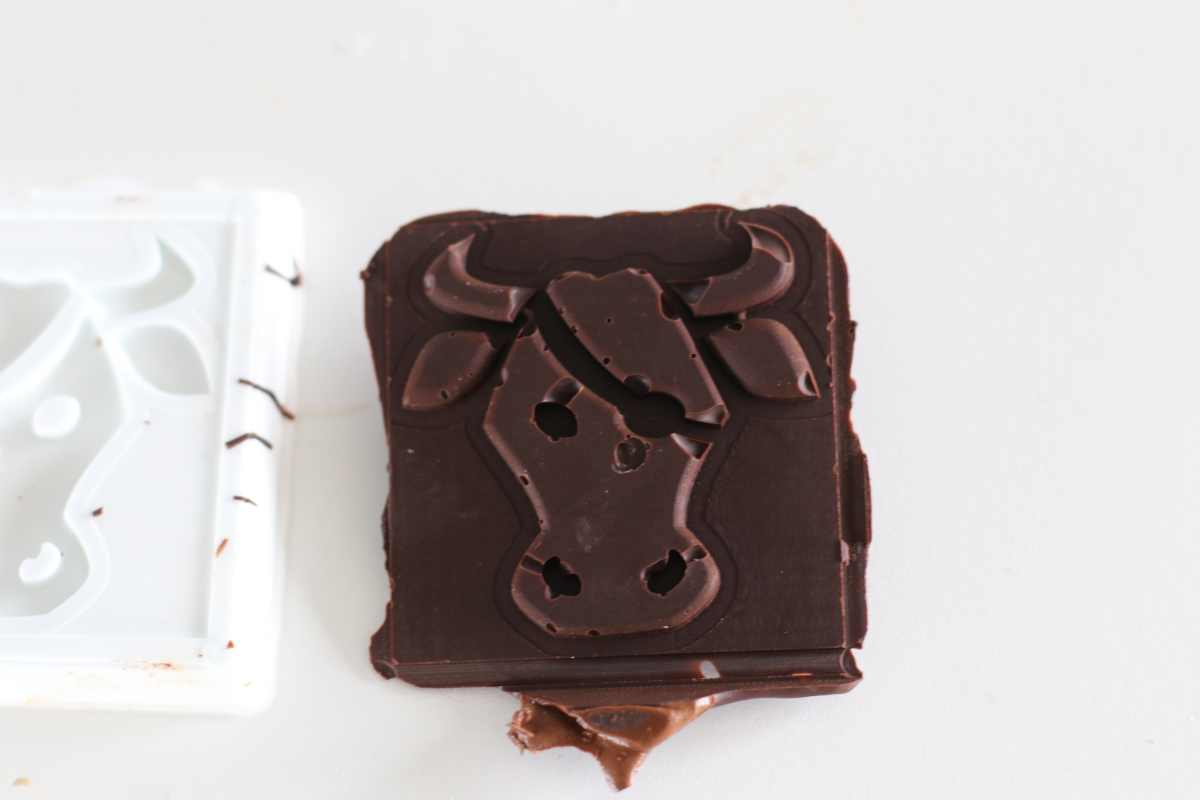
It’s not perfect. But it has worked. It is really nice and tasty .
Remarks :
The chocolate had bubbles the mold does not have any bubbles.
My global reviewer did not agree with my technique, but I would like to be sure people understand that chocolate seems easy but is REALLY difficult.
Chocolate is not the best material for casting. You cannot apply it with a brush, it is difficult to have thin foodsafe brush and then It will be difficult to apply the chocolate because the material has a certain viscosity and is hot . Take a look at the video above, you will have an idea of the viscosity and understand the difficulties.
Chocolate is a pleasure, so funny and so tasty ! I advise everybody to test it with fun .
Chocolate casting is really hard. You have to learn and practice for many years to have a correct result. Industrially the method is totally different (it is a nice subject but totaly outside the scope of the fabacademy).
I had lived more than 15 years in Brussels, near many worldwide famous chocolate masters. I had friends that dedicate their lives to master those techniques . Nobody would pretend to master those techniques in one week.
Files
Gcode : gcode.rar size 885ko or gcode.zip size 946 ko
Fusion File : week10-moldingv6.f3d