12. Output devices
For my final project: RGB LED
This week I made a board to read my first output device, soldering and programming an RGB LED.
I choose this type of output to approach to the LED programmation I’m going to make for my final project, about a levitating lamp.
Test
Before milling my own board with a RGB LED I started programming one with common cathode, using an Arduino uno; I programmed it connecting LED to Arduino digital pins with 220 Ohm resitors, and connecting its cathode to one of Arduino uno GND.
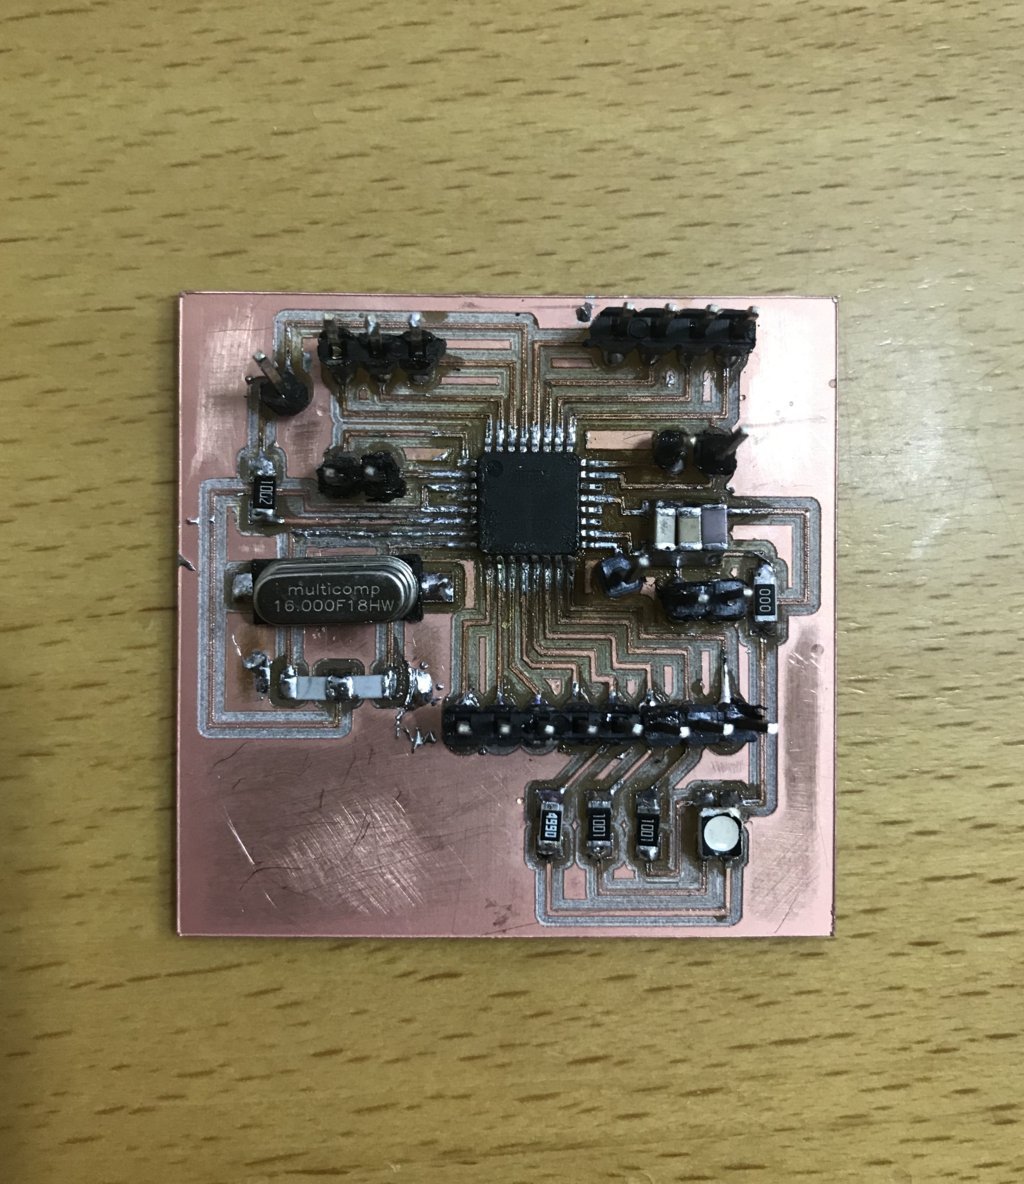
Satshakit micro + 4plcc smd RGB LED
I made a satshakit micro adding only one 4plcc smd common anode rgb LED and the respective resistors. I will use this board even for my final project.
Designing
I made a satsha kit micro adding a common cathode 4plcc RGB LED; I connected the cathode to the GND of Atmega328 and three others LED pins to PWM analogic pins of the microcontroller, to program their brightness.
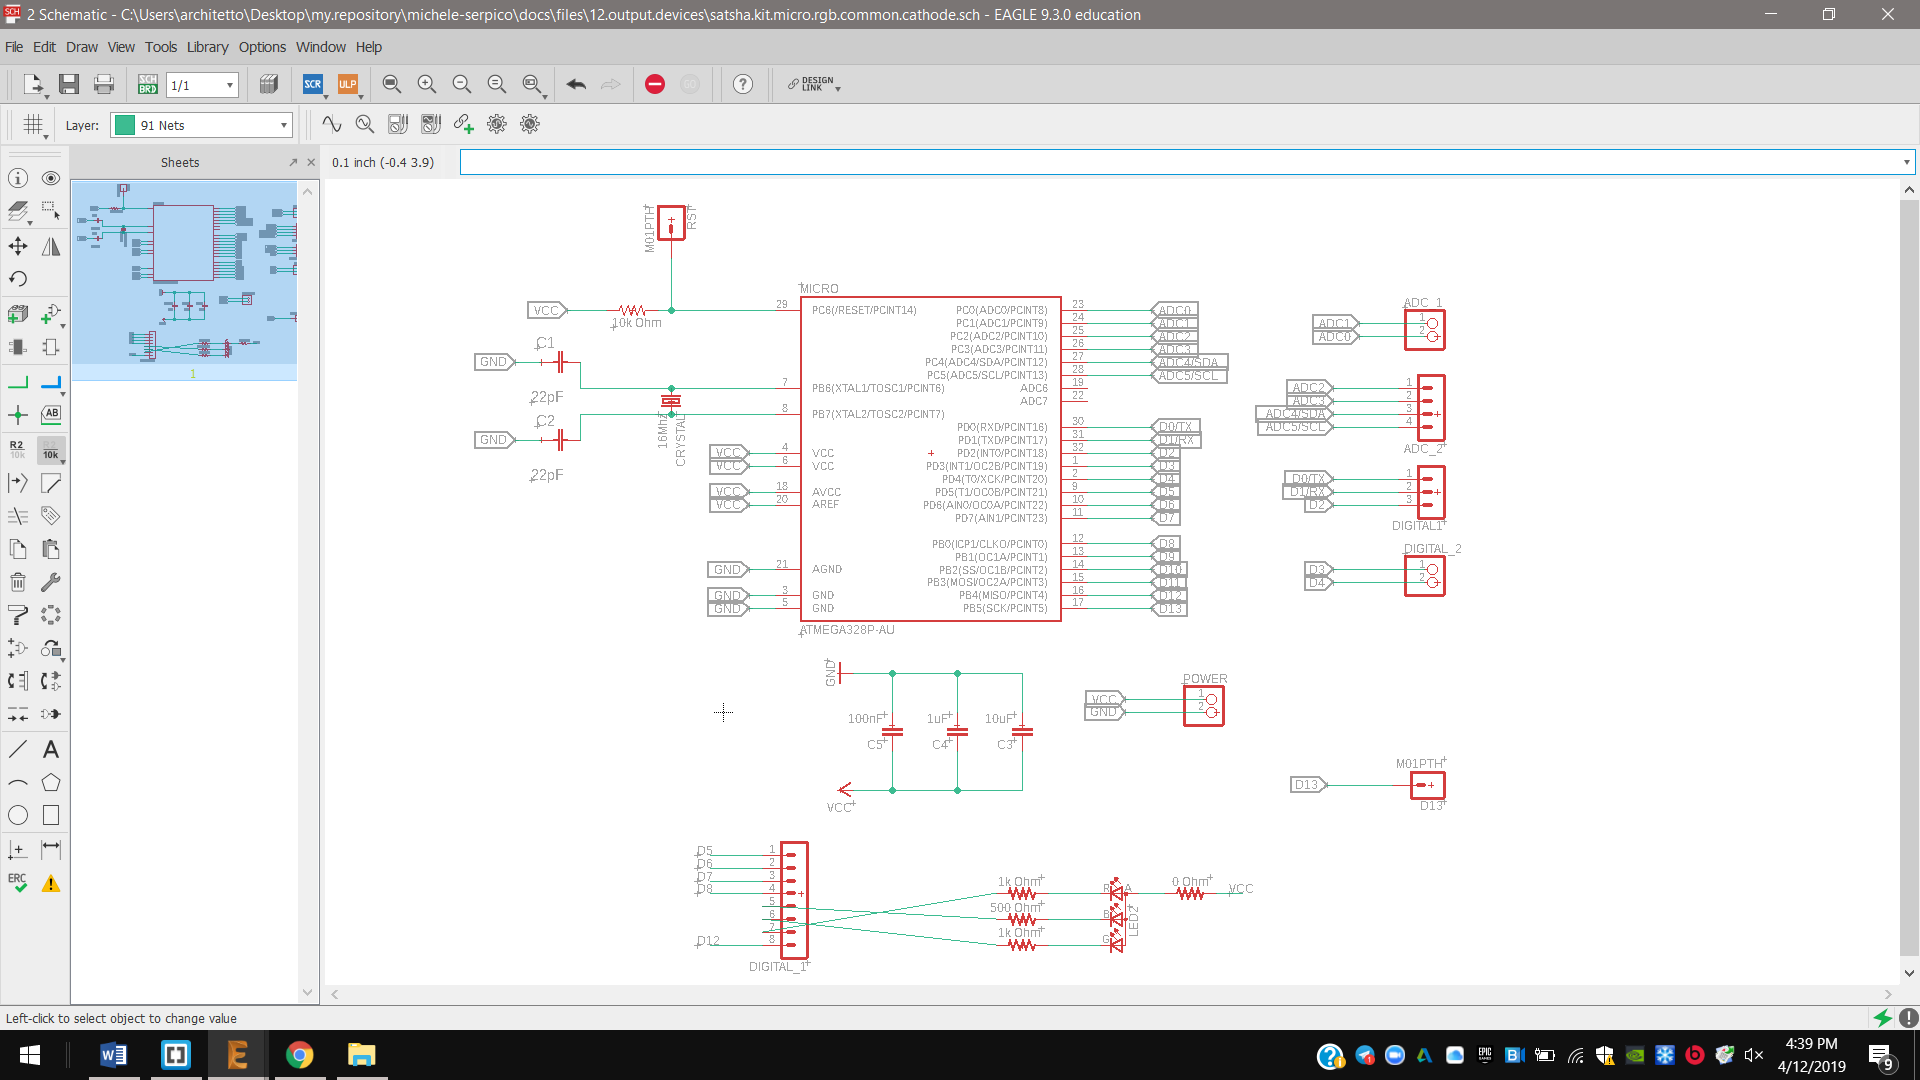
Schematic
I downloaded the Satsha kit micro .sch file and I just added one RGB LED with two 10K resistors for red and green LED and one 500 Ohm resistor for blue LED in series.
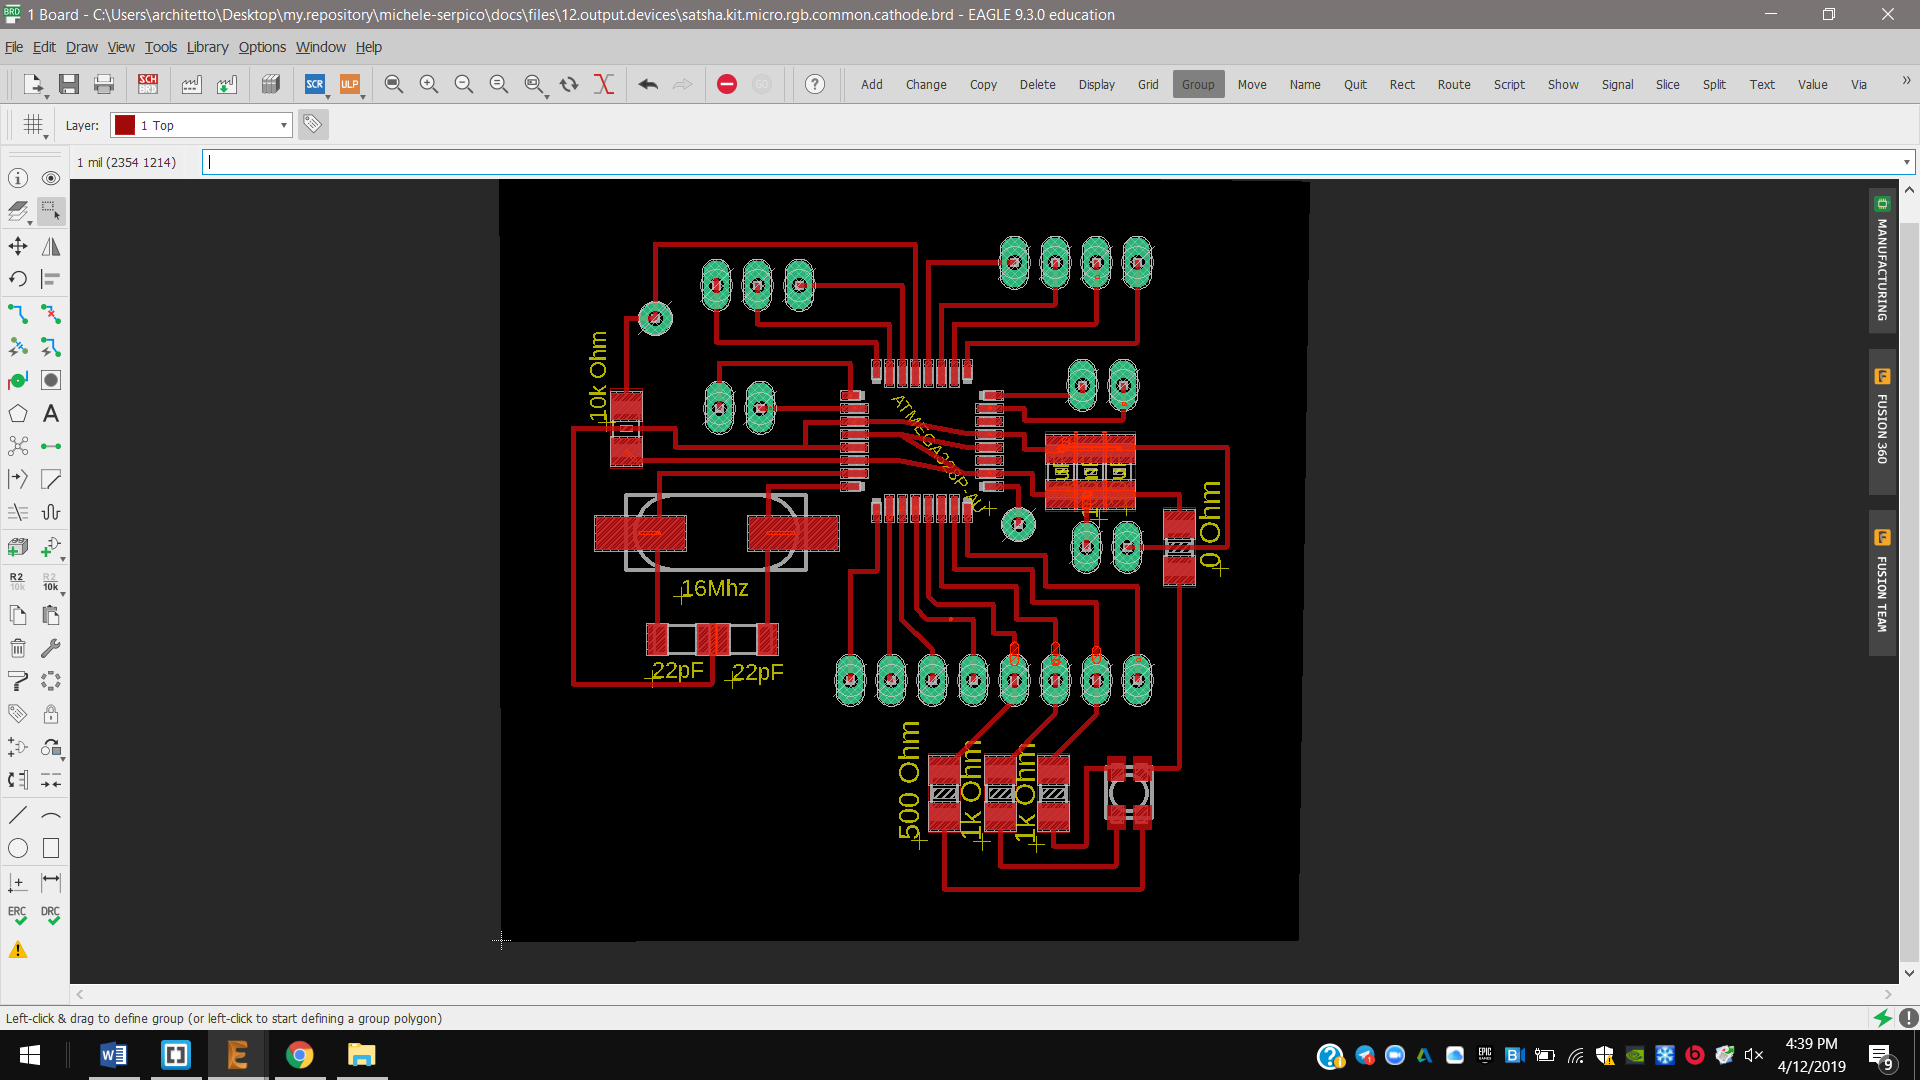
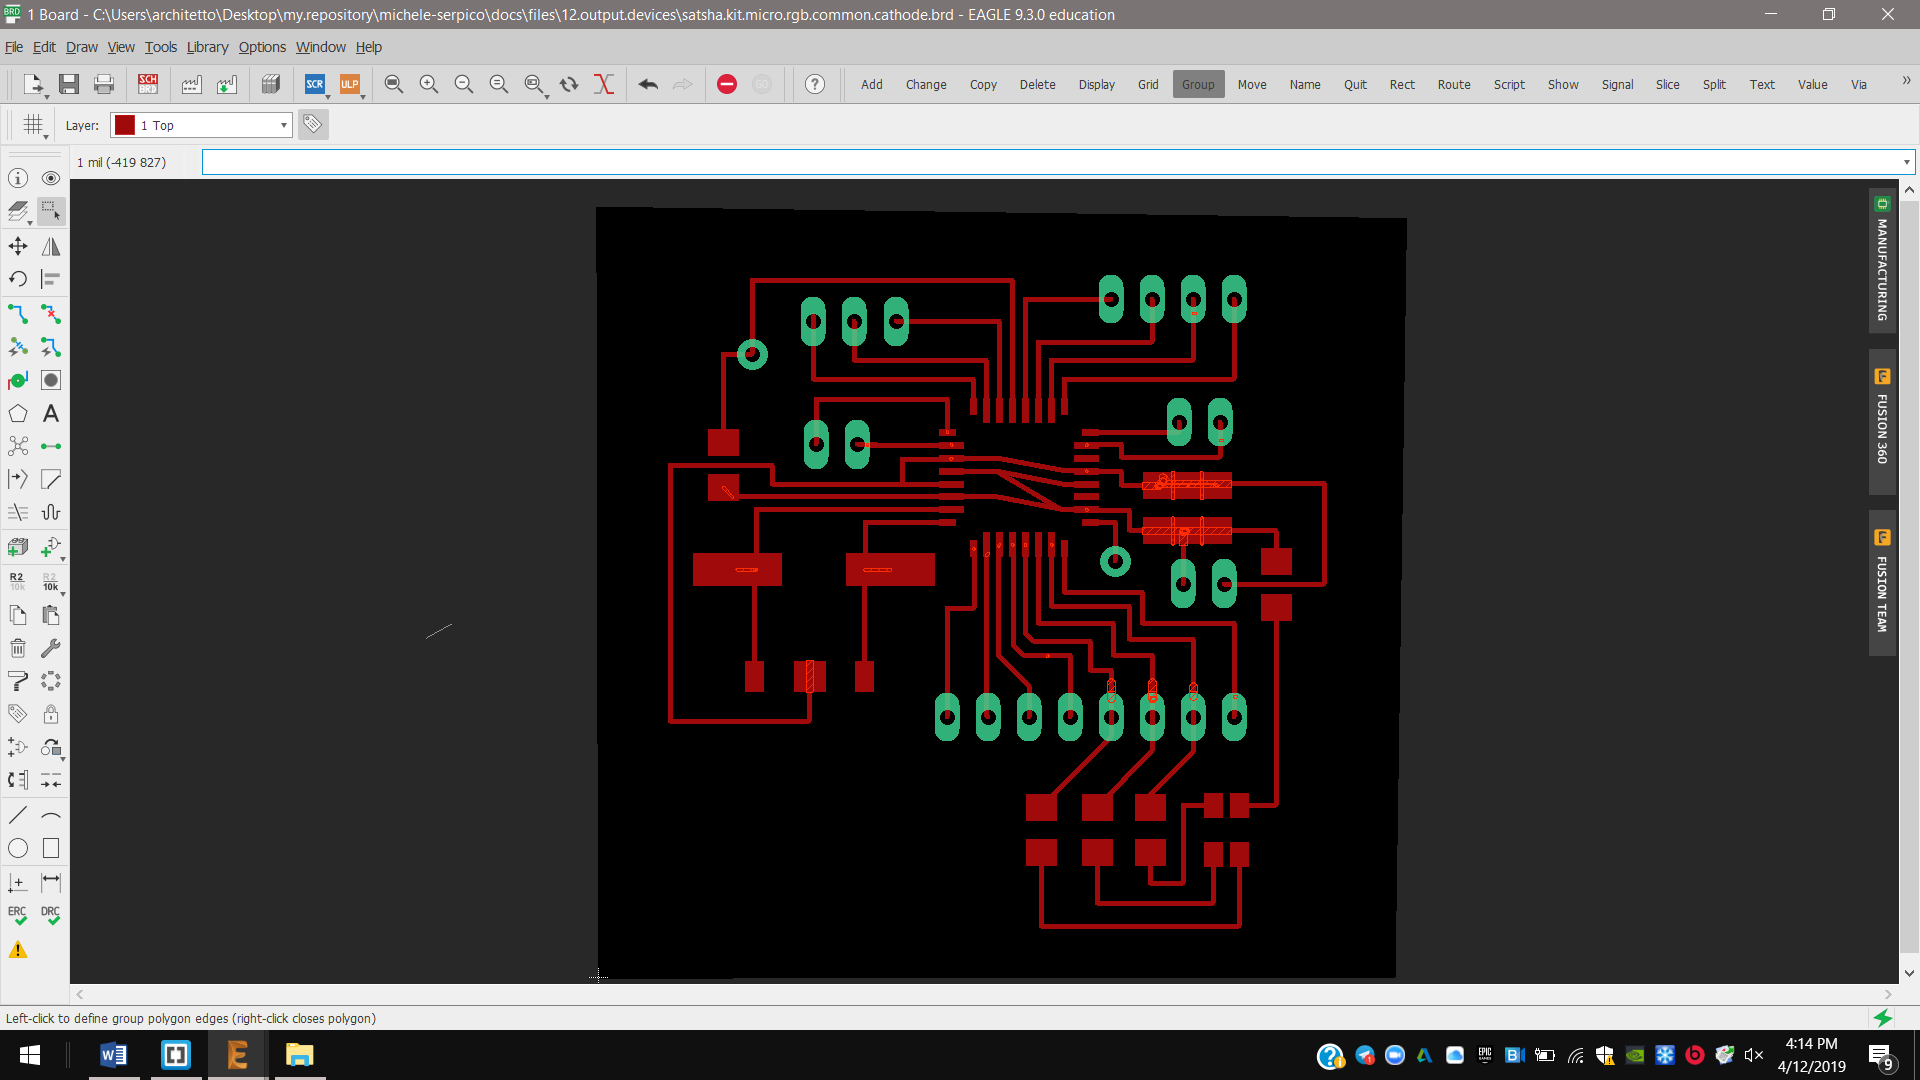
Board
I set and drew with routes of 12 mil size, such as the distance between each other.
In future If I will remove these resistor this board will be a standard satsha kit micro, beacuse the traces for the LED resistors could work as soldering jumpers.
Milling and soldering
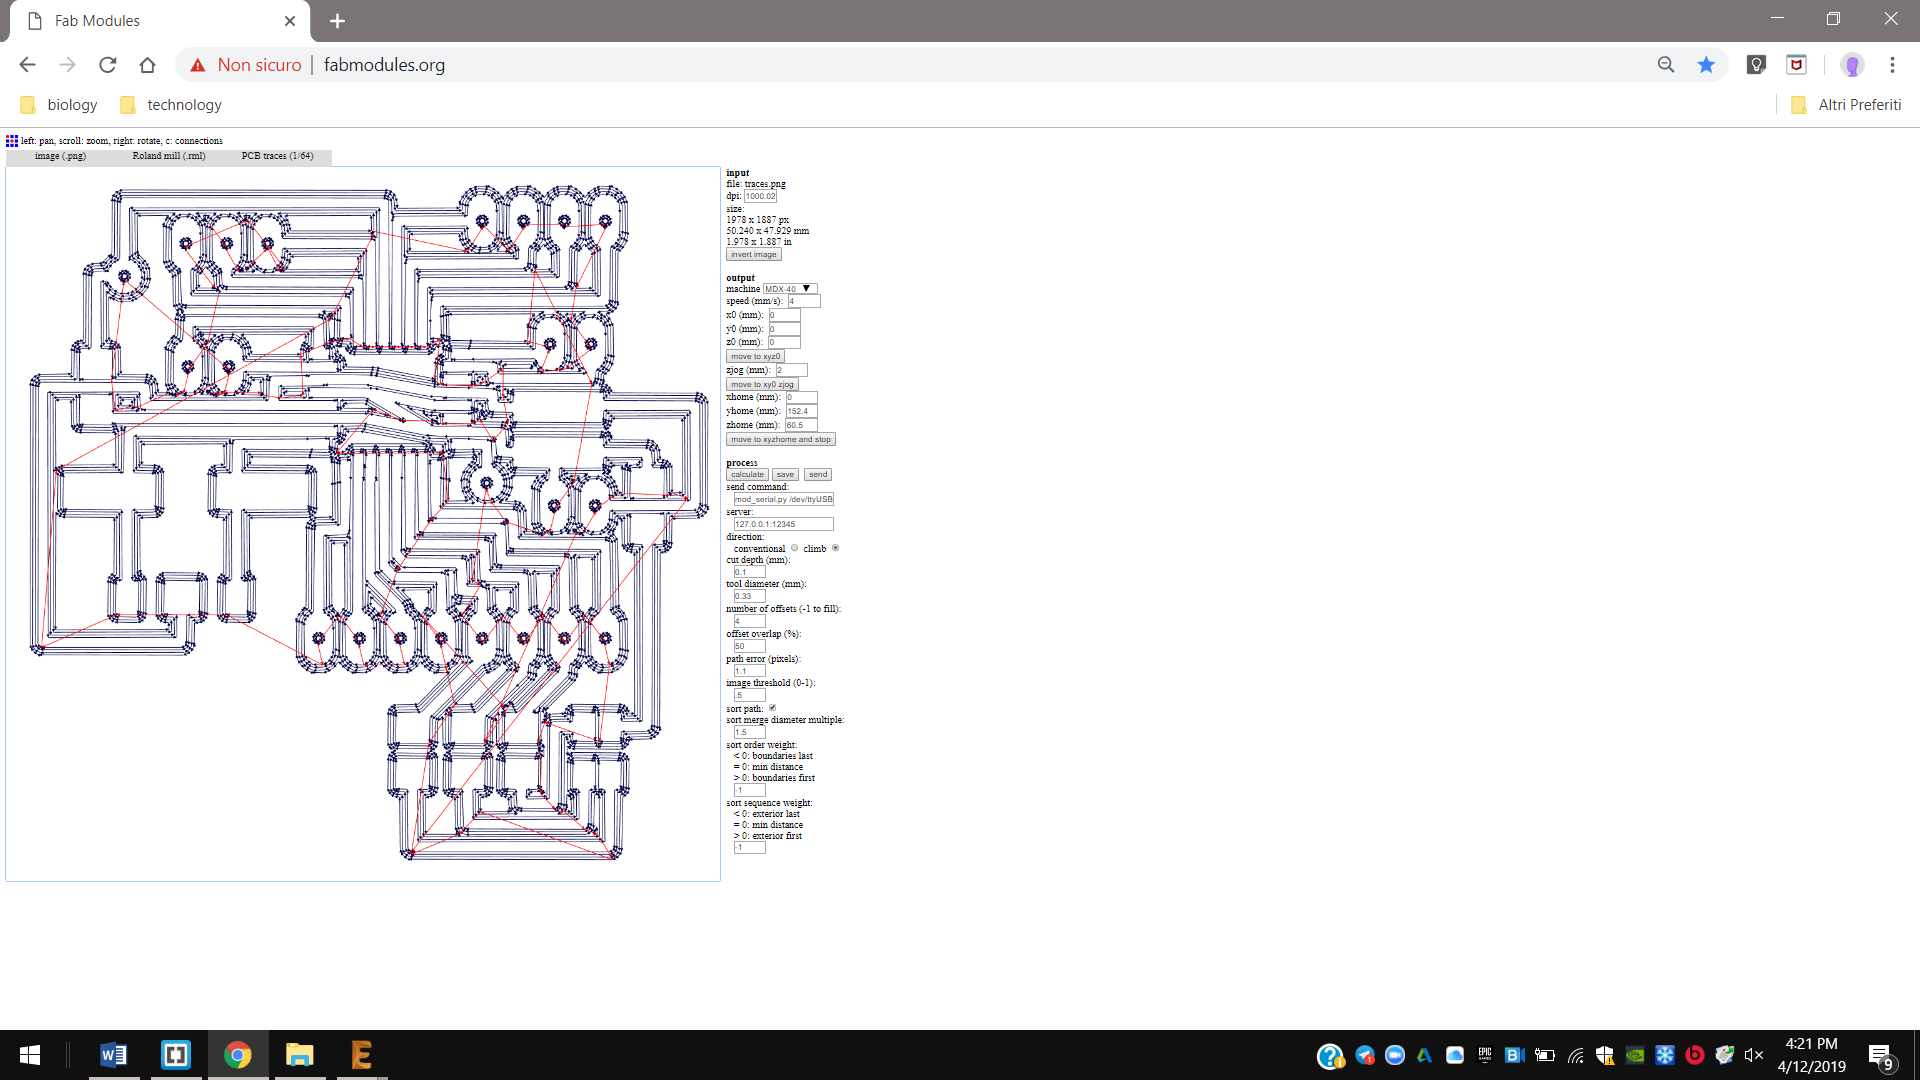
1st I generated .rml traces and .rml outline using Fab Modules. First I set a milling size of 1/64’‘ and a cut depth of 0,1 mm to make the traces, with 4 offsets.
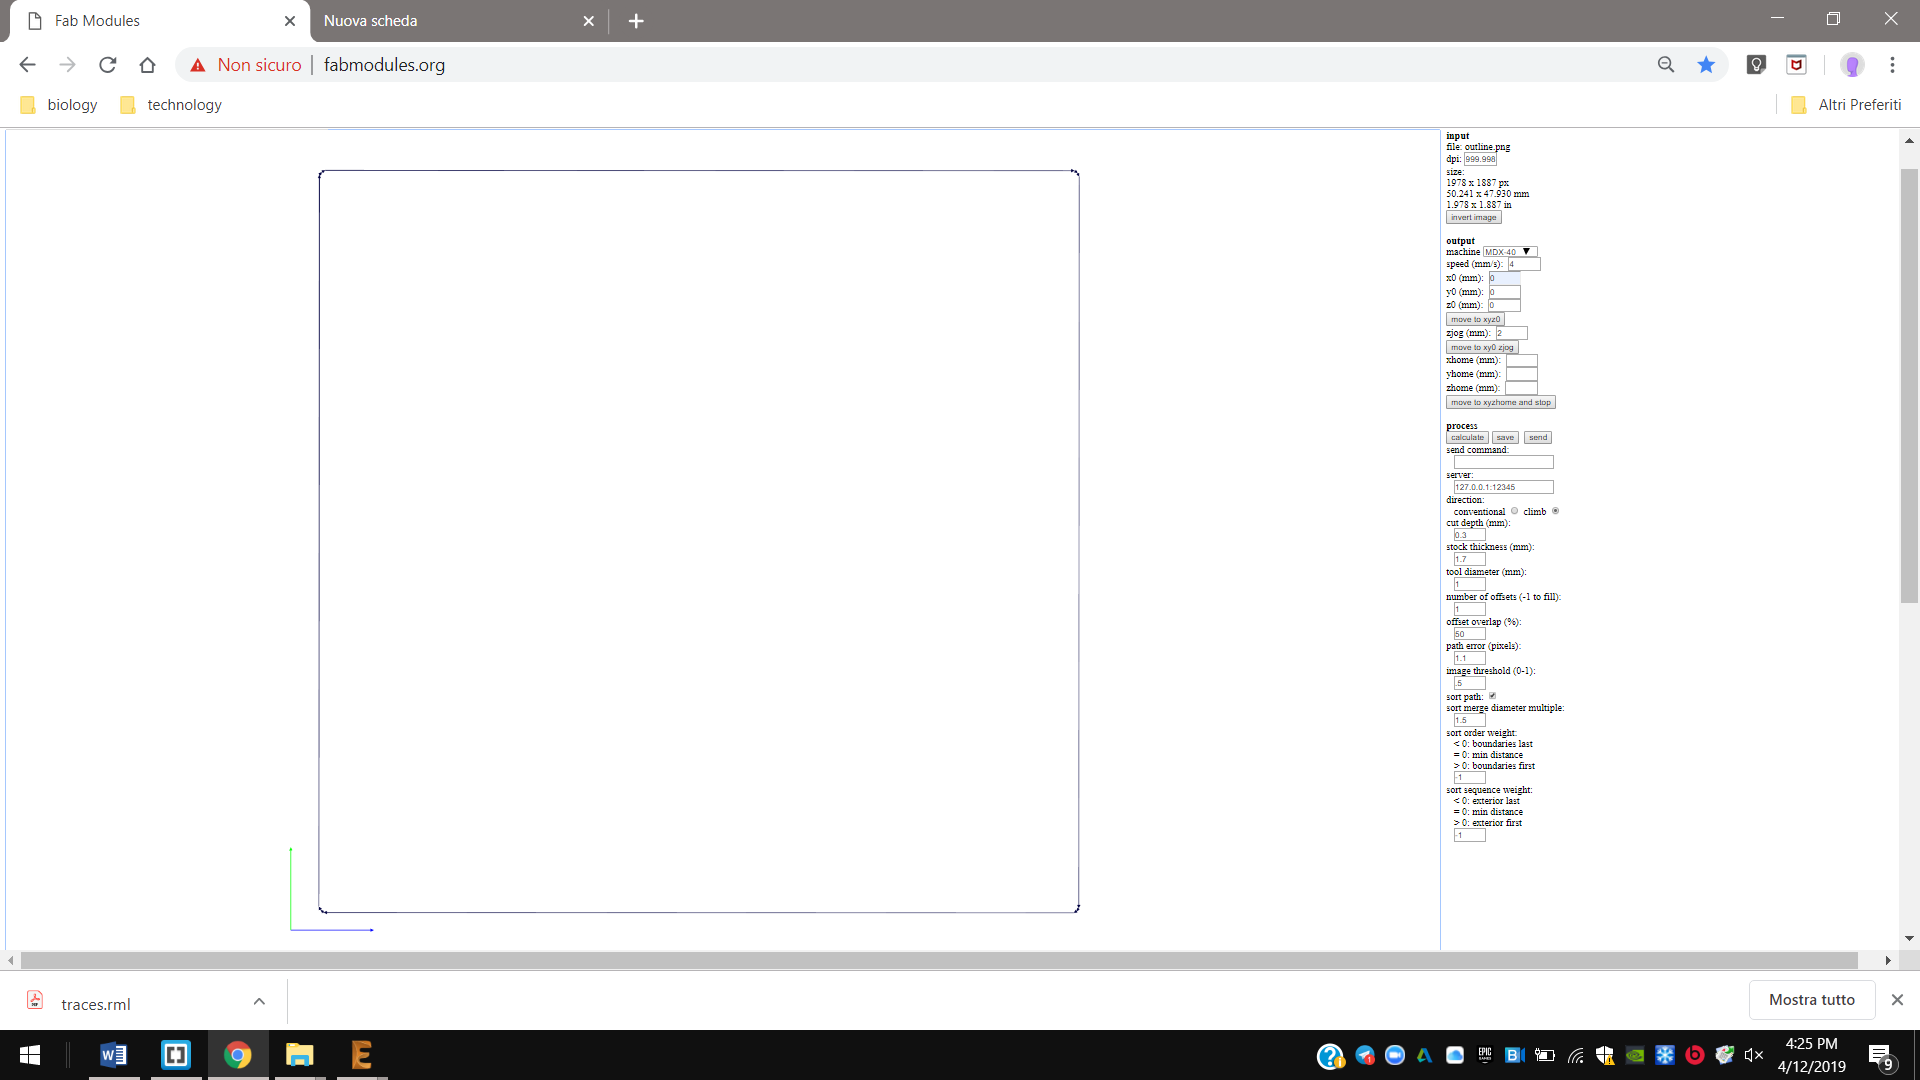
2nd And to mill the outline instead I set a milling size of 1/32’‘, a cut depth of 0,3 mm for each step for the whole thickness of 1,7 mm. I set 4 milling offset both times.

Programming
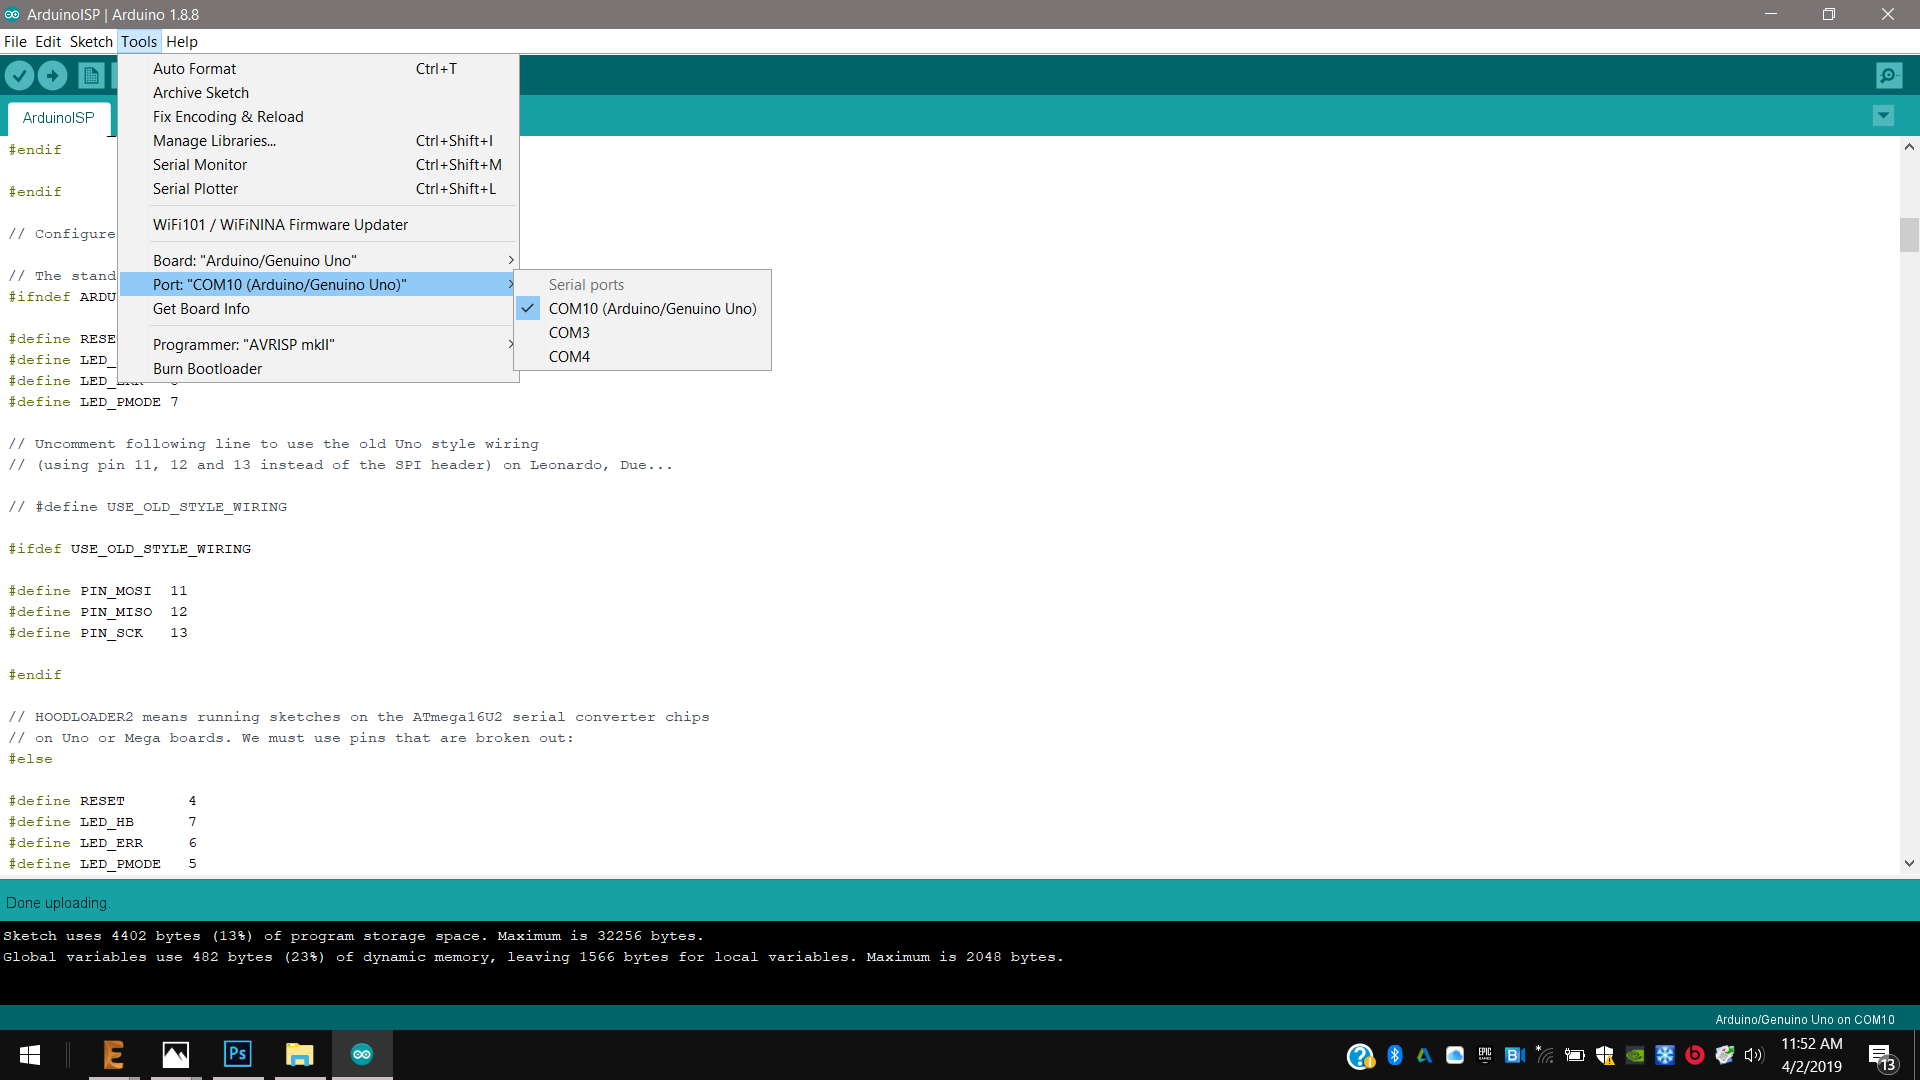
1st On Arduino IDE I uploaded the Arduino ISP example, to enable my Arduino uno as programmer.
This board abosorb 15,3 mA and its power consumption, just with the lighted on LEDs, is about 76,5 mW.
 2nd I connected it to my new board;
3rd in tools I selected the right port of the connected Arduino uno, such as the “board” setting in “tools”; I opened the ArduinoISP example and I uploaded it enabling my Arduino UNO as programmer.
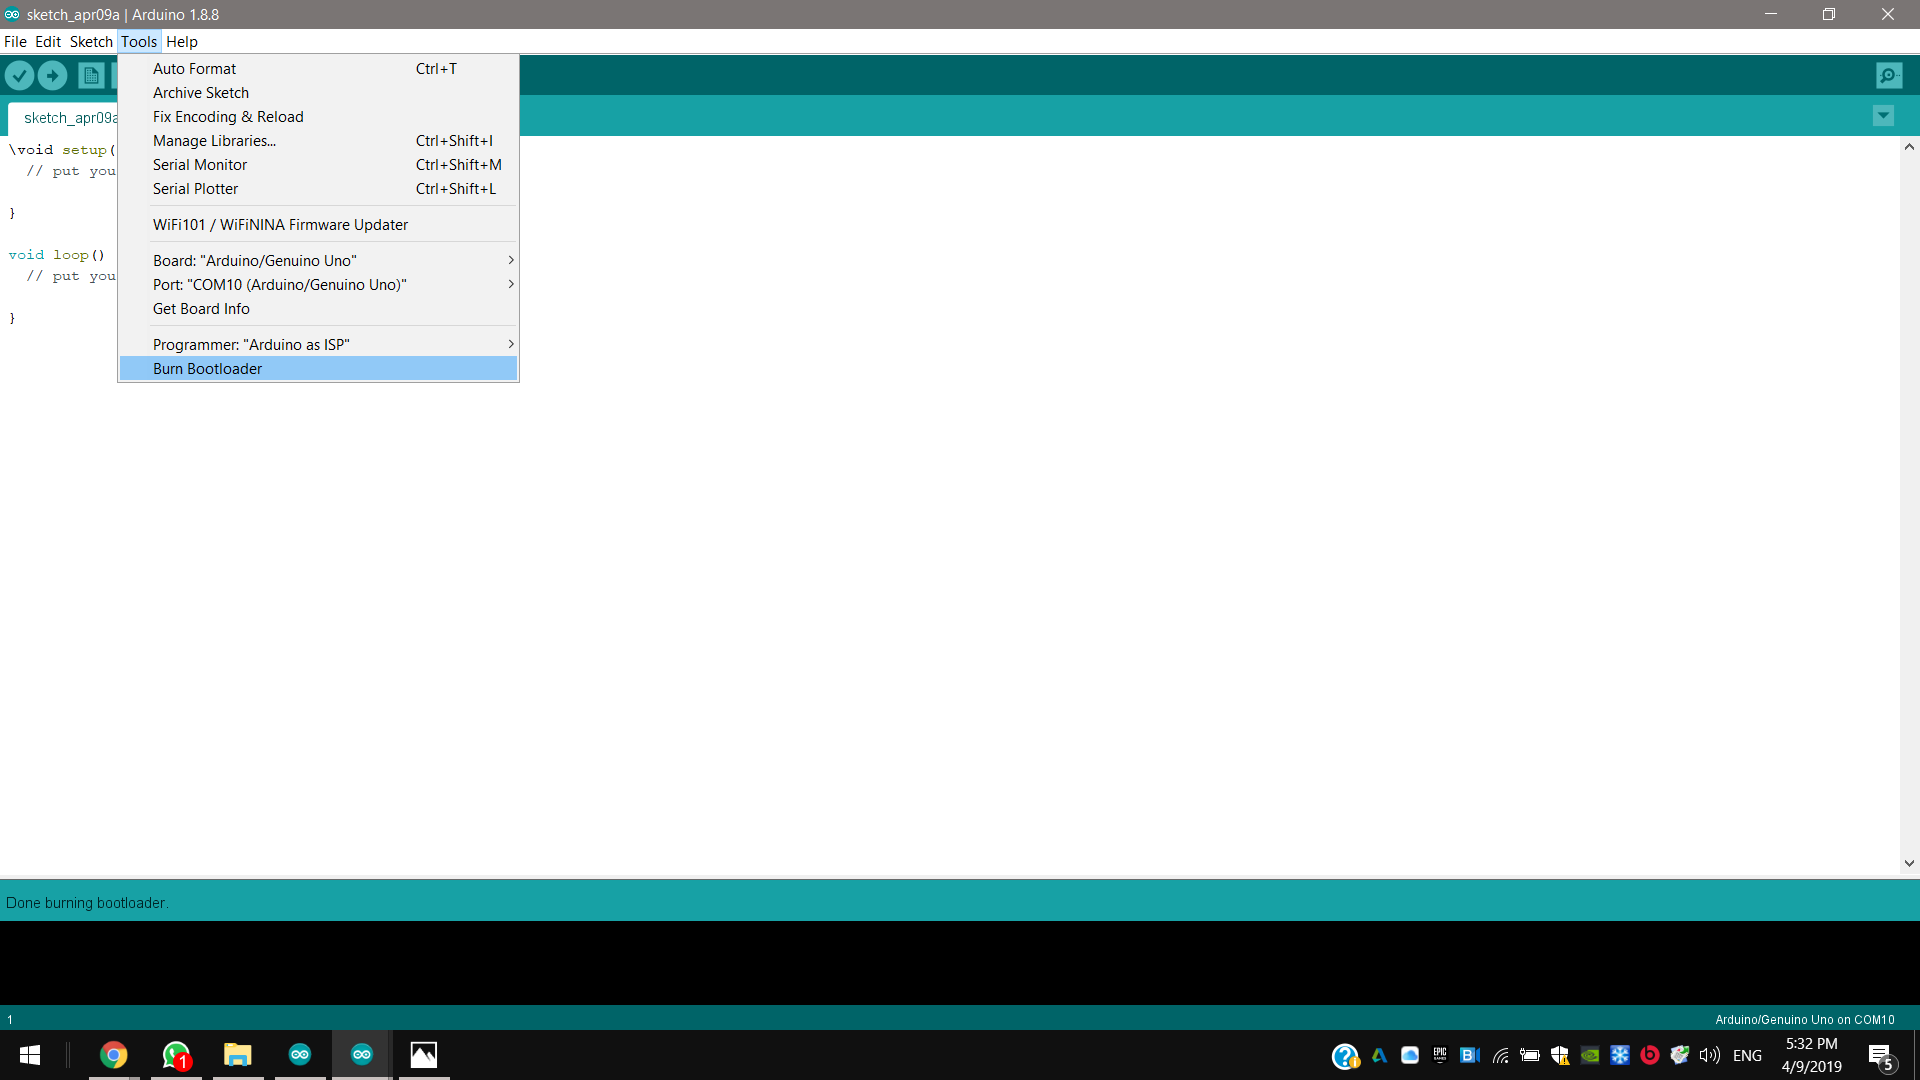
4th Then I burnt the bootloader of my new board; I could watch my rgb LED blinking while the programmer was doing this.
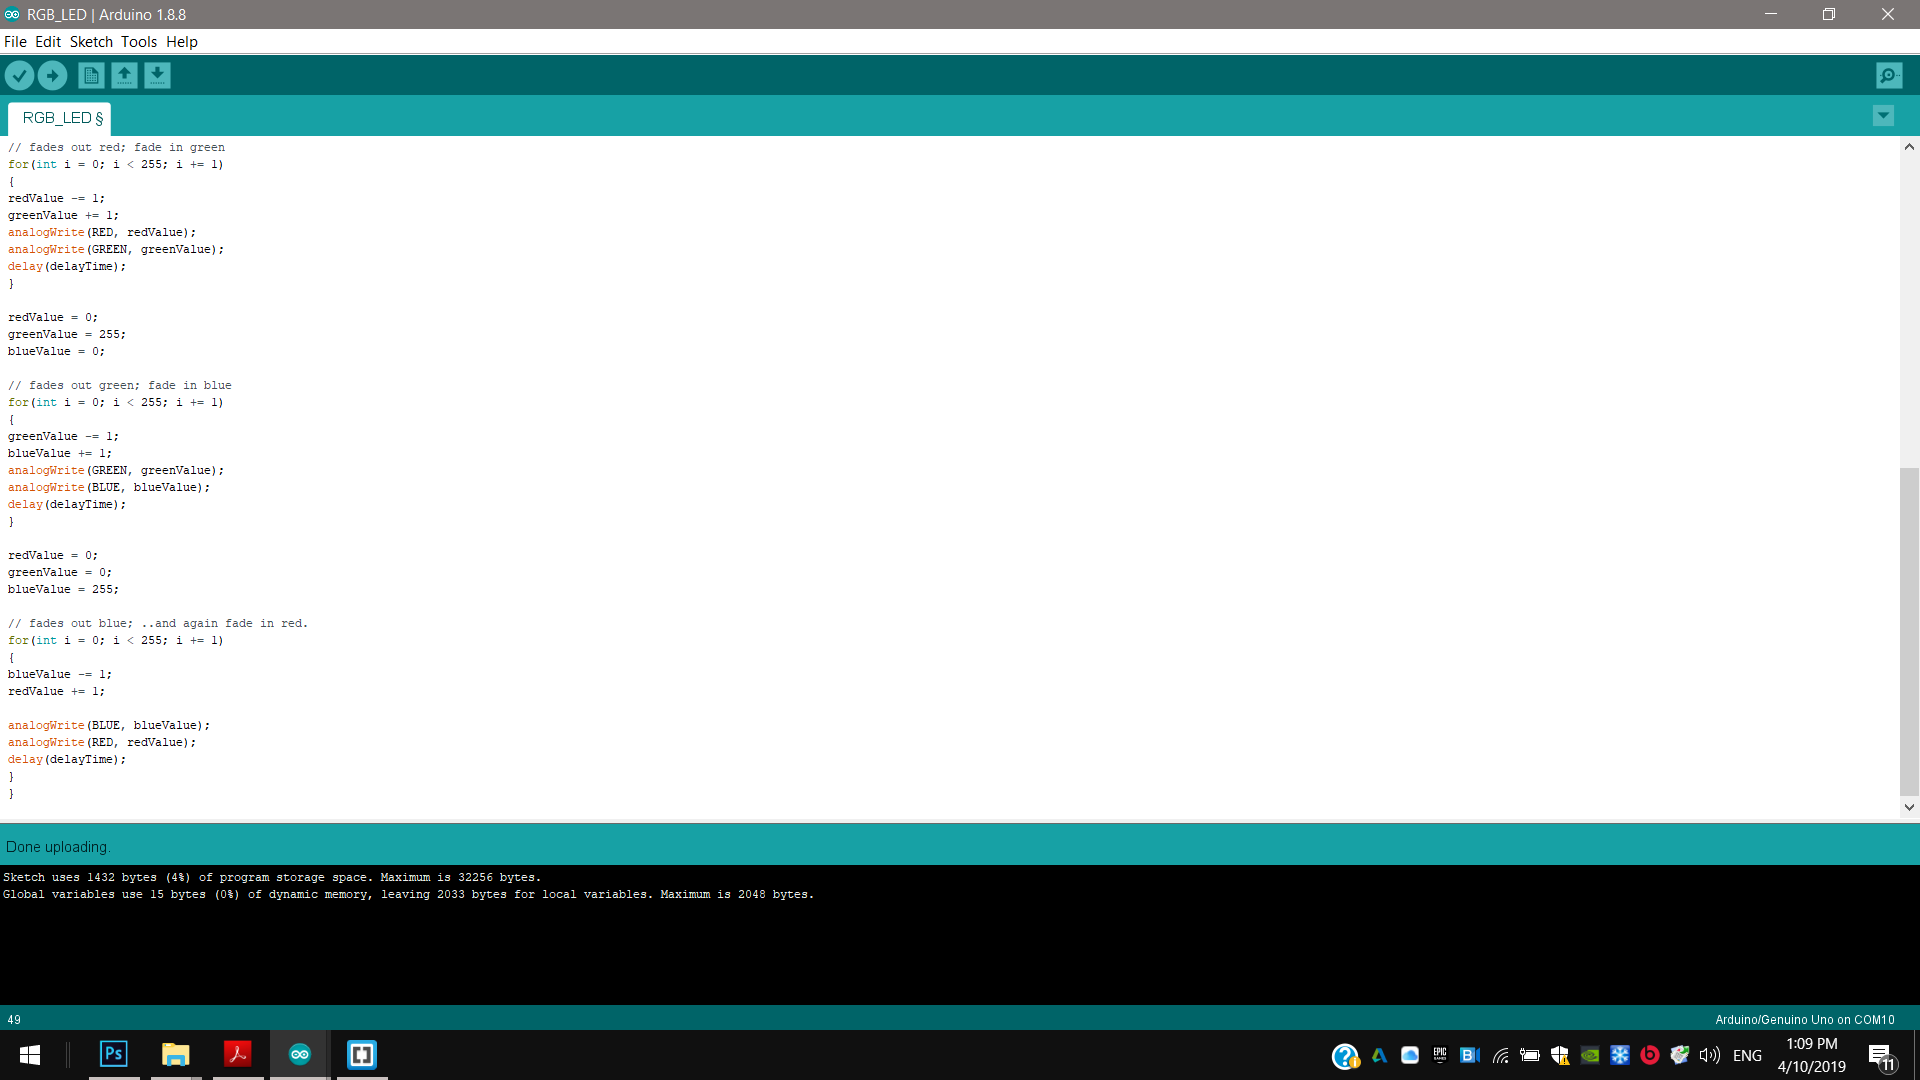
5th I compiled the .ino code to turn the colors of the RGB LED on, simultaneously increasing and decreasing them. I compiled a fade code for this rgb LED, defining pins, and respective LED values.
For each step I set a max for a color, decreasing its brightness and increasing others, from 0 to 255.
// Define Pins
#define BLUE 9
#define GREEN 10
#define RED 11


// define variables
int redValue;
int greenValue;
int blueValue;


void setup()
{
pinMode(RED, OUTPUT);
pinMode(GREEN, OUTPUT);
pinMode(BLUE, OUTPUT);
digitalWrite(RED, HIGH);
digitalWrite(GREEN, LOW);
digitalWrite(BLUE, LOW);
}


void loop()
{
// fading time between colors
#define delayTime 10

redValue = 255; // choose a value between 1 and 255 to change color's brightness.
greenValue = 0;
blueValue = 0;

// fades out red; fade in green
for(int i = 0; i < 255; i += 1)
{
redValue -= 1;
greenValue += 1;
analogWrite(RED, redValue);
analogWrite(GREEN, greenValue);
delay(delayTime);
}

redValue = 0;
greenValue = 255;
blueValue = 0;

// fades out green; fade in blue
for(int i = 0; i < 255; i += 1)
{
greenValue -= 1;
blueValue += 1;
analogWrite(GREEN, greenValue);
analogWrite(BLUE, blueValue);
delay(delayTime);
}

redValue = 0;
greenValue = 0;
blueValue = 255;

// fades out blue; ..and again fade in red.
for(int i = 0; i < 255; i += 1)
{
blueValue -= 1;
redValue += 1;

analogWrite(BLUE, blueValue);
analogWrite(RED, redValue);
delay(delayTime);
}
}
Downloads
.sch
satshakit.micro.plus.4plcc.rgb.led.sch
.brd
satshakit.micro.plus.4plcc.rgb.led.brd
.png
traces
satshakit.micro.plus.4plcc.rgb.led.traces.png
outline
satshakit.micro.plus.4plcc.rgb.led.outline.png
.rml
traces
satshakit.micro.plus.4plcc.rgb.led.traces.rml
outline
satshakit.micro.plus.4plcc.rgb.led.outline.rml