Computer-Controlled Cutting
Have you:
[x] linked to the group assignment page
[x] Explained how you parametrically designed your files
[x] Documented how you made your press fit kit
[x] Documented how you made your vinyl cutting
[x] Included your original design files
[x] Included your hero shots
Group Assignment
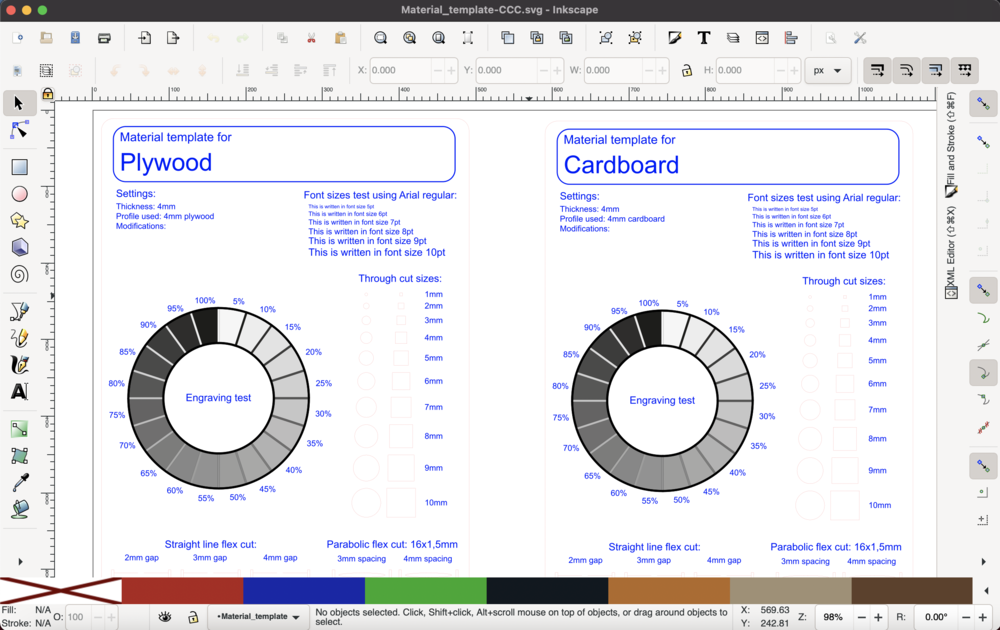
For this week, Fab Lab BCN broke into small groups to characterize the laser cutter. There are three in the lab: Trotec Speedy 100, Speedy 400, and Multicam large format laser cutter. I worked with my MDEF classmate, Guilherme Simoes, to complete this part. We followed along with the documentation from two Fab Academy students:
Tarek Mahmoud:
https://fabacademy.org/2021/labs/barcelona/students/tarek-galal/assignments/Week3/Nil Peguero:
https://fabacademy.org/2021/labs/barcelona/students/nil-peguero/week3.html
Following Nil’s example, we cloned the repository of Josep Marti who developed a datasheet for the laser cutters. I then imported the data sheet into Inkscape where I made updates to the designs.

Because I like pixel art, I also designed a test file modeled after the Super Mario Bros. character, Boo. Each of the files, I then brought into Rhino 7 for processing. The main commands that I had to remember when importing designs into Rhino are Join and Make2D. These commands ensure that the designs are closed curves which will be good to ensure that the lasercutter does not skip around the design or cut segment by segment.
- Design files: Right click + Save As
- Design files: Right click + Save As
The Materials settings that we used are the following:
- Plywood 4mm
- Cut: P 75 / S 0.8 / R 1000Hz
- Engrave: P 30 / S 100 / R 1000Hz
- Raster: P 80 / S 100 / R 1000 PPI
- Cardboard 4mm
- Cut: P 50 / S 1 / R 1000Hz
- Engrave: P 60 / S 100 / R 1000Hz
- Raster: P 80 / S 100 / R 1000PPI
Individual assignment
Fab Beading Loom - Trotec Speedy 400

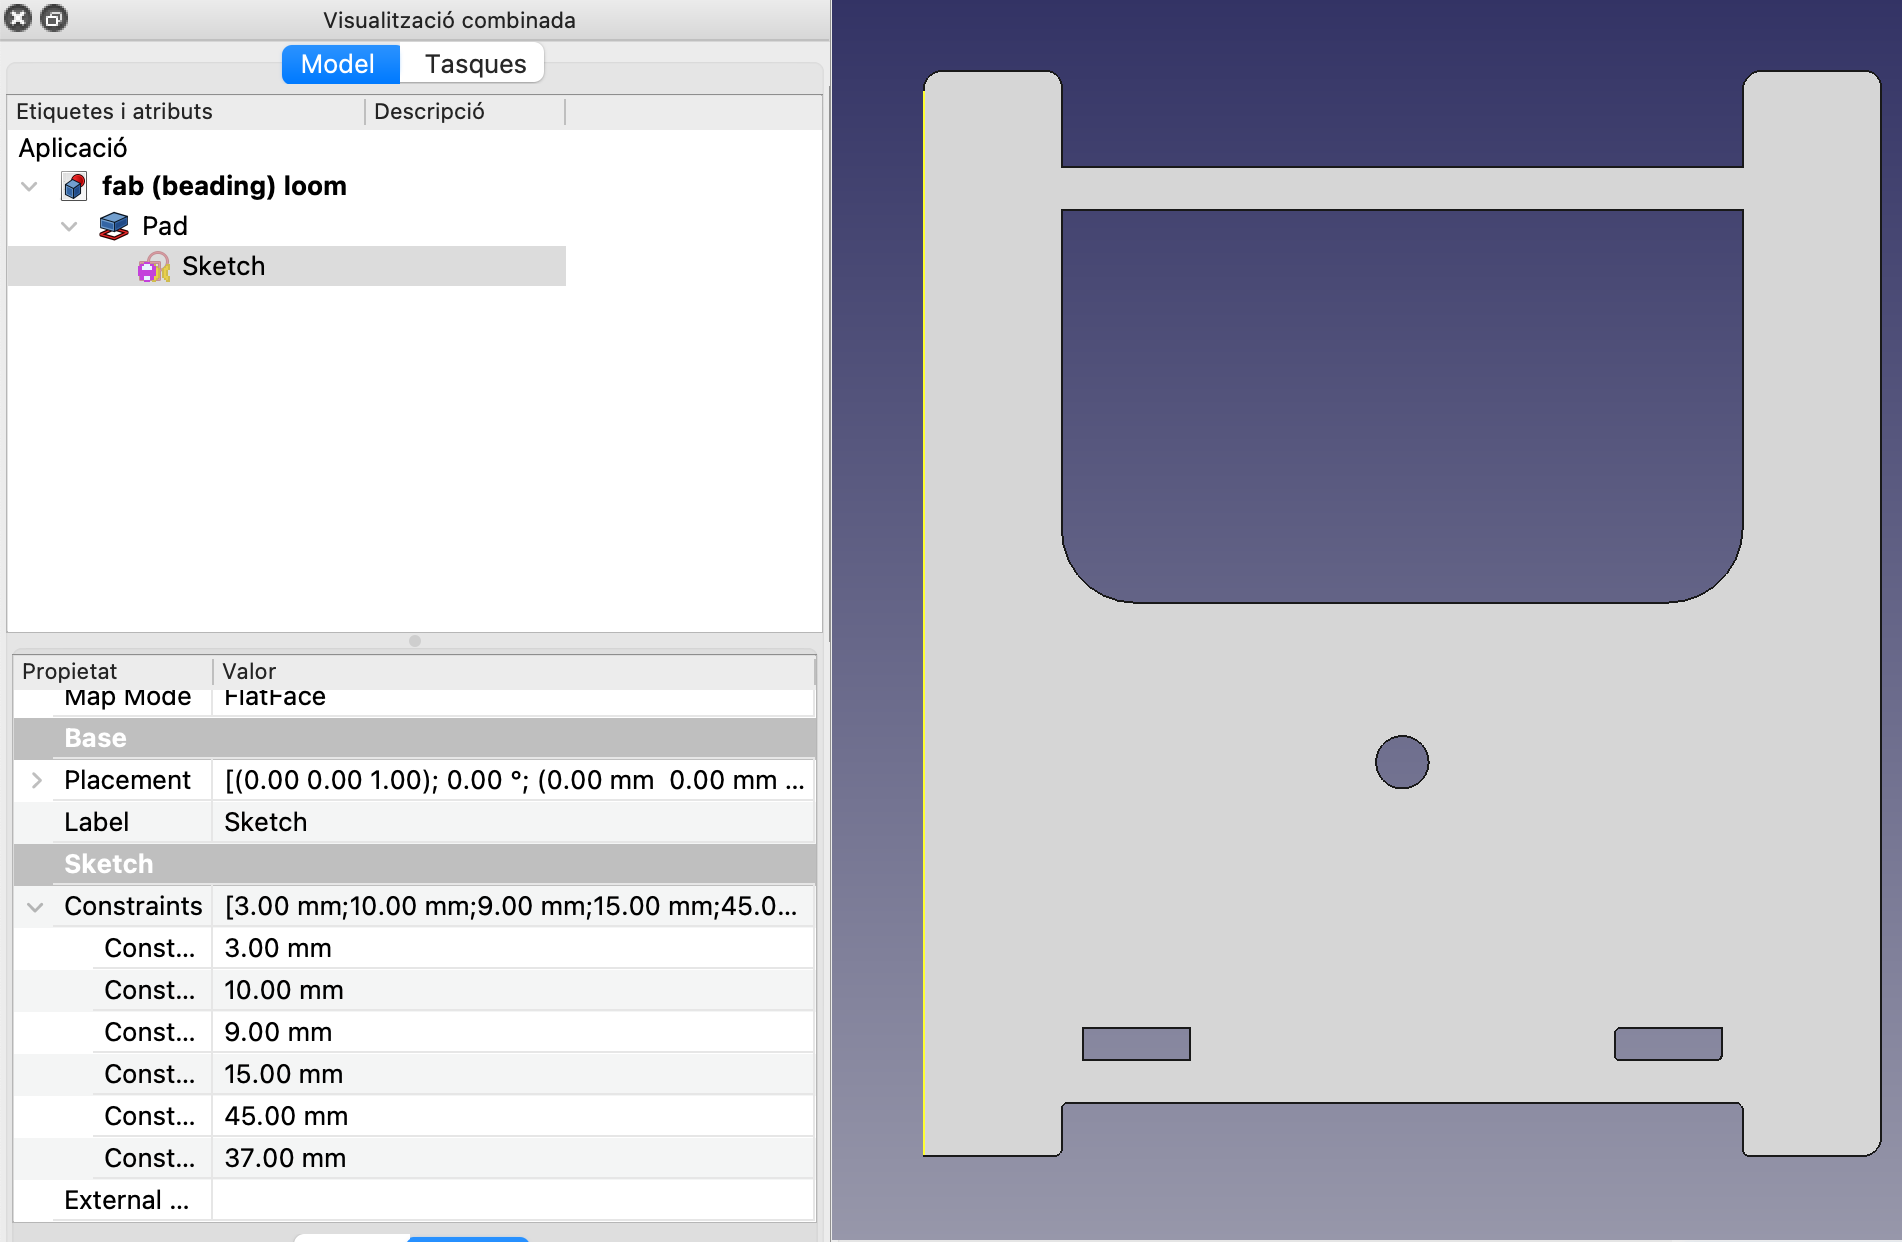
For the individual assignment, I designed a press fit beading loom in FreeCAD. I sketched the parts in FreeCAD and then extruded pads.

Once I have constrained sketches, I then group the design in Inkscape. I find that it’s good to plan out how to nest the parts in Inkscape after designing in FreeCAD. I then bring the parts into Rhino 7 where I export as Rhino 5 files to send to the lasercutter.
- Design files: Right click + Save As

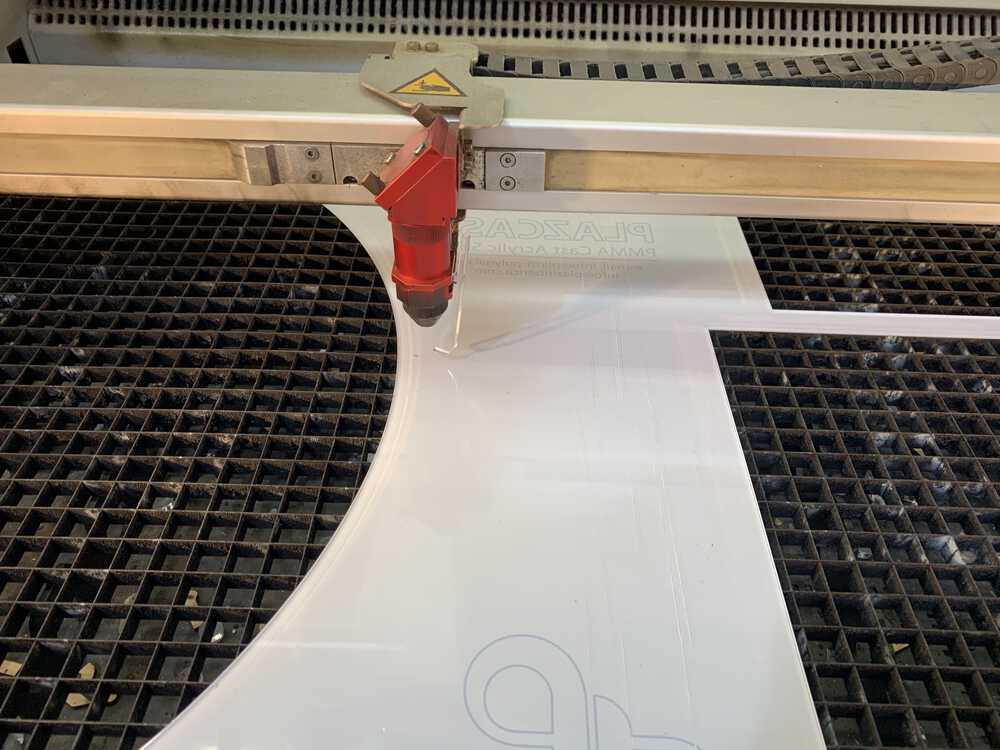
After turning on the air extraction and the Trotec 400, I focused the laser with the custom tool in the lasercutter room. This is done by bringing the bed up and then slowly stepping when I am close to the tool. When the tool drops, the laser is focused.

I open the file in Rhino 5. I run two commands (“Make2D” and “Join”) to be sure that I cutting closed polylines. I set the color to Blue, or whatever color I want to cut. Then I print from Rhino 5 is display colors. The file imports into the JobControl.
From there, I select the material profile and make the adjustments needed. In this case, I am cutting 3mm transparent acrylic. The settings that I used were Power 75, Speed 0.5, and Frequency 20000. For synthetic materials, we select a high frequency. For organic materials, we select a low frequency such as 1000. Since I was using scrap material, I measured the parts and cut the design out one part at a time.
Mewtwo & Lucario - Roland GX-24

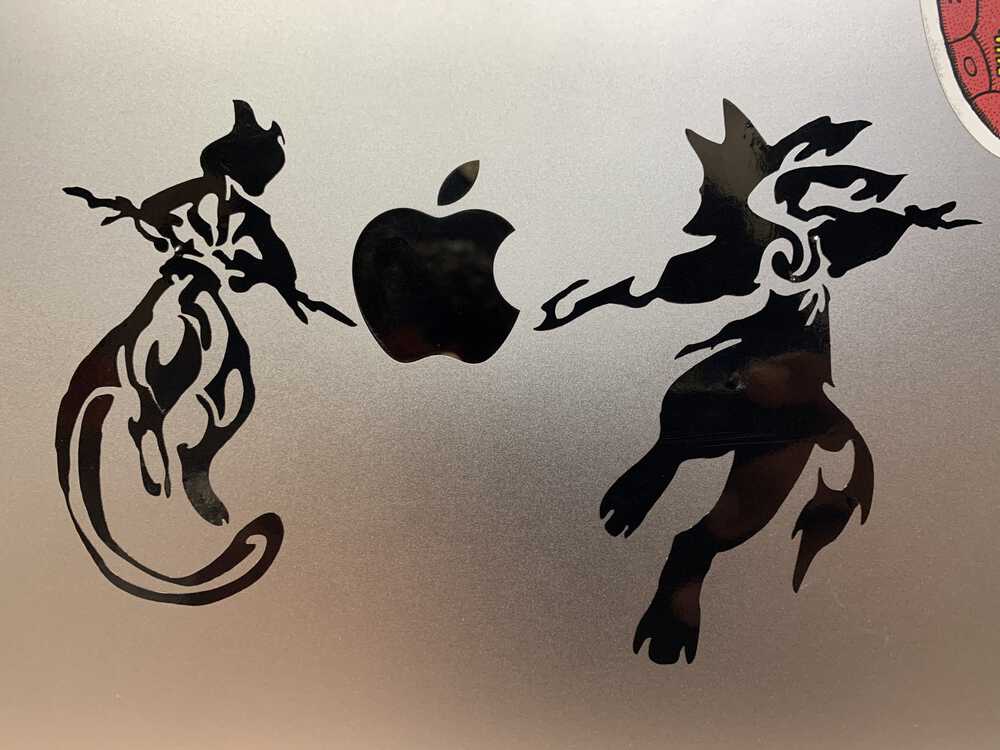
For the vinyl cutter, I found a piece on Deviant Art of Mewtwo and Lucario. Both are powerful Pokémon and I wanted to have them on my laptop.

After downloading the file, I brought the art into GIMP where I edited it to plain black and white picture. The process is iterative as I am using masks and adjusting the selection to smooth out the low resolution artwork.

Once the black and white image is converted, I bring the artwork into Inkscape and use Trace Bitmap to vectorize the image. It’s time intensive to work with the art after this step, because each node within a path represents a point in which the knife will stop on the vinyl cutter. I select groups of nodes and approximate the geometry from the original artwork. Once I have the vectors simplified reasonably, I can send the file to Roland Cut Studio.
Roland Cut Studio takes raster files and extracts contours. So, I had to export a PNG from Inkscape. The file did not import correctly into Cut Studio. So, I brought the file into GIMP where I added a white background. The file then imnported into CutStudio correctly. I loaded a roll of vinyl into the GX-24. I opened the lever to position the vinyl and checked that the rollers where within the white markings. I then closed the lever and set the origin on the machine. I can now send the file to the vinyl cutter.
- Design files: Right click + Save As
Laser cutter at the South End Technology Center - 2015
And then came the class in which the rubber met the road, or the laser met the cardboard.
I started out using the laser cutters at the South End Technology Center. Beckett Dunning, an alumnus of Learn to Teach Teach to Learn, guided us through the process of sending a job to the laser cutter. At the Tech Center, there are two models: Epilog Legend 24 and a Mini 24.
Rule #1 of laser cutting is: Don’t Burn Down the Place (what are you nuts?). Beckett walked us through proper safety precautions. He told us not to leave the laser cutter while a job was running. He demonstrated how to maintain proper air flow with the air pump and internal filtration system. The air assist pump reduces flare ups which cause the edges of the part to be scorched. As the laser pulses across the job, waste material or kerf is burned away to cut the part out of the stock (such as wood, acrylic, or aluminum). The internal filtration system or external ventilation system then removes the waste from the machine to reduce the chance of fires. Regardless of equipment, it’s still best to remain at the laser with a fire extinguisher or fire blanket in case of emergency.
In addition to Fab Academy, I have been collaborating with Luciano Betoldi and other members of the Fab Lab Network to compose the Fab Lab Installation Manual. This document details the set up of different machines that provide the capabilities that define what a fab lab is. My experience with laser cutters so far has been not only using them, but installing drivers, software, and helping to trouble shoot mechanical problems.
At NOLA Fab Lab at Delgado Community College, we had issues connecting Mini 24’s to computers through USB ports. While it’s not explicit on the Epilog website, I thought that the issue may be because only some of the ports were USB 2.0. We had a similar issue with the Sense 3D scanner which needed a USB 3.0 connection for power. Because of this issue, I opted to connect the machine through the ethernet port. When we discussed the connection with the install team, the ethernet port was preferred as a more reliable connection than USB.
Back in Boston at Fab@CIC, we installed two laser cutters: an Epilog Fusion M2 32 and a Legend 24 TT. The second one was donated by Neil Gershenfeld to The Fab Foundation. It had issues with the Y-axis and laser alignment. We contacted Mike Boyd at Axis Services to diagnose and service the machine. I was on-hand to help and document what the issues were. While disassembling the machine, Mike pointed out that the screws holding the sides were so tight that they may have torqued the machine. For Mike, his mantra was “snug, but not tight.” We went through the machine disassembling and testing the motion along the X and Y axis. While we did change out the Y motor, the main issue were the front and back bearings which were worn. These bearings are less available through Epilog, but should be easily locally sourced through a hardware store. Getting a job to the machine was the next step. The Legend 24 TT only has 32-bit drivers and all of the computers in the lab are 64-bit. I looked into several options to install the driver which almost required a virtual box on the Windows side. I tried two different cables to connect the machine to the computer: Belkin 6-Foot CAT5e Crossover Networking Cable and Sabrent USB to Parallel IEEE 1284 Printer Cable Adapter (CB-CN36). With the USB to Parallel, I was able to find the machine under add printers on Ubuntu 14.04. I then added it as a Generic, Raw Queue printer named “laser.” The desktop version of Fab Modules was able to send jobs without issue.
We covered several types of joints in the lecture for this assignment. I decided to make my own version of GIK using Inkscape to draw SVG shapes that can be brought into Fab Modules. I haven’t worked out sending jobs from Inkscape. The current workaround is to save out as a PDF and send from Adobe Acrobat. The main consideration for sending jobs is to be sure that strokes (outlines for shapes of parts to be cut) must be .001 to .003 inches or .0254 to .0762 mm.
Using Inkscape, I was able to create shapes and clones of shapes. These are all defined as SVG elements in the XML Editor. Shapes have either basic geometry or are defined as paths. Clones have use IDs and references to the original shapes. SVG elements have attributes that can be adjusted parametrically such as dimensions or transforms. In order to perform additive or subtractive boolean operations, those have to be done in the document. Once those operations are performed, a new path element is created. History of the new element is only retained by the undo button. So, it’s better to use an application like Antimony or FreeCAD to have parametric and hierarchical modeling.
The vinyl cutter was an old friend from my sign shop days. In Central Louisiana, I would use the vinyl cutter for several applications including: decals, corrugated signs, and masks for screen printing. In 2015, I made a Pokemon decal for my laptop. To do that, I downloaded a stylized design for Mewtwo and Lucario and then traced the bitmap using the plugin in Inkscape. The trick for more complicated designs like this is the attention to nodes within the SVG document. Curved lines can be rendered by the Bitmap tracer as several nodes along one curve. The idea is to reduce the number of nodes and adjust handles to the point where each line (straight or curved) is the travel between two points. This gives the cut a more natural travel, and the overall decal becomes easier to weed.
The goal of cutting with the vinyl cutter is to only cut the adhesive material and not the substrate. The knife only sticks out about the depth of a fingernail. You also have to balance the amount of force applied to cut the material. I once tried cutting Fab Foundation decals at a DigiFabCon in Cambridge, MA. Jean-Michel Molenaar came by the booth and saw that the force that I had was around 45. He immediately bumped the force up to 90 which made nice cuts that weeded very well.

