Final Project - Final Academy
Menu Principal:
Final Project
Week01. Personal Project / Mercurial Instalation
The Project
The first idea is based in fabricate an urban portable bicycle, with almost all parts made with machines from a FabLab. In this moment, I'm very interested in a singular bike type, the fixed pinion bikes.
This bicycle works like a pista bike, where the cyclist can not stop instantly the pedaling without stopping the rear wheel. In low velocity travels, in a bikeway for example, these systems can be used to brake or reduce the velocity only with the power of the cyclist´s legs.
I have a fixie bike, so i don´t want to make a copy of it. I wanted to be a little more ambitious, and i pretend to make a bicycle without spokes in the wheels and based in an italian forgotten pattern, the Velocino.
So, I have many many work to do. During the process I would like add some electronic parts, for example, signage and lighting, and complete a happy idea,make all the frame in wood and epoxy. I used a wooden handlebar for many month and I could make a hard and durable frame with a low weight without fibers.
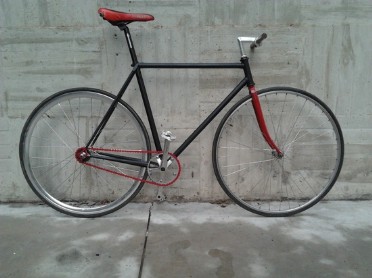
My fixie bike
Concept

Mercurial Intalation
I solved the question following the tutorial of Anna Kaziunas and Luciano Benotti, and with the help of Osfa. I don´t feel secure when I use it, I think that i´ll break something everytime that I write and execute any line, but I have not broken anything for now, hopefully everything running.
Week16. Applications and Implications
what will it do? A portable mini bike.
At this point in the Fab Academy, I do not know if it's my best idea or a great stubbornness. I explained at the beginning of the course, in any case, I pretend to complete this project.
who's done what beforehand? My ideas collection.
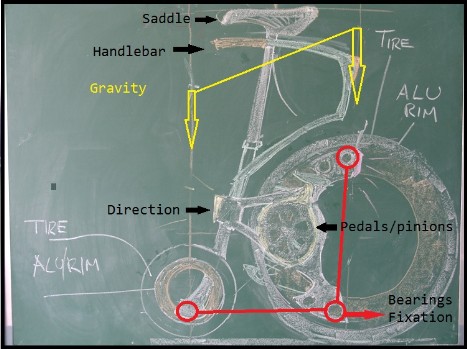
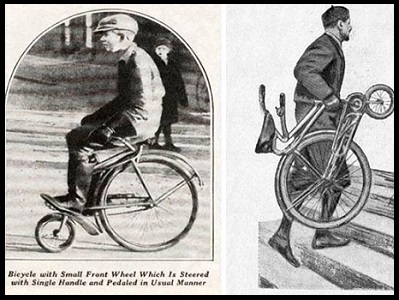
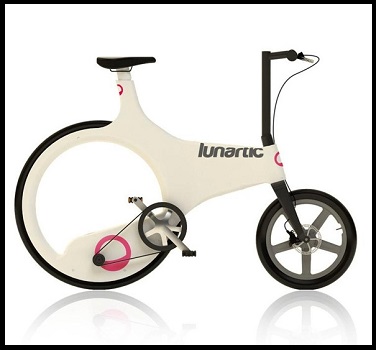
Here there are some pictures that make my brain work . The base is an Italian design from 30´s, the veloccino, a short and small bike with different size wheels and a special way to be driven, the handlebar is very close to the saddle. Then, the other pictures show how I want to create the wheels, a new concept without spokes, that work like a common wheel but using less materials.
There are many more pictures here.
what materials and components will be required? Basicaly, liquid plastic, aluminium, PCB, and bike parts.
where will they come from? Some recycled bike parts, fabricated pieces.
I´m an amateur cyclist,and I have many recovered parts at home, I think my girlfriend is very interested in destroy all, but I hope use some of it in this project.
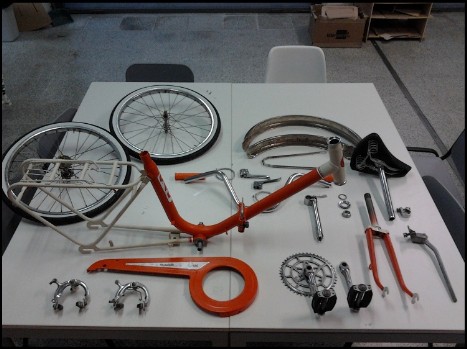
I have no pictures of my garage, but I have a picture of my last bike recycled, we can get an idea of the number of pieces that have a bike.
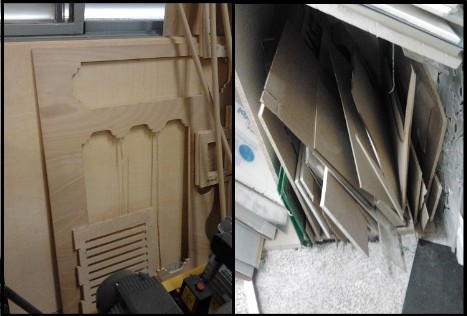
The fabricated piece.
Most of the materials used are consumed by the molds. To make them I will use recycled wood, the Lab is full of them. For the frame and rim, ABS for the 3D printer, plastic liquid from smooth-
· To order: Plastic liquid and thermoformable plastic.
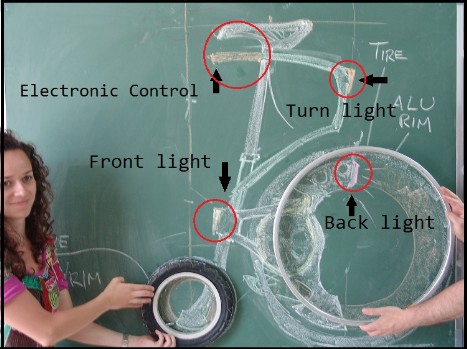
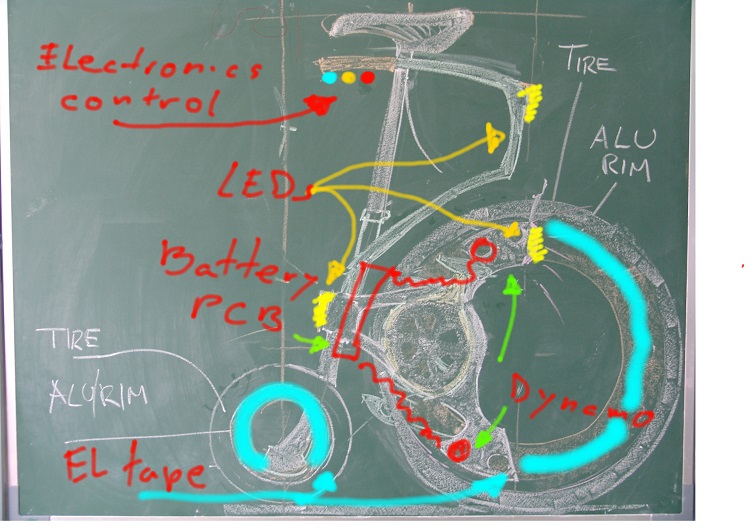
Electronics parts.
I don´t know yet how is the electronic kit, but I want to includ a light sensor, LEDs, EL surfaces, a battery and a dynamo.
· To order: almost the battery and dynamo, the EL tape is optional.
How much will it cost? I hope less that a crafted bicycle.
what parts and systems will be made? Almost all mechanical parts except pedals and alloy rims.
What processes will be used?3D print, molding and casting, electronics, milling machine and thermoforming.
what tasks need to be completed? First, hard wheel fixation, then, light weight and autonomous electronic parts.
What questions need to be answered? Mechanical properties for the different materials. A lot of help for electronics.
Electronic. How can I do a instalation that use a dynamo to charge the battery. There are turn signal light in the handlebar that can be activate with a button, a light sensor that activate front and back light, and other button for "cool presentation" :) EL tape ON!!
I think that I can design board with almost all the light system, but, how can I build the autonomus power system??
What is the schedule?
The last three month goes very very fast!! When here in Seville our people was thinking about start FabAcademy, Jose Perez convinced me proposing the possibility of make a unique bike. Convinced!
Since then, I've been thinking about how to get to that goal. and I think I have defined the steps.
·First. Make a mechanical scaled prototype. Cut flat piece in lasercut and test the movement.
·Second. Fixation. Choise the materials collection for get the main frame. Light and hard.
·Third. Gravity. The design depends entirely on the physics. I have to test about stress distribution and strength of materials.
·Fourth. Stability. I will train my balance, I think the driving will be different from a conventional bike. Some friends bought me a unicycle as my birthday present. Just hope to release the FabBike with my bones intact!
In time themes
·I hope test the mechanical this afternoon, and show you the result.
·There are many engineering professors interested in my project, and with his help I think I have a good combination of materials Fab that I will use for the frame.
·I´m closing the design, and in two three sesions I´ll finish it. So the stress will be defined and the structural correction solved.
· The stability depend only on my.
So, the time to the goal, will be defined for the production time.
I want to refine it as much as possible, but first I want to finish the process. Next week I will have the schedule.
How will it be evaluated?
The first goal is complete the requirement from Academy.
· Made in a FabLab.
· Use differents Fab tecnics.
· Use electronics parts made in FabLab.
The second goal is complete my own spectatives.
· Light weight.
· Usefull.
· Recycled and Fabmade.
· More cheep than a craft bike.
Week18. Personal Project-
week01
week16
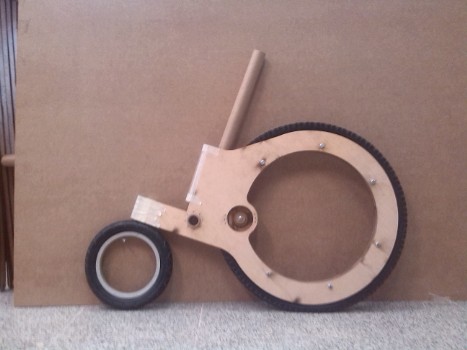
I'll start with an excuse, why nobody told me the number of pieces that have a bike?Hundreds!
Down, to (very) differens versions of the project.
·The latest digital sketch, where you can see all the parts fixed to the frame, and driving system under the saddle.
·The last state of the project, which, after the accumulation of errors could not advance more.
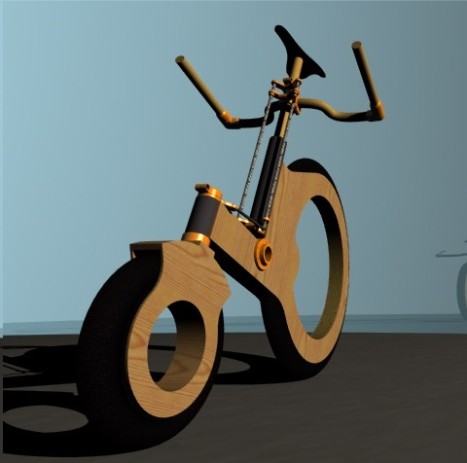

After making our RepRap Prusa, my brain would not start ... and it was time to finish my final project, but, all design versions had errors of some kind, ergonomics, mechanics, aesthetics, and even some law of physics broken (....?)
By this, I started to producing specific parts, then I would go adding to the project.
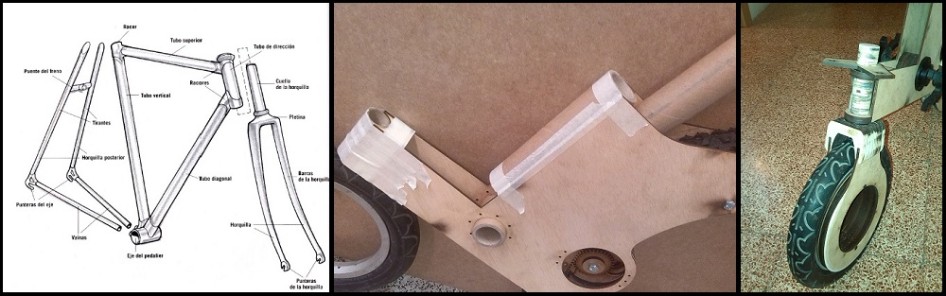
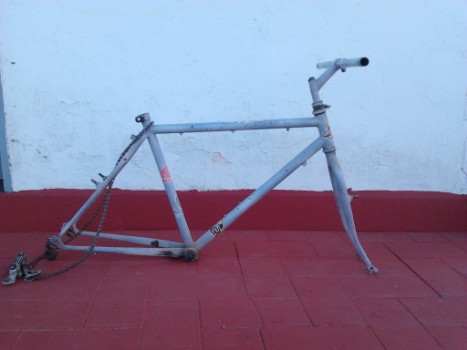
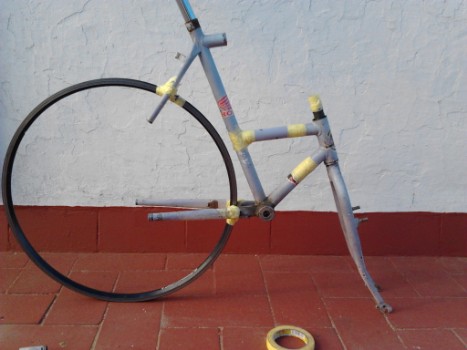
Step 1: Solucioesn geometric / Ergonomics.
I took a frame and started cutting ... in this step I chose the diameter of the wheels, and saddle height.
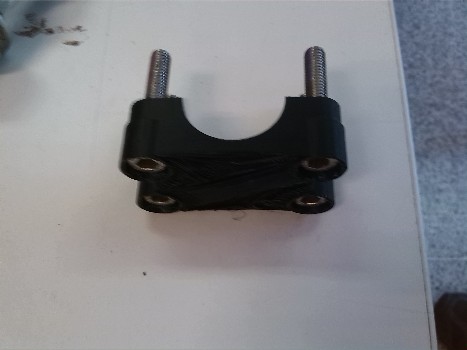
Step 2: Recent decisions regarding materials and parts to buy / manufacture.
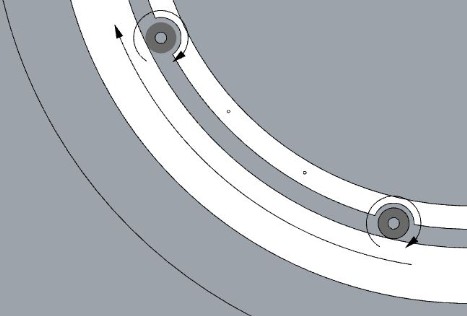
Last search in the network. Two images that accurately describe my idea for the picture and a more, how I would like it to be the transmission.

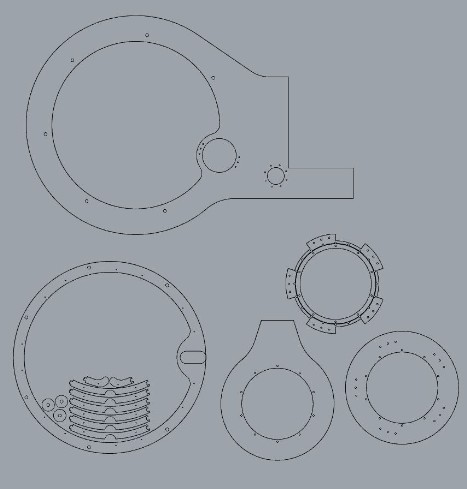
Step 3: Design of the first pieces.
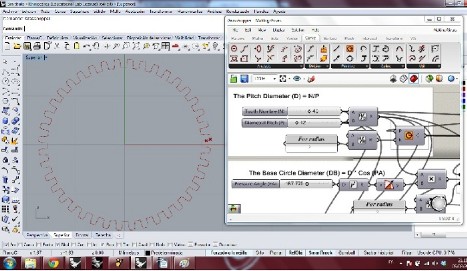
Rhinoceros was used throughout the process, and grasshopper, promptly.
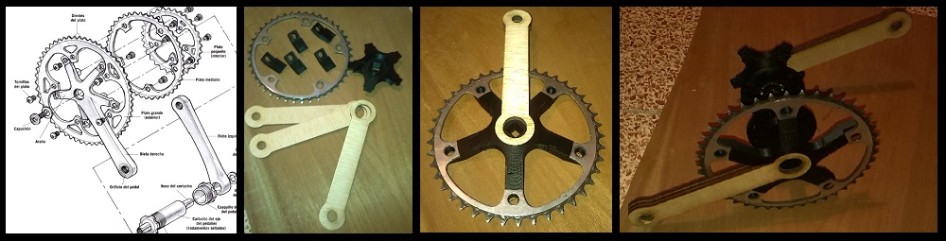
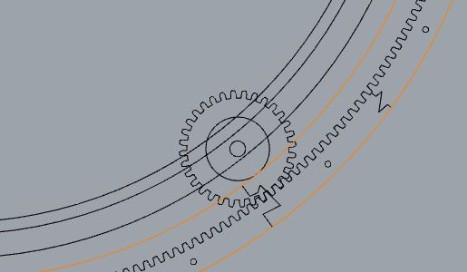
Step 4: Welcome to the exciting world of gears and bearings.
Take air if you know not the specific geometry of the gears and chains .... I ... do not know. It's really exciting and addictive, but it takes a long time to refine.

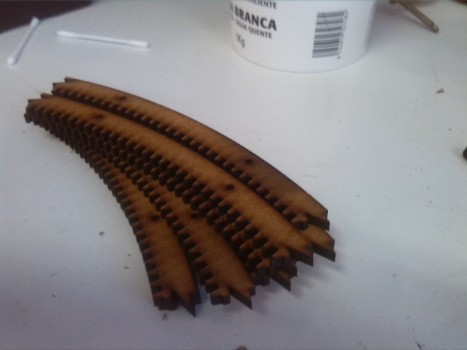
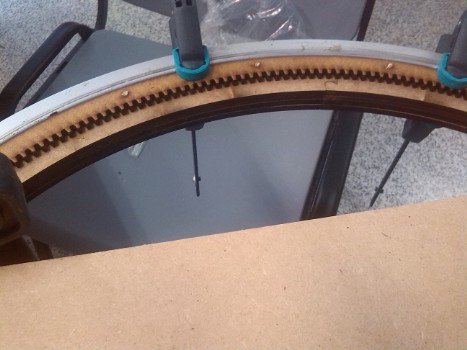
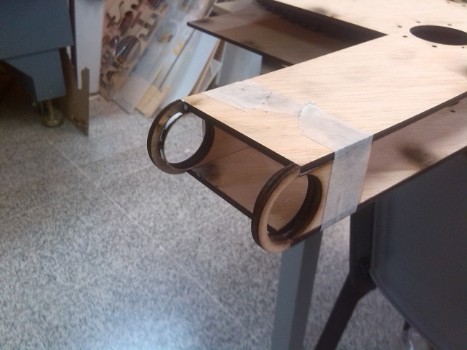
Step 5: Fabrication and assembly.
Will place a list of photographs of the process, the techniques used are laser cutting and 3D printing. I would have liked (necessarily) to use composites and technical plastic parts by molding and casting, but was economically unfeasible. These are the facts.


Step 5: Test & Surprises
I loved during the first 15 days ... then started base error, unrecoverable.
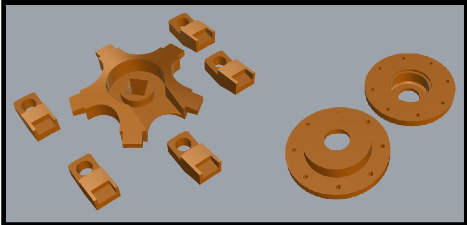
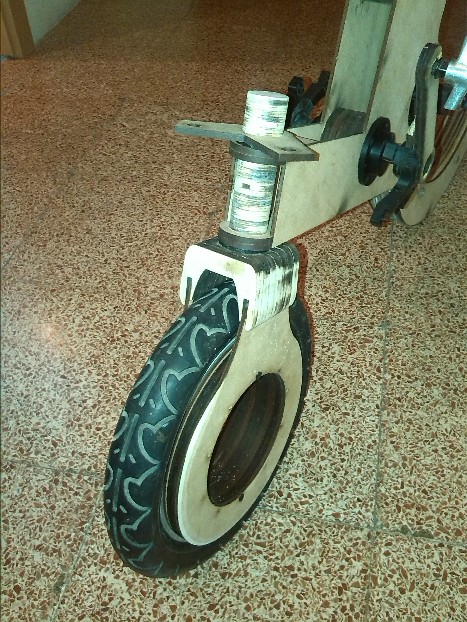
Wheels:
Track-
Front-
If I have to choose a system, I would repeat the pattern of the front wheel. It is much softer and easier to move.

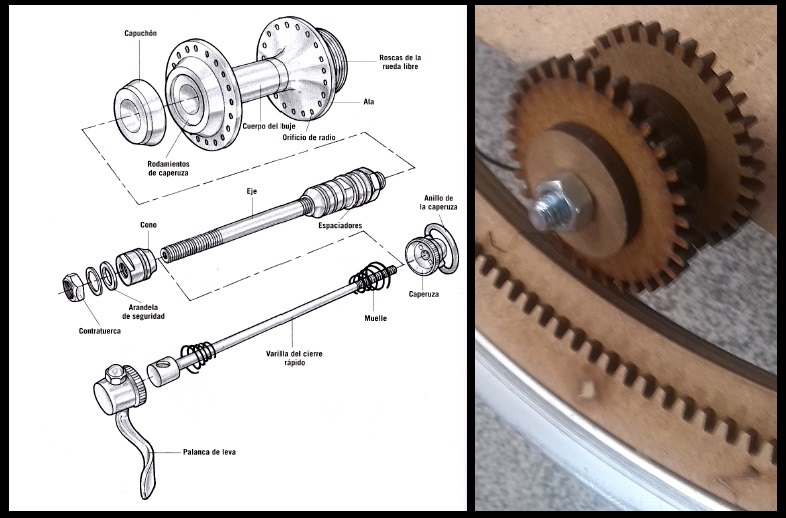
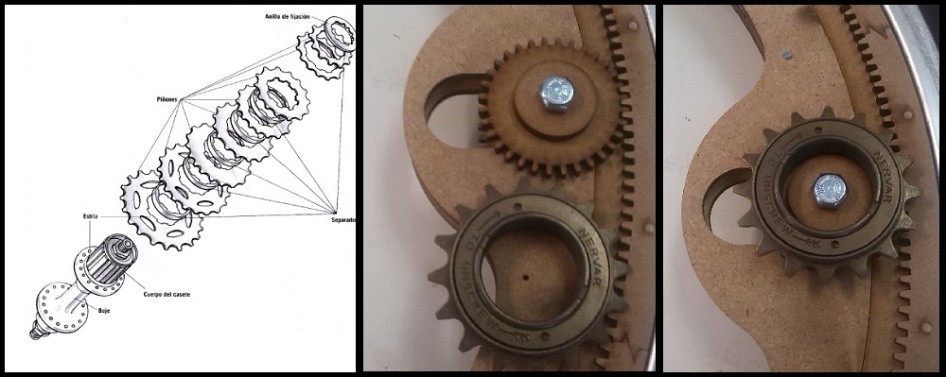
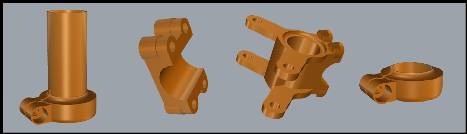
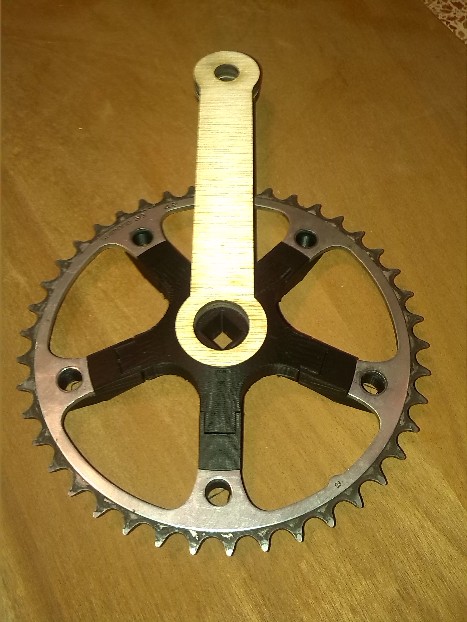
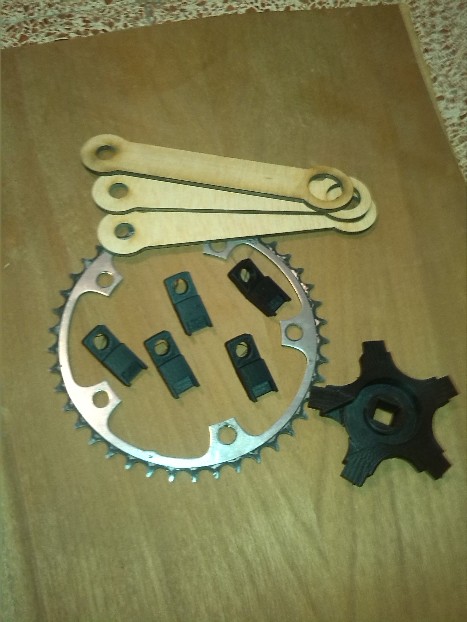
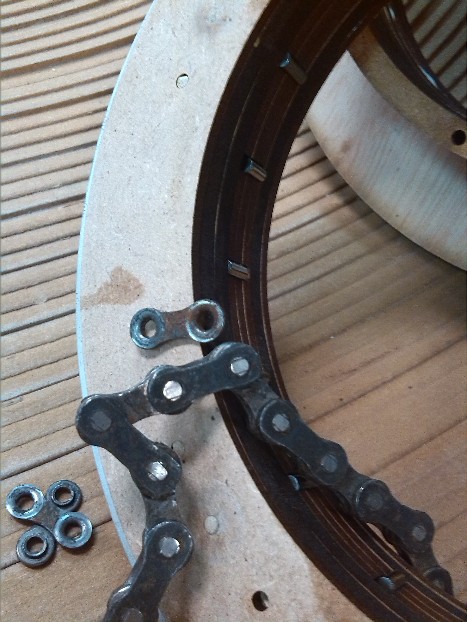
"Hub" & Sprocket:
Really the hub is just the sprocket axis. Includes holes, to crimp the sprockets, plus channels for rotating balls.