Fabrication - Final Academy
Menu Principal:
Fabrication
Week03.Cut 2D. 3D pieces from flat components. “Rubik´s Snake”
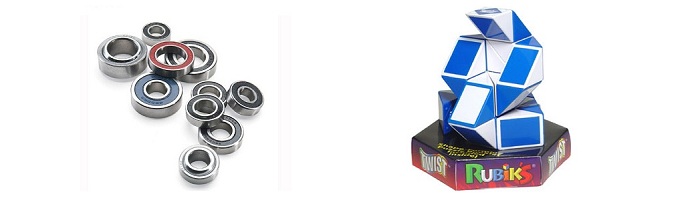
Study Case. I work with a laser cutter from five years ago. During these years, I experienced with many case to get fixed pieces without glue or screws, “Press Fit” system for many times. For this assignment I wanted get movement in the cutted pieces. I was thinking in make something like bearings, I hope to use big bearings in the wheels in my final project to eliminate the spokes. I drawed an abstraction from a special toy, the Rubik´s Snake.

Software. This week I started to use Inkscape, OpensCAD and FabModules, but I don´t get good results. I´m working on it. I used Rhino+Grasshopper to draw the parametrics pieces this week.
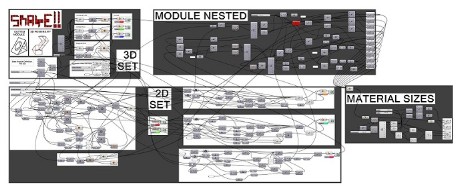
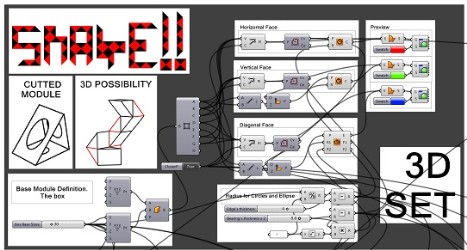
When I started to work with the definition in GHX, I tried to use the minimal variables, but not was possible...
In a few minutes all was complicated.
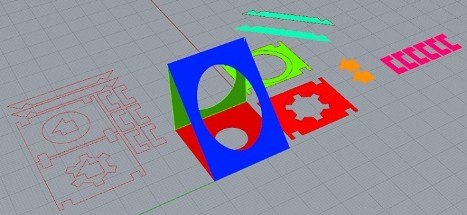
In the definition we can change the size in the square base, the thickness of the material, the separation between pieces...and more. And We get in one step the 3D, 2D and nested preview.
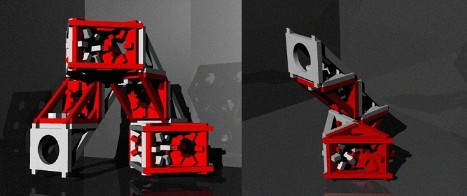
Choosed some parameters, I get the first approach. After bake, directly with Rhino, I prepared the 3D rendered views.
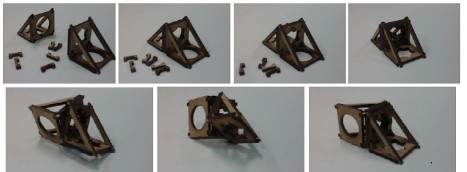
Later, The first cutted pieces. And the first build modules.
In these moment I discovered some mistakes in the pieces choosed.
1. The pieces ware very very small to be builded for my fingers. 30 x 30 mm base.
2. The sticks that run like bearings ware too much hight and they themselves collide when a third module is added.
3. Need a piece to close the bearing, because, when a module is rotated, the sticks can be moved outside.
Here the corrections:

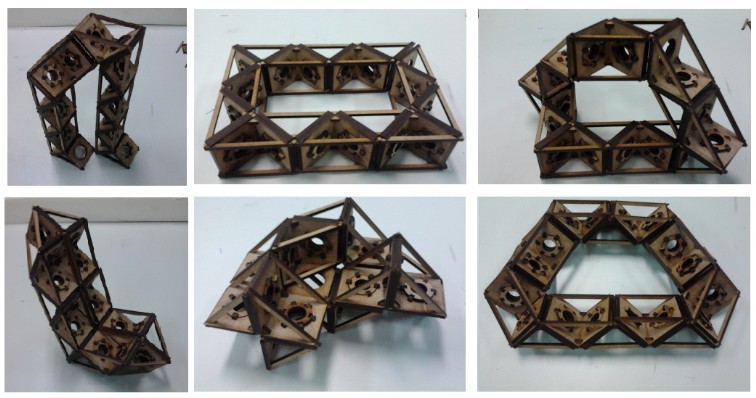
Week05.3D Scanning and Printing
To resolve the assignment, this week I used 123D Catch like 3D scanner, an Autodesk Software, I used my Facebook´s account to pass, and our MakerBot Replicator, to print.
My first try in 123D Cath was a bike saddle, I thought to use it in the 3D model drawed for my Final Project.
The 3D model was not the best...no very smooth, and some tries after, changing the check points in all pictures, the project did not improve, much noise in the saddle´s surface.
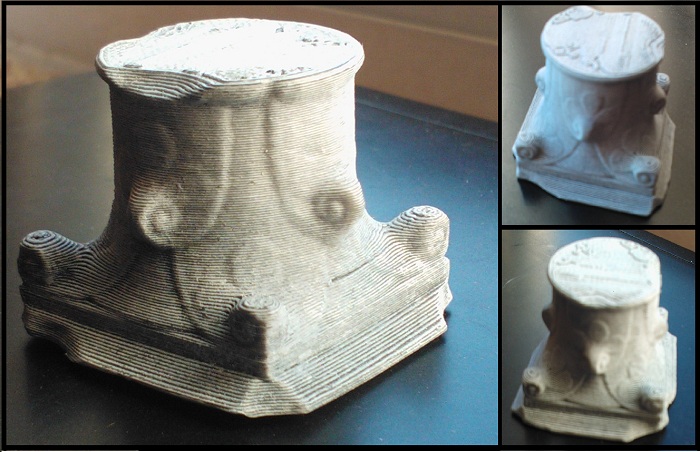
I left the "saddle project" the last Saturday, after visit an Ai Weiwei exposition in CAAC, , Andalusian Center for Contemporary Art, in the last patio, I saw a pond with several capitals of marble resting on the floor.
The best location, natural light, without shadows and with many details. I threw thirty-
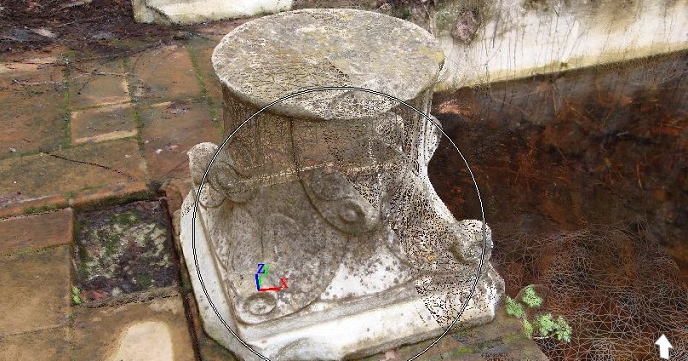
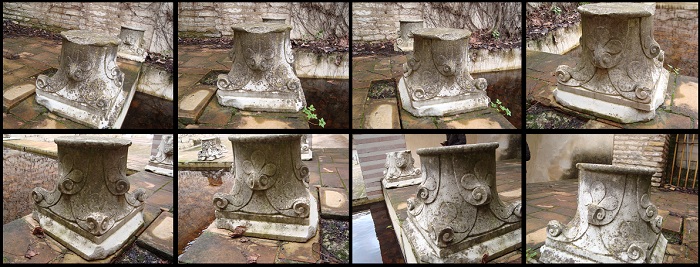

The first project, the saddle, had many problems to get a useful surface, the 3D model no improved after each correction of points tracking, but in the capital project, everything worked instantly.
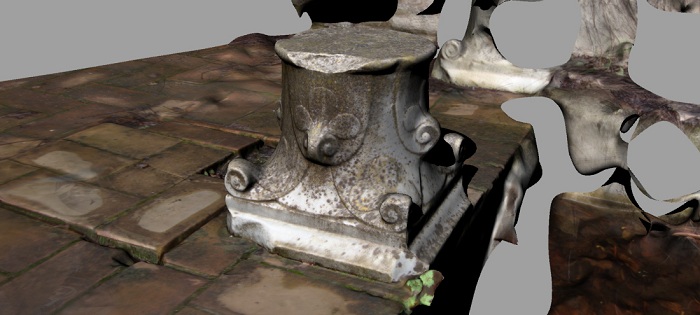
The mesh is very smooth and defines very well all the details of the marble piece.
I work with Rhinoceros to clean the scene, I could view the floor with differen height, or other nearby capitals. If you can open the 123D Cath scene, you will see even a little plant near the water that grows at the foot of the capital, lovely.
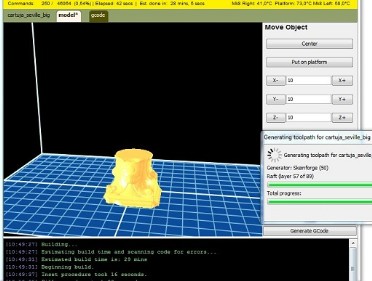
This week was my first print with the MakerbotbReplicator from FabLabSevilla...three month later the arrive, and I like...no, I love it!! After the fabrication of the capital, I printed a piece to my bike project, and a head to a toy and now may be possible I´m drawing something to print!!
I don´t know so much about spec of drivers or gcode writer used, Juan Carlos Venegas teached to me how to send *.stl files to the machine, and...I did it-
Down some pictures from the printed object. I painted it with acrylics to can see more details. A washing with black paint, and dry brush with white paint.
Week07. Molds and Casts
This week. Molding and casting.
I have no experience really serious about molding or casting. Being young I duplicate some pieces of modeling using a two-
Speaking of the realization of homework, the most complex part was the ultlización of a collection of new material for me. The second hardest part would be the choice of materials used.
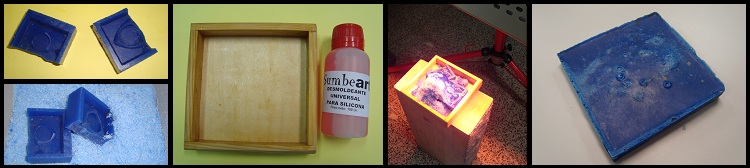
Last Thursday I went to the city center, to meet the guys at the shop "Sumbeart". Specialists in mold materials and reproductions.
I had to go alone, and after many questions, I materialize a purchase:
Silicone SHORE 22A
Acrylic resin
Mold release
Polymorph (to test)
After last week, I must confess that the silicone is very soft, very flexible, and I bought the acrylic resin thinking about she was something like "Drystone" and I think not. For future practices with molding and casting, I would try with polyurethane resin, pigments, polyurethane foam, or directly, with drystone or hidrostone.
Now, homework.
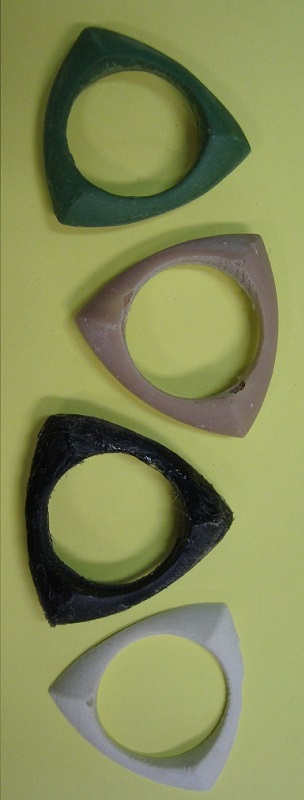
In order to test for something small, I decided to make a mold for rings. The geometry chosen for the design is based on the Reuleaux triangle. This triangle has very interesting properties, for example, could use it as a wheel for our cars, because its diagonals always have the same measure. as in the circle.
Or, more fascinating, we could have a bit to make square holes!
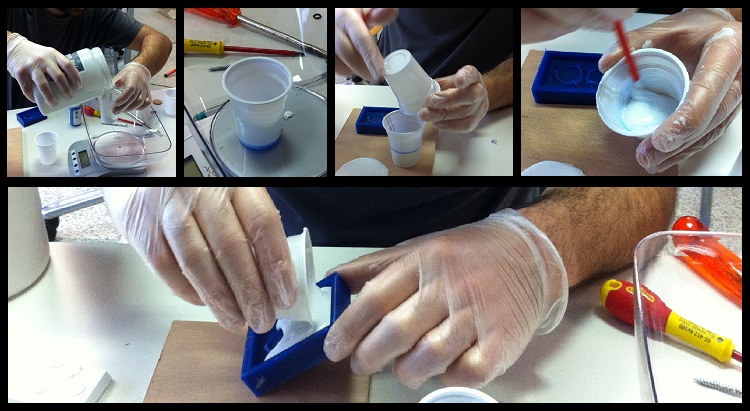
I used to draw the design Rhinoceros. In the following photo montage I show the drawing process, and the preparation of the mold. First The basic geometric, using curves, and then, the polysurface.

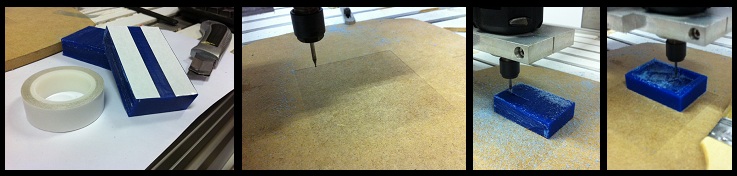
To get the Alpha piece on wax I designed walls with draft angle, and two holes with coned end, one to cast and the other to leave air free.

To cut the amount of wax needed, I followed the advice received in the last class. I used a saw, and I cut the block slowly. This wax is very hard, but easy to machine. You have to be patient, not to lose material, I saved all the dust that came out of the cut.
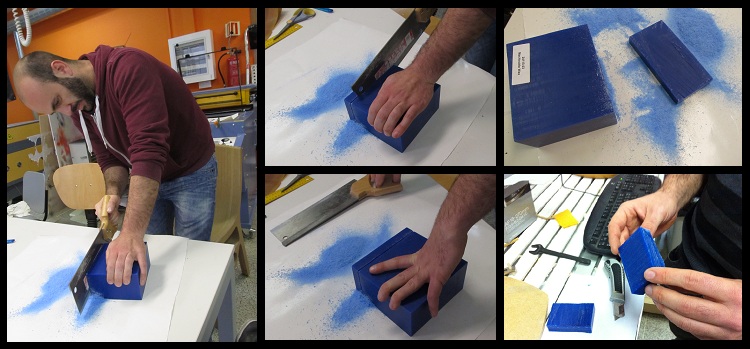
Block measured 55x76x20 mm. I put two strips of double-
Preparing the silicone.
The mixing ratio is 100 to 5, and is a bit difficult to calculate the 30 grams 5% if we use a scale that measures at least 1 gram. The first mold took more than 24 hours of cooking. I suppose I used too little catalyst.
The catalyst is blue, reveals that the mixture is good when the compound is again totally white.

I made the first copy with acrylic resin.
The ratio is 2.5 to 1, powder-
(While I cooked the second silicone mold I discovered that would not be symmetrical ... so most tests were made in two halves)

The second test.
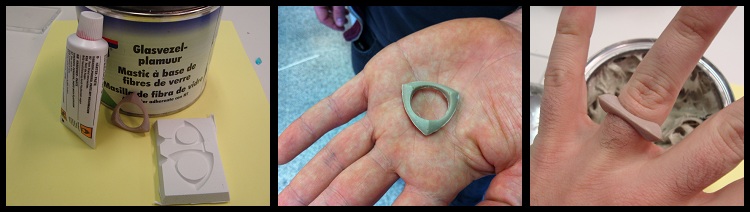
Polyester resin and fiberglass integrated. Proportion 100-
This compound is used mainly in automotive repair for dents.Cook quickly, in an hour you can sand it.The two halves were glued with glue, once the glue has dried, I sand the surface with fine sandpaper.
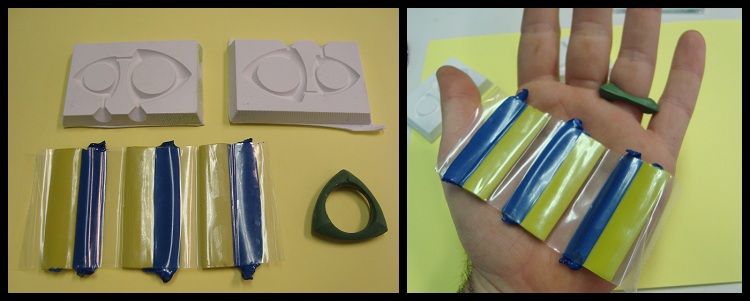
The third test.
Epoxy putty. Ratio 1-
Here I made a sandwich with two silicone molds, carefully placed, and epoxy putty. I need a little pressure to shape the putty.
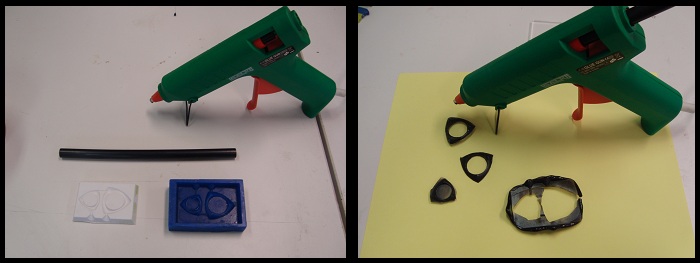
Fourth test.
Hot glue. In this test I Inject hot glue directly onto a mold, and then I put the other pan on top, and I did pressure. I could also make a mold of the wax.
Fifth Test.
The cycle of life. A box, trash, and my poor wax mold. I used an infrared lamp to heat and melt the remaining wax, so we got a new block of wax with which to work
Week09. Something Big
The weeks pass quickly, so, for homework this week I've decided to start making my final project models. I hope to use this work for this week, and also, for the week of composites, if all goes well, incorporate the mechanisms and electronics that I can do.
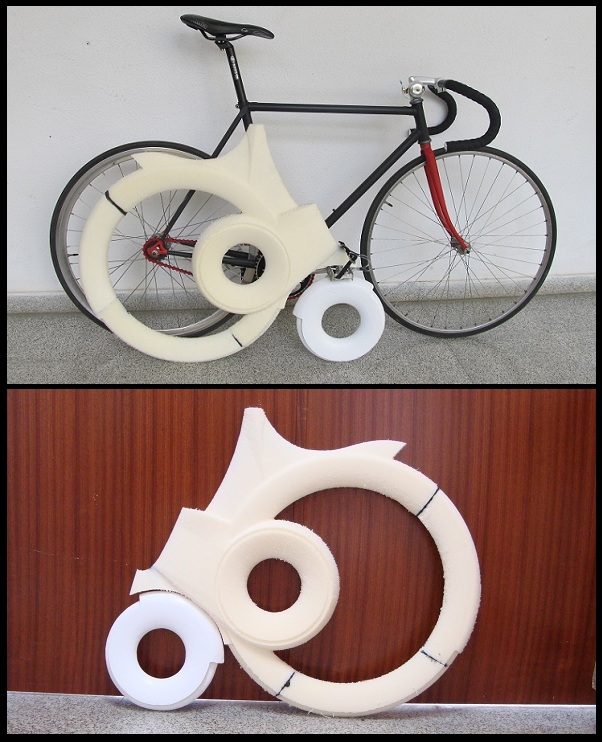
So, for this week ... my first physical sketch about final project!
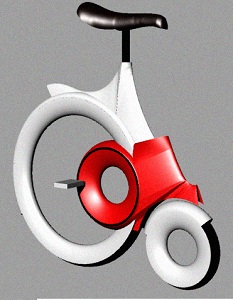
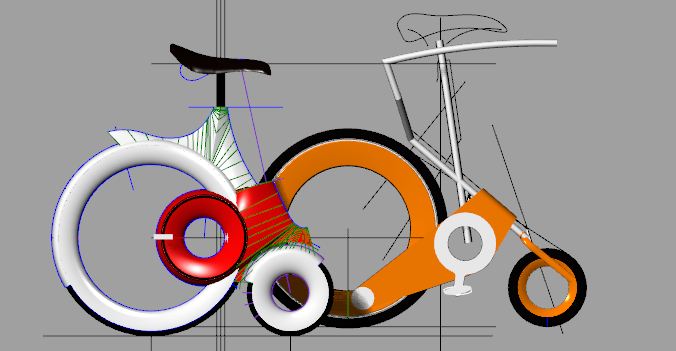
In recent weeks I've been thinking a lot about how the bicycle can work. The key is in the charge distribution and the position of the center of gravity. My target is to make the bike as short as possible. So my last idea was to place the pedals in the rear wheel, and so, put the wheels closer together. Viewing 1:1 scale model, I think the saddle is very close to the pedals, I do not know if it will be too uncomfortable.
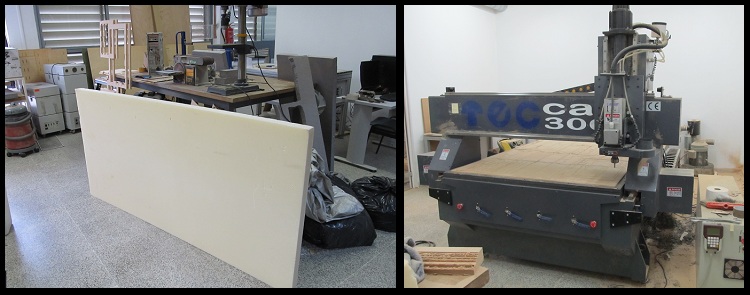
We had a very dense XEPs sheet. The measures, 1000x2000x60 mm. To create the 3D object, I use our large milling machine.
The measures of the material and the possibilities of the milling machine along the goal of making a short bike are my starting point for design.
In these weeks I got some tires with different radio. For the rear wheel, a mountain bike wheel, and the front wheel with 12 "radius, from a stroller

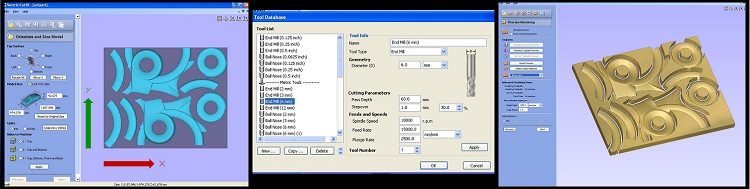
Completed the design, I separated the piece in half, and I nest the pieces on a board of 1000x2000 mm, the maximum height of my design is 43 mm. In FabLabSevilla Cut3D we use to work in three dimensions. I Calculate paths with one end mill 6 mm, two flutes 60 mm. The overlap 1.8 mm, max speed 15000mm/min.
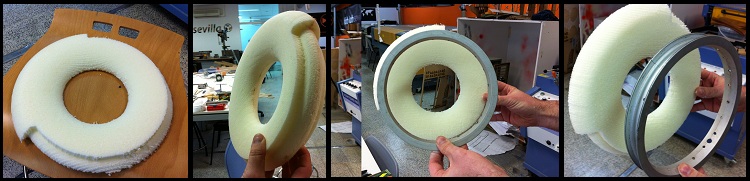
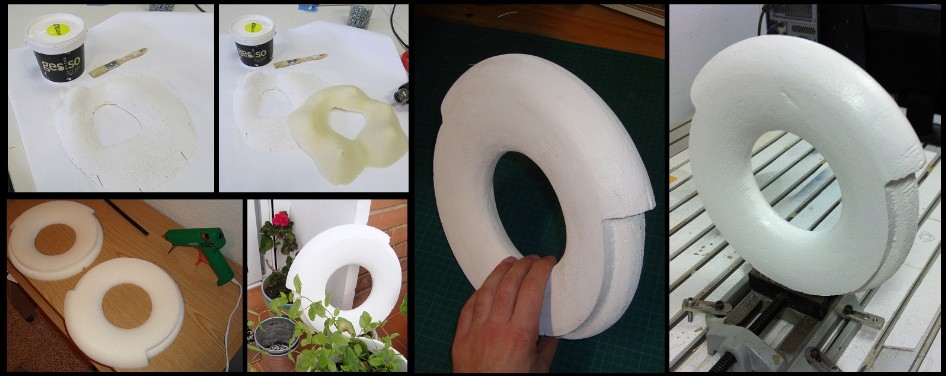
Before we had all milled parts, I removed the two halves of the front wheel to test with Gesso. Before painting practice pieces, I paint a piece that was in the Lab I thought the Gesso harden in less time, but I needed a long time to apply several coats of paint.
For drying the layers in the tested piece, I use a paint blow.
Before applying Gesso on my wheel, I glued the two halves with hot glue and I sanded the model. At home, I gave the first coat of paint .... oh no ... I have no blow at home ... I tried to put the piece on the terrace, but the day was cloudy and not dried anything... fortunately I convinced my girlfriend to get the piece under the table next to the heater, voilà! Dry!
Two coats of paint later, sandpaper, and synthetic enamel, this is the result.
I had no time, I was the last to use the machine, so I preferred sand more and use less the machine, for this reason I use an overlap of 1.8 mm.
With all the finished pieces, I had to do a work of archeology to extract all.
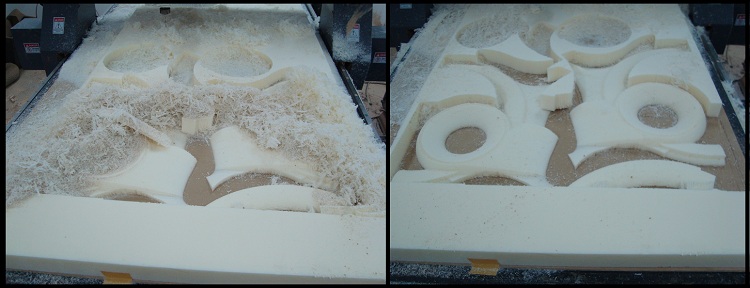
Again, hot glue to attach the pieces, and then, to sand!

My heart beats strong, the model looks very well! The bad thing is that I think I have no time to prime everything with Gesso and glazing. I get to work. So far this is the state of the piece. I like!