16. Interface and application programming
Objectives
Group (To redirect to group assigment page Click here)
- Compare as many tool options as possible
Individual
- To write an application that interfaces a user with input/output device
UI/UX Designing
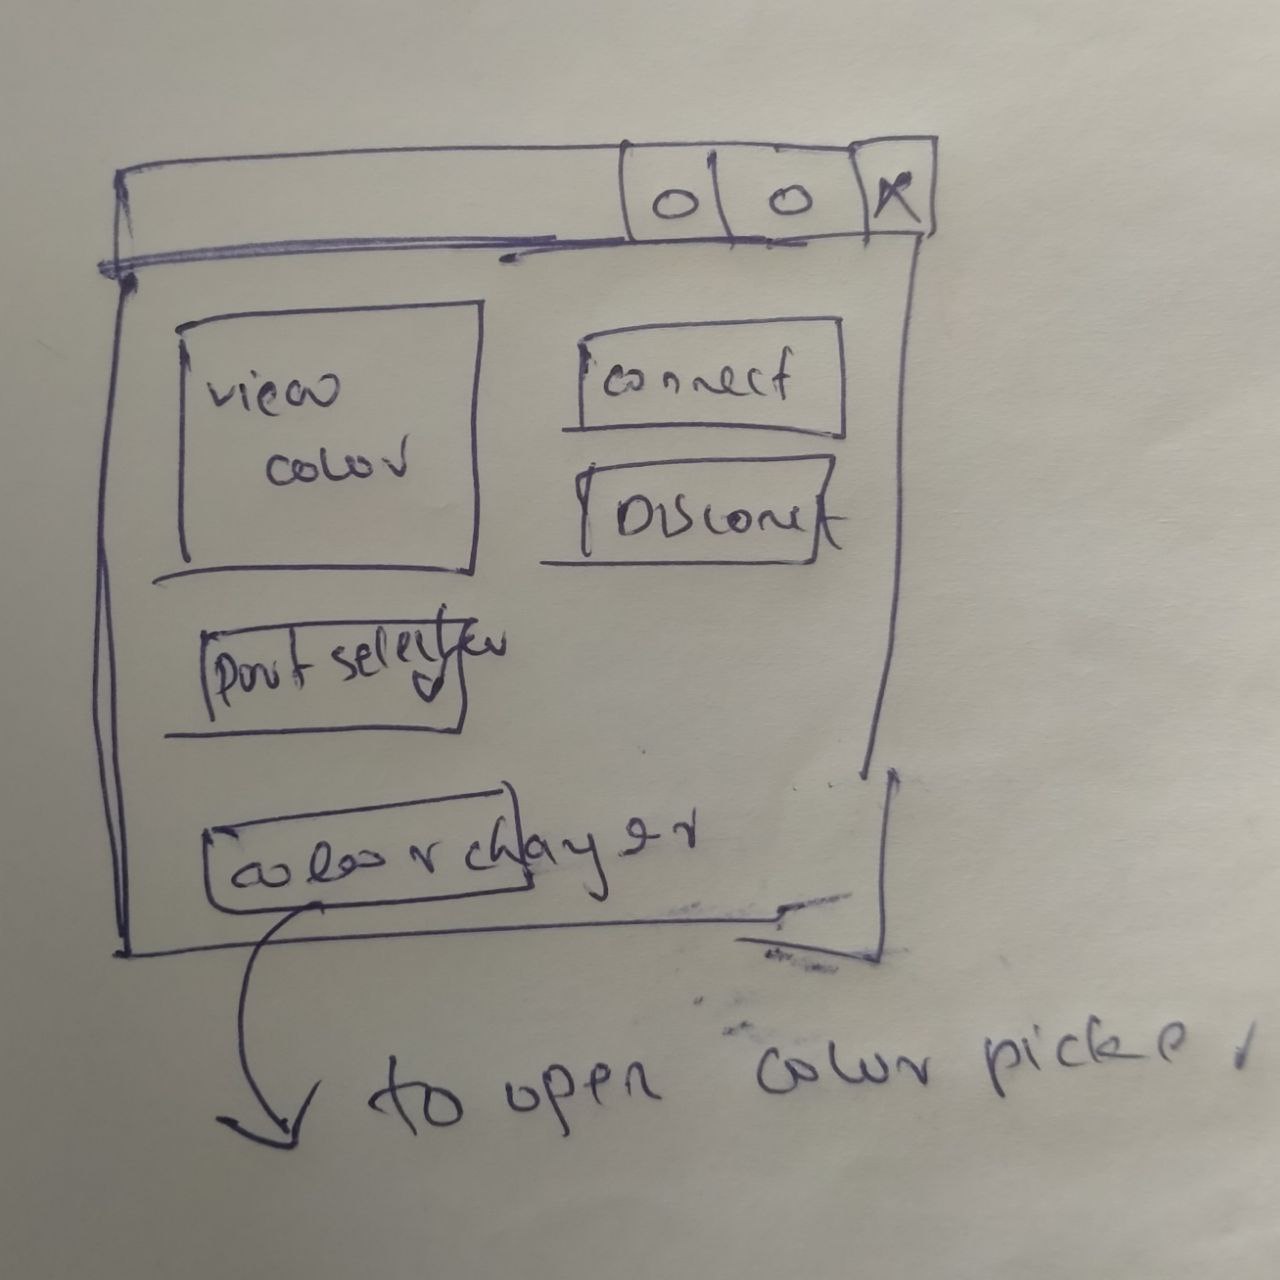
I was thinking of making a small interface to controll my RGB led board i made on output week so as always startred by sketching the UI on paper.
Flashing board
now lets begin coding the microcontroller, used the code below for that.
int RED_OUT 8
int GREEN_OUT 10
int BLUE_OUT 9

void setup() {
Serial.begin(115200);
}

void loop() {
if (Serial.available()){

  byte valRED_OUT = Serial.parseInt();
  byte valGREEN_OUT = Serial.parseInt();
  byte valBLUE_OUT = Serial.parseInt();

  valRED_OUT = map(valRED_OUT,0,255,255,0);
  valGREEN_OUT = map(valGREEN_OUT,0,255,255,0);
  valBLUE_OUT = map(valBLUE_OUT,0,255,255,0);

  while(Serial.available()>0)Serial.read();
  analogWrite(RED_OUT, valRED_OUT);
  analogWrite(GREEN_OUT, valGREEN_OUT);
  analogWrite(BLUE_OUT, valBLUE_OUT);
  }
}
Configuring Windows Forms App
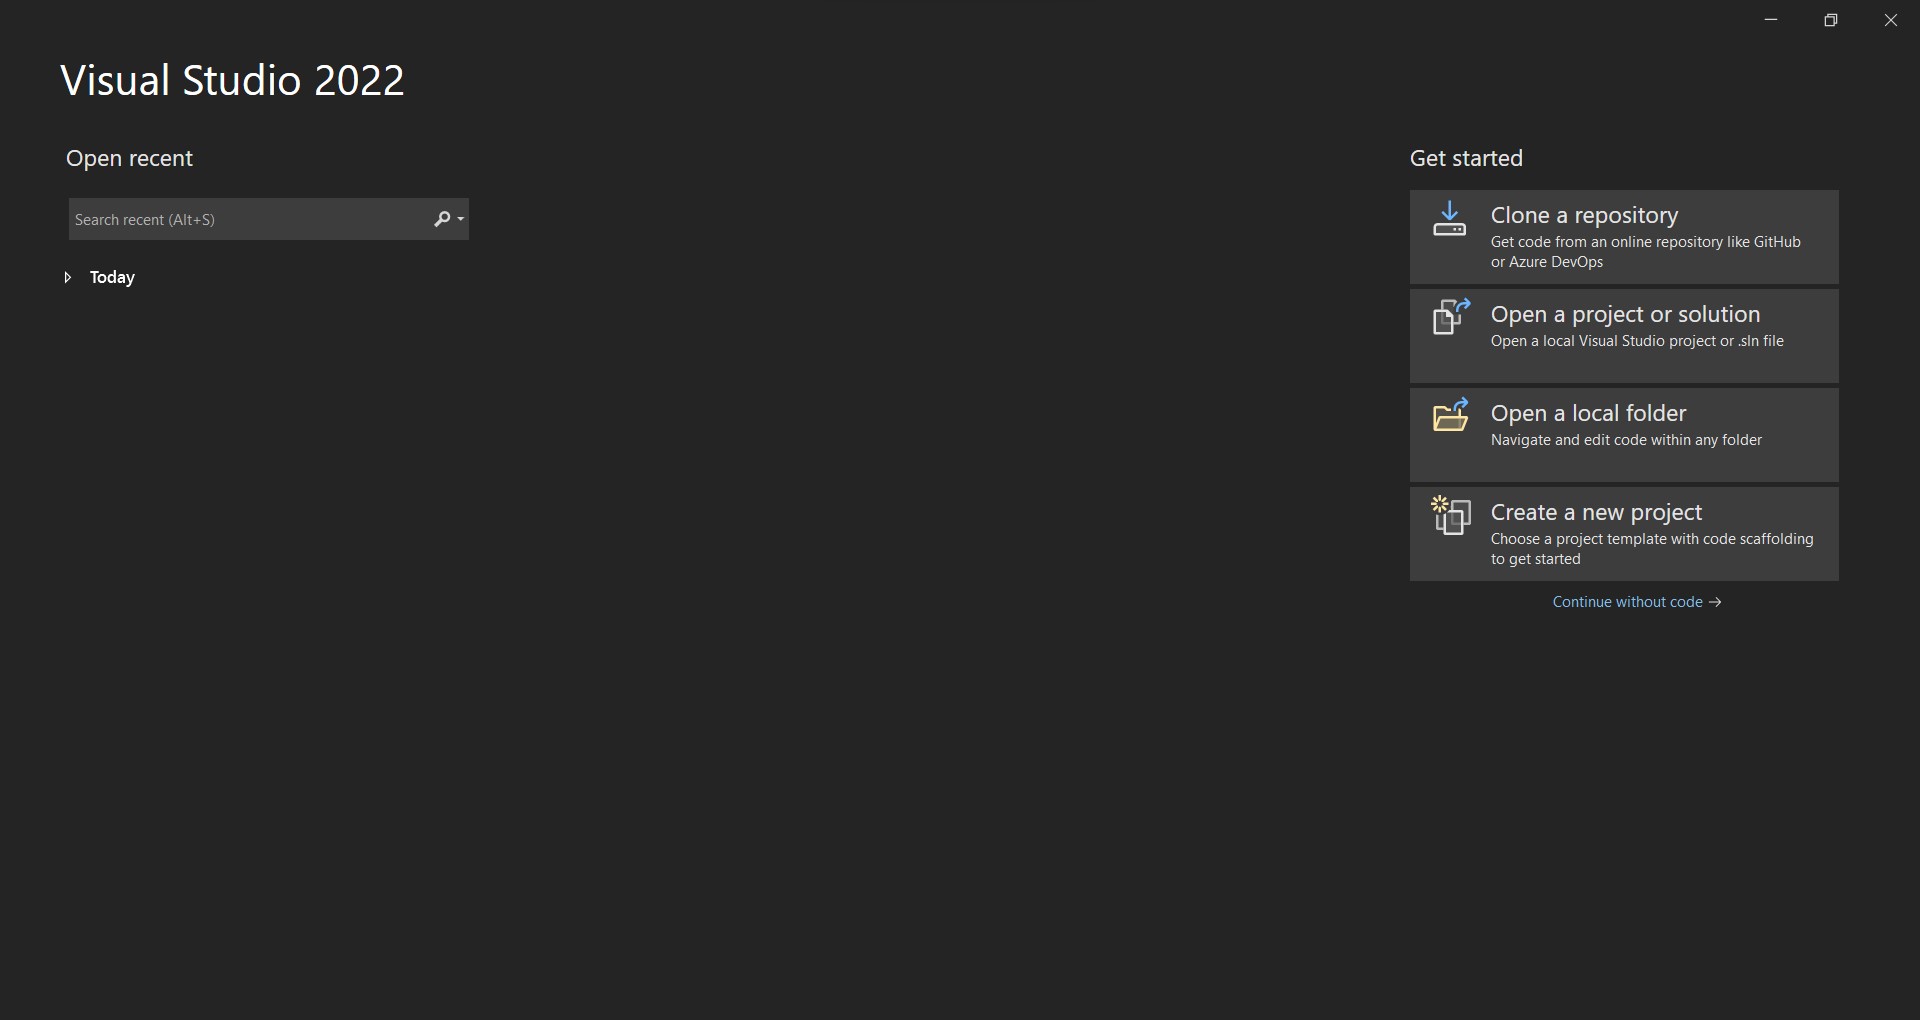
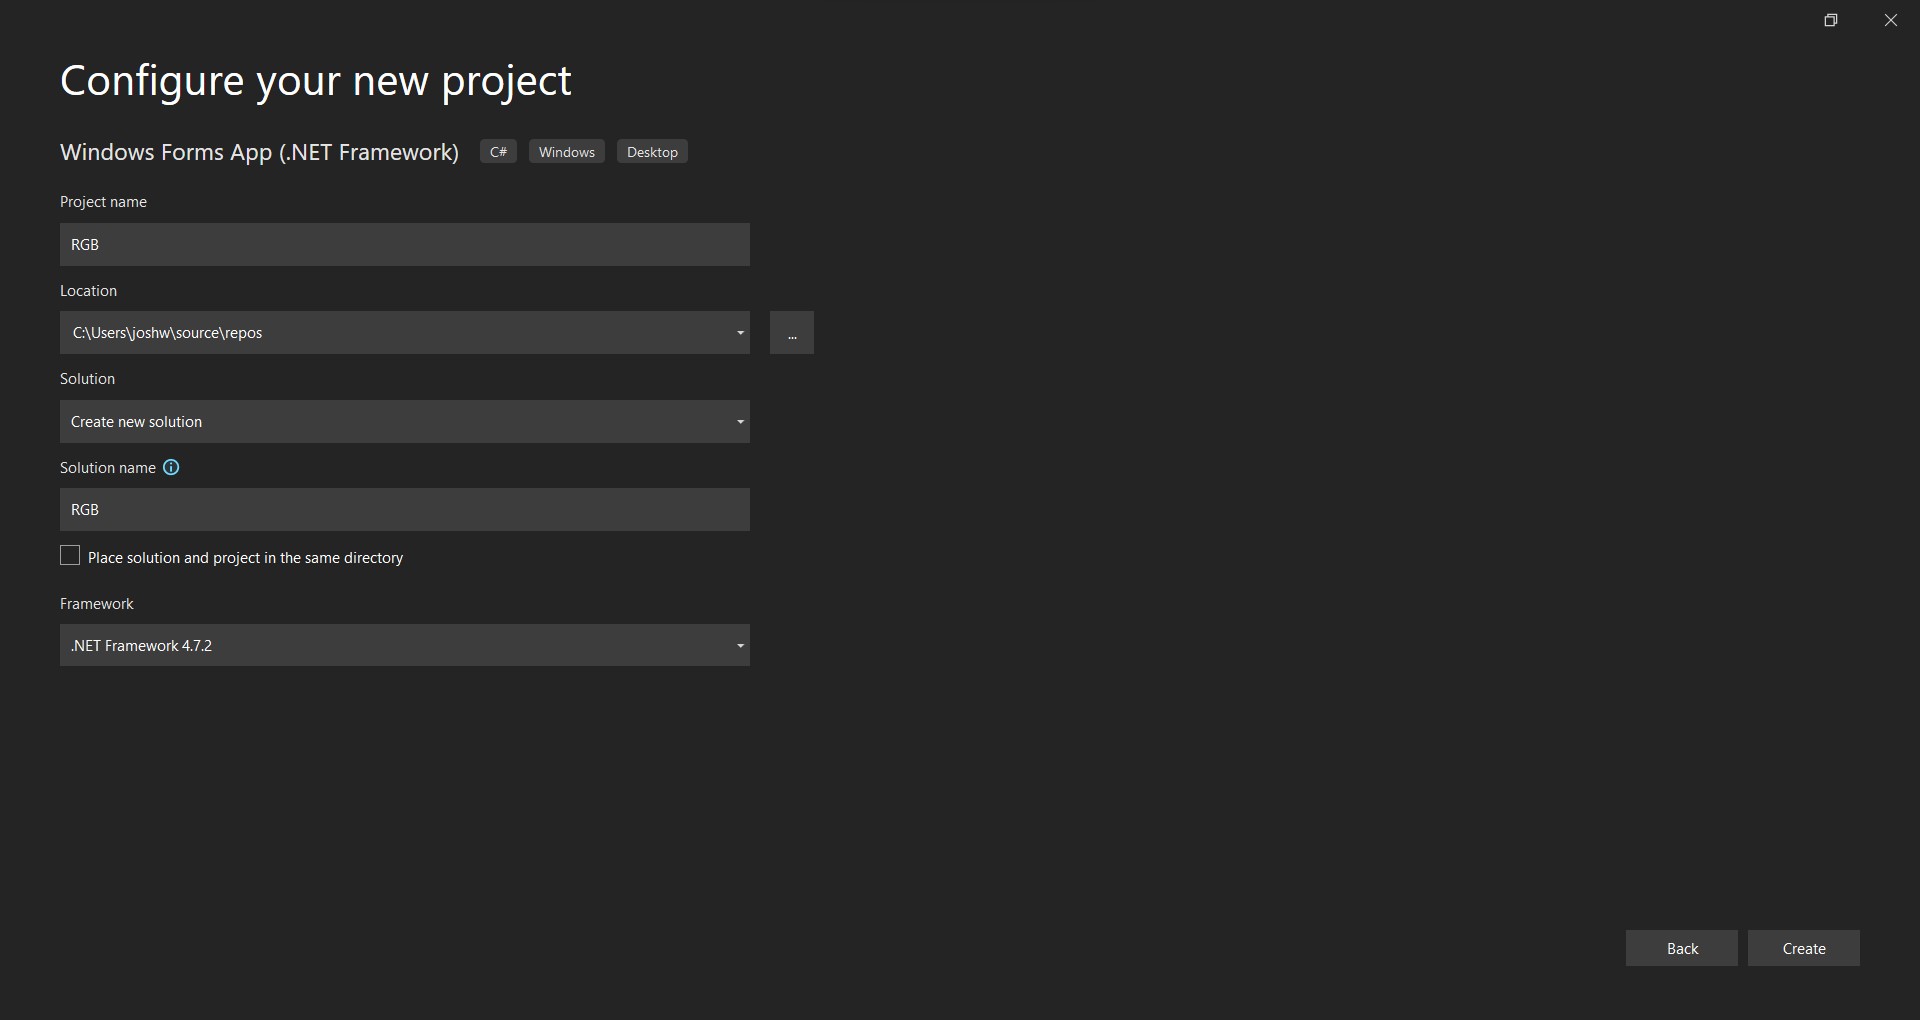
I used visual Studio 2022 for making this application so we can look how to setup a new project in visual Studio 2022 first we have to open VS and click on Create a new project (Fig.1 in slider) > select language as c# and OS as Windows I used Windows Forms App as template(Fig.2 in slider) > Now you can give the loation and name of the project in configuration window

Designing Interface
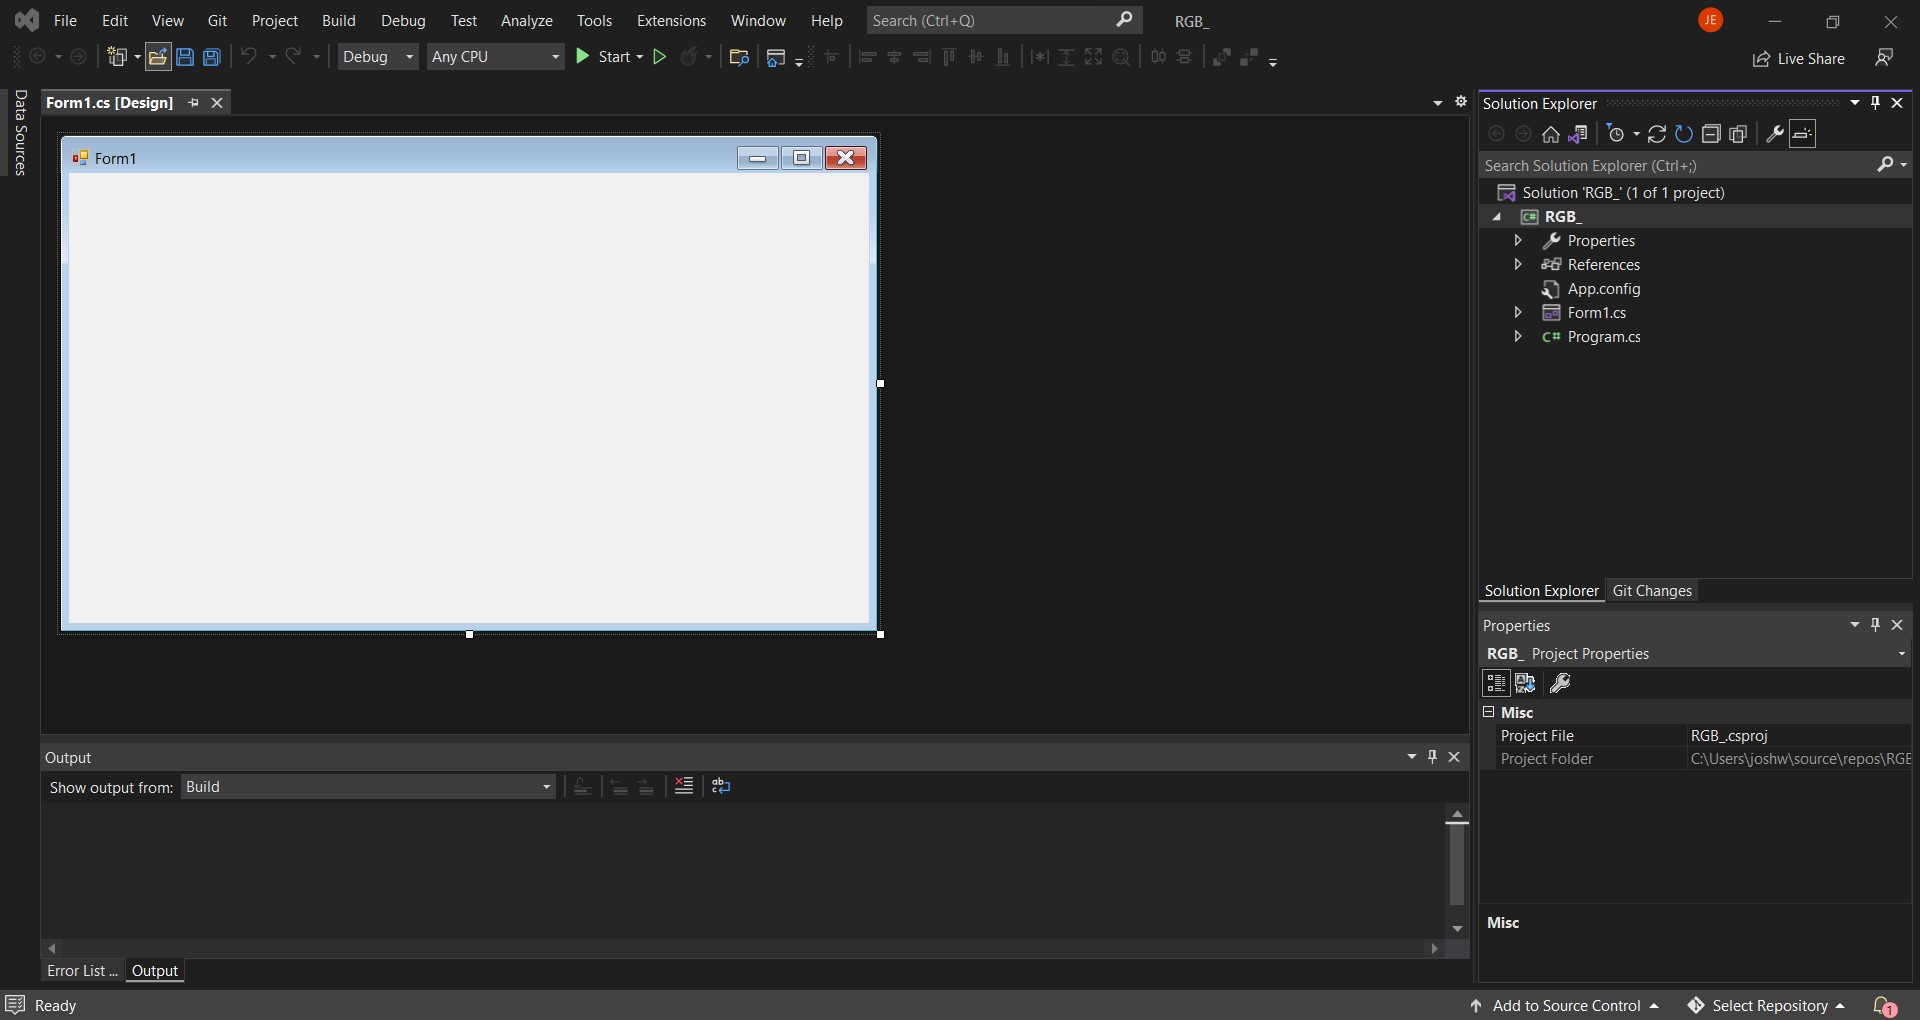
For this we need to serch for Toolbox(Fig.2 in slider) > now we can drag and drop the UI elements from toolbox (Fig.3 in slider) > done placing all elements we can edit properties of each elements by using properties toolbar in bottom right corner.


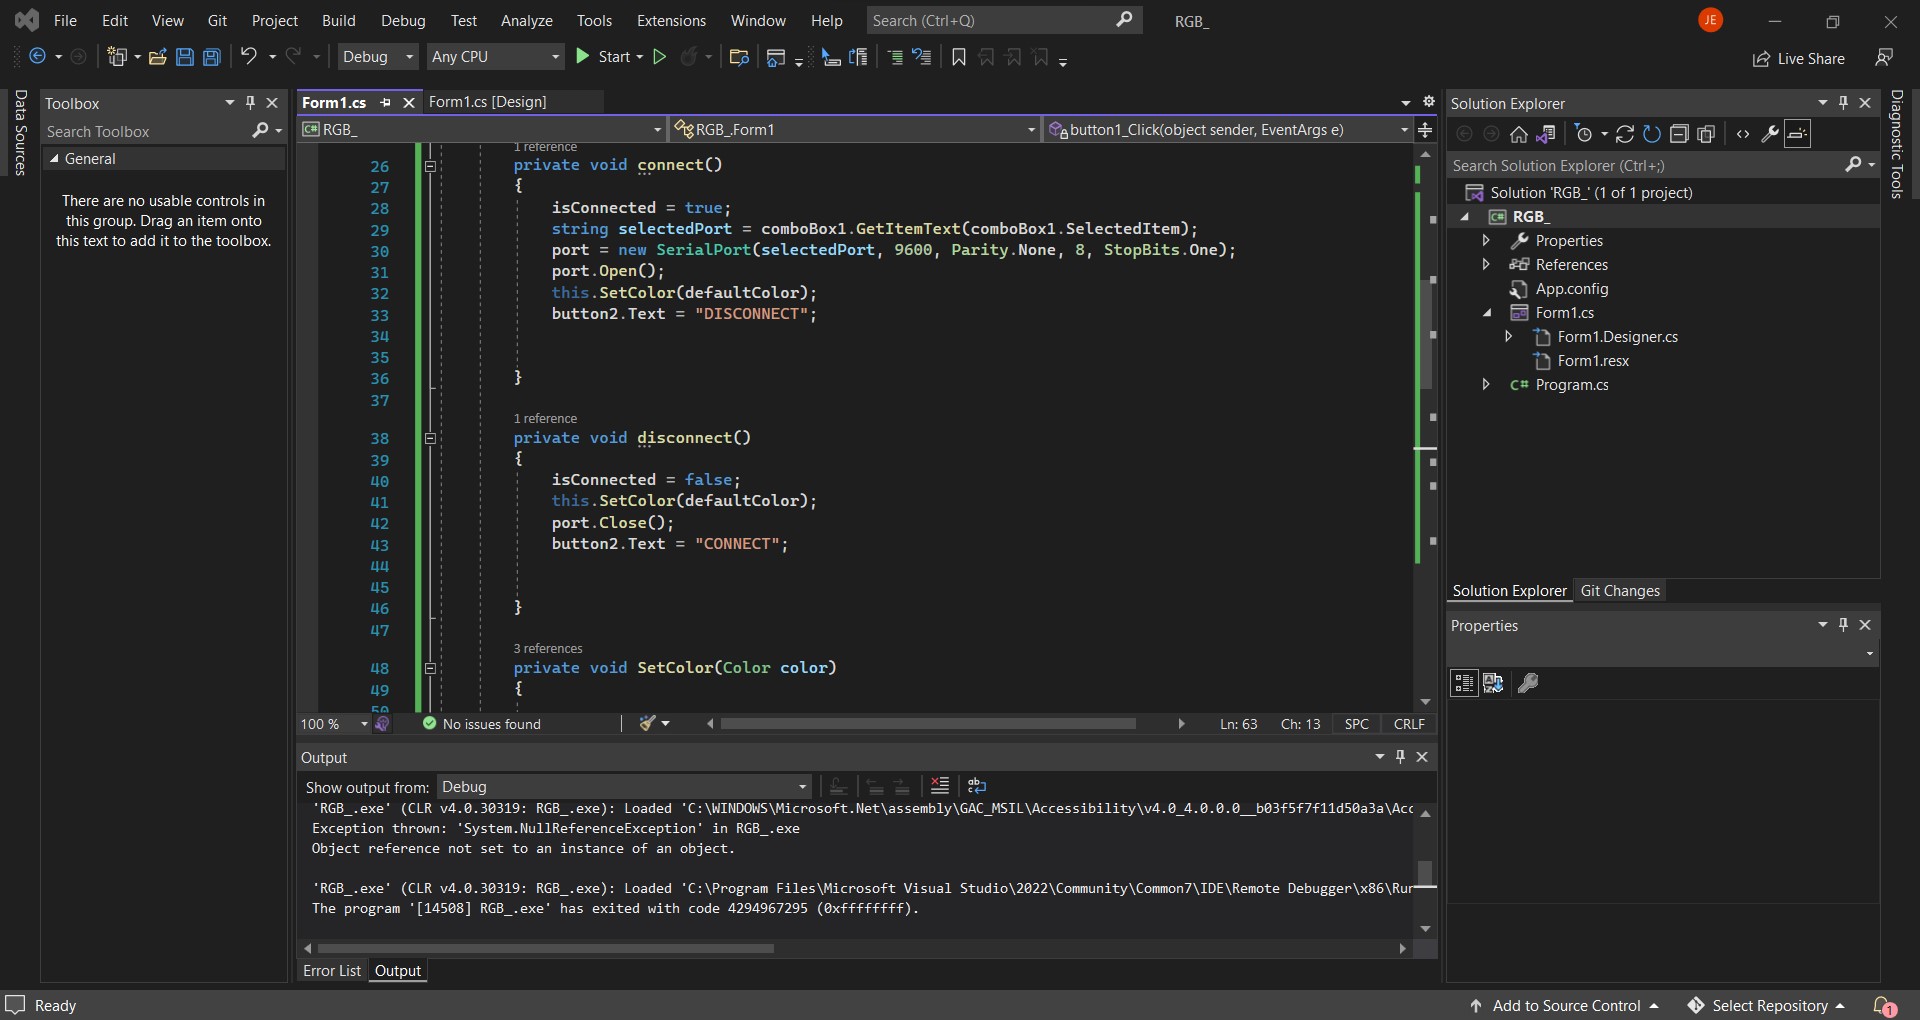
Coding
Double click on an element to write a specific function to them
using System;

using System.Drawing;
using System.Windows.Forms;
using System.IO.Ports;


namespace RGB_Controller
{
    public partial class RB : Form
    {
        bool isConnected = false;
        SerialPort port;

        private Color defaultColor = Color.FromArgb(0, 0, 0);
        public RB()
        {
            InitializeComponent();
            String[] ports = SerialPort.GetPortNames();

            foreach (String port in ports)
            {
                comboBox1.Items.Add(port);
            }
        }


        private void connect()
        {
            isConnected = true;
            string selectedPort = comboBox1.GetItemText(comboBox1.SelectedItem);
            port = new SerialPort(selectedPort, 9600, Parity.None, 8, StopBits.One);
            port.Open();
            this.SetColor(defaultColor);
            button2.Text = "DISCONNECT";


        }

        private void disconnect()
        {
            isConnected = false;
            this.SetColor(defaultColor);
            port.Close();
            button2.Text = "CONNECT";


        }

        private void SetColor(Color color)
        {

            panel1.BackColor = color;


            port.Write(new[] { color.R, color.G, color.B }, 0, 3);
        }
        private void button1_Click(object sender, EventArgs e)
        {
            if (colorDialog1.ShowDialog() == DialogResult.OK)
            {
                Color color = colorDialog1.Color;
                SetColor(color);
            }

        }

        private void label1_Click(object sender, EventArgs e)
        {

        }

        private void button2_Click(object sender, EventArgs e)
        {
            if (!isConnected)
            {
                connect();
            }
            else
            {
                disconnect();
            }
        }

        private void comboBox1_SelectedIndexChanged(object sender, EventArgs e)
        {

        }
    }
}
Testing
just click the play button at the top ribbon to test or simulate the application as shown in the video below. We can do this every now and then during the process of development to check everything is going as per our plan.
Exporting a exicutable file
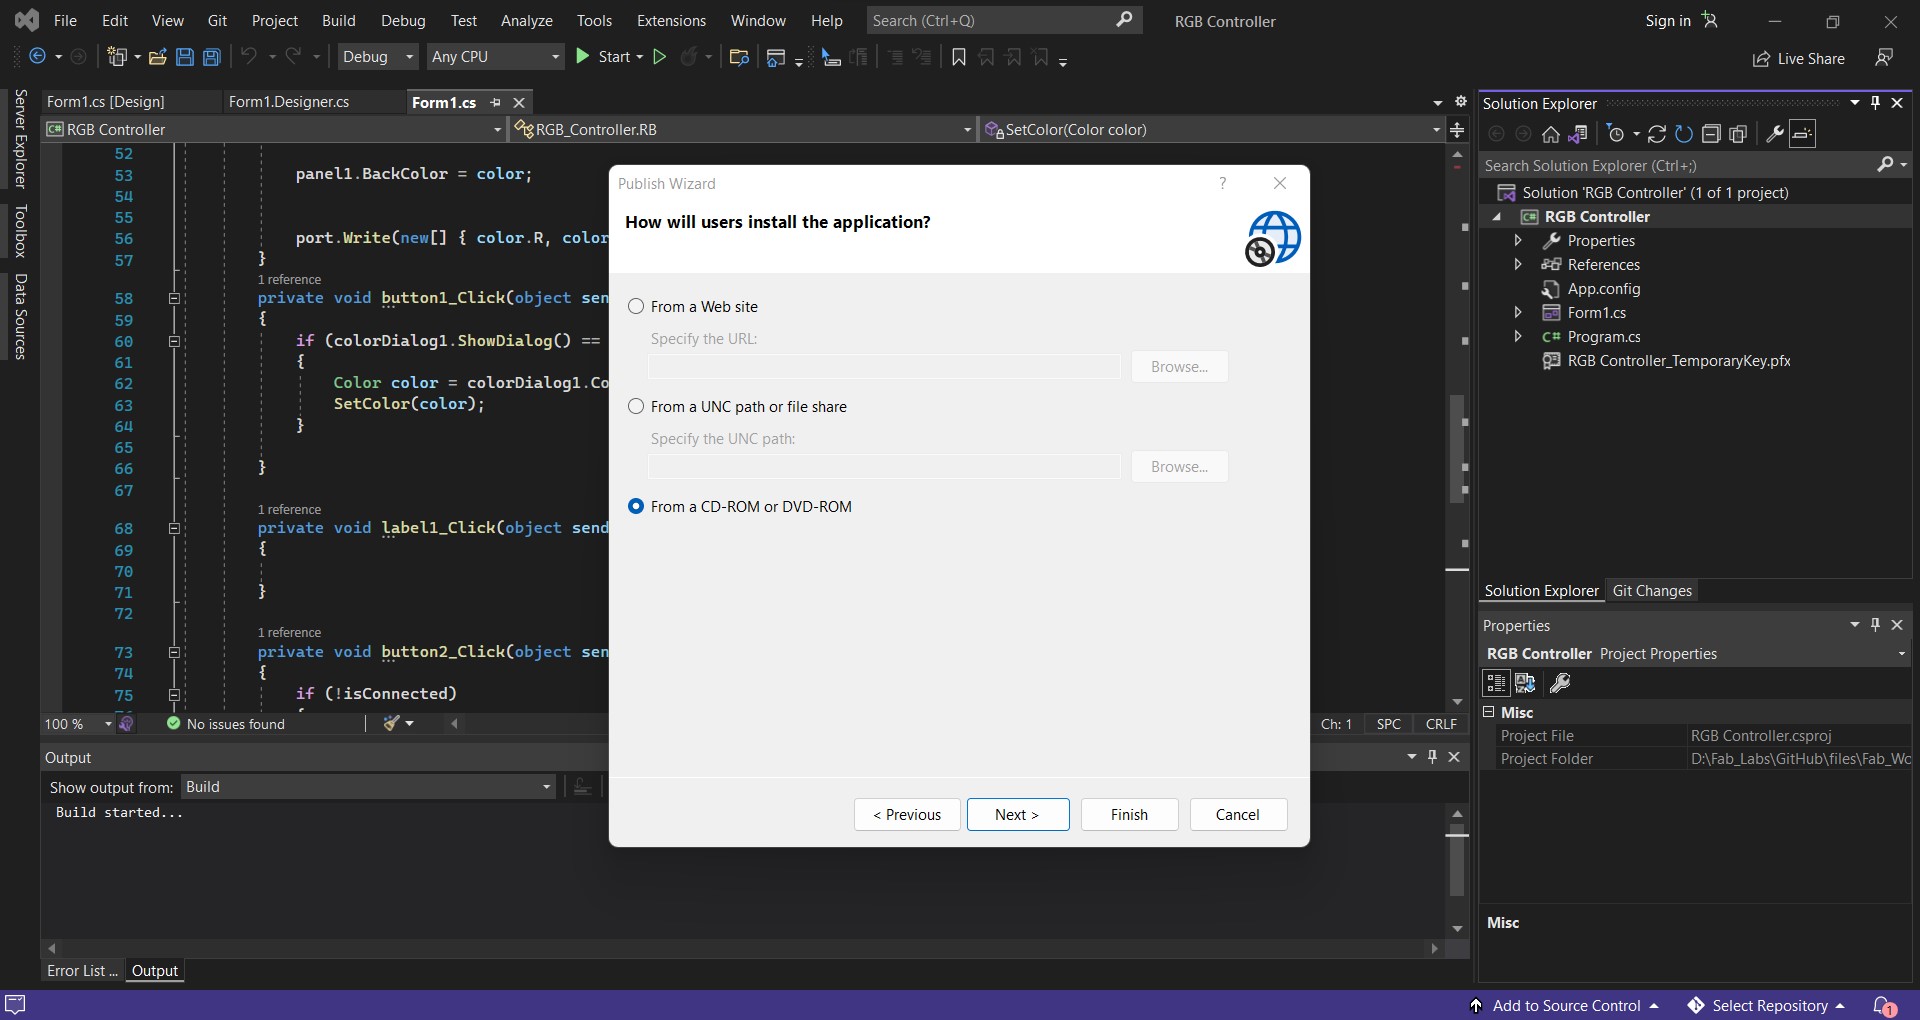
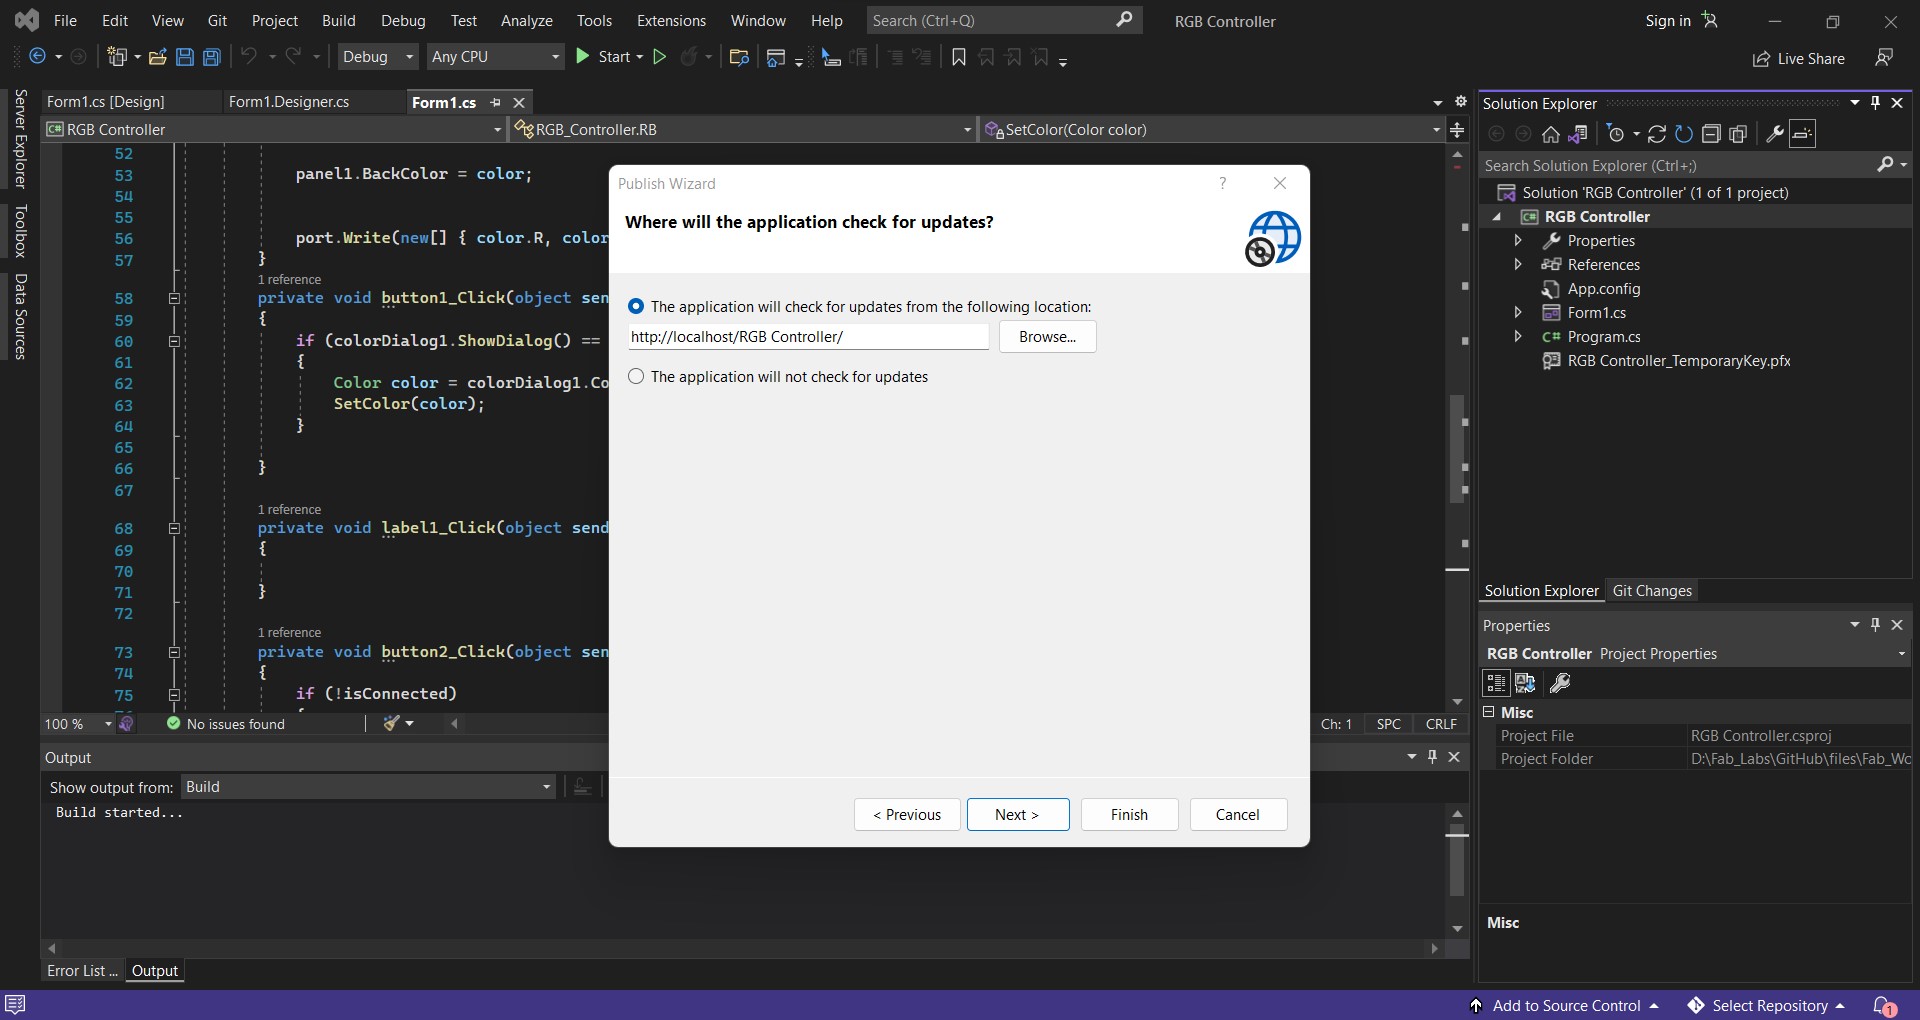
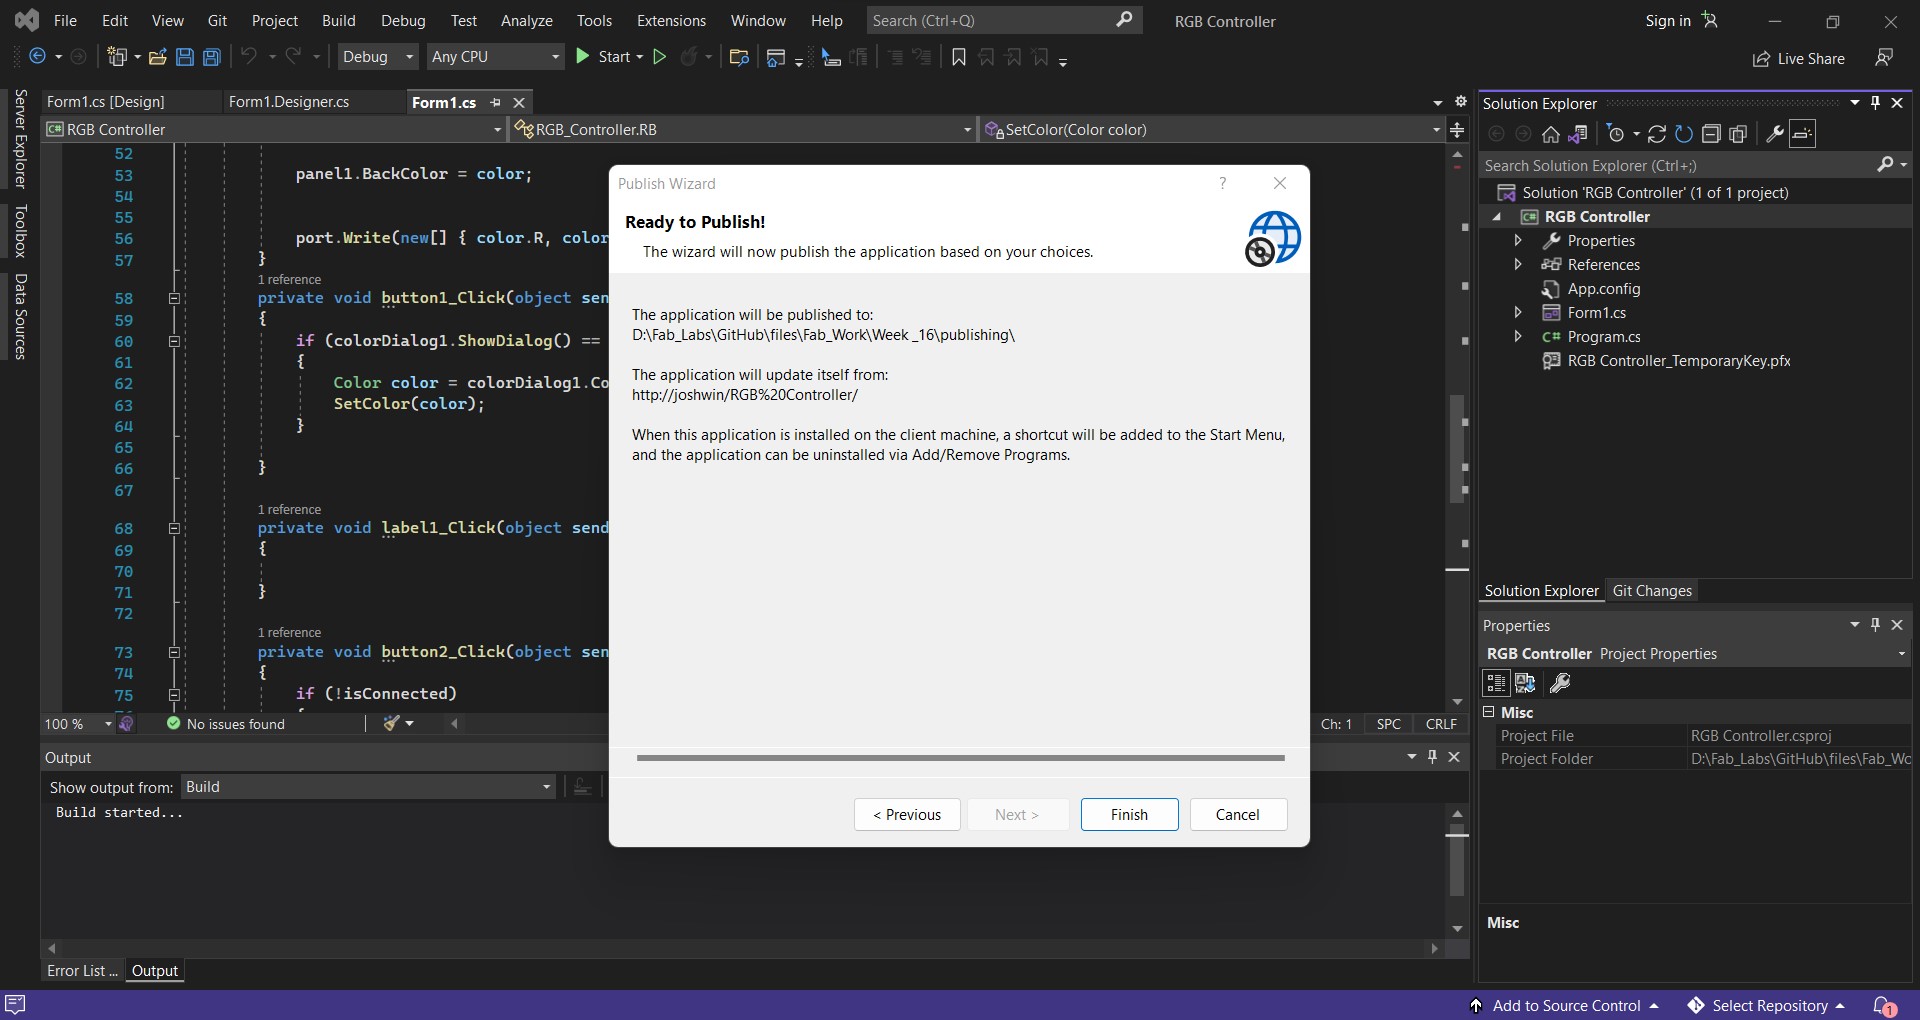
When everything is set right click on the file name you see on the Solution Explorer toolbar on our right and select Publish…(Fig.1 in slider) > give the file loction(Fig.2 in slider) > select From a CD-ROM or DVD-ROM(Fig.3 in slider) > select update options accordingly(Fig.4 in slider) > Click Finish(Fig.5 in slider) > a setup for your application will be available in the defined location(Fig.6 in slider)


for downloading file Click here
Installing application
simply install the setup by double clicking on the the exicutable setup and proceed as per instructions.

for downloading file Click here
Running the application
A small video on how the application works.
Group Assignment
-
MIT App Inventor
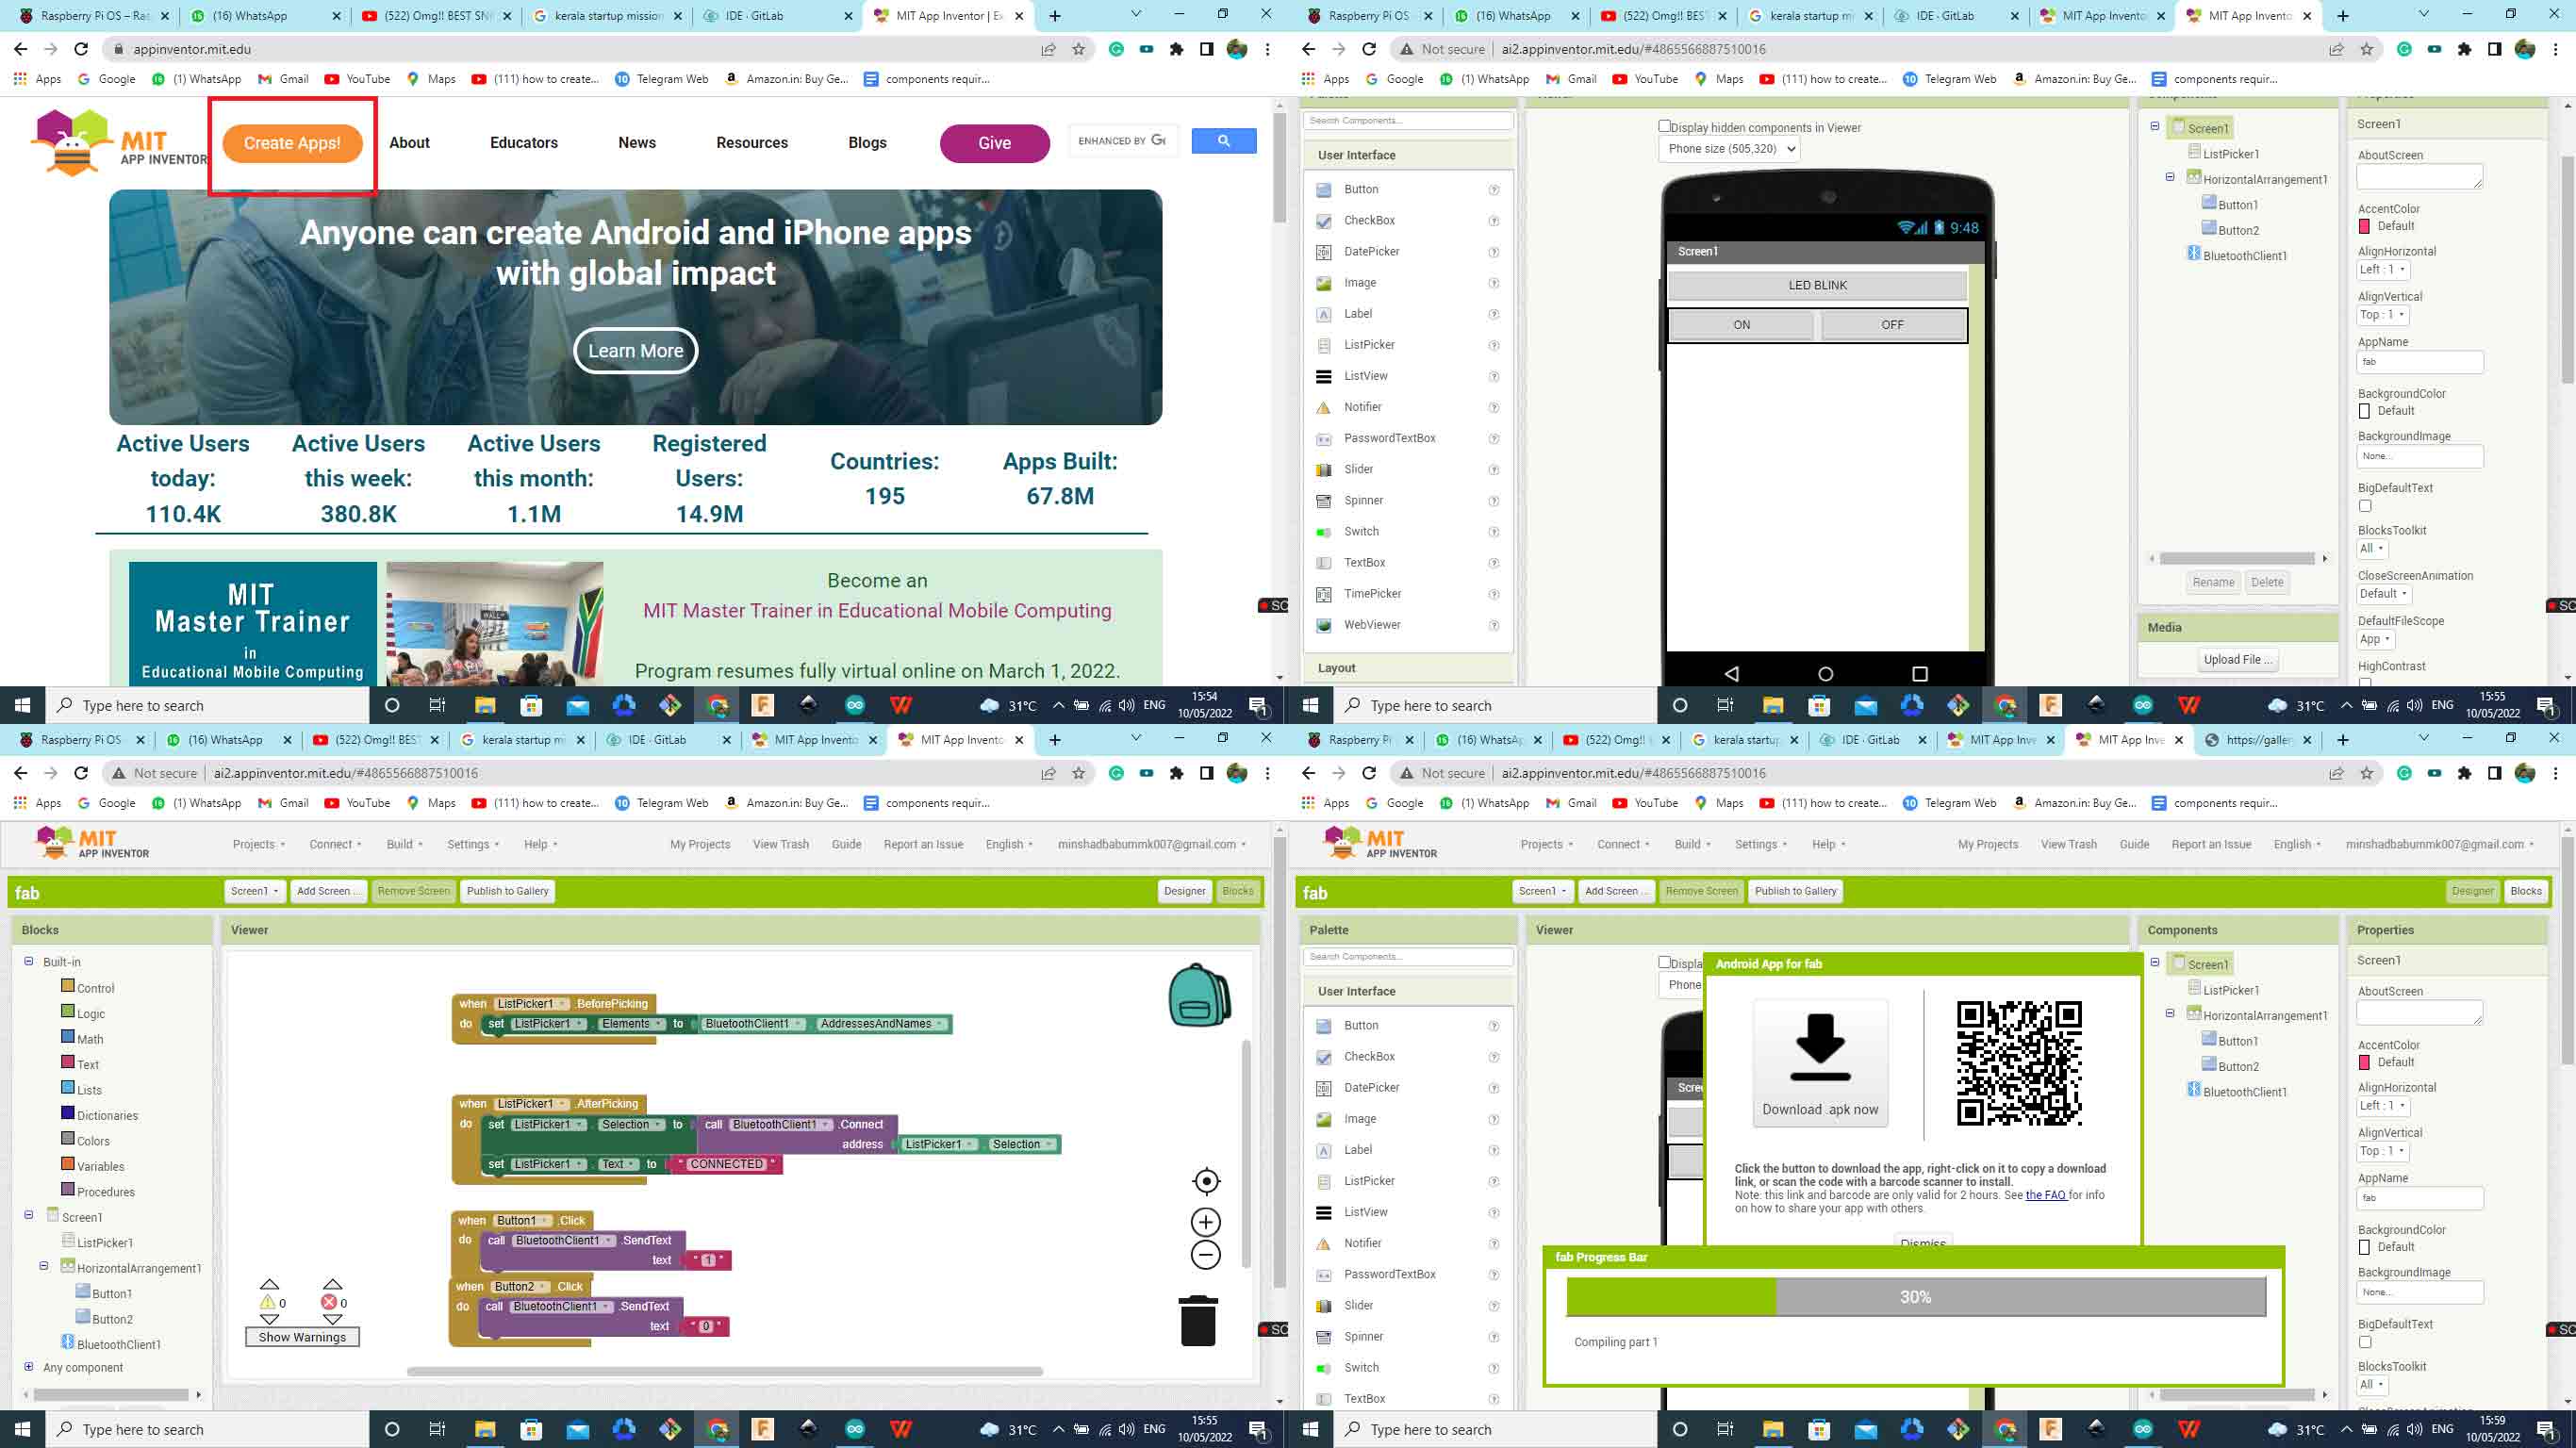
- start a new project by create app
- Use the drag and drop interface of create Apps UI
- Start programming by programming blocks
- Export the APP
Tkinter &Pyserial
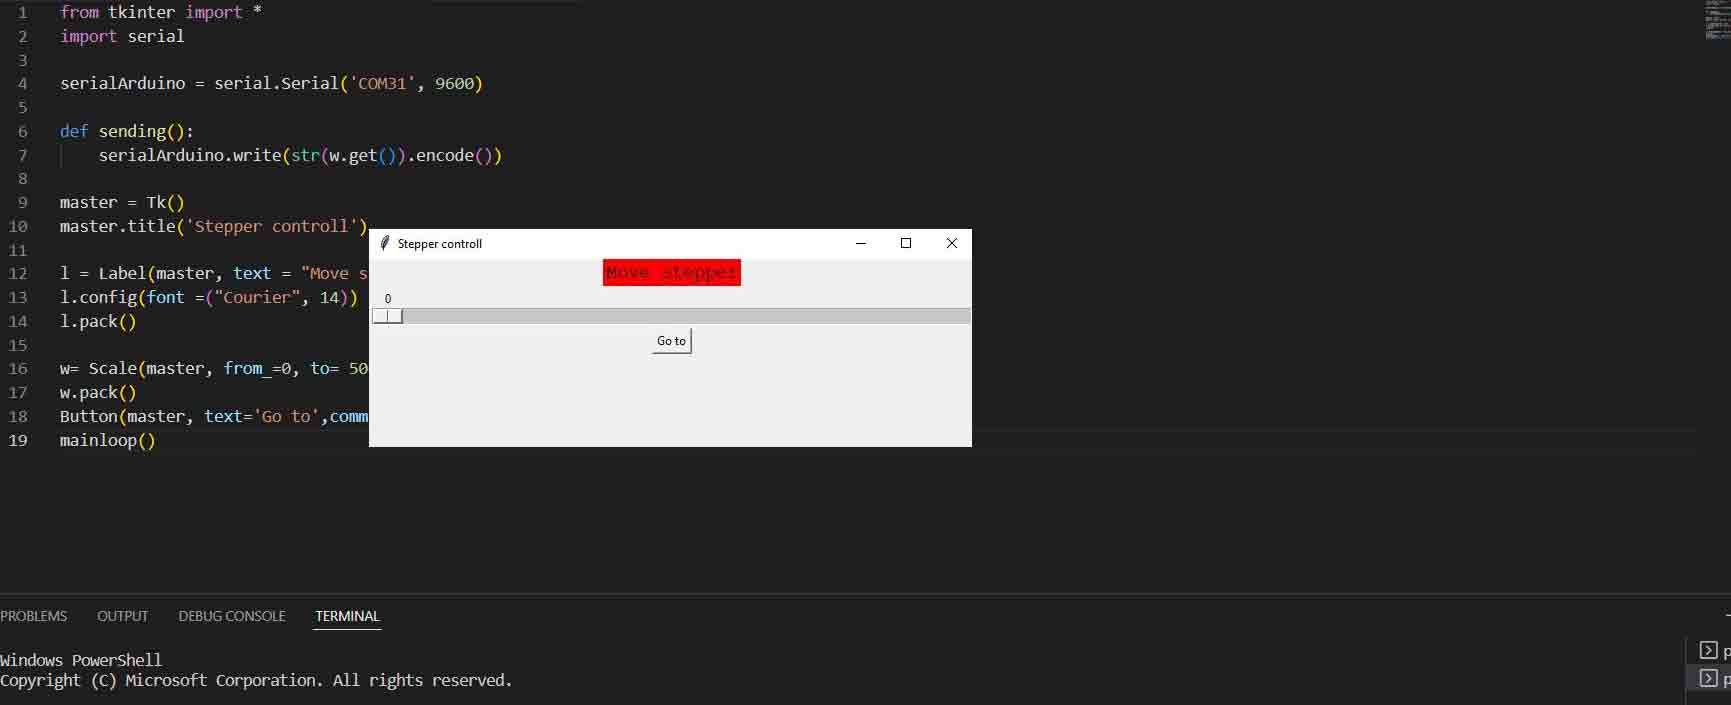
- Install pyserial
- Install Tkinter
- Start programming for further detailes go to Fahiz KP Doc Click here