CHECK LIST
Complete your final project, tracking your progress:
what tasks have been completed, and what tasks remain?
what's working? what's not?
what questions need to be resolved?
what will happen when?
what have you learned?
My Project
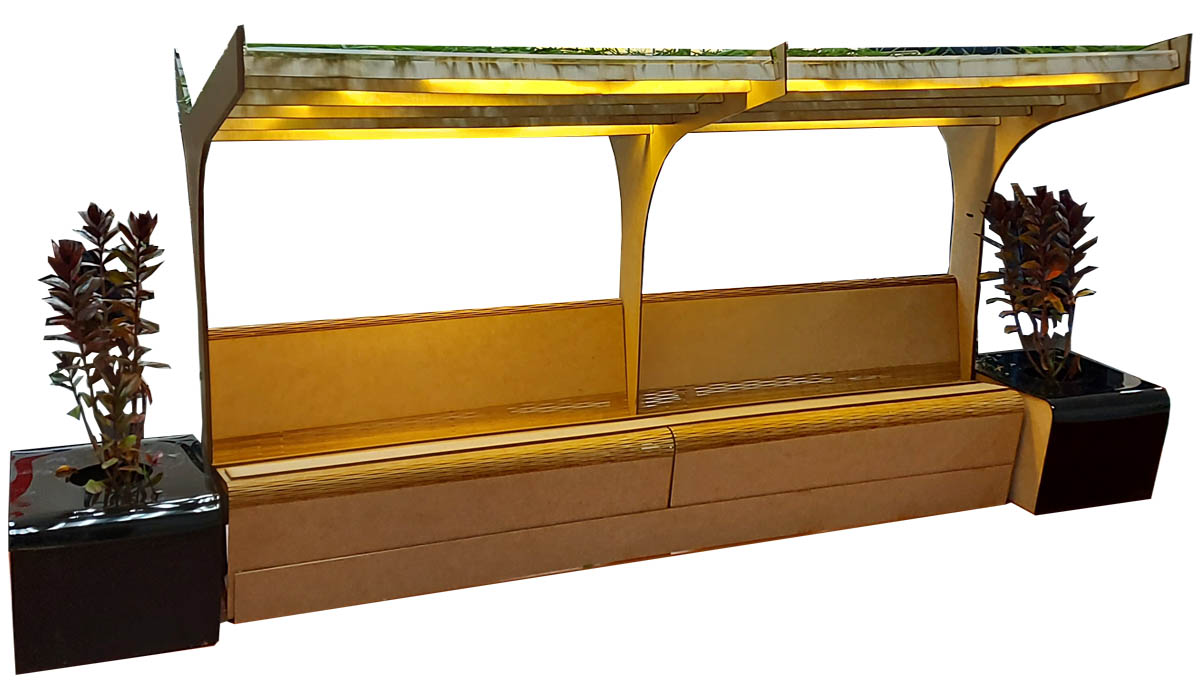
Develop a sustainable bus stop that allows to create a green
area on the roof, to create a habitat for insects and to help eliminate suspended particles of contamination
to see the final result enter the following link.
Final Project
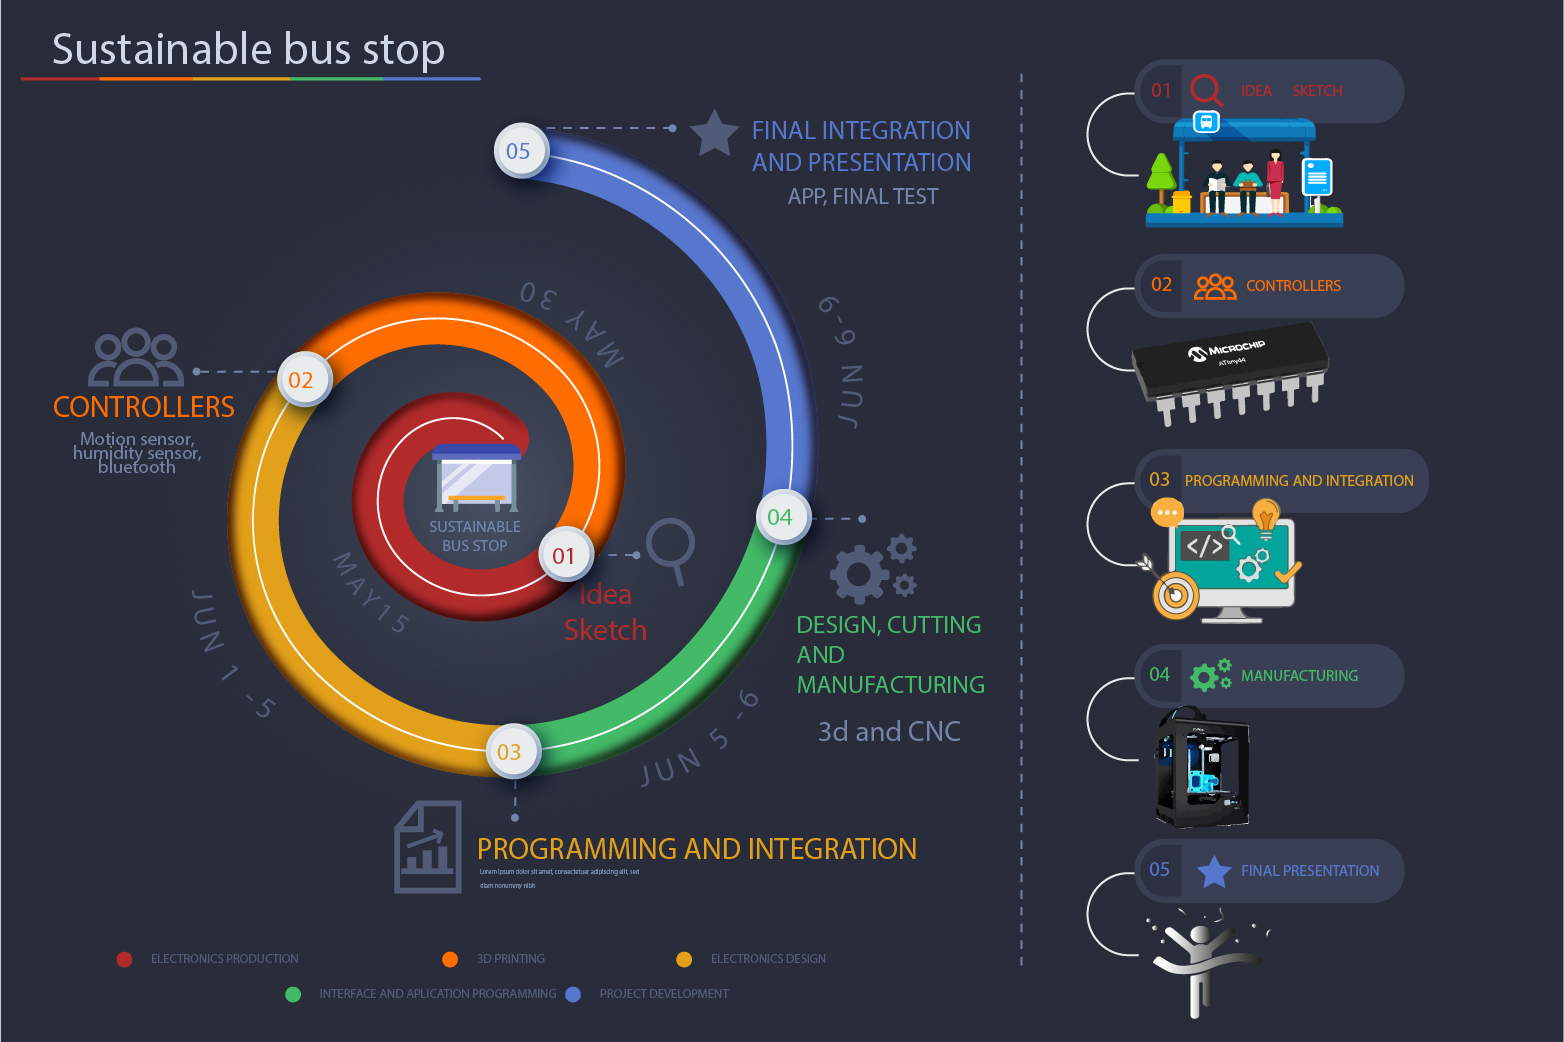
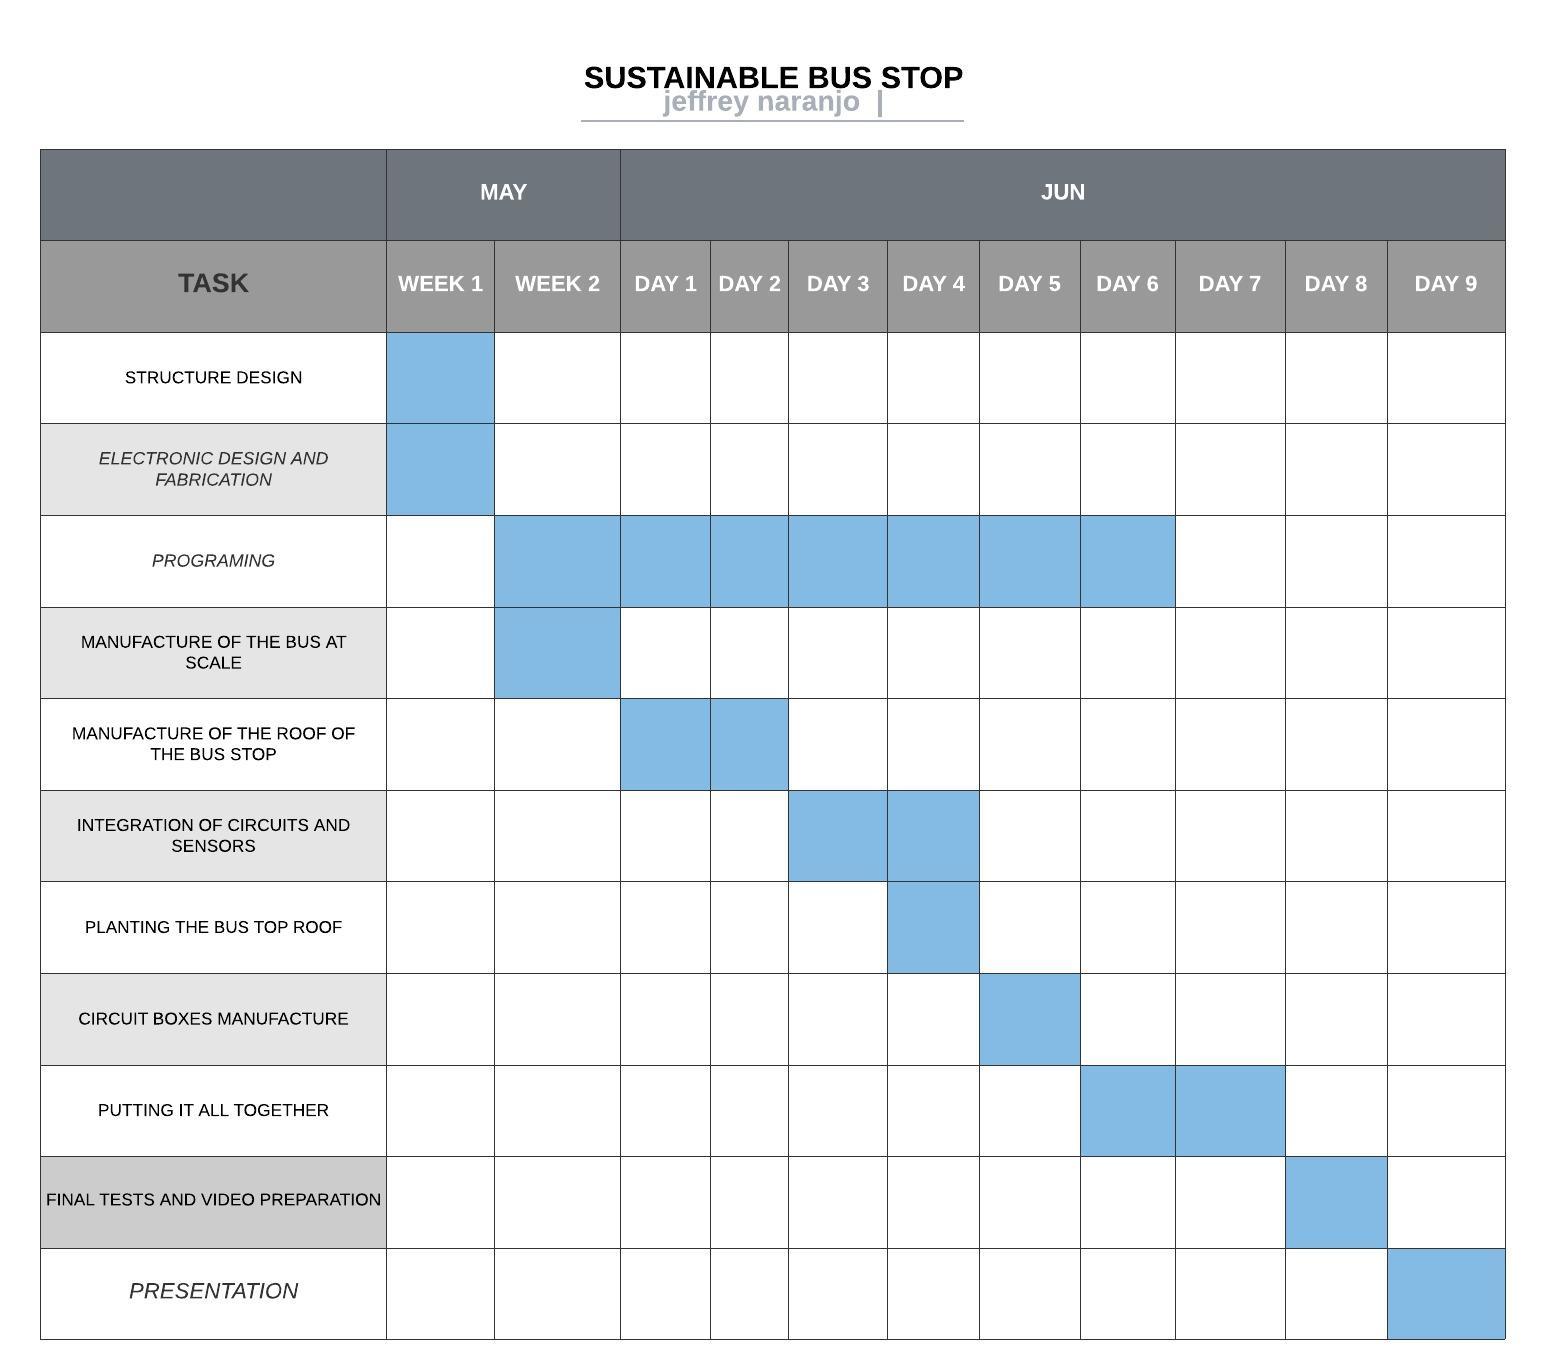
FINAL SCHEDULE
For the development of the final project I make a spiral diagram for the development of the activities to finish in the established times
Complete your final project, tracking your progress:
first diagrams and sketches:
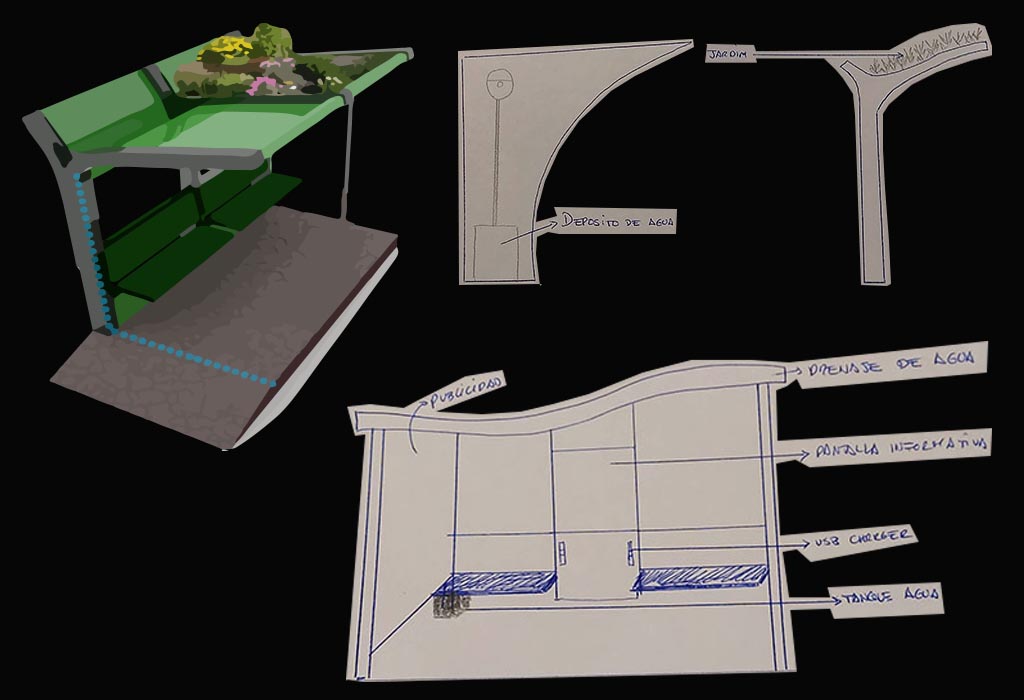
fabrication of the structure:
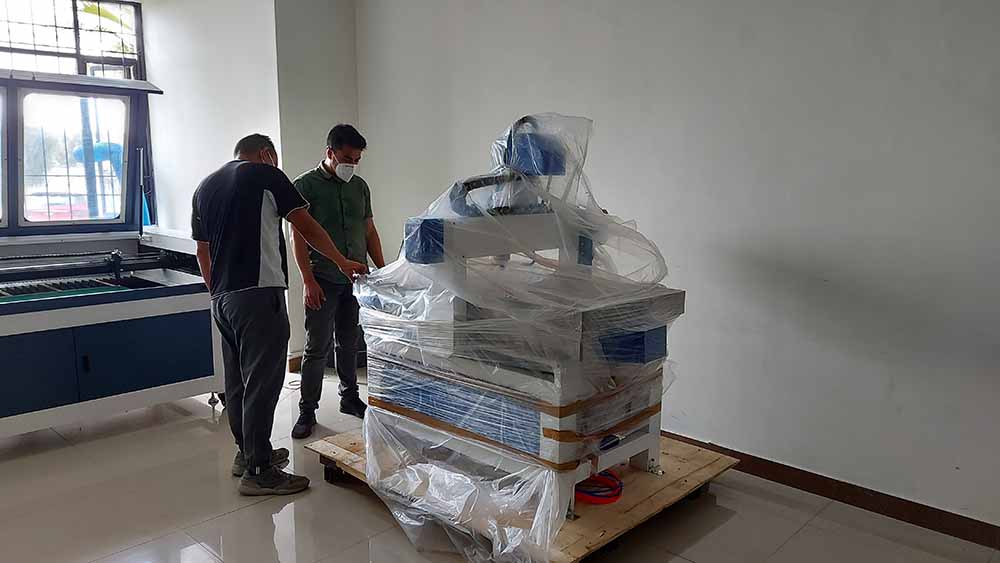
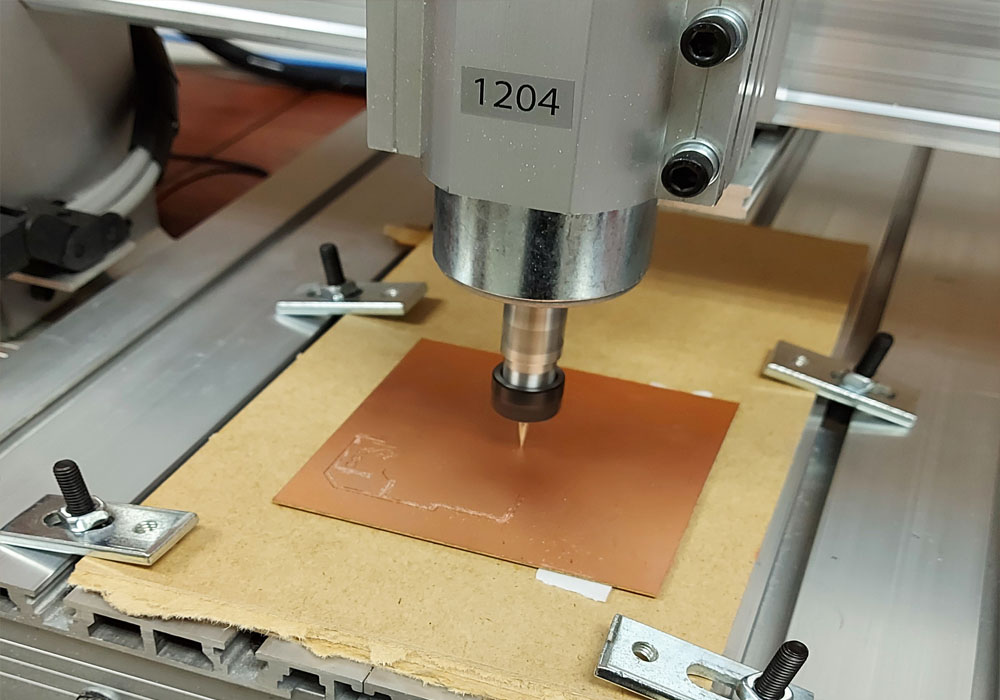
The most difficult part of the project was to understand on my own the operation of the CNC,
its calibration and sending of g files, so that it could do what it had to do, You can see the entire
design and construction process in the following link,
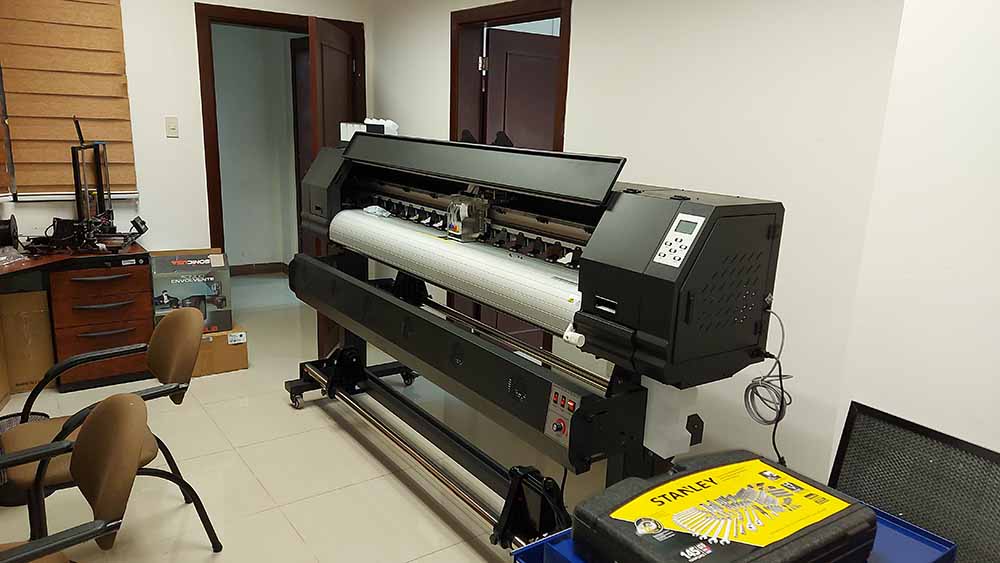
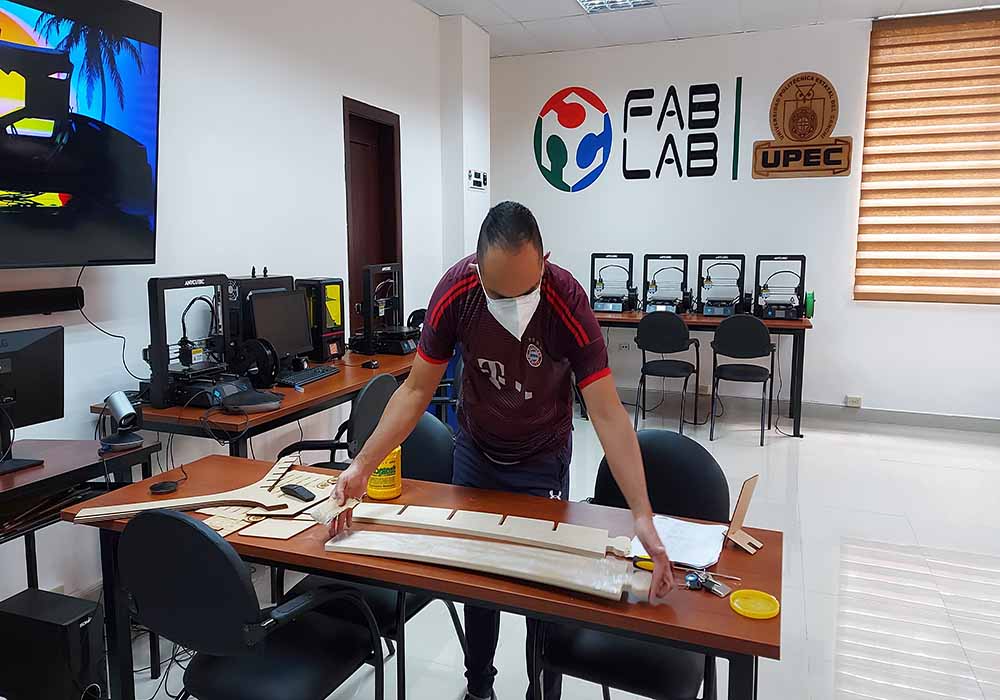
Computer controlled machining
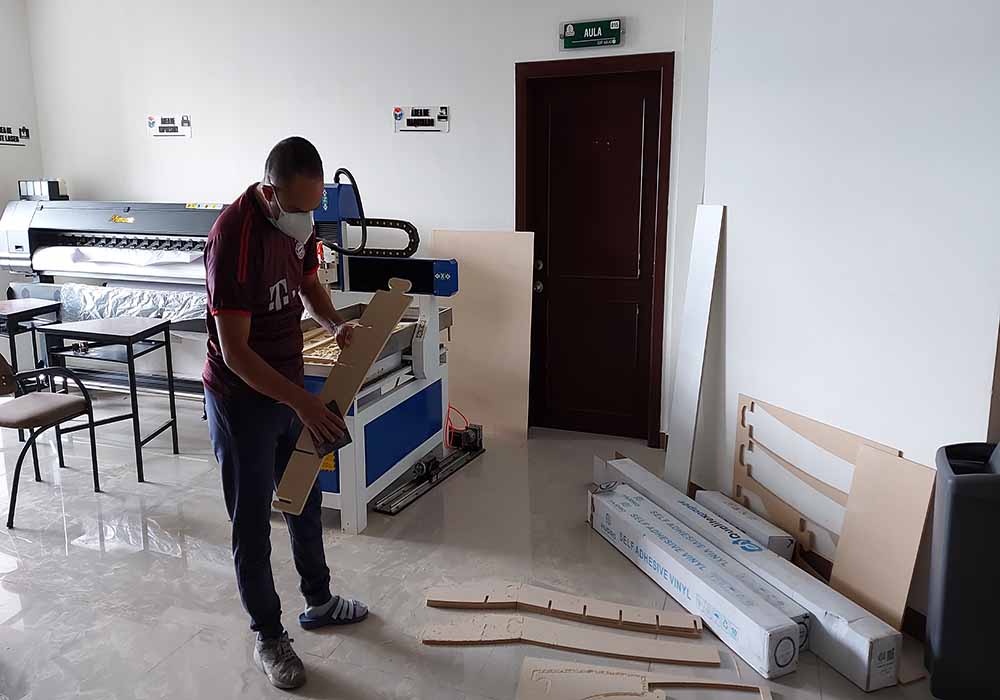
Once I understood how the cnc works, the construction of the bus stop structure was very fast
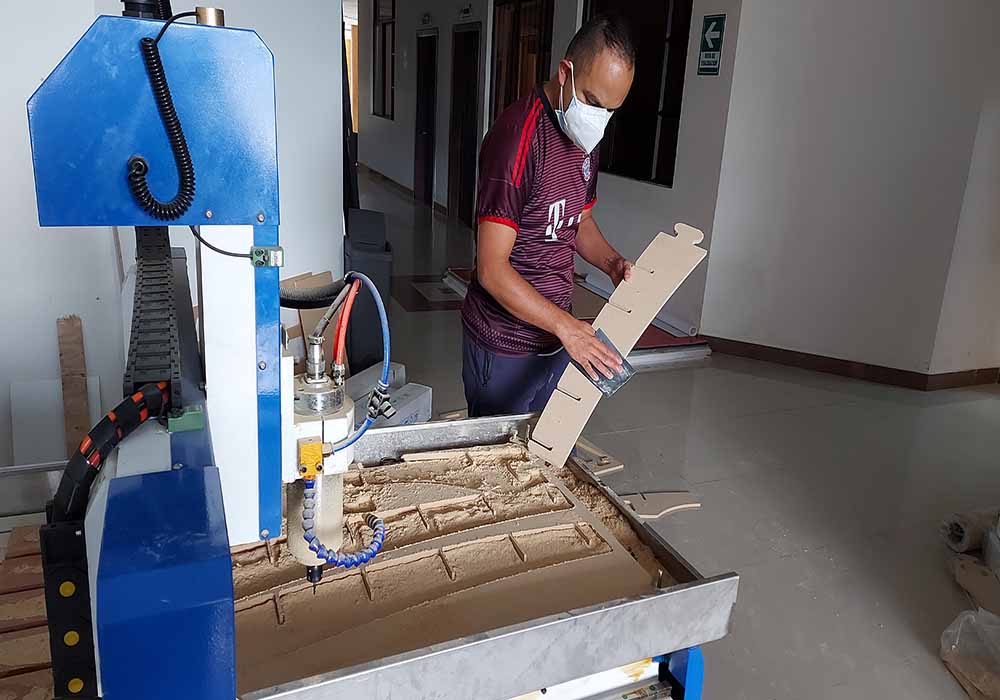
Because I have limitations in my 60X90 cm cnc I made a design of the arms of the bus stop in two
sections that are assembled as a puzzle, thanks to the Computer-Controlled Cutting assignment, I was able to build an arm in two pieces.
In local suppliers I only found 12mm mdf, for this reason I joined two arms with white glue, one of the arms in its design has notches to
adapt the pergolas of the roof of the stop
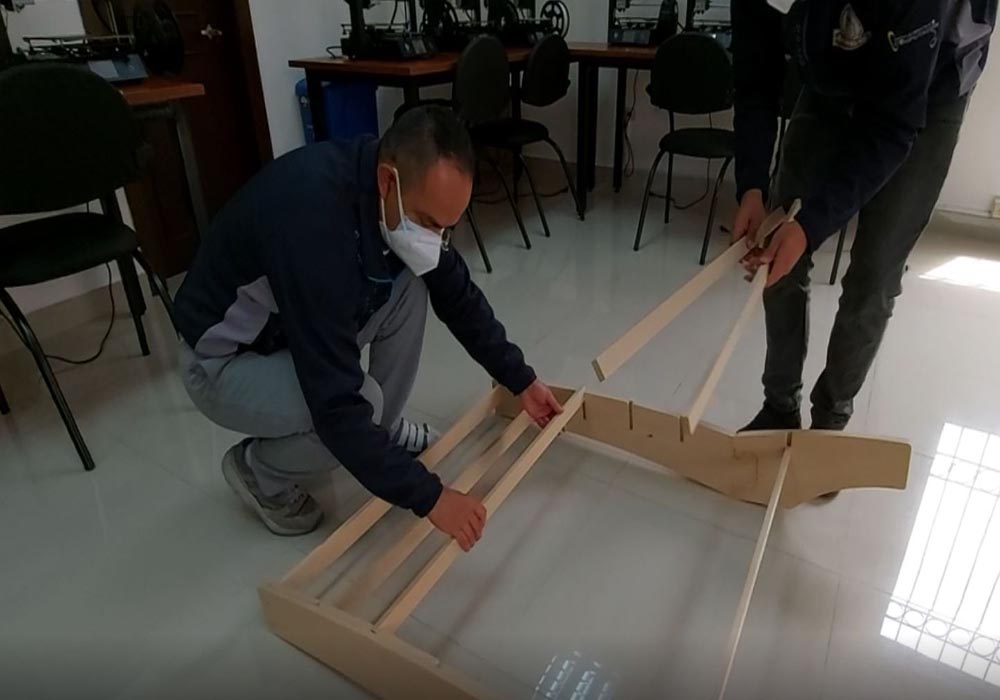
Below we can see some videos of the manufacture of the arms of the sustainable bus stop
The files can be downloaded from the following link,
structure
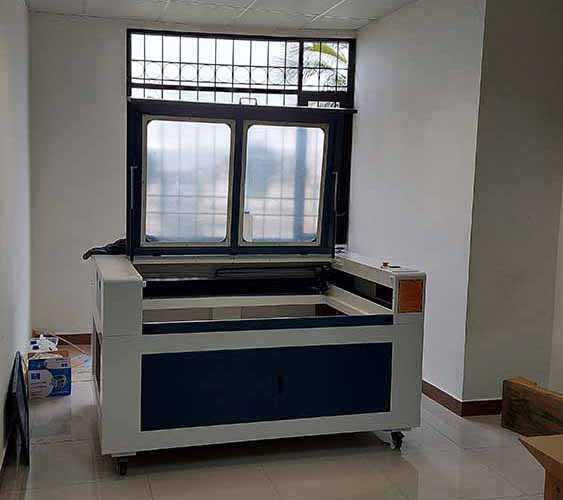
laser cut and acrylic fold:
It was a challenge to make the acrylic folds, the use of the heat gun involves some technique, especially
in very large areas such as the roof of the scale model of the bus stop, determining the right temperature, and even when to apply. hot.

to make the 3mm acrylic bends. I cut the shapes on the laser
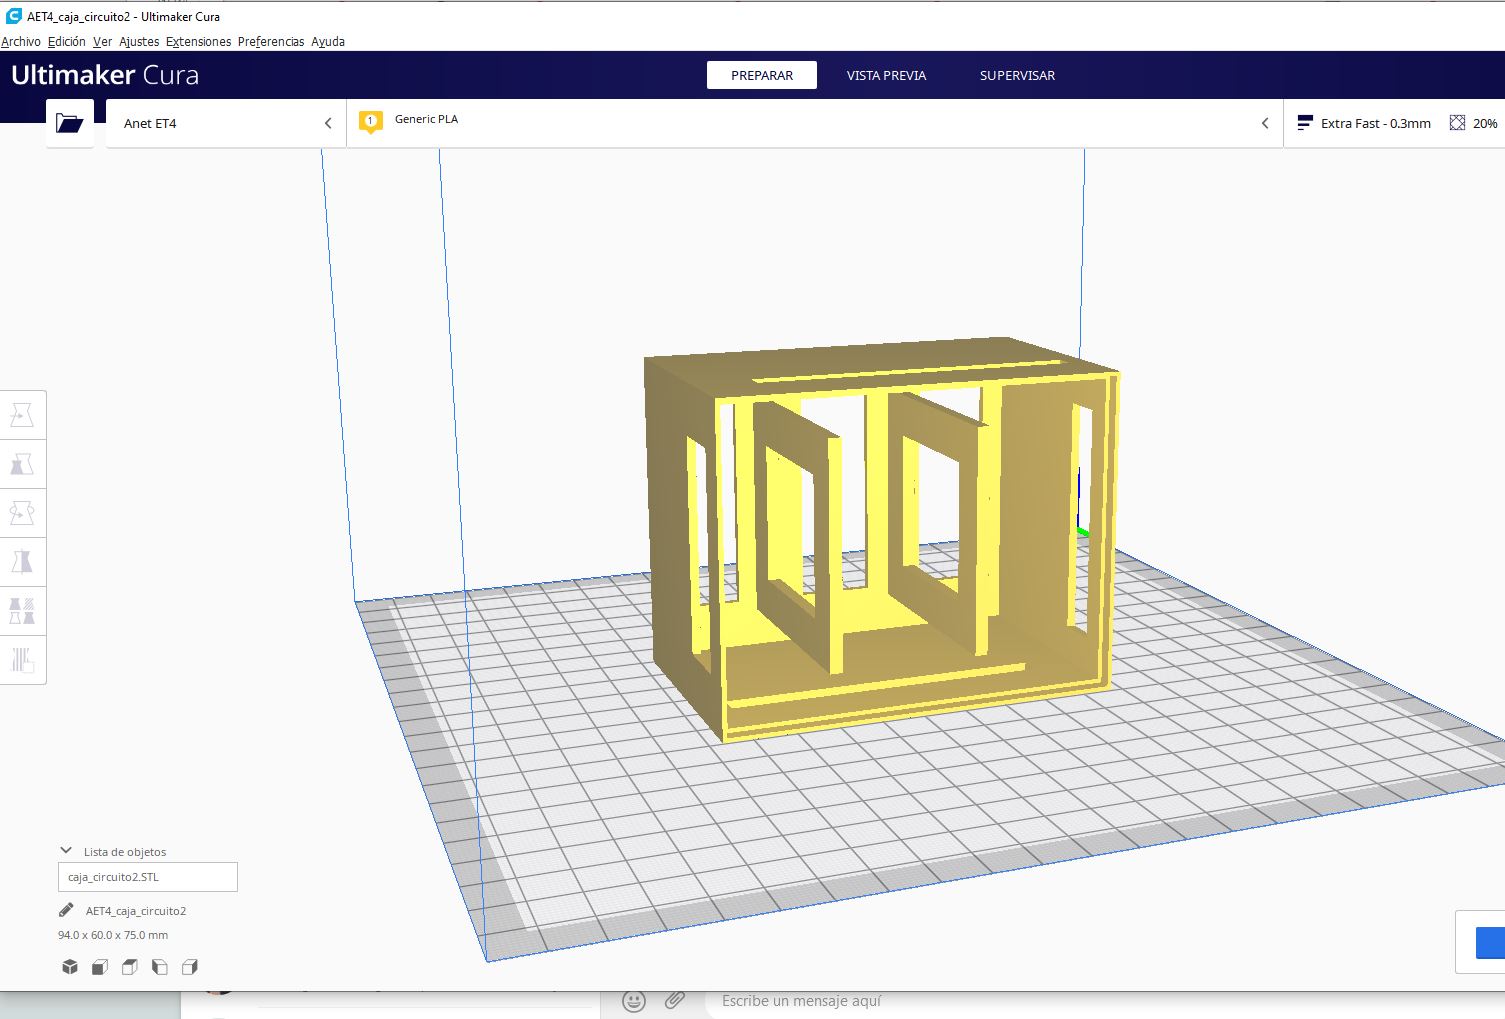
3d manufacturing:
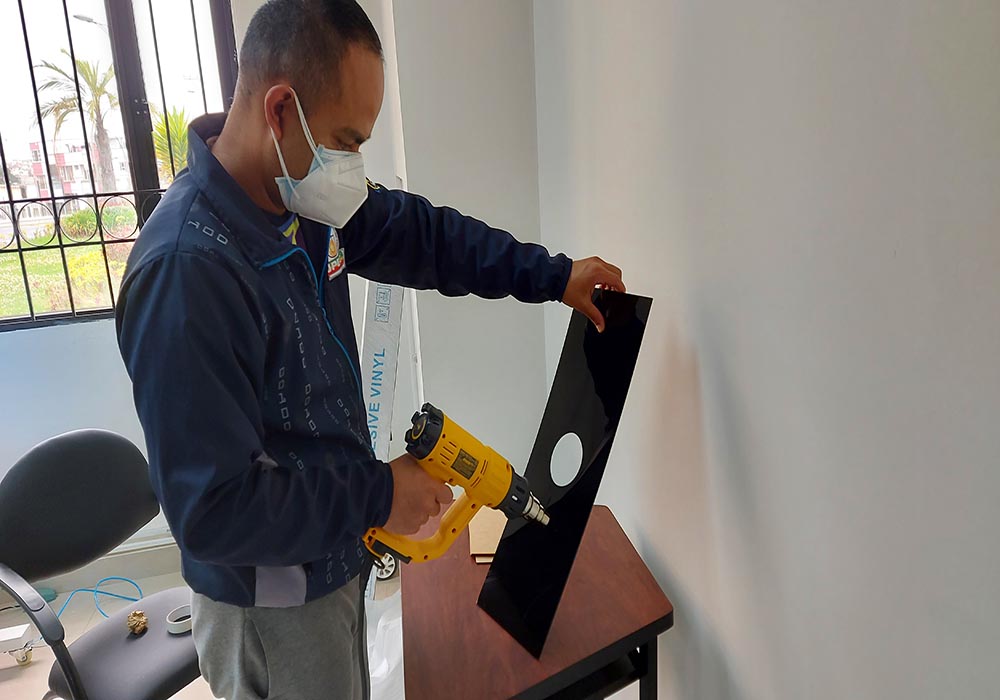
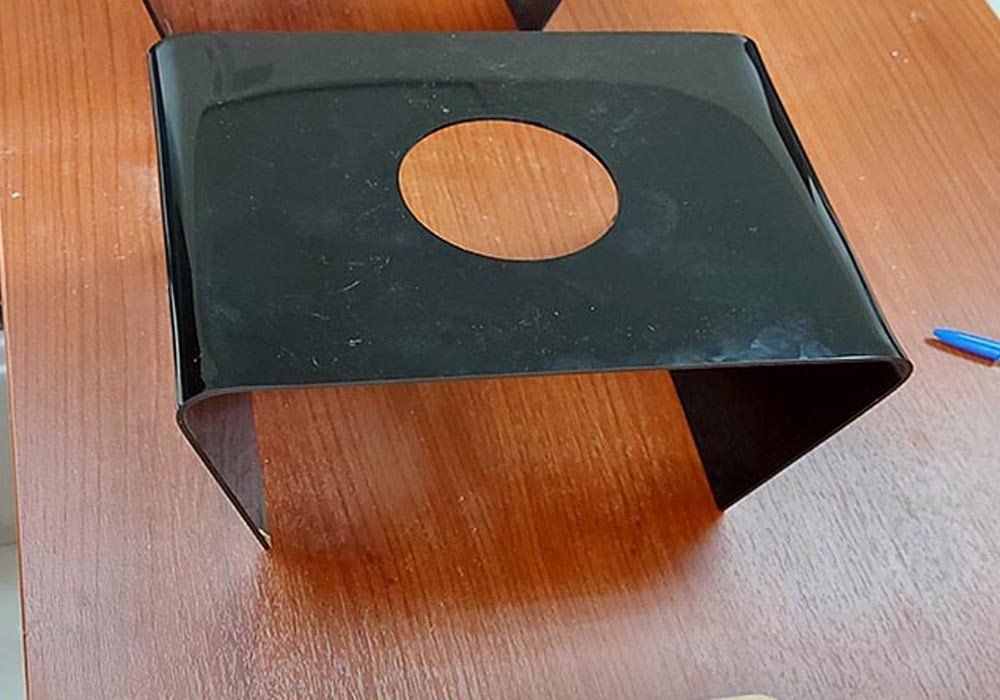
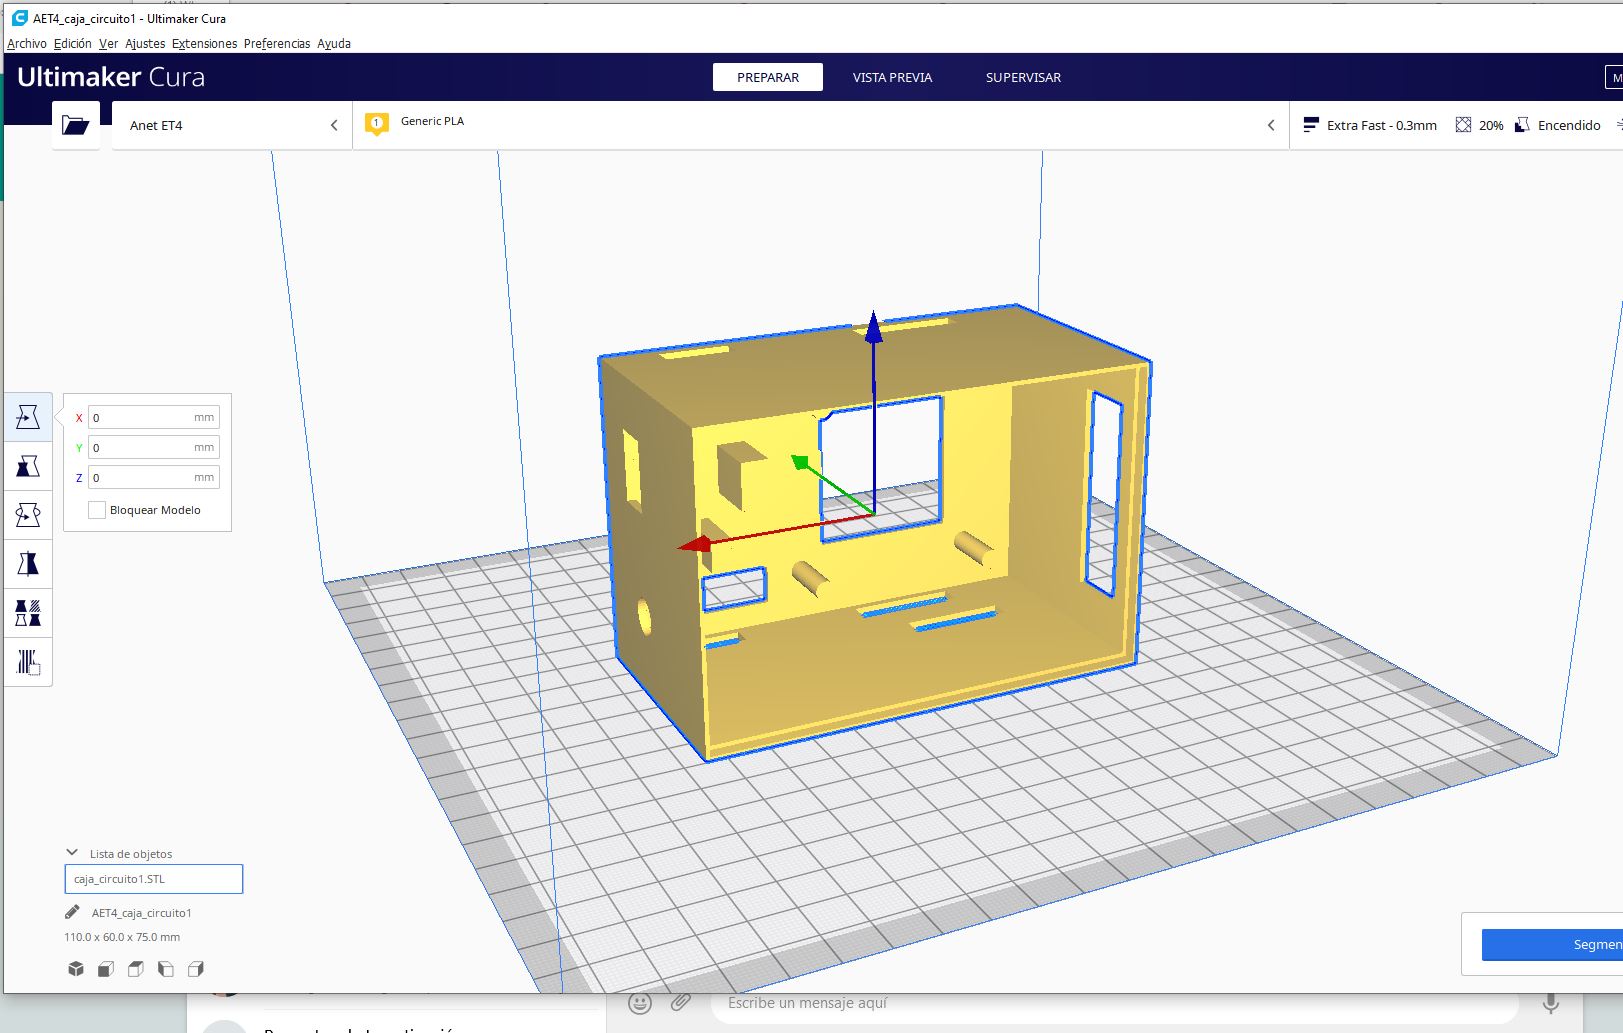
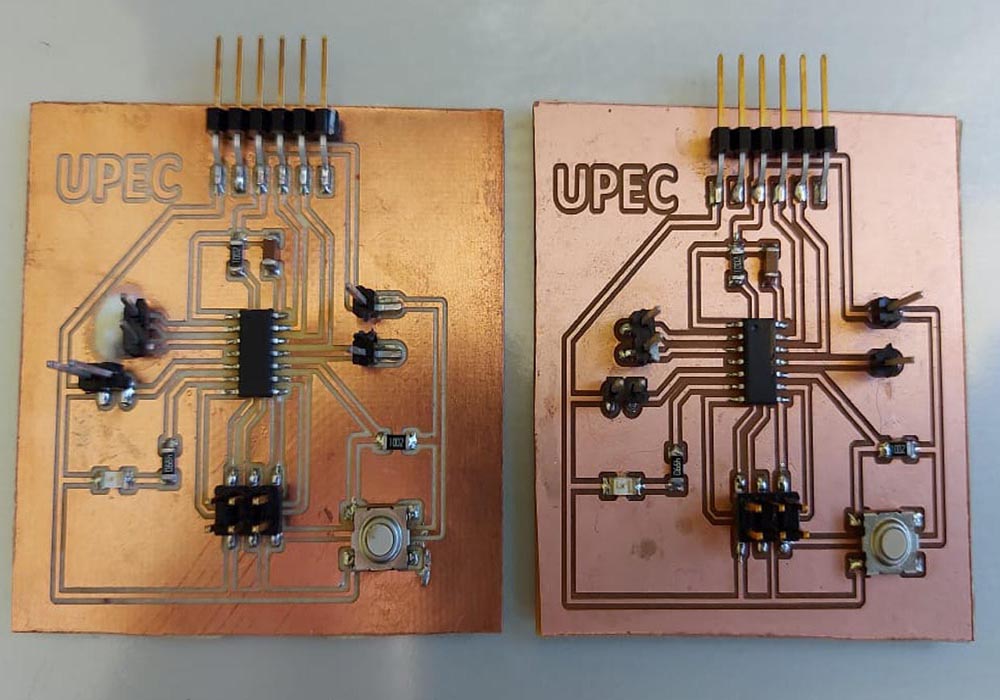
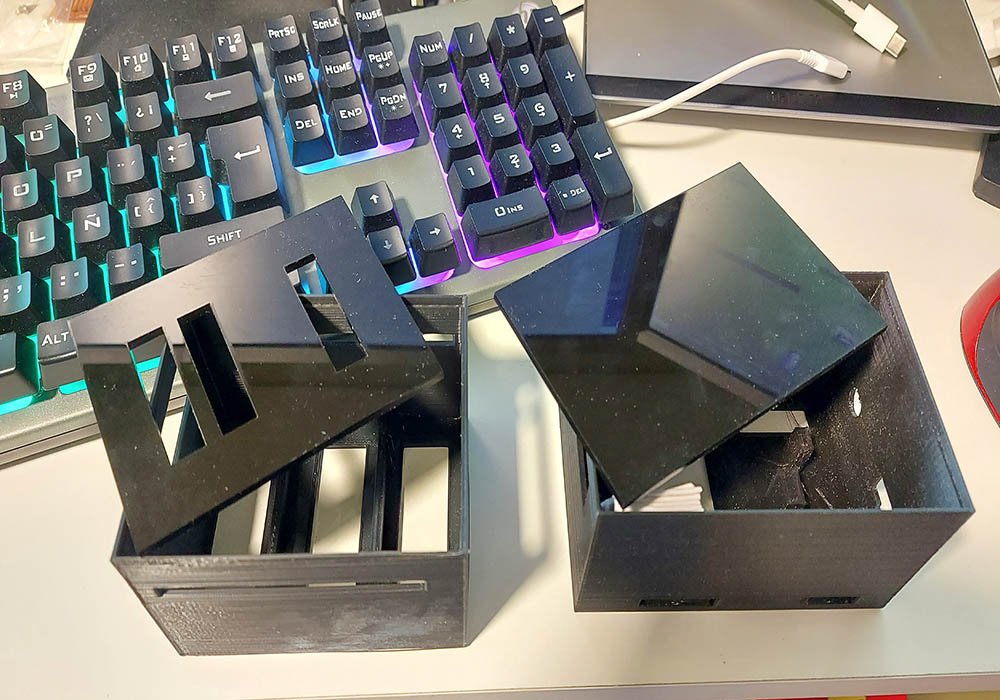
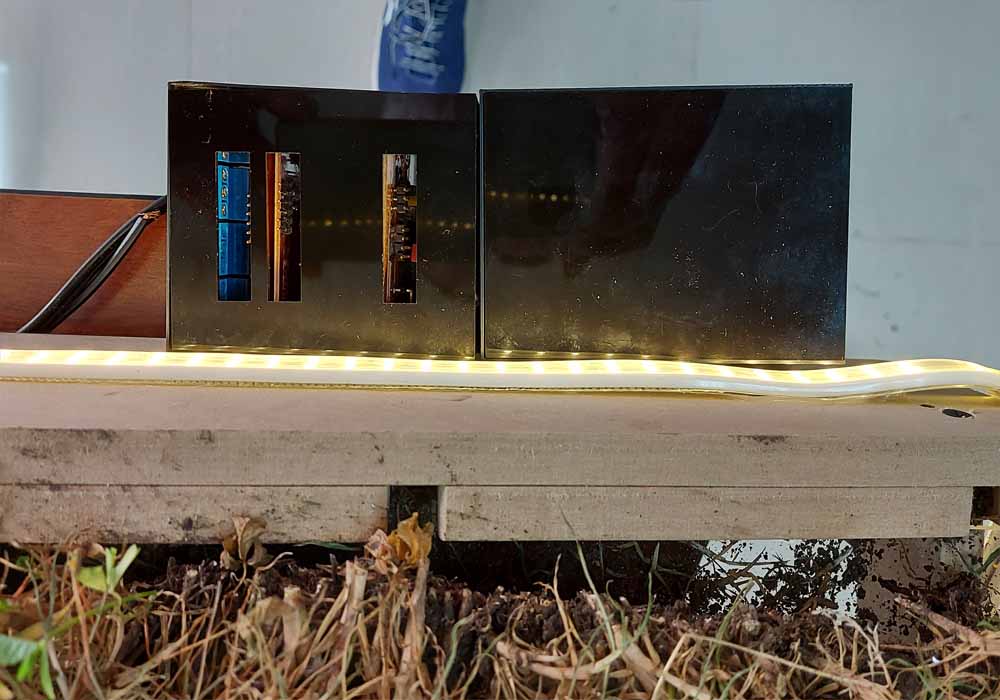
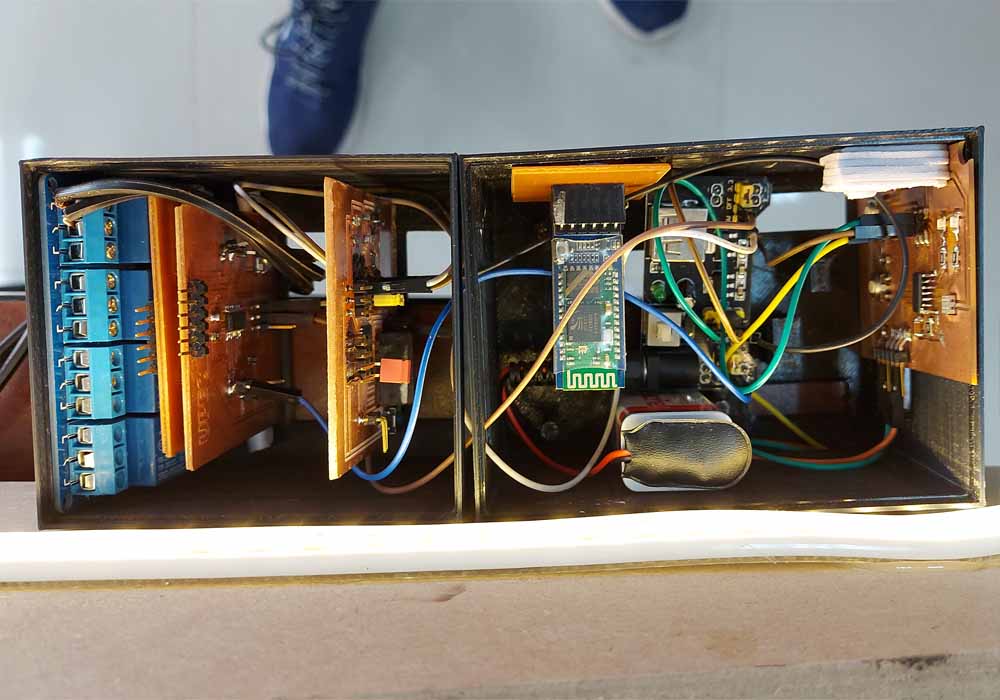
For the integration of the electronic circuits pcb, two boxes were designed to place the three palacas that are used
for the automatic control, both the movement sensor, water sensor, connection and bluetooth.
the covers of the electronic circuit pcb boxes were cut in 3mm black acrylic
 |
|
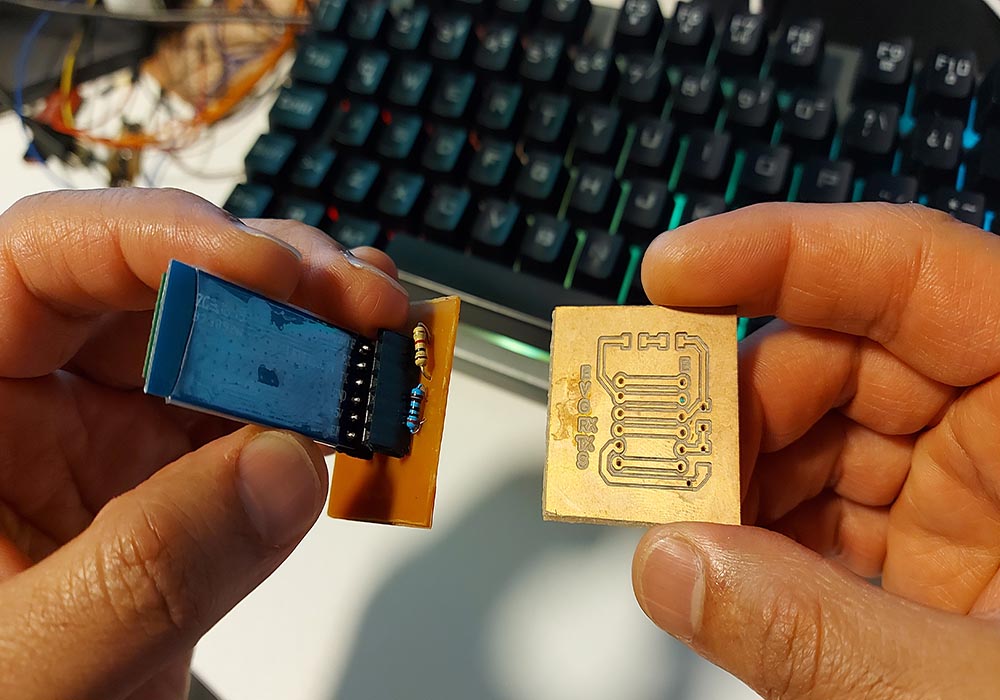
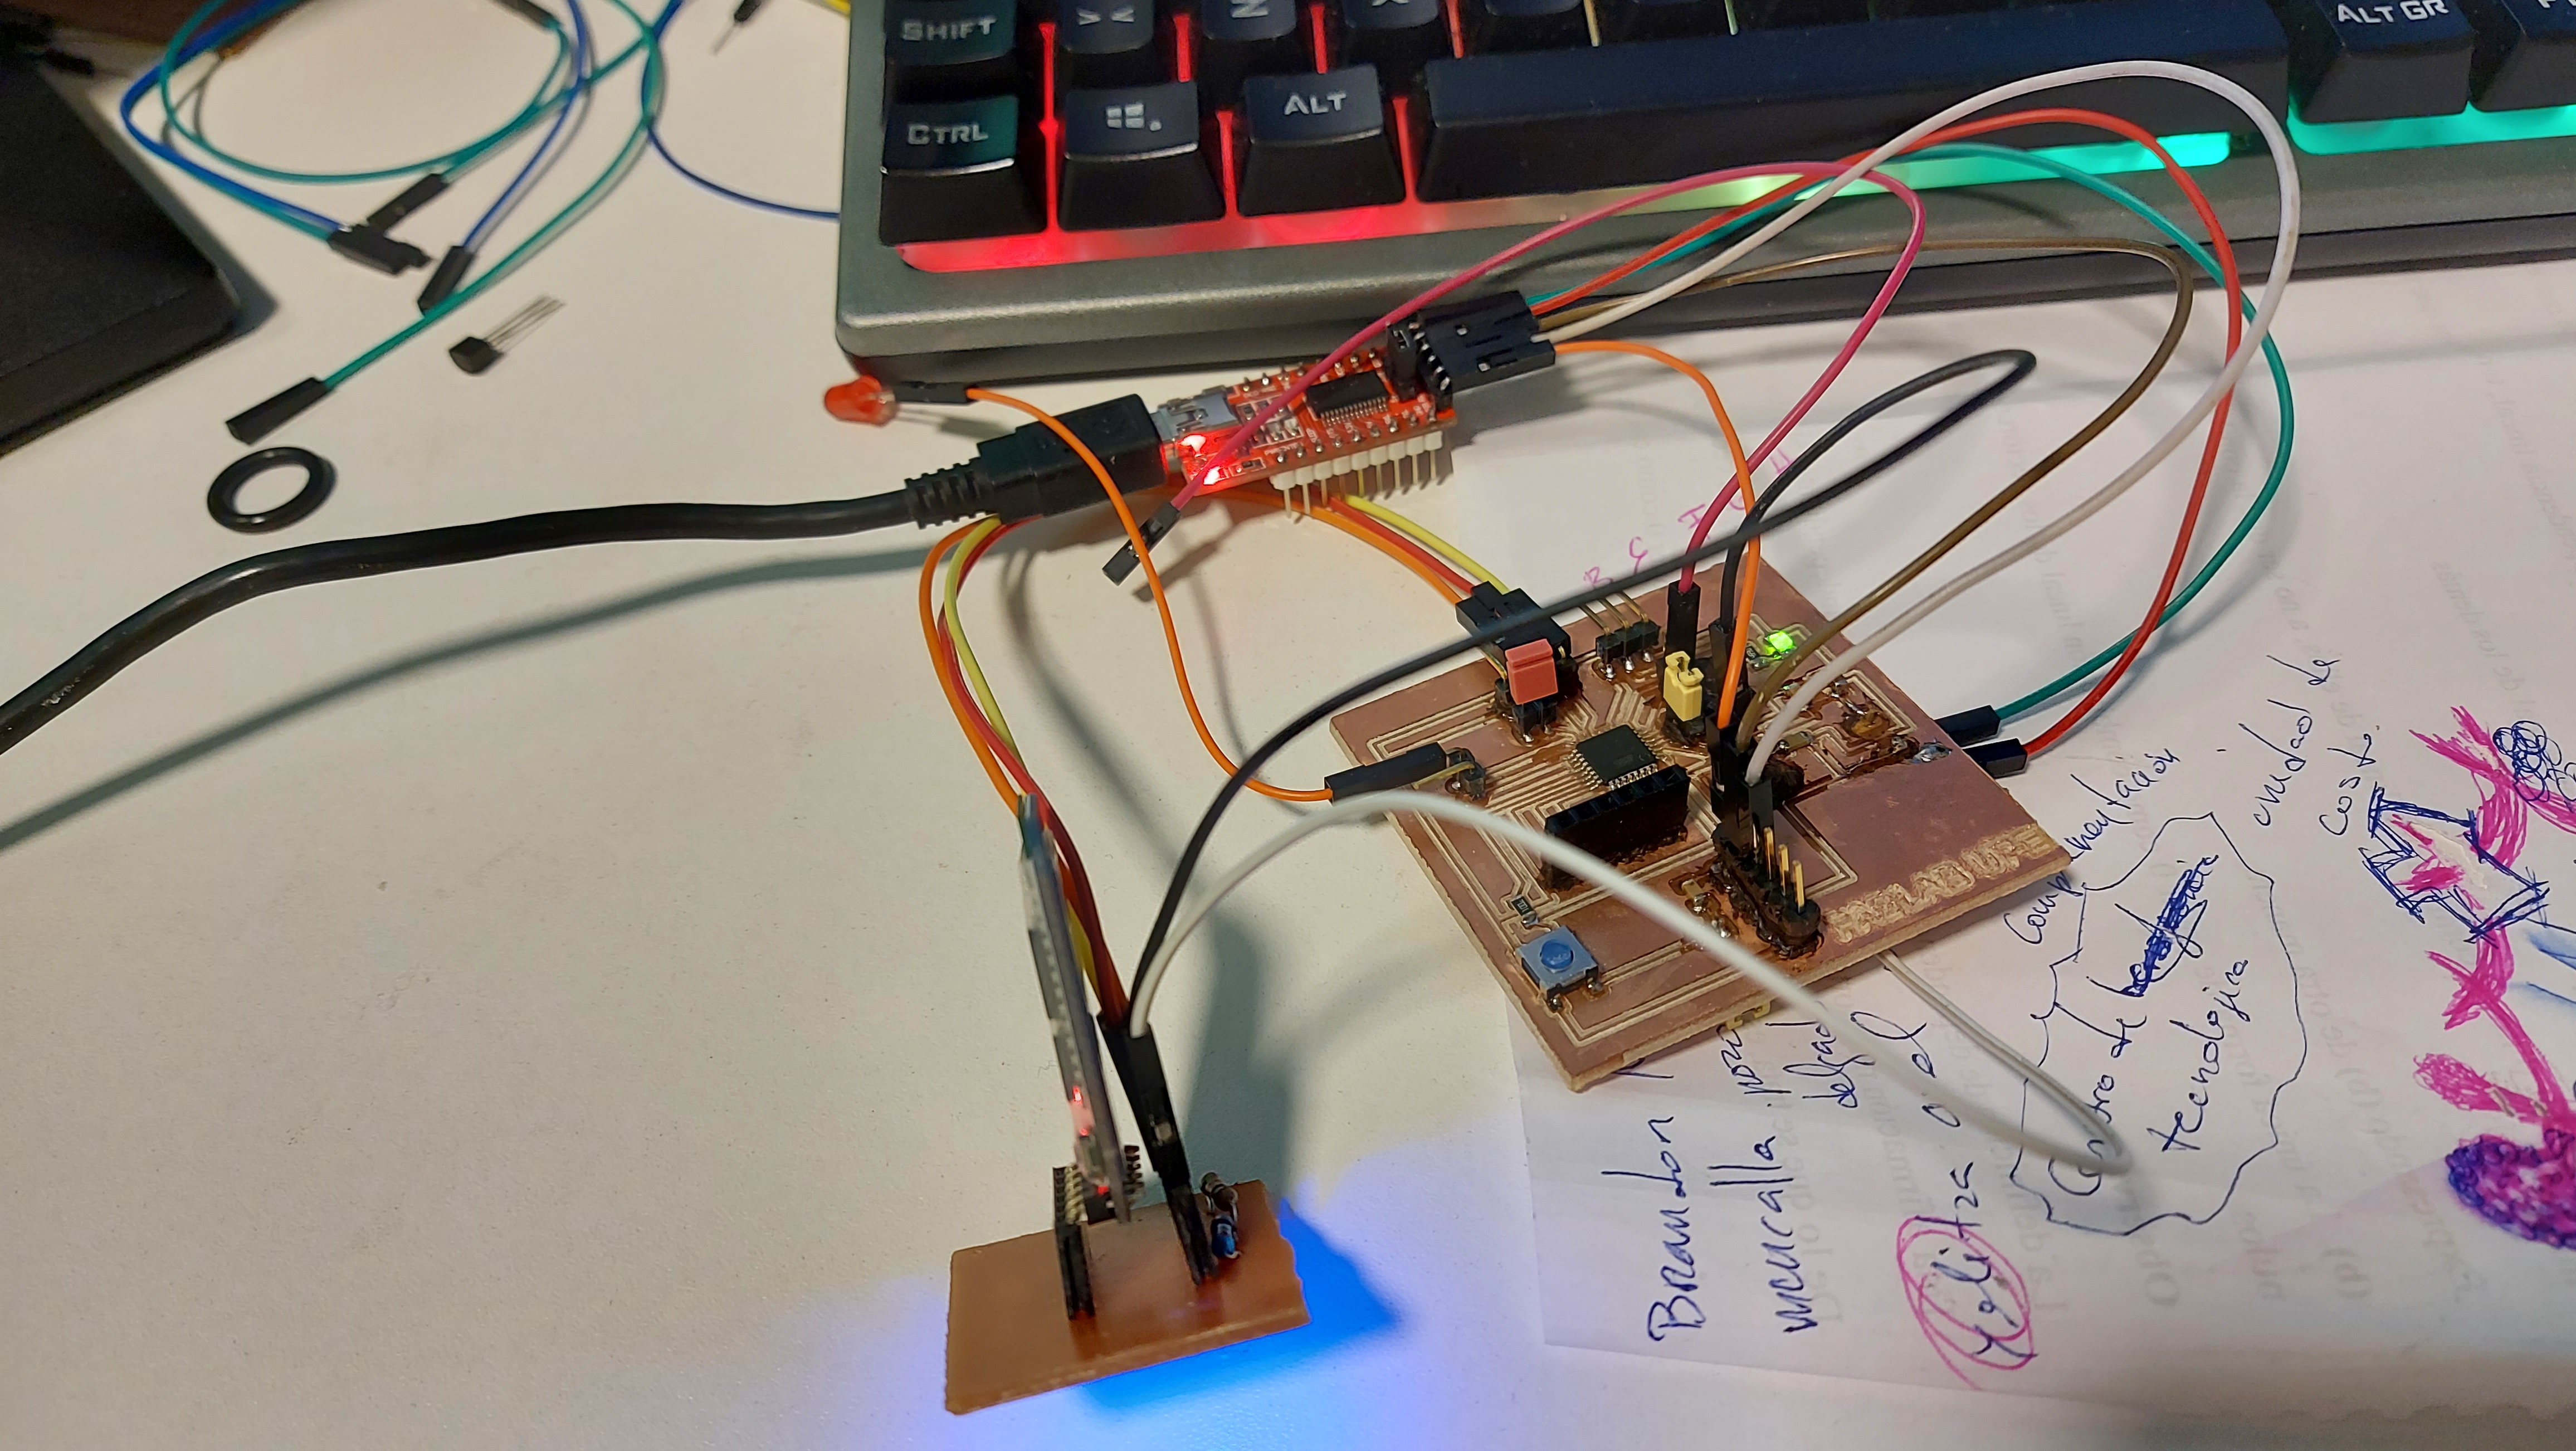
The electronic circuit boards pcb were developed throughout the course in the assignments of inputs,
outputs and networking, we can see their development in detail in the following links
Inputs
Output
Networking
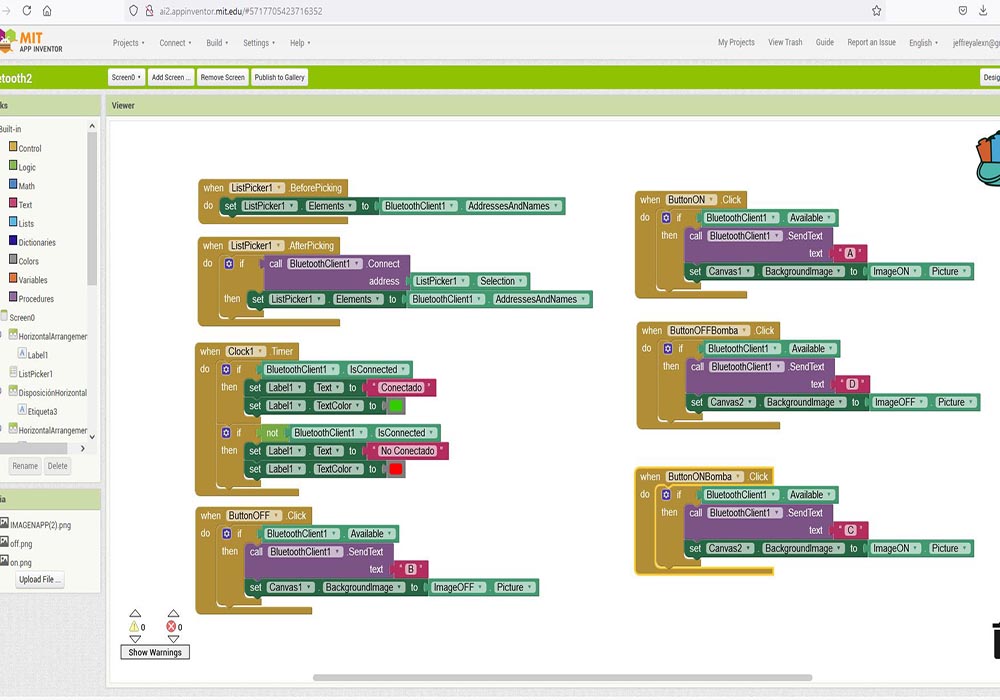
Development of the mobile application with the app inventor
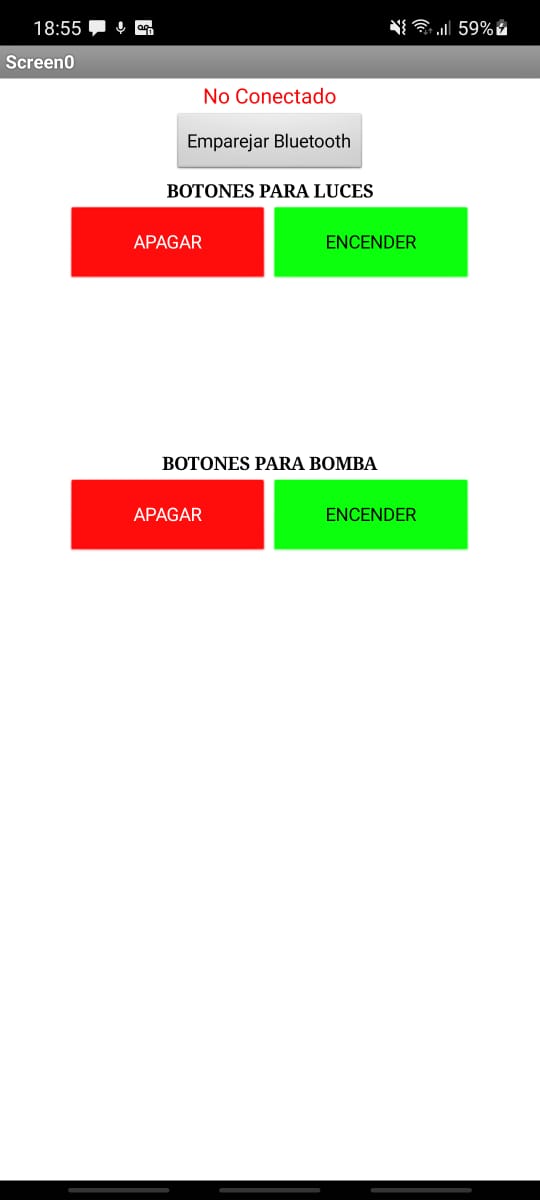
For remote control of the bus stop, turn on the lights, activate the water pump if manual activation is required,
a mobile application was developed that connects to the bus stop via bluetooth. we can see its operation in the following link
Final Project
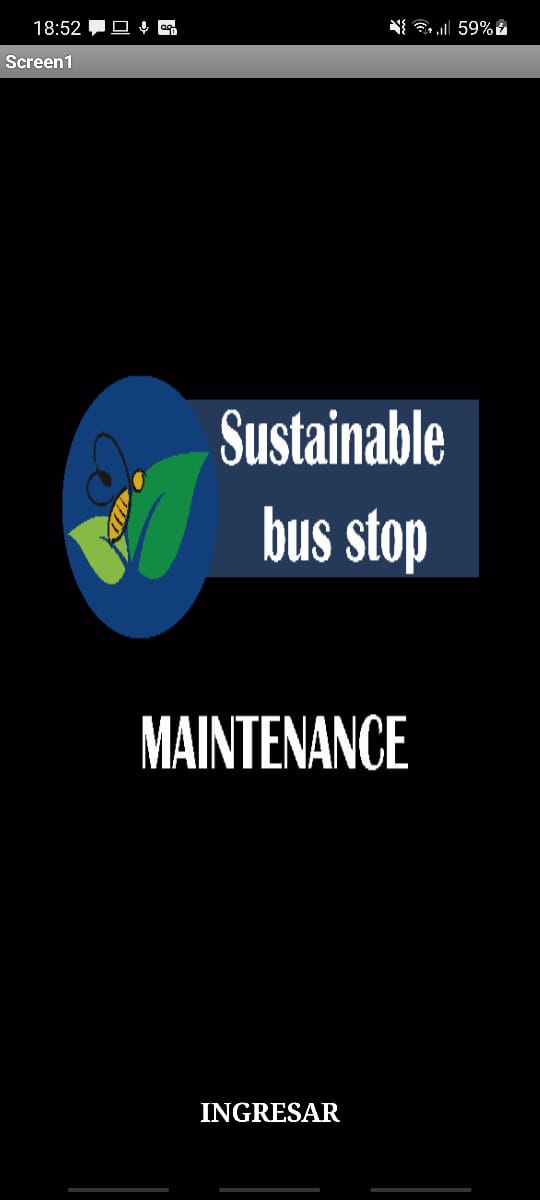
For the development of the mobile app, the inventor app was used, you can see more in detail in the Interface and Application
Programming assignment, the application consists of two screens, one welcome with the logo of the final project and another
that allows us to connect via bluetooth to the bus stop, where we can turn on the lights and the water pump
Networking
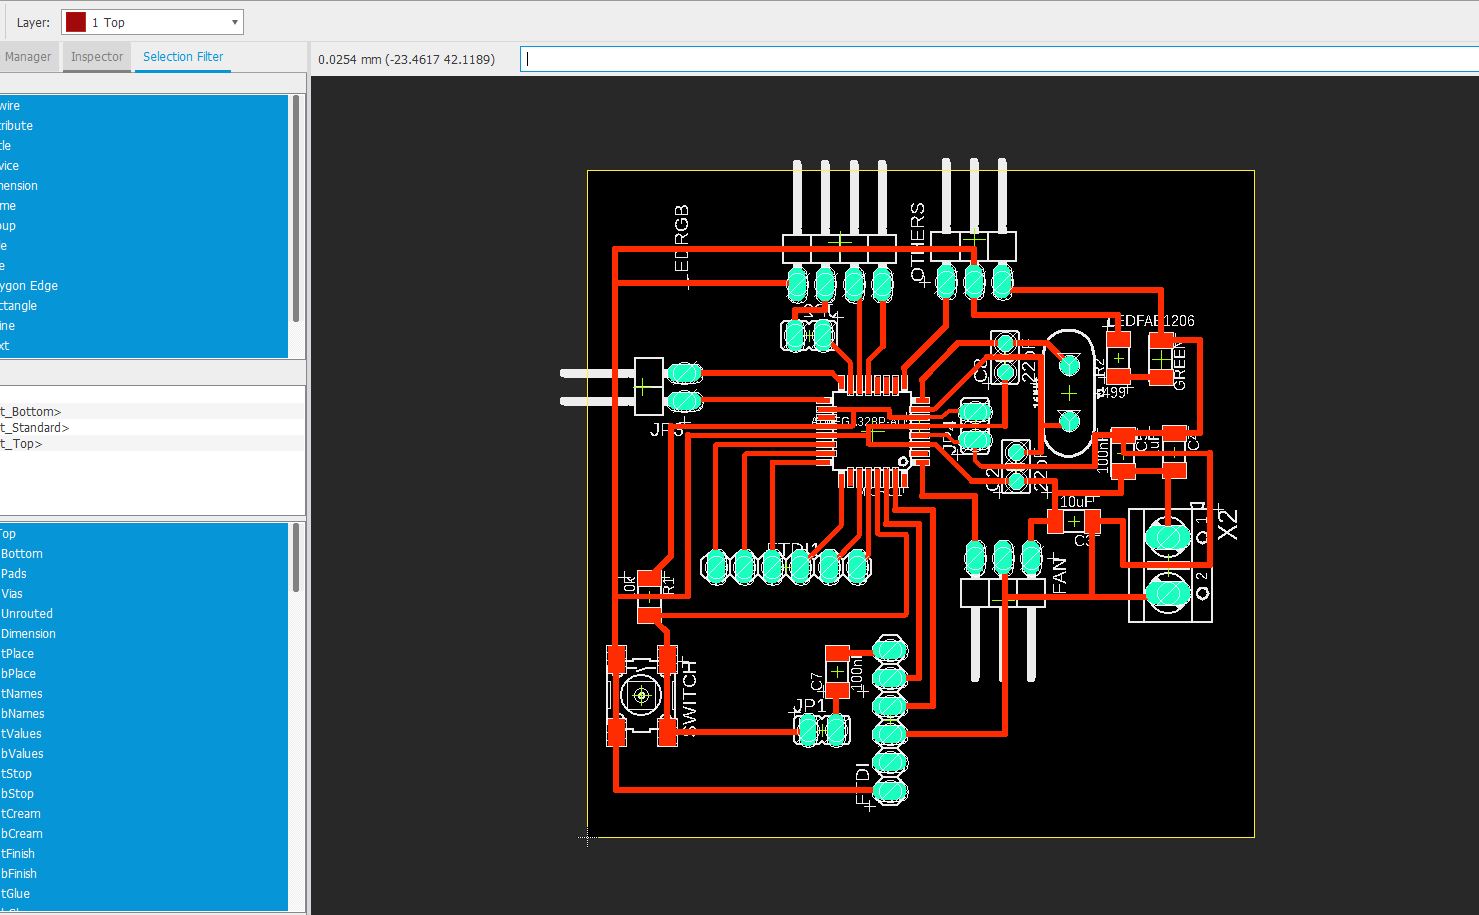
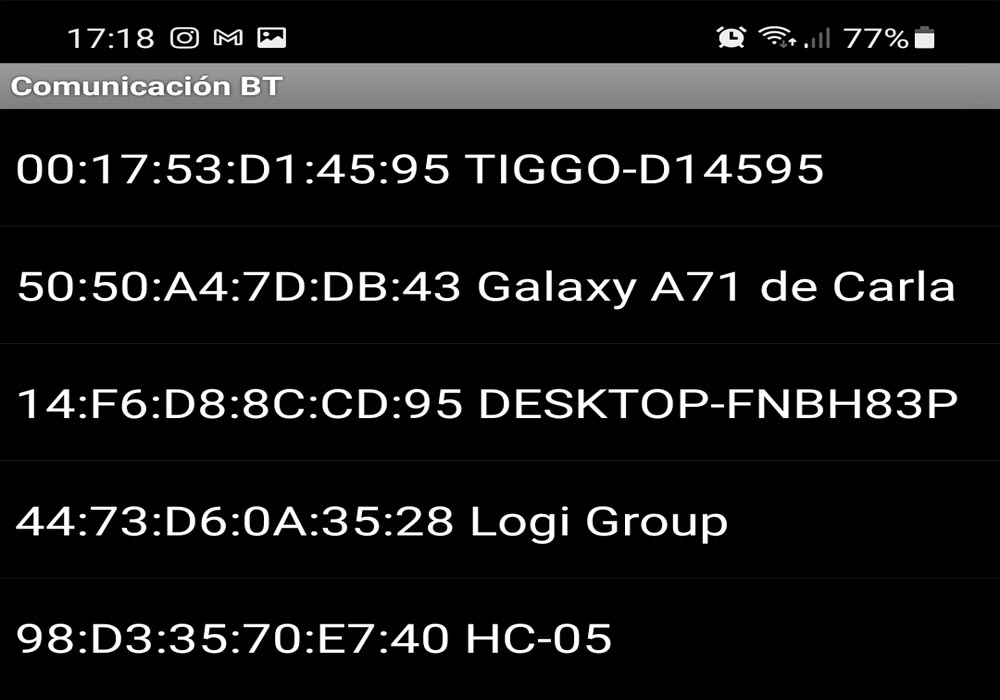
The communication between the app and the bus stop is carried out by means of a bluetooth module
that is controlled by the master board of the project with the Atmega 328p controller.
To see more in detail how to do this, I invite you to see the networking assignment in the following link
Networking
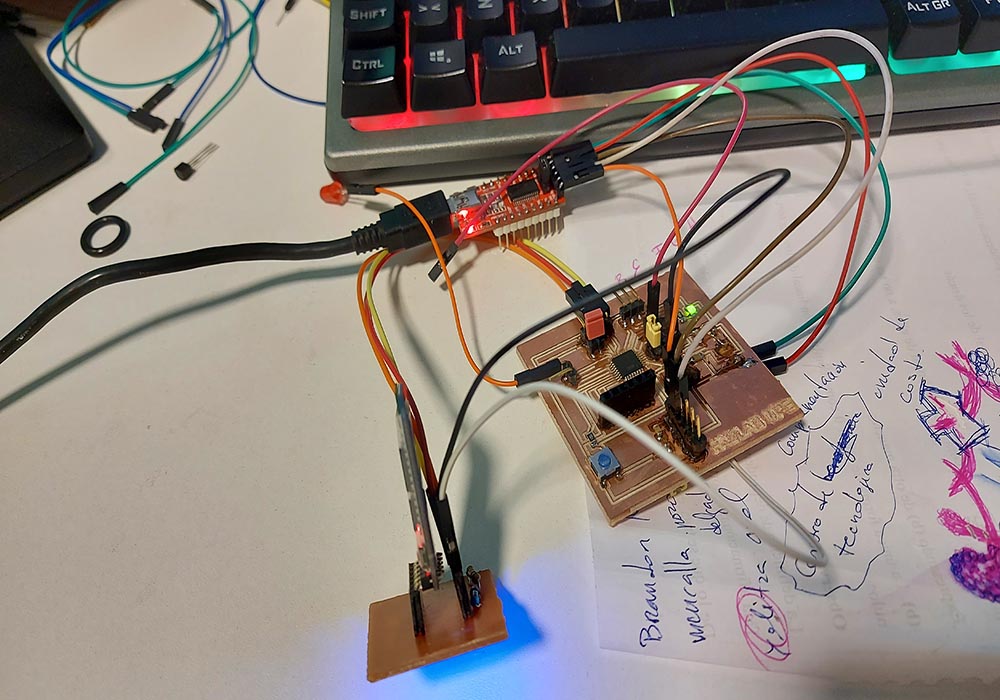
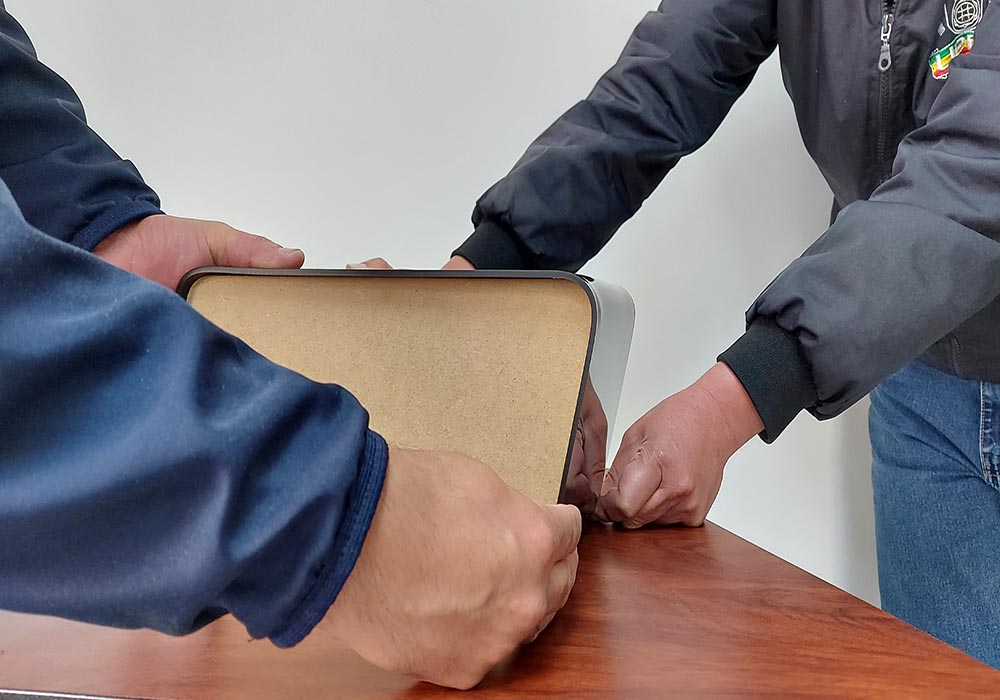
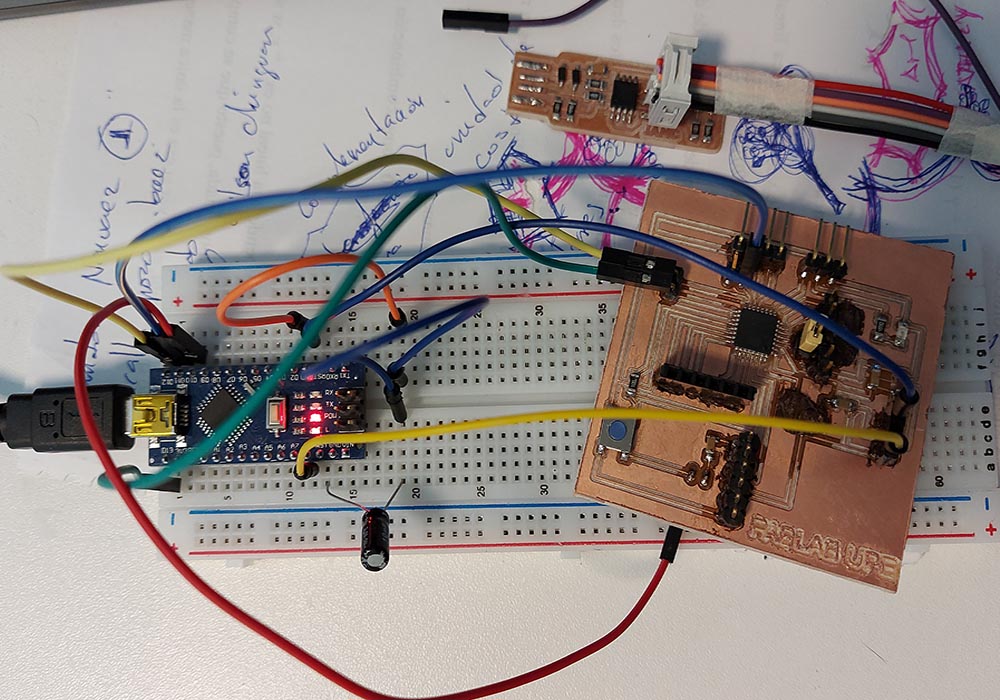
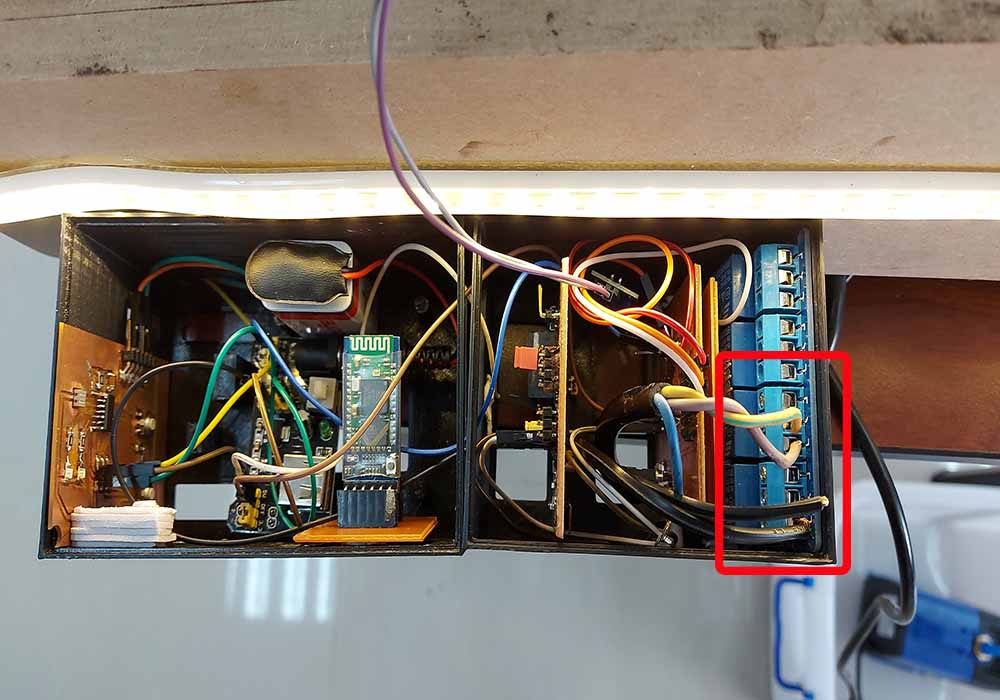
Integration of all electronic pcb boards, power supply, ftdi module, bluetooth module, relays.
Finally we integrate all the electronics inside the boxes manufactured in 3d printers
The files can be downloaded from the following link,
circuit integration boxes

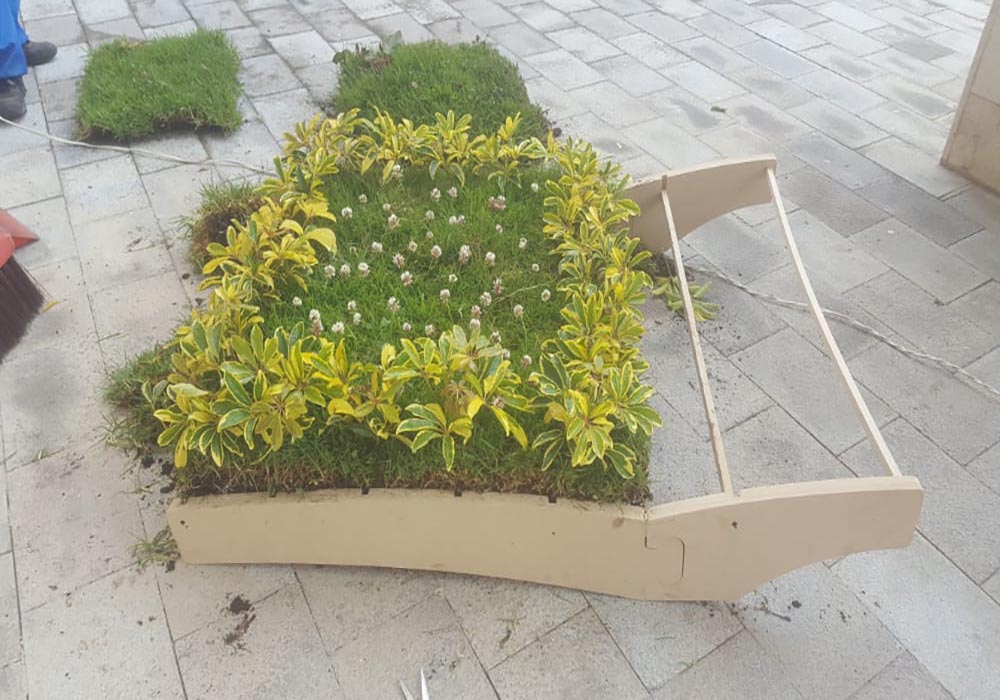
planting the bus stop roof
Putting it all together
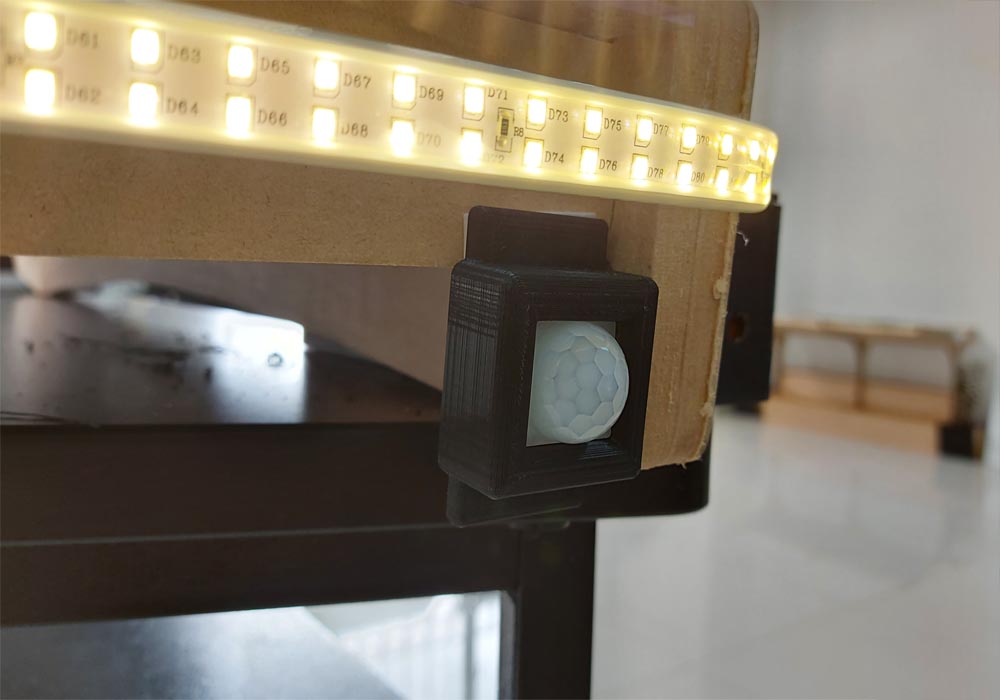
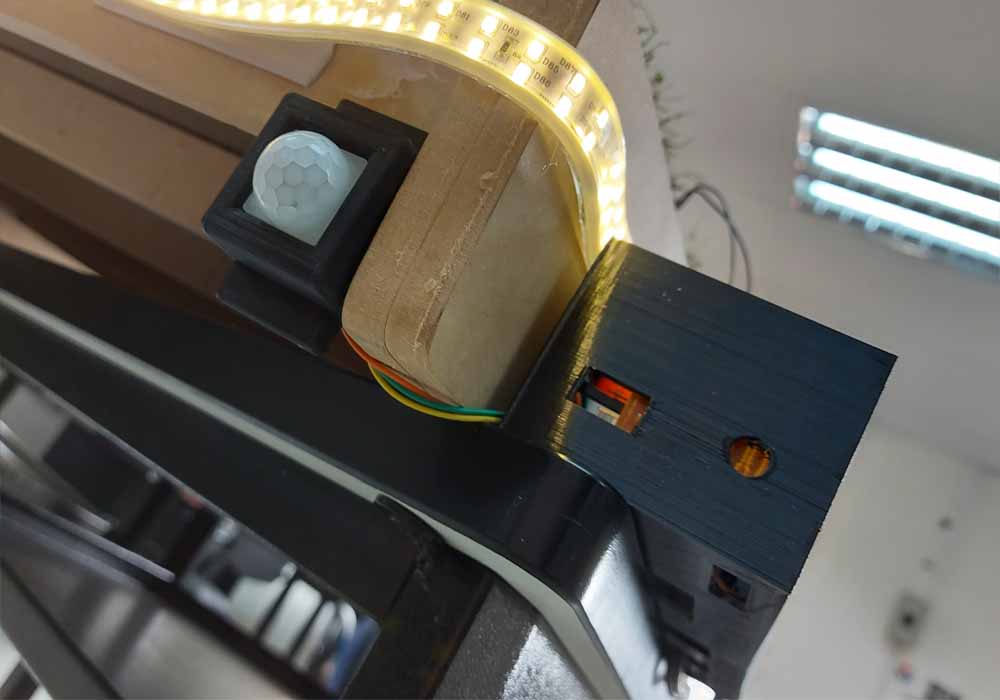
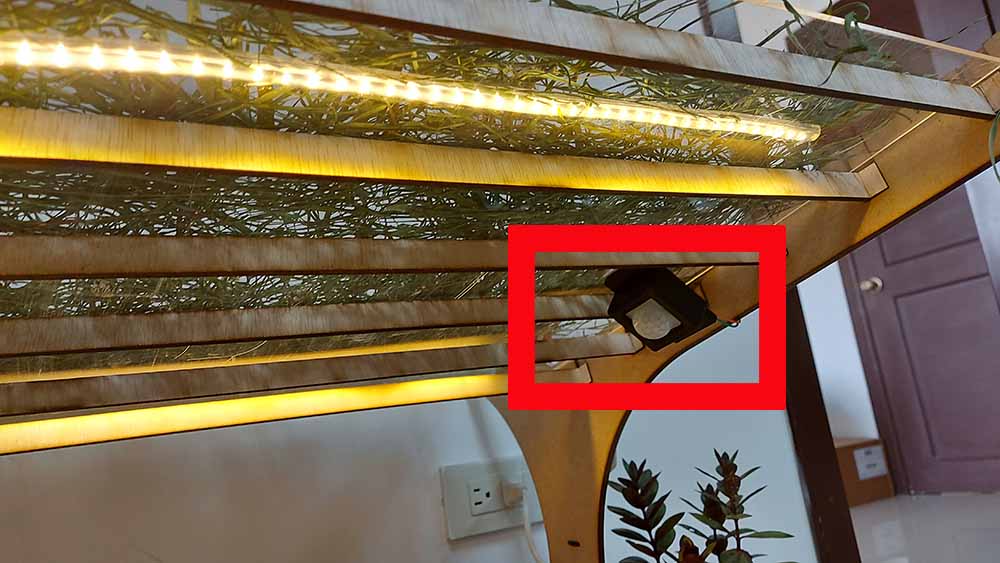
First of all, we place the motion sensor at the bottom of the bus stop to detect the movement of people.
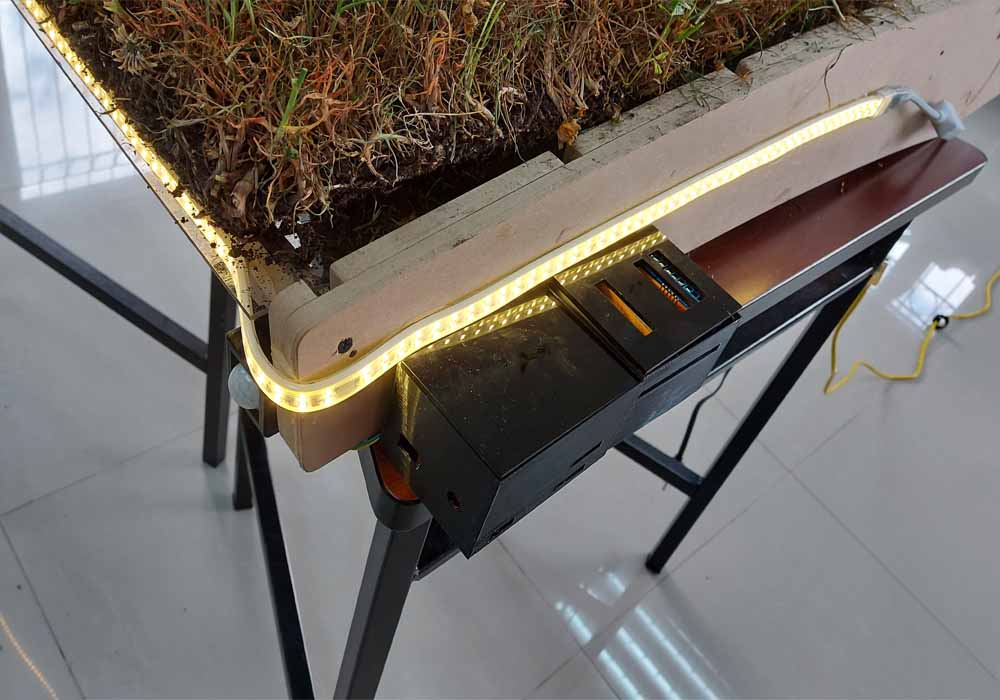
The boxes for the integration of all the electronics will go to one side of the model, near the sensor and
the main light socket, to be able to connect everything when being close to each other.
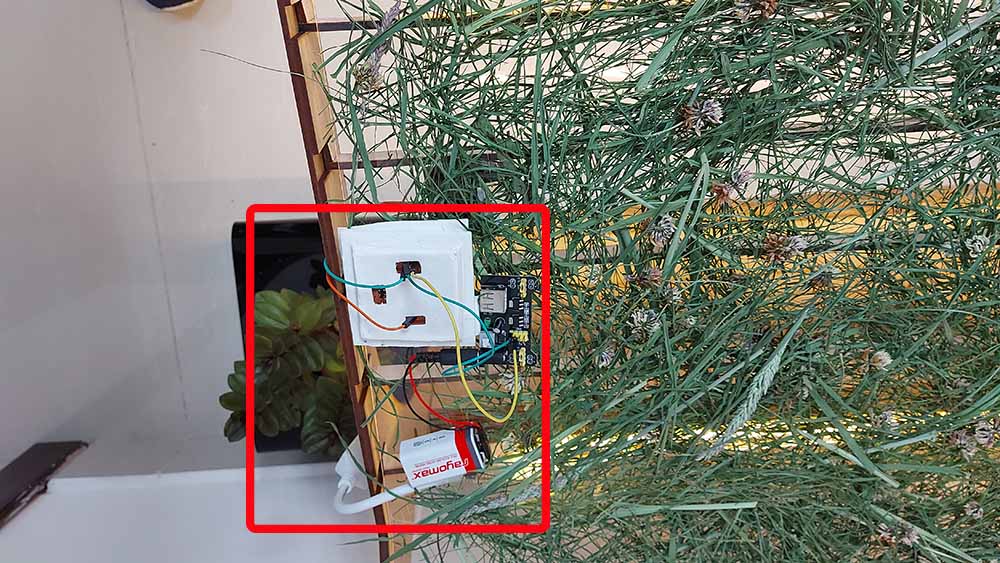
Here we can see how everything is integrated into the boxes that were printed in 3D, here the relays
were integrated, and a 9-volt battery as a power source
Below we can see the connection of the humidity sensor and the wiring of the motion sensor
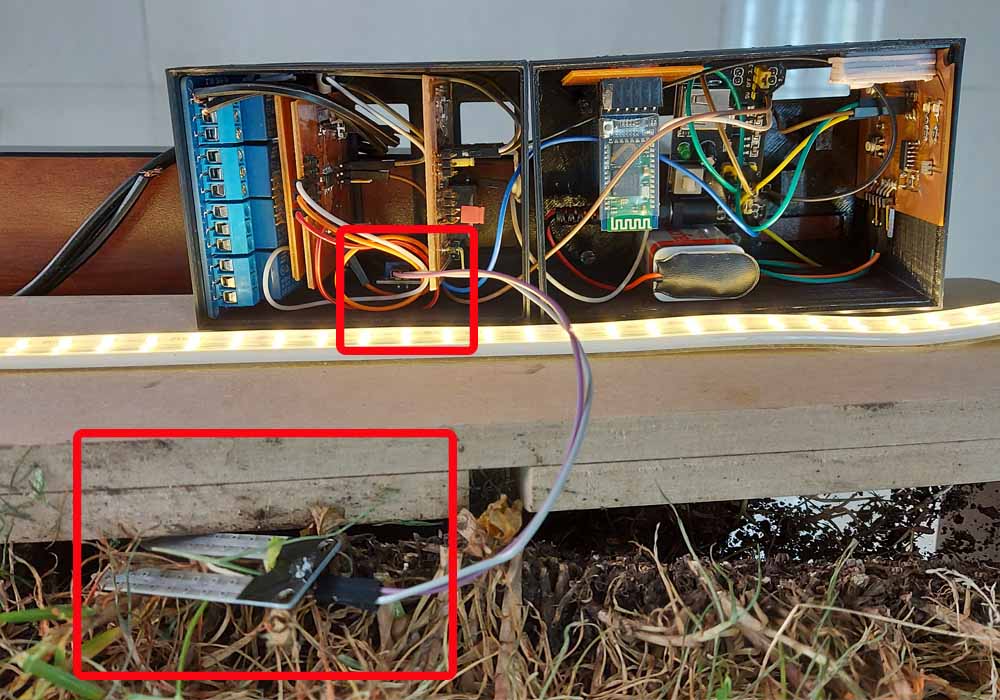
Below we can see the connection of the humidity sensor and the connection of the water pump, as well as the connection of the relays
We can see in more detail the handling of the pump in the week of Output Devices, how the water pump is programmed and controlled
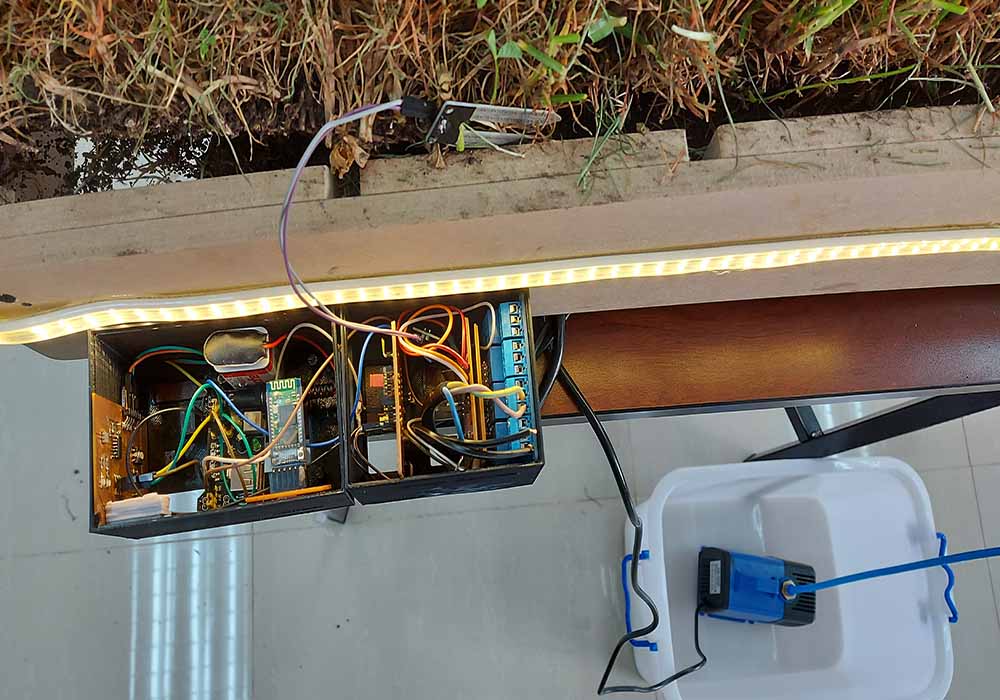

Being a too large bus stop to assemble it in its entirety, it was decided to manufacture a model of the roof on a smaller scale,
which integrates all the electronics, sensors and others. But a complete model of the bus stop was also manufactured to be able
to see the whole project, the small model has a motion sensor and an Attiny44 controller along with the led strip, in general
the small model is not functional, only the part of the lighting of the lus led is done with a movement sensor
Roof structure of the bus stop download files
Final list of downloads of my final project
Roof structure of the bus stop download file
Boxes for the integration of pcb boards download file
Mobile application to control the bus stop remotely download file
slave pcb board download file
master pcb board download file
bluetooth pcb board download file
Motor module download file
PCB board programming
Bluetooth controller download file
App App file
Move sensor download file
Water pump control download file
Schematic design final project

what tasks have been completed, and what tasks remain?
Initially, the bus stop was thought of as a tourist point that has information about the city and that allows users to connect to
the internet and be powered by solar cells, depending on how the project was progressing, I had to give up these ideas for Lack of
materials, such as a touch screen and a solar panel, the city where I live is small and due to a pandemic it was difficult to
ask for it from another city.
The humidity and movement sensors were implemented to ensure that the shutdown is sustainable at night and does not consume
energy if no one uses it, and through the humidity sensors take care of the roof plants
You can also control these elements through an application that allows you to connect the bus stop to the cell phone via bluetooth
what's working? what's not?
The motion sensor, humidity, the connection via bluetooth, the control through the attiny 44 slave boards and the Atmega328p master
are working, make
the bus stop light independent so that it turns on by movement and through the app it was no longer achieved the relay burned out
what questions need to be resolved?
how to integrate motion and humidity sensors and mobile application?
How to manufacture the structural elements, so that they are resistant to the environment, in the laboratory?
What is the right size for the city?
what will happen when?
I will complete all the electrical connections, integration of the controllers in their respective boxes, placement of the sensors and water pump, all this
to be ready for the presentation of the final Project on June 9
what have you learned?
What have I learned? Well, a lot, the best for me, the manufacture of the electronic pcb boards, the programming of the
controllers, this will have a lot of possibilities in the manufacture of new machines, for example now I started a project
with a student for the manufacture of an incubator of chicken and quail eggs that is managed through a mobile app, and that
has a knowledge database, to increase the efficiency in the hatching of eggs and raise productivity, this will help the
local economy a lot, and I cannot forget the design tools. I use the cnc that will be very useful for the management of
the laboratory that I implement in the university