2. Computer-Aided Design
Objectives
- Model (raster, vector, 2D, 3D, render, animate, simulate, ...) a possible final project, compress your images and videos, and post it on your class page
- Test as much softwares for 2D and 3D designs as possible
So this week I wanted to experience multiple design tools. I am not really a creative guy at first but on the other hand, I always wanted to learn how to use such softwares to be able to make some logos, some art and, as I am a teaching assistant, I want to be able to use such tools to make my courses more comprehensible.
I already had some basic knowledge of SolidWorks but it is the opportunity to learn more about other tools and how they work. In particular, I am really eager to test Antimony as I find the workflow so much different that everything I know !
2D-design: What did I do?
So I first wanted to experience 2D design.
I installed Adobe Illustrator, Inkscape, GIMP, Concepts and Sketchbook.
The main differences being that Illustrator is proprietary and costly, Sketchbook is also proprietary (Autodesk) but free while Inkscape and GIMP are both free and open-source.
Inkscape
Inkscape is used to make vector graphics (usually SVG files) meaning it is best used when drawing shapes, curves and text that can be later limitlessly scaled whiled still producing clean lines. This is especially important when the logo need to be printed or made available in a variety of sizes. Also, the colors of each object can be easily changed which makes it very easy to change the color of a logo or any other design.
I will try to make a logo for my project using Inkscape.
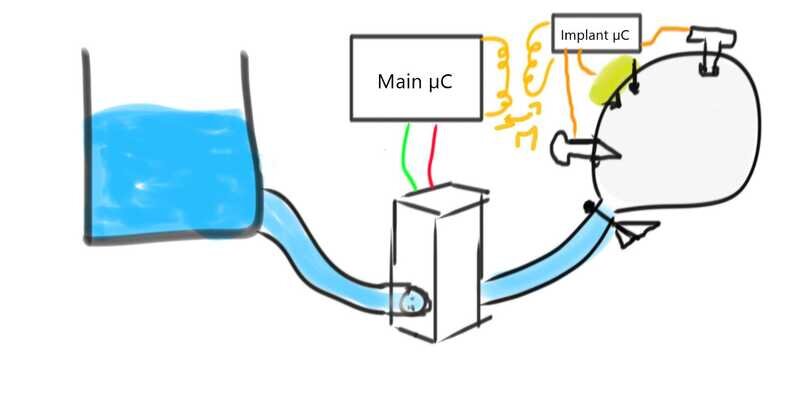
So I first began drawign an ellipse. I changed the thickness and color of the of it. This will be my “simplified” bladder.
I then added Bézier curves to model the ureters and the “wave” effect inside the bladder. The color is added with the bucket tool.
The sensor is made of a simple square for the main body and three smaller squares for the headers. The “communication” is done using half ellipses with decreasing transparency.
Finally, I added my bottom text. I first copied half of my ellipse, put its transparency to the maximum and then Menu - Text - Put on Path to make it follow the curve !
Once I was done with my design, the magic combo Ctrl+Shift+R allowed me to crop the canvas to my selection (Ctrl+A beforehand)
I only had one issue: when exporting to SVG, the bottom text does not appear. It is especially strange as it does appear in Inkscape (which reads the .svg) and also it exists when editing the file in “text mode”. I think it is linked to the half ellipses as the “communication” also does not appear… Workaround for the moment: export as a .png ! Note that in the File menu - Document properties you can set the background color to white so that it does export with a nice white background in .png.
Alternatives
Adobe Illustrator is basically the proprietary equivalent of Inkscape.
GIMP
GIMP on the other hand uses raster graphics, meaning that everything is displayed as pixels in a grid. When zooming on a file opened in GIMP it becomes very clear that every color in the image actually corresponds to a pixel. GIMP elements are therefore not scalable !
Therefore Gimp is more useful when manipulating or editing natural photos as each pixel can be manipulated. It is also easy to adjust colors, brightness, contrast, temperature, saturation, …
Also, as it is not a vector-graphics tool, it is better for free-hand drawing than Inkscape for example as vector-graphics tools will always need to slightly adjust the curve to make it fit a mathematical equation. For pixel-perfect drawing, GIMP is therefore better.
If you want to use GIMP to adjust several images automatically, you can use BIMP !
Alternatives
Adobe Photoshop is the proprietary equivalent of Gimp.
Sketchbook
Sketchbook is a bitmap program. That means that just like GIMP and contrary to Illustrator or Inkscape, it won’t create vector-graphics or SVG files. On the other hand that makes it perfect for hand-drawings. It features many brushes, transform features and so on. Additional sets and features are available for free by the community.
Tip
I found the very nice Hudson Rio’s bush set for Sketchbook. In my own opinion, the pencil looks the better and the airbrush is godsent. I really recommend it (and it’s free so try it out !). Simply download it and drag&drop it inside Sketchbook for it to appear in the available brush sets. You can pin it to the palette for easy access. So easy!
Alternatives
Concepts for lightweight/rapid prototyping. It features “hybrid vector-raster engine” that makes the strokes sharp at any zoom level before exportation. The “infinite canevas” is also an extremely nice option when brainstorming for ideas and testing out things.
Vectornator is another vector-graphics tool that looks very promising but I didn’t get the chance to explore it as its only available to iOS and macOS devices.
Krita: open-source and free.
MyPaint a raster very lightweight, cross-platform and simple drawing tool.
Note that both Concepts and sketchbook are free but exist in “Pro” versions with added features that come with a price (but still way less expensive than Adobe’s products).
Powerpoint
I also used Powerpoint to make animations and some nice designs but I feel like it was less difficult  . Powerpoint was always my go-to software to make a quick animation or design when I wanted to explain something in a paper or a video but it really lacks drawing capabilities and I feel like I’ll be using Sketchbook and GIMP way more in the future for this.
Adding constraints
As an engineer I’m actually a bit panicked with free-hand drawing. It just feels like it lack parameters and geometry (vector graphics feels a bit better already but still).
This is where constraints come around. They are especially important when using drawings to machine things as you want your drawing to respect specific dimensions. Instead of just drawing, you create relationships between objects.
The best advantage of constraints drawing is that whenever you want to change your design and everything is correctly constrained, you can just change the dimension that you want to change and everything else just respects your previous constraints. Easy.
The best free tools for 2D constrained design are QCAD and FreeCAD. Autodesk also created their AutoCAD software, costly but free for students.
3D-design: What did I do?
I had a very very small bit of experience using Blender as I used it to make assets in a video game project but it is a very complex software that I still have trouble using, especially since I use it once every 3 years …
Blender really shines when it comes to artistically sculpt objects and make animations. There are multiple rendering engines. Eevee for example allows for real-time rendering but offline rendering in Blender is extremely powerful, allowing things like ray-tracing to be rendered.
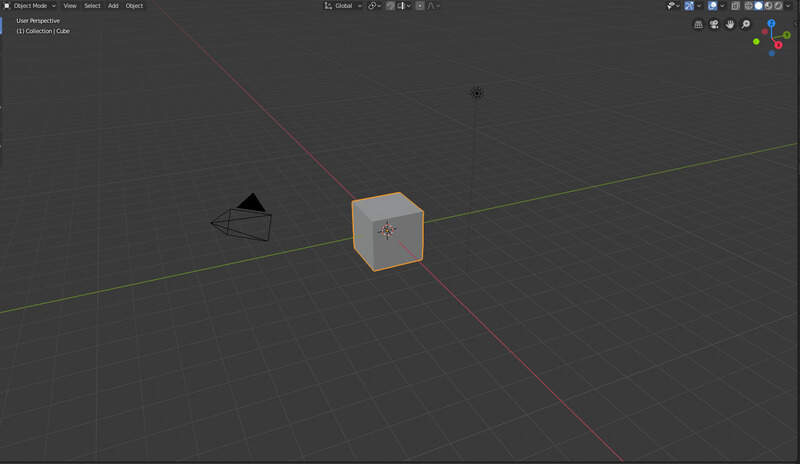
I tried to render a very basic scene in Blender featuring a “pressure box” made of plexiglas, a manometer, some wires and a “bladder” inside. To do so, I started a new project which begins with a simple cube in the middle.
I then go into the “Edit mode” using the Tab key and I select the upper face of the cube. I then use the E key to extrude a new face from it. I do the same for the bottom part. Then use the I key to make subdivision of the faces.
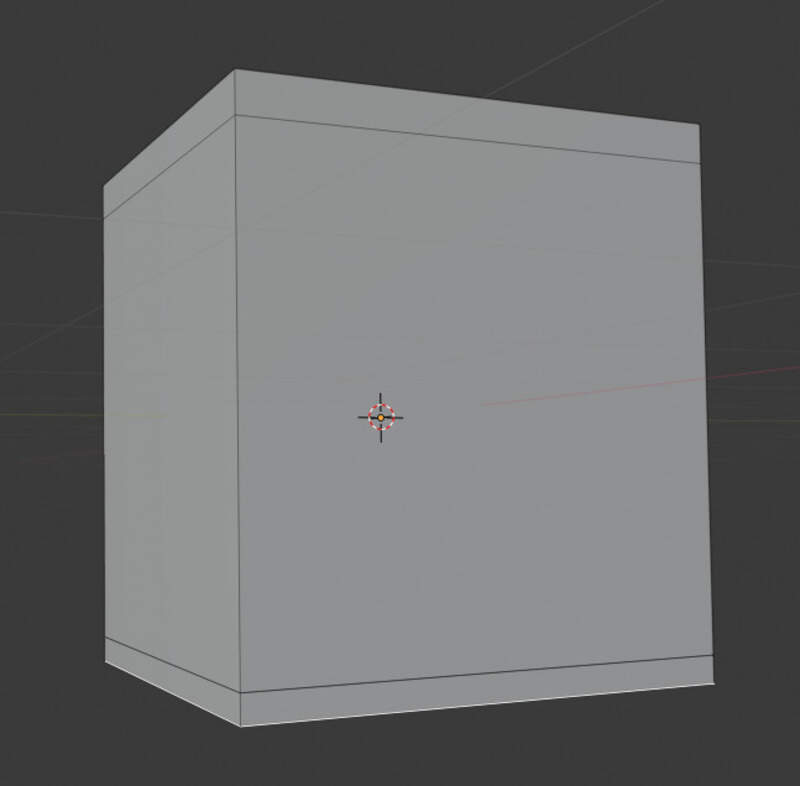
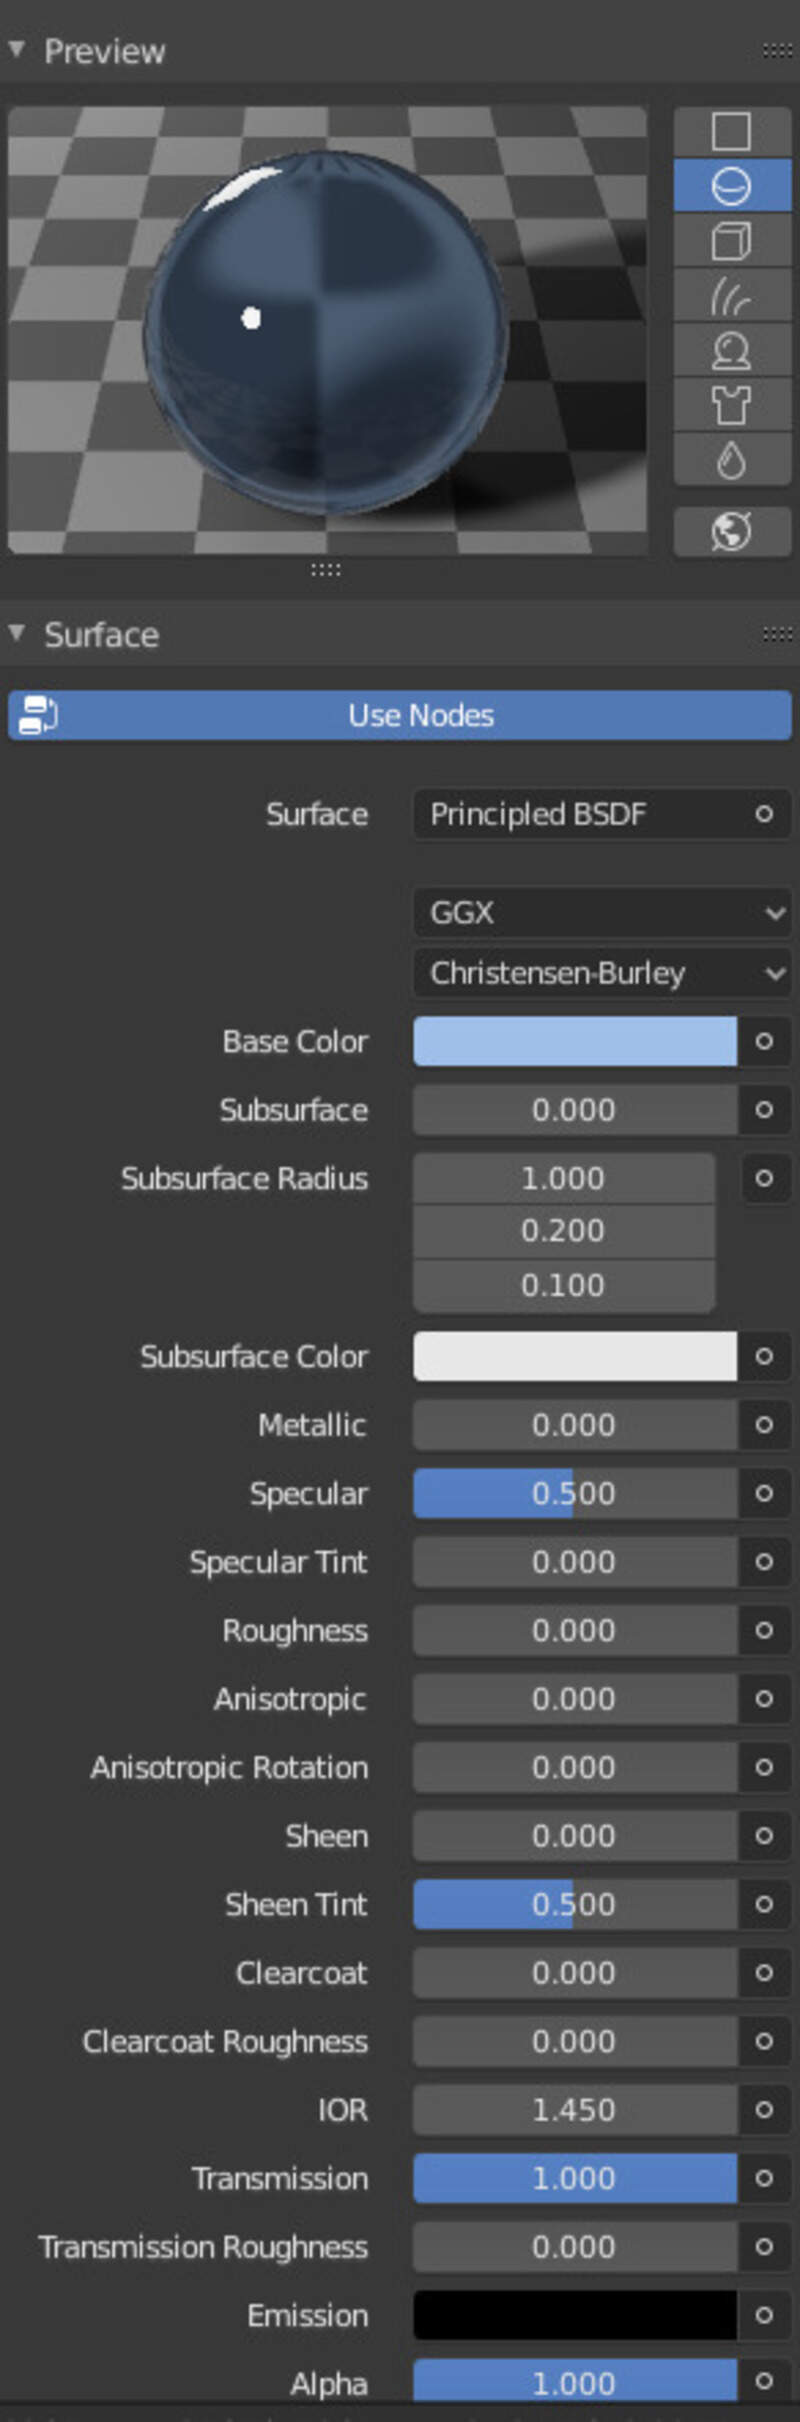
I can then select these faces an apply a specific material to them. To make the center of the cube “transparent”, I choose a slight blue color and place the transparency dial to the maximum as well as the alpha. The effect is not perfect but it’s a good starting point.
For the external part, I simply use a brown color and tweaked the settings to my liking.
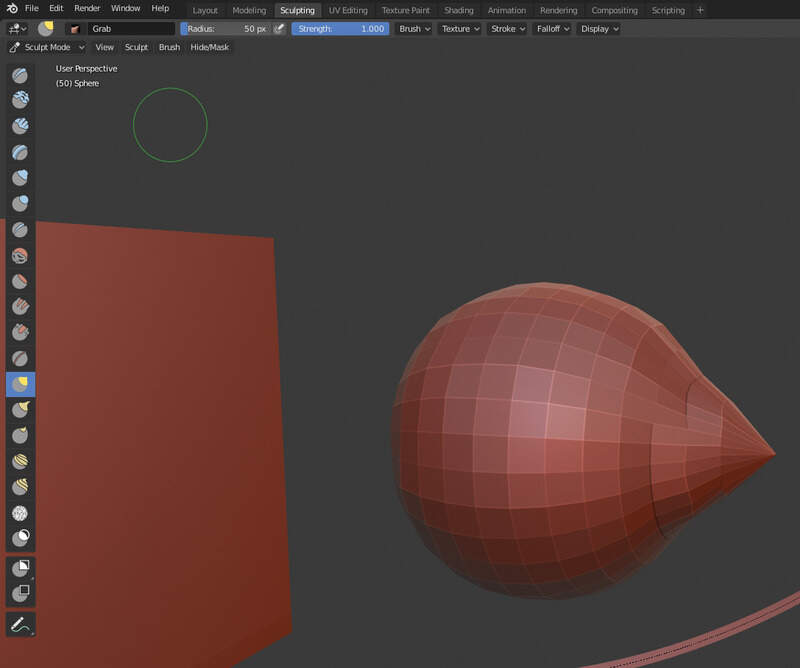
To make the bladder, I started from a new sphere and I sculpted it a bit (sculpting upper menu). You can increase the mesh resolution to get a better result but I didn’t want to mess with it as it is a simple project.
To make the manometer, I followed the same workflow : make a new cylinder, add new circle on top of it, extrude it, and so on … I then applied a texture on it and colored it manually just to test that.
Finally, for the wire, I had to activate the “extra objects” addon in the preference menu to get the possibility to add “knots” to an object and I could link my bladder and the manometer together with this kind of very simple wire.
I also have some experience using SolidWorks so I’ll give others programs a try such as FreeCAD. I’ll start by following the tutorials on the wiki until I get the hang of it and I’ll try to design a small part.
At first sight, despite the interface being a bit older, it looks like SolidWorks. The first thing that tickled was that to rotate the camera you have to hold the MMB and right or left-click at the same time. I find it so uncomfortable.. But keybinds 0-6 are so nice to move around the body.
I was able to directly make a new body, select the plane on which to draw a sketch and voilà. I then used the rectangle (R), line (L) and trim(T) tools to make a basic shape. I then constrained every part of the sketch (link two points R, horizontal and vertical constraints H and V and their dimension Shift+V Shift+H). I really like the simple keybinds and how lightweight the software feels. SolidWorks feels a bit clunky sometimes and lacks proper keybinds. Also, the number of degrees of freedom is written on the left (tasks pane) and I like it but SolidWorks blue VS black lines works a bit better I think (when fully constrained the sketch gets green which is fine).
I could then exit the Sketcher workbench and start expanding my sketch to 3D.
The “pad” option simply extrudes the sketch in the chosen direction. Then, just like in SolidWorks, I chose a face and I could start drawing a sketch on it. A simple circle will do the trick for a hole. The “lock” constraint automatically adds the dimension which can then be changed. Finally, the “pocket” option removes the excess of material in the object based on the sketch of my hole. I also added some thread and countersink socket screw for fun ! It is also possible to change the color of the body and its transparency (is it possible to paint independent faces like in SolidWorks ?).
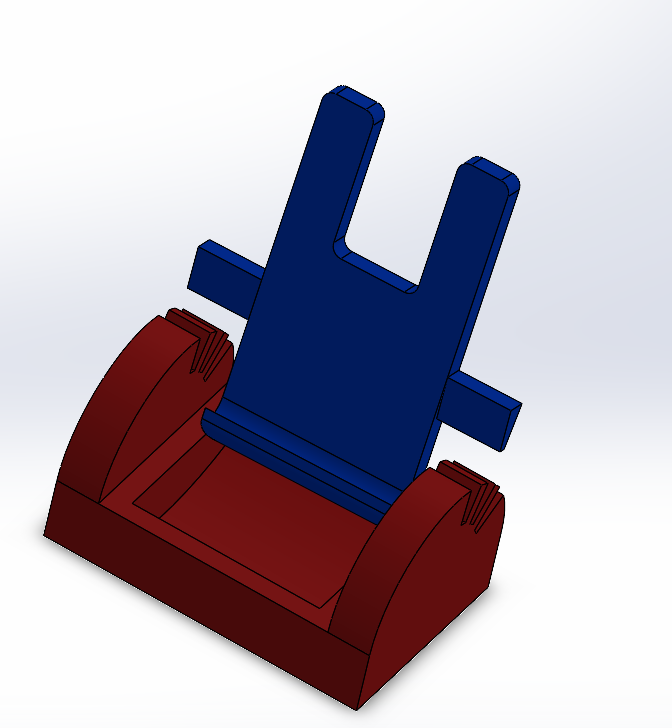
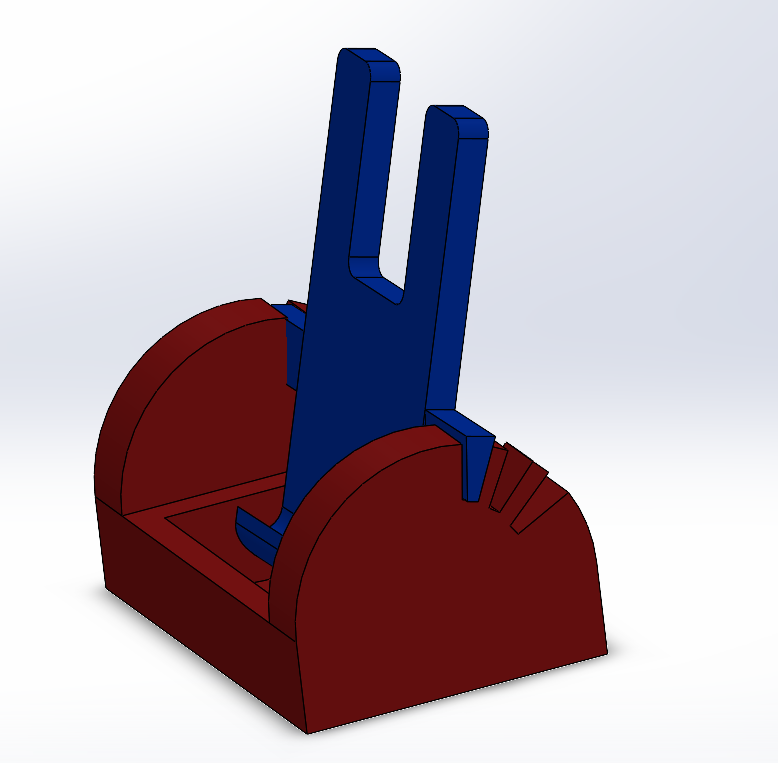
Because last week I had to solder something very tiny for another project, I decided to also design a phone holder that I will be able to use to zoom on the component I am soldering.
I won’t go into the details of how I did it (to be honest I kinda rushed it since I lack time) but here is the result.
Alternatives
Rhino3D is a non-parametric 3D design tool but it can be parametric if linked with Grasshopper. Sketchup and TinkerCAD are veary use to use tools but are therefore a bit limited. xDesign is a cloud solution from Dassault. It therefore runs in a browser on any operating system and does not rely on your computer performances. OnShape free for education is a collaborative solution, thought for teams.
Finally, I wanted to give a go at FReps (or function representation). The best example of it is Antimony. The whole idea is to represent objects not as meshes but as mathematical equations and functions. That means that we can also interpolate between objects and so on and scripts are editable ! However I’m running Windows on my laptop and I won’t have time to test the Linux subsystem. However I lot of videos about it and about libfive and though I doubt I’ll be using them in practice in my life, I think it is an extremely cool way of design props.
To go further
I just ordered a XP-Pen Star03 V2 drawing tablet off Amazon to further enhance my skills in 2D-design and to enjoy it more ! It will also certainly be useful for any lecture I might teach online during the academic year.
I would also like to experiment the video game designer tools such as Unity or Unreal Engine. Whenever I have time !