12. Molding and Casting
This week I worked on defining making a castable mold. The final output would have been a mold that I could use to cast sweets. My process nvolved designing the final positive, generating such shape as inserted in my stock, machining the stock, preparing the latex, pour it in the mold, cure it and then cook the sweets I would put in such mold.
CAD
I used Fusion 360 to design my shape. As the final shape was made by the repetion of four shapes, i designed the first one using sketches, extrude and loft, I the “embossed” a letter on the top face. Once I repeated the shape I filleted every sharp edge.
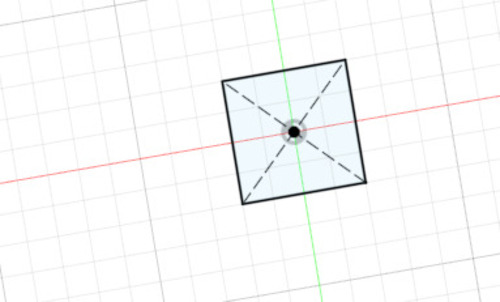
First sketch.
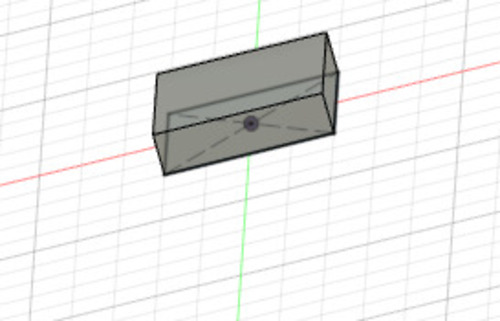
Base layer extrusion.
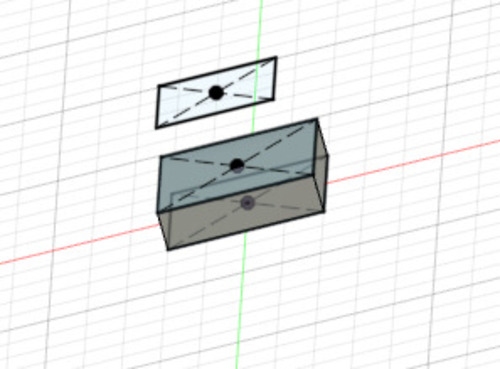
Top layer sketch.
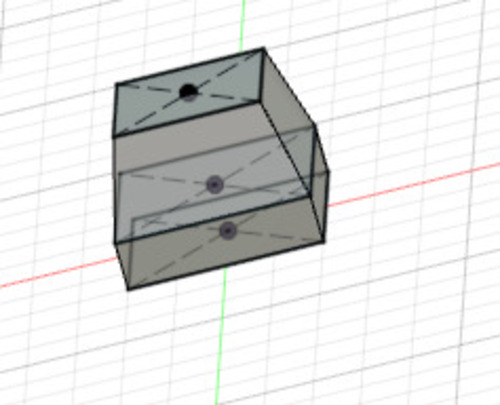
Loft.
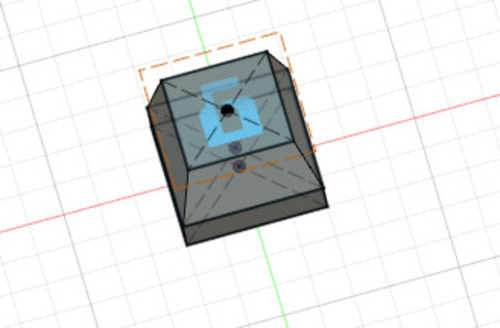
Letter sketch and extrusion.
First module moltiplication.
Filleting.
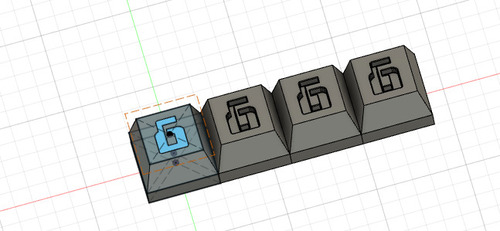
The second step was building a “frame” around the shape itself in order to hve an offset in between the multiple shapes I’d put onto my final stock, this frame would eventually also define the thickness of the mold.
Frame sketch.
Frame extrusion.
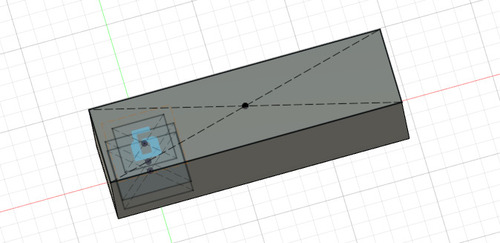
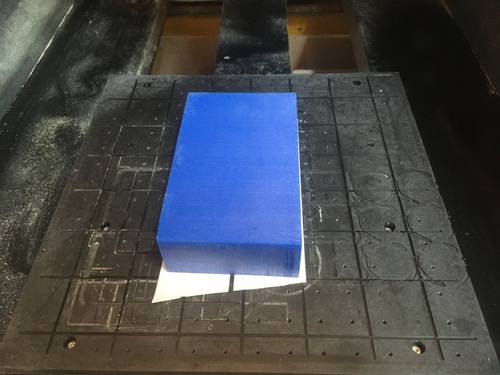
The third step was measuring the wax stock, and then place on the stock as many of my frames+shapes as possible onto it. Thankfully I did design my shape using parameters which allowed me to adapt my initial design to the stock.
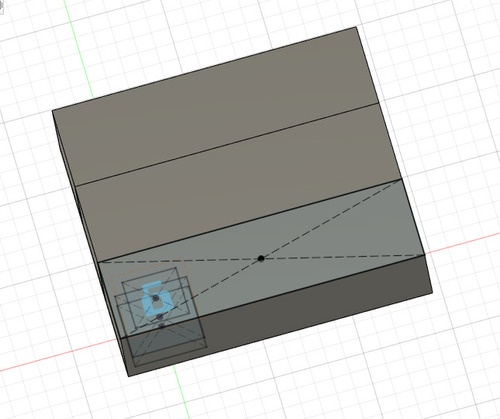
Multiplying the shape+frame module.
Stock extrusion.
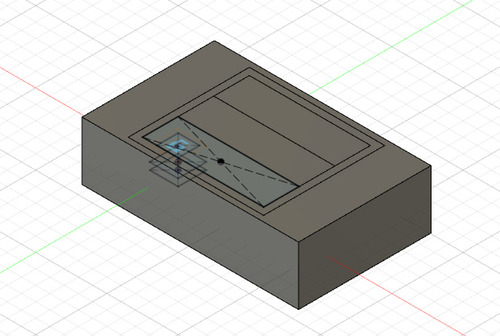
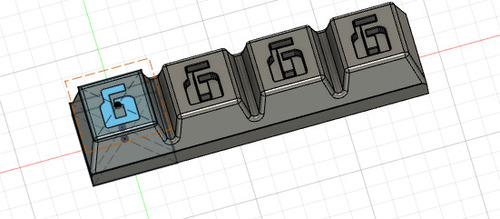
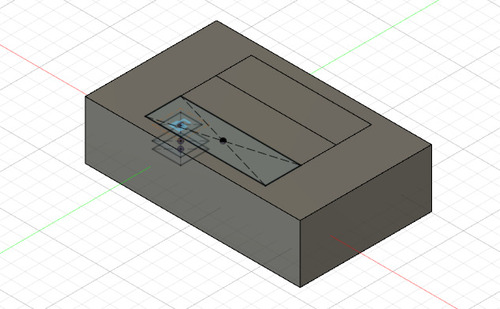
Boolean operations to obtain all the different bodies needed for the CAM file and for volume calculations.
In order to both create the shapes I wanted and mantain the bodies for further development and for defining limits in the machining section I’ve always selected keep tools when doing boolean operations.

This was also useful as I managed to get what the shape of the actual mold would be, as in the negative space in between the stock and the frames. By having this as a body I could inspect its volume and translate that from cm3 to lt, which gave me the amount of latex I needed for the casting.
The value came out as 102cm3 that is 0.102 liters.
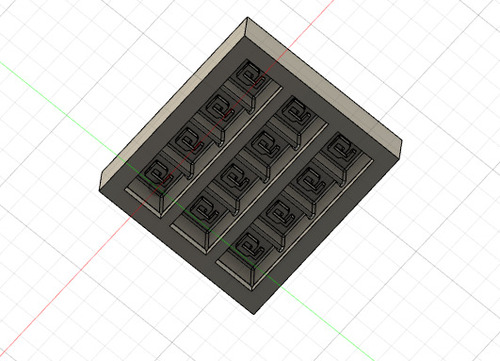
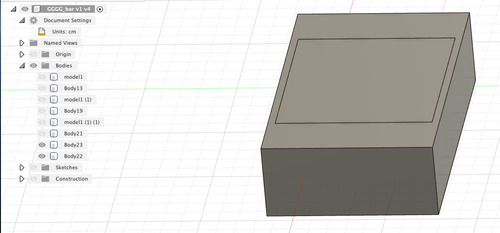
My CAD for the golden master.
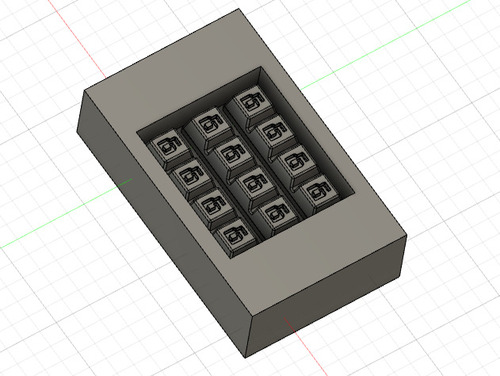
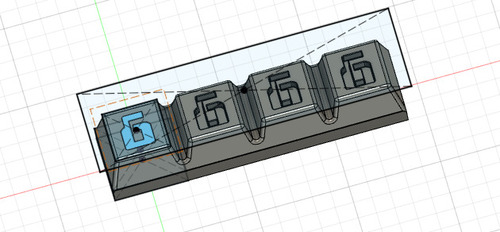
My CAD for the mold itself.
## CAM
The CAM files were also generated in Fusion 360.
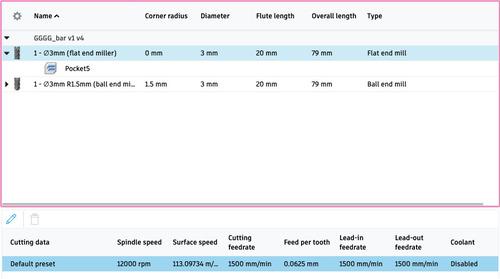
I generated three different operations:
- a pocket clearing with a larger flat end mill to carve out a lot of the material
- a scallop with a ball end mill to do the precision job
- a pocket clearing with a very small ball end mill to make a precision job aroung the embossed letter
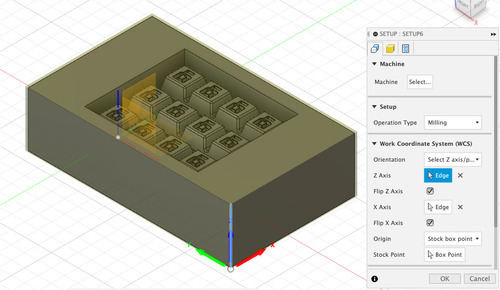
Before starting to generate the different jobs I setup the stock orientation and origin.
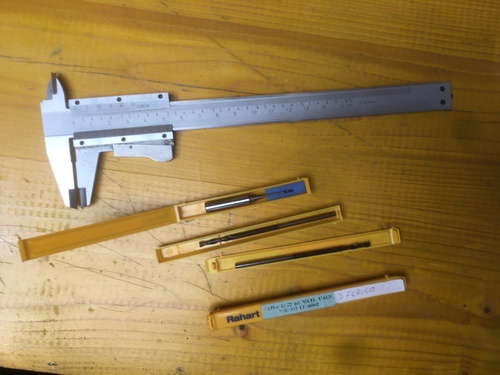
The second step was measuring and adding the different mill bits needed for the job.
This is the first flat end mill bit I used for roughing the most of the material.
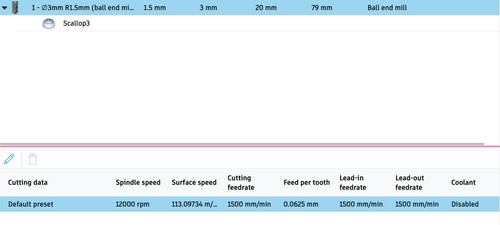
This is the ball end mill I used for the scallop.
I chose a longer mill bit for these two jobs as it would have to cut more deeply into the stock.
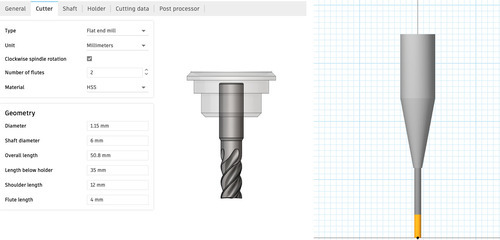
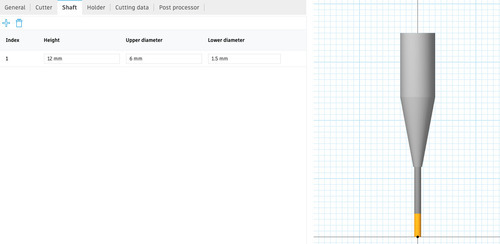
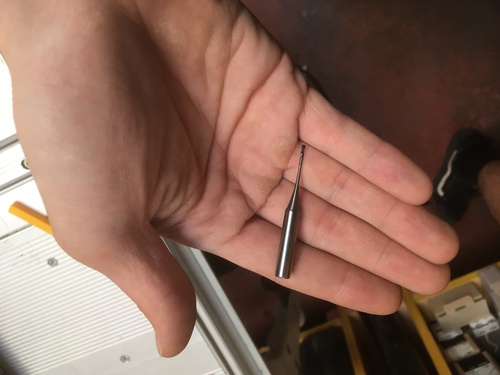
This is the flat end mill bit I used for the precision pocket clearing of the letters.
The current feeds and speeds were calculated for machining foam, I later changed it when I decided to machine wax instead.
First pocket clearing
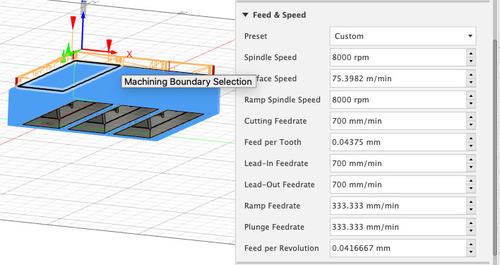
Feeds and speeds for the first pocket clearing on wax.
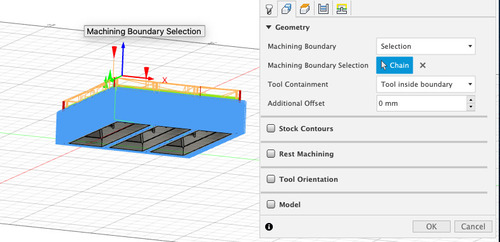
I used the outer edge of the frames as my machine boundary.

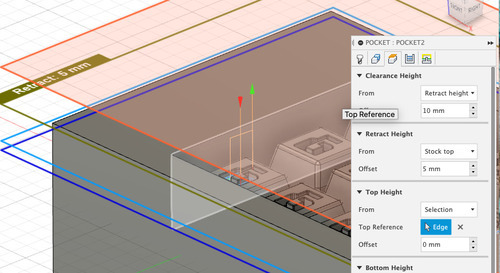
In this case the heights were meant to include the whole of the stock.
Roughing step down was set to 1mm to have a quick job that would take most of the material out.
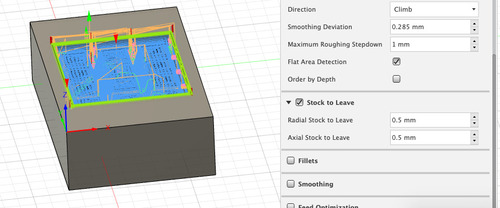
I left half a mm of material around the model to be taken out by the scallop job.
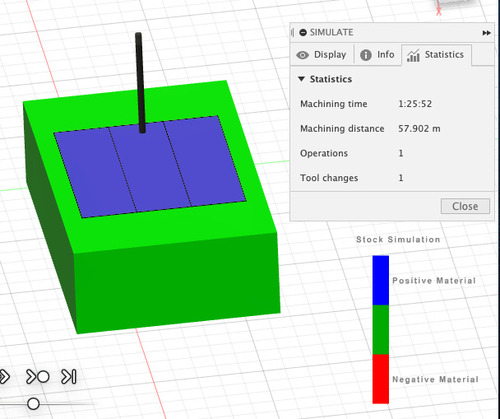
Job preview.
Scallop
Feeds and speeds for the scallop job on wax.
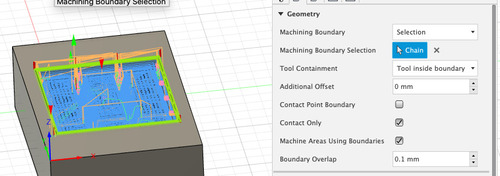
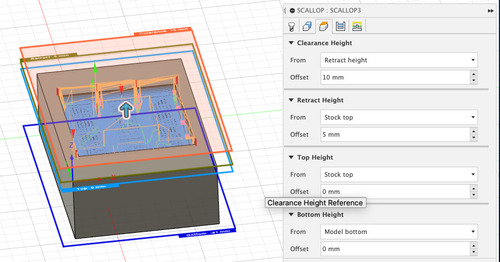
For the scallop job, bothe the boundaries and heights remained the same as the previus job.

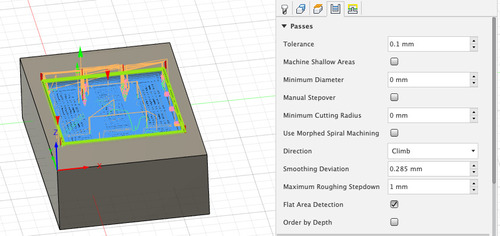
For the scallop I reduced the stepdown by half, and no stock was left to leave.
Job preview.
Second pocket clearing
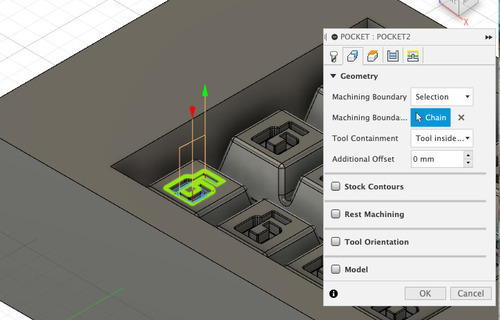
The boundaries for this job were inside the letter outline.
The lower limit for the heights was set as the bottom face of the letters.
Options for stepdown and tolerances.
The pocket job was done on one single letter, I then created a pattern with an horizonal and a vertial repetition based on the build parameters.
Job preview.
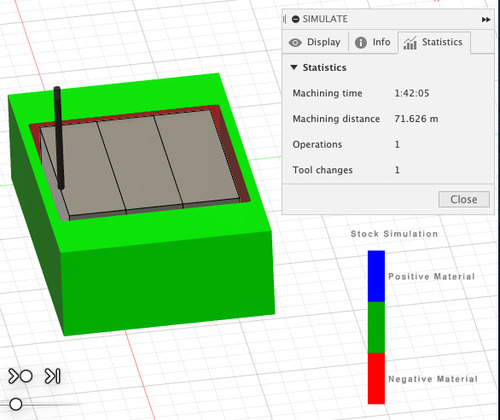
Post-Processing
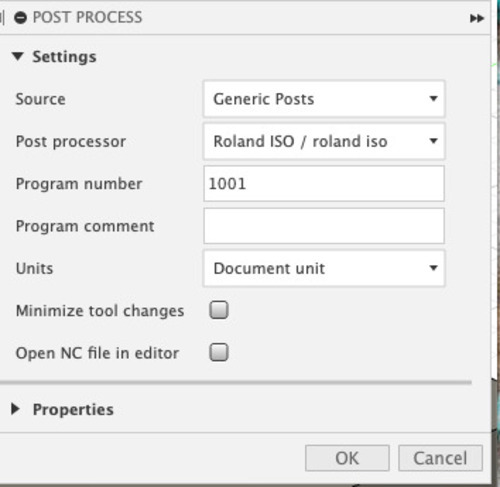
I exported the CAM files using the Roland ISO option as the .rml option would create failed files.
Machining
I positioned the stock as precisely as I could and following the x axis and stock origin I had set on Fusion.
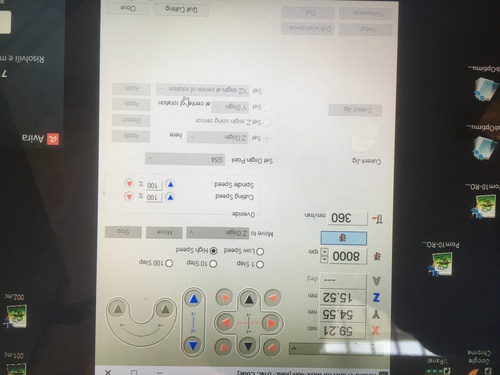
I selected a suggested by my tutor G54 coordinates on the control panel.
X and Y were selected allowing a small offset in order to correct any alignment issue.
As for the Z axis, I tried to be as close as possible in between tool changes.
Every once in a while (when it looked necessary), I vacuumed to excess wax remains from the machine to prevet it from melting by friction. This would have caused the mold to be damaged and potentially kill our beloved Roland mill.
The first two mill bits did not need for the bit holder to be changed, but the third one did.
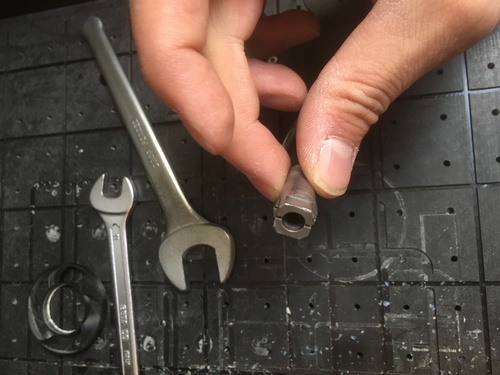
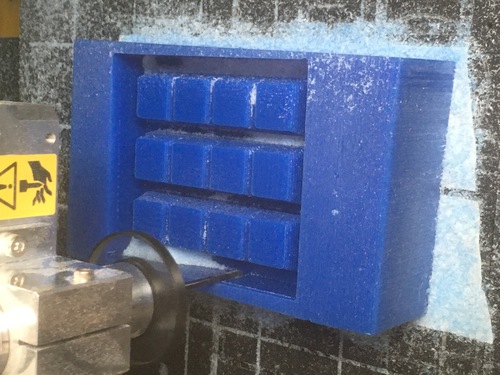
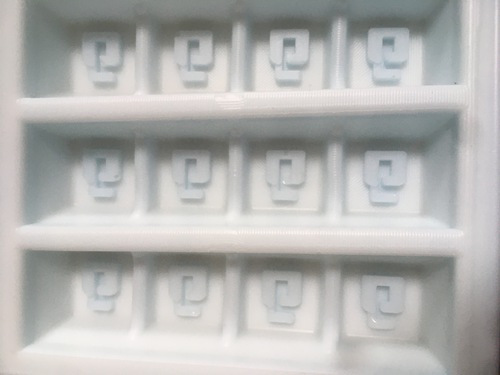
Golden Master
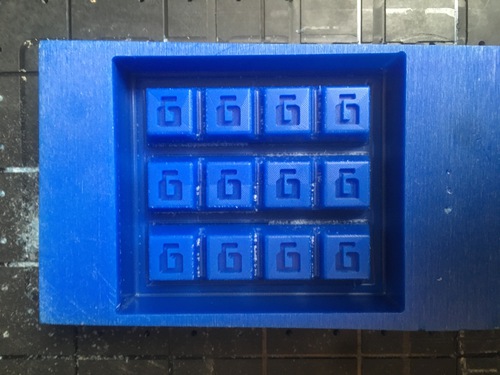
This was the aspect of the master as soon as it came out from the CNC. I later cleaned it with a air compressor.
Preparing the mixture
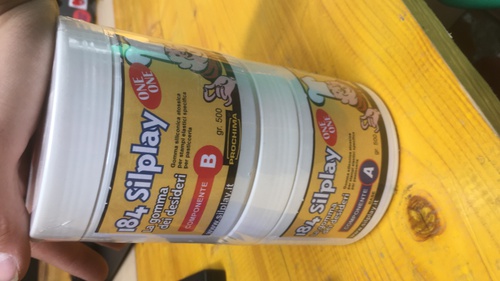
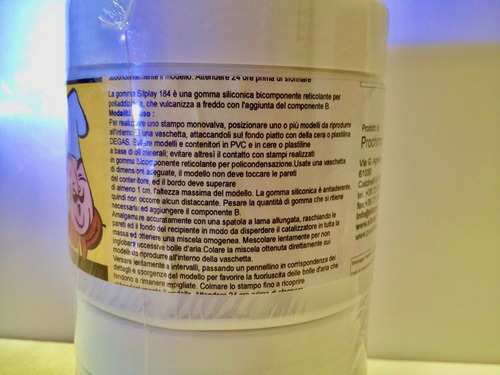
The material I used is called 184-Silplay. It’s a food safe epoxy resin by Prochima.
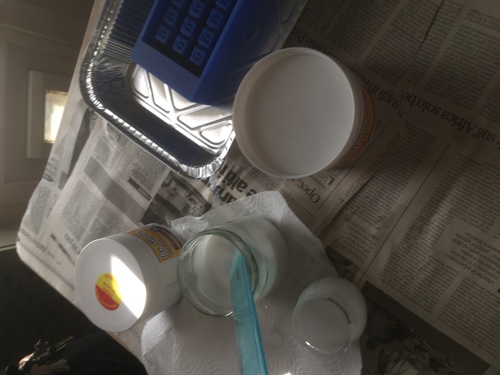
The ratio in between the first component and the second one is 1:1. I therefore poured the same amount in two identical glasses. I then poured the two together in a bigger jar. I slowly mixed the compunds, the mixing was mainly done by keeping my tool straight and in a fixed position and rotating the jar itself.
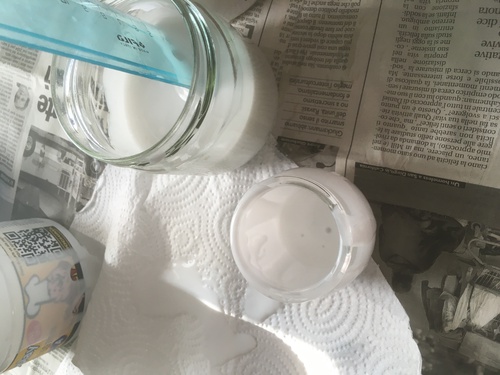
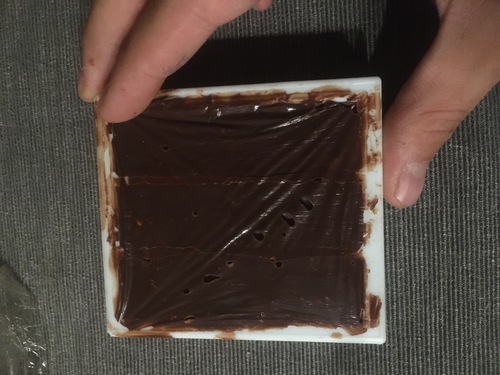
I poured the finalized mix into my golden master, taking a lot of time, in order to be sure every socket was filled and no air was left inside.
Curing the mold
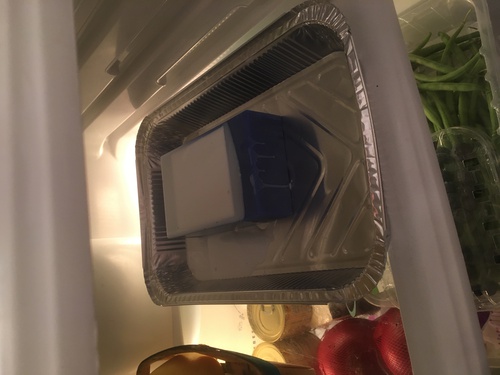
As suggested by the manufacturer I placed my mold in the freezer for about 10 hours, this was done to slow down the curing process and allow time for air bubbles to burst out. After that I left the mold to cure next to a heater and in the sun for the consequent 24hours.
After this waiting time the mold was ready, it came out pretty much perfectly.
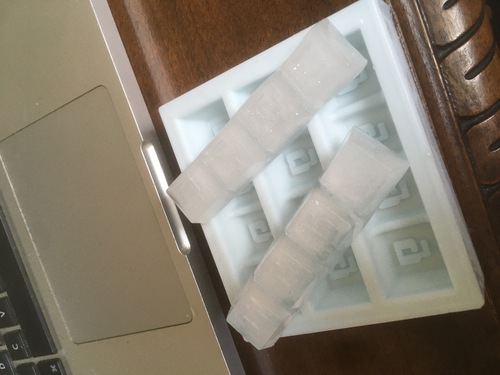
Casting
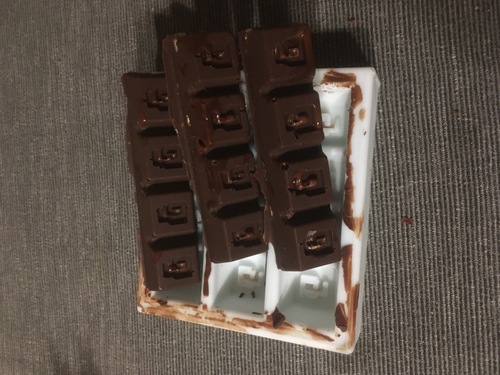
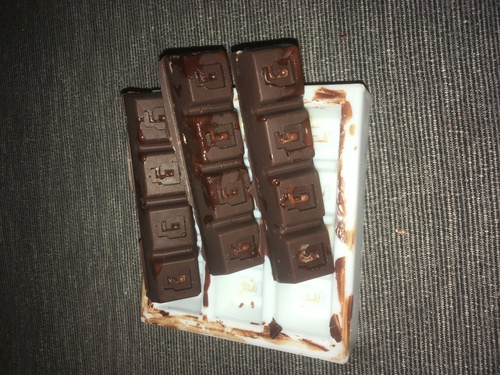
In order to test wether a cast would come out nicely from the mold I decided to start by freezing some water into chocolate bar shaped ice.
I later than moved on to chocolate (with rolled oats filling), the hardest part of this process was to temper the chocolate so it would resist melting for longer times.

Group Assignment
As a group, this week, we were to confront different materials for casting. The main charateristics that we evaluated were:
- A\B component ratio
- Shore value
- toxicity
- curing time
- pot life
The Shore value indicate the grade of elasticity of a Silicone: the higher the number the most resistant to rupture and cutting.
Silplay 184
Silplay 184 by Prochima is a foodsafe siliconic rubber, of translucent white colour. Here‘s a link to the safety .pdf, unfortunately in italian.
- A:B = 1:1 (in weight)
- Shore = 184
- not toxic, foodsafe
- can be used with no protection, but gloves are raccomended
- curing time: (suggested 10 hours in the fridge to eliminate air bubbles) + 24h
- pot life: 30 minutes after mixing
Cristal EP

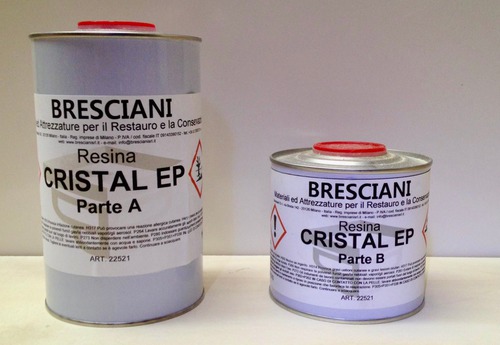
Cristal EP by Bresciani is a two component epoxy resin, transparent in colour.

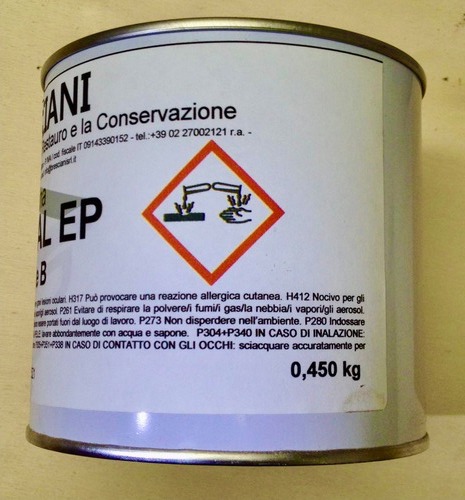
- A:B = 100:40
- highly dense and hard material
- extremely toxic: it will cause harsh burns on your skin and eye membrane, avoid breathing
- one should use this product with a face mask, heavy duty gloves and possibly glasses, as this thing seems to be real nasty
- this product is brutally violent to aquatic enviroments so it is necessary to have the two components react prior to waste disposal
- curing time: 24h + (suggested 4 hours a 60°)
- pot life: 90 minutes
I could not find a proper safety .pdf for this product.
Liquid Mold
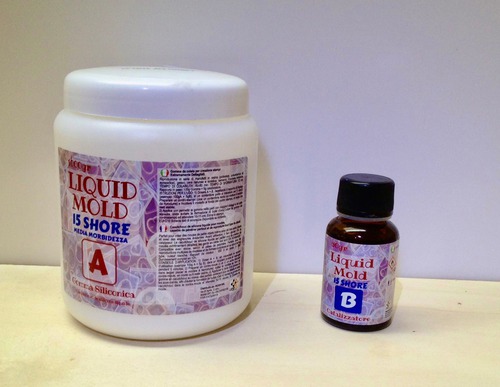
Liquid Mold is a medium hardness sililiconic rubber for detailed models.

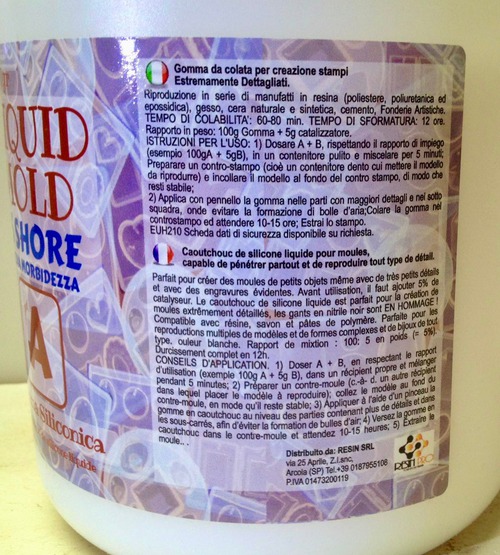
- A:B = 100:5
- Shore = 15
- extremely toxic, fire hazard (B component)
- this product will caus moderate skin burns, very bad eye membrane damages, lease use with gloves, mask and glasses
- curing time: 12h
- pot life: 60\80 minutes
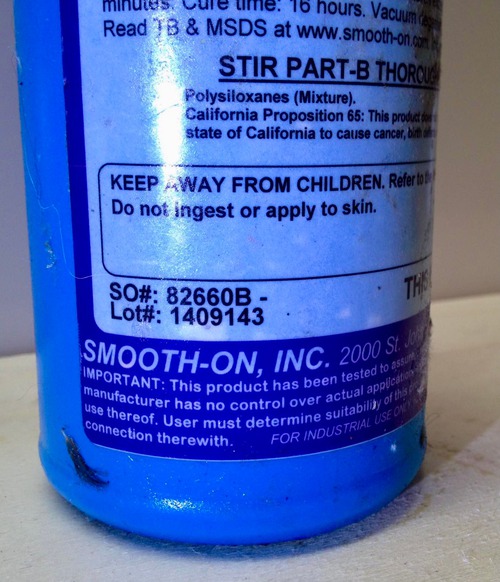
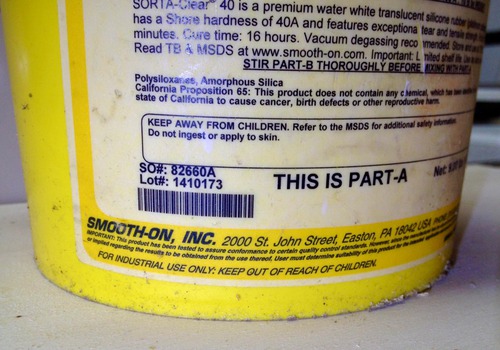
Sortaclear 40
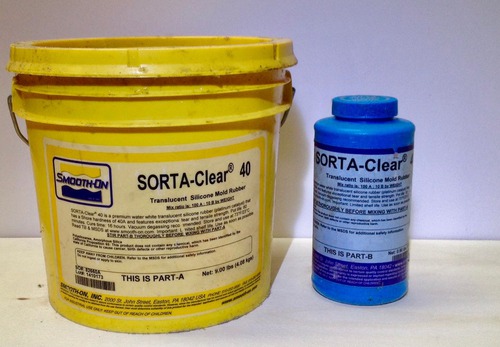
Sortaclear 40 by Smooth-on is a foodsafe siliconic rubber, translucent white\transparent in colour.
- A:B = 100:10
- Shore = 40
- non toxic, foodsafe
- curing time: 16h
- pot life: 60 minutes
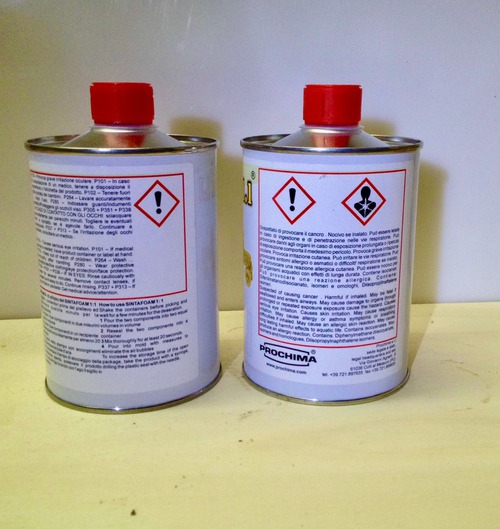
Sintafoam
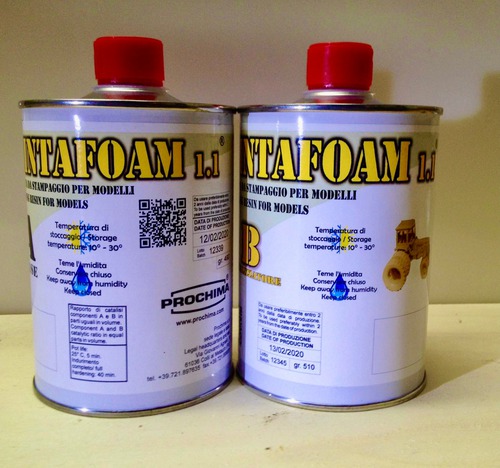
Sintafoam by Prochima is a two component polyurethanic resin, blue in colour
- A:B = 1:1
- high density, hardness
- highly toxic: suspected to cause cancer, can be lethal if ingested of breathed, will cause burns to skin and eye membranes
- please use this product with gloves, glasses and facemask
- long lasting harmful effects on aquatic environments, take care when disposed of
- curing time: 40 minutes
- pot life: 5 minutes
General Indications
As much as it’s self explanatory why one should be using gloves, goggles and masks for all of the more toxic products listed above, I would suggest to at least make use of gloves even for the foodsafe ones. Ventilation is not overly necessary for the non-toxic ones, but it’s extremely important for all others: if not possible to operate these product outdoors, one shoud do it in a large enough environment, that also features openings (such as windows or doors) to the outside. On top of that casting moulds is a very messy business: you may find yourself covered in splashes and stains, so take note of that when gearing up for such tasks, leave no skin uncovered close to the hands, never bring anything contaminated with such product close to your face. Even if it looks like condesed milk do not try and taste even th foodsafe products.