15. Interface and Application programming
Group assignment
For this week we looked at all kinds of different frameworks to use with our esp based boards. We need a web based interface to use in the final project, so we narrowed it down a bit to this list.
- ESP-UI:
- ESP-dash install
- embeded AJAX
- html/javascript
- Bootstrap
- Wifi web interface
- ESP now webserver
After comparing we choose the ESPnow webserver path to further work with. It is a basic html/css/javascript running webserver on the module and leaves also room to use the mesh networking capabilities of the EPSnow framework.
Individual assignment
After programming the RGB diode to burn using a value generated by a force sensitive resistor on my other ESP board, it’s now time to run it over an interface.
The goal:
- set up a html server on ESP board number 1 (hotspot)
- send values from this hotspot to ESP board number 2 (the receiver)
The RGB led has to change color to the values you can set in the html page. The difficult part will be to make the sender both a hotspot as well as a sender.
Let’s find out just how hard it will be!
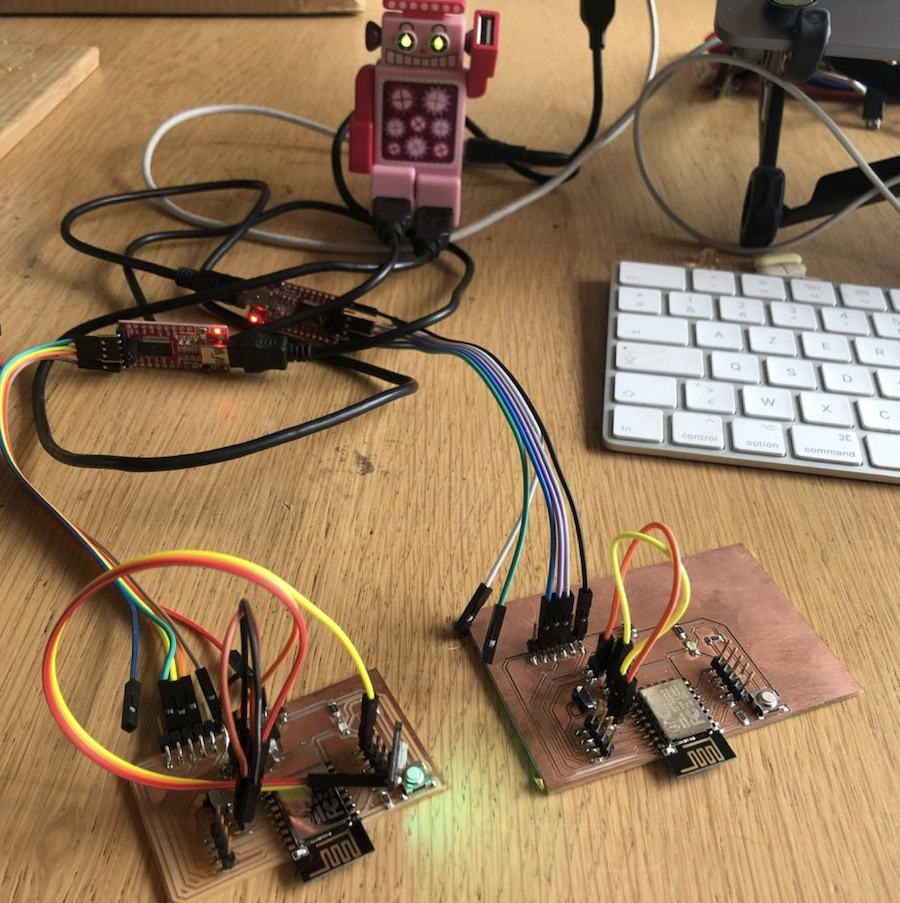
Set up
The set up is the same as last week: two ESP boards, one has the RGB led attached.
Coding the reciever
Let’s start with the easy part. During the embedded networking week looked up the mac addresses from both board. For this week I will need the mac address from the receiving board. I also tested how to set values to the different colors in the RGB during the output week. Combining all this knowledge, let to the following code:
#include <Arduino.h>
#include <ESP8266WiFi.h>
#include <espnow.h>
#include <Adafruit_NeoPixel.h>

#define PIN 13 //=wemos D1

//the Wemos WS2812B RGB shield has 1 LED connected to pin 2
Adafruit_NeoPixel pixels = Adafruit_NeoPixel(1, PIN, NEO_GRB + NEO_KHZ800);

typedef struct message {
   int red;
   int green;
   int blue;
} message;
message myMessage;

void onDataReceiver(uint8_t * mac, uint8_t *incomingData, uint8_t len) {
   Serial.println("Message received.");
   // We don't use mac to verify the sender
   // Let us transform the incomingData into our message structure
  memcpy(&myMessage, incomingData, sizeof(myMessage));
  Serial.print("Red:");
  Serial.println(myMessage.red);
  Serial.print("Green:");
  Serial.println(myMessage.green);
  Serial.print("Blue:");
  Serial.println(myMessage.blue);
  setColor(0,myMessage.red,myMessage.green,myMessage.blue,100);
}
void setup() {
  Serial.begin(115200);
  WiFi.disconnect();
  ESP.eraseConfig();

  // Wifi STA Mode
  WiFi.mode(WIFI_STA);
  // Get Mac Add
  Serial.print("Mac Address: ");
  Serial.print(WiFi.macAddress());
  Serial.println("\nESP-Now Receiver");

  // Initializing the ESP-NOW
  if (esp_now_init() != 0) {
    Serial.println("Problem during ESP-NOW init");
    return;
  }

  //esp_now_set_self_role(ESP_NOW_ROLE_SLAVE);
  // We can register the receiver callback function
  esp_now_register_recv_cb(onDataReceiver);
  pixels.begin();
}
void loop() {
}
void setColor(int led, int redValue, int greenValue, int blueValue, int delayValue)
{
  pixels.setPixelColor(led, pixels.Color(redValue, greenValue, blueValue));
  pixels.show();
  delay(delayValue);
}
This code allows the receiver to recieve a value for the red, green and blue and show them on the neopixel.
Coding the server and sender
Now for the hard part: how can you make an ESP both a server and a sender?
The answer: you need to change the function once you are ready to send your date. You can do this with the following piece of code.
#include <espnow.h>
#include <ESP8266WiFi.h>
#include <ESP8266WebServer.h>

// Replace with your network credentials (STATION)
const char* ssid = "RGB color";
//const char* password = "1234";


typedef struct message {
   int red;
   int green;
   int blue;
} message;

message myMessage;

// ESP8266 Mac address (first peer)
uint8_t broadcastAddress[] = {0xDC, 0x4F, 0x22, 0x6E, 0x35, 0x3A};

ESP8266WebServer server(80);


const char index_html[] PROGMEM = R"rawliteral(
<!DOCTYPE HTML><html>
<head>
  <title>RGB led color picker</title>
  <meta name="viewport" content="width=device-width, initial-scale=1">
   <link rel="icon" href="data:,">
  <style>
  html { font-family: Helvetica; display: inline-block; margin: 0px auto; text-align: center;}
    h1 {  font-size: 2rem;}
    body {  margin: 0;}
    .topnav { overflow: hidden; background-color: ##ffe4e1; color: white; font-size: 1.7rem; }
    .content { padding: 20px; }
    .card { background-color: white; box-shadow: 2px 2px 12px 1px rgba(140,140,140,.5); }
    .cards { max-width: 700px; margin: 0 auto; display: grid; grid-gap: 2rem; grid-template-columns: repeat(auto-fit, minmax(320px, 1fr)); }
    .reading { font-size: 2.8rem; }
  .button { background-color: ##f4f4ae; border: none; border-radius: 10px; color: white; padding: 16px 40px; text-decoration: none; font-size: 30px; margin: 2px; cursor: pointer;}
  .button2 {background-color: ##f4f4ae;}
  .button:hover {background-color: #555555;color: white;}
   .button:active { color: ###caf0b3; }
   .red  { color: red; }
   .green { color: green; }
   .blue { color: blue; }
.slidecontainer { max-width: 700px; margin: 0 auto; display: grid; grid-gap: 1rem; grid-template-columns: repeat(auto-fit, minmax(320px, 1fr)); }
.slider.blue { color: blue; }
.slider {
  -webkit-appearance: none;
  width: 75%;
height: 15px;
  border-radius: 5px;
  background: #555555;
  outline: none;
  opacity: 0.7;
  -webkit-transition: .2s;
  transition: opacity .2s;
}

.slider:hover {
  opacity: 1;
}

.slider::-webkit-slider-thumb {
  -webkit-appearance: none;
  appearance: none;
  width: 25px;
  height: 25px;
  border-radius: 30%;
  background: #FF69B4;
  cursor: pointer;
}

.slider::-moz-range-thumb {
  width: 25px;
  height: 25px;
  border-radius: 30%;
  background: #FF69B4;
  cursor: pointer;
}
</style>
</head>
<body  onload="readVars()">
  <div class="topnav">
    <h1>RGB led color picker</h1>
  </div>
  <div class="content">
    <div class="slidecontainer">
    <p class="red">Red : <span id="redValue"></span></br></br><input type="range" min="1" max="255" value="Rslider.value" class="slider" id="red"></p>
    <p class="green">Green : <span id="greenValue"></span></br></br><input type="range" min="1" max="255" value="Gslider.value" class="slider" id="green"></p>
    <p class="blue">Blue : <span id="blueValue"></span></br></br><input type="range" min="1" max="255" value="Bslider.value" class="slider" class="blue" id="blue"></p>
  </div>
    <div class="cards">
    <div class="card">
    <p><a onclick="location.href=this.href+'/dat?n=1&r='+Rslider.value+'&g='+Gslider.value+'&b='+Bslider.value;return false;"><button class="button">Set color</button></a></p>
    </div >

  </div>
  <div class="cards">

  </div>

  </div>

<script>

function getUrlVars() {
    var vars = {};
    var parts = window.location.href.replace(/[?&]+([^=&]+)=([^&]*)/gi, function(m,key,value) {
        vars[key] = value;
    });
    return vars;
}

var Rslider = document.getElementById("red");
var Gslider = document.getElementById("green");
var Bslider = document.getElementById("blue");

var Routput = document.getElementById("redValue");
var Goutput = document.getElementById("greenValue");
var Boutput = document.getElementById("blueValue");

Routput.innerHTML = Rslider.value;
Goutput.innerHTML = Gslider.value;
Boutput.innerHTML = Bslider.value;

Rslider.oninput = function() {
  Routput.innerHTML = this.value;
}
Bslider.oninput = function() {
  Boutput.innerHTML = this.value;
}
Gslider.oninput = function() {
  Goutput.innerHTML = this.value;
}

function readVars() {
  Rslider.value = document.getElementById("redValue").innerHTML = getUrlVars()['r'];
  Gslider.value = document.getElementById("greenValue").innerHTML = getUrlVars()['g'];
  Bslider.value = document.getElementById("blueValue").innerHTML = getUrlVars()['b'];
Routput.innerHTML = Rslider.value;
Goutput.innerHTML = Gslider.value;
Boutput.innerHTML = Bslider.value;

}
</script>
</body>
</html>)rawliteral";

void sendMsgtoNodes() {
  Serial.println("send esp now message");
  Serial.println(myMessage.red);
  Serial.println(myMessage.green);
  Serial.println(myMessage.blue);
  esp_now_send(NULL , (uint8_t *) &myMessage, sizeof(myMessage));

}

void setup() {
  // Initialize Serial Monitor
  Serial.begin(115200);
 // Set the device as a Station and Soft Access Point simultaneously
  WiFi.mode(WIFI_AP_STA);

  WiFi.softAP(ssid);
  IPAddress IP = WiFi.softAPIP();
  Serial.print("AP IP address: ");
  Serial.println(IP);

  // Init ESP-NOW
  if (esp_now_init() != 0) {
    Serial.println("Error initializing ESP-NOW");
    return;
  }
  esp_now_set_self_role(ESP_NOW_ROLE_COMBO);
  esp_now_add_peer(broadcastAddress, ESP_NOW_ROLE_COMBO, 1, NULL, 0);

  // Once ESPNow is successfully Init, we will register for recv CB to
  // get recv packer info
  //  esp_now_register_recv_cb(OnDataRecv);

  server.on("/", HTTP_GET, handleRoot);        // Call the 'handleRoot' function when a client requests URI "/"
  server.on("/dat", HTTP_GET, handleData); // Call the 'handleData' function when a GET request is made to URI "/dat"
  server.onNotFound(handleNotFound);

  server.begin();
}

void loop() {
  server.handleClient();
  static unsigned long lastEventTime = millis();
  static const unsigned long EVENT_INTERVAL_MS = 5000;
  if ((millis() - lastEventTime) > EVENT_INTERVAL_MS) {
    //events.send("ping", NULL, millis());
    lastEventTime = millis();
  }
}

void handleRoot() {
  server.send(200, "text/html", index_html);
  // debug // Serial.println("server show index");
}

void handleData() {
  String inputMessage = "No message sent";
  String inputParam = "none";
  // debug //Serial.println("server handle data ");
  if (server.arg("r")) {
    inputMessage = server.arg("r");
    myMessage.red = inputMessage.toInt();
  }
  if (server.arg("g")) {
    inputMessage = server.arg("g");
    myMessage.green = inputMessage.toInt();
  }
  if (server.arg("b")) {
    inputMessage = server.arg("b");
    myMessage.blue = inputMessage.toInt();
  }

  // debug //Serial.print("inputMessage = ");
  // debug // Serial.println(inputMessage);
sendMsgtoNodes();
  server.send(200, "text/html", index_html);
}

void handleNotFound() {
  server.send(404, "text/plain", "404: Not found"); // Send HTTP status 404 (Not Found) when there's no handler for the URI in the request
}
Once the code has been uploaded to the ESP, you need to set your wifi network to the network defined in the code. In this case that’s “RGB color”. I didn’t set a password, but you could if you wanted to. (I would definitely set a password if you want to use this for IOT modules connected to your own wifi network.)
The code generates an IP address in the serial monitor.
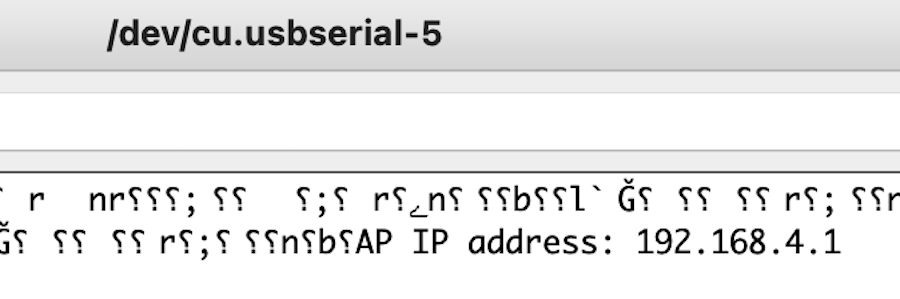
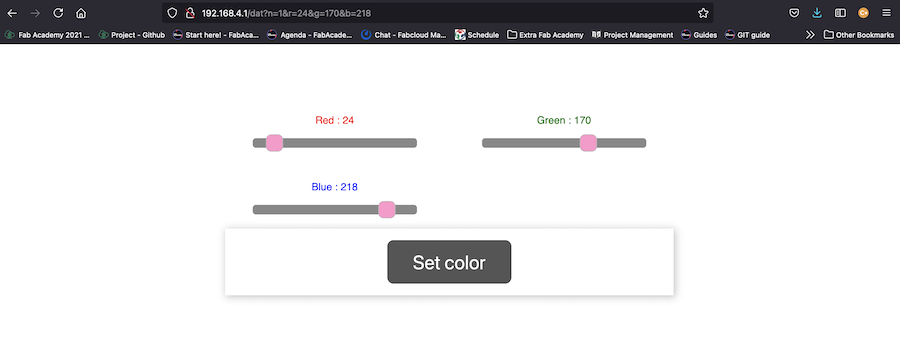
You can simply type in the address in the browser and it will load the programmed html page in the browser.
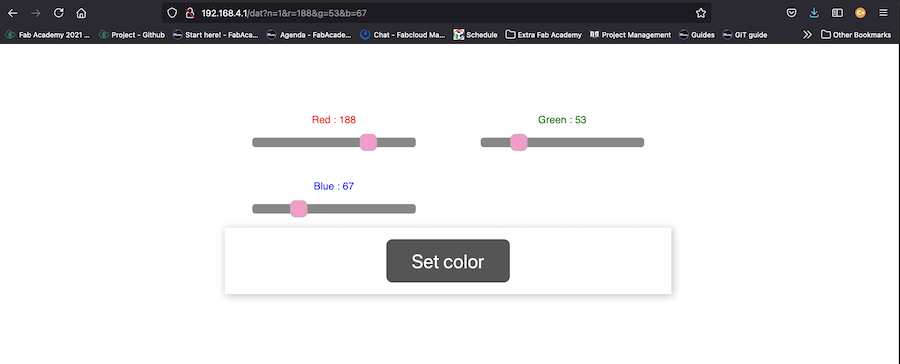
The page looks super simple, in the url you can see the values change once you press send. Of course the RGB led changes color on the other board. Thankfully!
Nous helped me make a little video to show how the disco works.