16 - Wildcard: Make a kitesurfing harness with composites
This week we focus on composites and how to apply this. We got a introduction of the possibilities by our instructor Henk. Before we start doing tests with apoxy on materials we needed to do some preparations and read the safety sheet of the epoxy we used for testing. We tested with two different epoxy. Epoxy cast and Super Sap.
Requirements for this week
- FabAcademy:
- Make the design on a computer you will make on a machine (it is not about arts and crafts)
- Harm:
- Make a fitting cast to fit on my back
- Make it stiff enough
- Make it so strong I can rely my life on it
- Make it waterproof
Assignments
- individual: make something on the computer, create on the CNC mold with composites
- group: test different composites
Content
- Group Assignment
- 1. 3D design for lamination
- 2. Get our ShopBot CNC machine ready for Milling
- 3. Import in Vcarve and create G-code
- 4. PrinterBot & running the machine
- 5. Preparing the model for lamination
- 6. Result and cutting the laminated material
- 7. New hardshell
- Conclusions & files
Group Assignment
We are testing different materials. Make soft materials hard.
| Fiber | Resin | |
- Different fibers
- Different methods of getting the air/resin out
- Result = different strengths
Read all about our group assignment
Lessons learned
- More fibers make it stronger
- It is not easy to get the remaining epoxy out with the vacuum bag
- Thick fibers make it even more stronger
1. 3D design for lamination
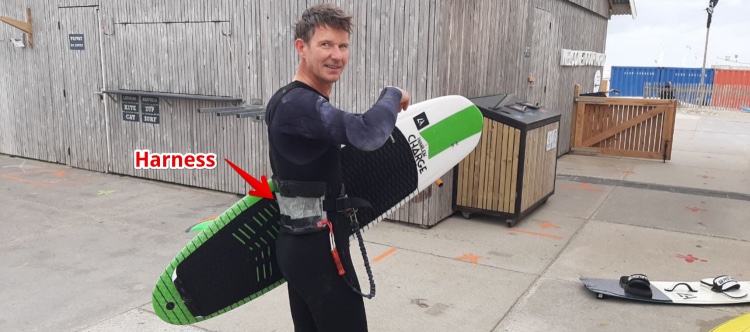
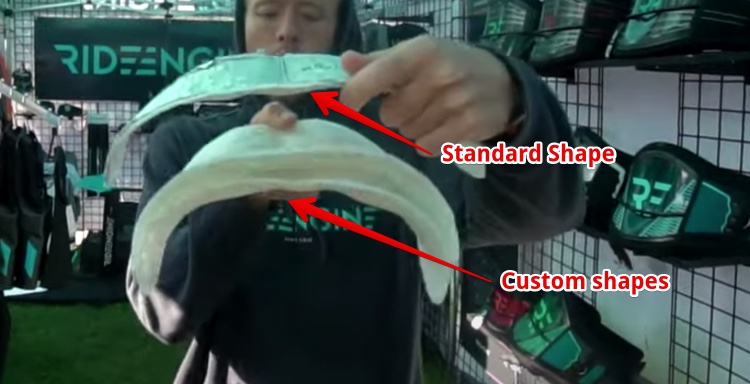
I’m a big fan of the RideEngine Kite Harnesses. A kite harness is the strap that attaches the kite to your body. Since a kite can easily pull you in the air it is really important the fit is perfect. Ride engine was one of the first companies started to make custom made hardshell harnesses. Nowadays they made as casual shapes. In this video it is show that the ‘average shape’ does not look like the average shape fits all.
I think this is a huge difference
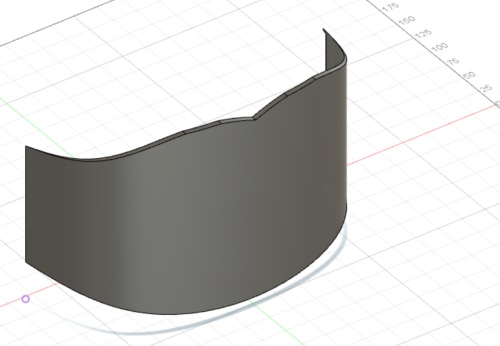
How to measure my ‘fit’?
One way it to put a piece of wax in your back and mold around this. But we are supposed to use digital fabrication techniques, so no option there. I tried to measure my back and make a model in Fusion. But there are too many dimensions.
Scanning my back
This is the place where the harness should fit 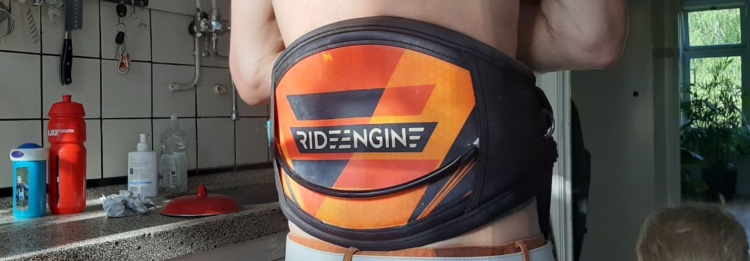
My girlfriend made markers to get make the shape more visible for the 3D scanner and to know what area we should scan.
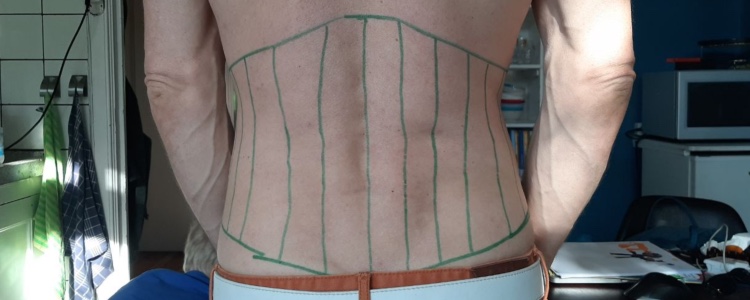
Hyejin Scanned my back using the Sence hand-scanner we learned to use in the 3D printing and scanning week
The result was .obj file 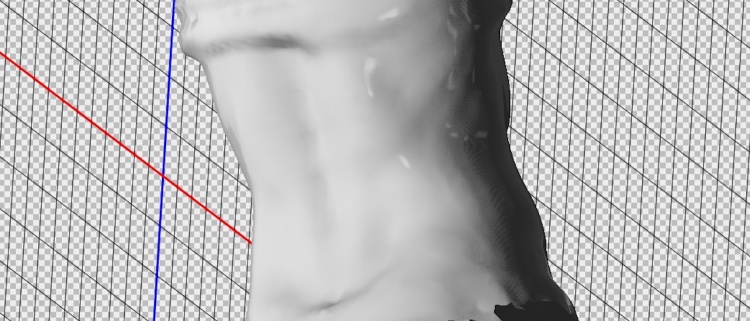
I imported the file in Fusion 360 and exported the STL file 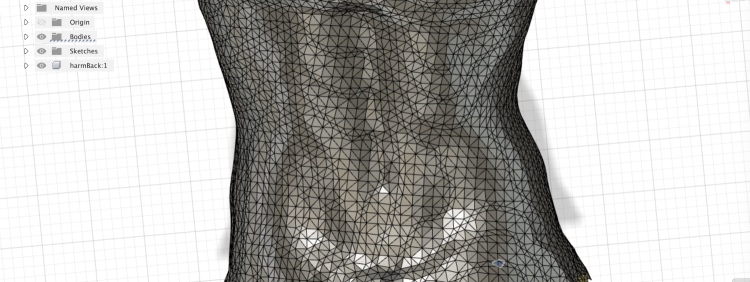
2. Get our ShopBot CNC machine ready for Milling
I used Polyisocyanate, (PIR) isolation foam to mill. This material is non toxic and easy to mill. I attached the material to the sacrificial beth using double sided tape and pieces of wood. Same as last week, but not with wax this time.
Fix piece of 120 mm Resol hard foam to the sacrificial layer: 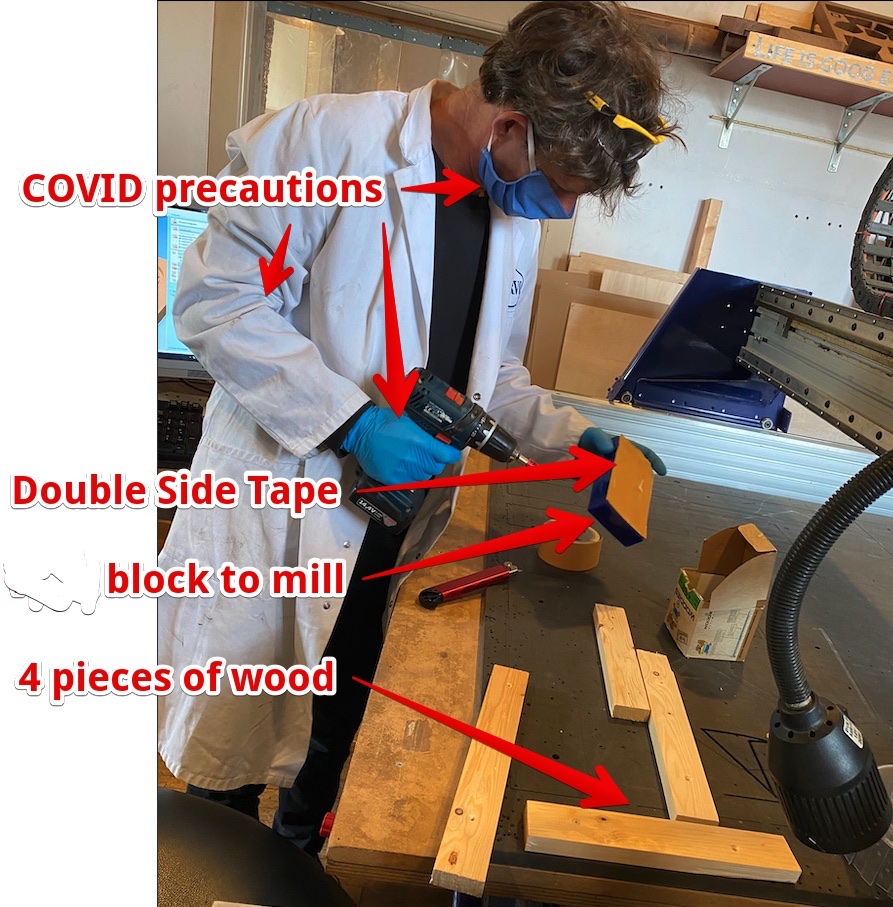
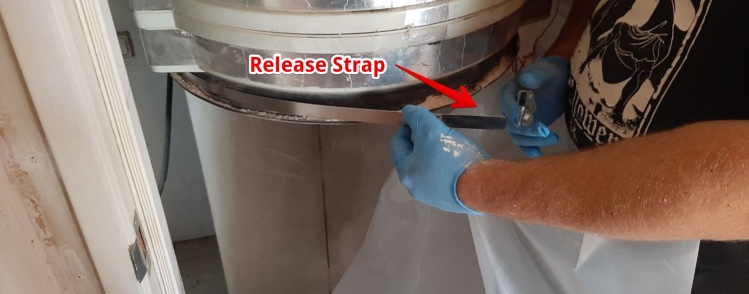
The changing of the bag is not easy and you best do it with two people. Make sure the bag is closed by the strap.
Attach the copper wires to prevent an static discharge 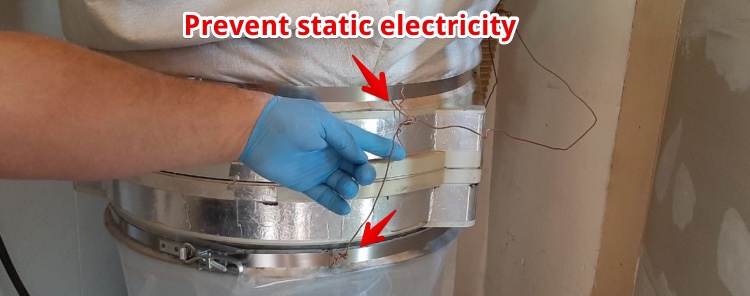
3. Import in Vcarve and create G-code
Since I had troubles cutting the STL in Fusion, I used Vcarve to only cut a specific part of the scan.
I imported the entire 3D model. But since the material is restricted It only created toolpaths for the model in the material. 
But I had to thick the ‘discard data Below Plane’ if I did not do it It gave me an error the model was to thick.
I could not understand why the Zero pane in the material is not on the Z-zero,
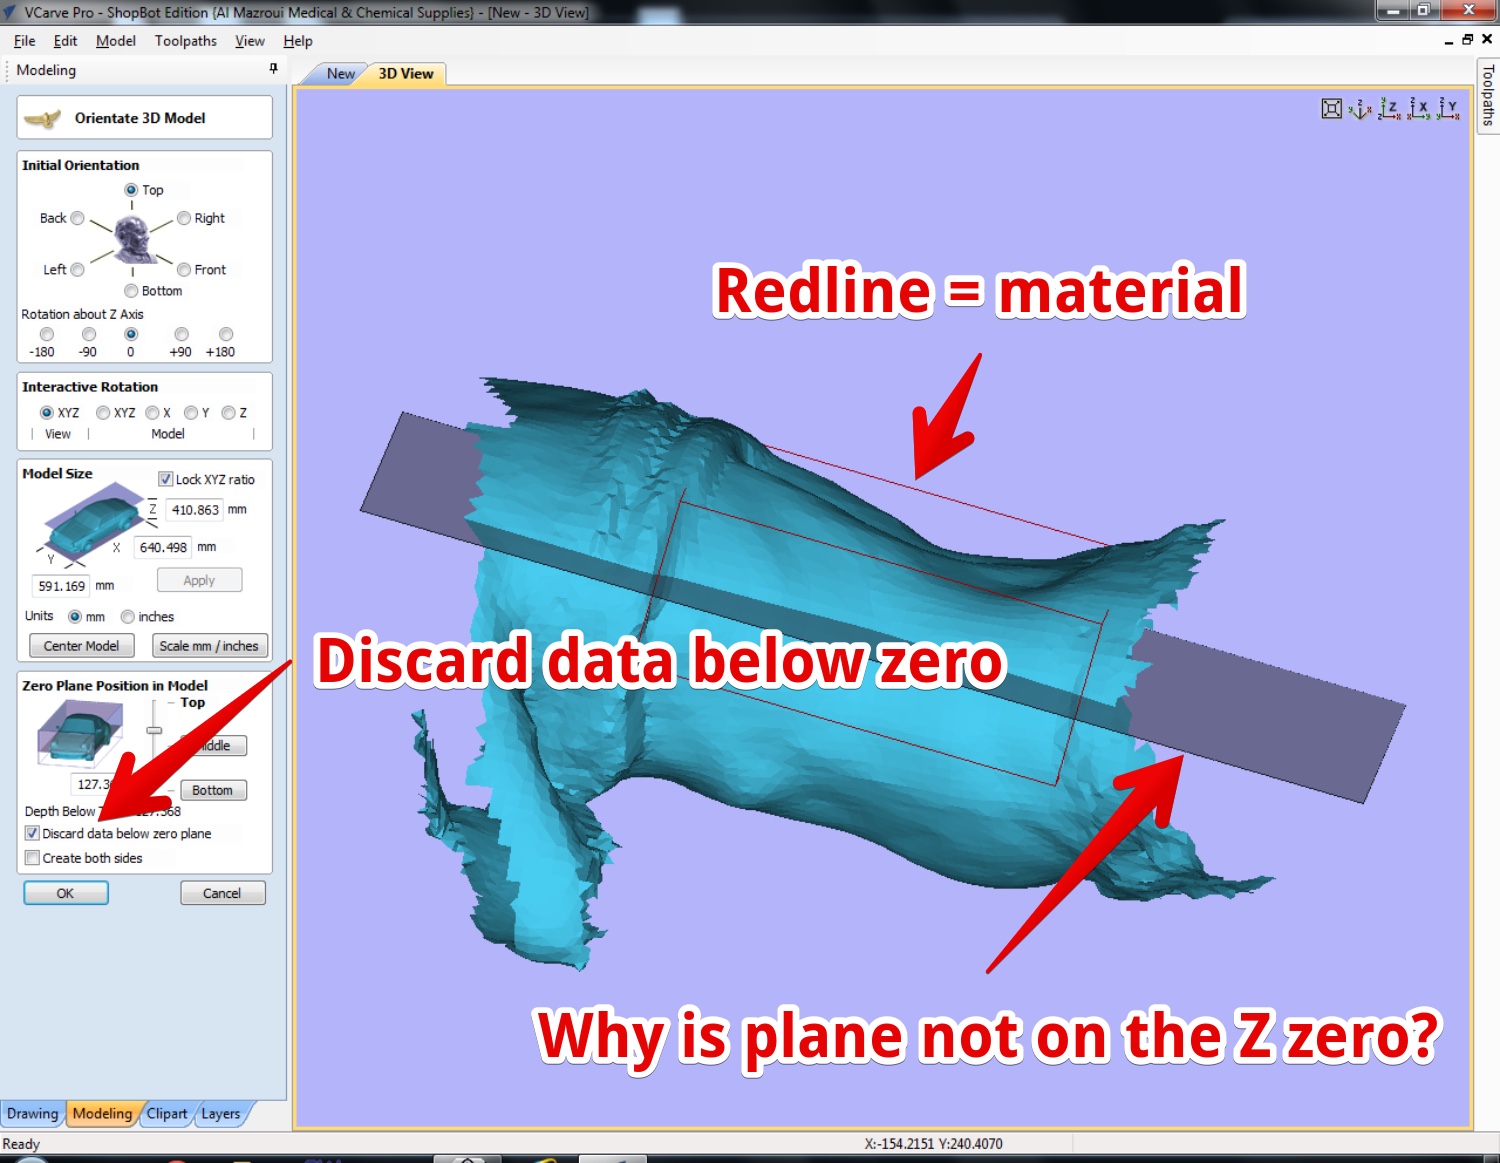
But in the workflow on the Vcarve website it is explained: “ Discard data below zero plane Checking this will remove any data below the original Zero level within the imported 3D model. If the model is effectively a negative model such as a dished or recessed design with a flat plane then you should uncheck this option to make sure you retain the 3D data below the plane.”
I checked back in my Fusion File. And this solves it. I just have to get the Model higher (in Z): 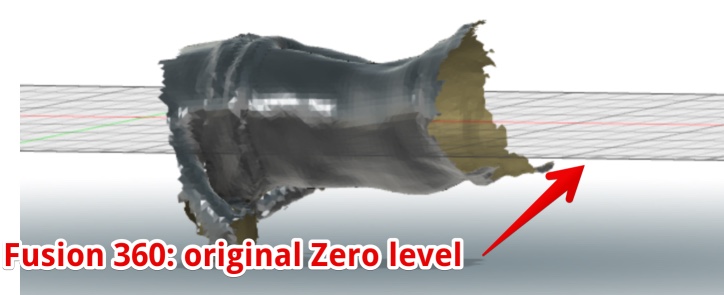
Mill settings:
I generated a roughing toolpath using this mill settings 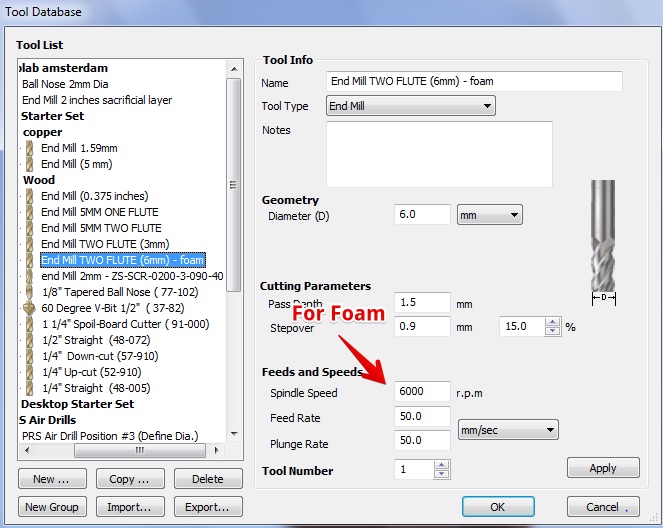
While the machine (shopbot) was running it would take 20 hours. I stopped the machine and changed the speed created a new toolpath 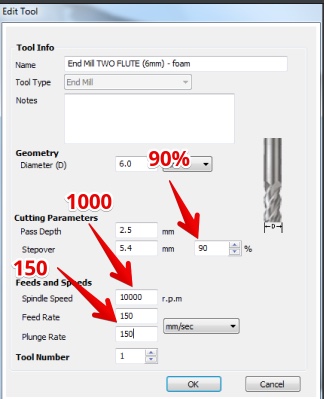
For the finishing toolpath I used these settings: 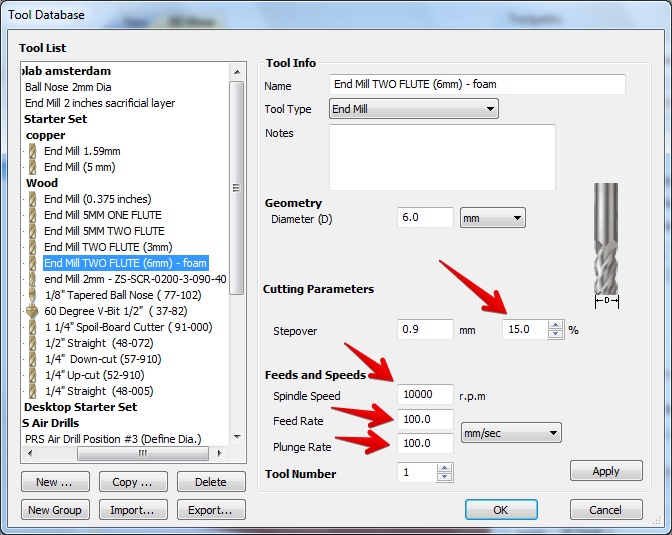
This are the generated toolpaths: 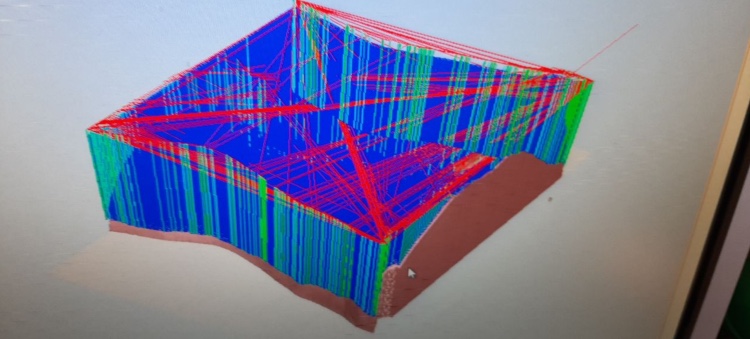
4. PrinterBot & running the machine
I used my own manual from the CNC week how to get the settings on the Shopbot ready.
While Milling
The first thing the CNC did was cut straight thought the material 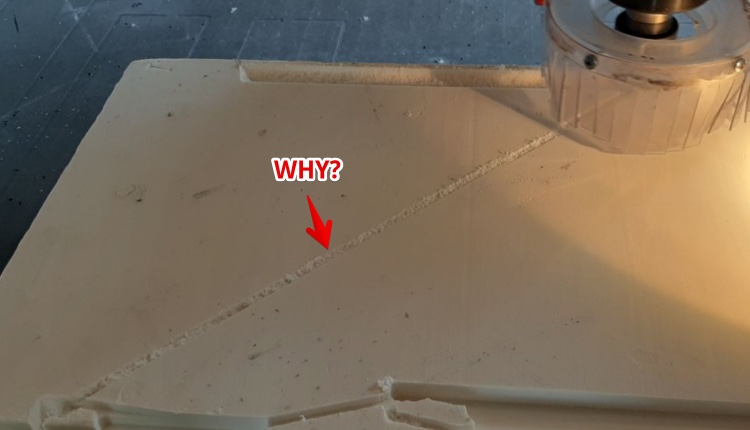 Henk and I spoke about this, this cut is the travel of the tool. The tool should be above the material (see toolpaths above). So the Z-ax must be changed after calibration. I noticed a kind of strange ‘banging’ of the Machine before I started the Mill. This was when I went up (Z) more than the machine could go.
I changed the speed up to make sure I could finish on time. This had no negative effect on the result while it is foam. I would not like to do this speeds with wood. 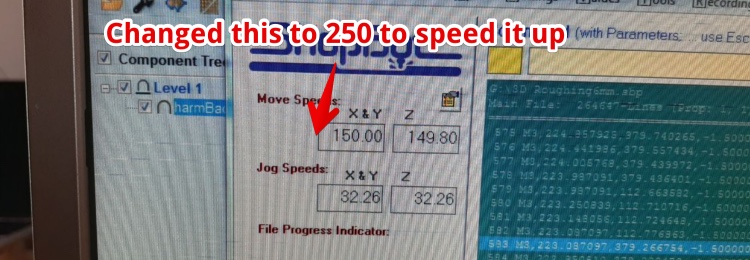
Get the steep material away
The milling job was 90 mm while the mill is only 50, so I had to pause the machine a couple of times to get the sides off with a saw: 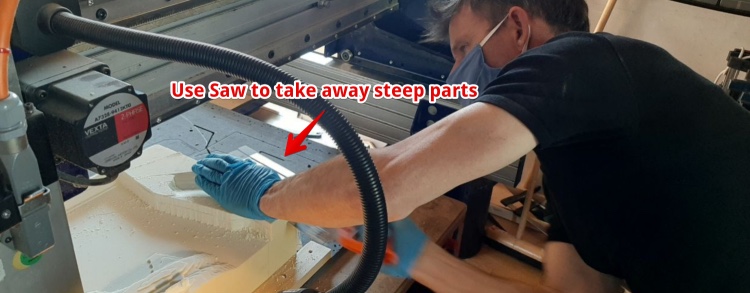
Cut my back!
While still on the roughing path. I paused the CNC to saw away material. When resuming the job the CNC desided to travel in a straght line from the previous path. So it went straight trough my back! 
Hero shot: Result of Milling job
5. Preparing the model for lamination
I fixed the cut and glued it on an other 120mm block and take the remaining material away. I Used Bison Montagekit: 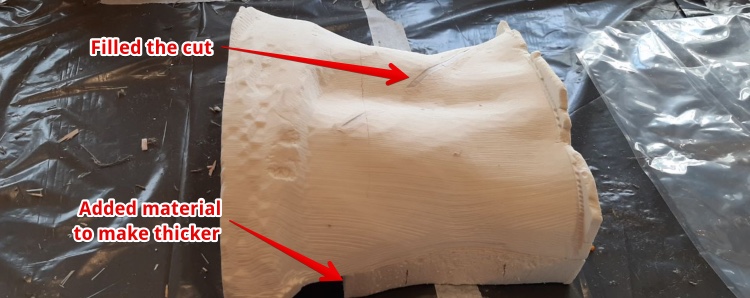 w
w
The Fibreglass we have at the Waag is a multiaxial 600 grams type. Multiaxial means it has strength in every direction of 45°. In my case I need strength over the long side of the harness, so 
Since I normally wear a 5mm wetsuit I decided to first put a layer of EVA foam over the model: 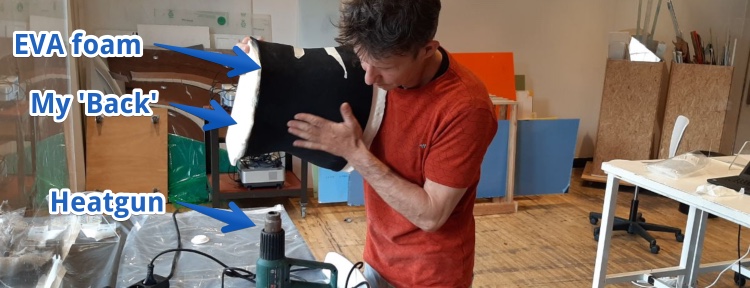
I wrapped my back in plastic foil and Vaseline so the epoxy will not stick: 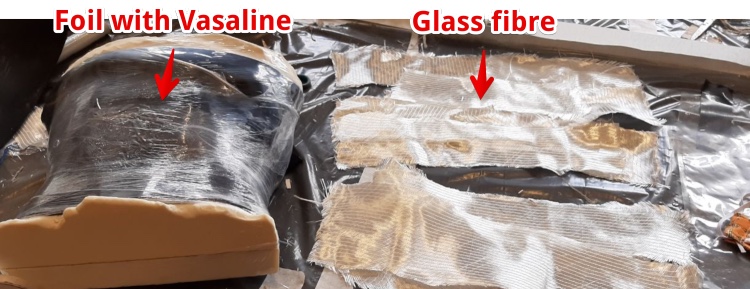
Made 200 milliliter of Tarbinder Epoxy (was tested and described in this weeks Group Assignment). Used a brush to apply the epoxy to the fiberglass. Then I applied an extra layer of EVA foam, to be inbetween both layers of composites. This will make it stronger but It will still be light. 
I applied the outer layer of epoxy-Fiberglas and Wraped it all in Household foil. Then Put it in the vacuum bag: 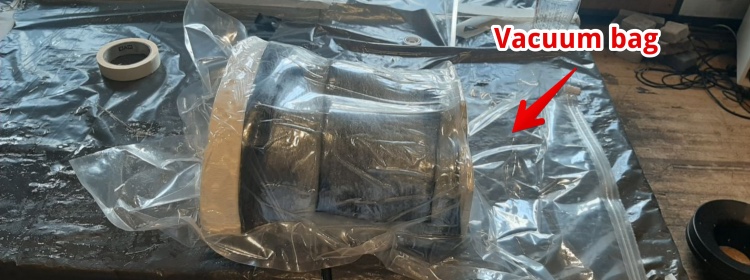
Total of layers:
- Center: PIR (Polyisocyanates) foam (not part of the composite)
- Eva foam (not part of the composite)
- Household foil (not part of the composite)
- Two layers Fiberglass-Epoxy
- Layer of EVA foam (body for the harness)
- Two layers Fiberglass-Epoxy
- Household foil (not part of the composite)
- Vacuum bag (not part of the composite)
I was not able to put Vasaline inbetween the Fiberglass-Epoxy and the final layer of household foil. But having remains of household foil sticking on the outer layer is not a problem.
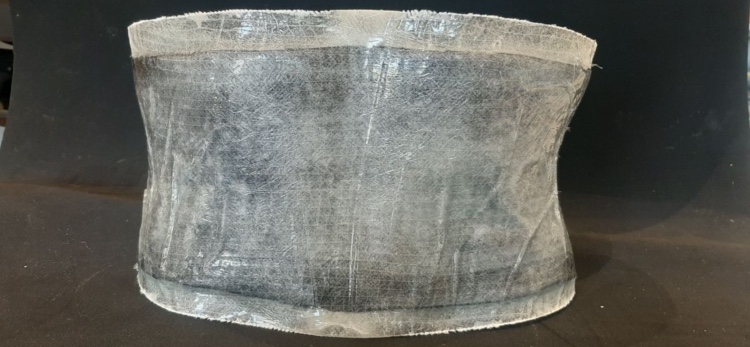
6. Result and cutting the laminated material
I could take the composite out. Only the folded ends on my model I had to take away with a saw. 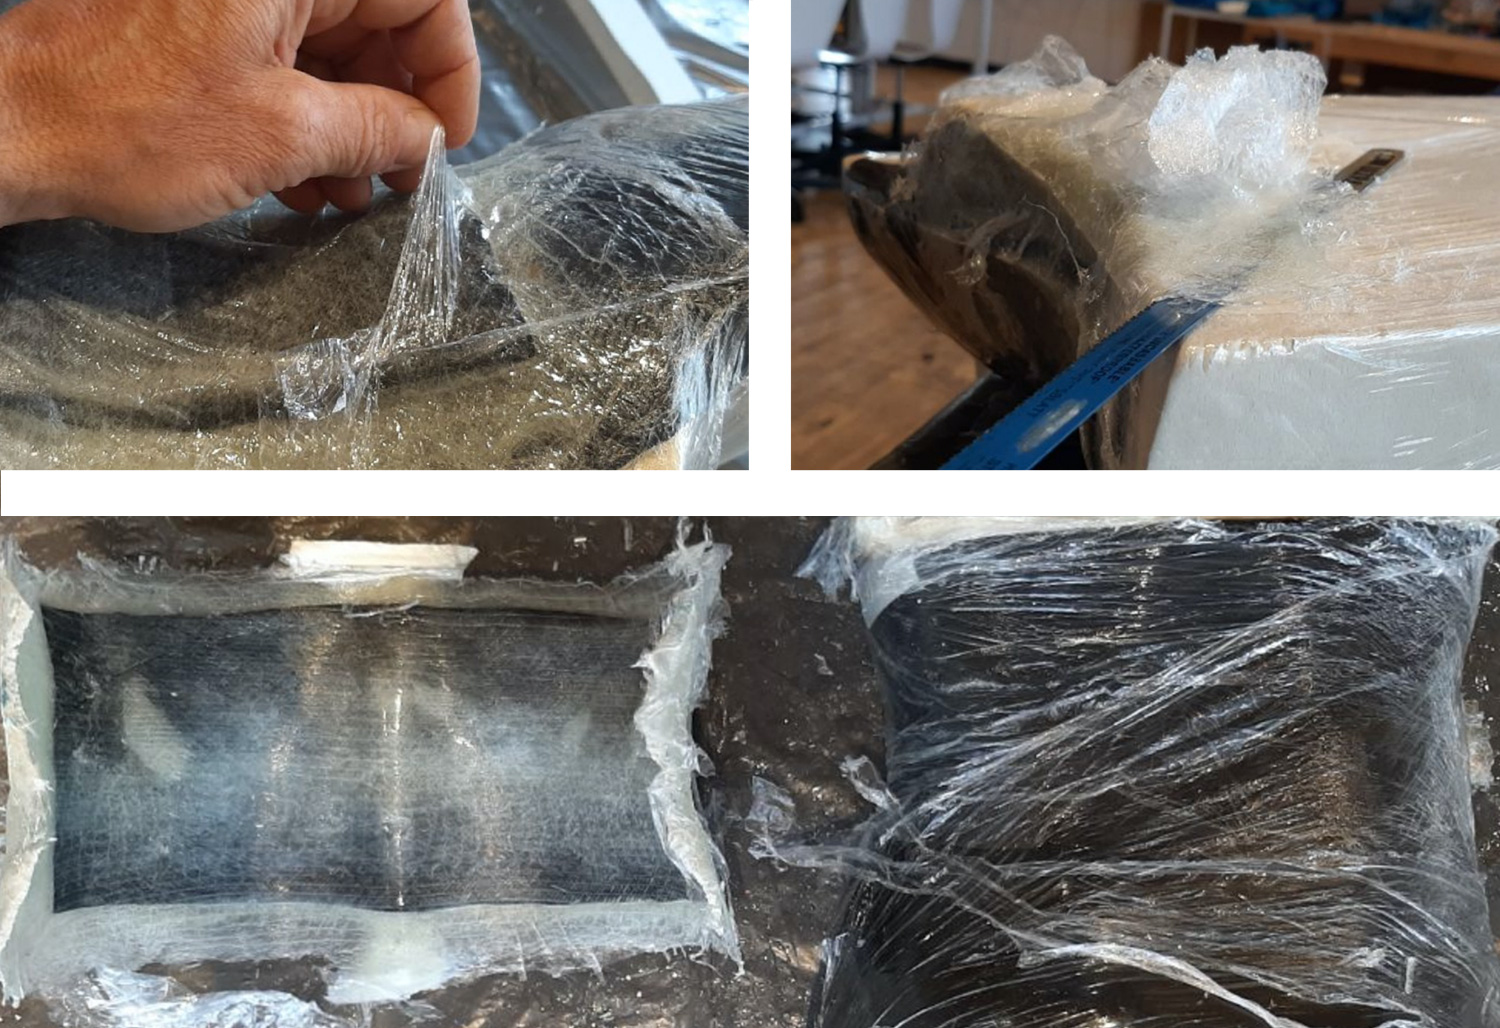
I used the sanding machine to finish it 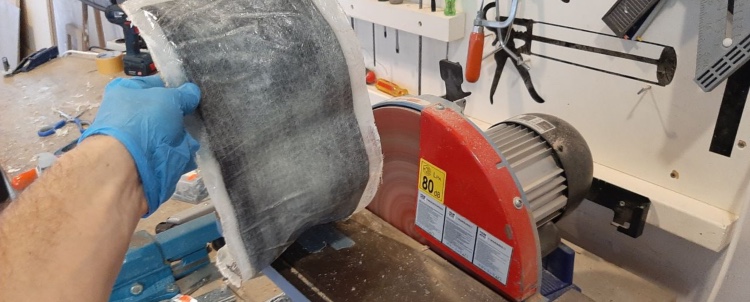
The weight is 343 gram. 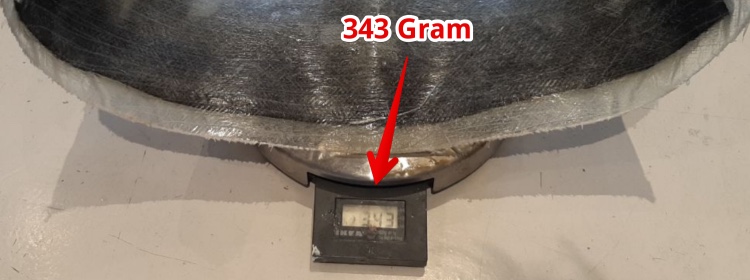
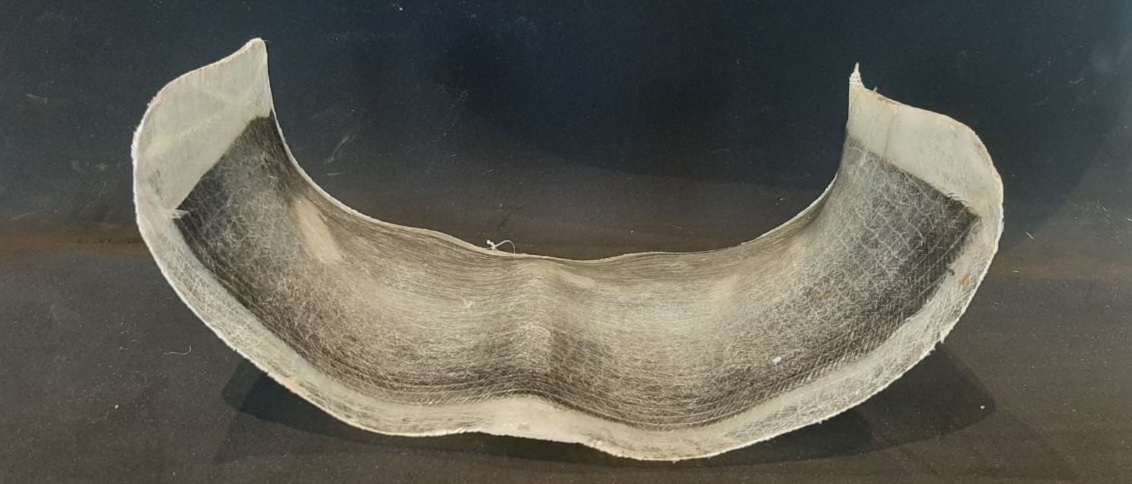
Hero Shots:
| What I like | I don’t like | How to improve |
|---|---|---|
| The fit is perfect | It is perfect when I stand upright, When I bend over a bit i can feel the shell in my spine | I will fill the negative spine shape |
| The strength is good enough | I don’t like the EVA foam in the center, it is soft and only a filler | I will look for a thermoplast honeycomb layer |
Lessons learned
- A perfect fit is not always perfect in a dynamic condition.
- The vacuum bag method will not get all the air out.
- Making a reusable model is really helpful, now I can try again
7. New hardshell
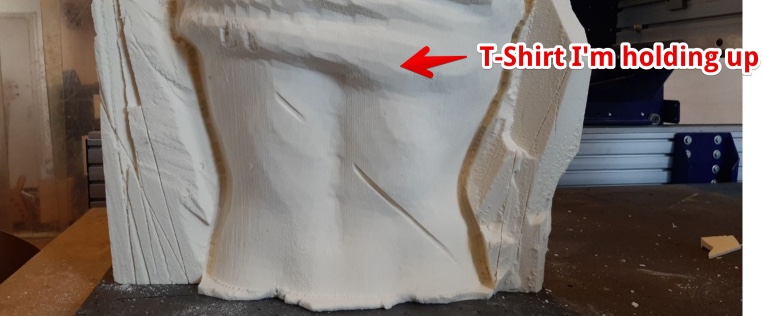
I really payed attention to my posture last time I was kitesurfing. And I was not standing upright all the time, I bended a lot on waves and in gust.
I tried my hardshell bending over, I could really feel the shell pressing to my spine. You can see this on this pictures: 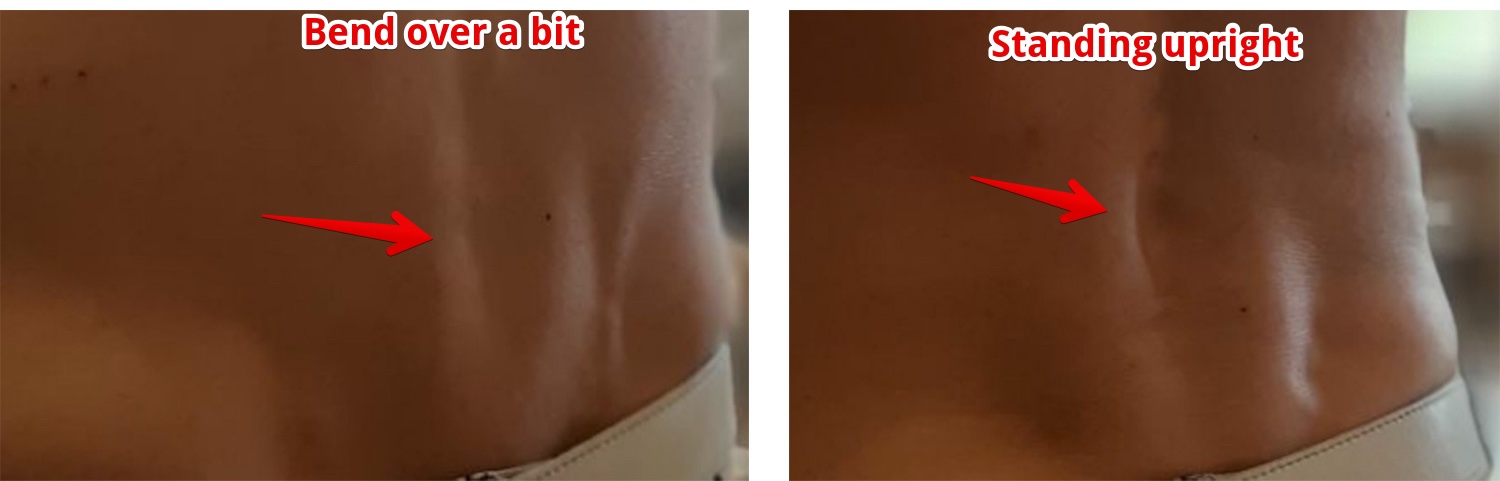
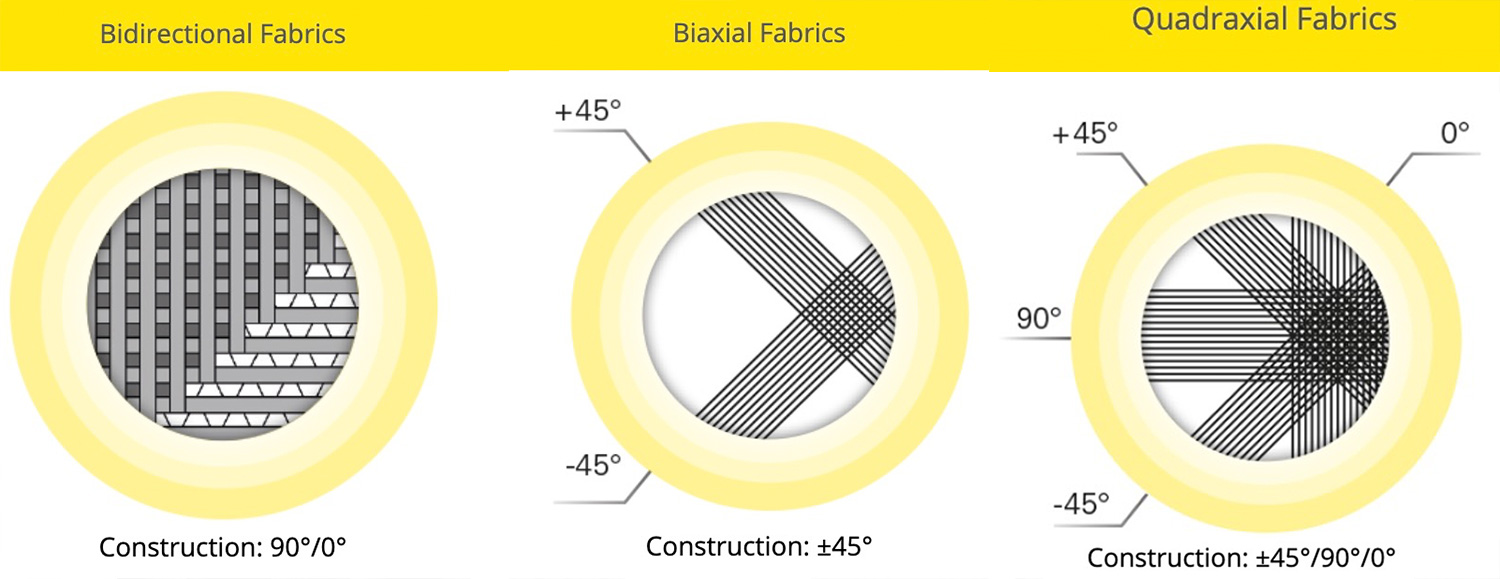
We where out of fiberglass, so I went to the shop to get new. They had multiple types:
- Multi-axial 600 grams
- Biaxial Mat 600 grams
- Twill fabric 160 grams
In the shop they Adviced me to take the Twill fabric. I tried to find the difference between Muli, Bi-Axial and Twill. It is explained on the website of Saertex:
Since I don’t like the negative spine shape to be this deep. I decided to fill this with SmoothCast 305. I chose this product so I can get the cast out of my mold if I decided not to use it. So my model will not be destroyed. Another advantage of the SmoothCast is the curing time: only 30 minutes. So I can start with my composites the same day. 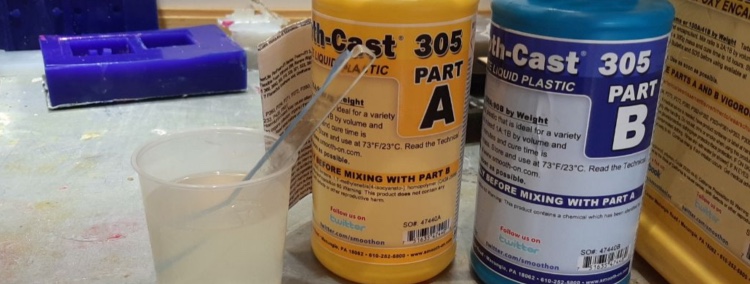
U put a lot of Vaseline in to make sure I could get it out if it is not perfect 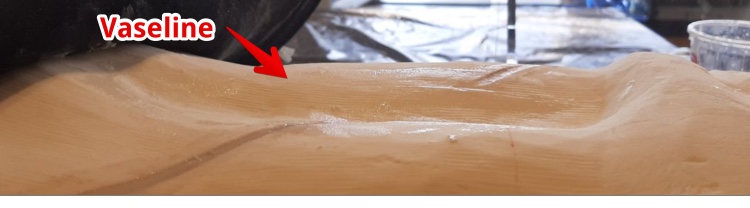
Just filled it with the SmoothCast 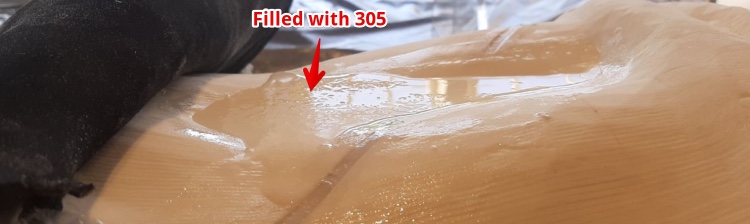
And did everything again. From step 5 to 7. Only now with a different shape and Twill fabric 150 grams/M2
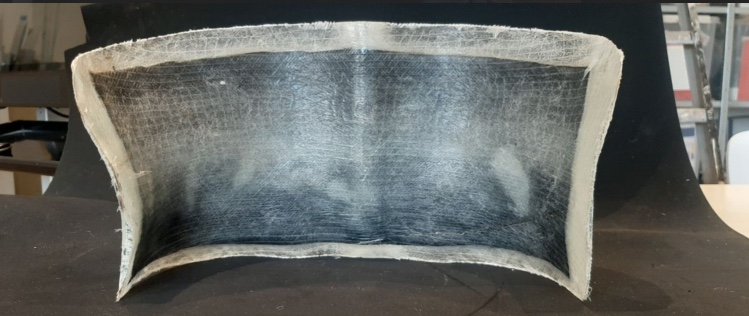
The weight was 231 gram. 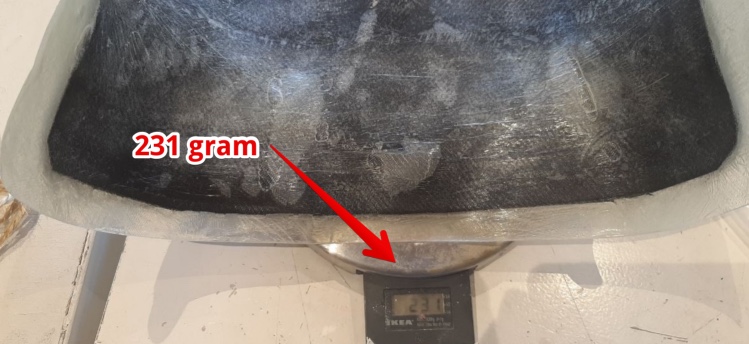
This is 100 gram lighter than the previous model!
Hero shots second hardshell
Inside: 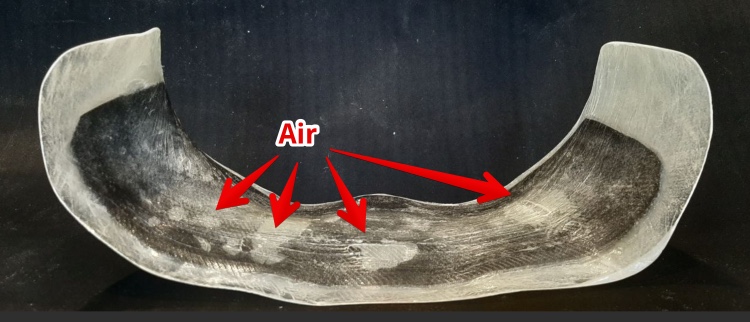 Inside:
 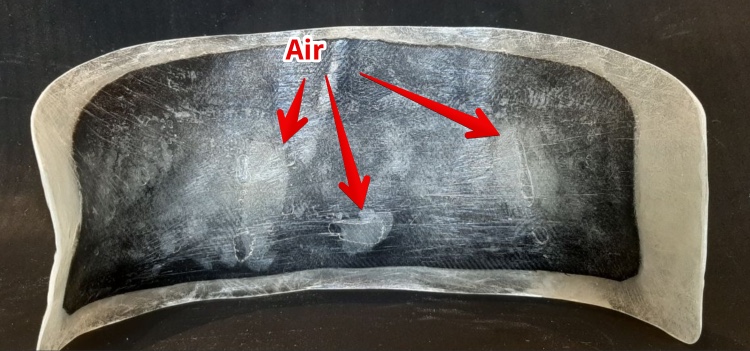 Outside:
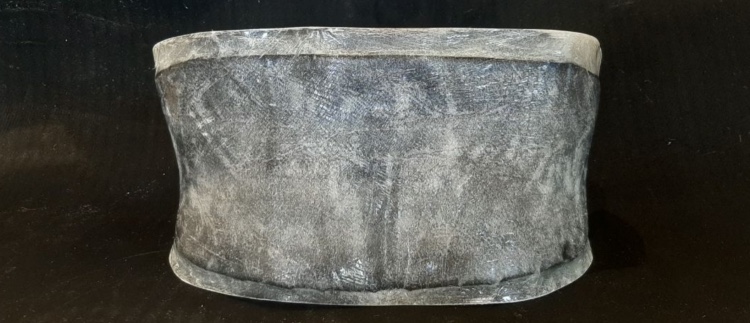
Problems:
- Some air/not soaked fiberglass
- Not so stiff as the other model
Solutions:
- Use more epoxy? I found the ratio should be 1:2.5. Resin to Glass (in weight). But have to find out if this is cloth/resin or the other way around.
- Use more layers (since I used the 160grams instead of the 600 grams) I just need more.
But the shell fits perfect even when bending over!!!
I decided to improve the last model with reinforcements
So I added 3 layers of 160gram/m2 fiberglass to the inside, 3 layers of 600 gram/M2 to the outside and 75ml of Epoxy (Tarbinder): 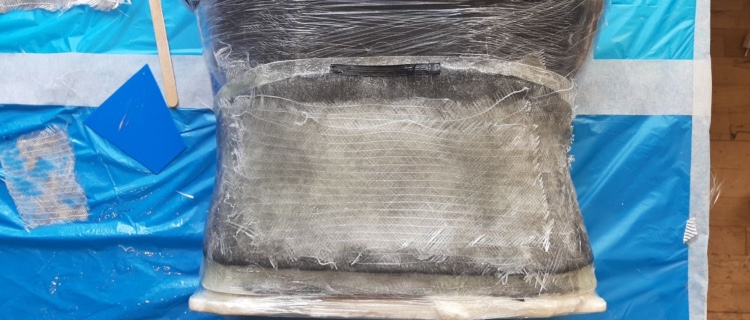
In the vacuum bag: 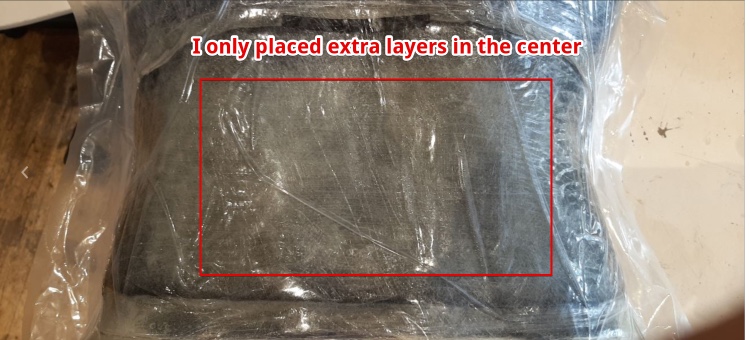
Now the week is over… But I will continue my work on the PERFECT fit Harness!
I have made the Harness! It fits perfect even with a minimum padding
Hero shot: 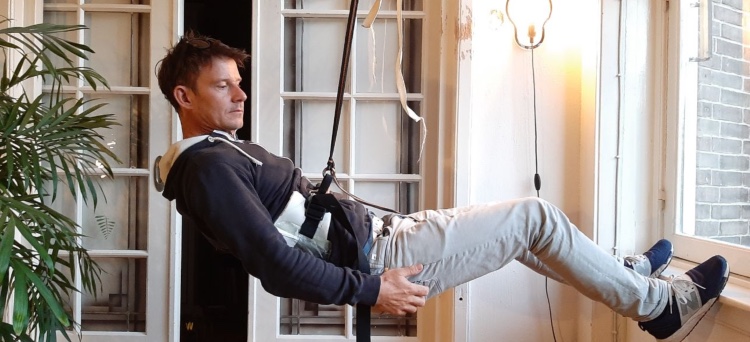
Superhero shot:
I have tested the Harness for Kitesurfing (first shell). These are the improvemns:
- The confort was really good!
- Some pressureponts at the lower right front
- Eva foam as padding is not strong enhough
- The spine part is sticking out to much, (but not as problematic as I thought)
Conclusions & files
Files
Biggest Mistakes and lessons this week
- I should have put my material on the right dimensions in Fusion
- Pausing the CNC ShopBot is a risk
- I did not use enough fiberglass in my second model, Always consider the Weight per m2. Next time I should weight the EVA foam, the fiber so I know how the epoxy/fiberglass ratio is.
Wat I really liked
- I finally can work with the CNC machine.