3 - Computer-Controlled Cutting
This week I will learn create and apply a parametric design cutting with the vinyl cutter and the laser cutter. Together with my fellow WaagFabbers we will find and document all the specifics of the machines.
How can I use this in my final project?
Maybe I can use laser cutting for creating the case with the electronics.
The steps for this assignment
- 1. How to use the laser cutter
- 2. Characterize the laser’s kerf, focus, power & speed - Group Assignment
- 3. Create a vector design for the vinyl-cutter & cut
- 4. Design & lasercut a parametric construction kit
- Week Files & Conclusions
Lets get started!
1. How to use the laser cutter
The cutter is a BRM1612, size 1200 by 1600 mm with Lasercut 5.3 (software).
The laser is water-cooled. On the left of the tube below electrons are fired. The inner tube holds CO2 and this forms the laser beam. The laser goes to the right and via mirrors to the nozzle (laser head) 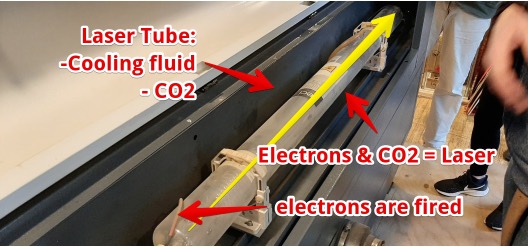 the laser tube on the back
Laser safety rules
- RESPECT THE LASER
- Keep within the red lines (don’t leave it unattended)
- If a small fire will ignite use the waterspray on the bed
- Be careful when lower or raise the bed (in case of thick material)
 Safety
Laser cutting instructions
- Create a vector file
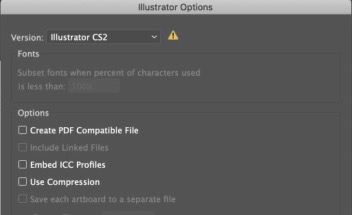
- Convert in Illustrator (CS2 unselect all options)
 Save file for the laser
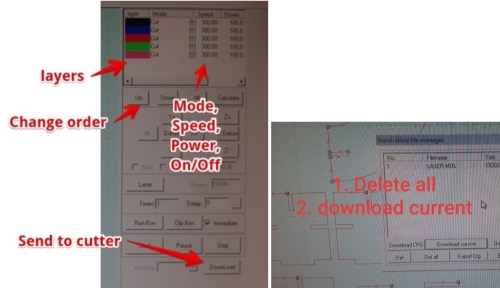
Settings on the software (LaserCut 5.3)
- Use a USB stick to get your files on the computer (use the Fab Files folder) & st
- IMPORT files (sometimes do this again, if software is not working)
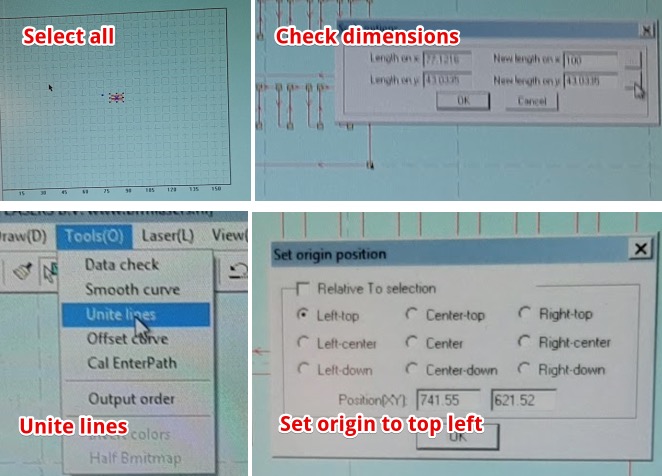
- Select all (CNTRL-A)
- Check dimensions
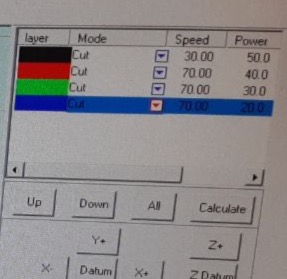
- Select the objects and (in the right panel set Speed, Mode and Power
- You can disable a ‘layer’ in this menu, scroll to the right
- DownLoad (right menu)
- Delete All (in Popup)
- Download current (in Popup)
 Important steps on the laser software
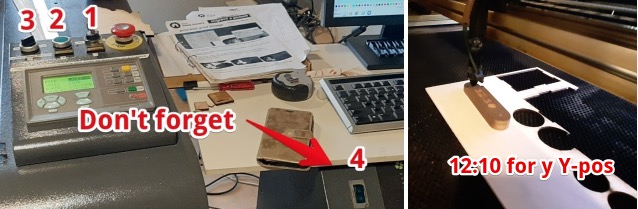
Setting on the laser
- Switch on: 1=Key, 2= Button, 3 =Switch (blows air over laser nozzle)
- ESCAPE (on display)
- XY-0 = Position to left corner
- ANCHOR & ENTER = the starting point)
- TEST = Test the dimensions: press
- Nozzle height = place 12:10 wooden block, Unscrew nozzle and rest on lowest part of block
- If you have very thick material use (Z-0)
- Close lid (both handles)
- Turn on 4 = this will start the exhaust system
- START press again to pause the job (STOP will cancel a Job)
- Leave Exhaust filter (switch 4) on till 1 minute after cutting
 Switch es & 12.10 wood block to adjust the height (focus) of the laser
Adjust the Power & Speed
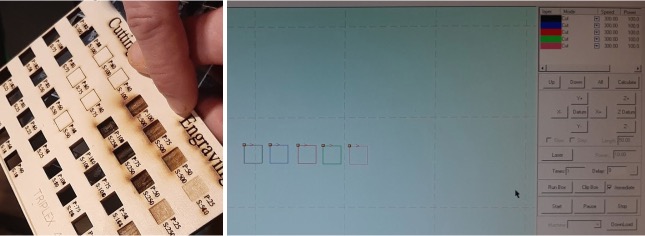 Power & Speed test - Create a test cutting for your material
2. Characterize the laser’s kerf, focus, power & speed - Group Assignment
What I learned from this group assignment:
- It was fun to work together
- But not easy to work efficient, since we all had no experience in the tasks we had to do.
- It is good to start relying on each other, this will be handy in the coming months
Read all about it on the The Group assignment page
3. Create a vector design for the vinyl-cutter & cut
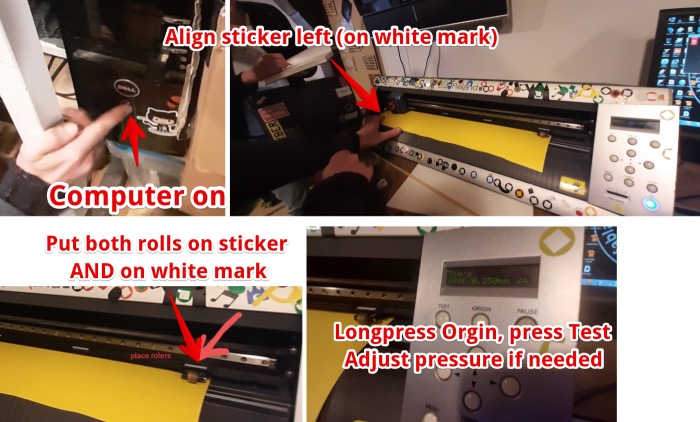
We have the Roland CAMM-1 GX-24 24” Vinyl Cutter. For this I Created a vector or even grid image (I prefer vector). From Illustrator to vinyl cutter
- Illustrator > Artboard in size of illustration - Save file as CS2
- Switch computer on (press F12 for windows)
- Open the leverage (on the left back)
- Place the sticker-roll on the LEFT (use two fingers to gently move rols to white strips)
- Select ROLL
- ORGIN long press till beep
- TEST (wil make a cutout to test the pressure - normal 3cm/s and 80gf)
- Open CS2 file with illustrator on windows computer
- CNTRL-P (Print)
- Placement (left bottom)
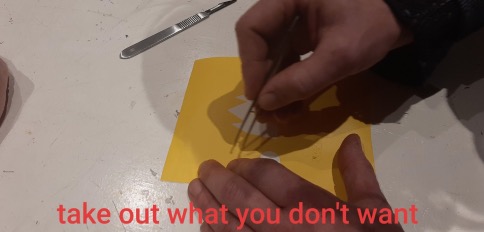
- Take away the material you don’t want
- stick the wanted material on transfer foil
Things can go wrong, even with a simple machine…
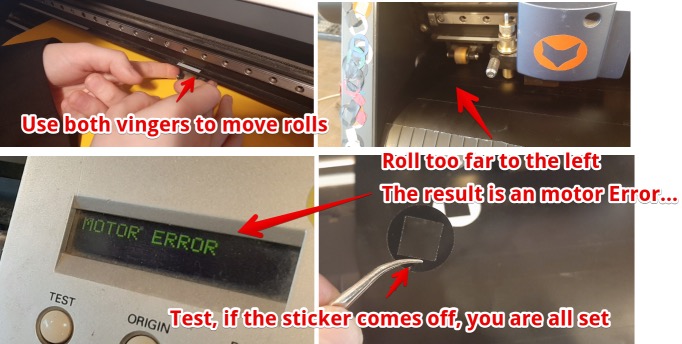
The result of cutting in vinyl
4. Design & lasercut a parametric construction kit
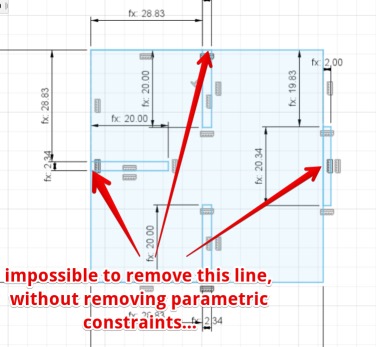
Design - In Fusion 360 (& Illustrator)
- Sketched the shape on paper, used the Kerf found by the team
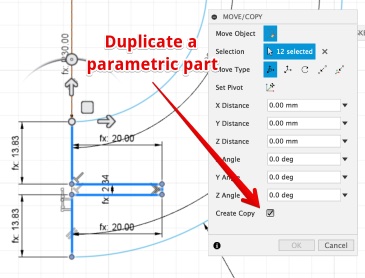
- Made the parameters (Fusion: Modify > Change Parameters)
- Created the shapes from lines (not closed figures)
- Draw every line and entered the parameters
- Test by changing the parameters
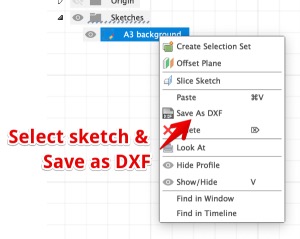
- Select sketch > right-click > Export as DXF
- Imported in Illustrator
Things to remember when designing next time
| Don’t build with shapes if you need lines | Duplicate saves time |
|---|---|
 |  |
| Export DXF |
|---|
 |
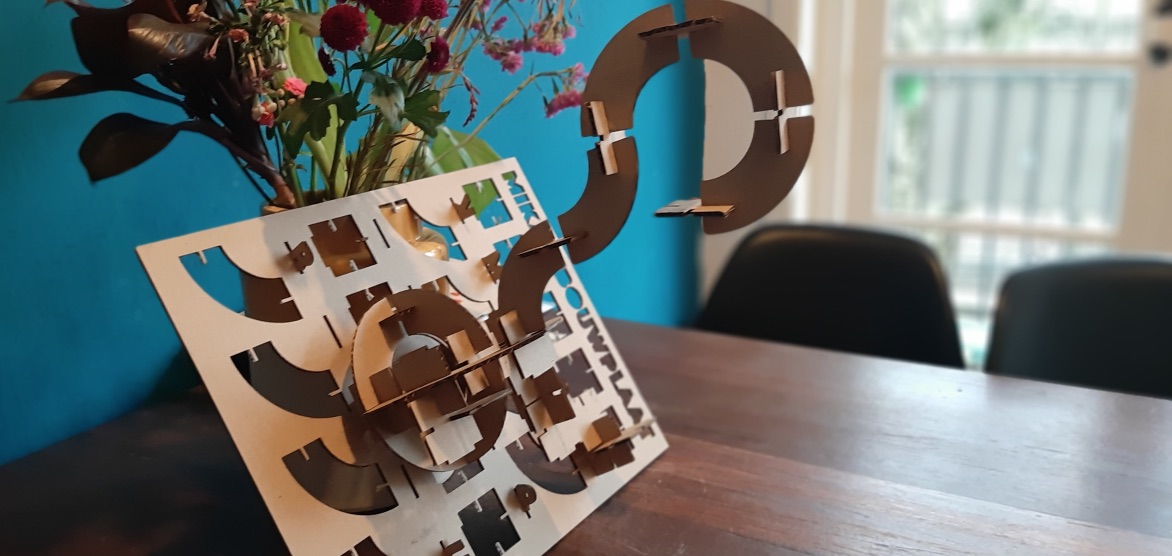
The result - a parametric design of two pressfit drawings
This was the result after several test prints (more about the things I changed to the design in the next chapter)
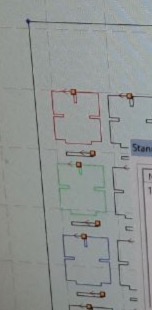
The parameters I created in Fusion 360
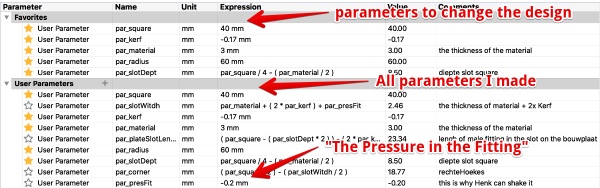 all the parameters used
Lasercut the construction kit
My first test turned into a failure. The parts just fell apart. Looking at my parametric calculations I discovered my mistake: The kerf should be subtracted from the size not added. The easy way to fix it: just make the number negative. (The best way is to change the calculations in the table)
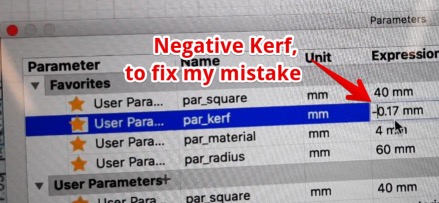 substract the kerf, don’t add…
| Dept of the slot was 1/2, can’t be fully inserted. | Now it can |
|---|---|
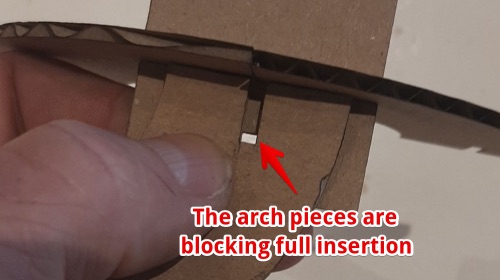 | 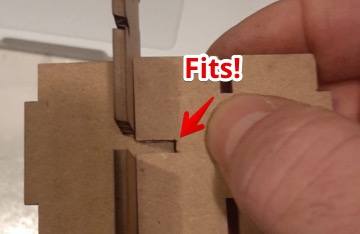 |
 changed Slot Dept parameters to get full insertion
Make the carton pieces stick in the base
I would really like to make the pieces remain in the cardboard, since the base is a part of the product to. I tried to not fully cut trough by decreasing the laser power. I made a few tests, but this didn’t work (Michelle told me so…)
| Test if the carton would stick | Layers | I gave up |
|---|---|---|
 |  | 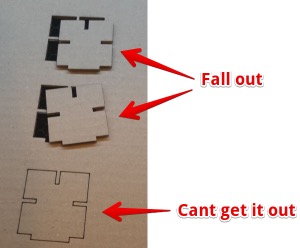 |
Best thing to do is change my parametric design in Fusion and add gaps in the equation. I really tried for one hour, I’m sure I can do it, but since time running out. Illustrator to the rescue!
| Endless line | Create guides | enter Y distance |
|---|---|---|
 | 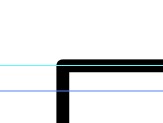 | 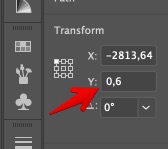 |
| Select & cut | ‘Direct Selection tool (A)’ | Delete part of this line |
|---|---|---|
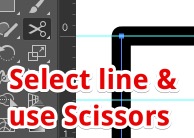 | 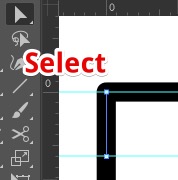 |  |
The 4 little gaps in the lines will hold the pieces in place till you press it

The result - A modular metric zero waste playfull cartboard press-fit kit
Not working? Watch video on youtube
Yes, it is press-fit
Used Sources
Week Files & Conclusions
The final versions of the files I made
- Fusion 360 parametric file .f3d
- Fusion export file .DXF
- Illustrator file creating multiple cuts for the laser
- Illustrator file for the VinylCutter
Mistakes and lessons this week
- I stressed too much
Wat went really good
- I really liked the parametric design
- I finished in time. So it is possible in 4 days!
- Love the fact the pieces stay in the cardboard
- The user-test of the cardboard. My son loved it!
My concerns
- I really liked to work with Fusion and the Laser cutter. In my final project will not use both technologies a lot. Shouldn’t I change to something more physical and fun to make?