Computer-Controlled Cutting
Let's Design!
This assignment is so fun ! We will start using the MACHINES!! Computer Controlled Cutting assignment, is divided into two parts. The first part is a group assignment. We are asked to characterize our laser cutter’s focus, power, speed, rate, kerf, and joint clearance. The second part is an individual assignment. I have to design a parametric press-fit construction kit and print it with the use of a laser cutter. I also have to use a vinyl machine.
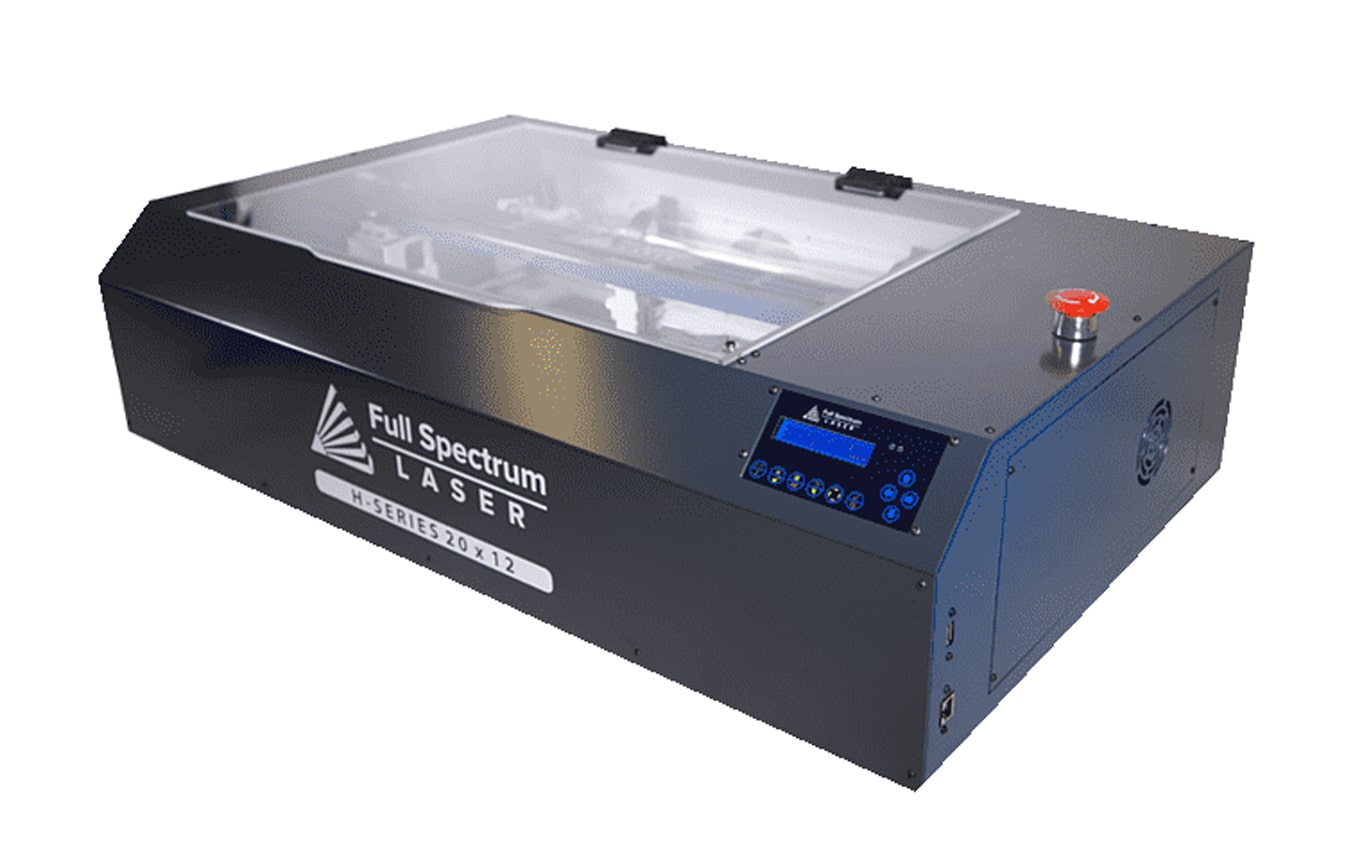
I did a lot of research about different laser cutter machines to know more about their components and characteristics. I used many different types such as Epilog, Mophorn and Full Spectrum. I noticed that the easiest laser cutter to work with is Full Spectrum.
Group Assignment :
In the group assignment, we did some tests by using full spectrum laser cutter machine. First, I will talk about Full Spectrum characteristics and components. We got these information from the full spectrum manual.
You can check the group assignment from this link : Group Assignment.

Full Spectrum Characteristics :
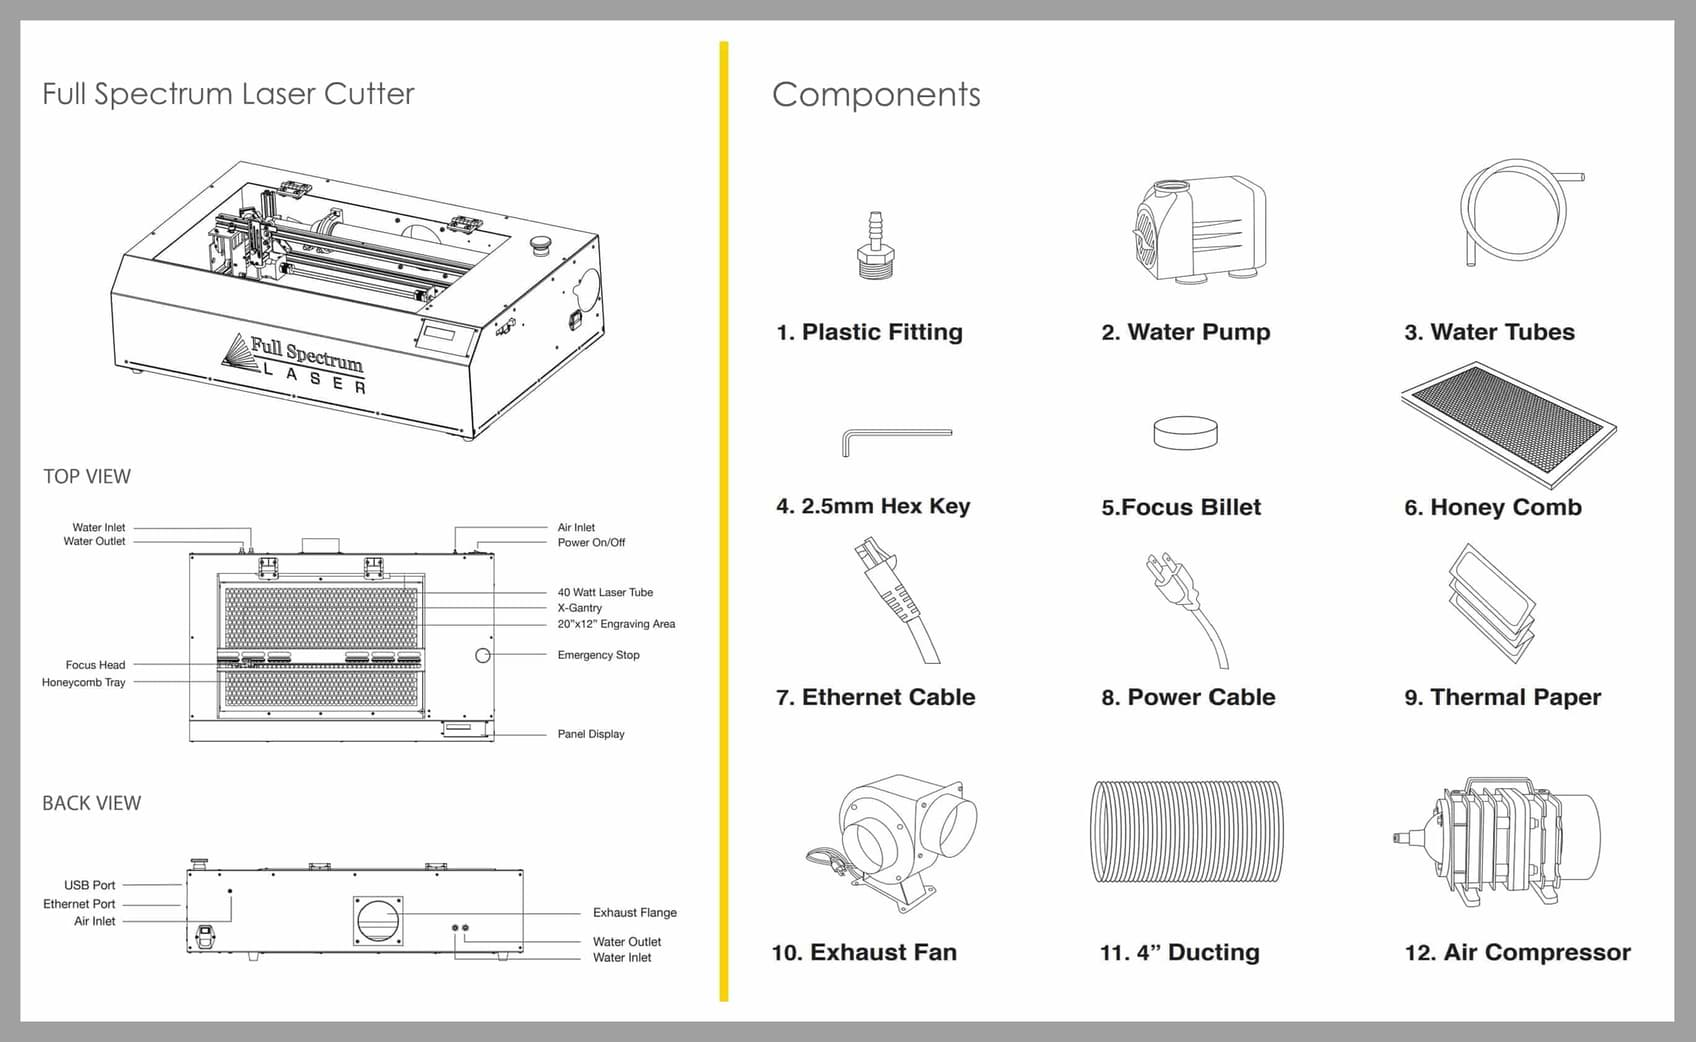
Full Spectrum Parts and Components :
Individual Assignment :
Laser Cutter Machine
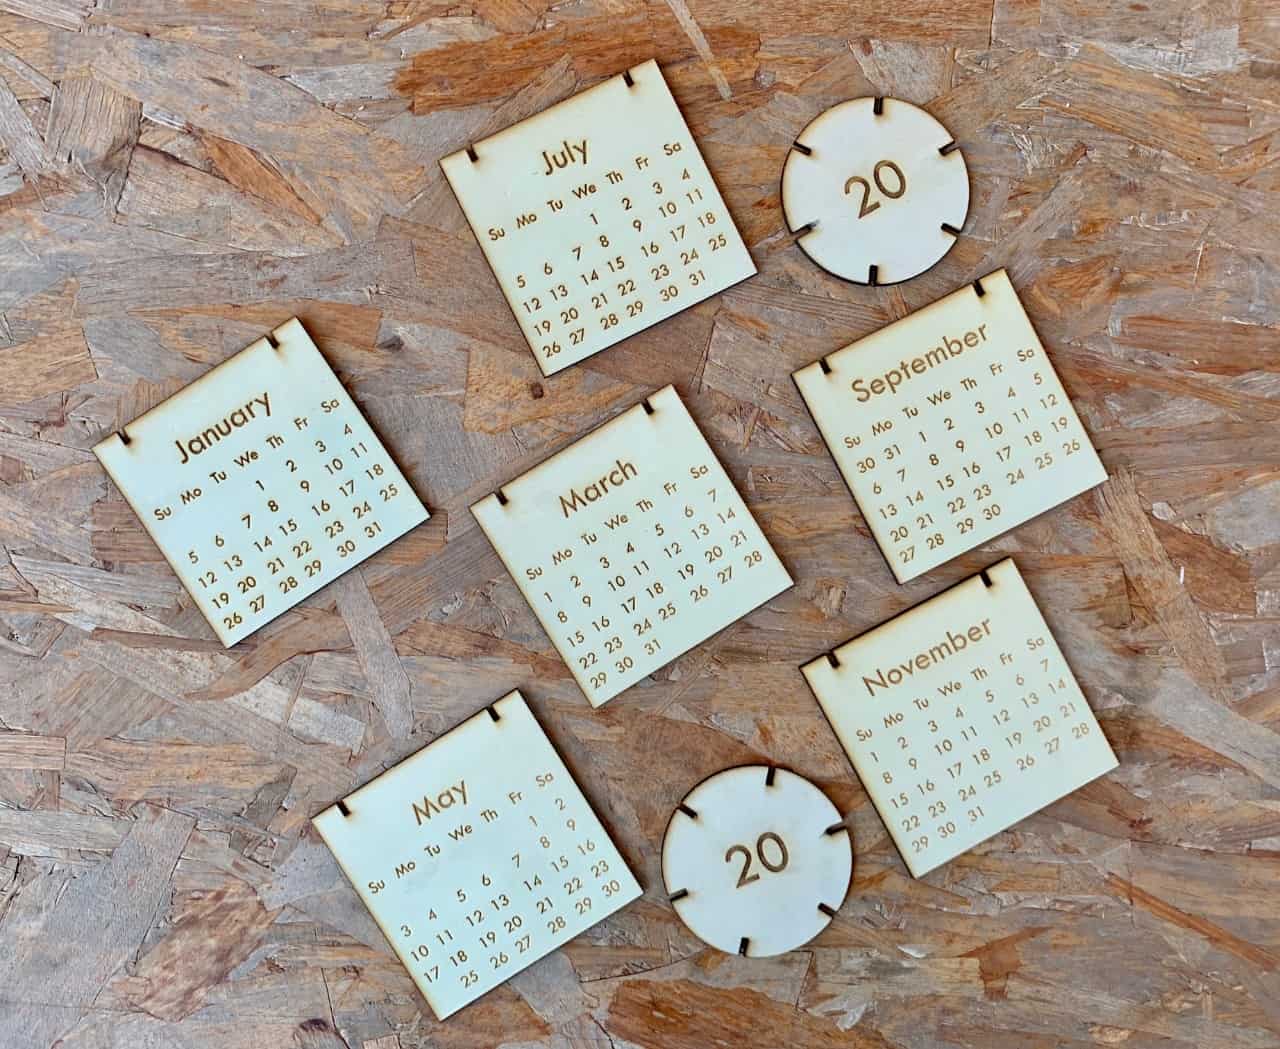
In this assignment, we were asked to design a parametric press-fit construction kit. This entails building shapes and combining them together to become a fixed object. This assignment promises to be so much fun. I used OnShape as a parametric tool to design the press- fit kit. I did some tests to make sure all the shapes fitted well. Because we just have started a new year, I decided to make a 2020 calendar in a creative way!!
To design the object we need to draw 3 main shapes :
Let's make it!
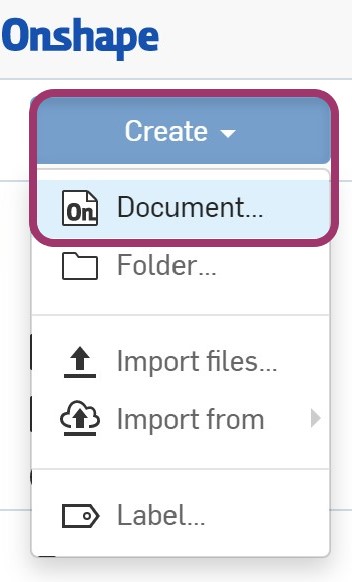
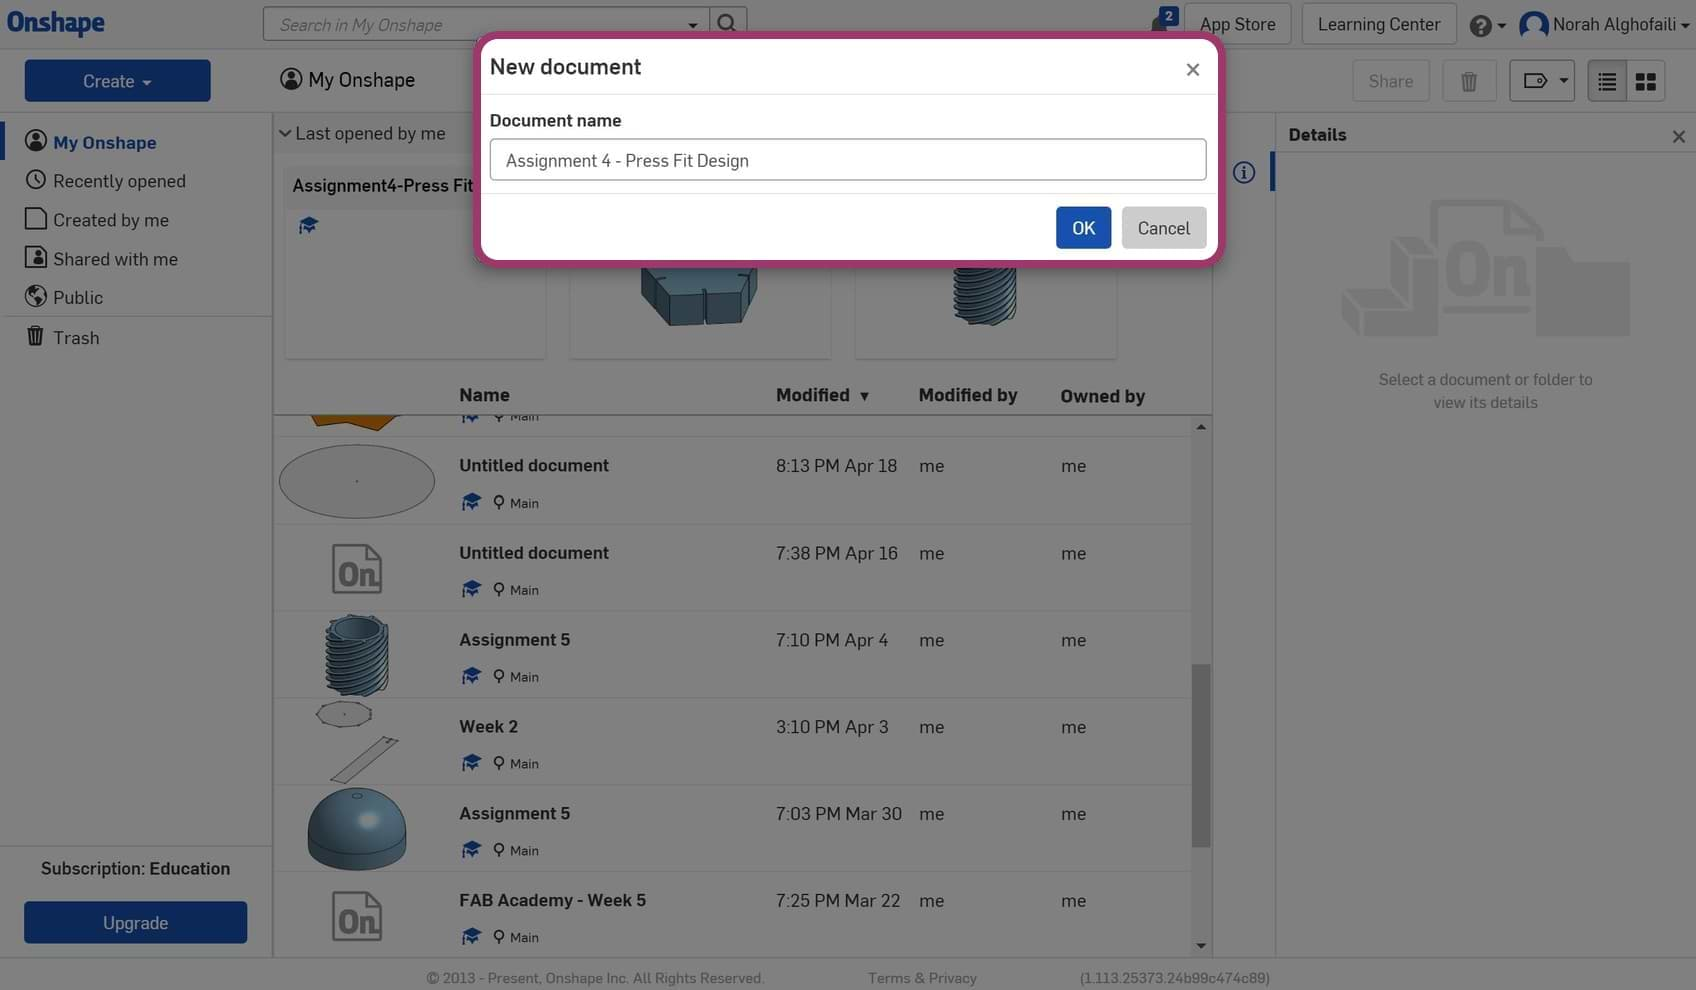
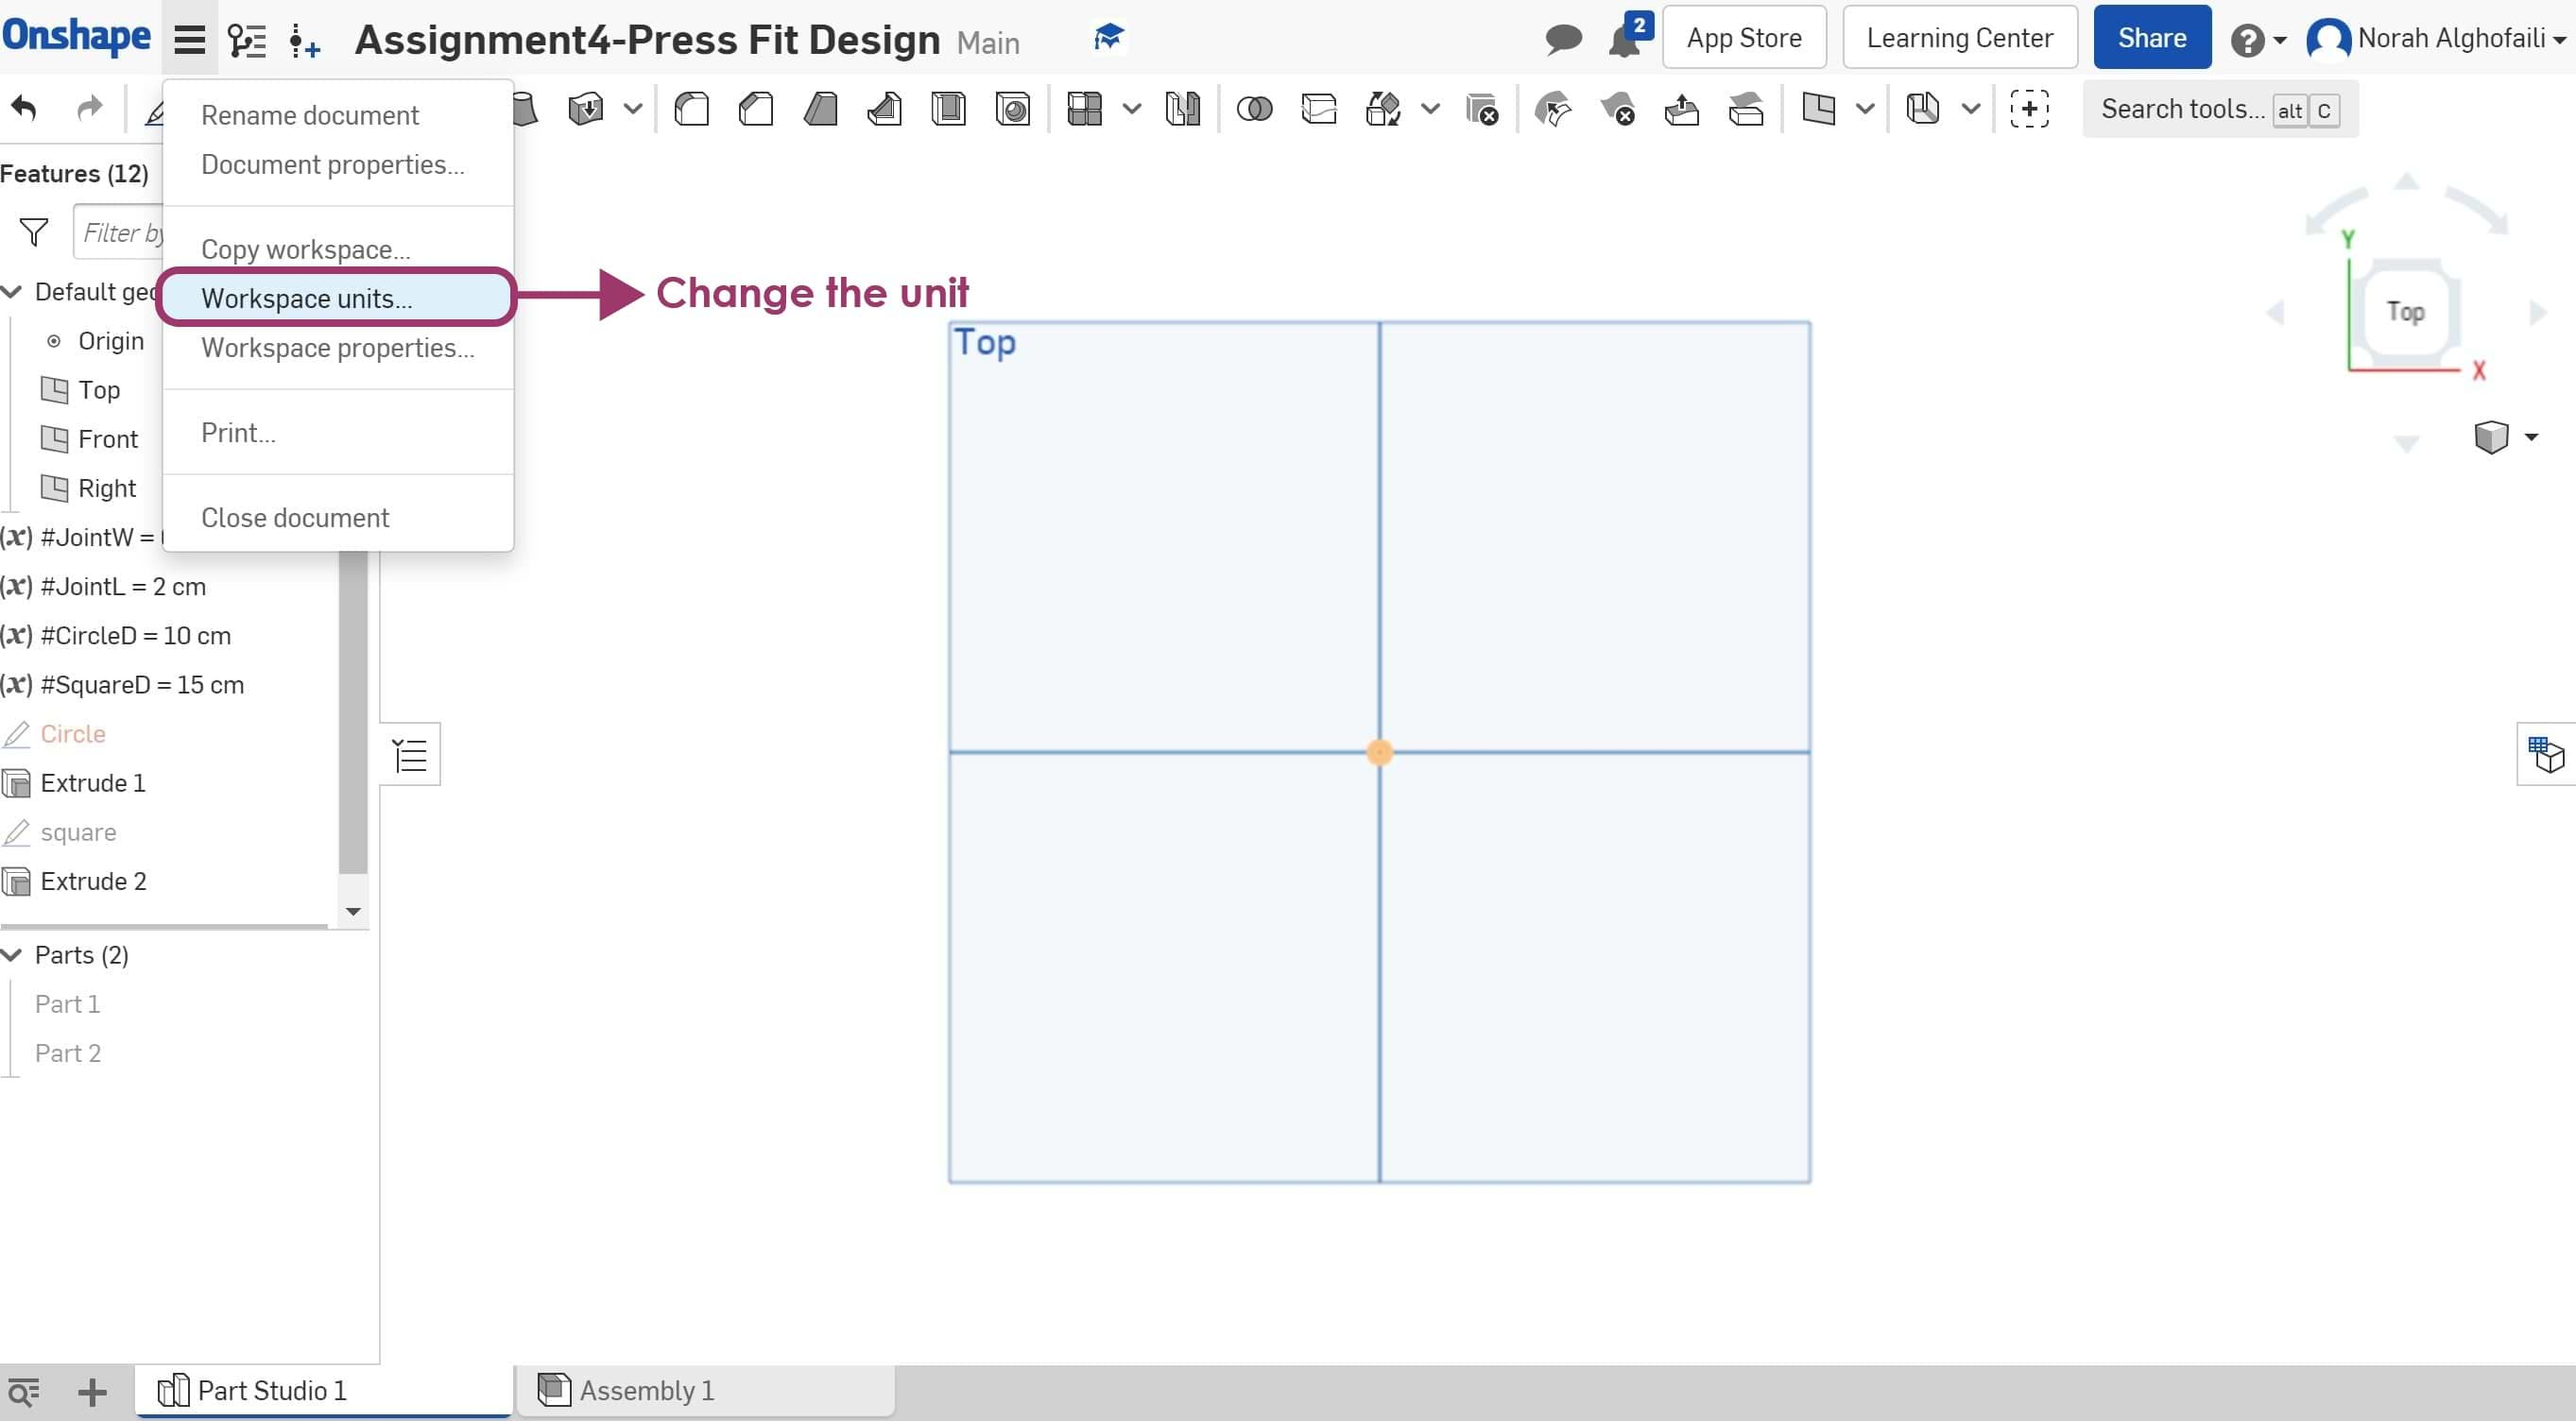
1. Open a new document in Onshape software.
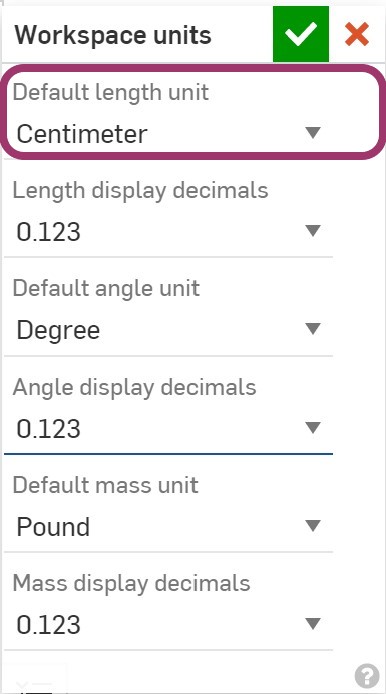
2. The unit can be changed to centimeter (cm).
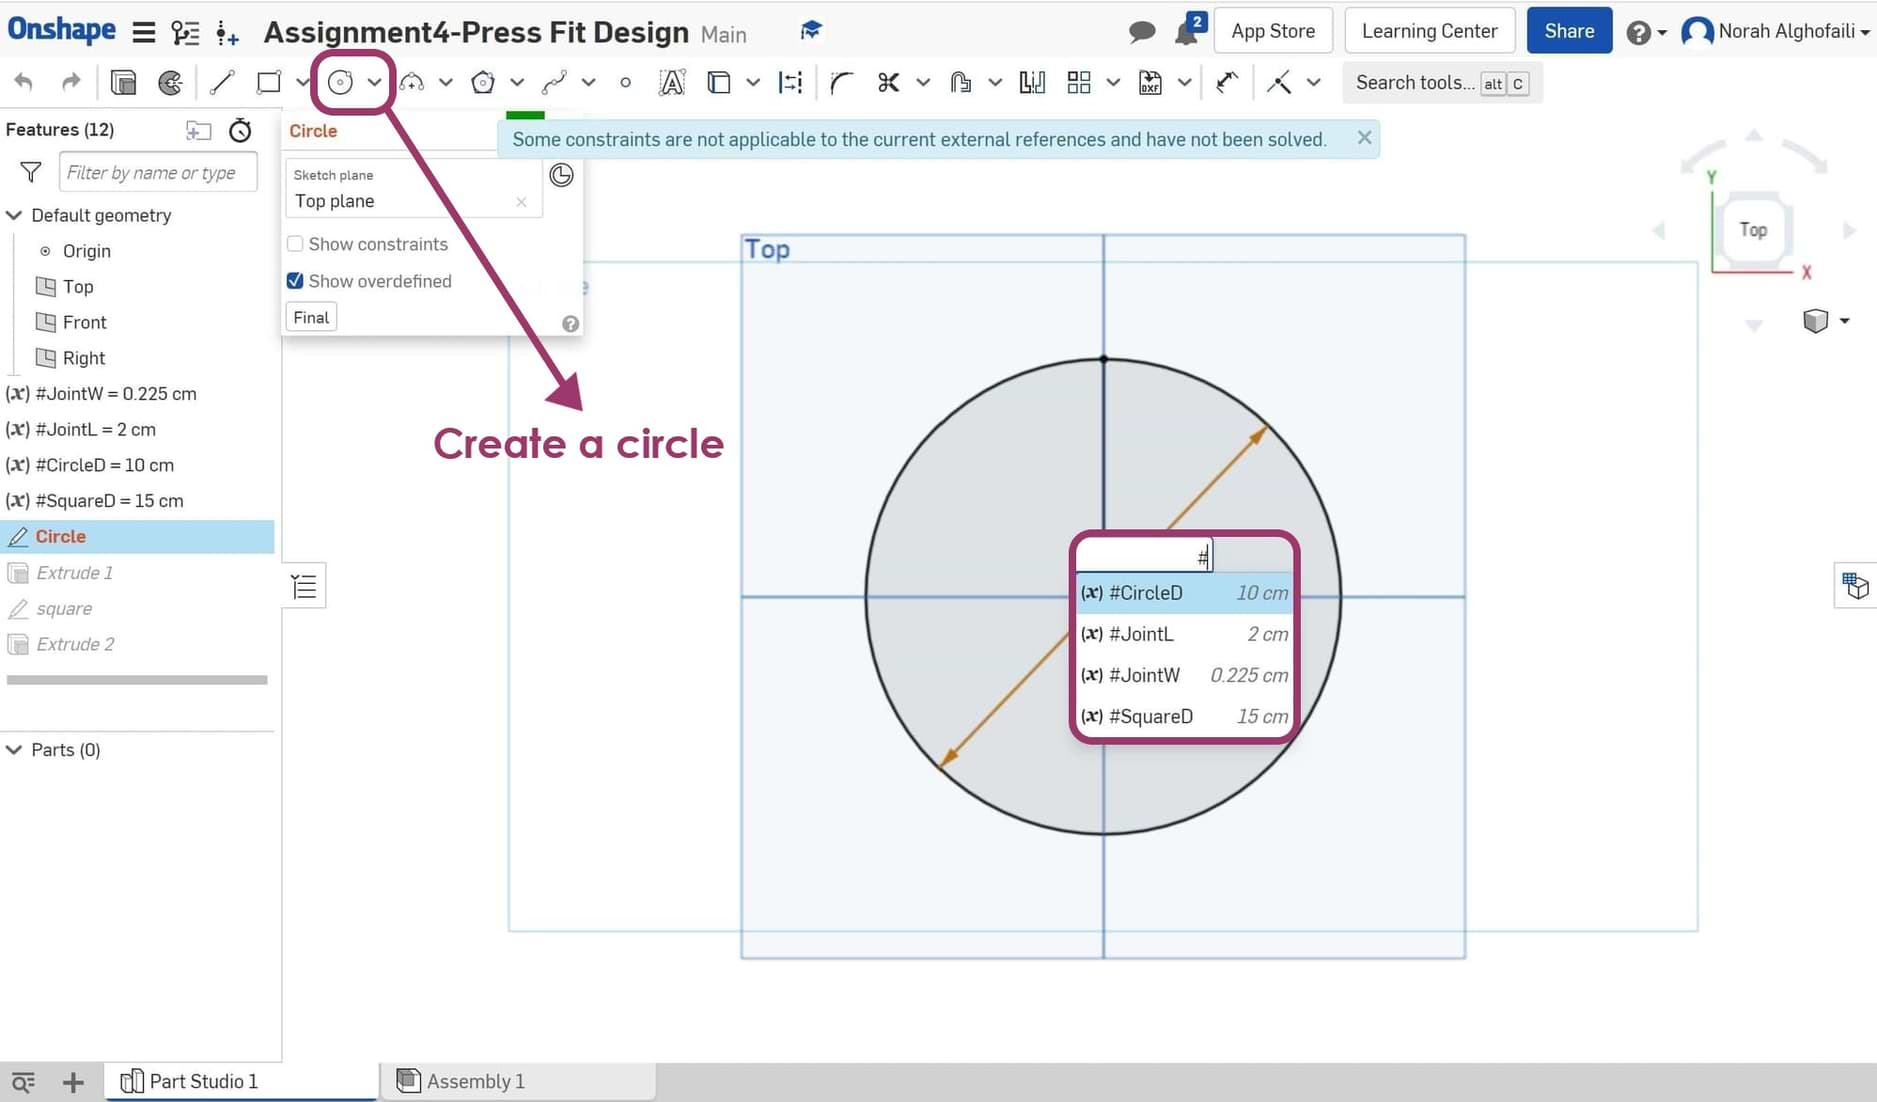
3. To design the object in a parametric way, I'm going to create variables that allow me to control the dimensions easily later. Create variables > Go to variable icon > Specify a name and numeric value > Use # with the numeric field and the variable name > Identify the dimension.
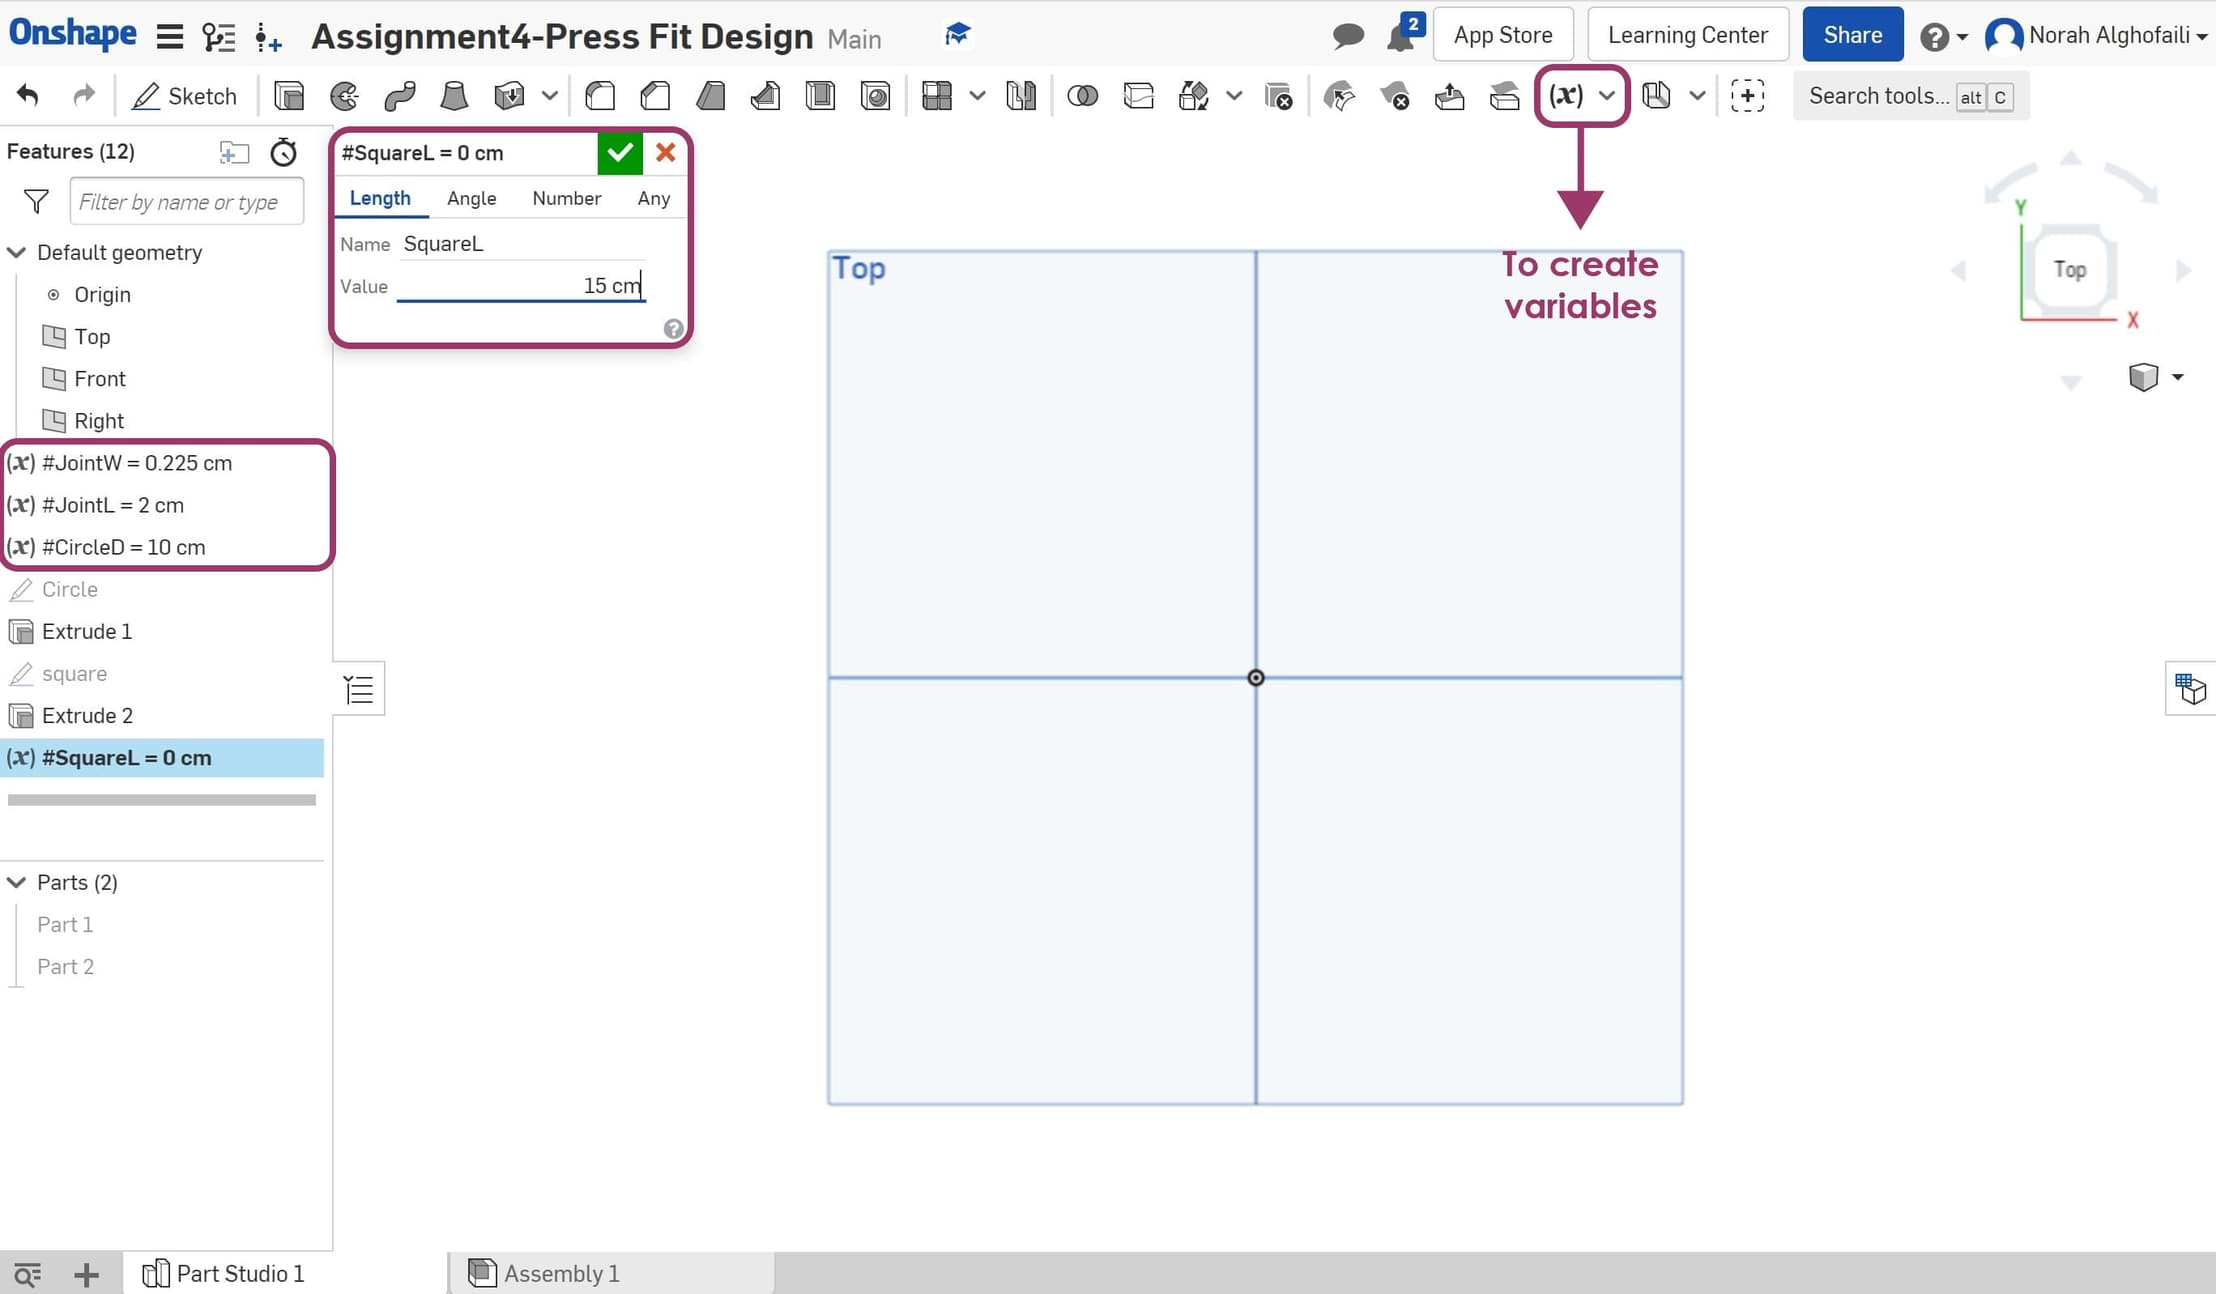
I used the following variables :
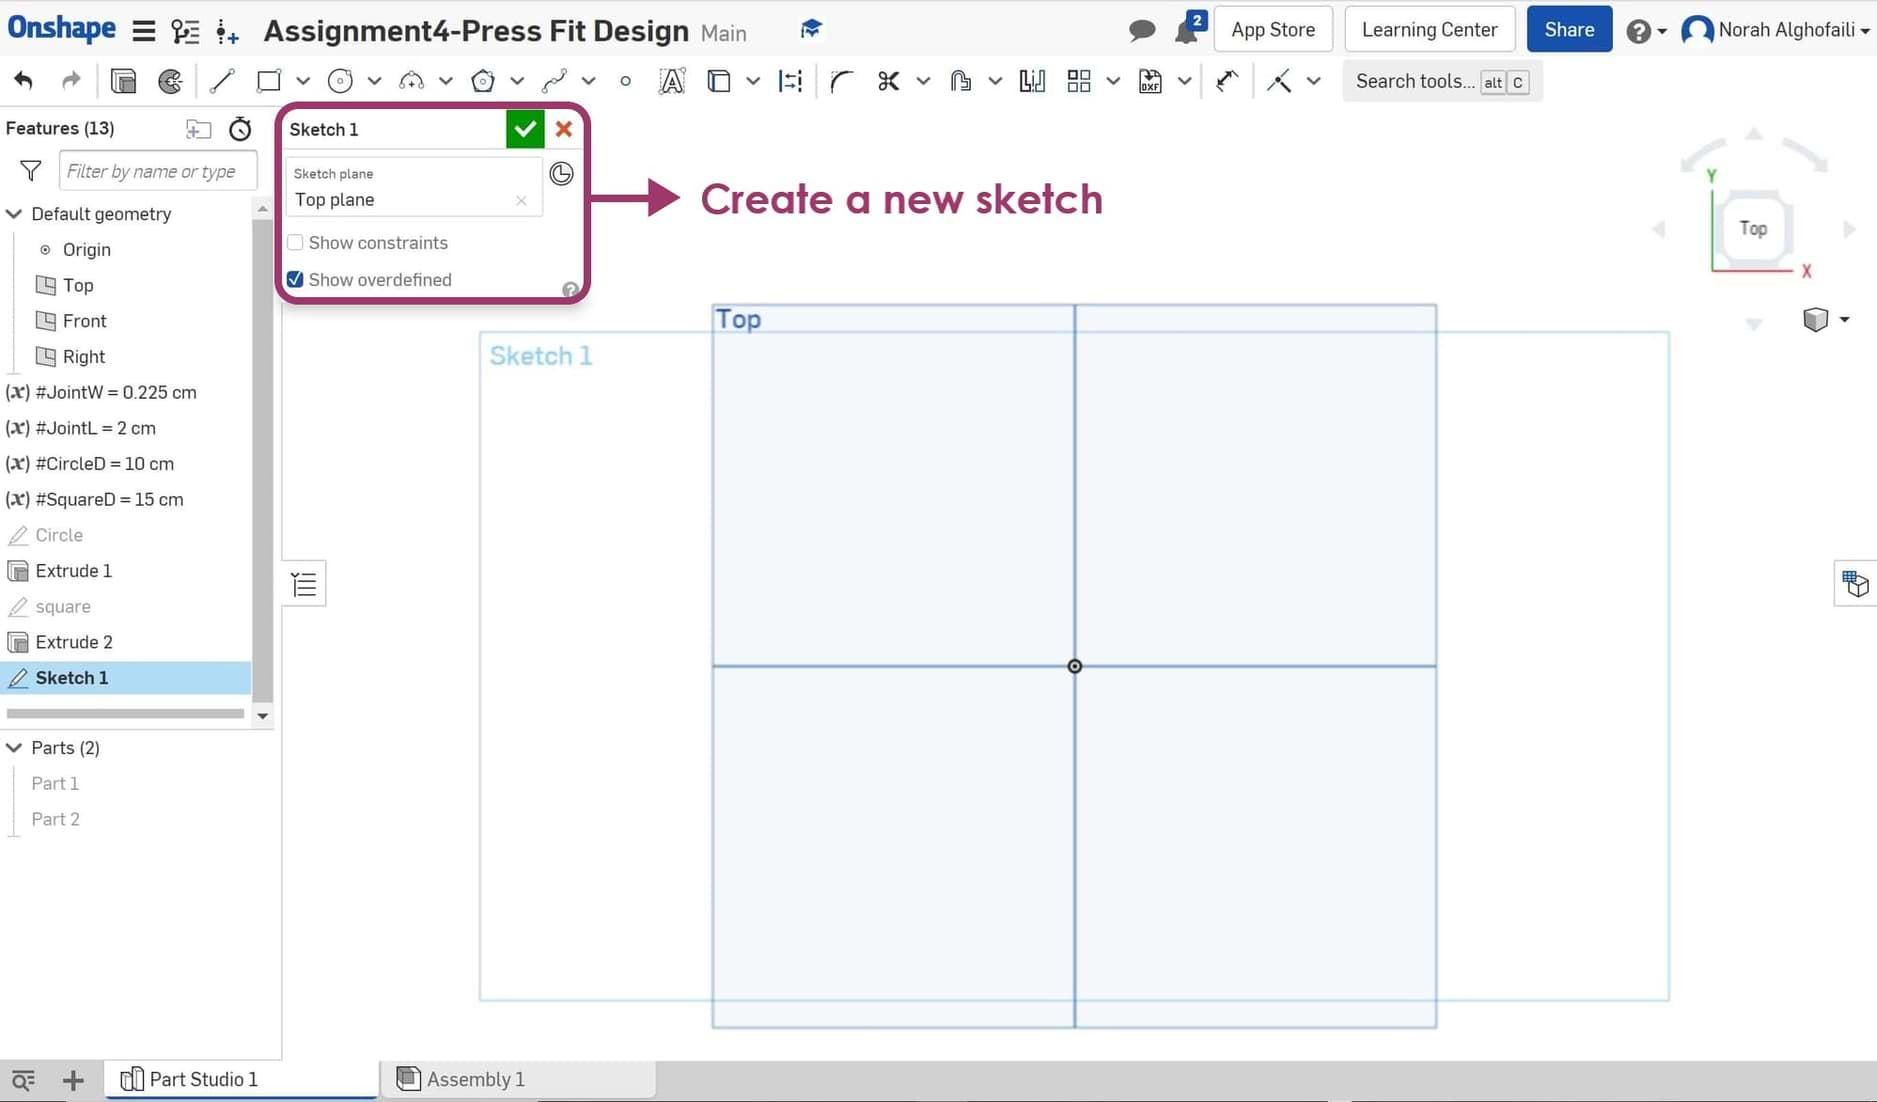
4. Choose the sketch and plane to start designing. I chose the top plane.
5. Draw the first part of the object, which is a circle then change the dimension by using the variable #CircleD = 10 cm.
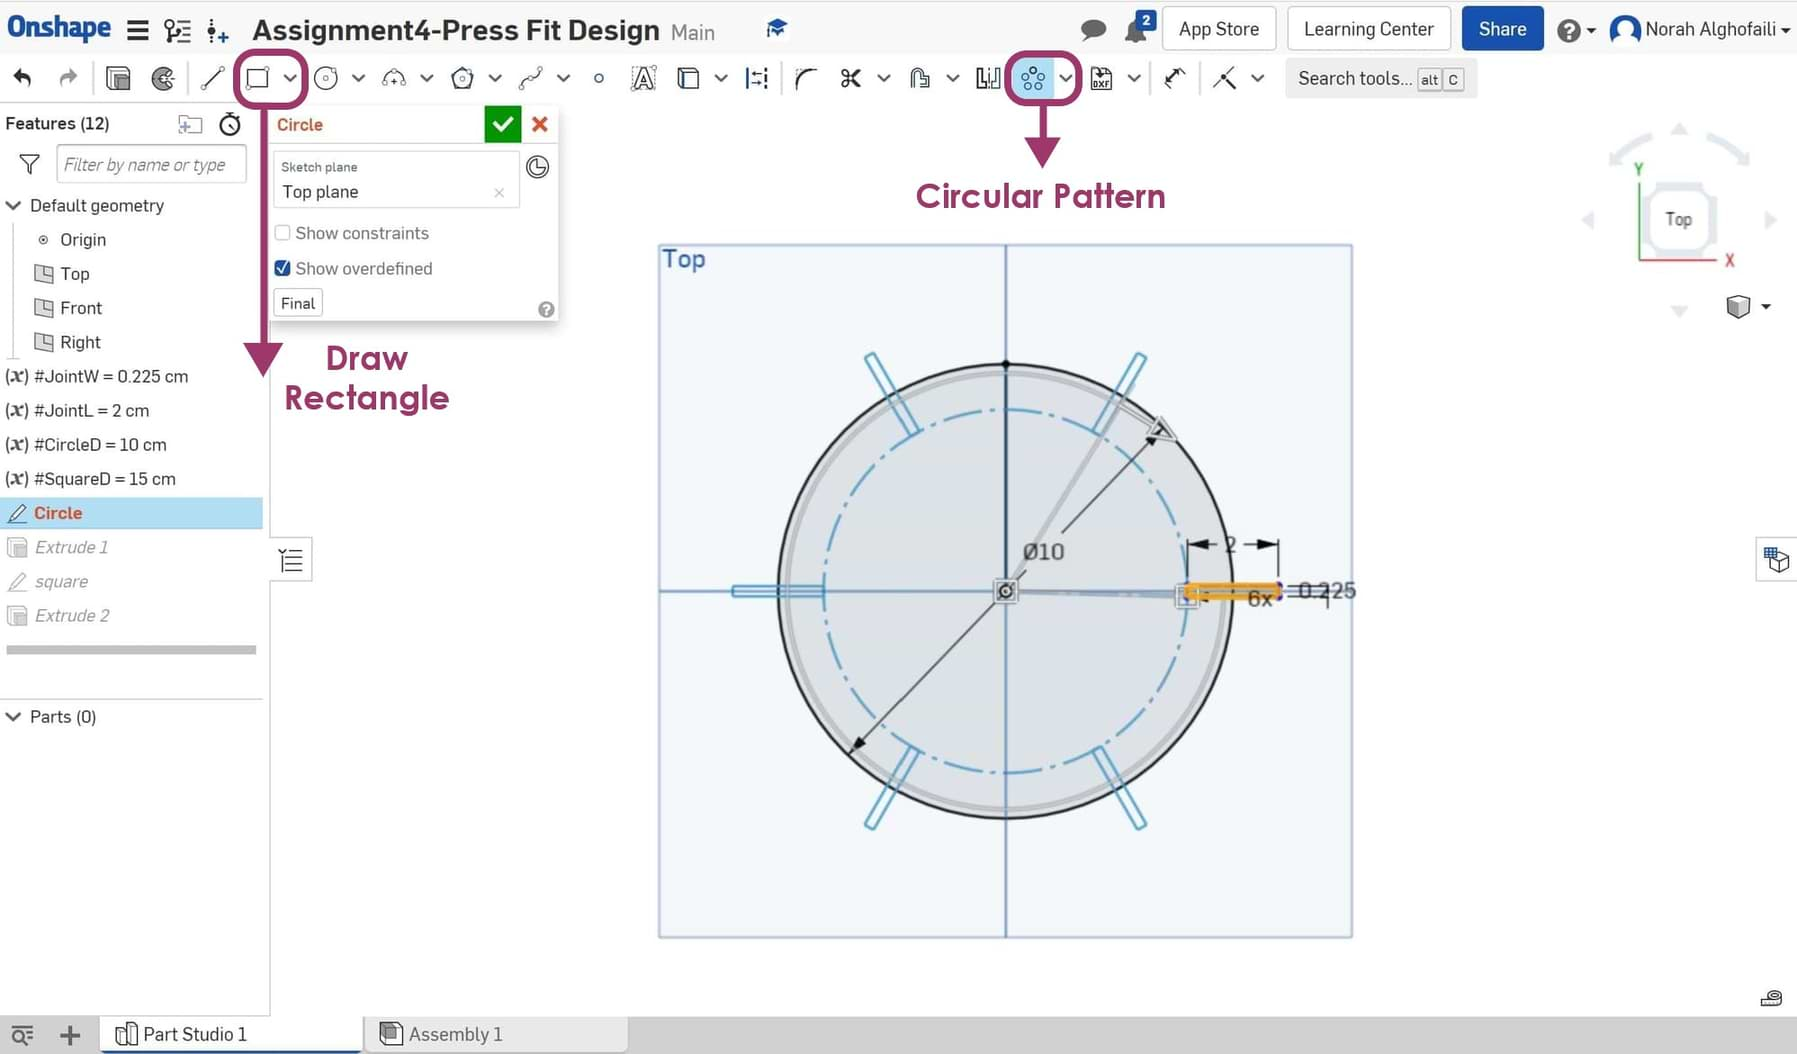
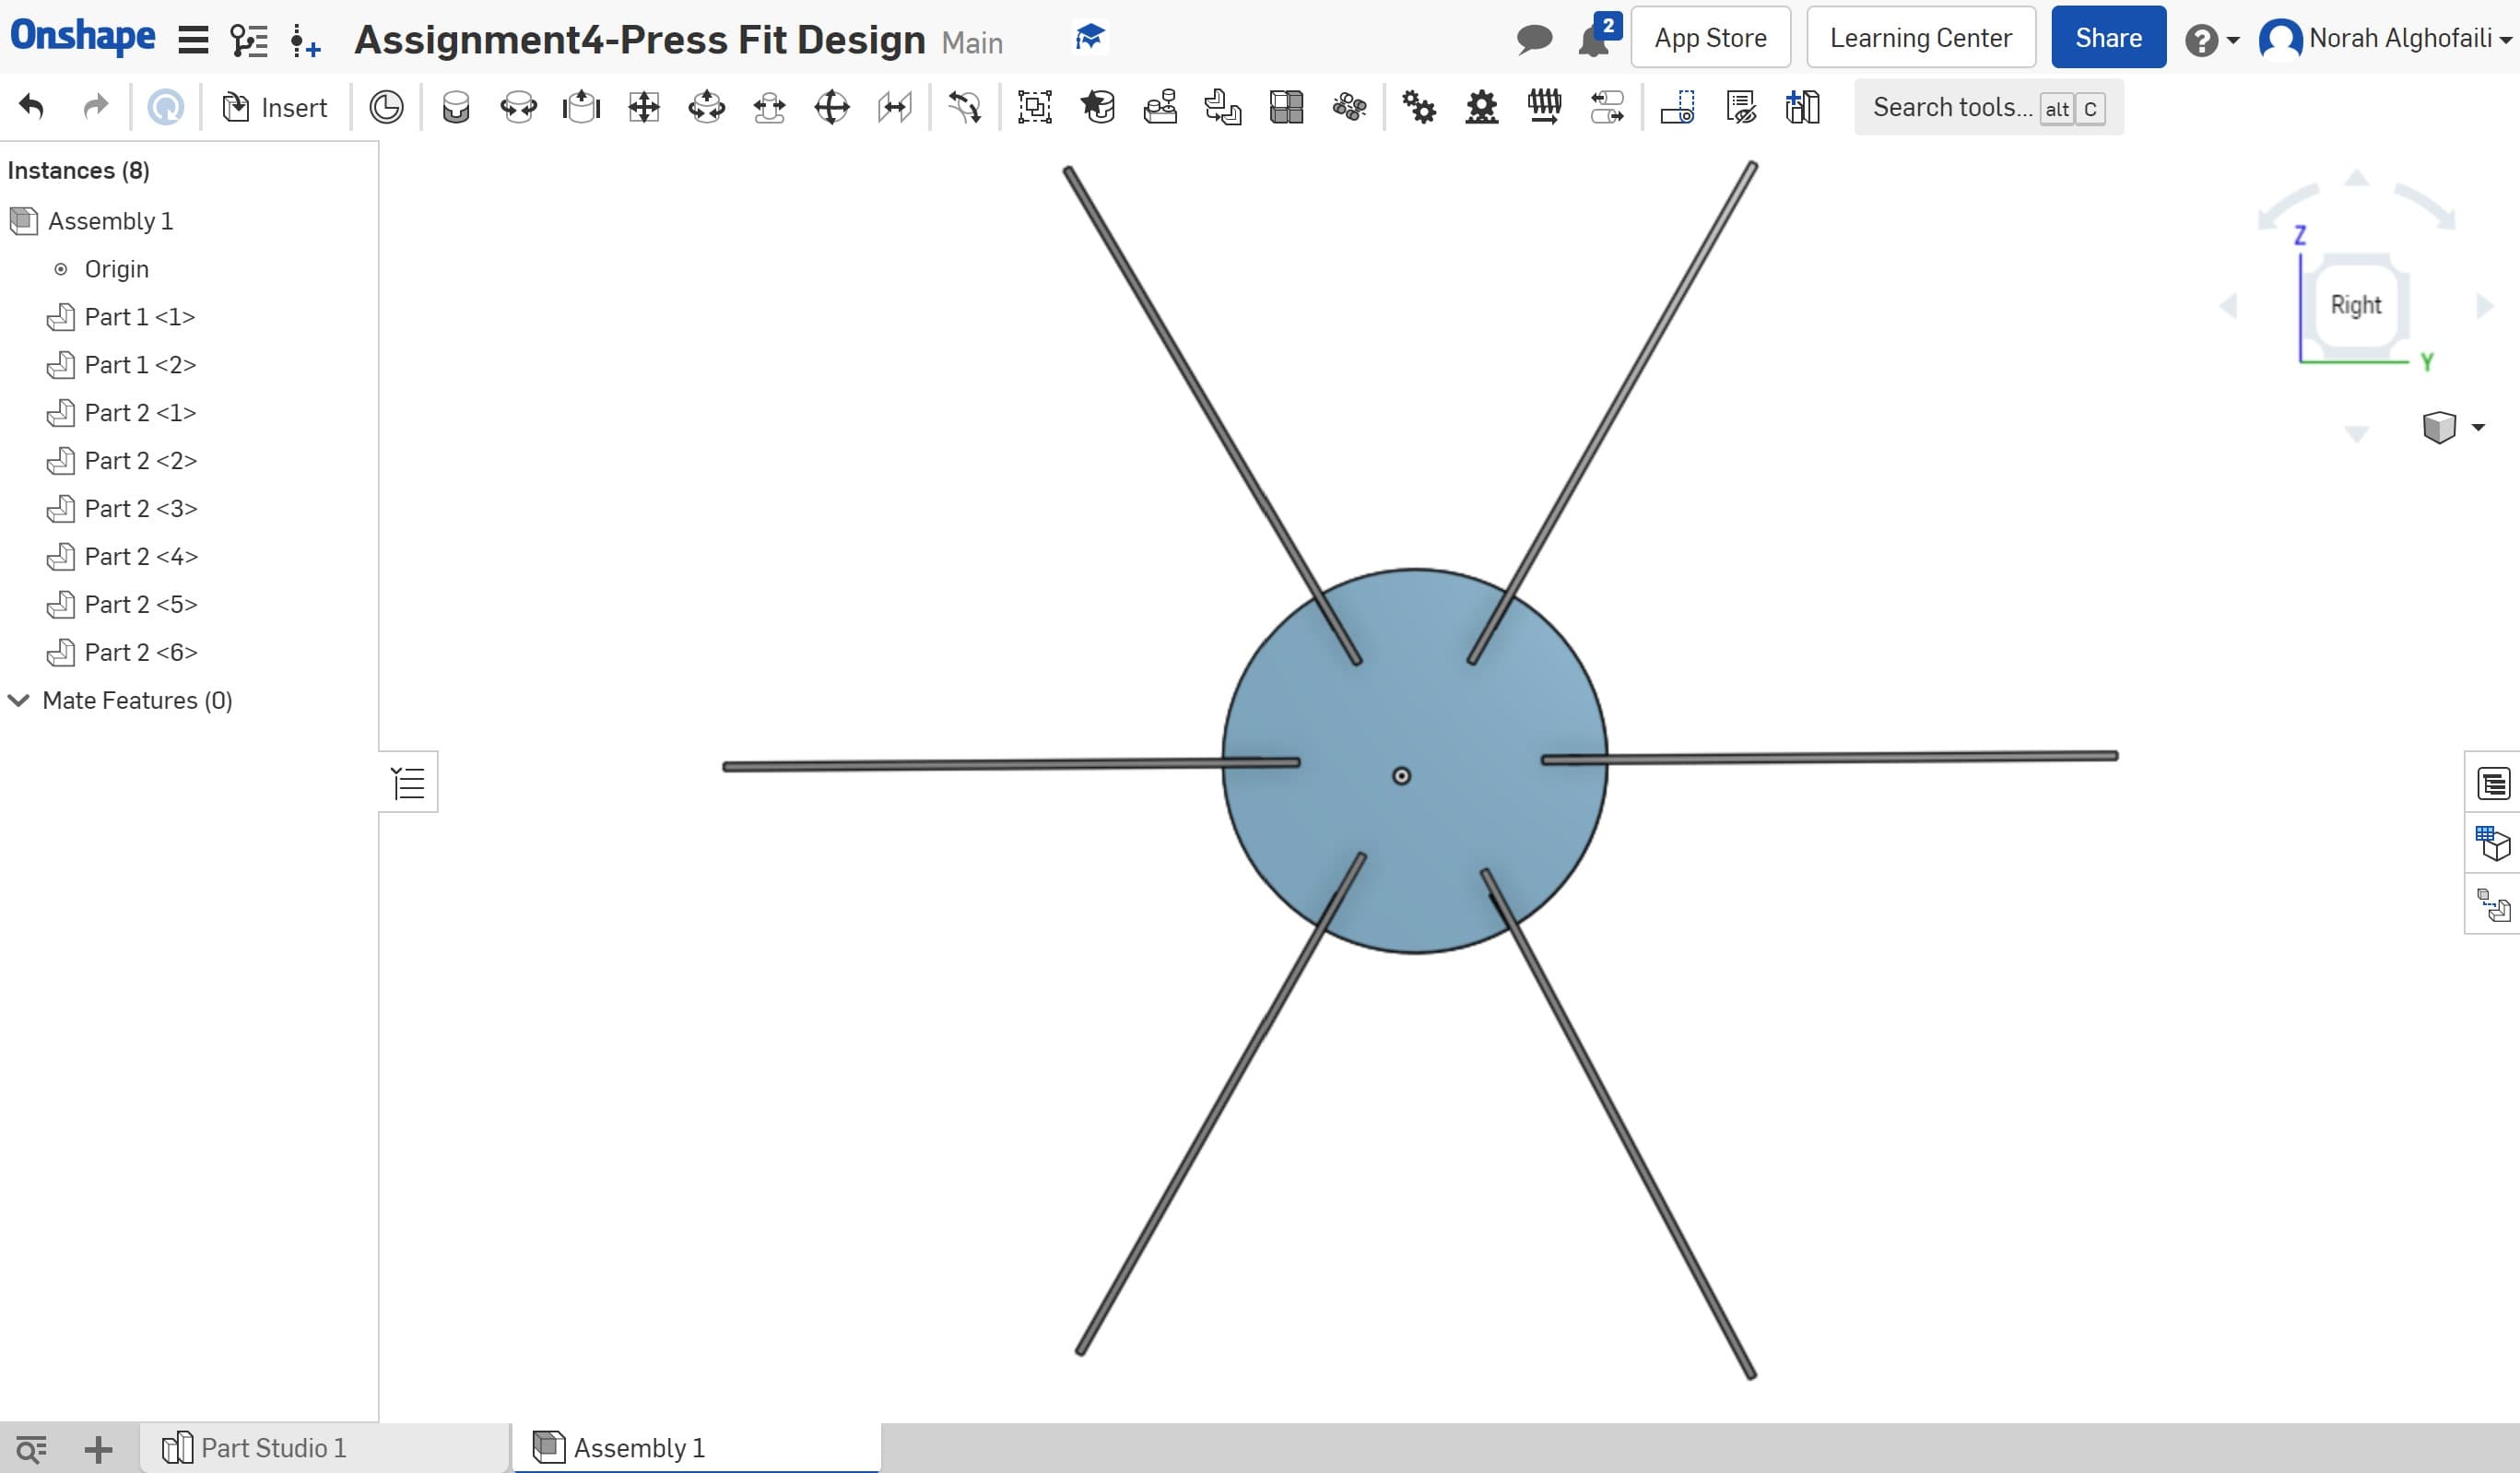
6. Use corner rectangle with variables #JointW = 0.225 cm and #JointL = 2 cm to be fit with the other joints. then using a circular pattern to make 6 copies around the shape.
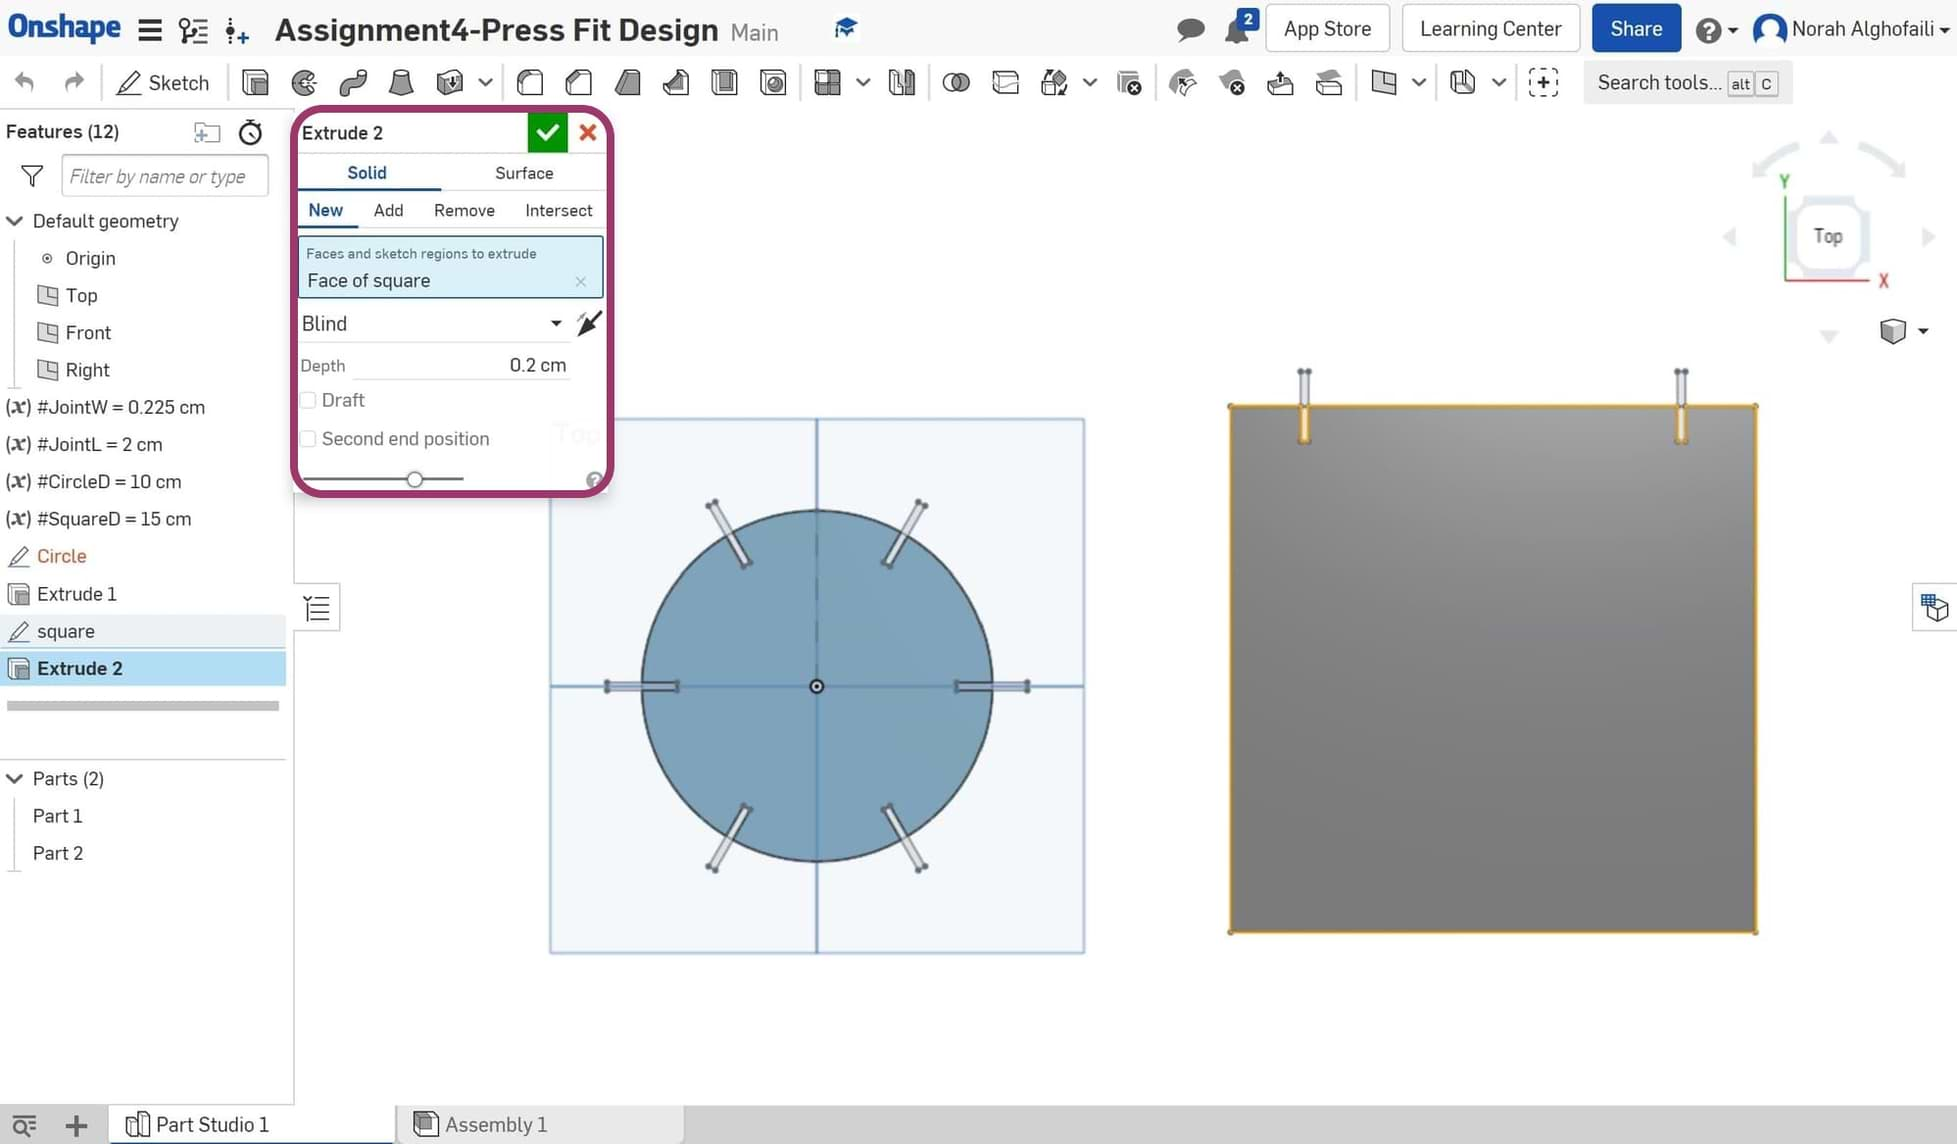
7. After that is done, subtract the joint from the circle by using extrude.

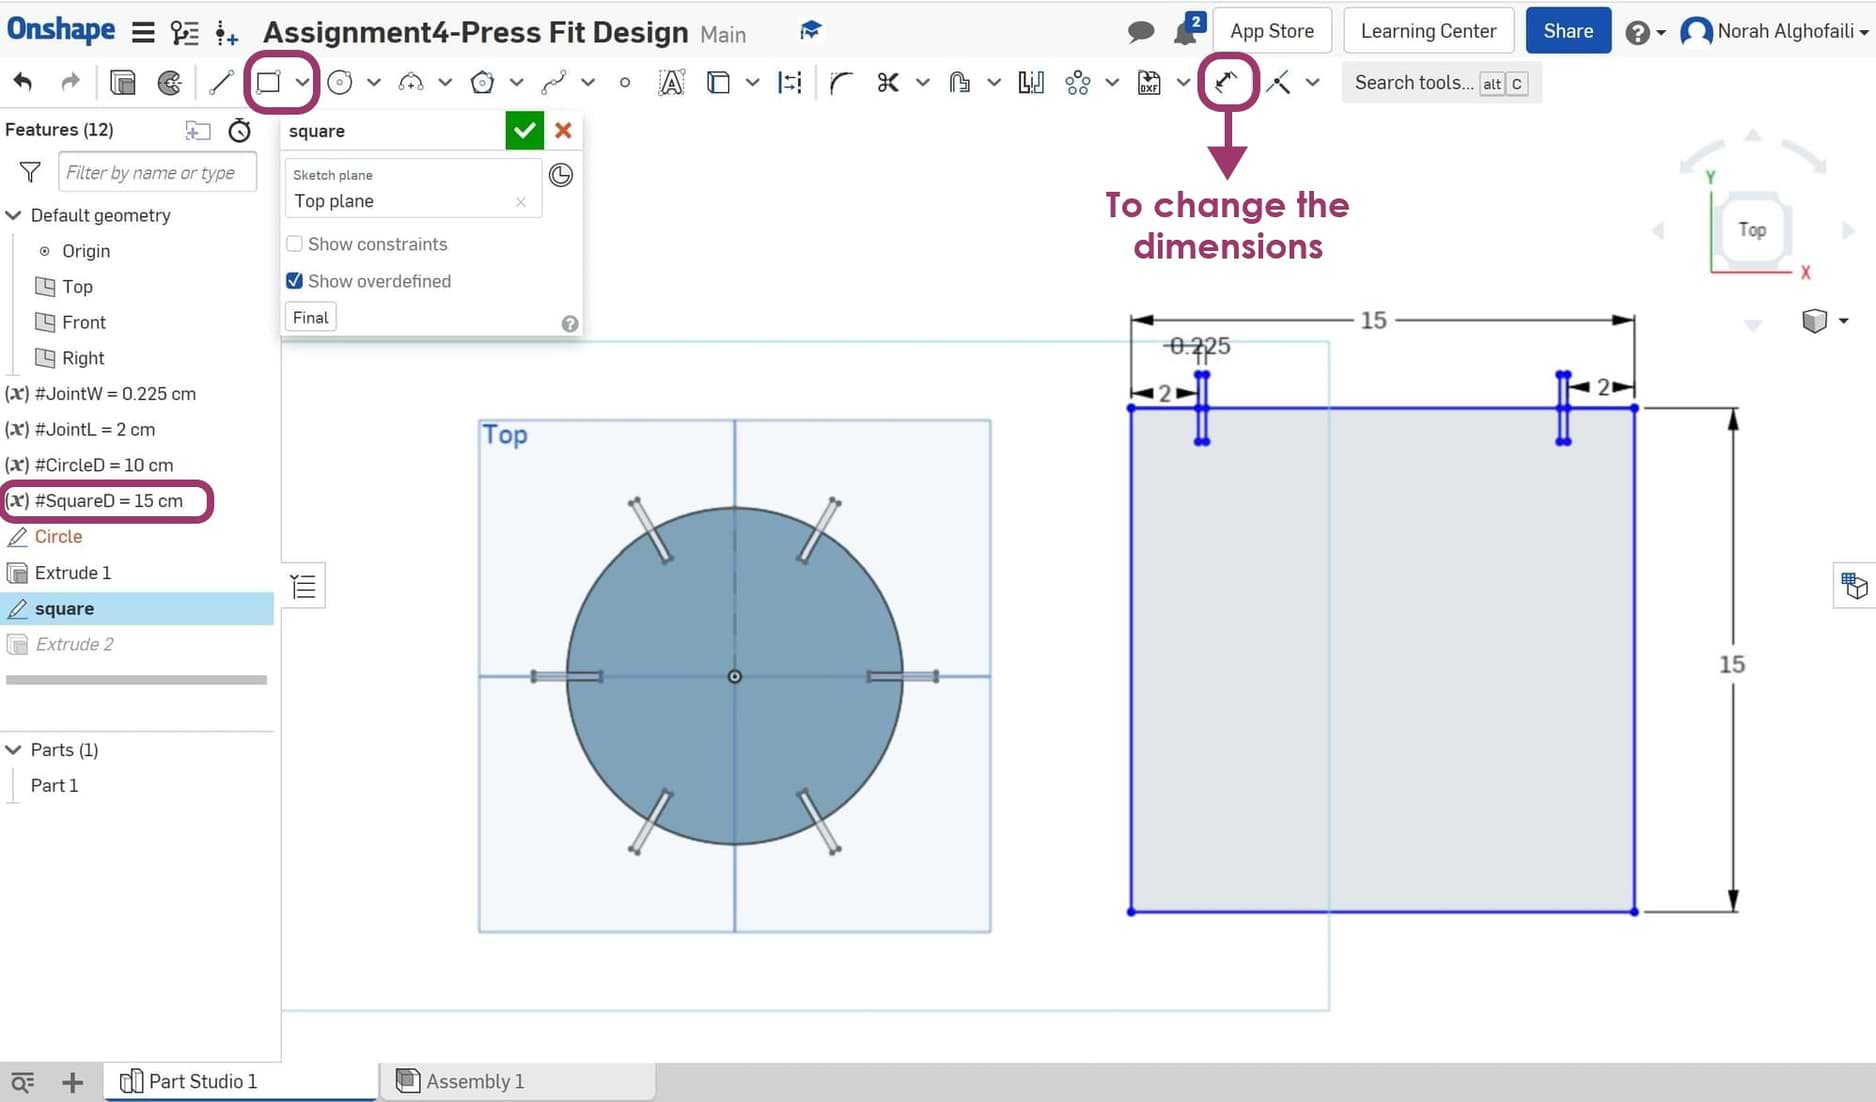
8. Draw the second part of the object which is square shape, and use the variable #SquareL = 15 cm to change the dimensions then draw 2 joints. Afterwards, subtract them by using extrude.
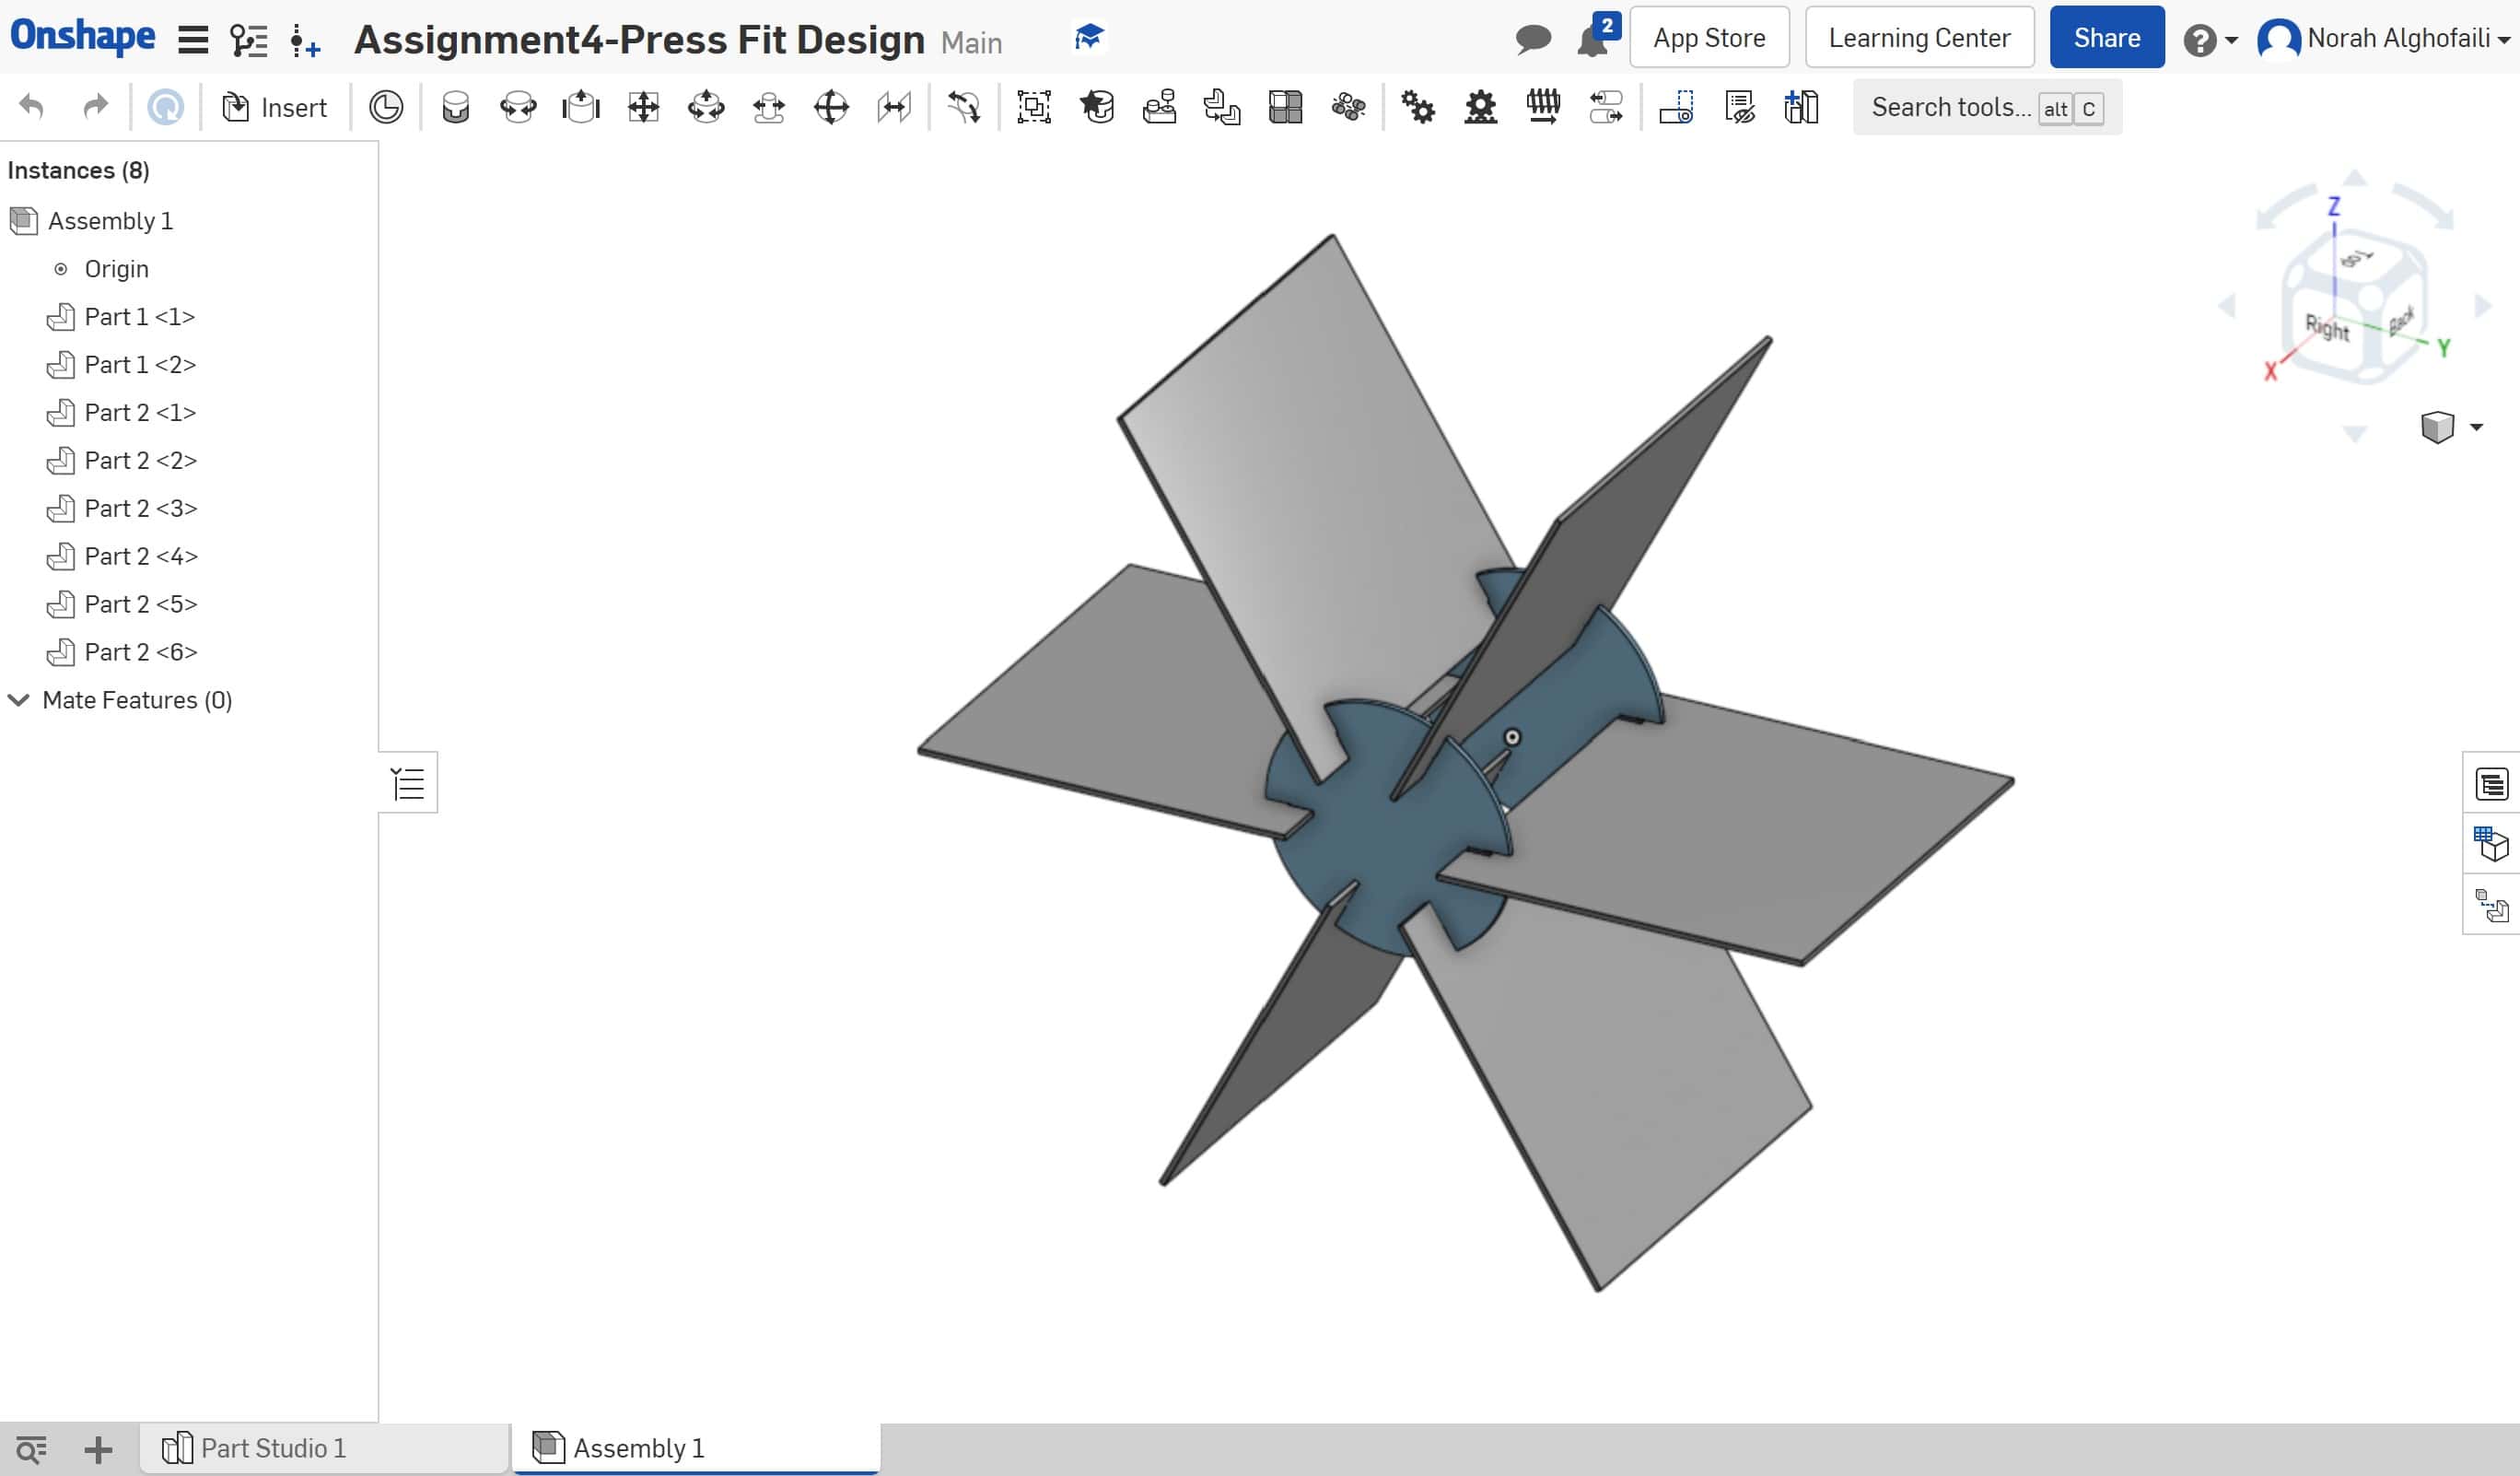
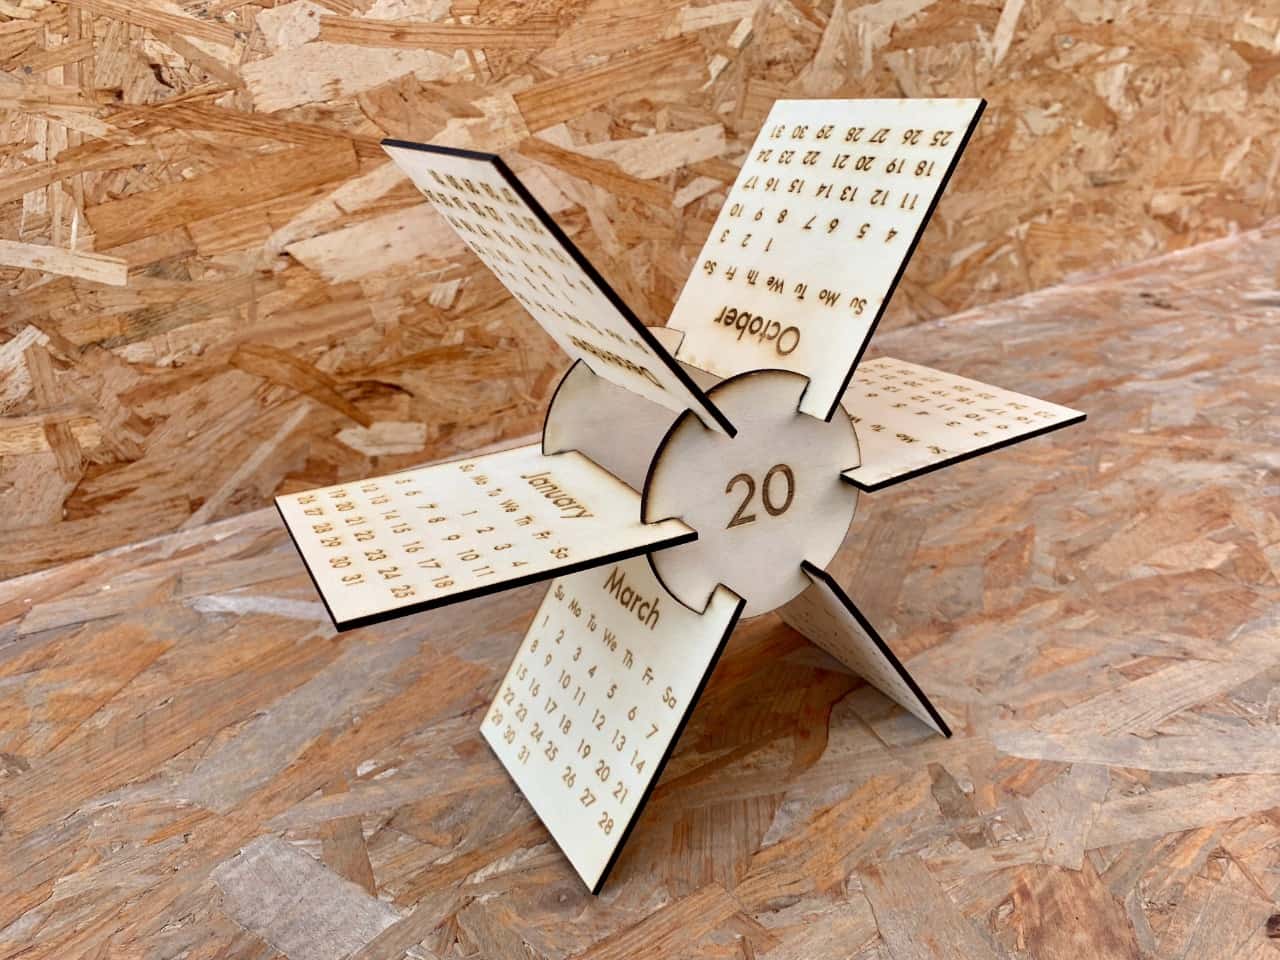
Assemble the object !
Go to the assembly window > Then insert > Choose the objects > Start assemble the objects together.

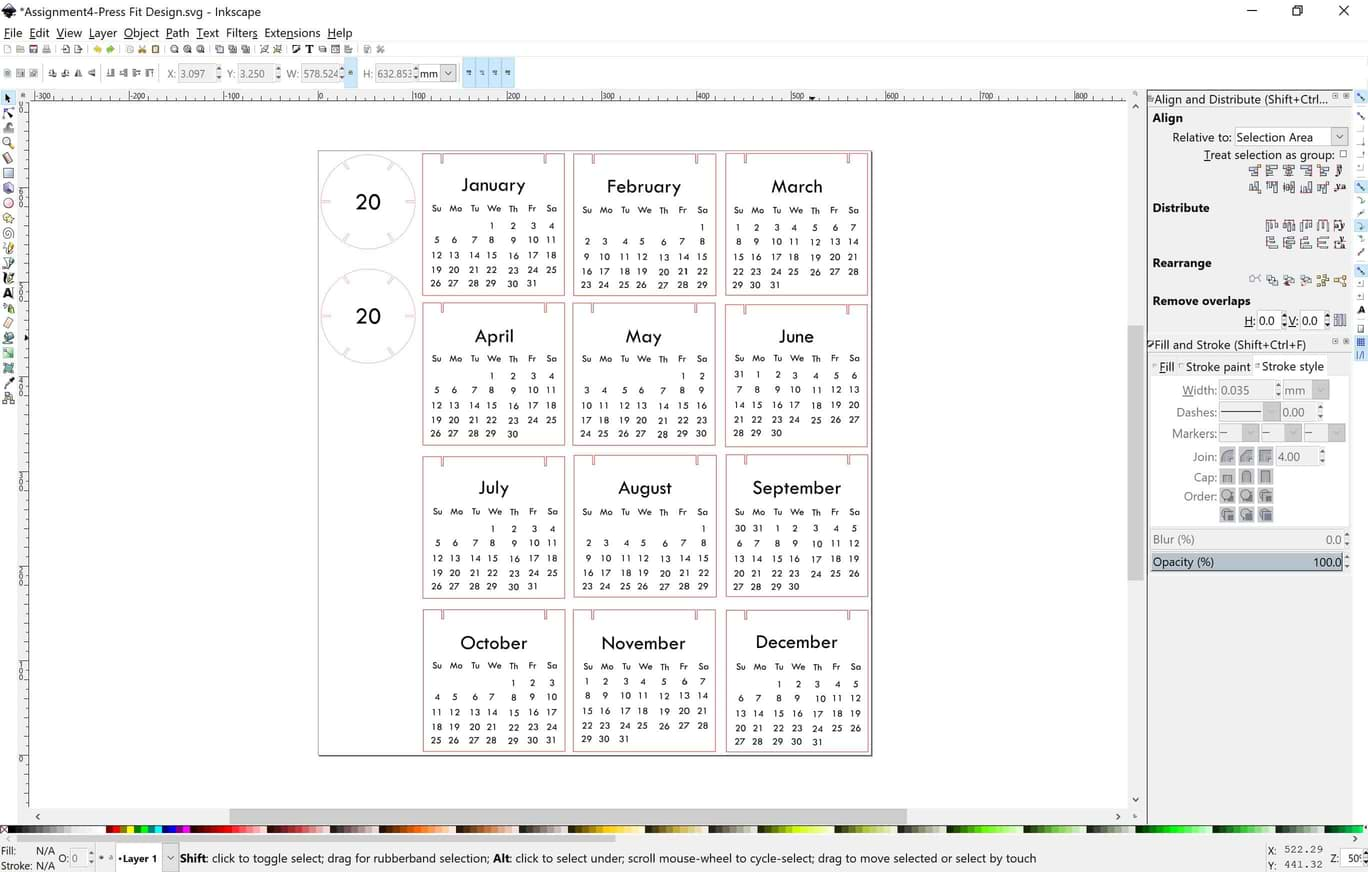
Inkscape
I decided to write the text of the calendar by using Inkscape software.
Now, let's cut the shapes! How ?
Change the printing settings by using Fill and Stroke.
1. To engrave the text > Make the text fill.
2. To cut the outlines > Make the outline stroke paint > Change the color to Red color > Change the stroke style to 0.035 mm.
3. To resize the page > Select the design > Go to file > Document properties > Resize page to content > Change the values (Top, Left, Right and Bottom).
4. To export the design from Inkscape to RetinaEngrave > Go to file > Print > Choose Full Spectrum Engineering Driver > Print.
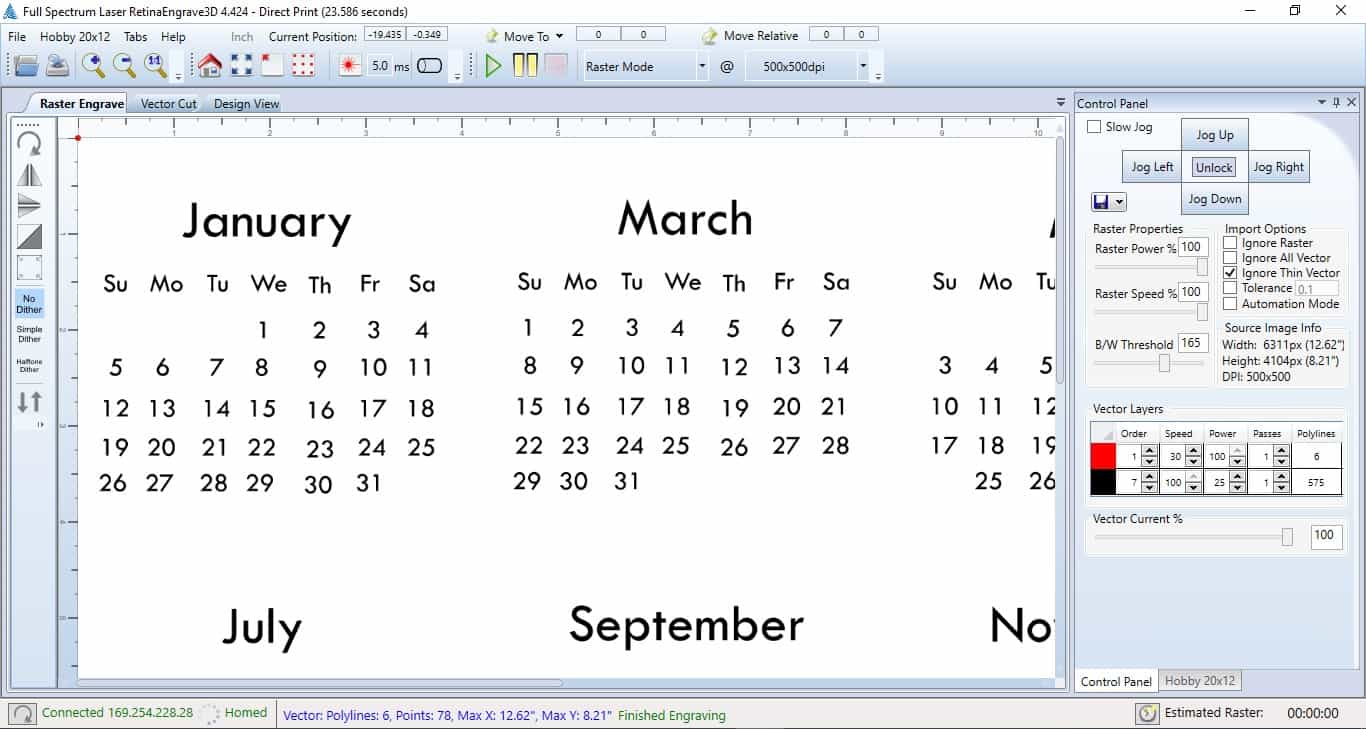
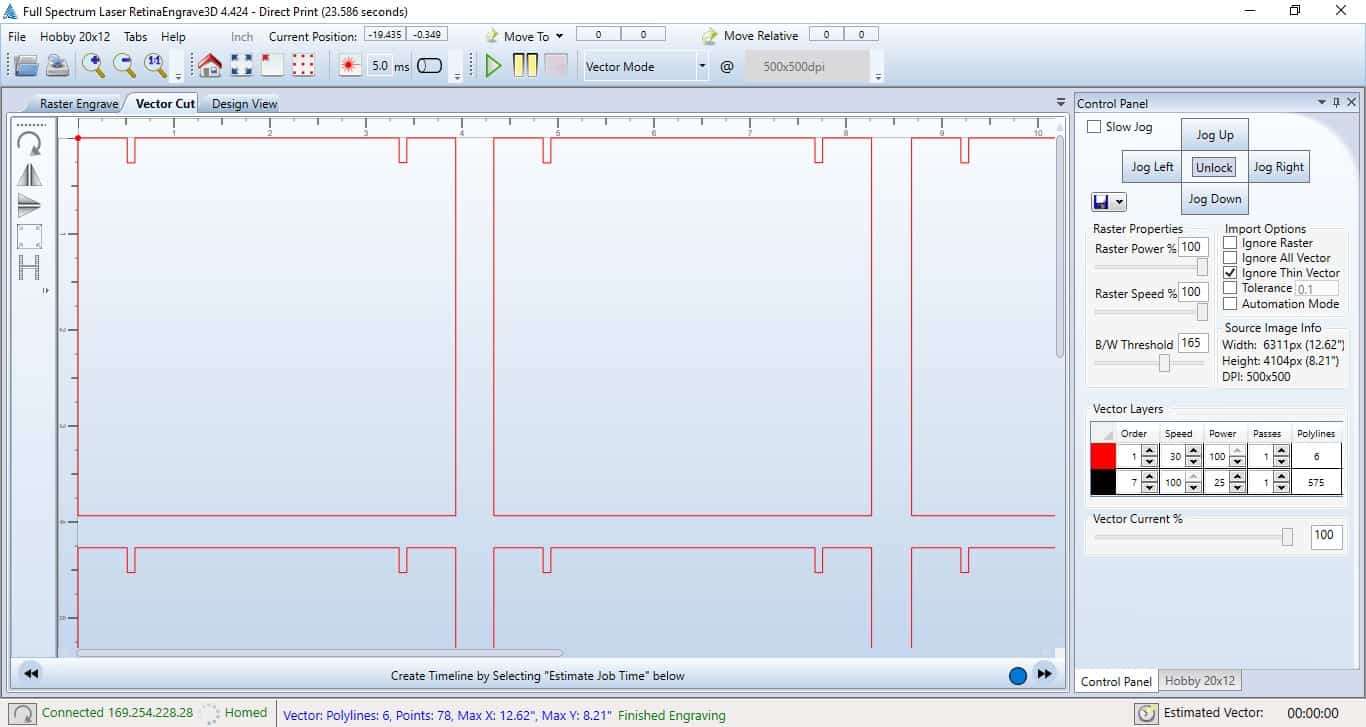
How to use RetinaEngrave 3D software ?
1. Open the RetinaEngrave 3D software.
2. Connect the machine to the computer by using ethernet cable and make sure it’s connected with the same IP.
3. Put a check mark on ignore thin vector.
4. Change the speed and power for raster and vector layers based on the material settings schedule.
Recommended Power Settings for Material Test:
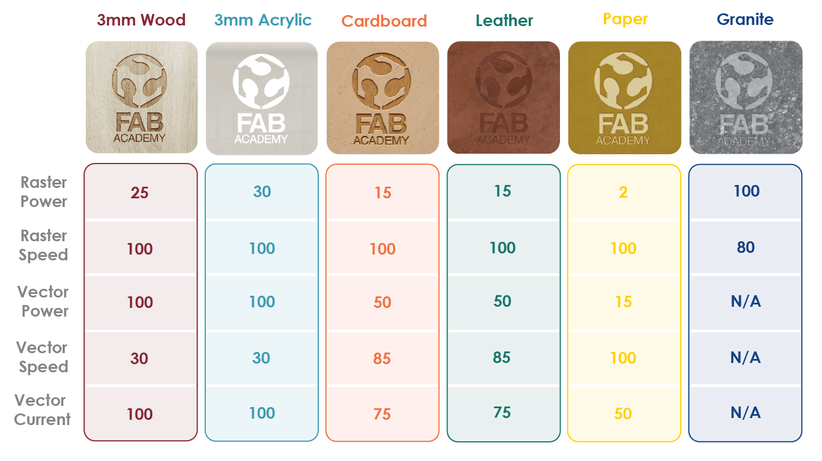
Raster :
I wil make the speed (100) and the power (25).
Vector :
I wil make the speed (30) and the power (100).
Now, let's start cutting the design !
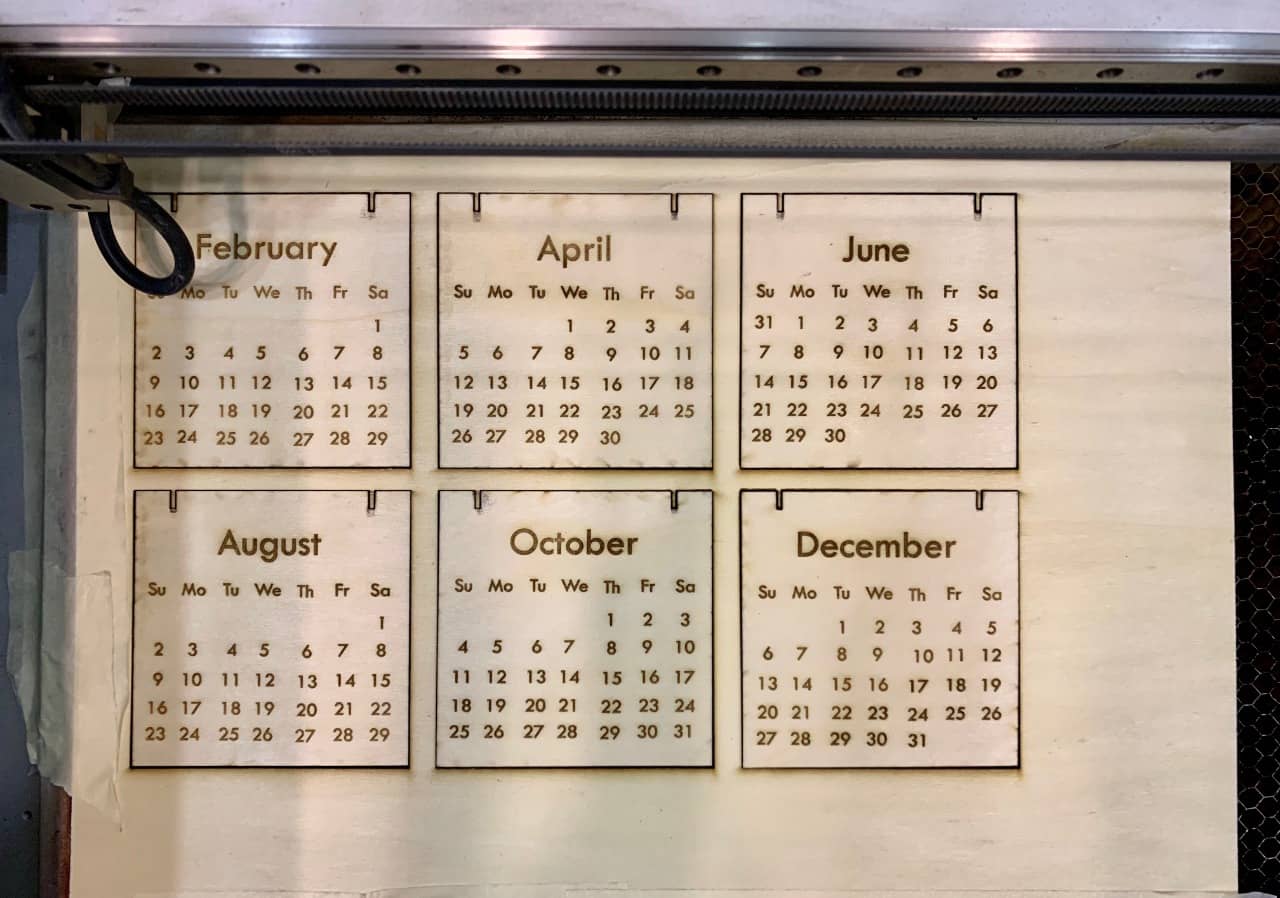
The finsl result !
Vinyl Cutter Machine
What is a vinyl cutter machine ?
A vinyl cutter is a type of computer-controlled machine. Just as a printer controls a nozzle, the computer controls the movement of a sharp blade over the surface of the vinyl material. This blade is used to cut out the designs from sheets. To cut out a design, a vector-based image must be created using vector drawing software.
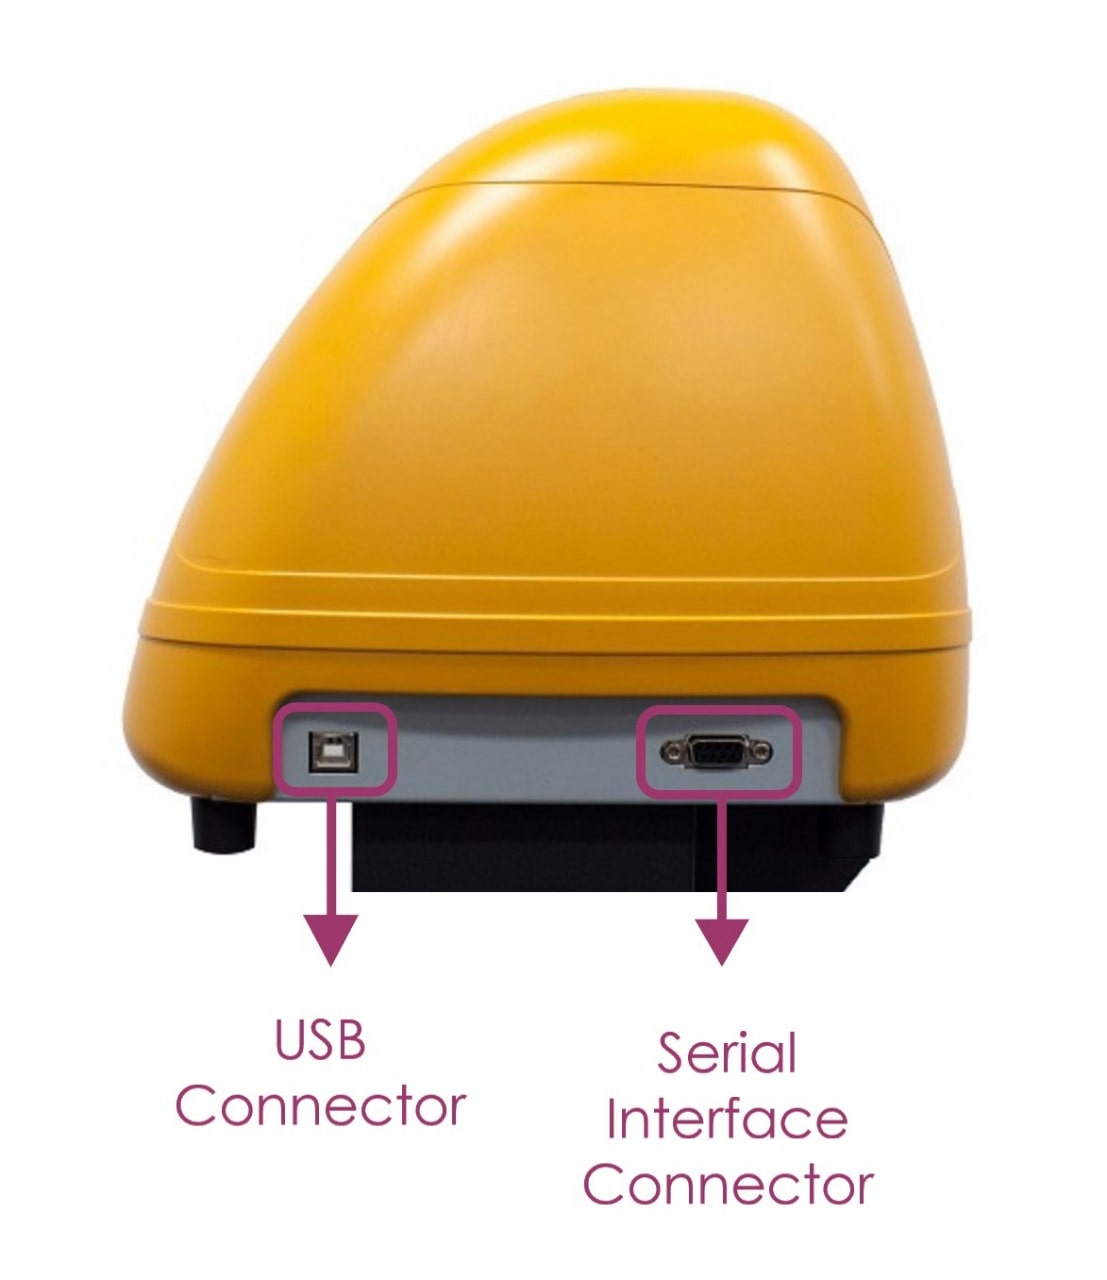
GCC Expert 24 Vinyl Cutter Machine
In TalentS LAB, we have GCC Expert 24 vinyl cutter machine.
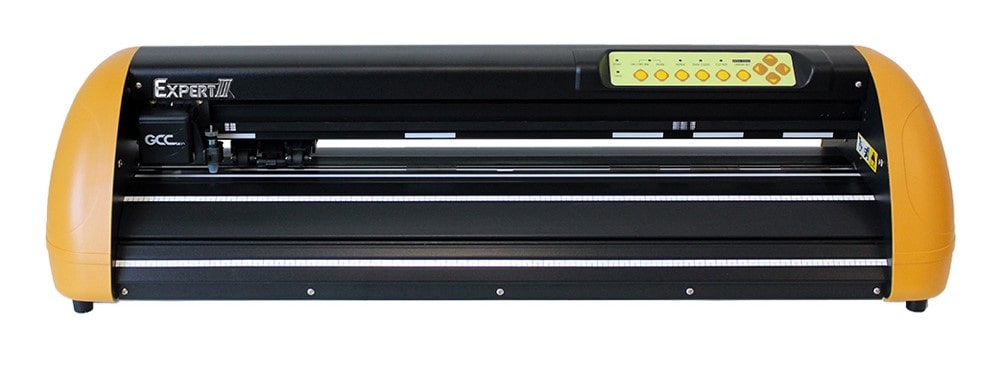
Specifications :
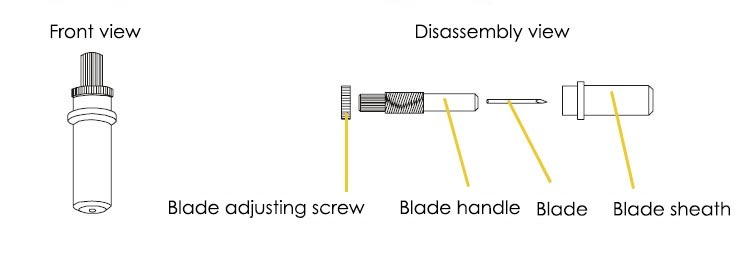
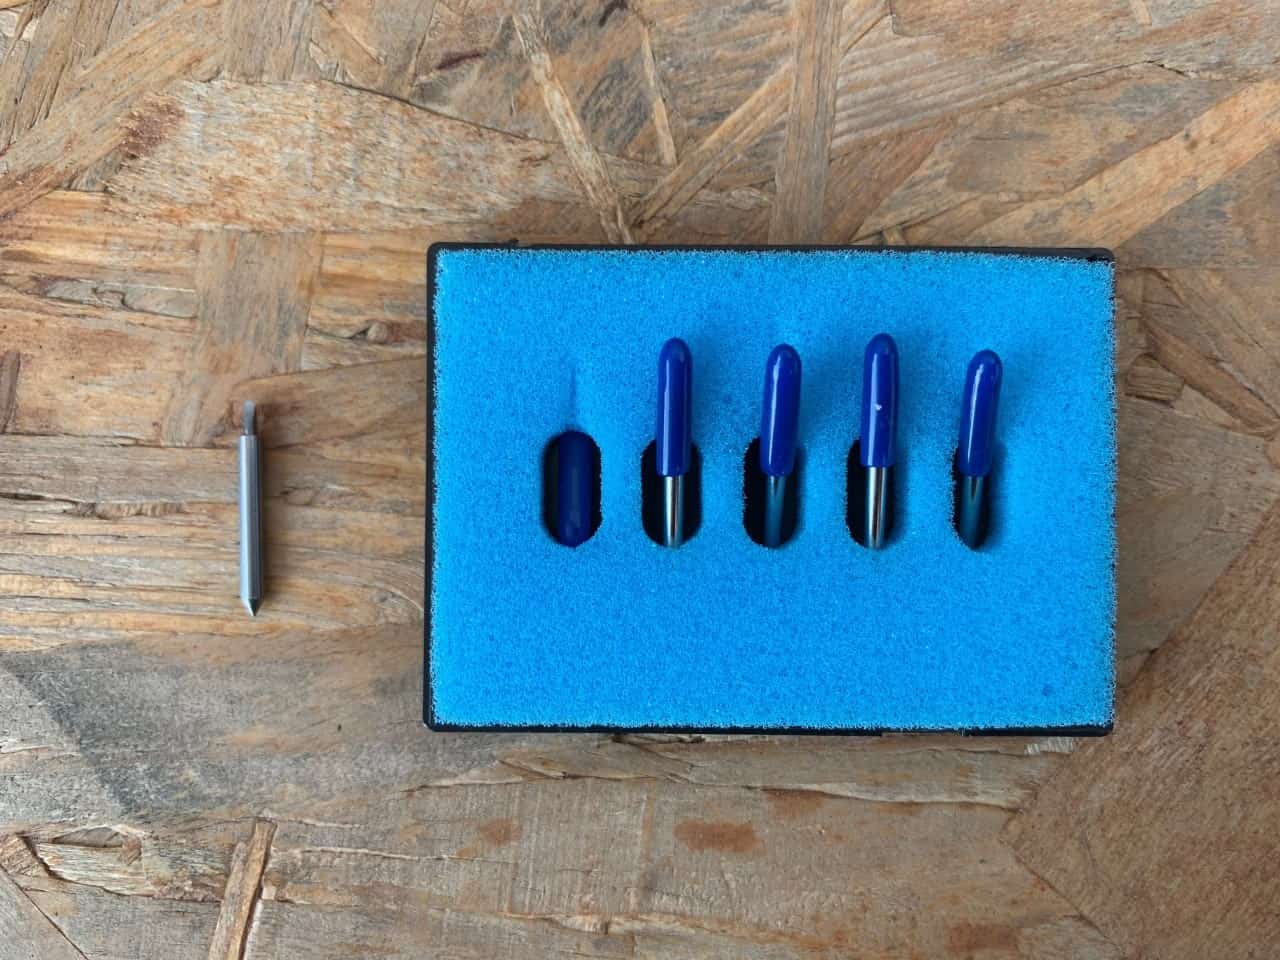
Blade and blade holder of cutting plotter:
There are three popular types of blade :
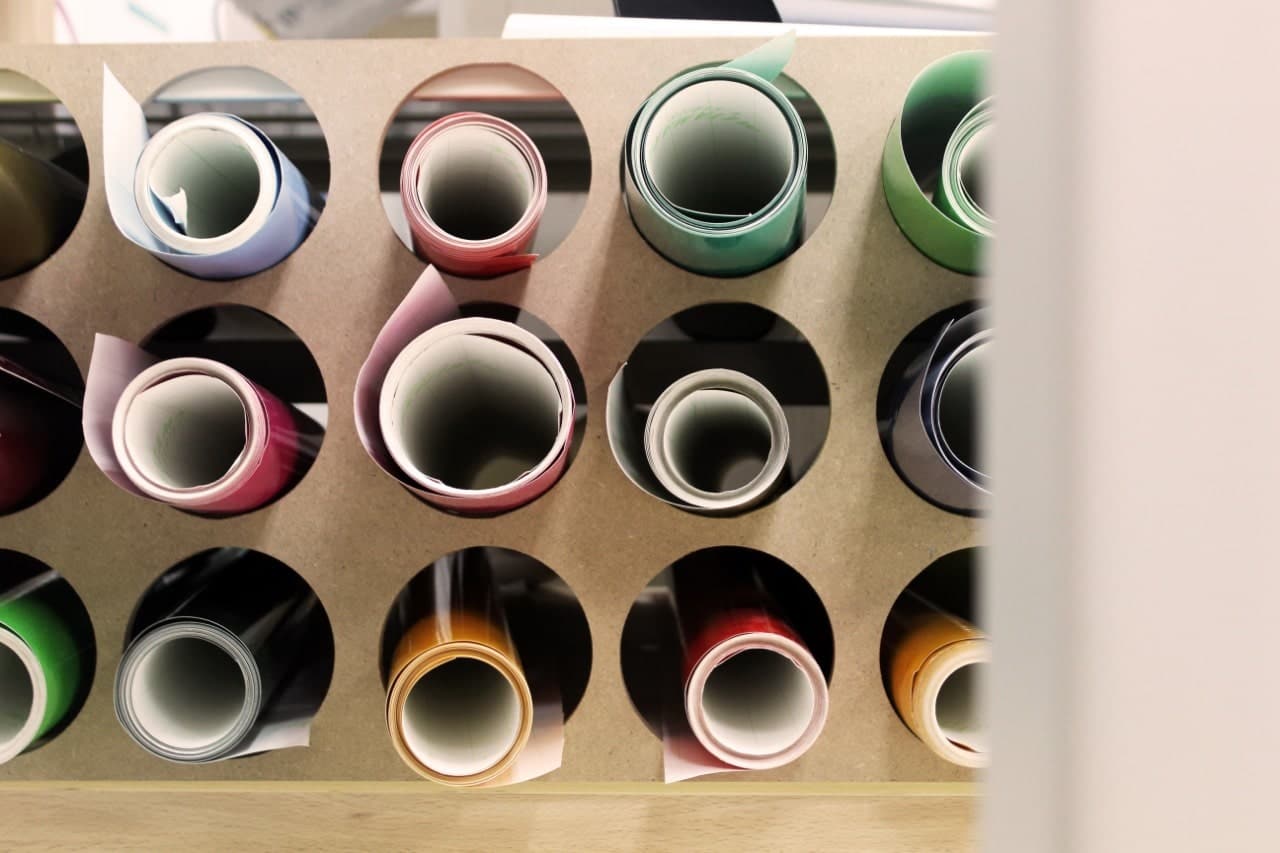
What are the materials ?
We can use different materials such as:
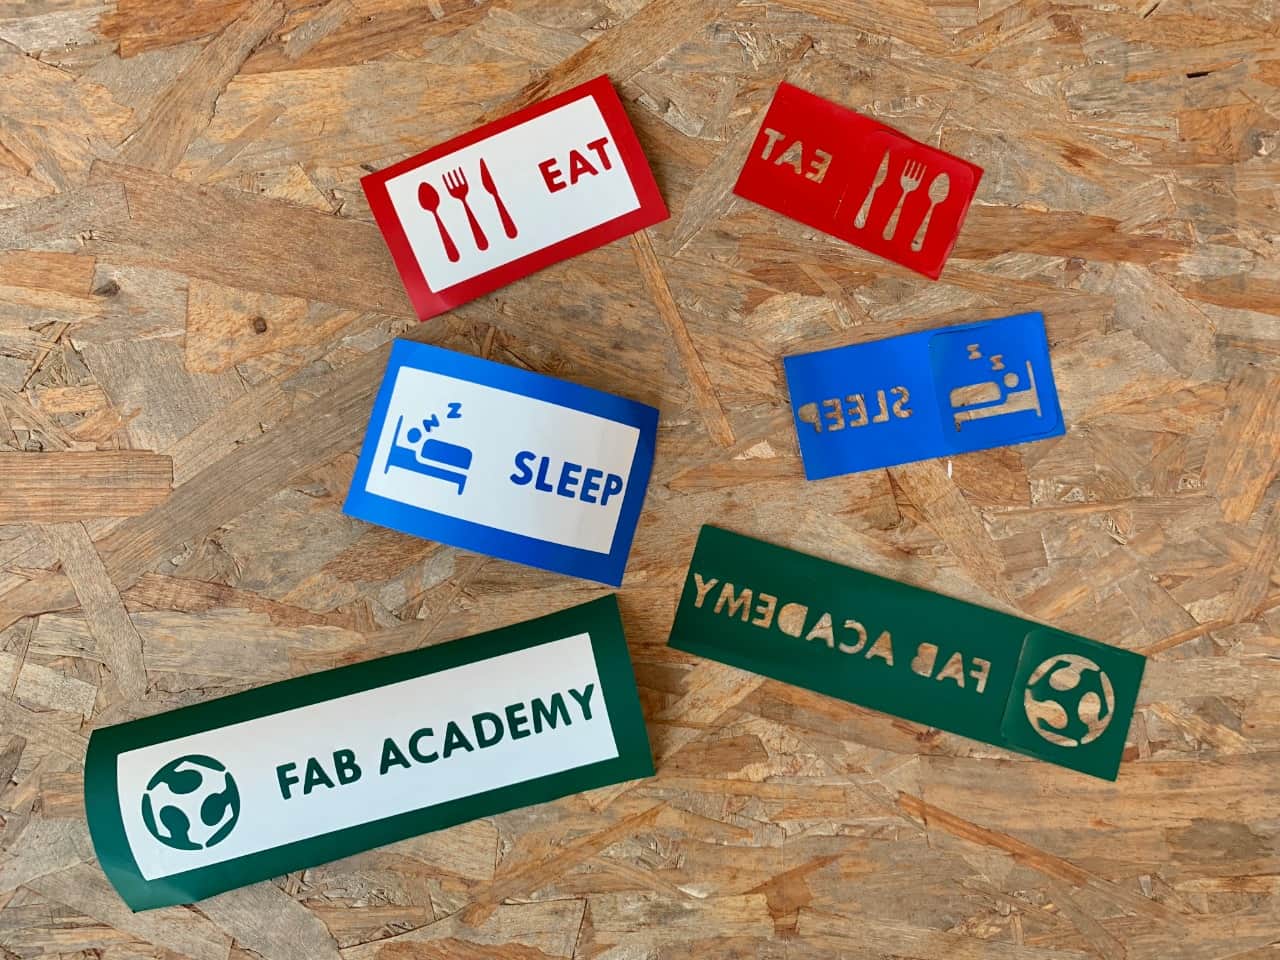
Now, let’s design a sticker !
I used Inkscape to design the sticker. This design represents my life during the FAB Academy course. I used trace bitmap to change the icons from raster to vector.

Let’s cut it !
I’m going to use GreatCut software which is the software for the vinyl cutter.
How to use it ?
1. Open the software.
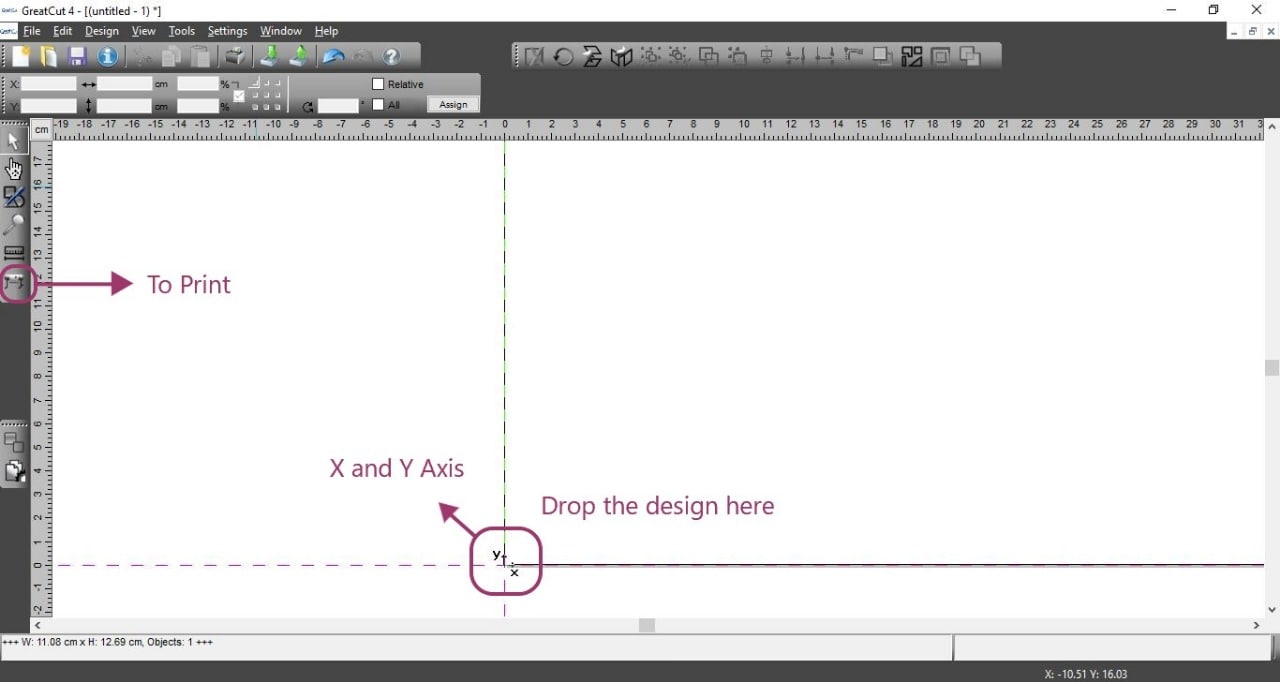
2. Drop the SVG file.
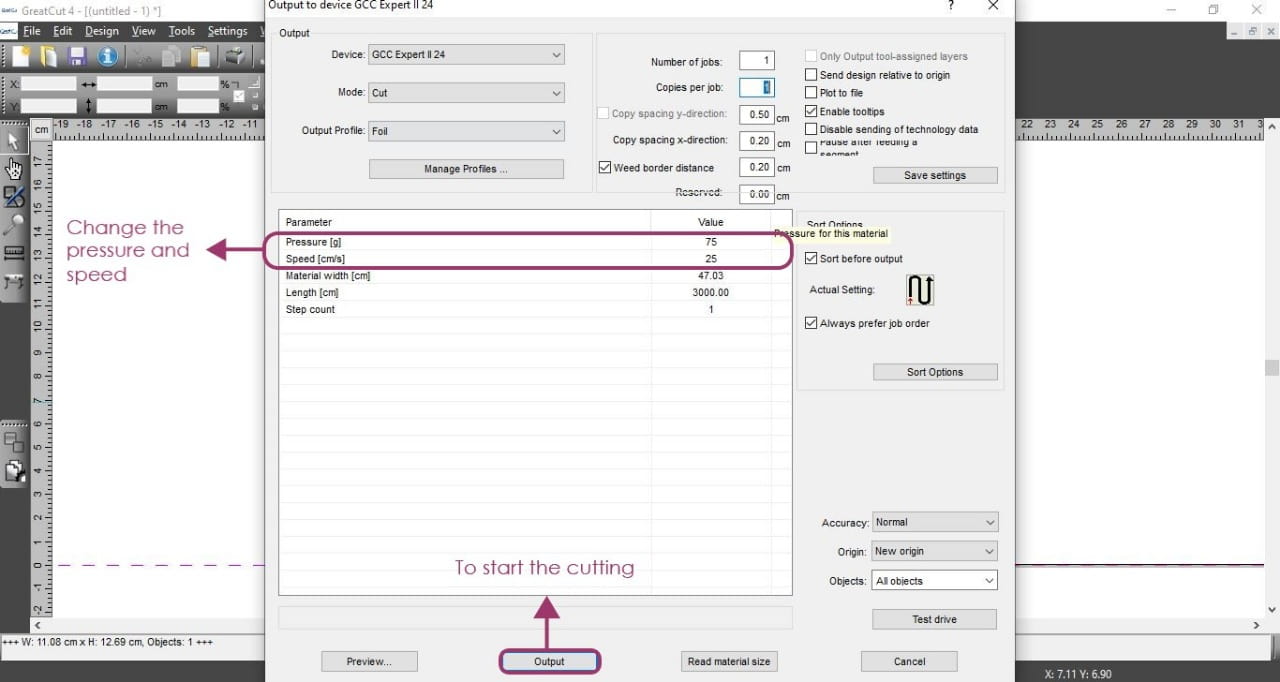
3. Go to print > Change the pressure and Speed > Press on output to start the cutting.
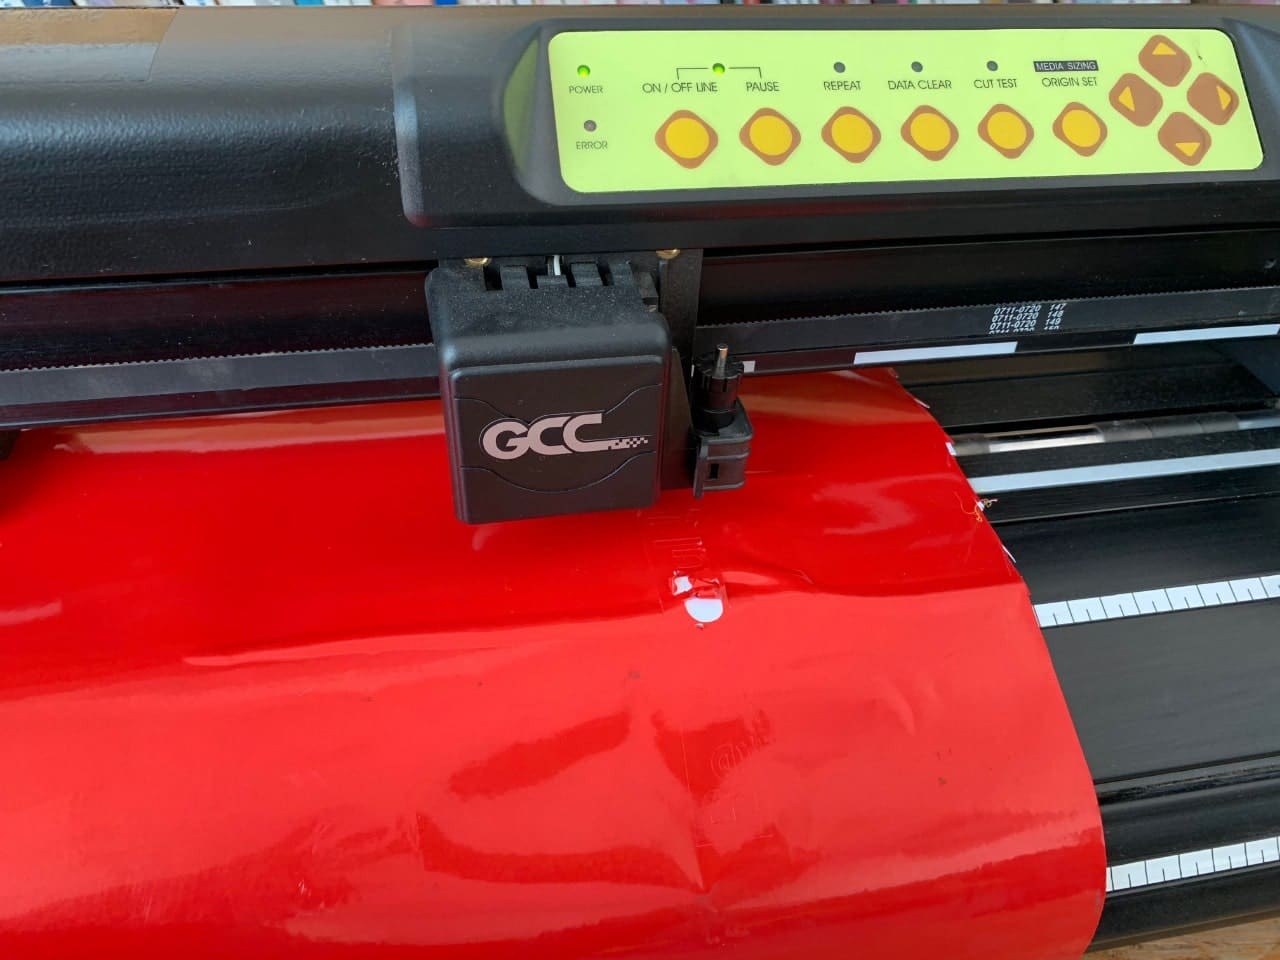
Let’s learn how to use the vinyl machine !
1. Connect the machine to a computer using a USB cable.
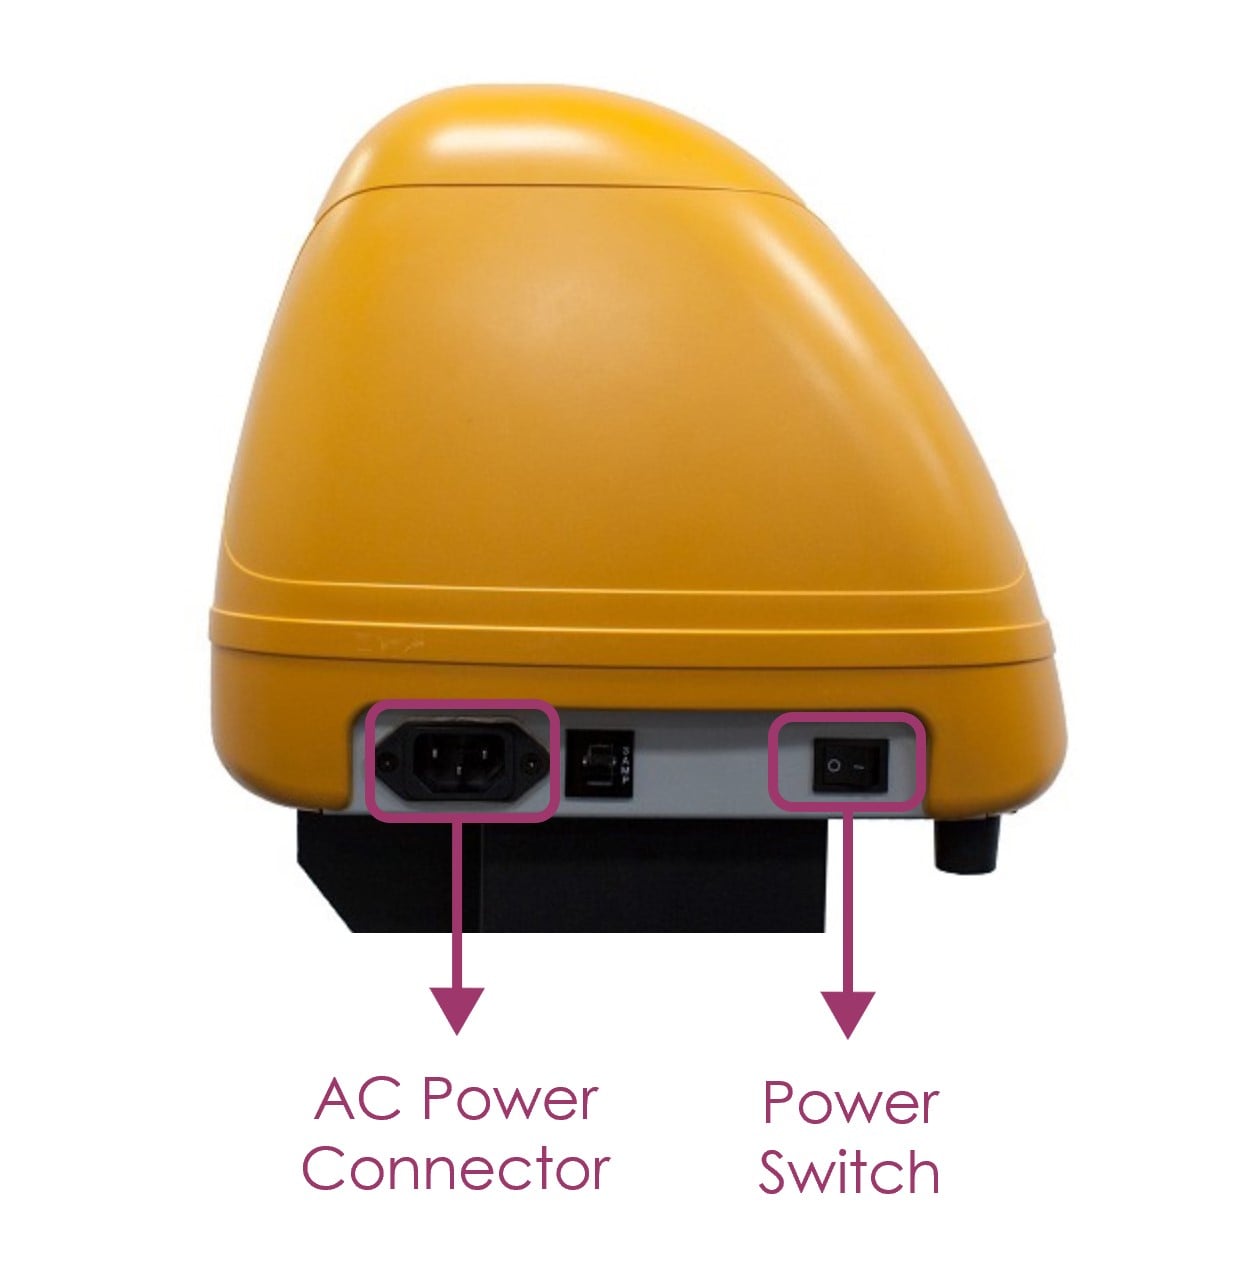
2. Use the power switch to turn it on.
3. Open the grid drum.
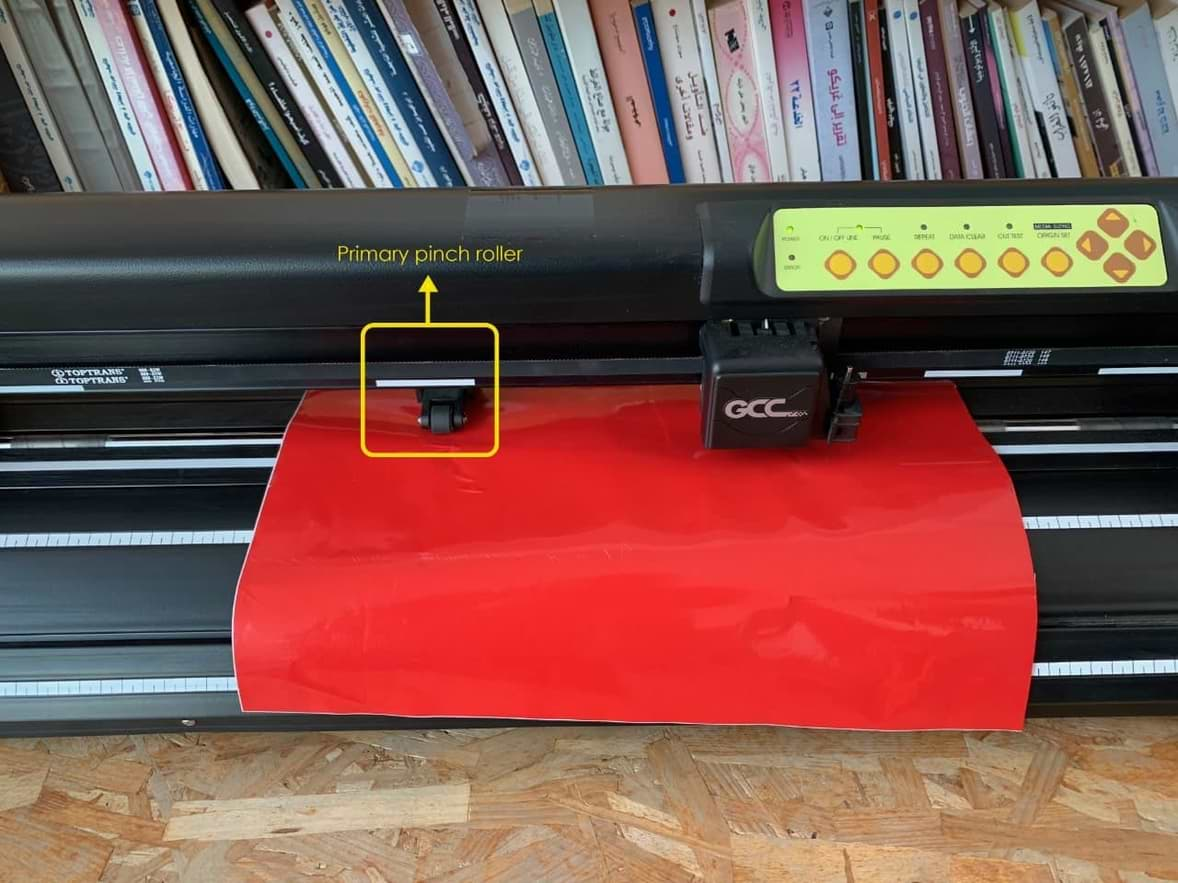
4. Put the vinyl sheet.
5. Put the primary pinch roller on the sticker to help hold the material during cutting.
6. Close the grid drum.
I was faced with a difficulty when I used the machine. The first cut got damaged, and then I tried to solve that by changing the pressure and speed with different numbers. This still did not make the machine cut the design as it should.
I changed the cutting blade to a new one and the cut was just as I wanted it.
Start Cutting !
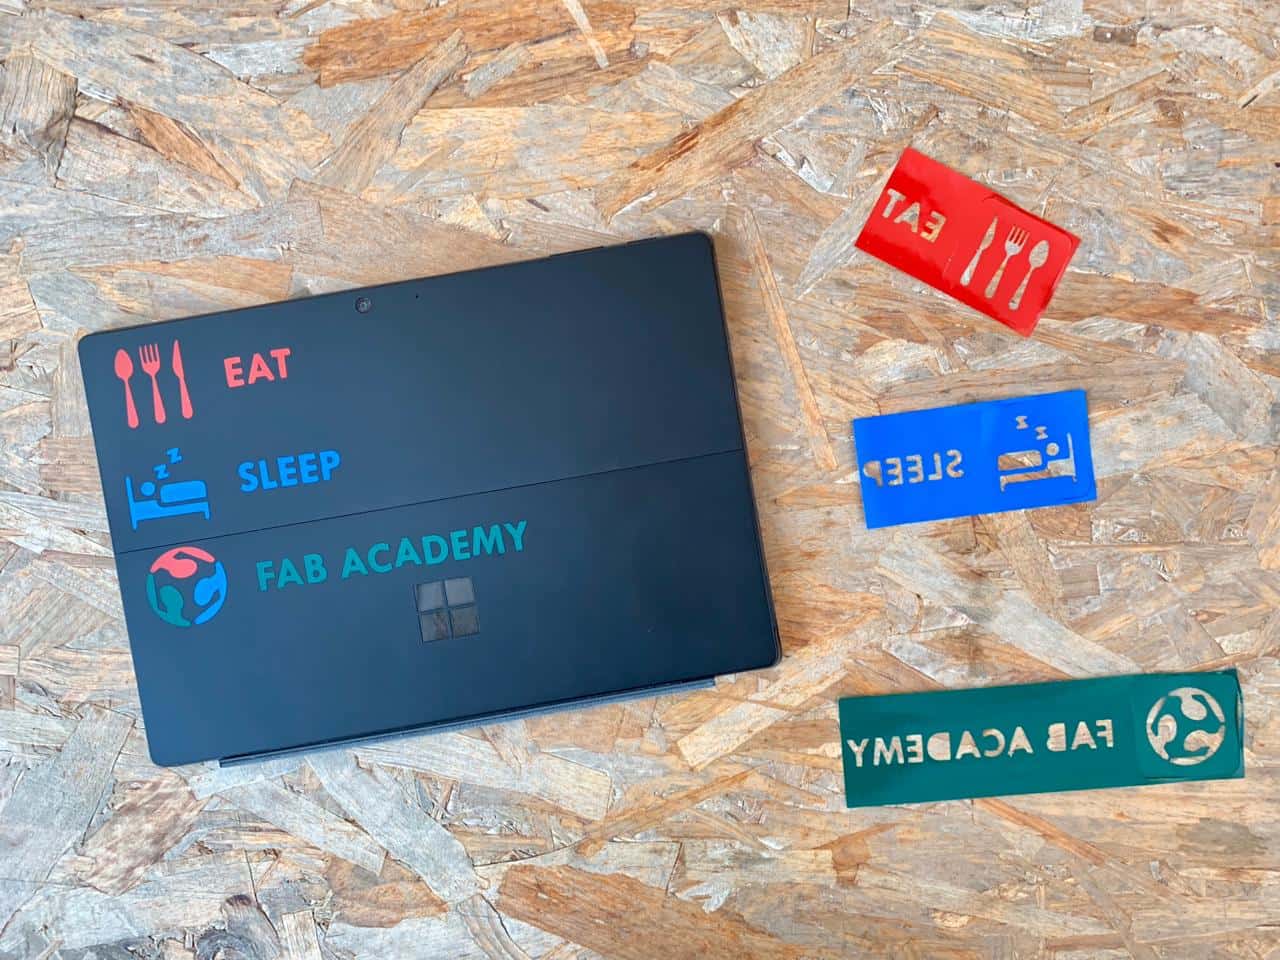
Now, I am going to use transparent tape to remove the sticker and stick it on the laptop.
The Final Result !