Wildcard Week !
We finally got to this assignment. This week, we have the chance to choose anything. We can use this to make something new! I love this assignment because it gives us freedom to think and explore new things. I think it will be so much fun. We were asked to design and produce something with a digital fabrication process (incorporating computer-aided design and manufacturing) not covered in any other assignment.
During the Fab Academy course, I learned many different machines, electronic devices and techniques. So, I prefer to use a new machine that we have in our lab which I’ve never used before.
Yes, I got it ! I want to try two techniques that I have never used before. will be using:
Hmmmmmm... I am trying to think about what I can make by using these techniques. I think I will make something delicious !! Guess what it is?
Is there anyone in the world who does not like chocolates? Of course not ! So, let’s make a chocolate mold !!!
The process of completing this assignment will be as follow :
Let’s Start!
Design :
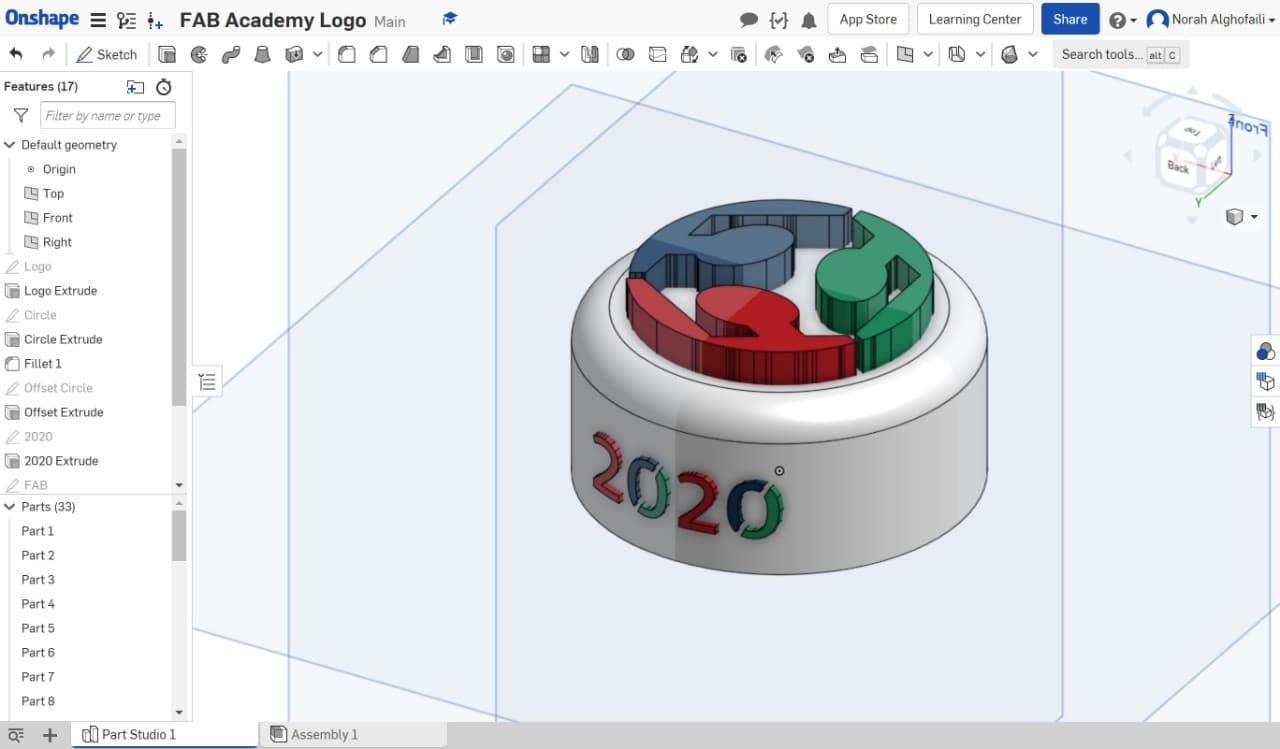
I’m going to design an object by using Onshape software. I’m thinking of making FAB Academy chocolate by using their logo.
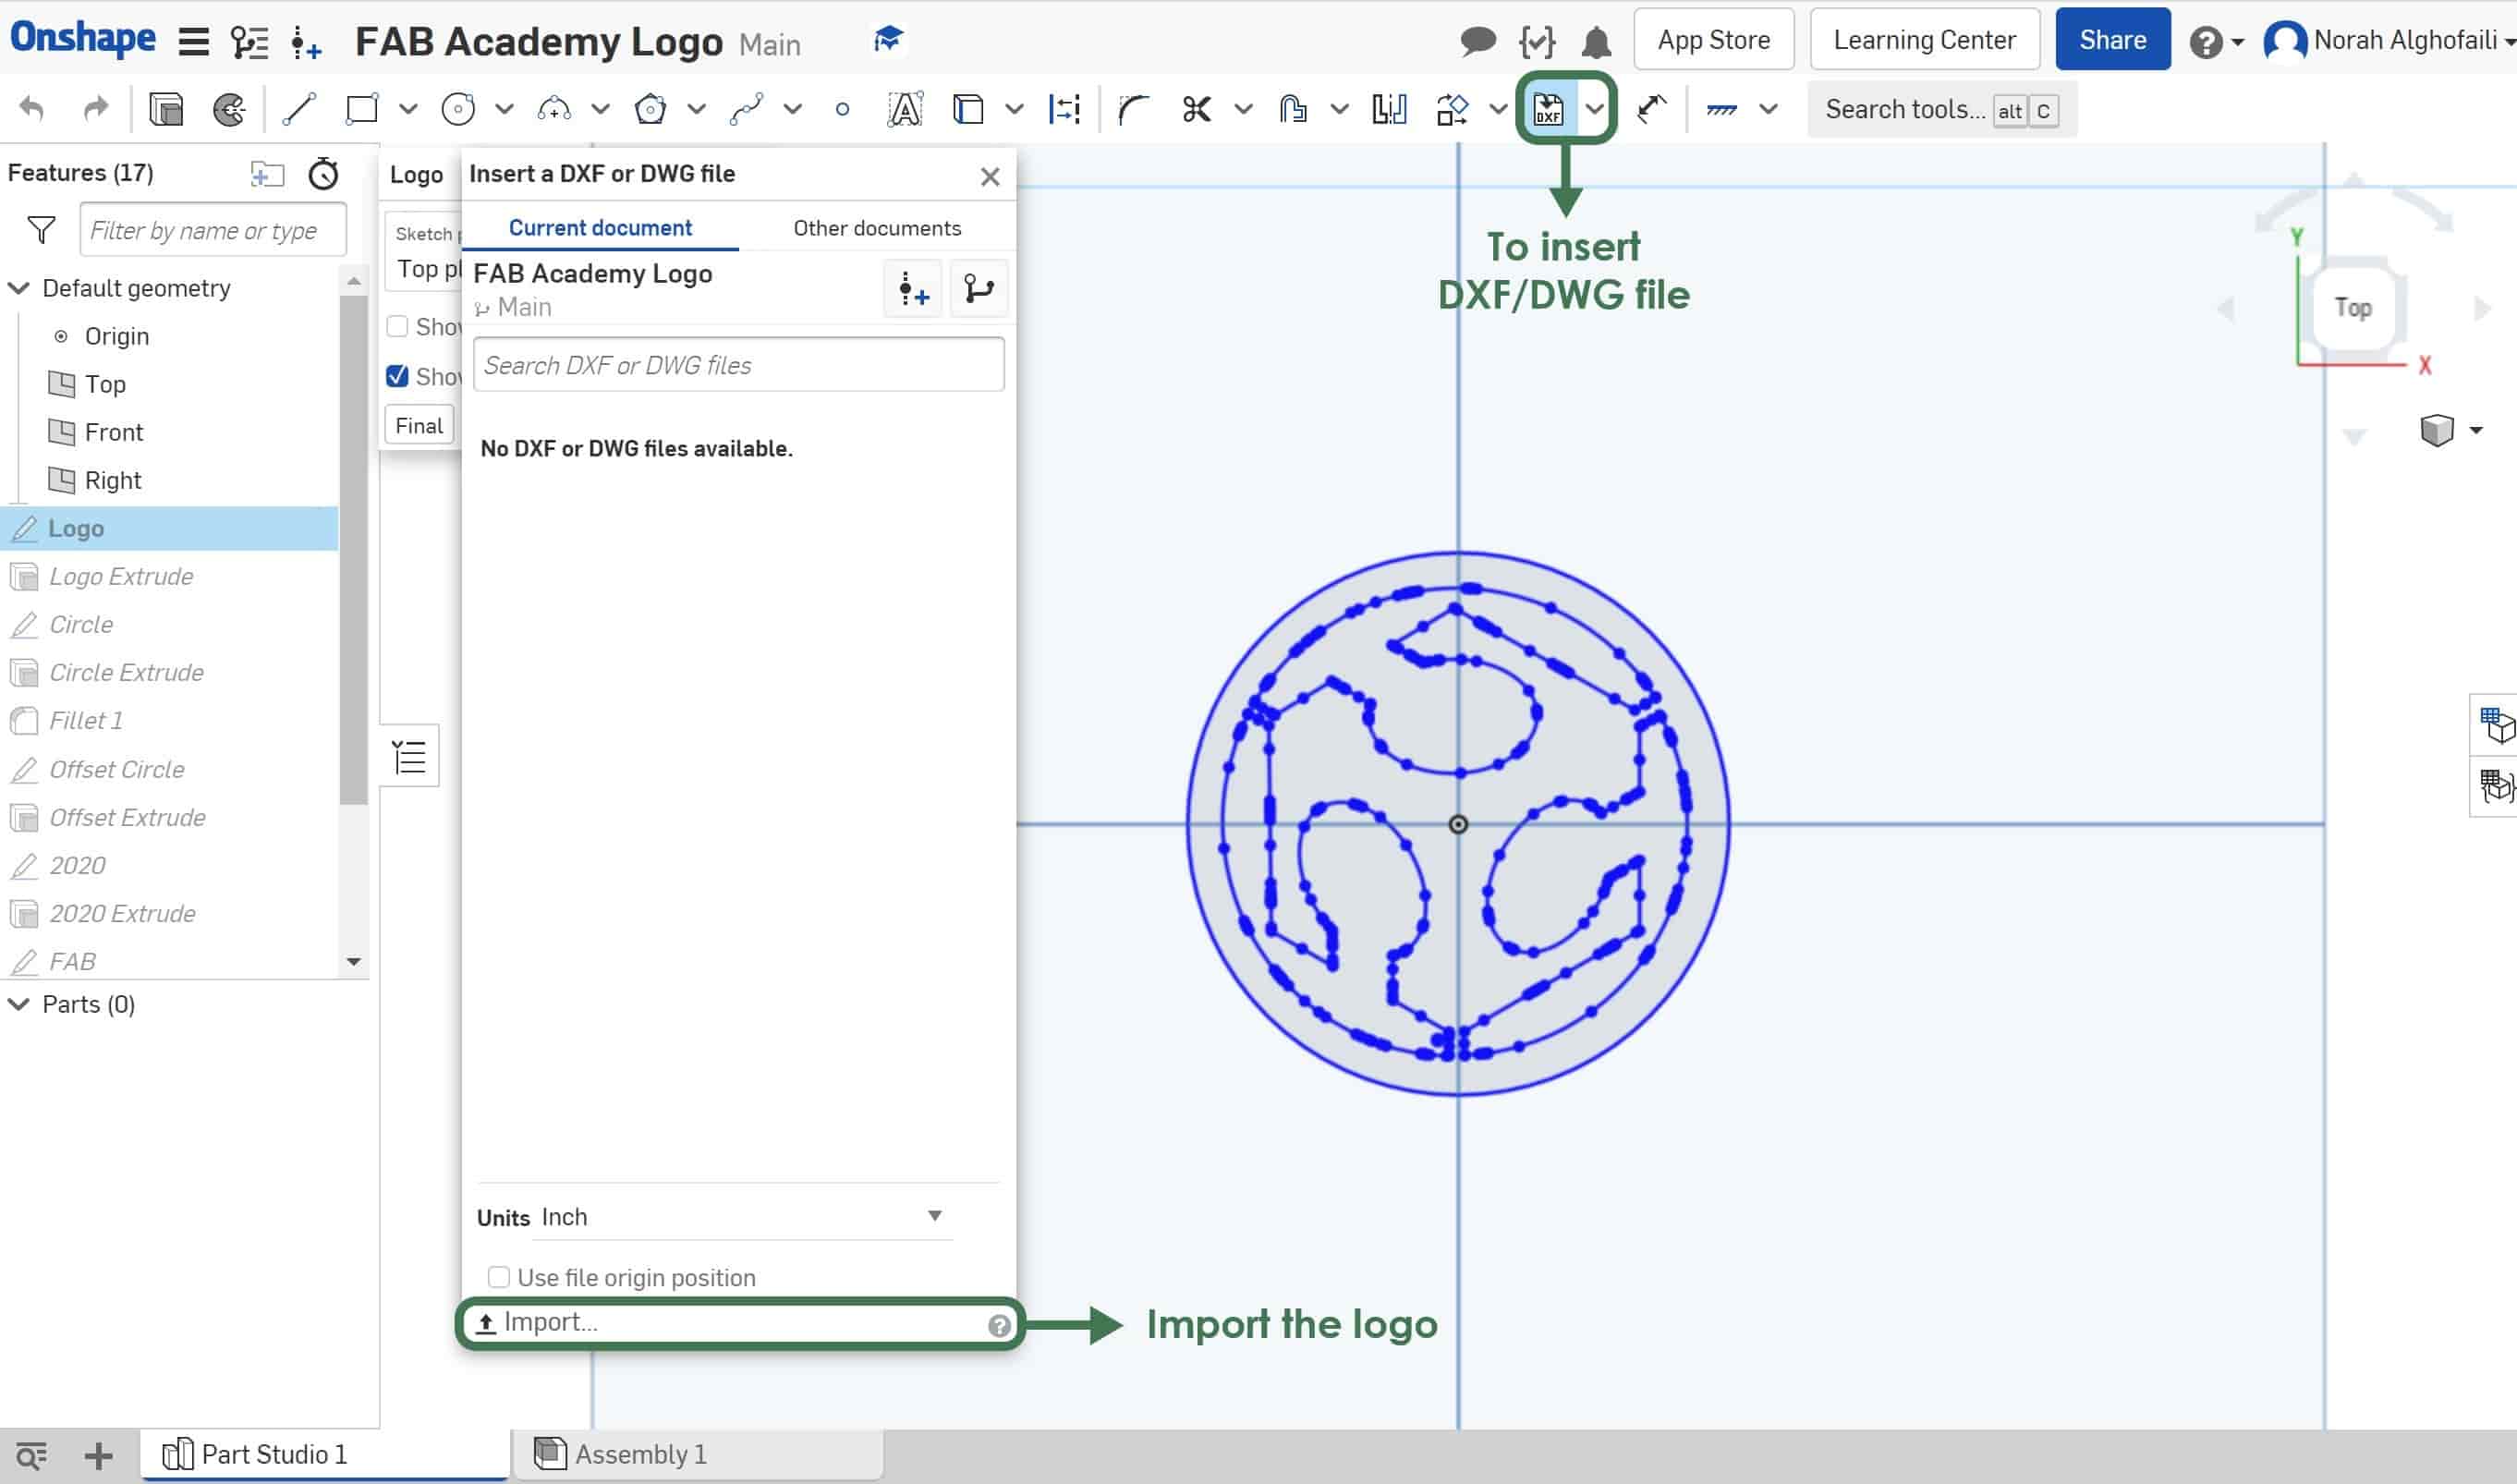
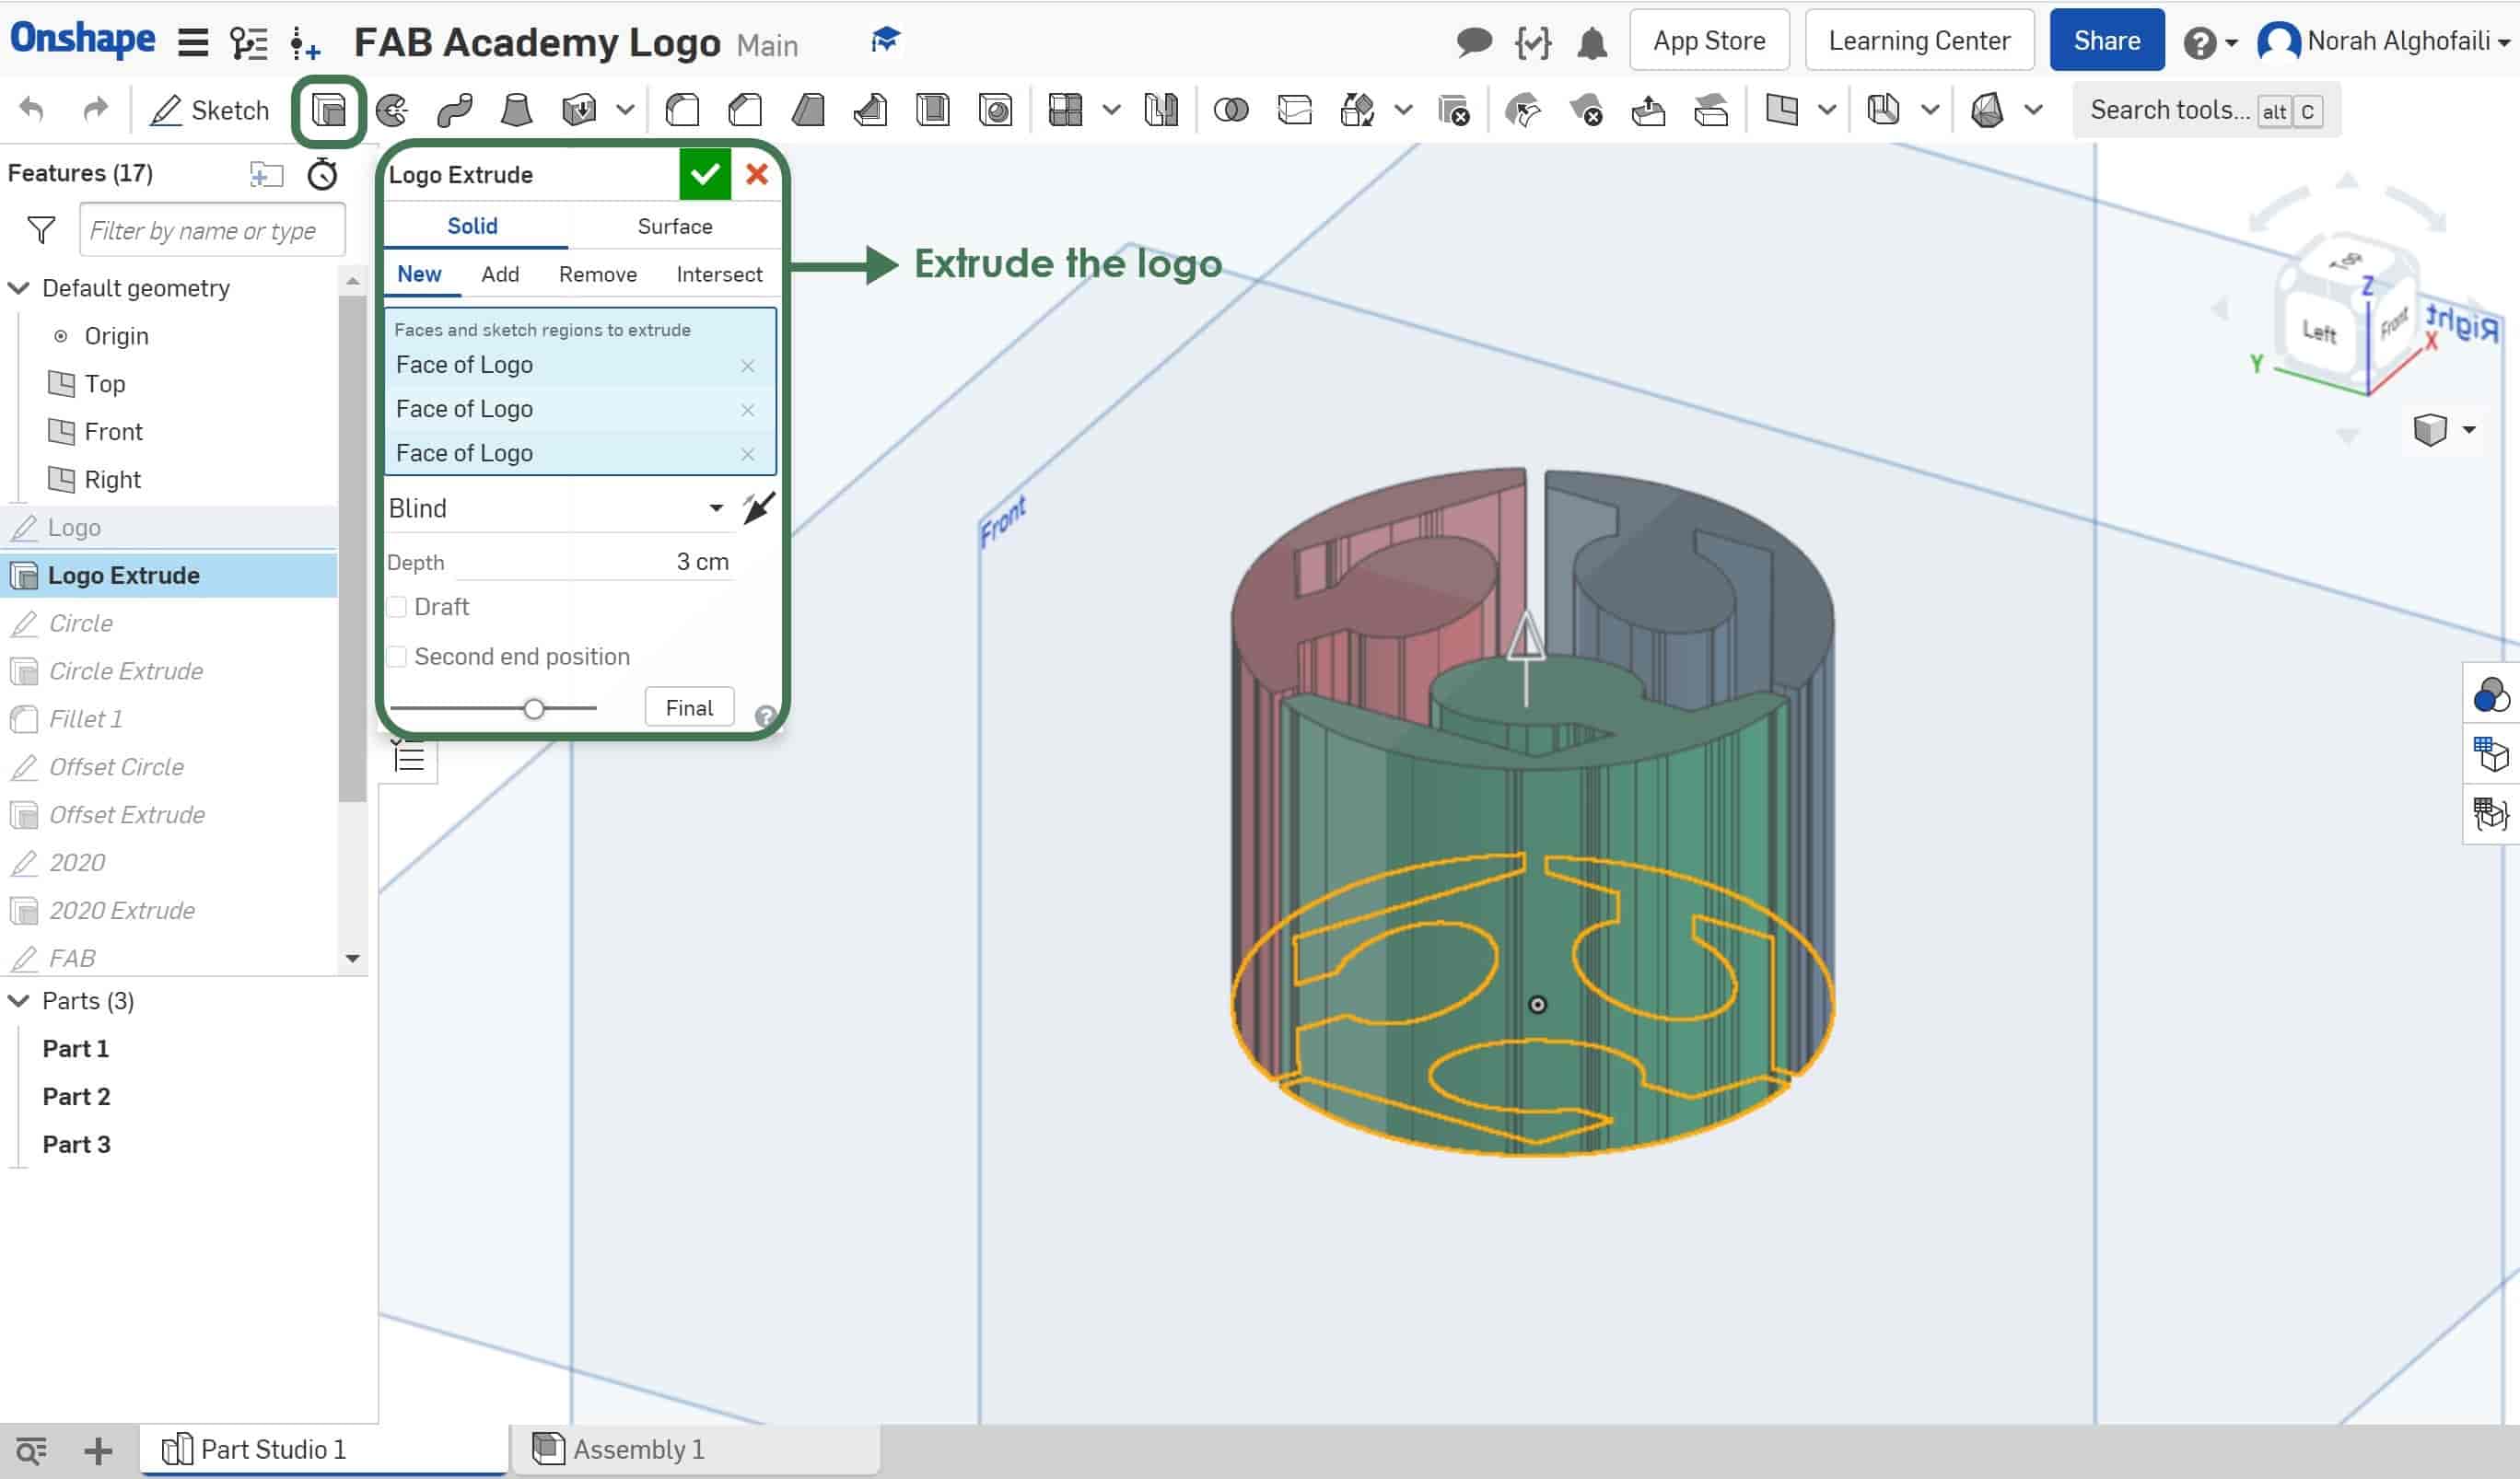
1. To Import the logo > Open a new sketch > Insert DXF or DWG file > Import > Choose the logo file. Then extrude the logo with depth = 3 cm.
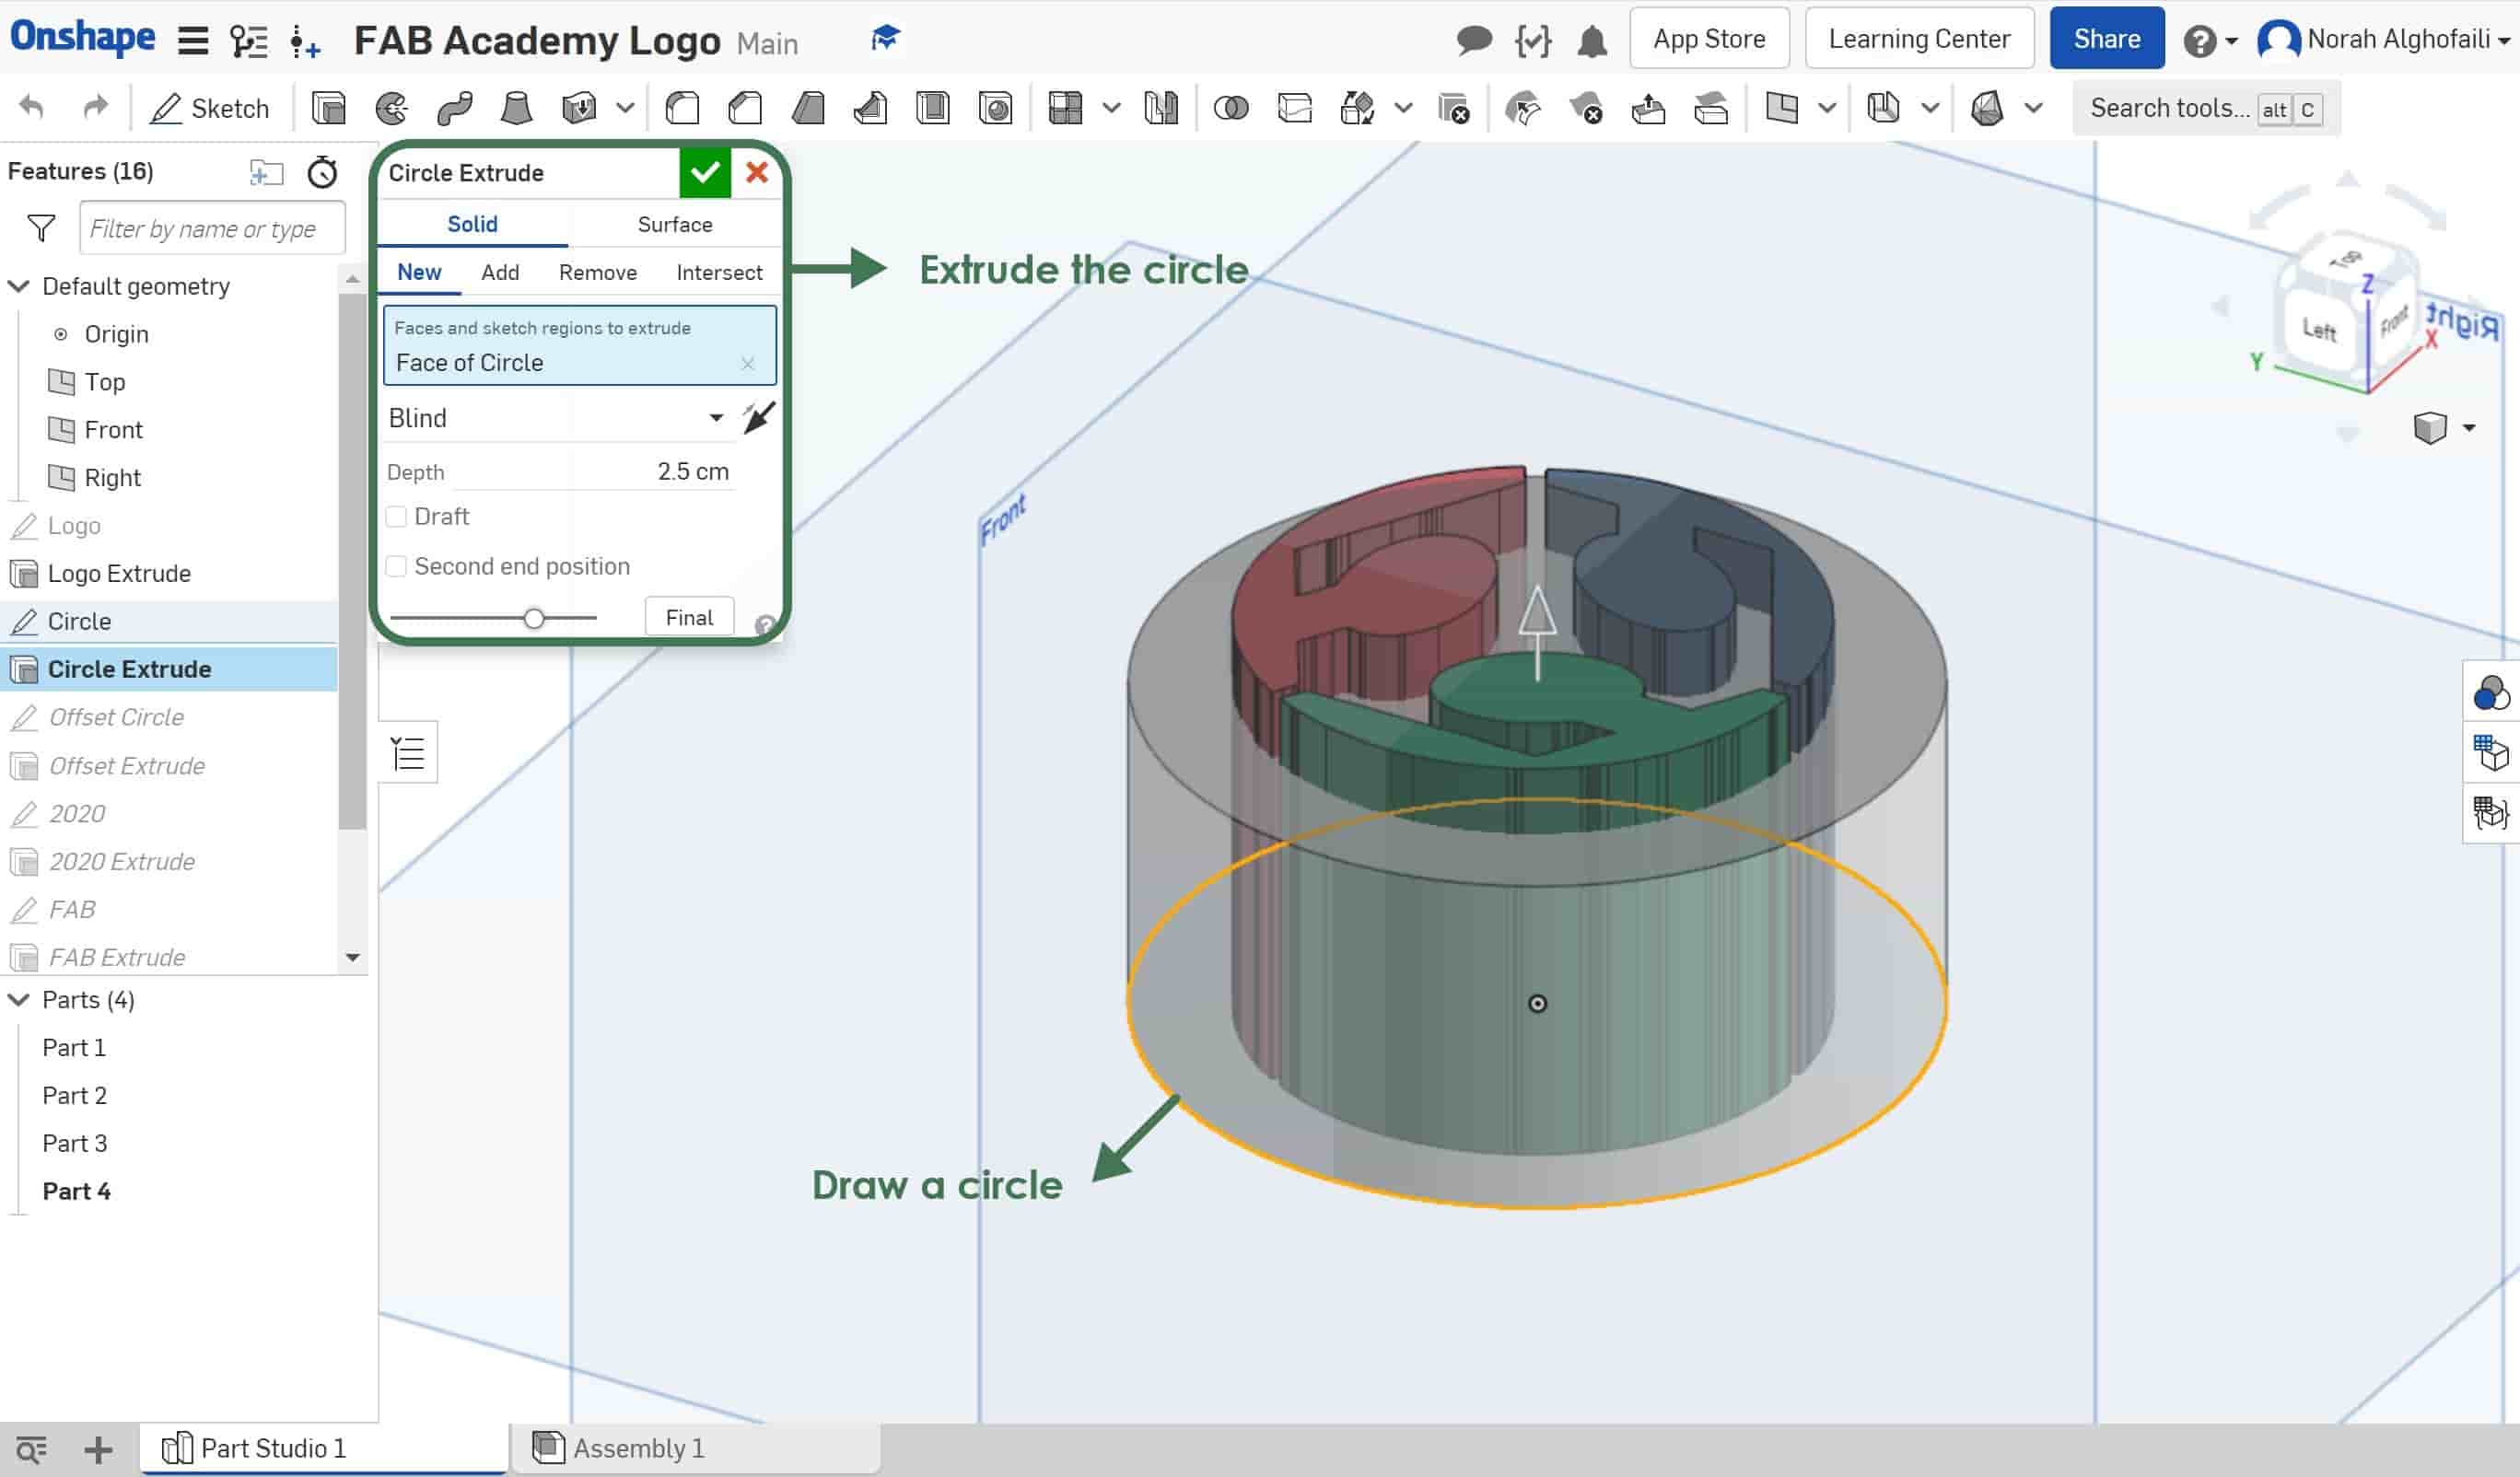
2. Draw a circle with diameter ( D = 5.5 cm ) > Then extrude it with depth = 2.5 cm.
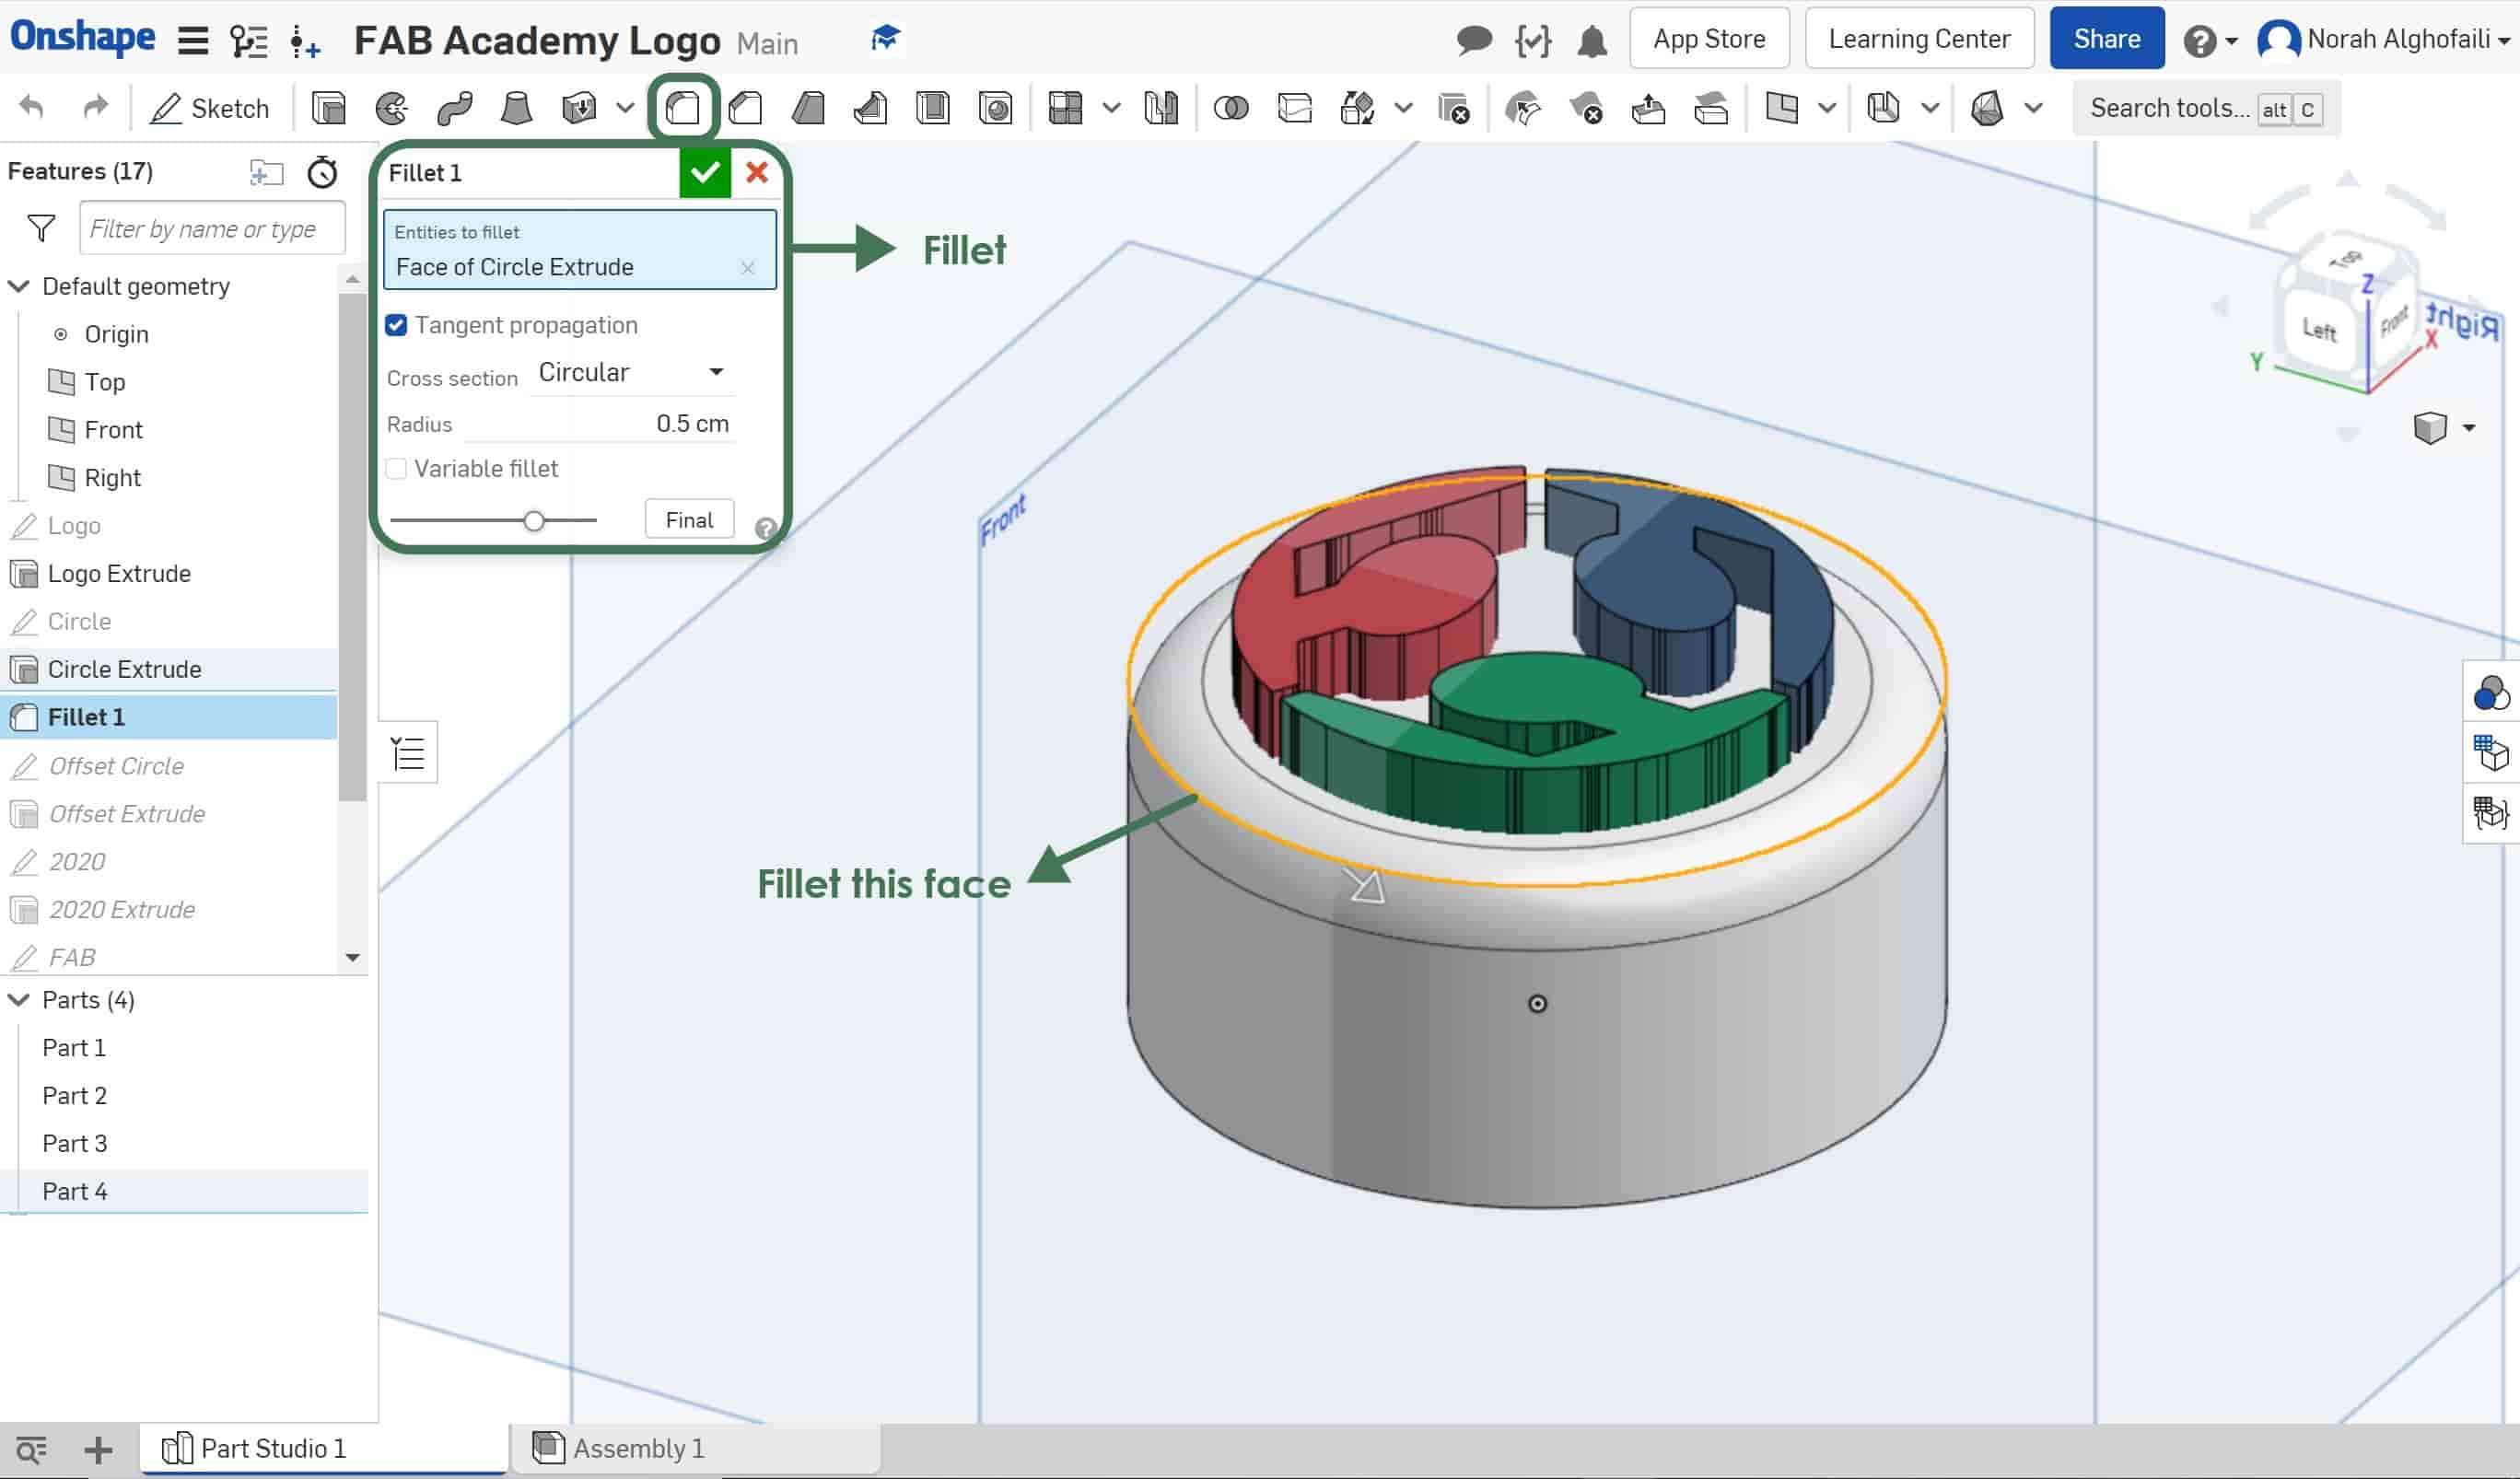
3. Felt the circle edges > Choose circular and radius = 0.5 cm.
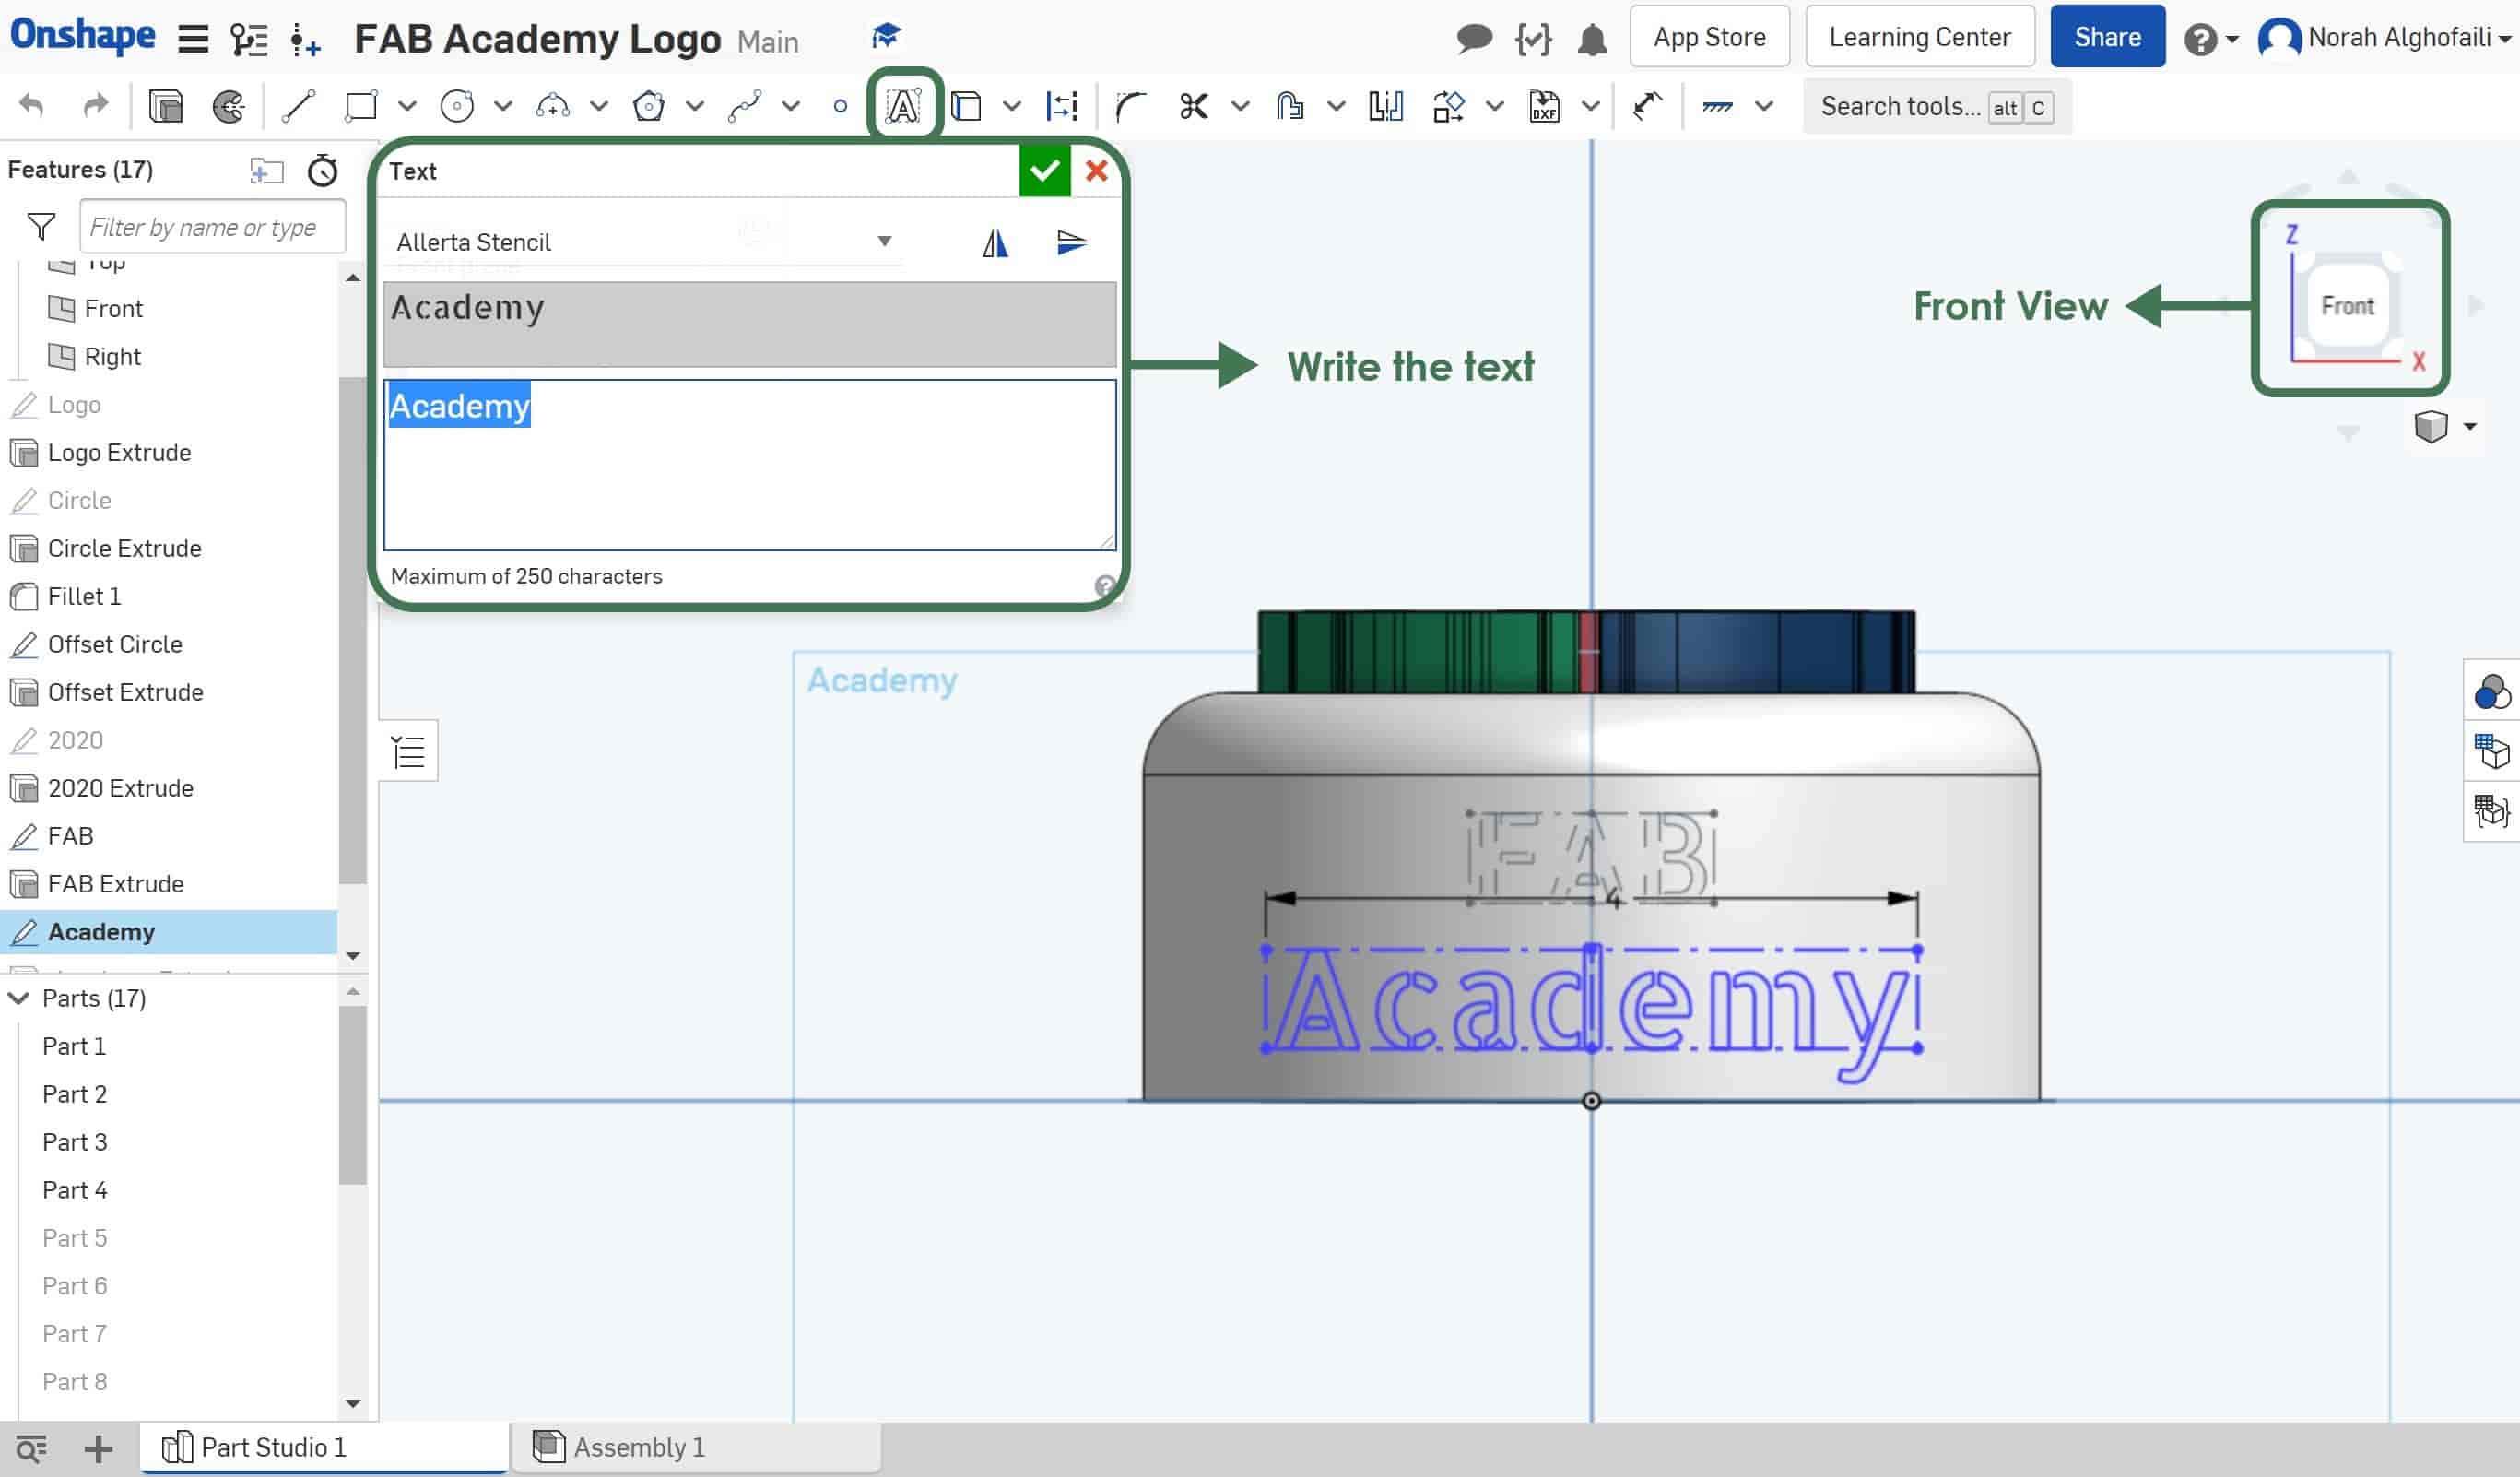
4. To write texts around the circle > Open a new sketch and choose the front panel > Click on text and write “FAB Academy” on the front side of the circle > Change the dimension if needed.
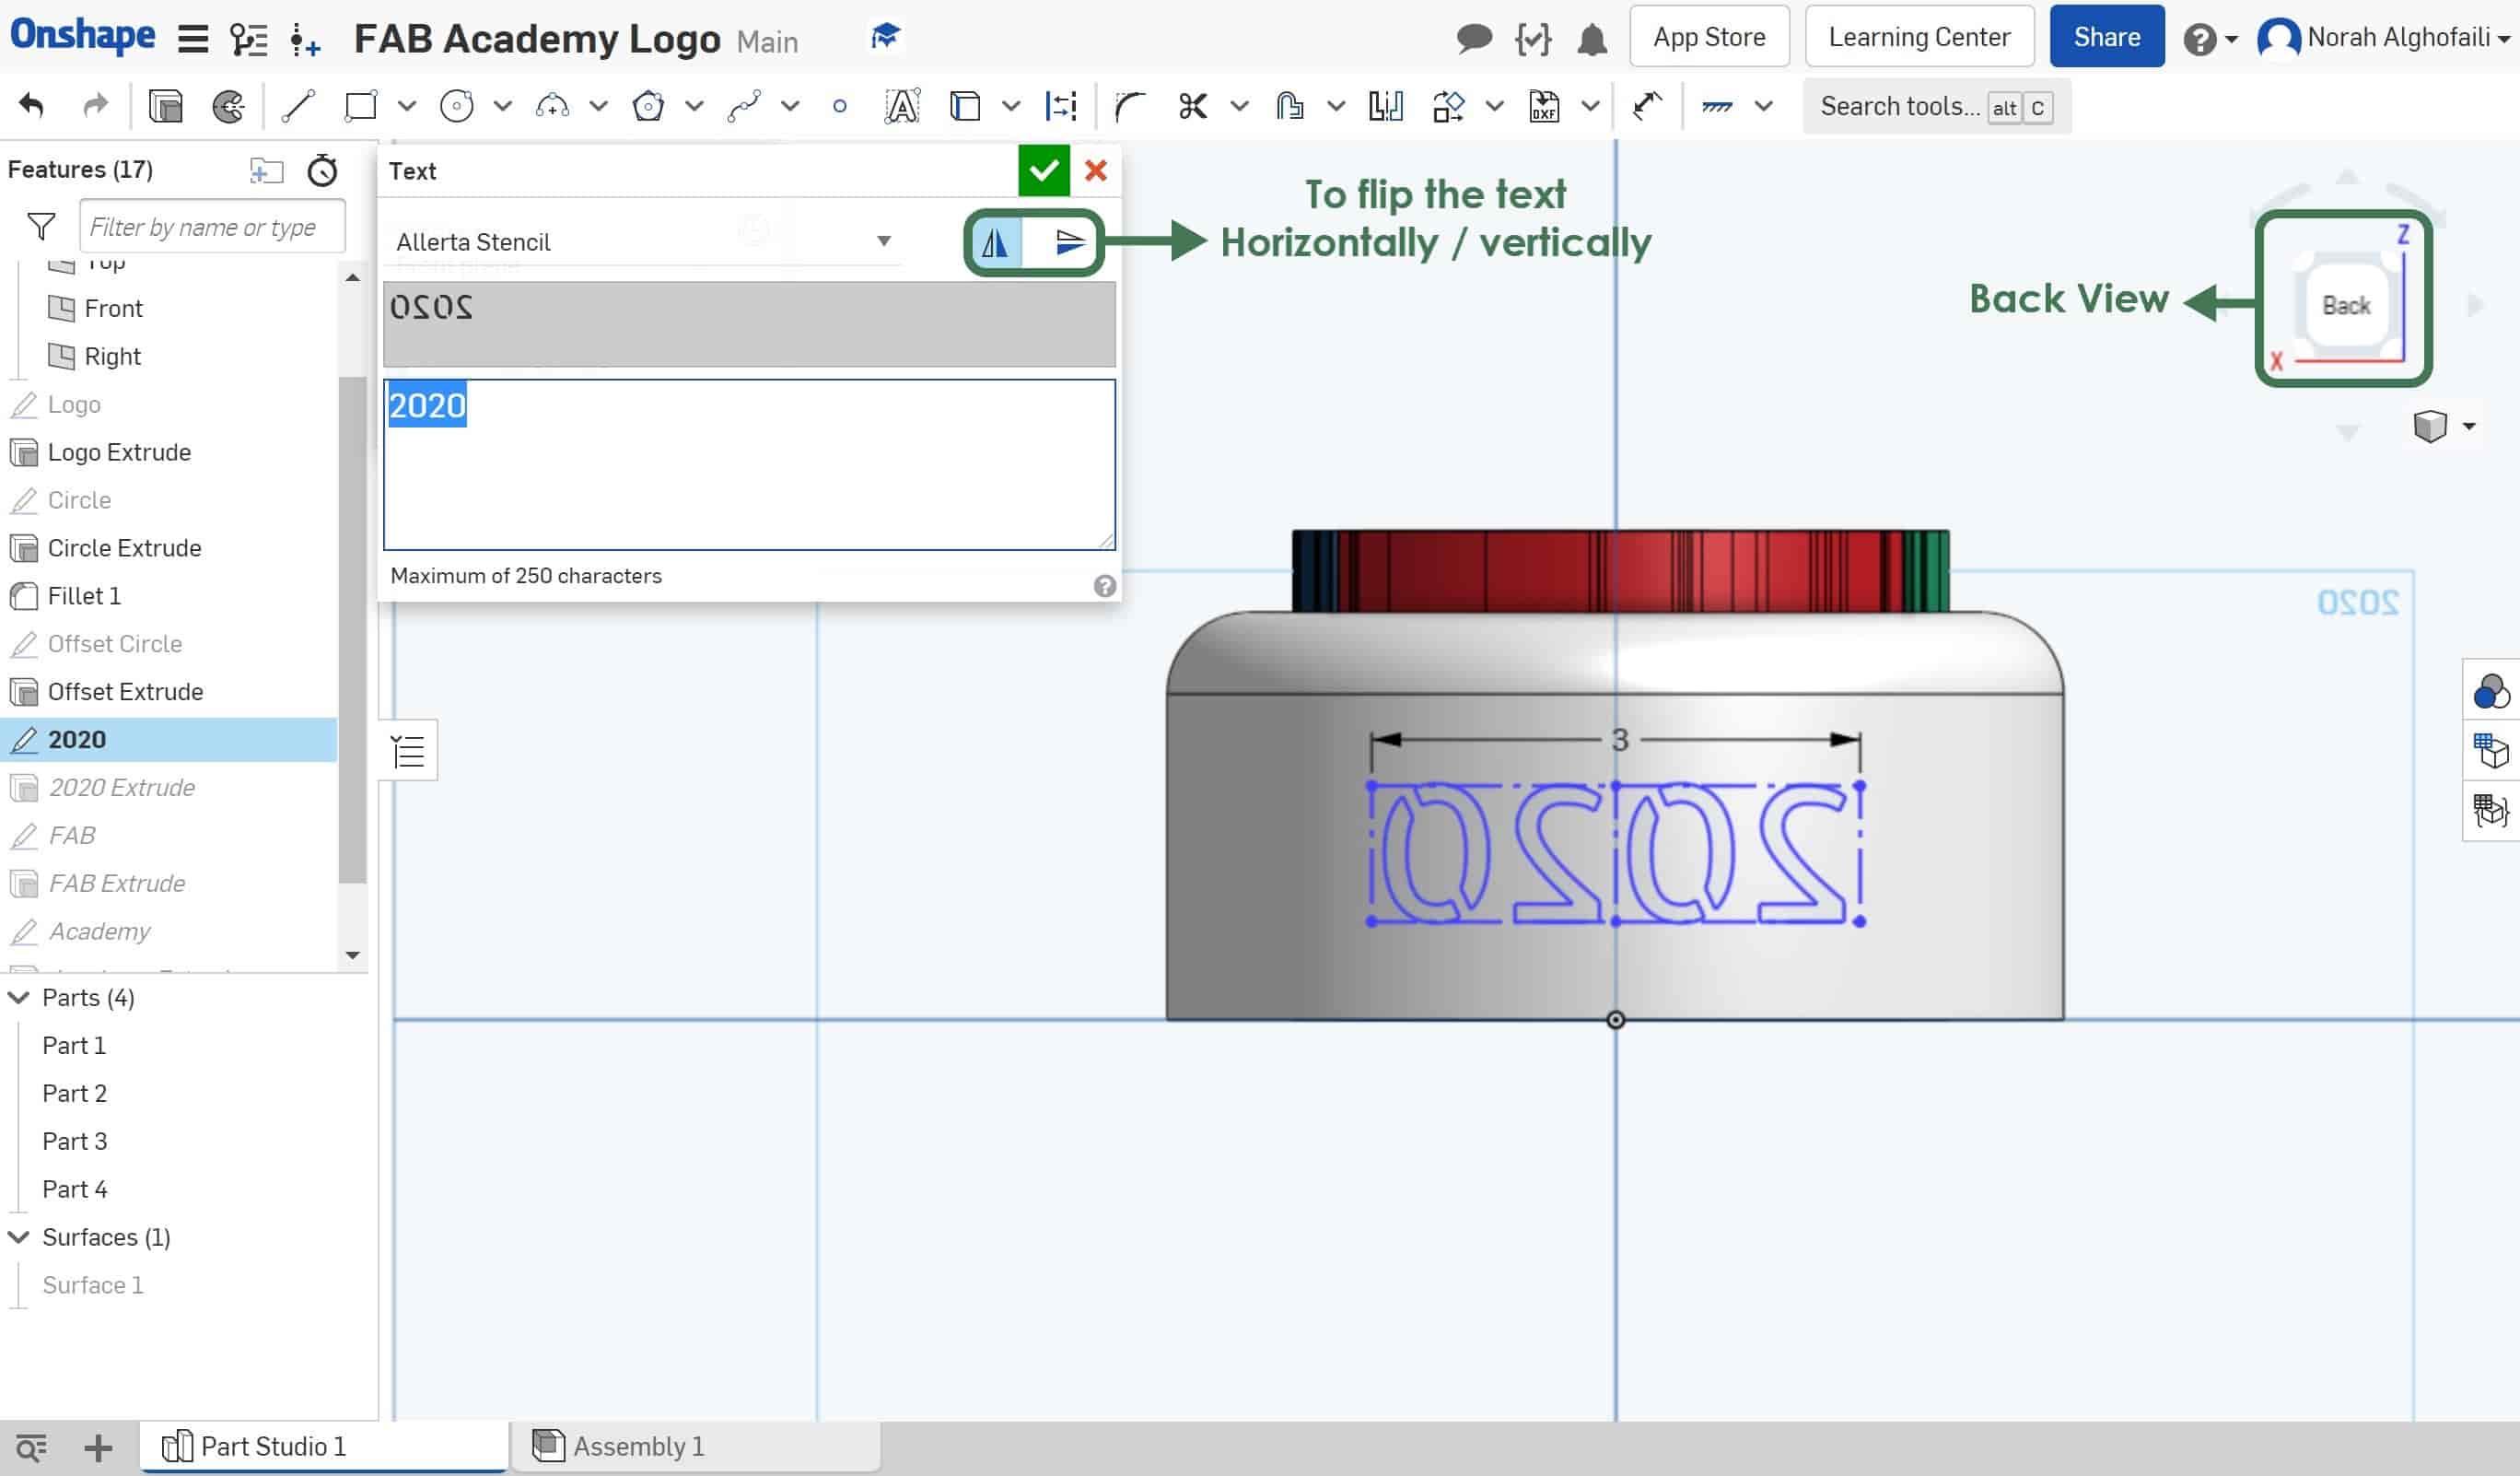
In the back side write the text ( 2020 ). This text will not be in the right direction. So, we have to flip it horizontally.
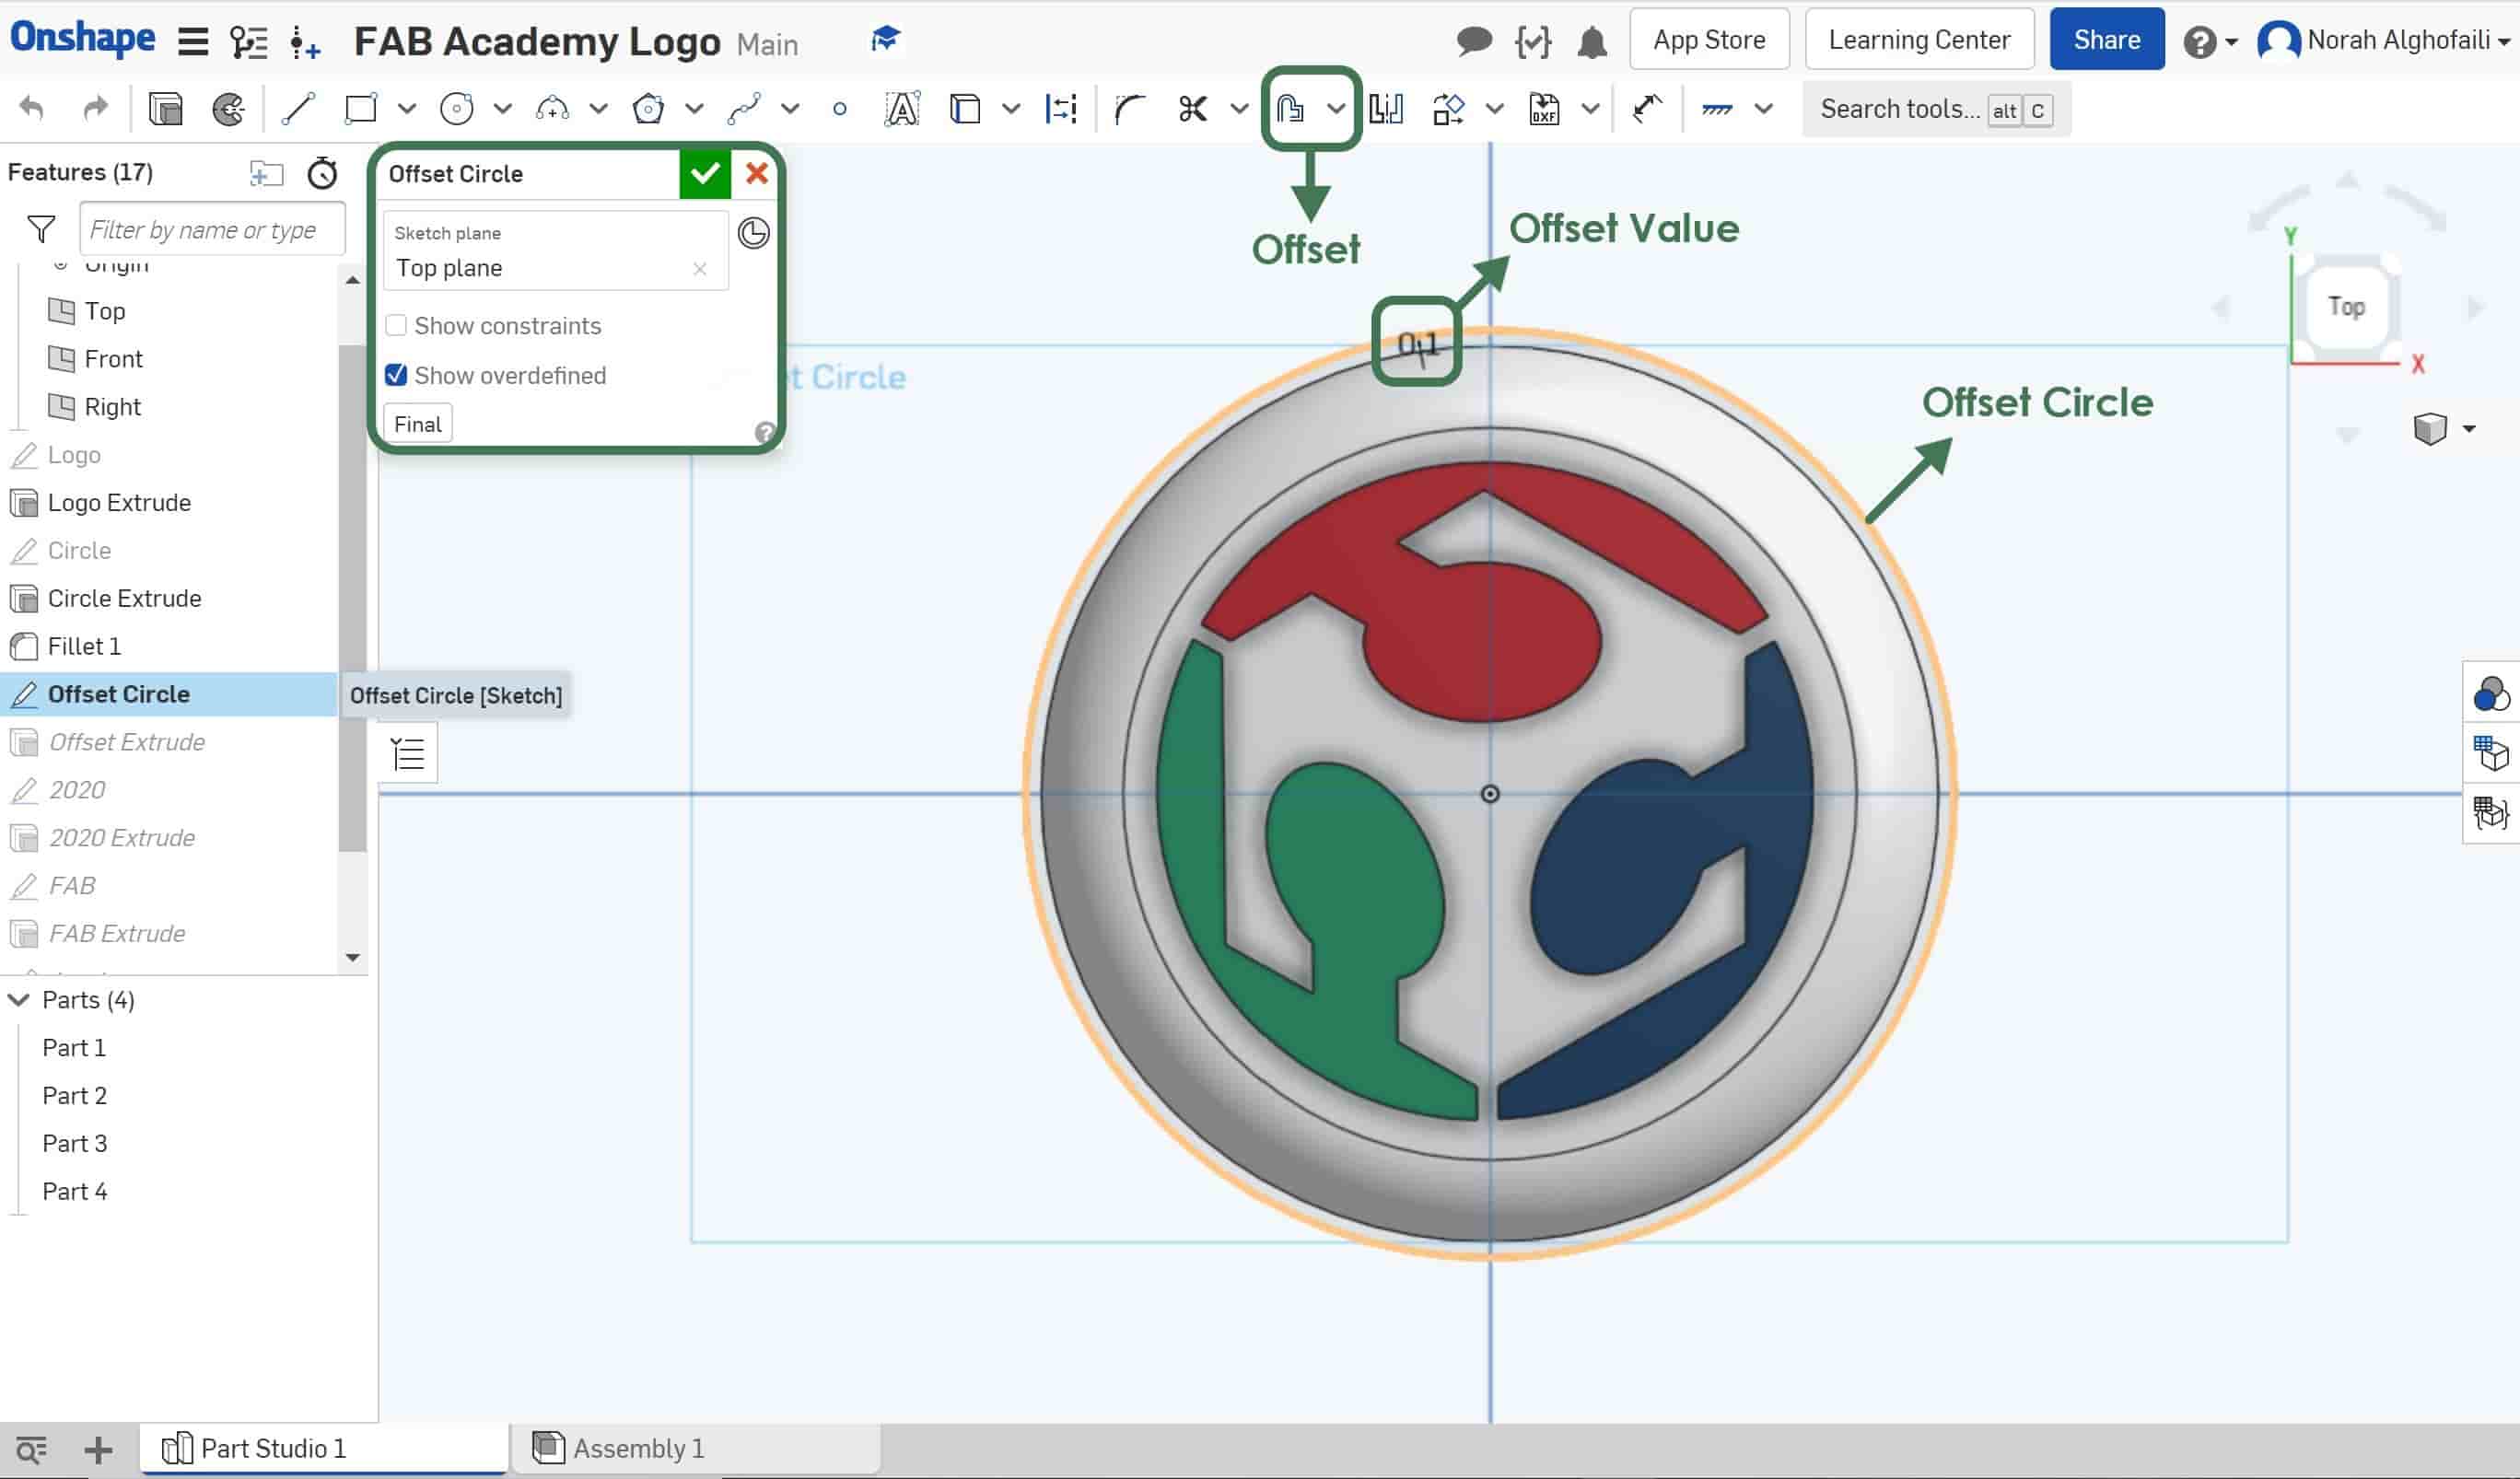
5. Make a new copy of the circle by using offset > change the offset value. Then extrude it by choosing a surface with depth = 2.5 cm.
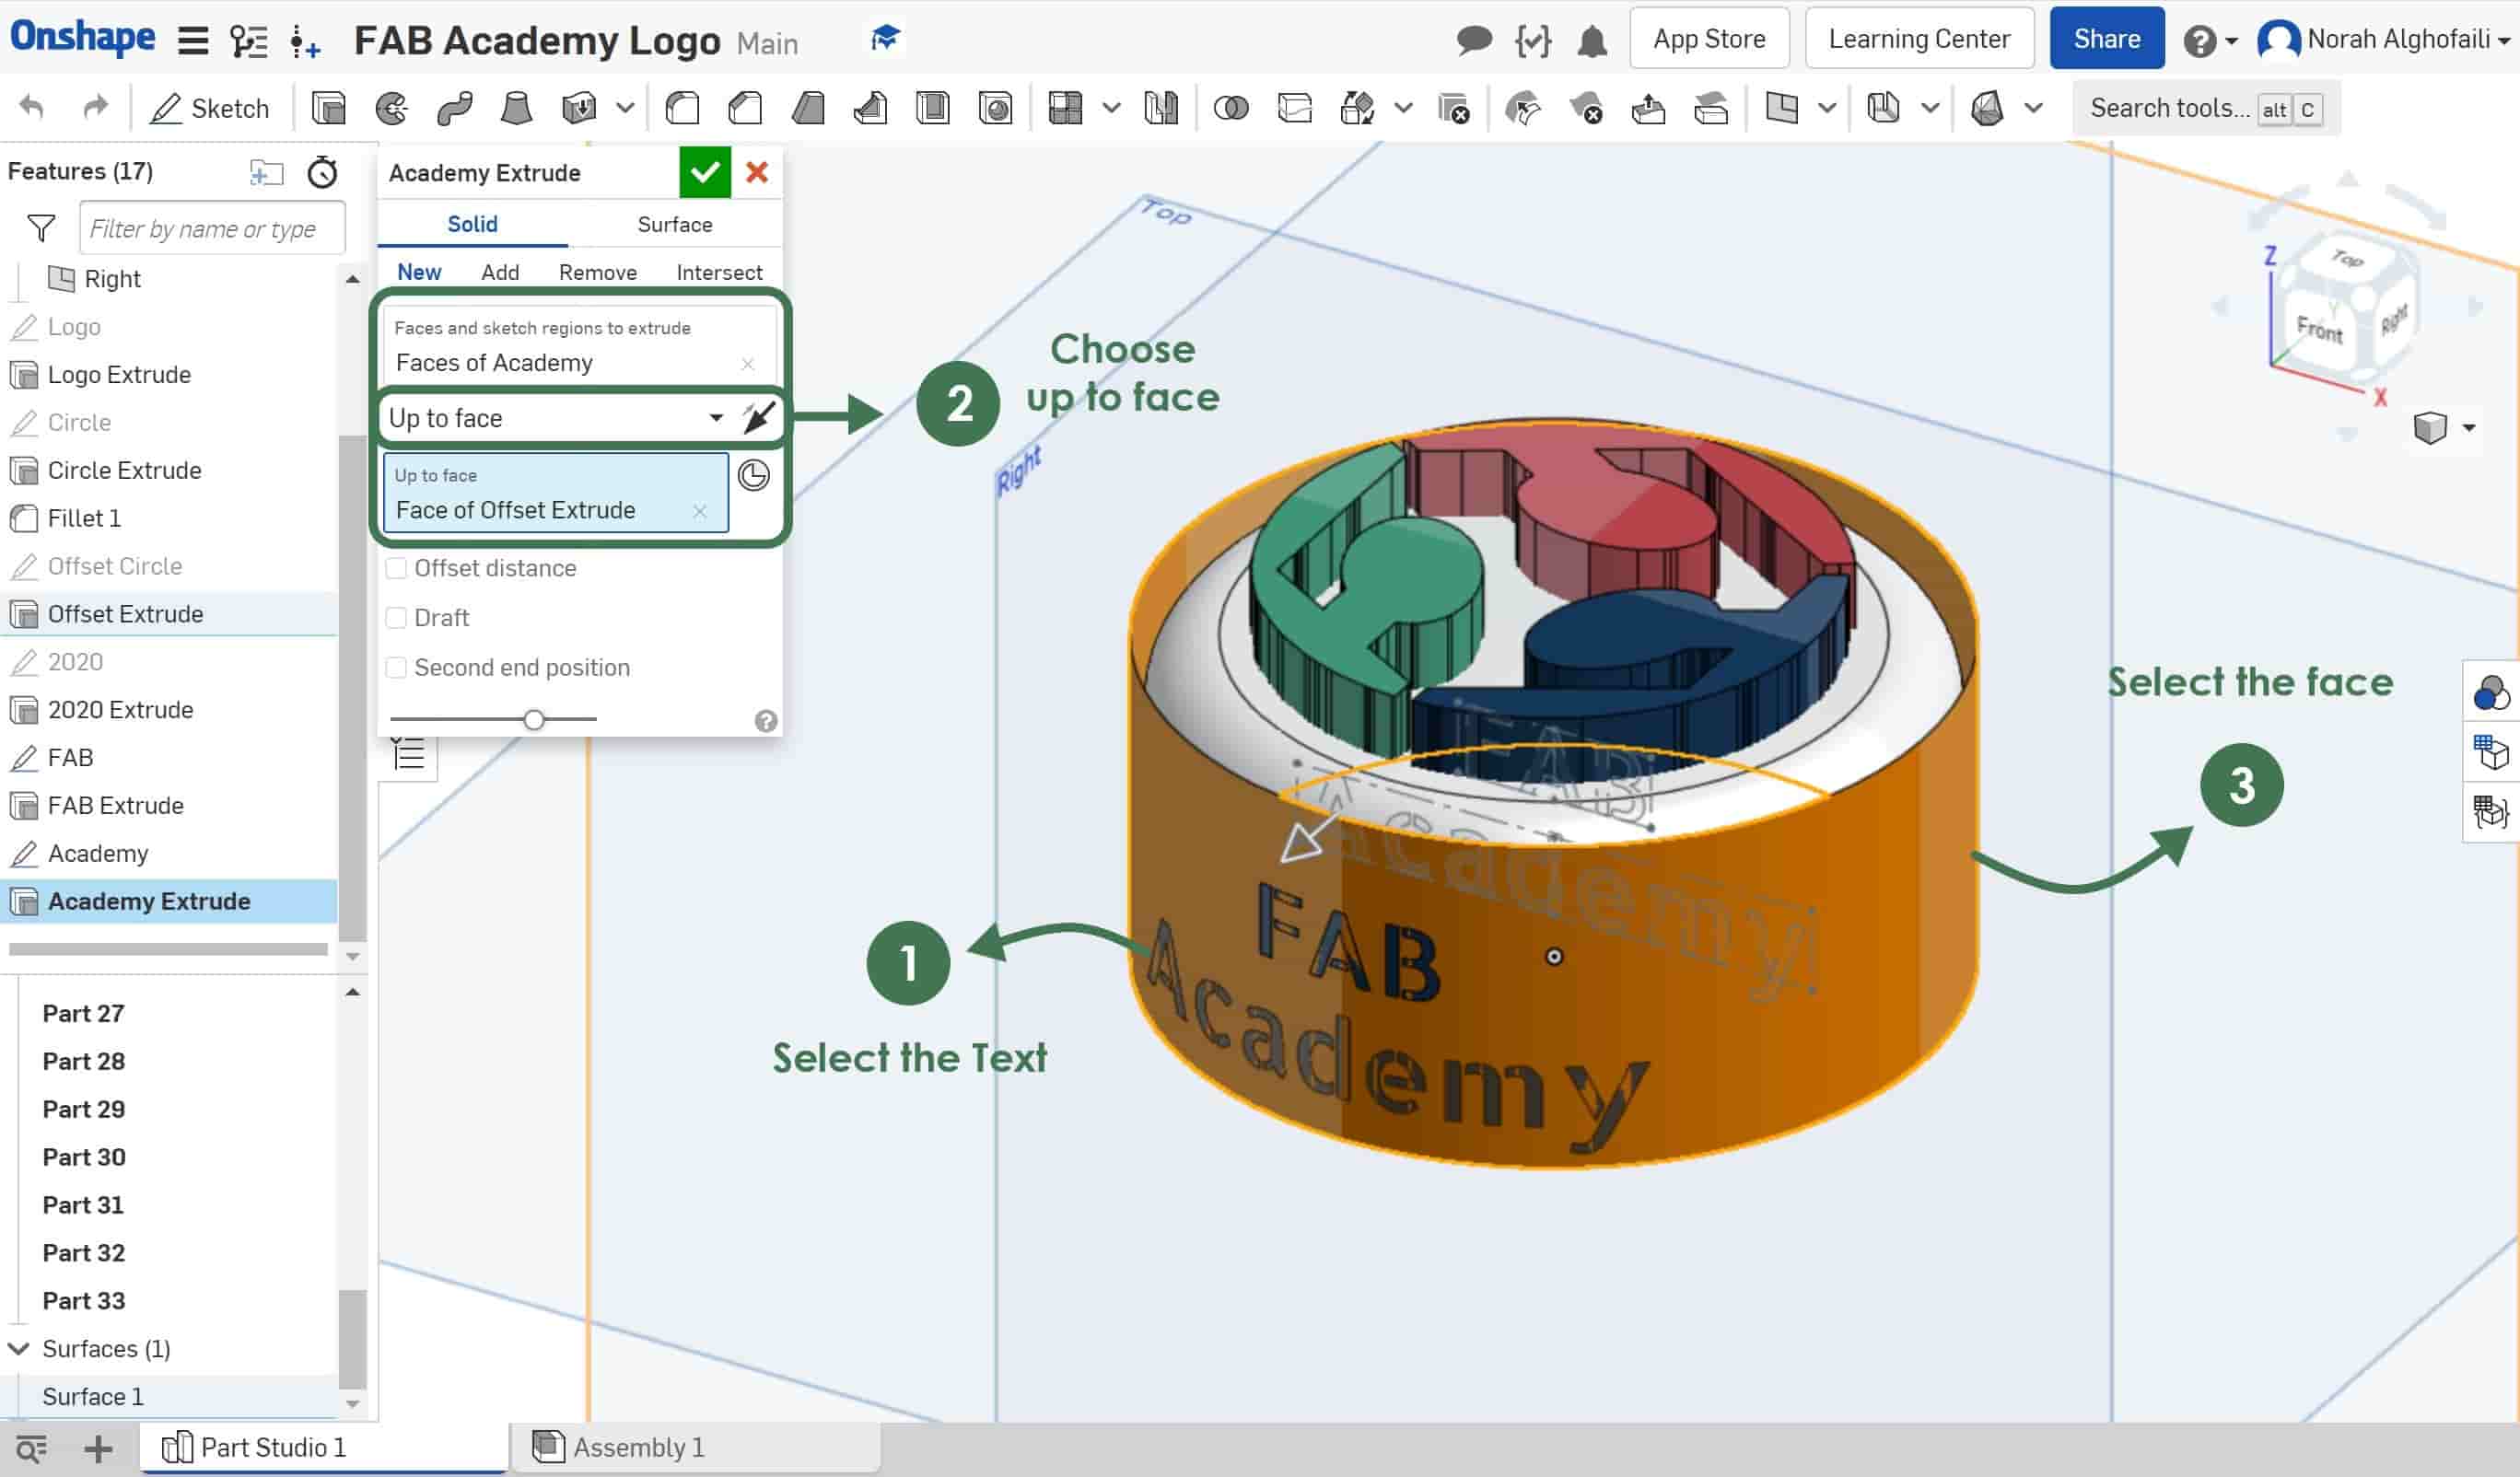
6. To extrude the text as curved around the circle > Select the text > Choose up to face > Then select the face of the surface extrude circle. Increase the value of the offset to get the text thickness.
7. Hide the surface extrude circle and you will get the final result !
Wow! I learned a new thing while using Onshape. I found out that I can change the color of each part that I created by going to the exact part and then right click. This is followed by clicking on “edit appearance”.
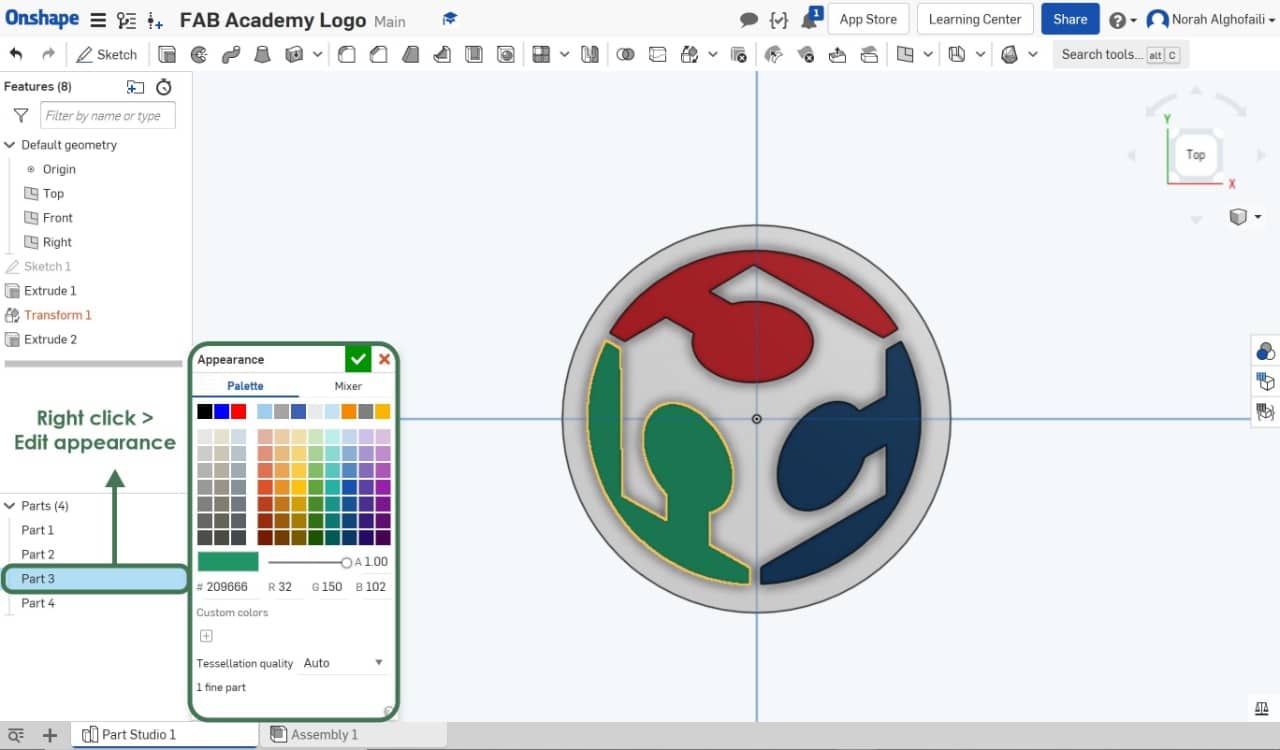
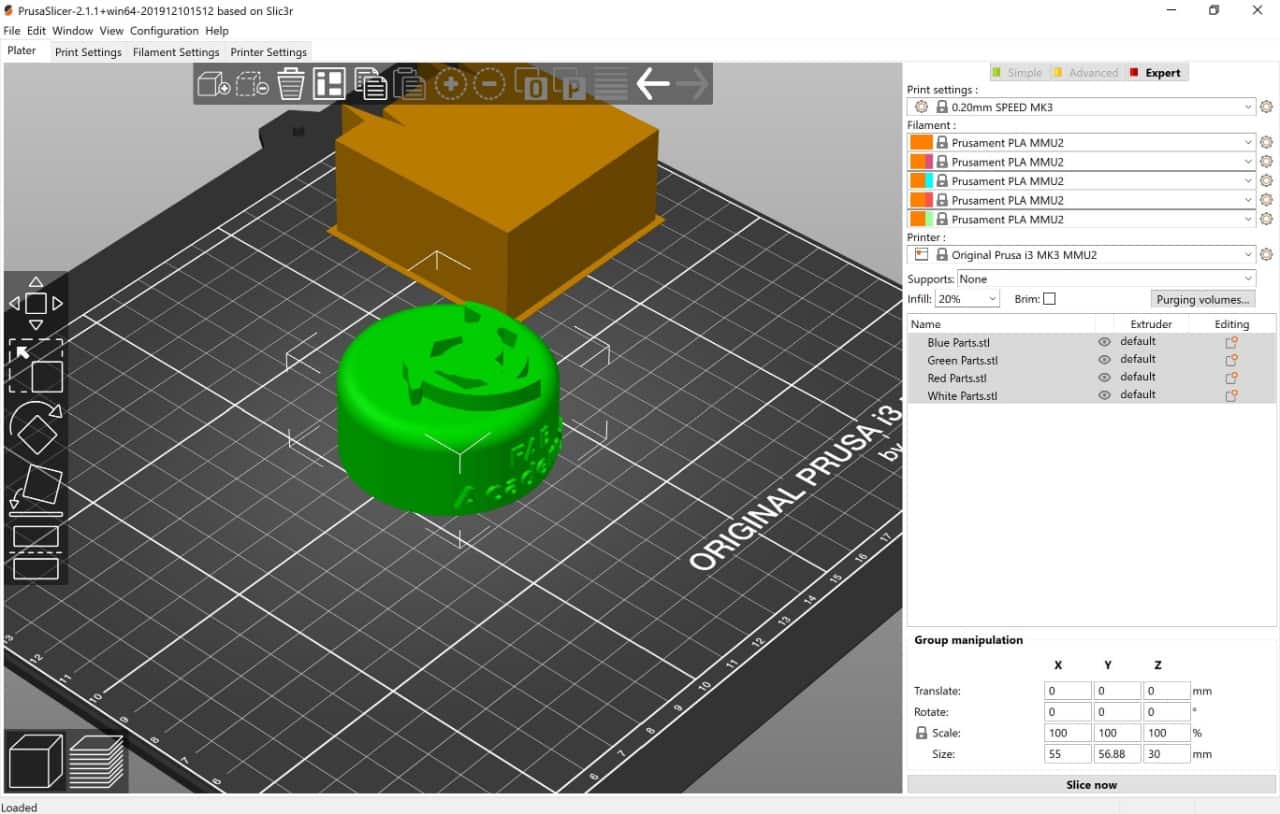
After I finish the design stage, I have to select all parts that have the same color. This will help me to export them in a separate STL file. In the end, we will get 4 STL files ( Blue, Red, Green and White ).
Now, let's start the printing stage !
3D printing :
I have used a 3d printer before in the 3d printer assignment, but I have never used multiple color filaments. So, I’m going to try this technique by using (Red, Green, Blue, and White filaments).
Multicolor Extruder :
By using the multicolor extruder, we can print with up to 4 materials or colors simultaneously. All at once! This is amazing!
How does this technique work?
There are Tteflon tubes going from each stepper into the extruder. The filament spools are placed behind the printer in the feeder. The material is loaded into the tubes and then forced into the nozzle by extruder steppers. The printer prints ordinarily. However, when it reads the command to change the color, the print head moves to the corner and automatically unloads/loads the filament. While printing a waset tower, the nozzle will be cleaned. It then continues printing with the new color.
Prusa Slicer :
How do you import multicolor objects into a prusa slicer ?
1. Open PrusaSlicer > Go to printer and choose (Original Prusa i3 MK3 MMU3 ) > Multifilament list will be shown > Select the filament type.
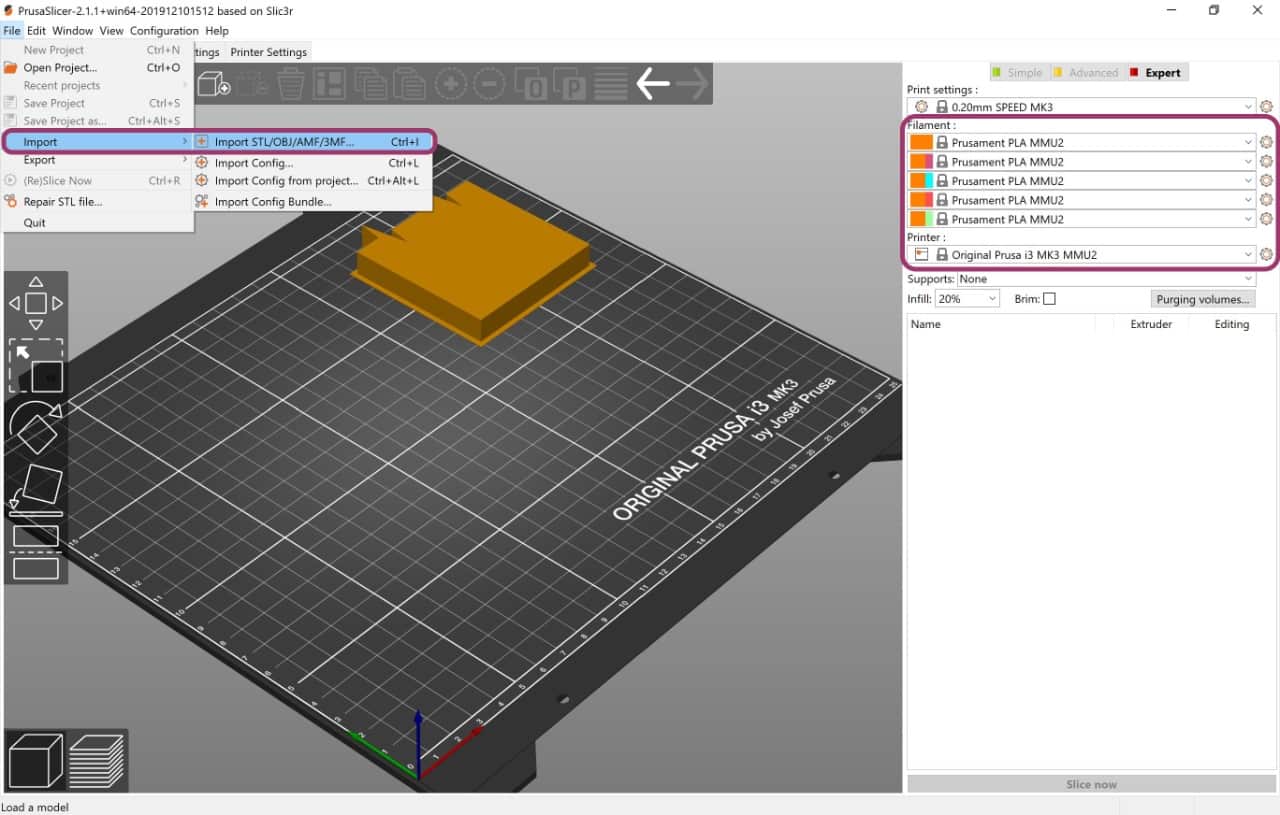
2. Import the STL file > Select all the 4 STL files.

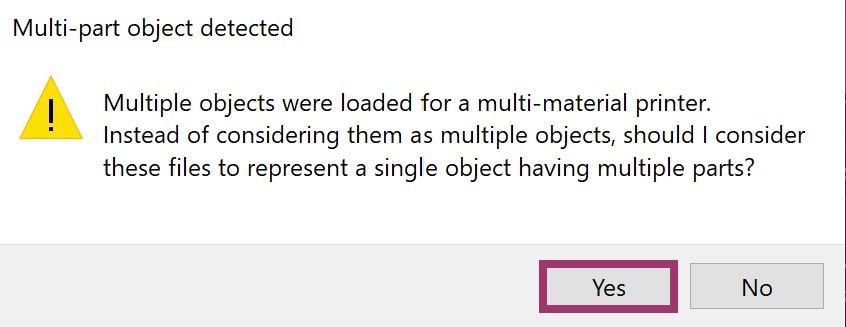
Popup message will be shown.
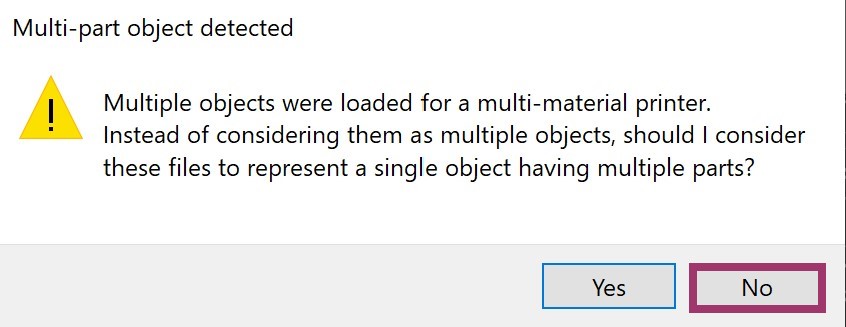
I clicked on (No) and I noticed that this option will make us move each part separately. This is, not what we want to right now.
When I clicked on “Yes” option, I got the correct object.
3. Change the printing settings then export G-code file > Save it on the SD Card..
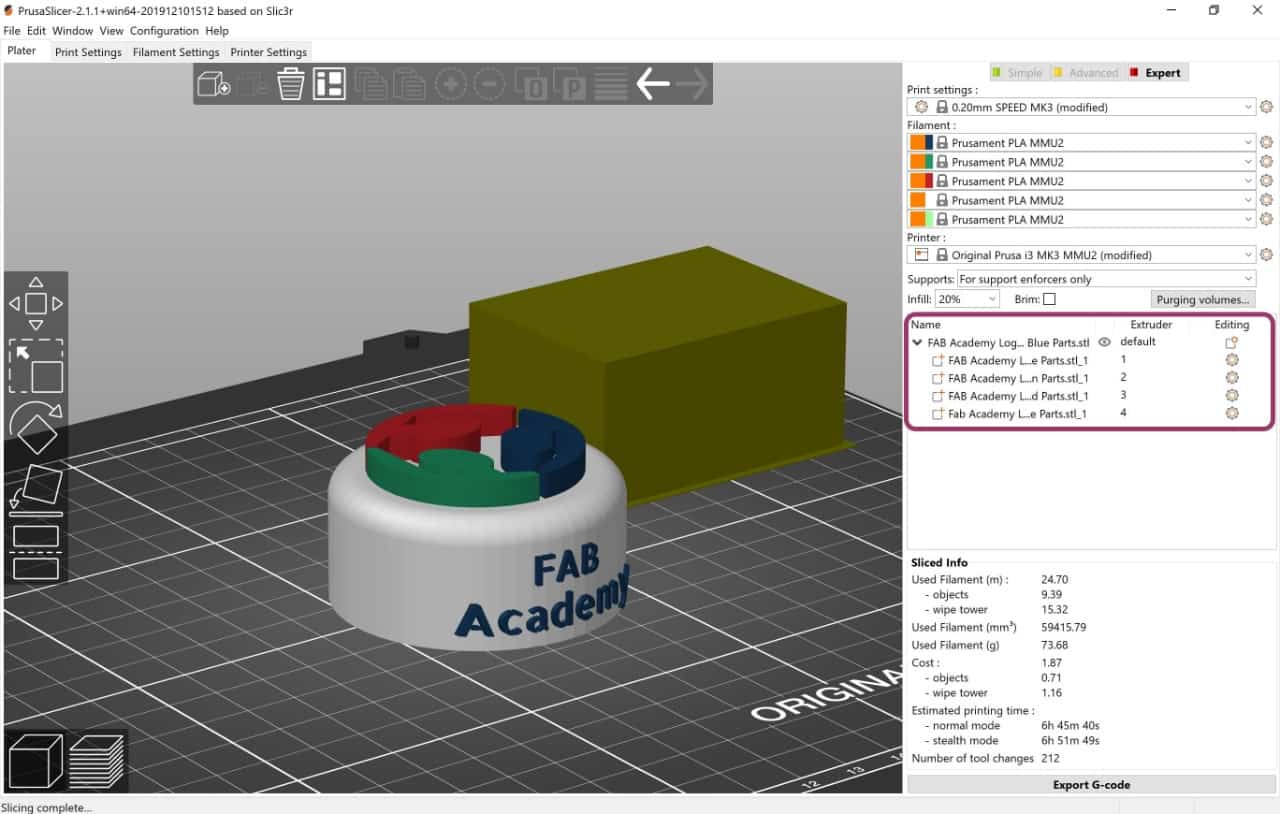
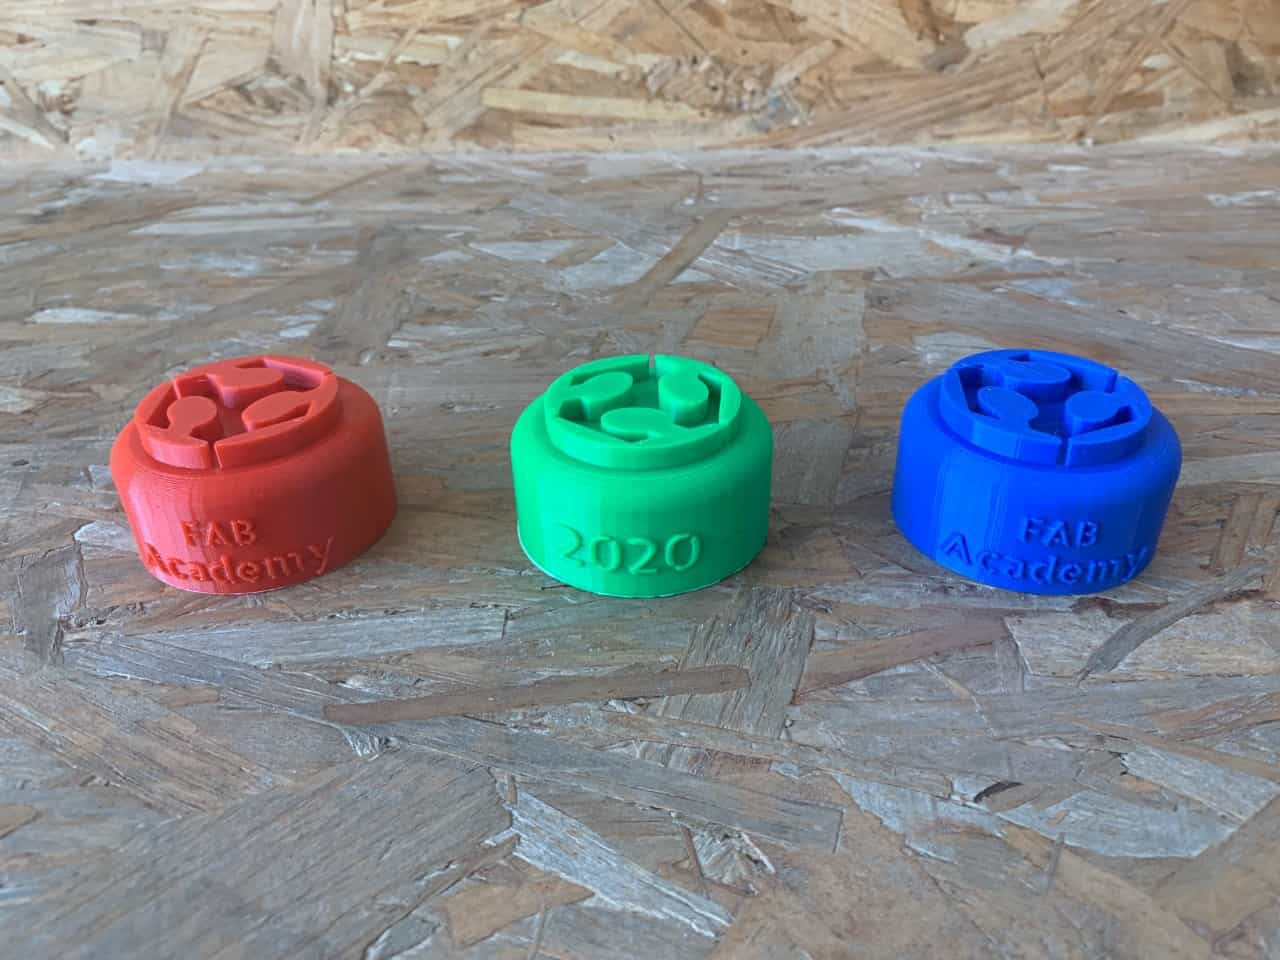
Ops Ops Ops !! Unfortionity, we have a problem with the extruder so it does not work!! It's okay Norah. Let's change the idea hmmmm.. I am going to print 3 objects with 3 different colors (Green, Blue and Red).
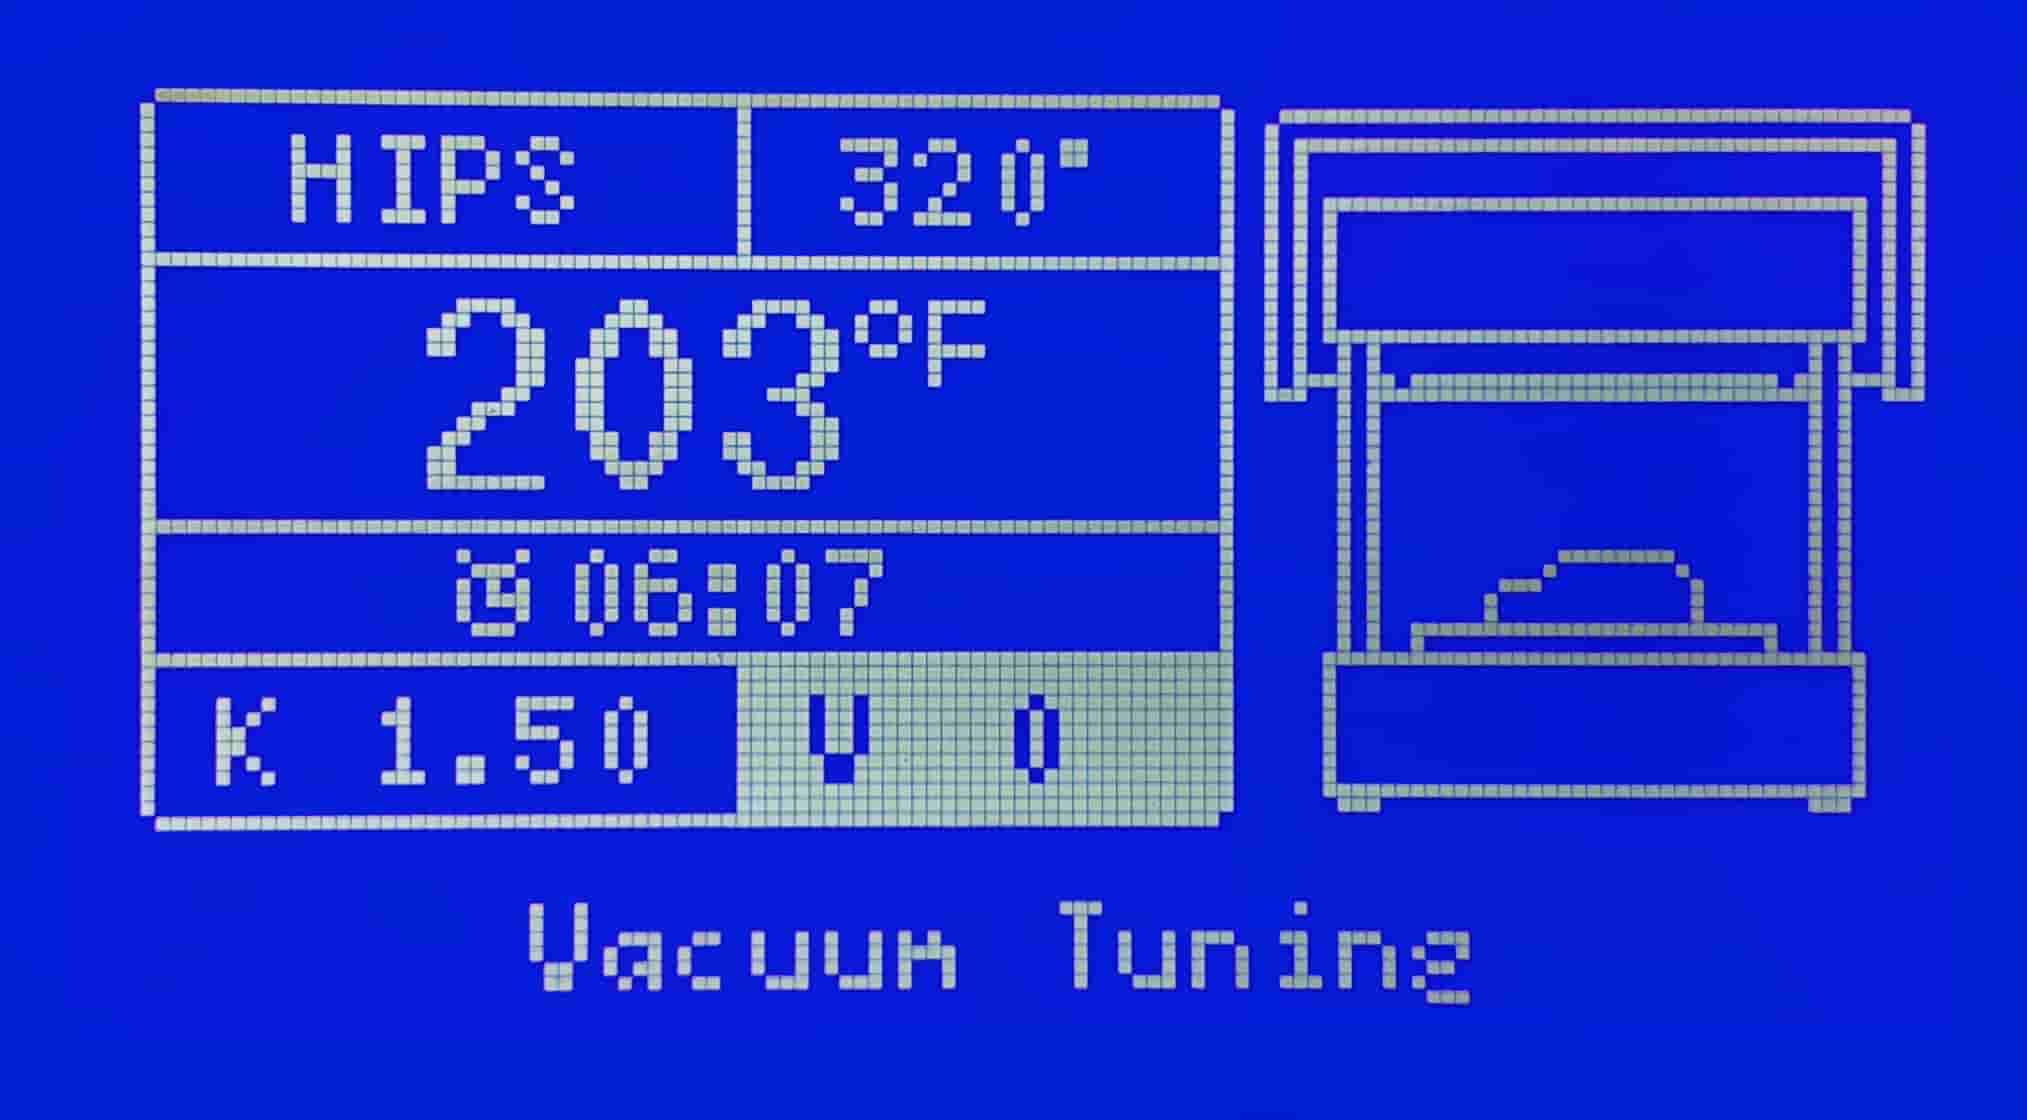
Vacuum Forming Machine :
Now, I am going to use the Vacuum forming machine to make the mold ! Firstly, let’s learn about this amazing machine.
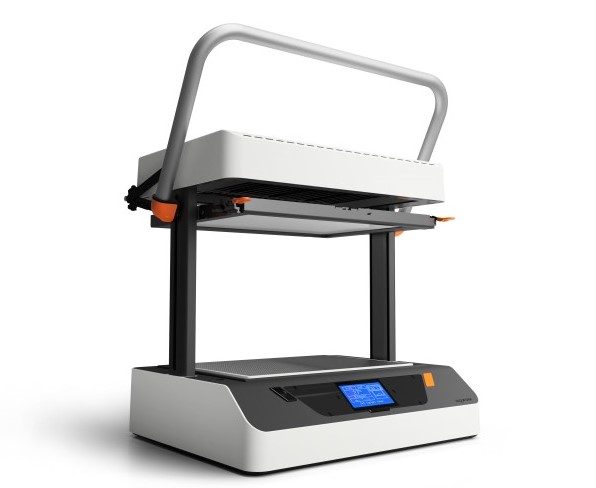
What is a vacuum forming machine ?
A vacuum forming is a thermoforming digital fabrication machine, where a sheet of plastic is heated to a forming temperature, stretched onto a single-surface mold, and forced against the mold by a vacuum.
In the assignment on molding and casting, we have a lot of processes to make the mold and cast. This machine will help us to make them faster!
Machine Specifications :
Parts of the machine :
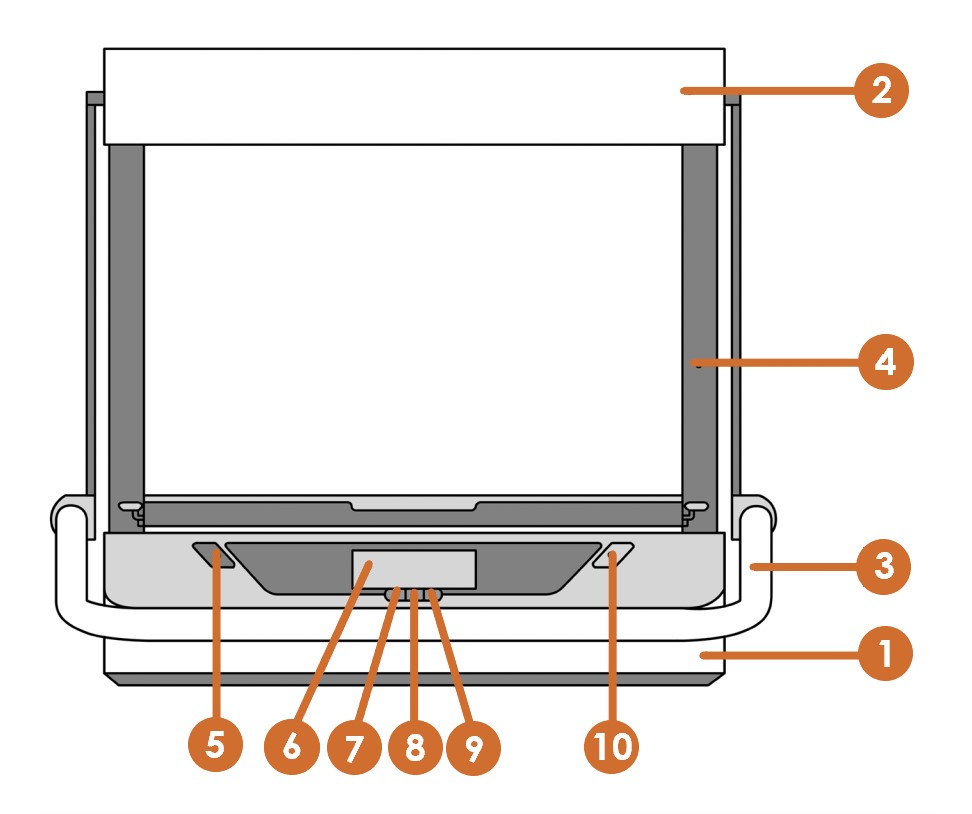
1. Lower Unit.
2. Heater.
3. Handlebar.
4. Sliders.
5. Power Button.
6. LCD Screen.
7. Left Button.
8. Select.
9. Right Button.
10. Start Button.
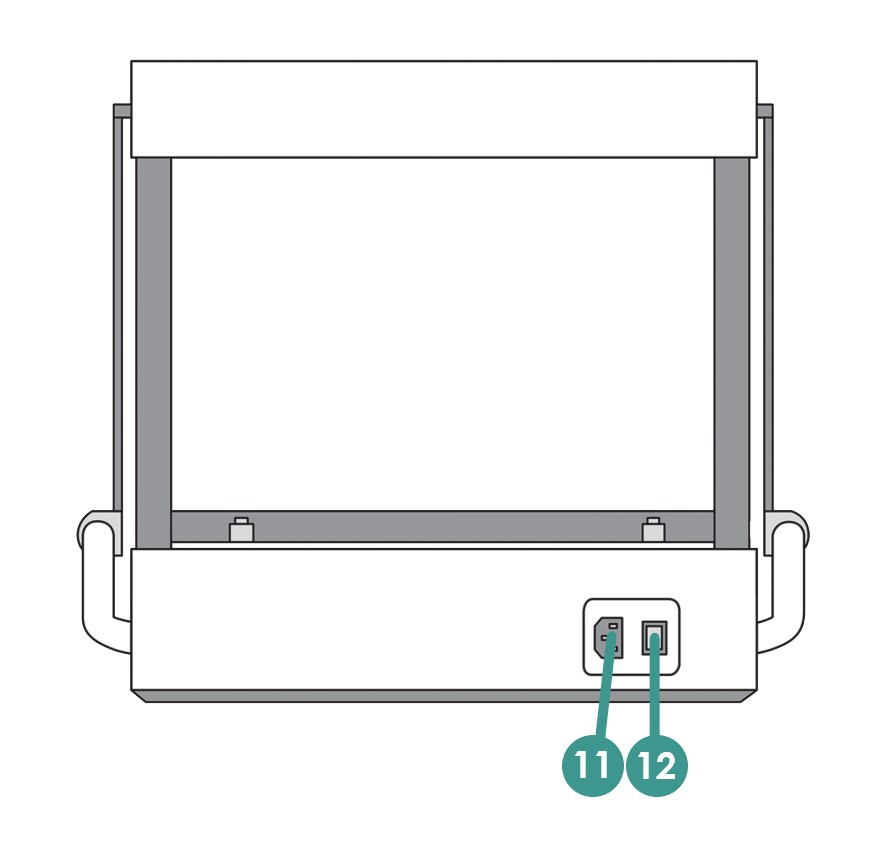
11. Power Port.
12. Main Switch.
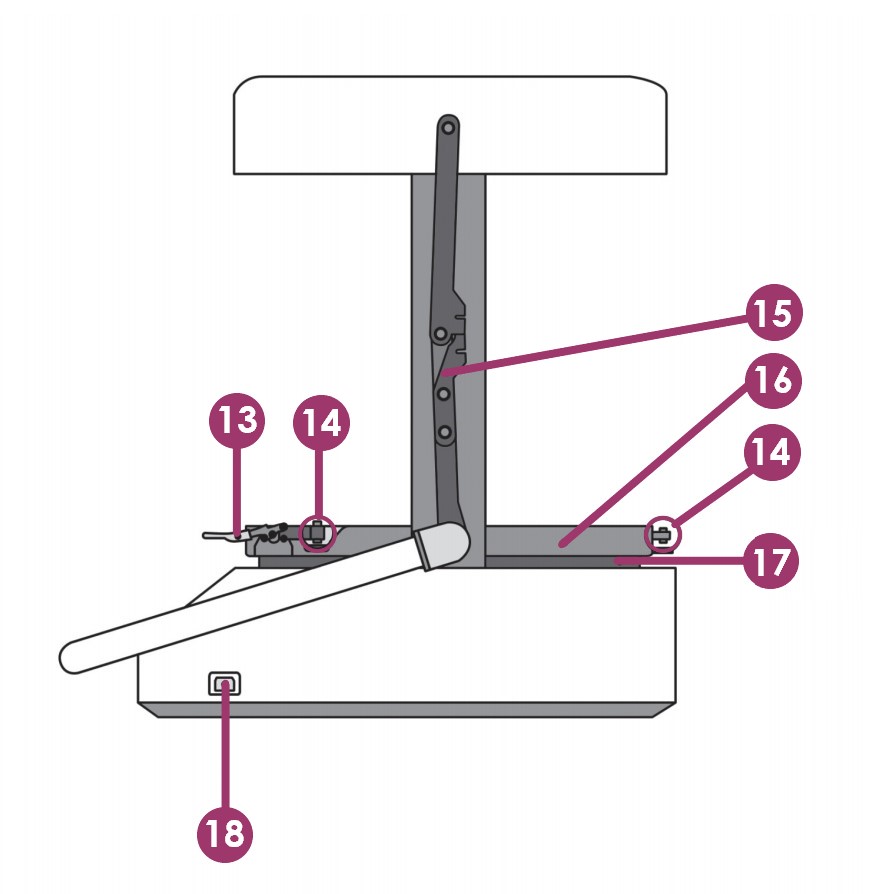
13. Toggle Clamp.
14. Adjustment Screws.
15. Linkage.
16. Sheet Clamp.
17. Platen Mesh.
18. USB Port.
The Materials :
There are various materials present, in a wide range of colors, that can be used with this machine. They include:
To know more about the machine, click here : Vacuum Forming Machine.
Let’s start making the mold !
To load the material, I’m going to follow the steps below :
Then change the settings as follow :
Ops! The first test has been failed.
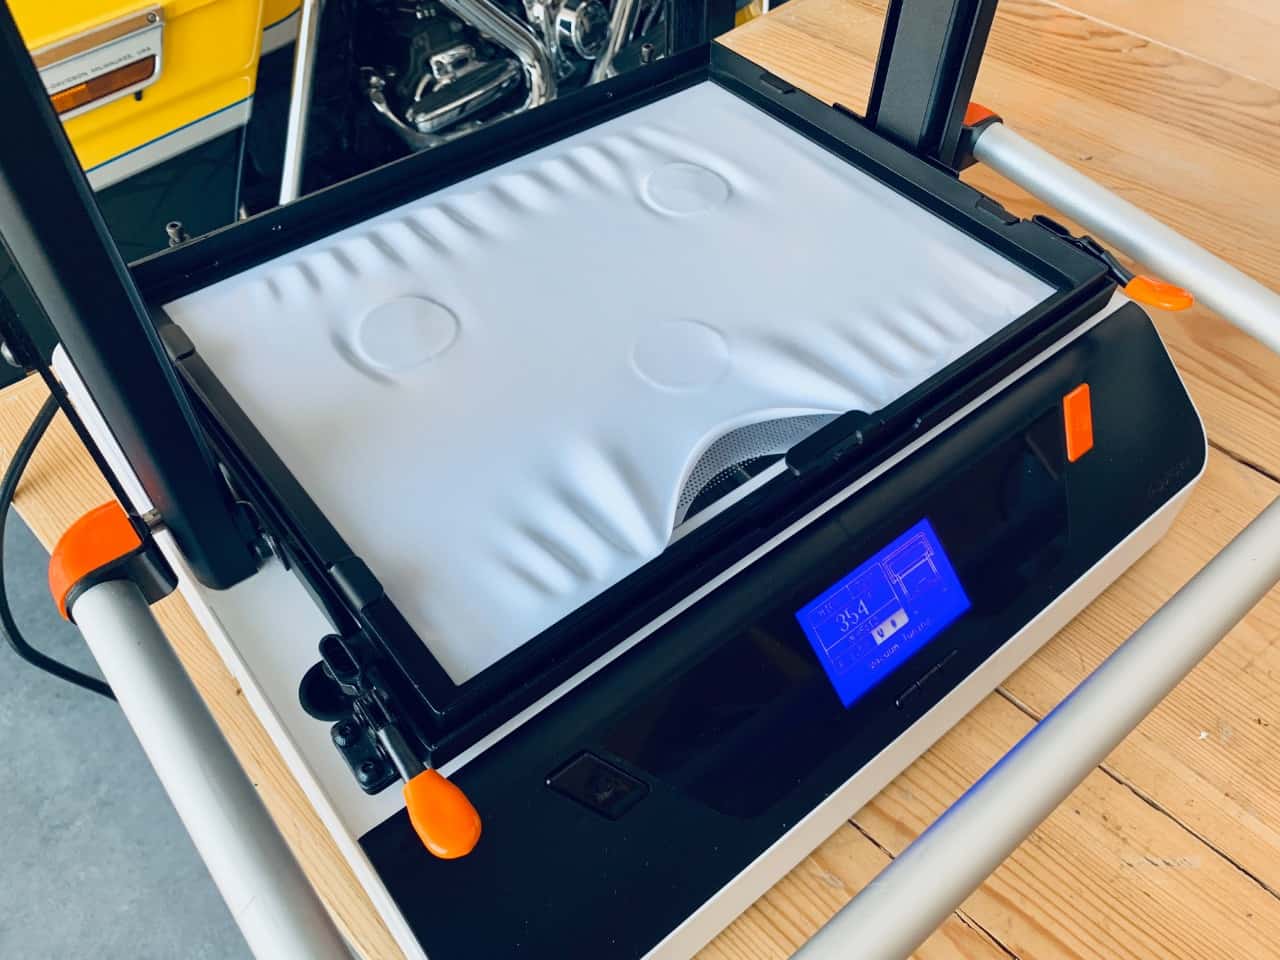
I will try again !
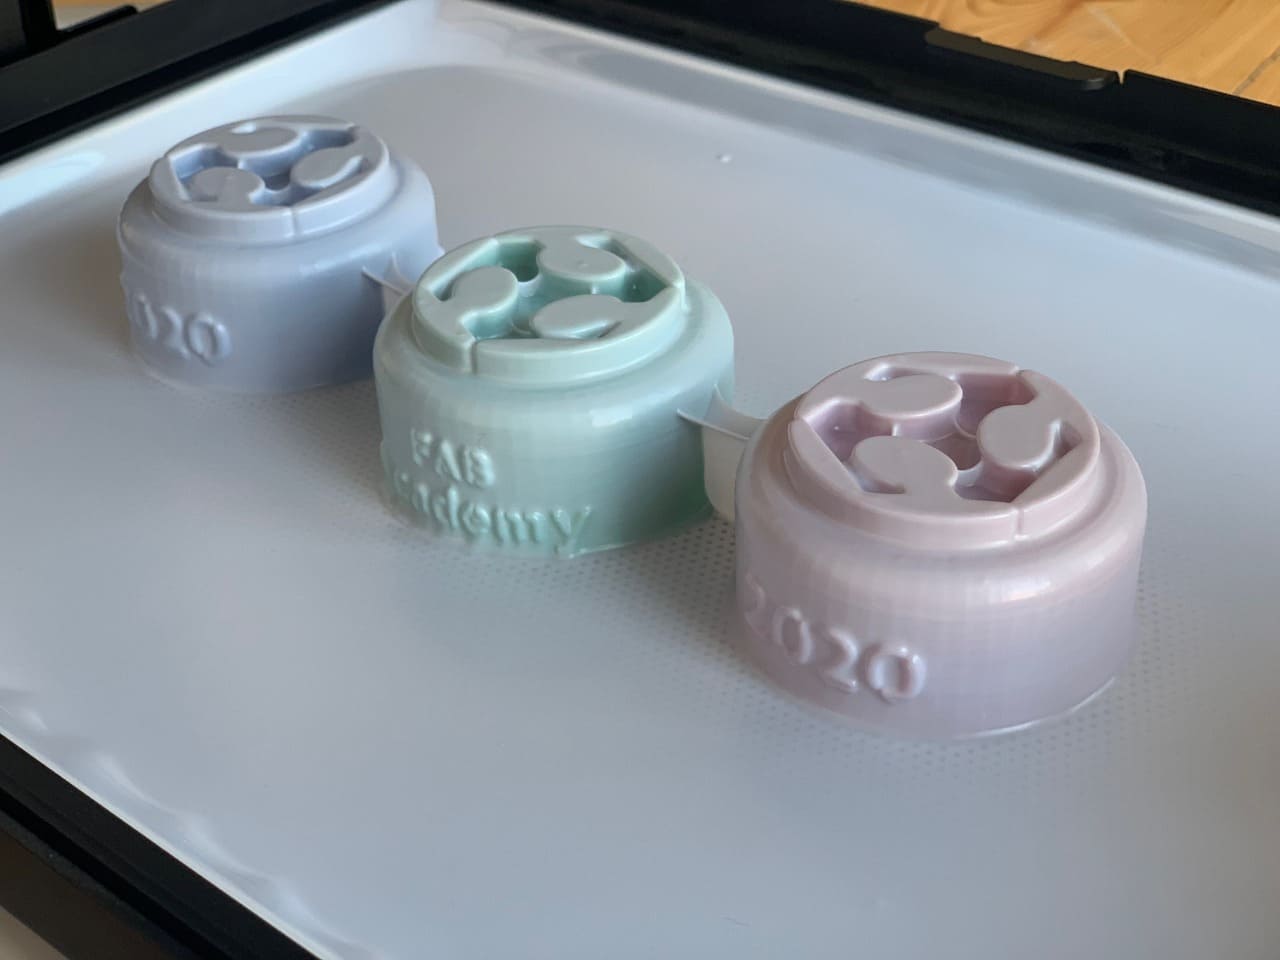
Yaaah, It is perfect! The mold is ready.
Now, let’s make the chocolate! All you need is CHOCOLATE !!!
My little sis Muhrah loves making sweets and chocolate. She has a chocolate heater. I gave her the mold and she made it !!
Enjoy watching the vedio !
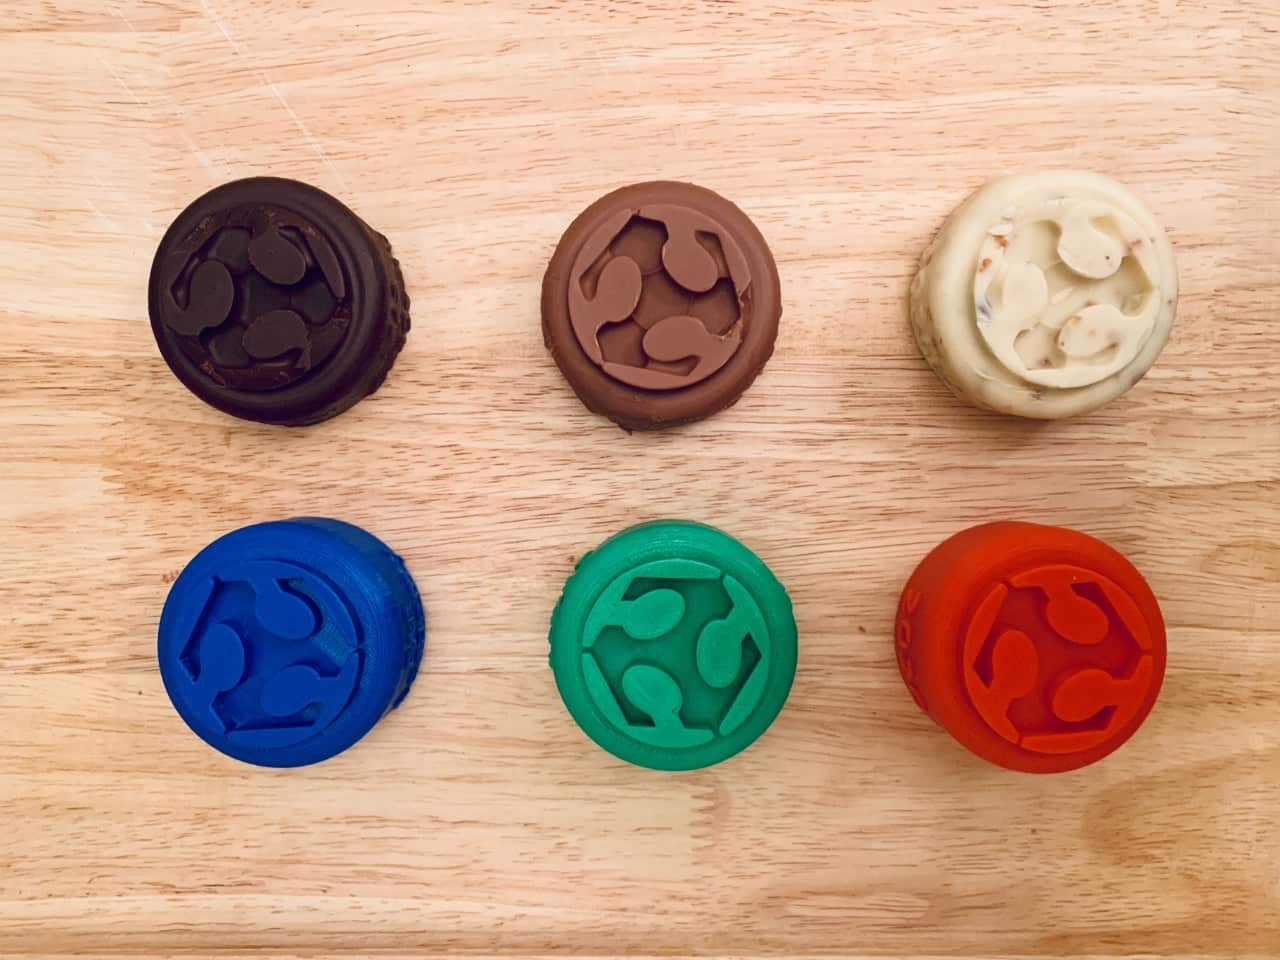
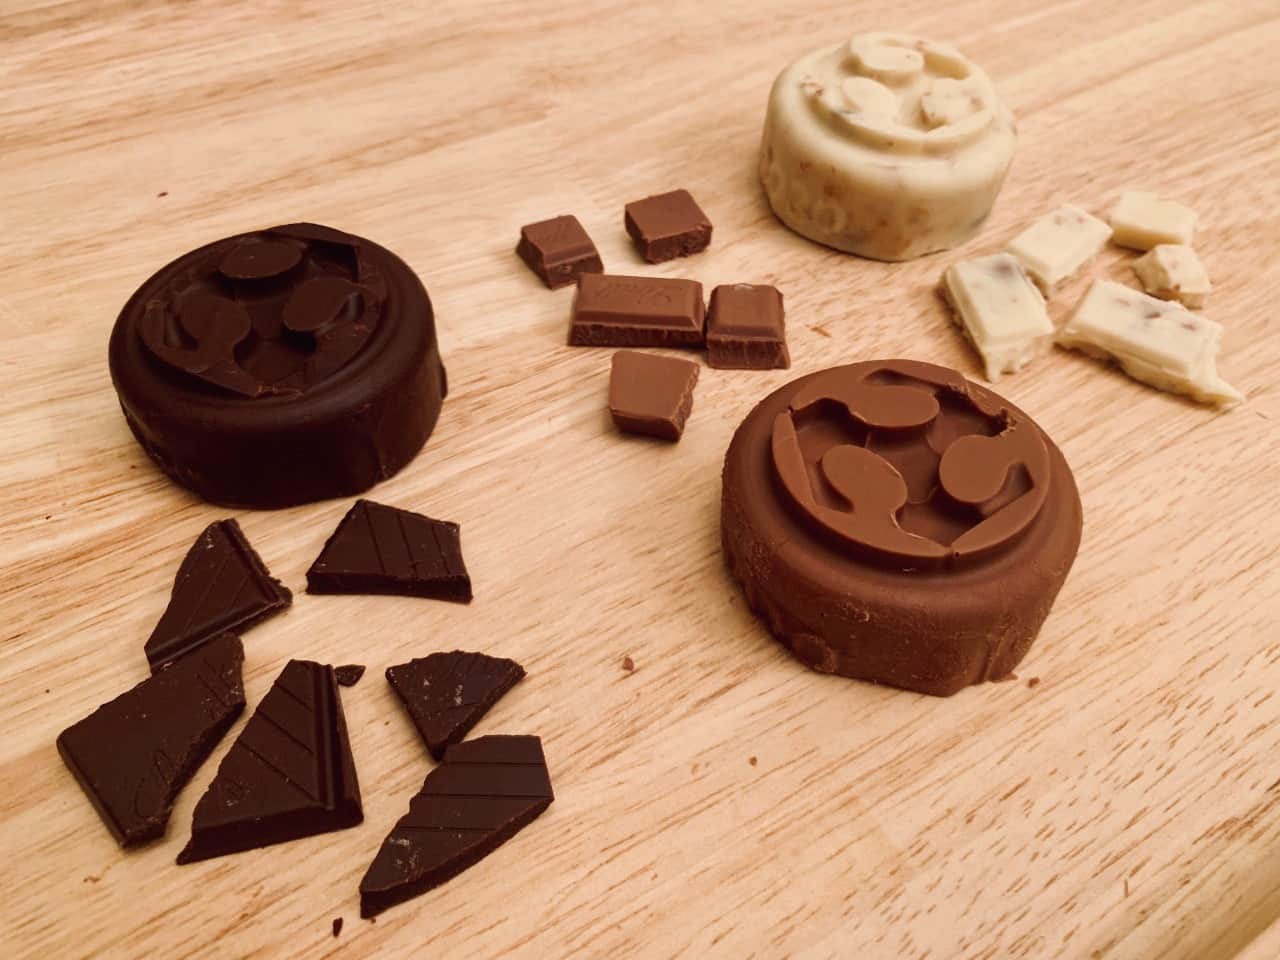
Yummy! It’s so delicious !!! I’m going to use the mold later to celebrate the FAB Academy graduation.
DONE .. DONE .. DONE !