Slide & Video
First Try With Prototype 1 (project development week)
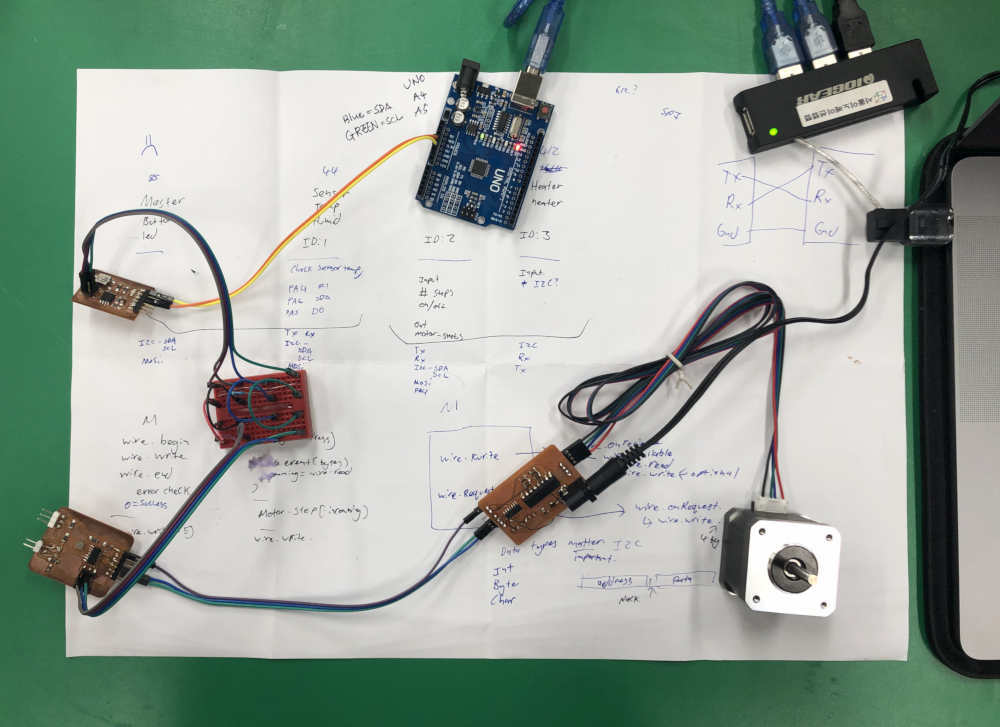
1) When the button is pressed in the Button&LED Boad, the Sensors Boad receives a signal through I2C networking.
2) And the signal is transmitted to the Motor Board by the Sensors Board as an electrical signal.
3) The motor board that receives the signal rotates the motor.
The code can be found here.
Second Try With Prototype 2 (project development week)
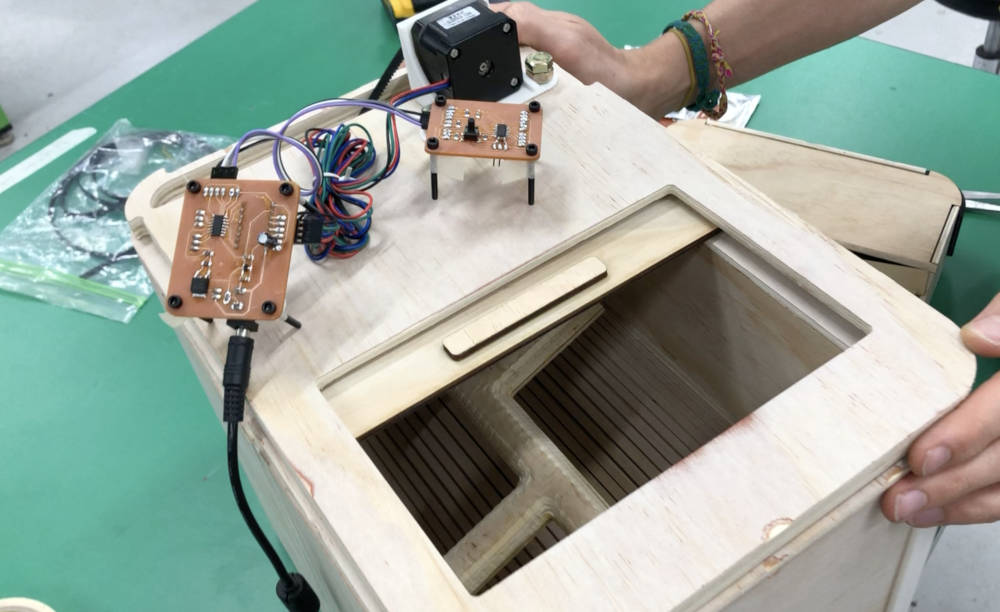
1) Pressing a button on the Button&Sensors Board sends a signal to the Motor&Heater Board through I2C networking.
2) The Motor&Heater Board that receives the signal rotates the motor.
3) Pressing the button on the Button&Sensors Board again sends a signal back to the Motor&Heater Board through I2C networking.
4) The Motor&Heater Board that receives the signal stops the motor.
Assessment of Project & The Next Spirals
1. Assessment of Project (From applications and implications week - 10. How will it be evaluated? part)
Internal Cylinder
---> Because it was made using Playwood, leaks occur. This is what should be evaluated after creating the inner part using stainless steel in the next version.
---> The power of the paddle is excellent. But I haven't tested it yet because there's a leak.
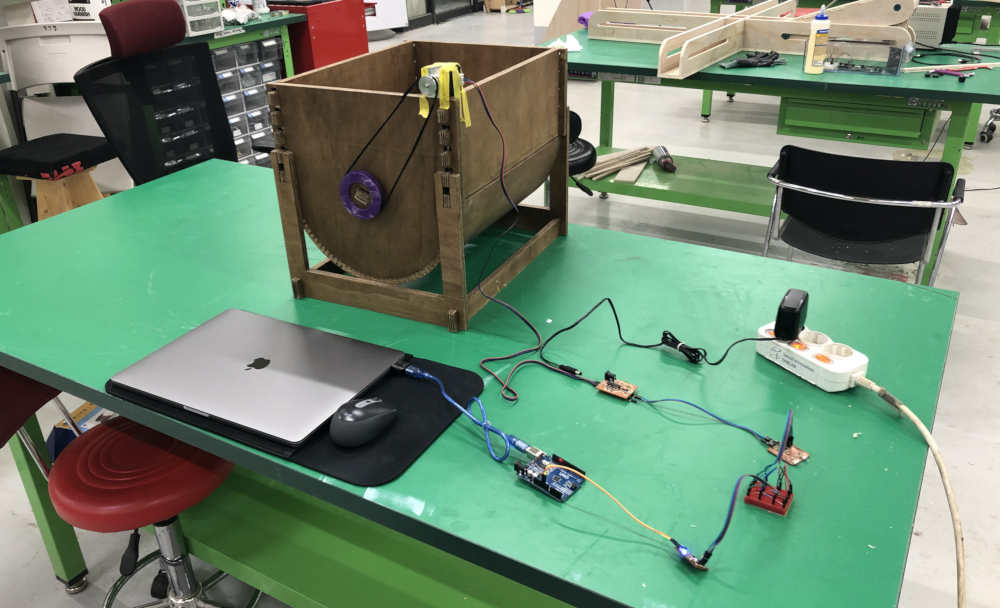
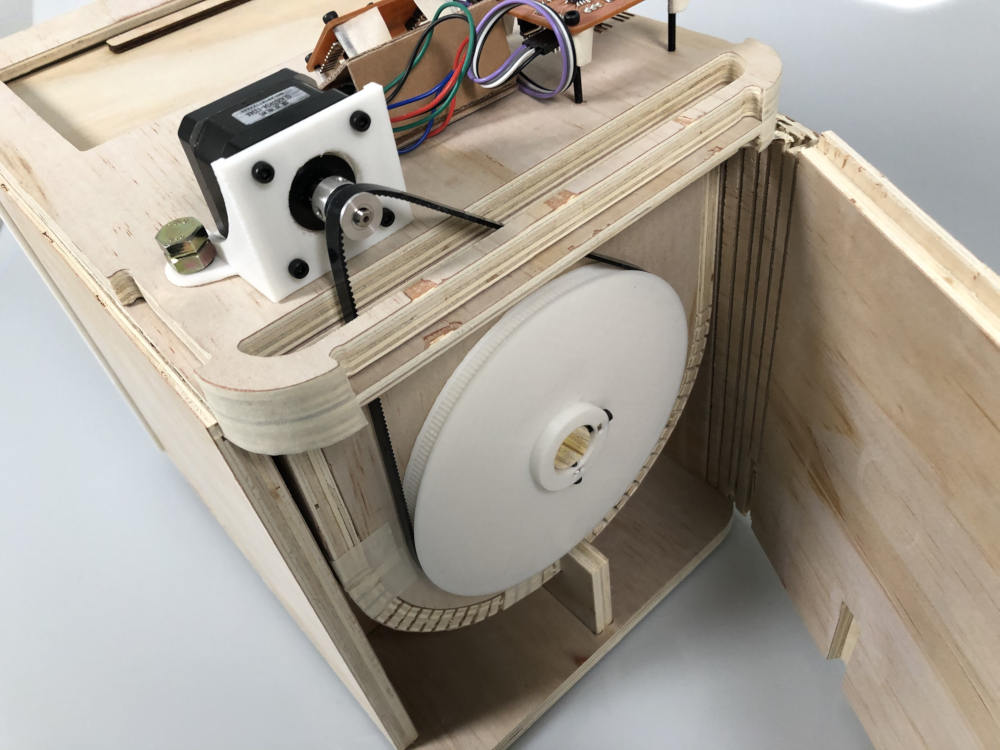
Frame
---> Gear moves smoothly enough. However, since there is a slight break in the code, it seems that the code needs to be modified more.
Input Devices
---> The distance sensor will be added to the next version.
Output Device
---> It works well.
---> The code for the heater is not yet complete.
---> More testing is needed.
Communications
---> Code for the sensor and the heater is not yet complete.
---> LED Panel will be added to the next version.
---> LED Panel will be added to the next version.
---> LED Panel will be added to the next version.
---> More development is needed on this part.
Conclusion
There are still a lot of gaps in the project as a whole. It is less developed than I thought in applications and applications week, and there are interface parts, distance sensors, LED panels, and so on that I couldn't add to this version. First of all, this version will focus on whether temperature sensors, soil humidity sensors, motors and heaters work well through networking.
2. The Next Spirals
A big thank you to…
Intellectual Property
All the work I have generated throughout Fab Academy is being released under an open license which means they are opensource so everybody can download and reuse the files. I decided to license my final project under a Creative Commons Attribution-NonCommercial-ShareAlike 4.0 International (CC BY-NC-SA 4.0) License.

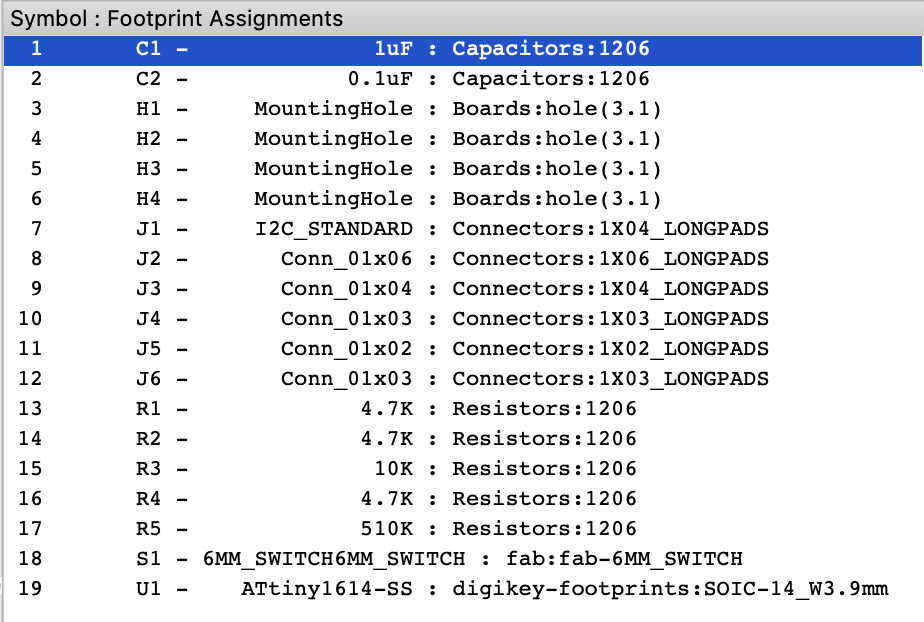
The BOM
| Components | Materials | Make | Specifications | Source | Cost per unit | Unit | Qty | Cost in KOR | Cost in USD (Cost in USD (1,210 won=1USD)=1USD) | Comments |
|---|---|---|---|---|---|---|---|---|---|---|
| Frame | Plywood | indi. | Plywood (12T) | FabLab inventory | 80,000 Won | 1200mm x 2400mm | 1 | 80,000 Won | $66.24 | |
| PLA | Sindoh | PLA | FabLab inventory | 38,000 Won | pack | 1 | 38,000 Won | $29.99 | https://www.amazon.com/Sindoh-Filament-Compatible-millimeters-Diameter/dp/B01HD9A8GG | |
| Input Devices | Soil Moisture Sensor | WINGONEER | YL-69 | FabLab inventory | 11,500 Won | piece | 1 | 11,500 Won | $9.50 | https://www.amazon.com/WINGONEER%C2%AE-Hygrometer-Humidity-Detection-Arduino/dp/B01H6WK51I |
| Temperature Sensor | DFROBOT | Waterproof DS18B20 | FabLab inventory | 8,000 Won | piece | 1 | 8,000 Won | $6.59 | https://www.navimro.com/g/432711/ | |
| Output Devices | Motor | MotionKing | 17HS8401 | FabLab inventory | 17,000 Won | piece | 1 | 17,000 Won | $14.00 | https://www.amazon.com/Twotrees-Stepper-17HS4401-Connector-Printer/dp/B07THK76QQ/ref=sr_1_4?dchild=1&keywords=17HS8401&qid=1594018330&sr=8-4 |
| Heater | FLD Heater | Silicon Heater Pad | FabLab inventory | 6,790 Won | 100mm x 100mm | 3 | 20,910 Won | $17.48 | https://smartstore.naver.com/marketsharing/products/3011967095 | |
| ETC | Timing Belt | UNITA | Length (m): 2.218 Width (mm): 6 Pitch (mm): 2 |
FabLab inventory | 2,640 Won | 2m | 1 | 2,640 Won | $2.21 | https://smartstore.naver.com/sondori/products/2462120345 |
| Timing Pulley | UNITA | Length (mm): 20 Number of teeth: 20 Pitch (mm): 2 Hole size (mm): 5 Length of teeth (mm): 7 |
FabLab inventory | 770 Won | piece | 1 | 770 Won | $0.65 | https://smartstore.naver.com/sondori/products/2462159824 |

Codes
Sensors & Button Board Code
              #include <Wire.h>

              const int buttonPin  = 10;

              int buttonState      = 0;
              int lastButtonState  = 1;

              void setup() {
               Wire.begin();
               pinMode(buttonPin, INPUT);
              }

              void loop() {
               buttonState = digitalRead(buttonPin);
                 if (buttonState != lastButtonState) {
                   if (buttonState == 1) {
                       Wire.beginTransmission(2);
                       Wire.write('p');
                       Wire.endTransmission(2);
                   }
                   lastButtonState = buttonState;
                 }
               delay(20);
              }
Motor & Heater Board Code
                #include <Wire.h>

                int STEP = 9;
                int DIR = 10;
                boolean turn = false;

                void receiveEvent(int howMany) { //Read Transfer Data


                while (Wire.available() > 0) {

                  int A = Wire.read();
                  Serial.print(A);

                  turn = !turn;
                }


                }

                void setup() {
                  Wire.begin(2); //slave address
                  Wire.onReceive(receiveEvent); //Call the reciveEvent function when data is sent
                  Serial.begin(9600);
                  pinMode(STEP,OUTPUT);
                  pinMode(DIR,OUTPUT);
                }

                void loop() {
                  if(turn == true) {
                    motergo();
                  }
                  delay(20);
                }

                void motergo() {
                   digitalWrite(DIR,HIGH); // + Direction

                 for(int x = 0; x < 200; x++) {  // 200 pulses one revolution
                   digitalWrite(STEP,HIGH);
                   delayMicroseconds(1200);
                   digitalWrite(STEP,LOW);
                   delayMicroseconds(1200);
                 }
                }