3D Printing and Scanning
Entering the lab I thought that the process of printing is uploading a design and clicking print, but it has more to it specially when the printers are worn off through time. I encountered different challenges starting from the resolution of the print, nozzle functionality, bed surface, correct calibration and ending with the validity of the material. The MakerBot Replicator 2 is a desktop 3D printer with great functionalities, though it an old generation of 3D printers it works like a charm If well maintained and is capable of doing it’s job well.
In the lab we have two MakerBot Replicator 2, one MakerBot Replicator 2 Mini and an Ender 3D printer. Luckily enough I was able to print, fix and experiment with these printers and understand the limitations and functionalities of each of them.
- Read the user manual.
- Calibrate bed surface using MakerBot utility.
- Check if PLA is installed right.
- Heat up the printer before printing.
Our MakerBots have been heavily used by the school kids where our lab is and aren’t well maintained. The first MakerBot nozzle was jammed due to dust and micro dirt it used to stop working after printing a couple of lines and stops extruding PLA. At the beginning I thought that it could be the connection with the software so I tried uploading the file on the SD and running it though the machine itself and I came with the same results the machine stops extruding the material and it just wonders around. After many tries and different settings we decided to put it on the side for future maintenance and started to work on the second unit instead since its nozzle is intact.
The print bed surface was a challenge, we ran out of the dedicated blue bed stickers and instead we used regular wide paper tape thinking that it may replace the dedicated blue but it didn’t. Printing on a naked bed was not an option at the beginning so I researched if there’s any other alternatives. It’s written that using hair spray will create a non sticking layer and is a good, cheap alternative to the blue paper but It wasn’t. The PLA didn’t stick to the surface, the surface was too smooth for the PLA to stick. I printed on the glass surface of the bed, it prints alright but it sticks really hard on the bed and you could break a part or get a wound while removing using a sharp object.
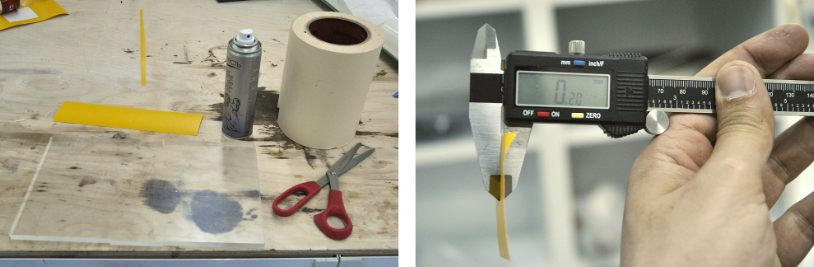
Calibrating the surface bed on a MakerBot left wounds on my fingers the screws under the bed that are used to calibrate the bed were jammed and due to that I couldn’t get a good surface for printing. They were so stiff that I ended up with water bubbles on my fingers. I decided to use a glove but still they wont budge. Luckily we have WD-40 lubricant in our lab and I decided to use it to spray the screws and they worked like a dream. We used thicknesses of paper to compare the result 0.20mm was named the magical card the thickness was good for calibration.
Note: Cover the printers if you are not using the 3D printers the parts are sensitive to dust, always maintain them and use dedicated materials for the printer.
Group Assignment
Overhang & Bridge Test
We downloaded an overhang & bridge test from thingiverse to test out the printers we had in the lab. Whats good about the test is that we can see the limitations of our machines.
Results:
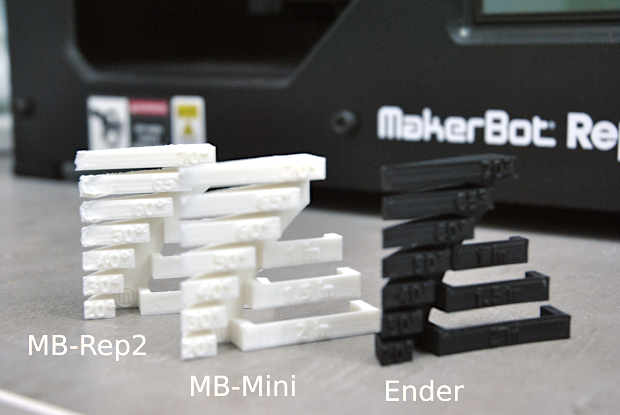
MakerBot Replicator 2
The final results of the MakerBot 2 were satisfying, understanding the wear and tear it went through and the validity of the PLA.
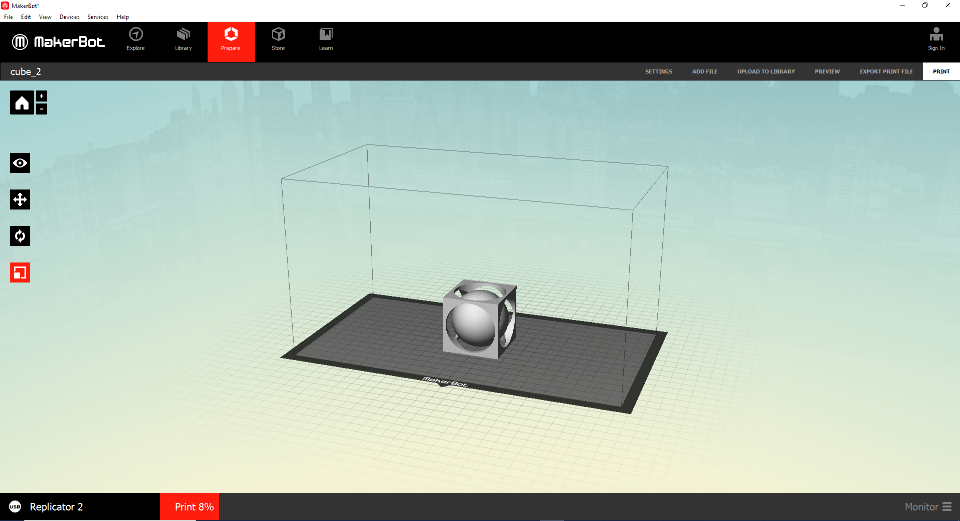
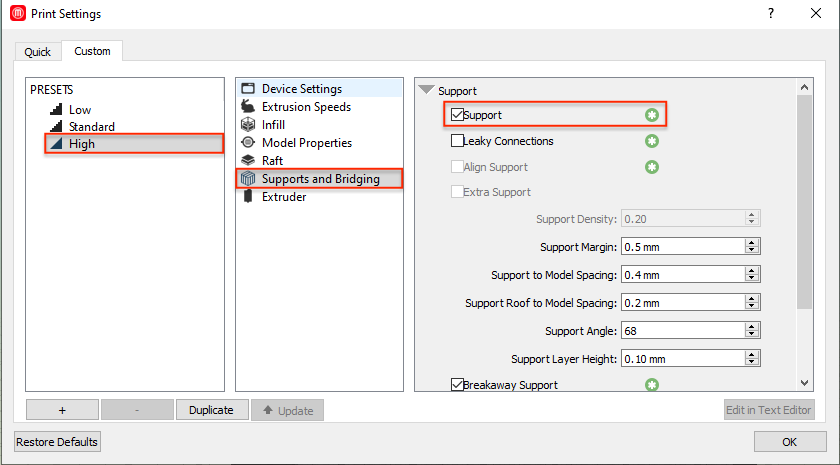
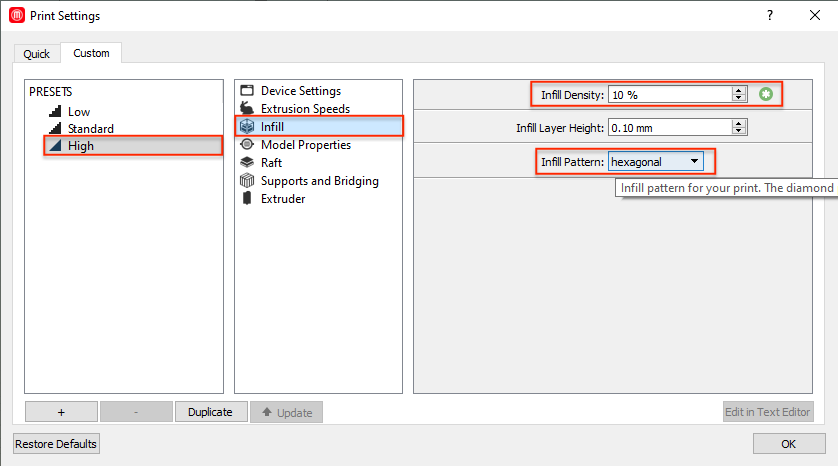
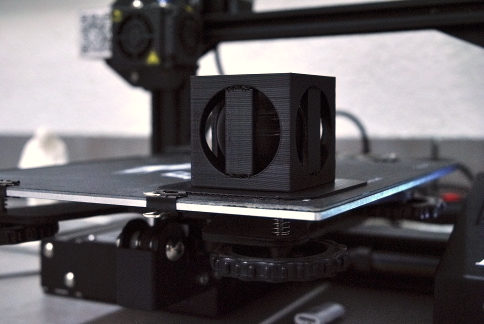
I used OpenScad for designing the cube and exported the cube as an stl. file.
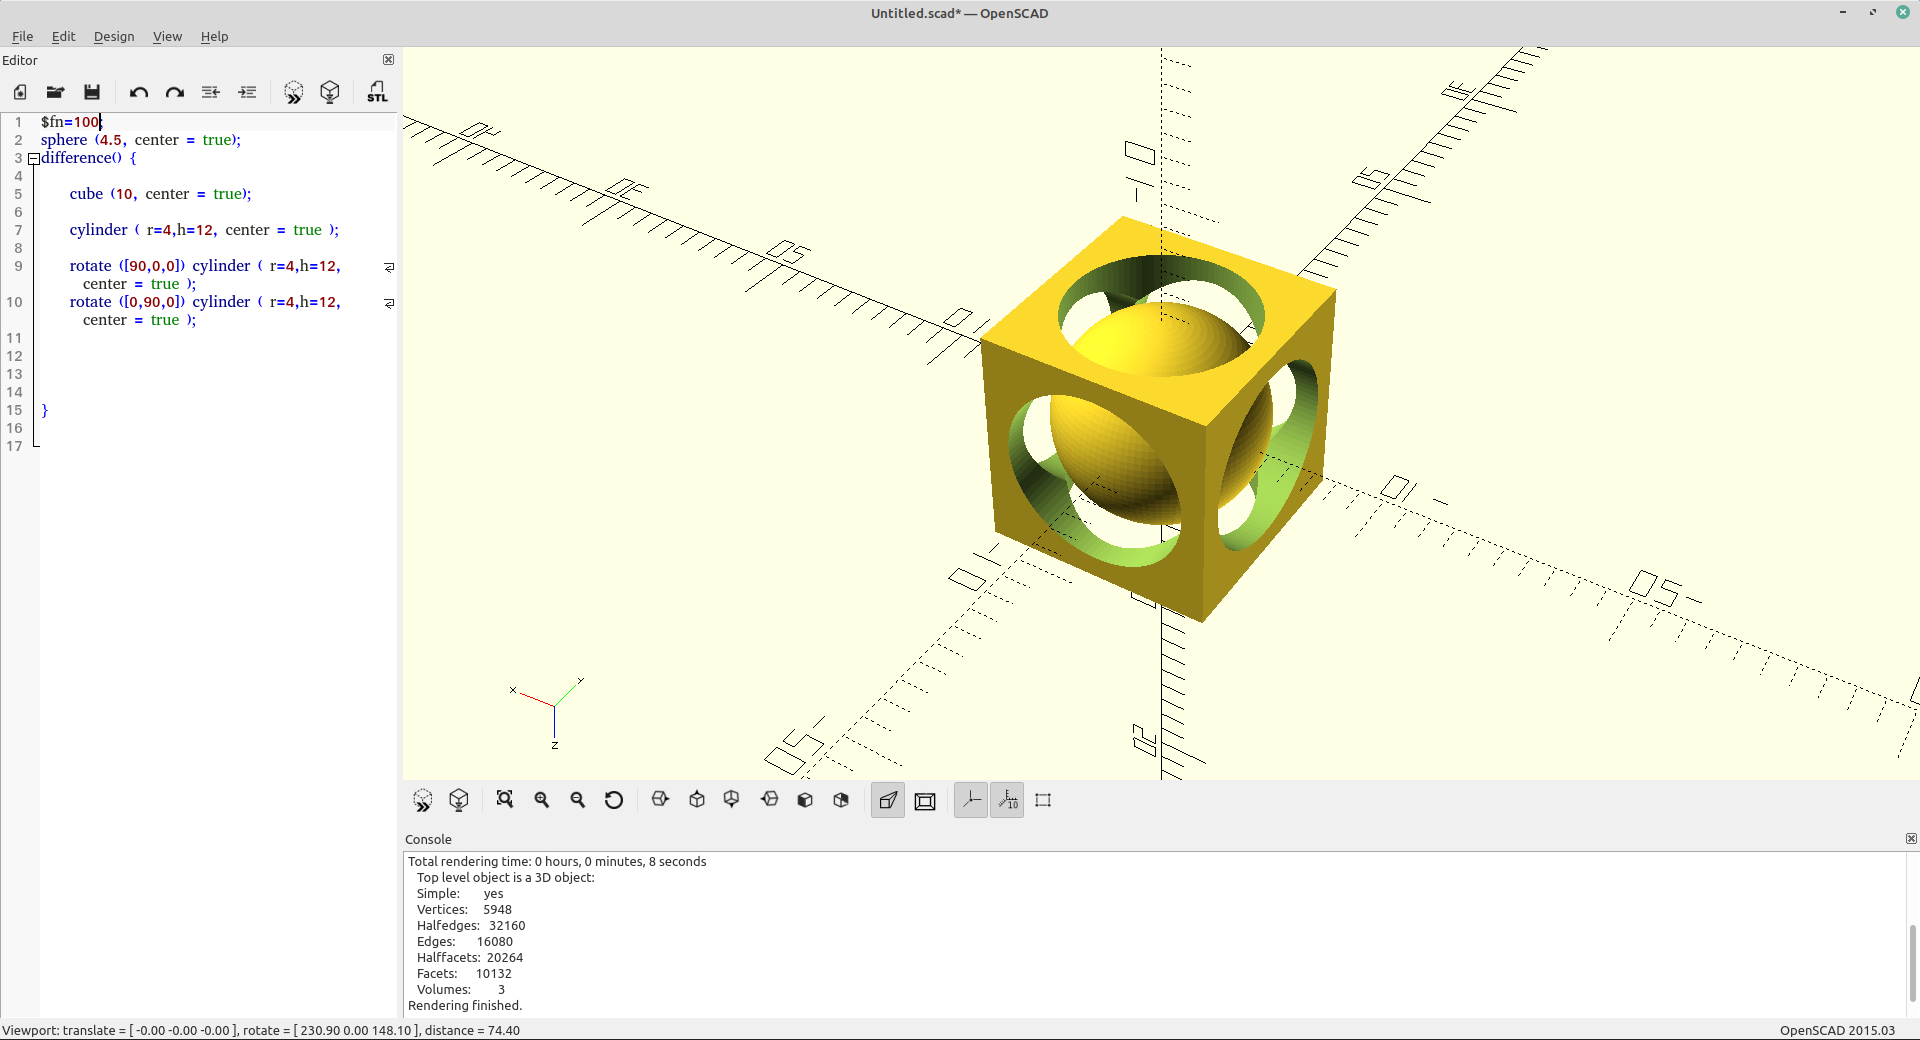
$fn=100;
sphere (4.5);

difference( ) {

    cube (10, center = true);

    cylinder (r=4,h=12, center = true);

    rotate([90,0,0]) cylinder(r=4,h=12,center = true);

    rotate ([0,90,0]) cylinder (r=4,h=12,center =true);

    }
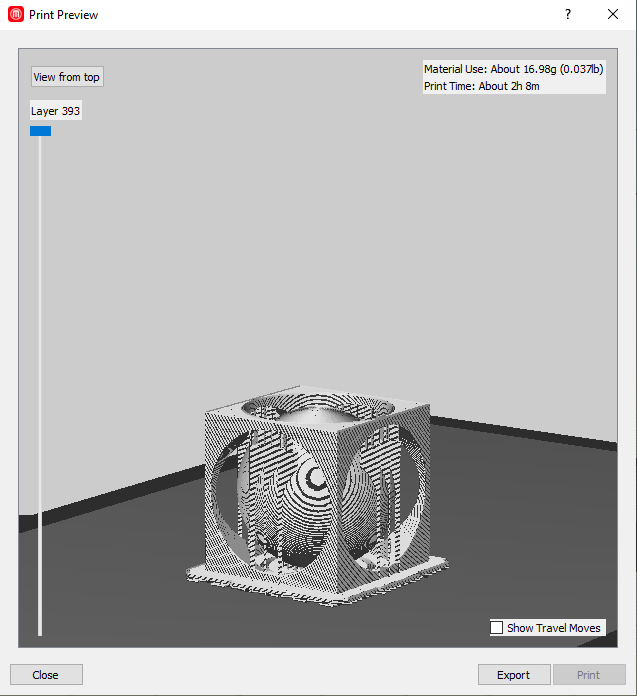
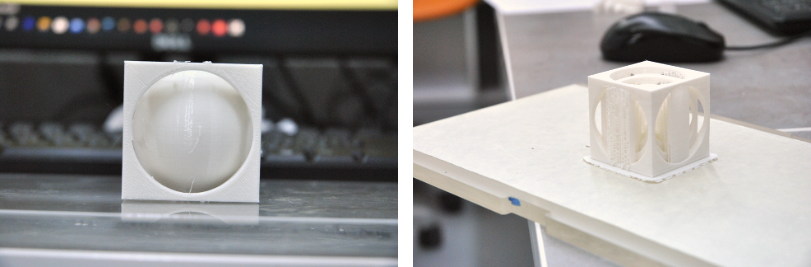
Result:
Creality Ender 3
This Ender 3D printer is a newer generation that gave really good results. The bed is heated and the calibration is done manually. This printer is capable of reading G-Codes via a mini SD-card . The machine is well maintained and gave great results.
Photogrammetry
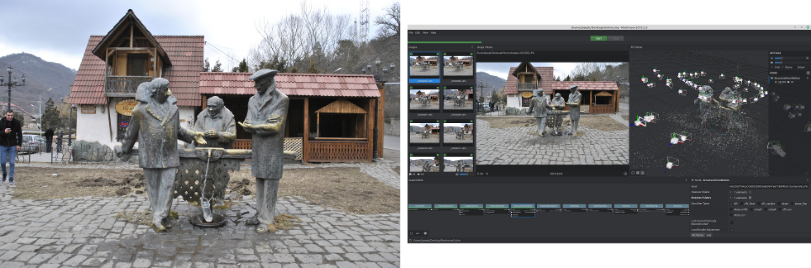
After doing some research and checking the links on or weekly assignment I checked out a couple of software that are compatible with Linux and settled with Meshroom. I took photos of a well known spot here in Dilijan it’s a statue resembling an iconic movie from the Soviet times called Mimino, you can check the movie it’s officially available on YouTube and yes it comes with English subtitles too. To test the software I uploaded around ninety five images of the statue including wide shots, close-ups and photos from all around and above. Meshroom is very user friendly and easy to use, you have to just drag and drop the images in the left panel and click save the cache file and click start.
Meshroom has a lower panel where the nodes are located I didn’t yet explore the nodes fully due to the amount of time required due to the amount of time and processing power needed. I prefer taking the process one step at a time by right clicking on a node and selecting compute.

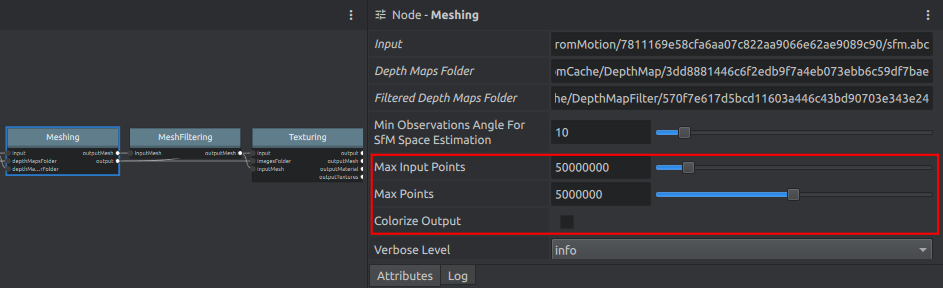
I did bump into processing problems when Meshroom stopped processing due to the large amount cache I found a way around it by:
- Creating a SWAP drive which will give you good results.
- Lowering the max point process at the end of the node which actually will lower that resolution of the 3D object.
MakerBot Replicator 2 Mini
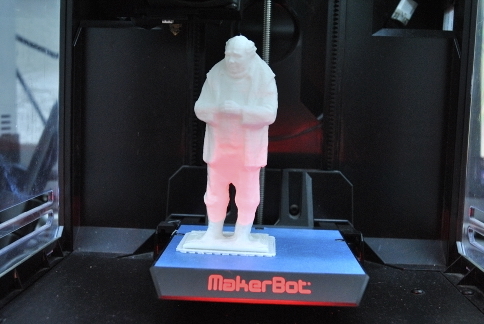
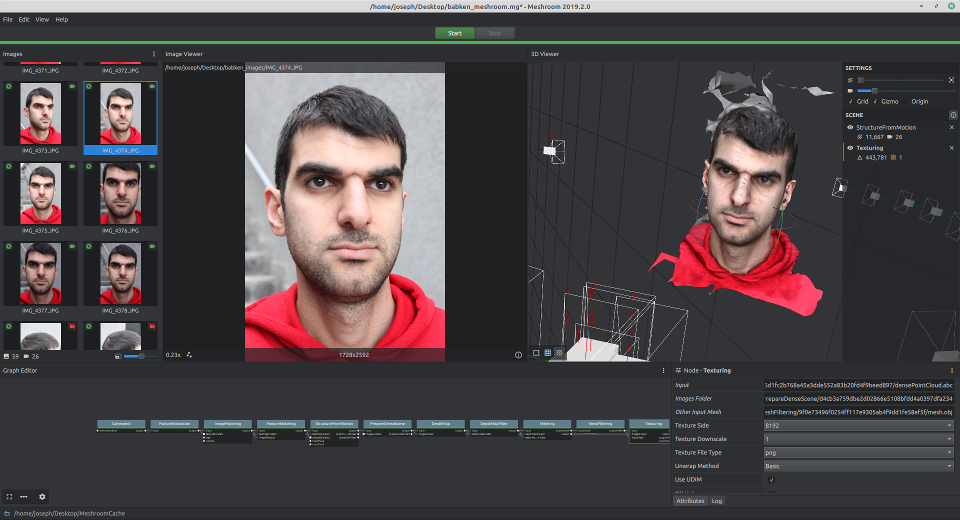
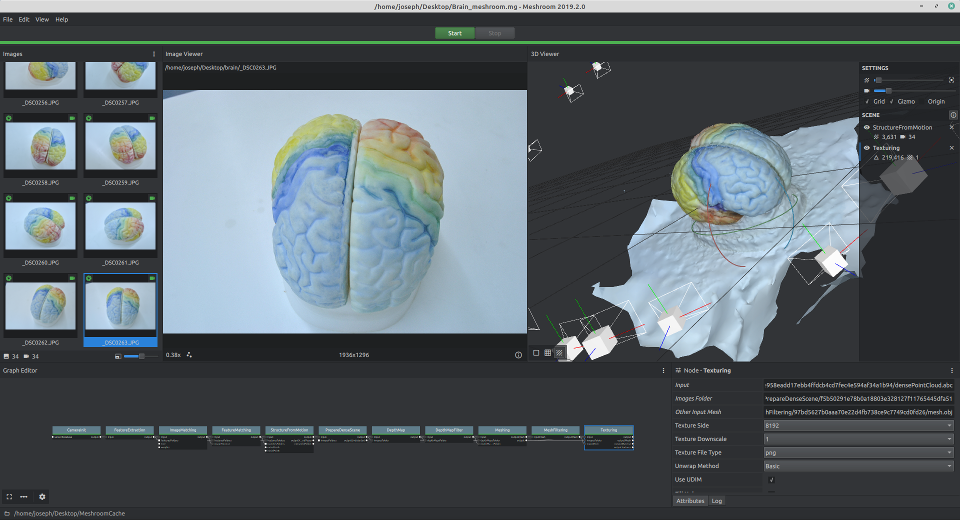
After that I went and took more photos of our node Babken and went to the science lab and took pictures of a brain just to check on the processing power and adding more control on the angles and light used to take the photos. The processing was faster due to the amount of information that was less than the statue which was on a busy street and surround by an complex atmosphere.
3D Model
Conclusion
There are many open source softwares that can be used to build your 3D printed object. Meshroom and OpenSCAD were my favorite tools for this assignment. OpenSCAD works with it’s language and in a way everything is set parametrically once you enter the code and since my background is photography I really liked the idea of taking photographs digitally and replicating them physically using the 3D printers.
Design Files
| Name | Type |
|---|---|
| Mimino Statue | .obj |
| Cube | .stl |

This work is licensed under a Creative Commons Attribution-NonCommercial-NoDerivatives 4.0 International License.