2. Computer Aided Design
The week two class was about Computer Aided Design (CAD). model (raster, vector, 2D, 3D, render, animate, simulate, …) a possible final project,
- ASSIGNMENT WK 2.1 : Model 2D
- Use Inkscape to develop a Raster an image and sticker image with text. (Link to WK 3.1)
- Use Rhino/grasshopper to model plant growth in plan view using data inputs.
- Animate the growth of plants (2D) according to input data.
- Explain QGIS use for Valldaura Labs.
- ASSIGNMENT WK 2.2 : Model 3D
- Use FreeCAD to develop a plan diagram of planting bed.
- Model your final project using Solidworks
- Import the project to Onshape
- Use ‘Kirimodo’
- Load your project into sketchfab.
- Use OpenSCAD to create a stove component for wild week.
- Use Antimony for design.
- Render and Animate final project in Blender.
WK 2.1 : Technical Drawing 2D
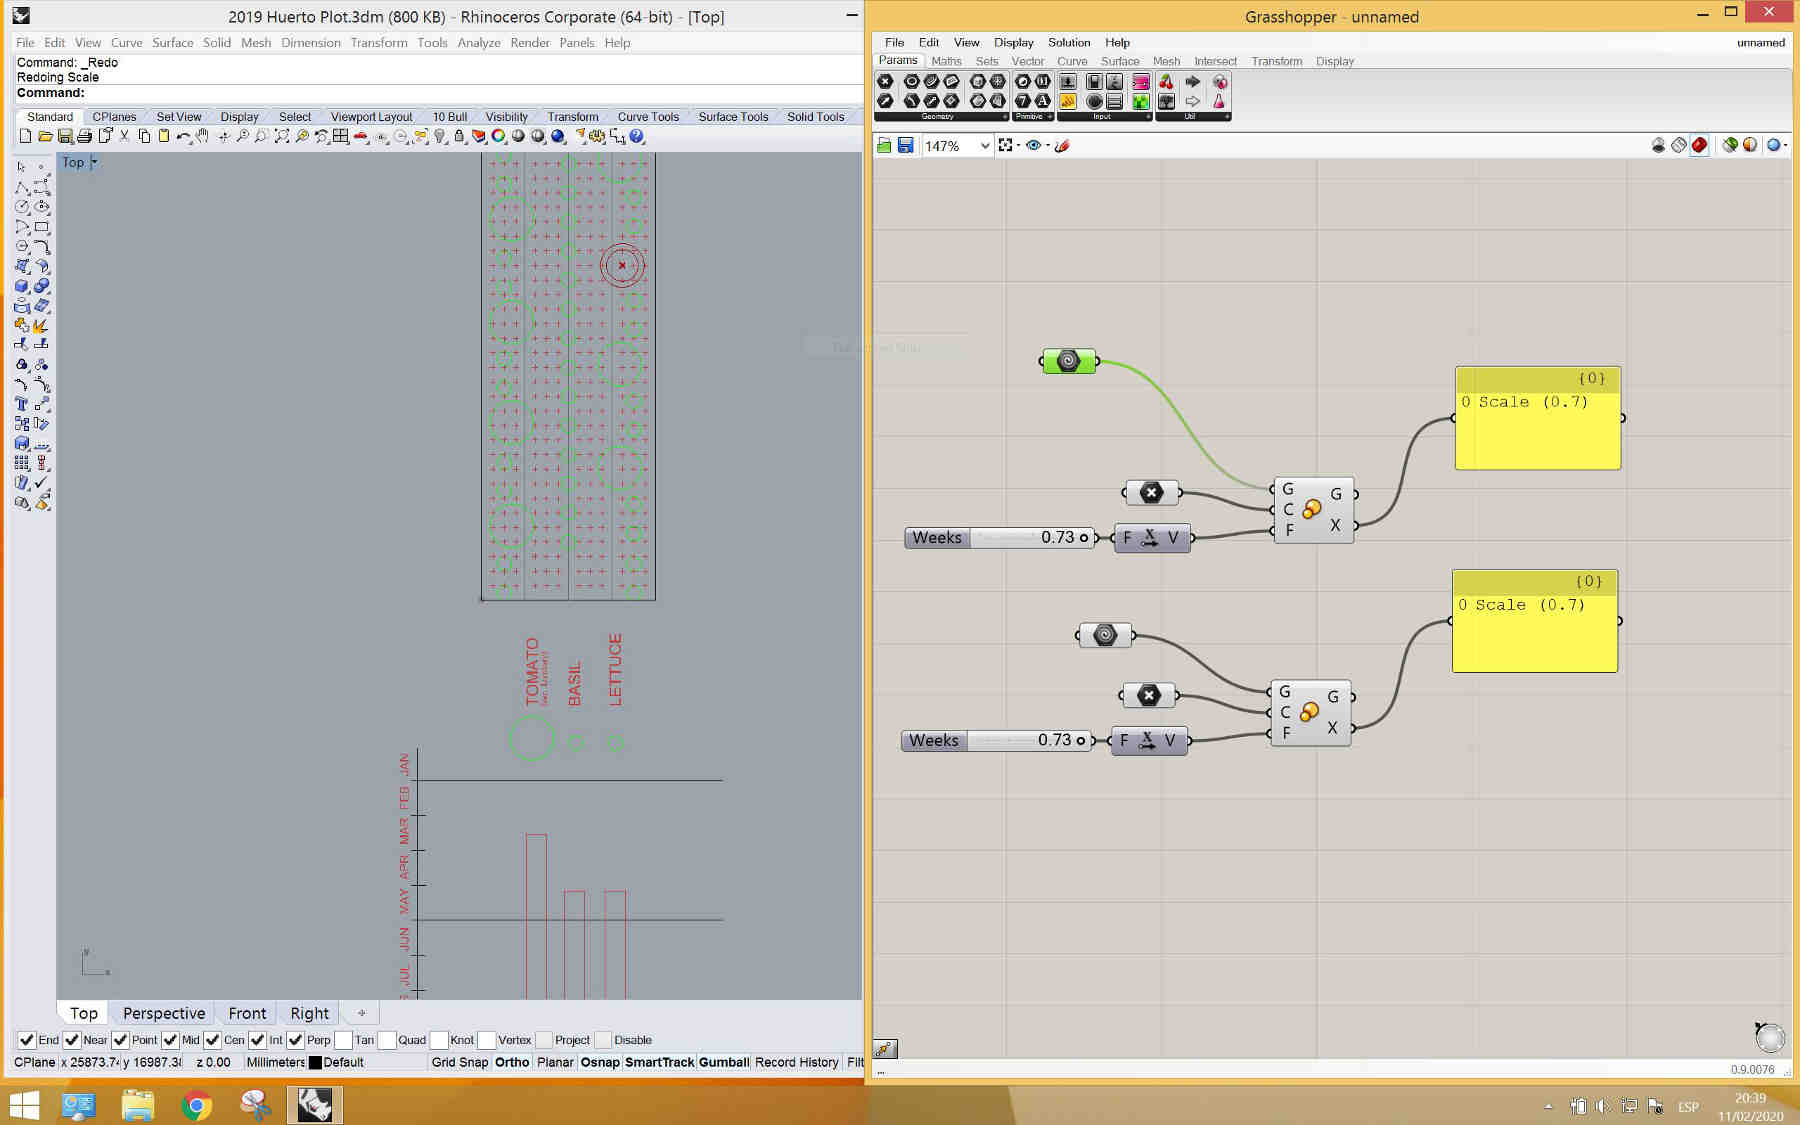 To model a single plot of Cabbages and Lettuces I needed to create a Grasshopper definition that could demonstrate the growth rates and ultimate sizes of two Crops.
I first drew a plan of the plot to the correct dimensions using rhino, the command line is useful for entering exact dimensions. I then assigned circular geometry to represent either a cabbage final circumference or that of a smaller lettuce. (The lettuce grows faster but finishes comparatively smaller)
I then assigned ‘geometry blocks’ in grasshopper to the respective circles and created a time slider of 52 weeks of the year. A ‘factor block’ was used to convert the week number produced by the slider into geometry.
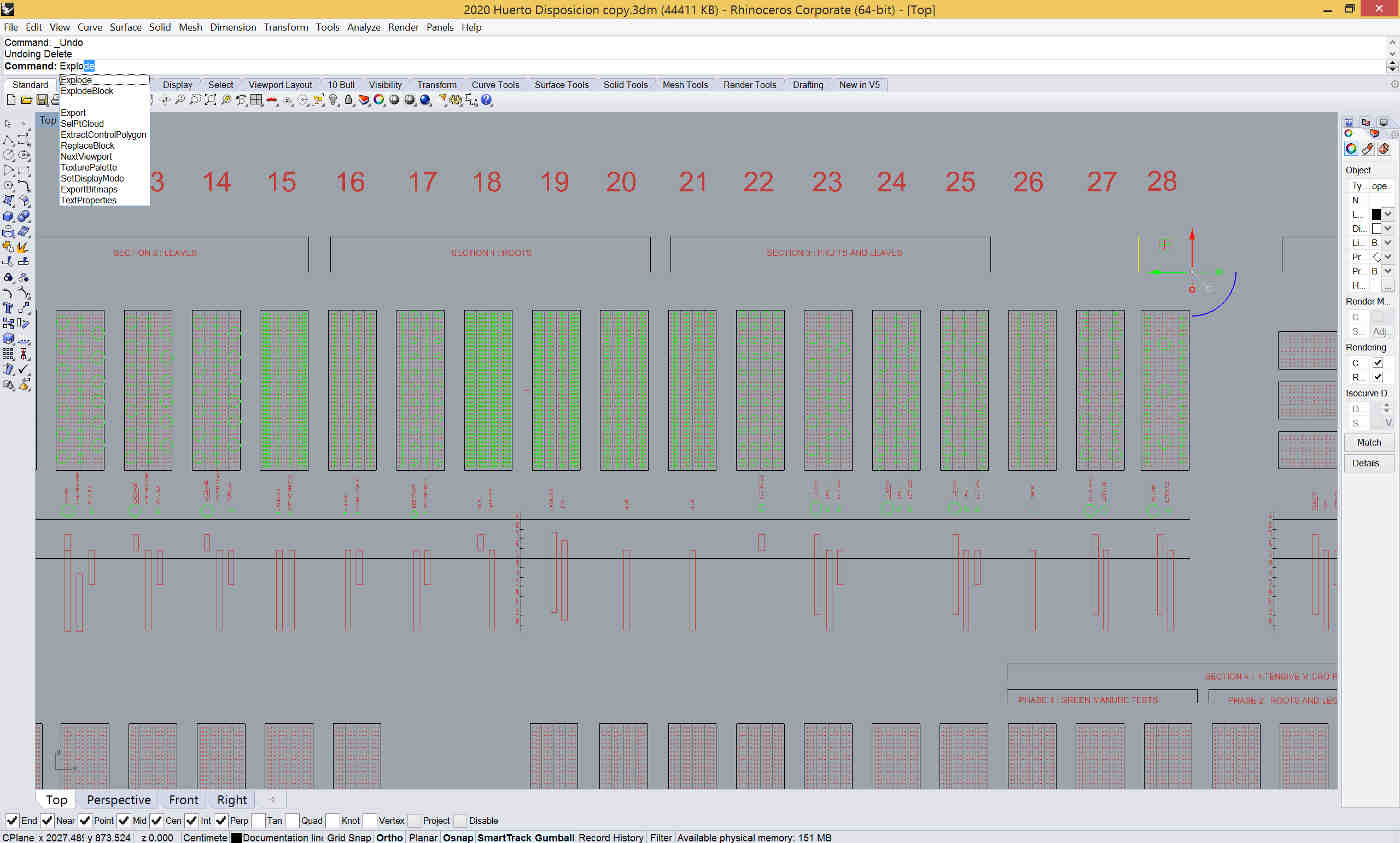 Showing the plant layout of the Valldaura research garden
Next I will add other inputs to develop a ‘Growth factor block’ for these two crops. The Firefly plugin may also be used to model and change the growth factor by adding realtime sensor data such as Light count, Soil Fertility and Humidity from a Parrot soil sensor, or simply an Arduino.
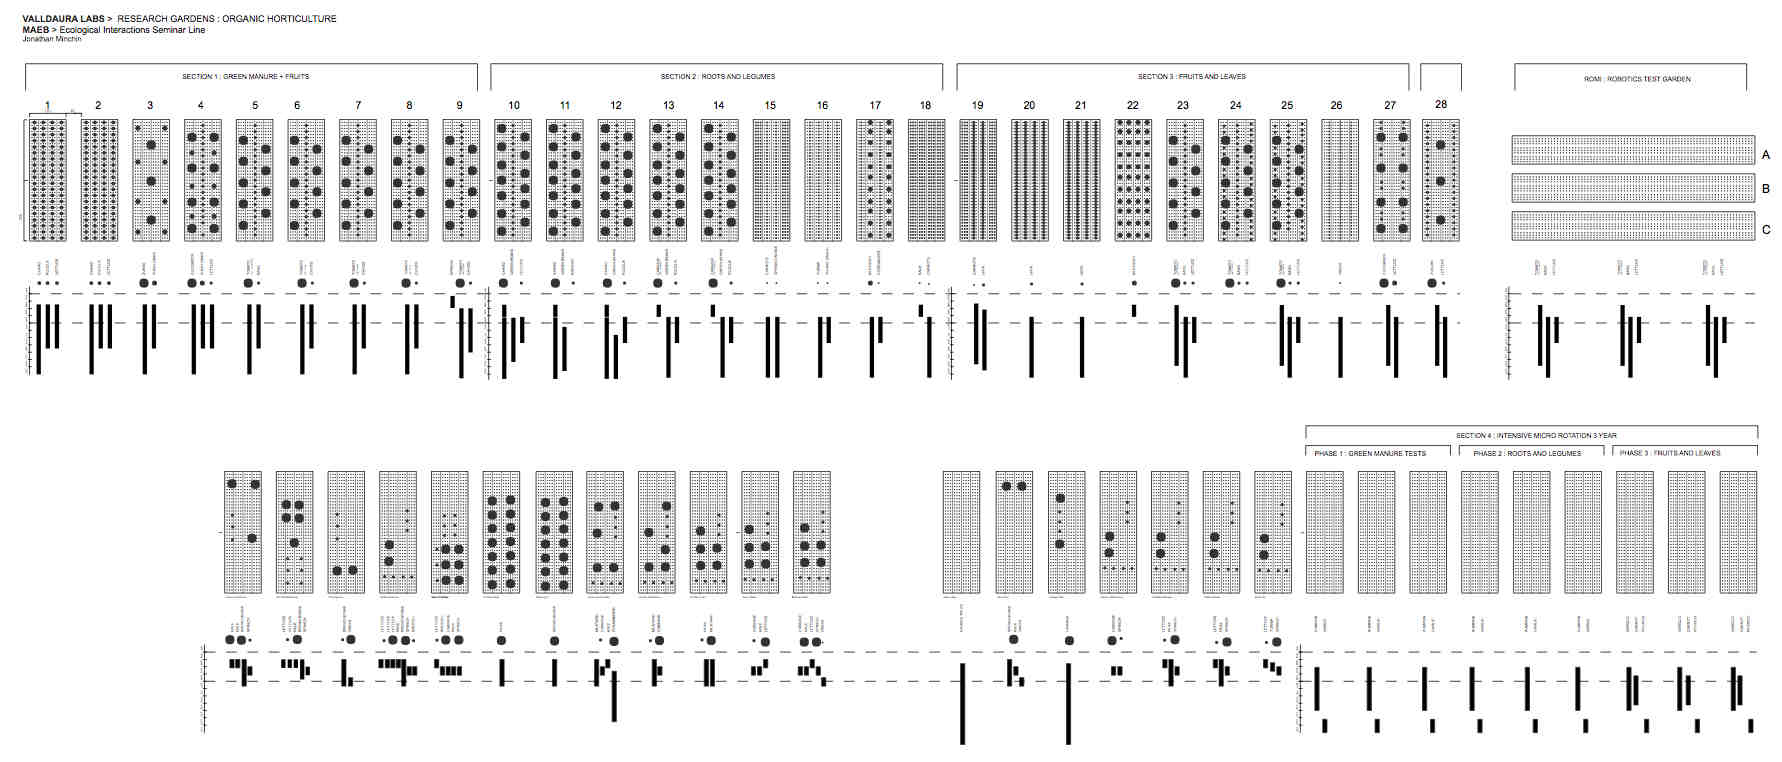 Showing a possible rendering for the famers dashboard
To create a ‘farmers dashboard’ (ref.WK1.5.3). I have drawn a template for the whole research garden using Rhino. The file exported as PDF then reduced as a screen shot to finally obtain a small file size. I would ultimately like to make this interactive and possibly with the idea of using digital ink.
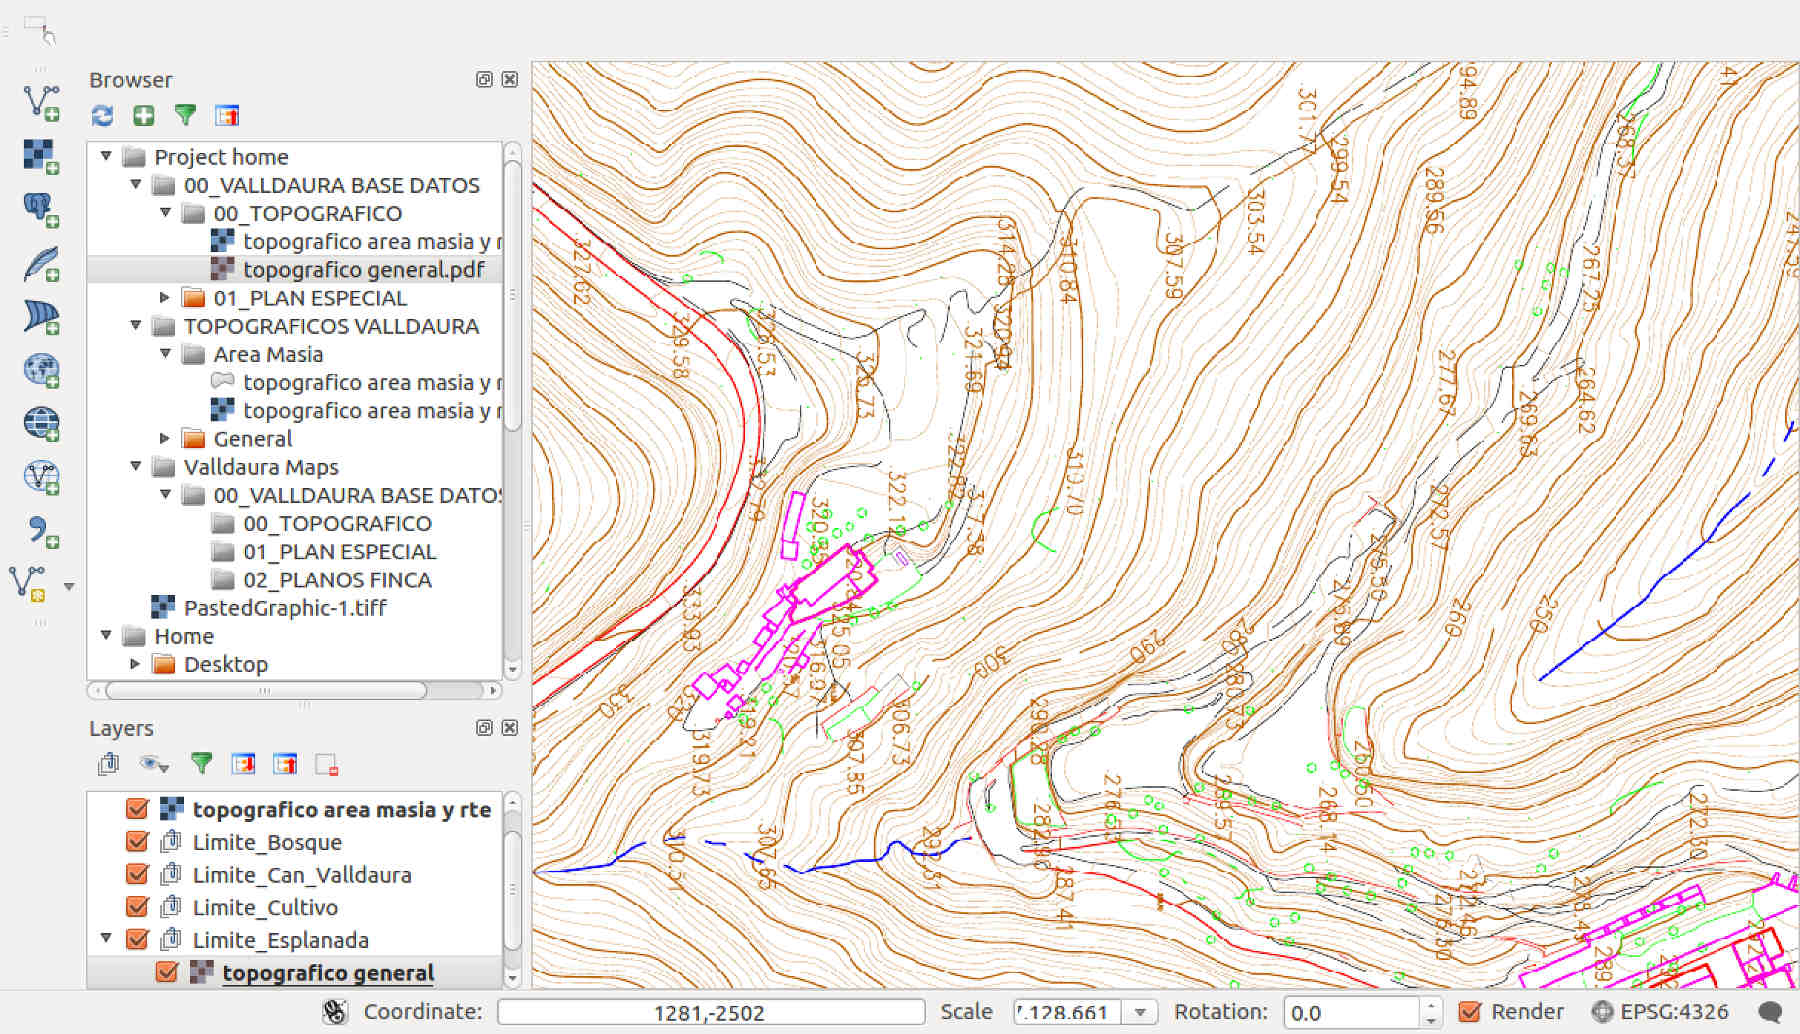 Showing QGIS of the Valldaura estate
Also part of the ‘farmers dashboard’ (ref.WK1.5.3) for ROMI is the need to integrate Geographic Information Systems. Here i have begun to compile some topographical maps into the software called QGIS, there is very little design work here so far yet it will be useful as an open source software to compile location based information.
Next I will be looking at web apps that can help visualize and make use of this multi-layered information. For now I am making using of the open source platform FarmOS to help integrate simple GIS mapping and farm management data. Something hopefully i can contribute to and adapt. You can find the Valldaura Farm OS instance here.
 Showing a GIS image from Farmos
WK 2.2 : Modeling in 3D
I had had some experience using Solidworks in the past yet for this reason wanted to refresh my knowledge and also make use of the online programs. My collaborator and I decided to use ONSHAPE to make adaptions and a forked version of the 2-Achen-Brushlie Gimbal supplied by Norbert Arnold on Grab Cad. We had chosen this model for its high level of detail. Thanks for Norbert!
- I would adapt the Gimbal to fit a Pi CAM with the idea of later 3D printing a prototype. (See Week 5)
- Marco Cataffo would create a stand for the Gimbal.
The files downloaded from GrabCad where in .STP format and were had to be converted before being translated through upload to Onshape. Here is an onshape tutorial to help with Importing Assembly into Onshape from Solid works. After several attempts I found that exporting the full assembly as an .x_t from Solidworks was succesfull translated by onshape. This is a Parasolid file type shared by both softwares and seems to compress very well.
- The ROMI Gimbal Adaption file is here.
- A PI CAM support by Yassin Klass is also on Grab Cad
A major feature of Onshape is the ability to allow others to add comments and notes. Anyone reading this is invited to do so. Both Marco and I had created forks of the main version to allow us to track and to backtrack through changes.
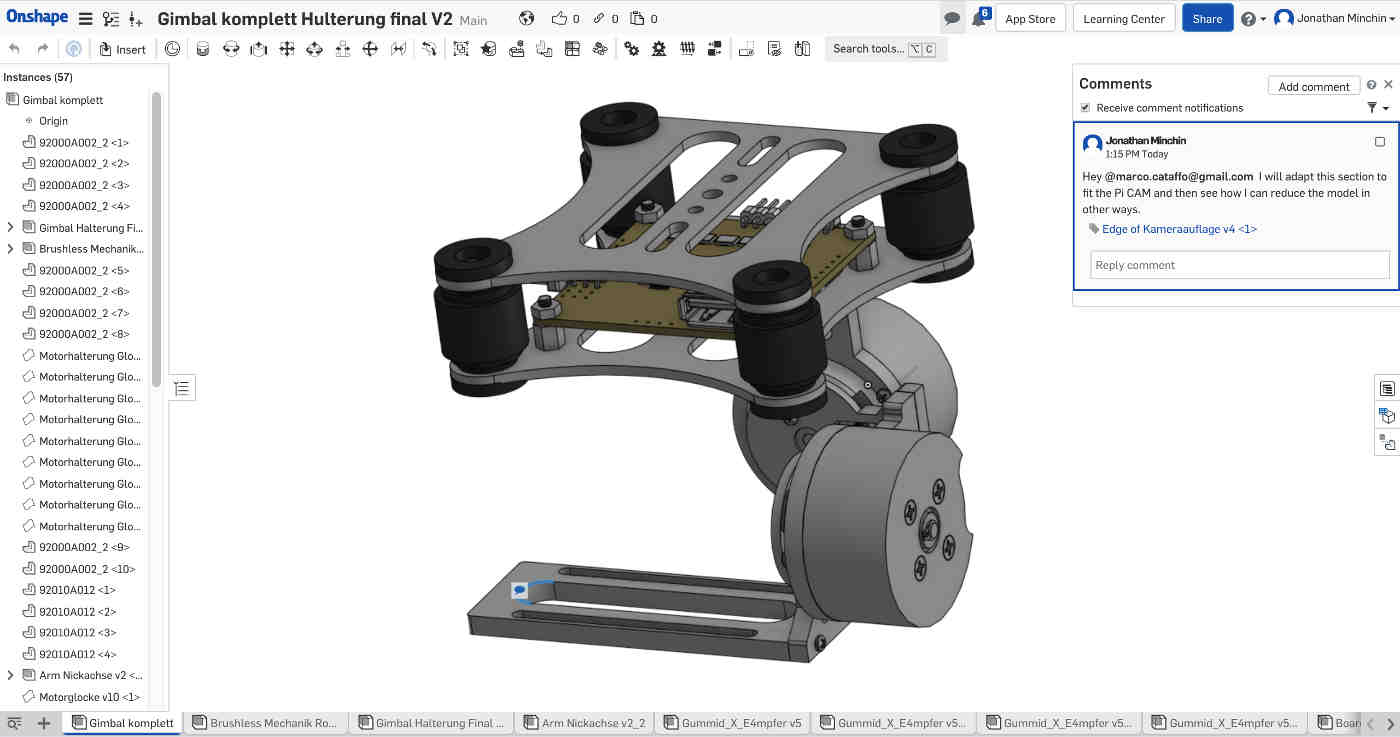 Showing the ROMI Gimbal Adaption in onshape
Finally the Pi Cam Support could be imported to the model and attached using the mate tool quite simply. I then made some simple edits to the model by rounding the edges. You can see the progression in Week 5 for 3D Scanning and Printing.
 Showing the Pi Cam Support Adaption in onshape
It would be useful to be able to embed this design as a viewer in my webpage. The 3D model view link copied in the text above. I am interested in any WEBGL viewers that i can use to embed this model into a webpage, this relates also to what I would like to achieve for the Open Page visualizer described in W1.5.2. I shall make a comparison between onshape and the Solidworks X-design online apps such as Fusion 360.