Input Devices
- Group: Test runout, alignment, speeds, feeds, and toolpaths for your machine
- Individual assignment: Measure something. Add a sensor to a microcontroller board that you have designed and read it.
Planning circuit
For this assignment I will make an attiny45-based board with a button, similar to the 'electronics design' assigment. This board will serve too for networking week, adding a 2x2 header and FTDI connector. Also, will add two red LED to output a program in the board.
The code will make the board to turn both LEDs at different times when button is pushed.
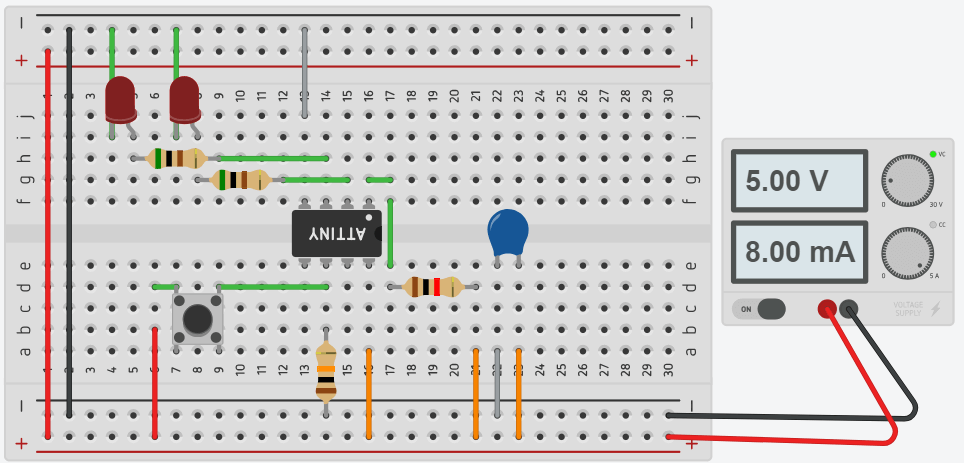
Simulation
The difference between this assignment and week 7 is we are adding FTDI and 2x2 header, intended for serial comm. Also we are connecting an extra LED to the free PIN.
The bill of materials used here is: (without FTDI and 2x2 headers)
- Attiny45 x1
- Red LED x1
- 1uF Capacitor x1
- 10 kOhm Resistor x2
- 499 Ohm Resistor x2
- Pushbutton x1
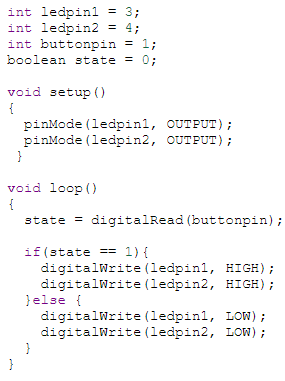
Programming
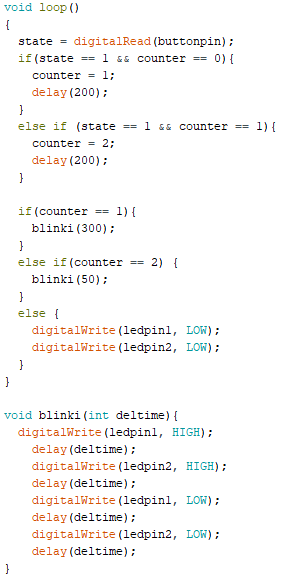
Similar to previous weeks, the code will read when the button is press and turn the LEDs on.
Adding some conditionals, I can make the LEDs behave different when pressing one more time (counter).
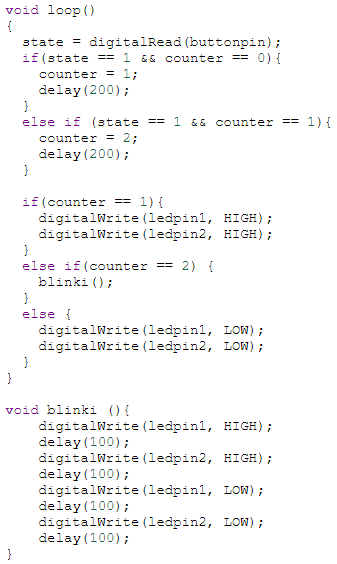
And thats it! Now I have to mill my board and program it with this code.
Can find the simulation here
Design
For design steps with Eagle, check week 7.
Create project, schematics and add all components to it. This time, I tried to make less "physical" connections but more labeled ones. Once all is connected, we start board design.
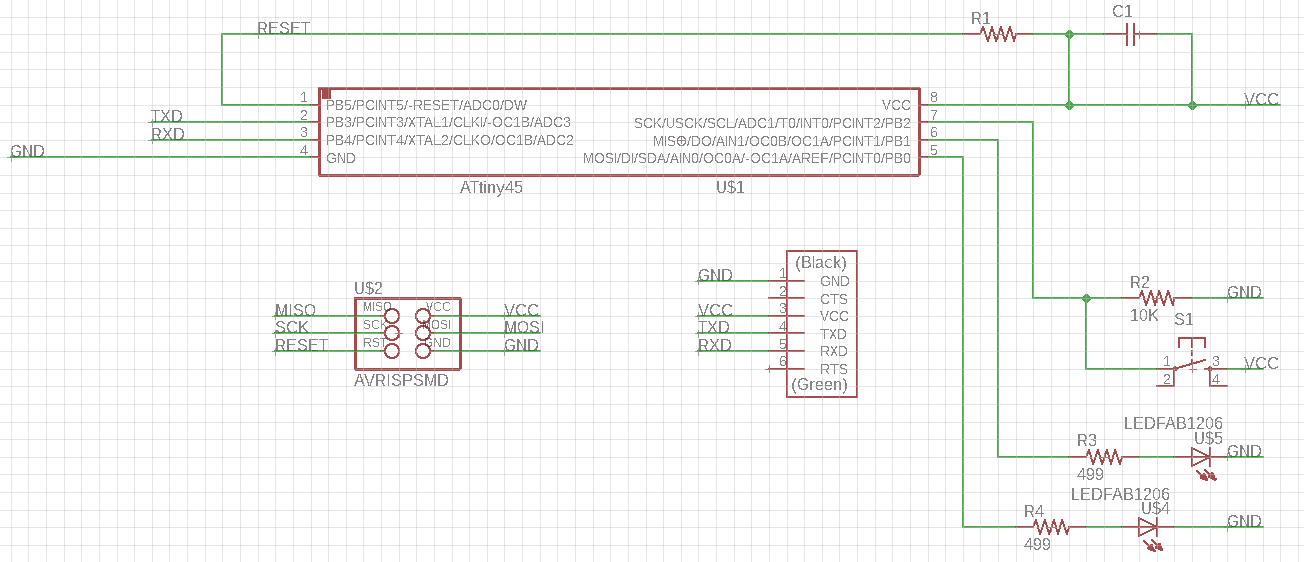
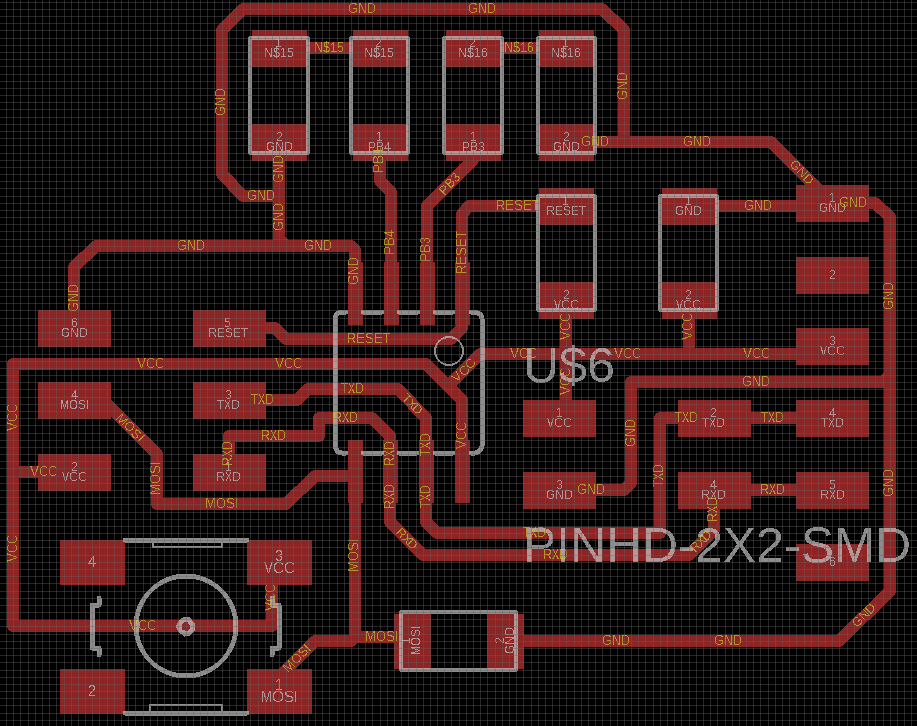
I first arrange components to their possible position. When ok, start to route. When finished, exported PNG for milling process.
Milling and soldering
For milling process, check week 5.
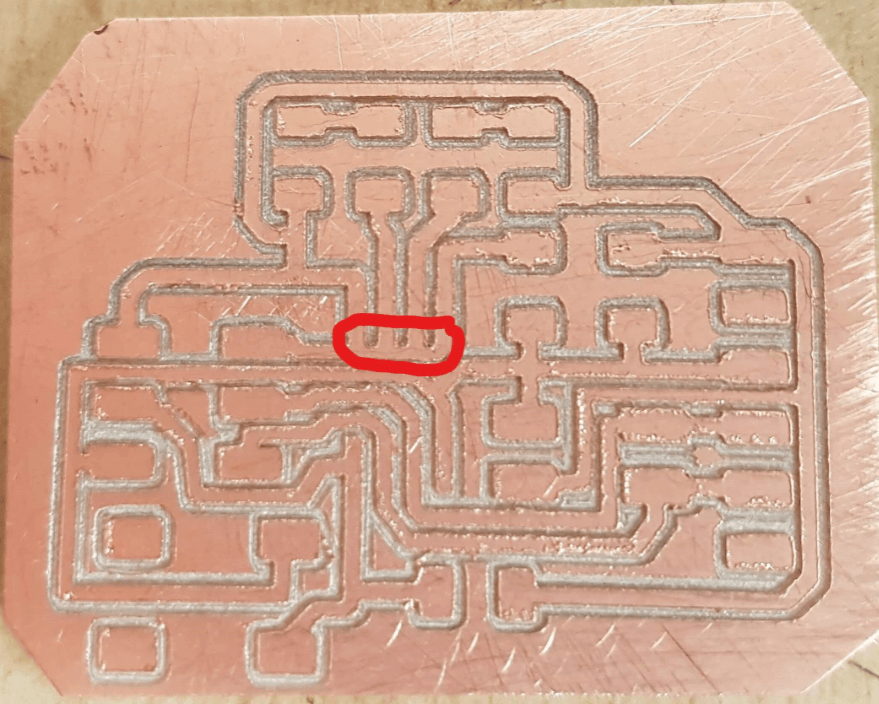
After milling noticed some tracks were connected! Used a cutter and then cleaned with a toothbrush. Also, due to the use of a broken 1/64 tool, the board had some debri on it. Had to remove with a lime.
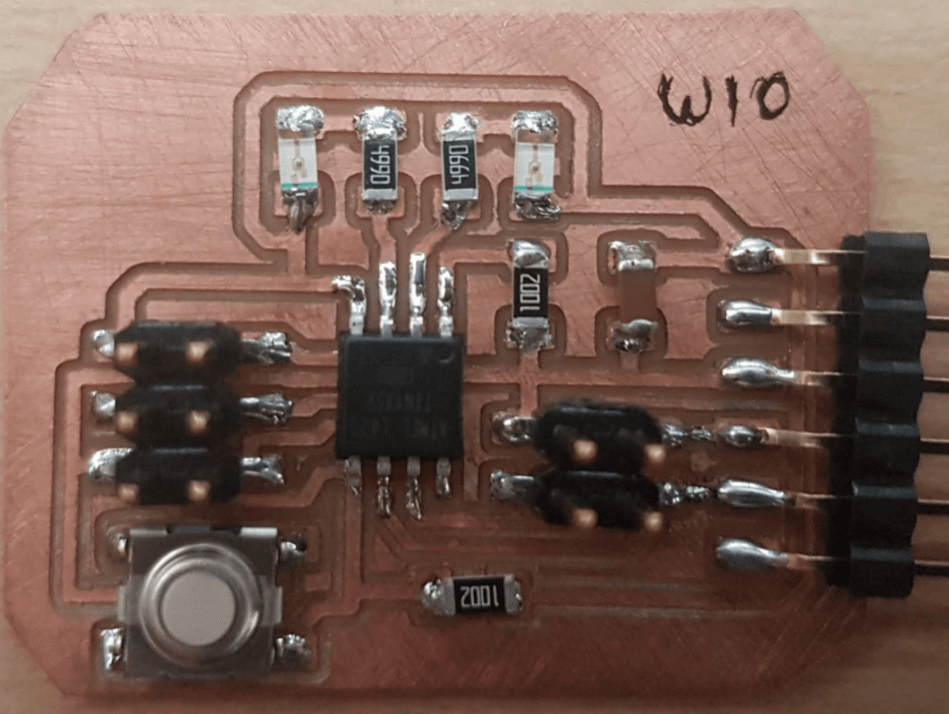
Soldered, loaded the code from simulation (little fix to turn on both LEDs) and tried continuity. Everything was ok!
Programming
The program was improved a bit (image), but keep the same idea from simulation